1/72 Zveno 7: Yet Another Teaser Photo!

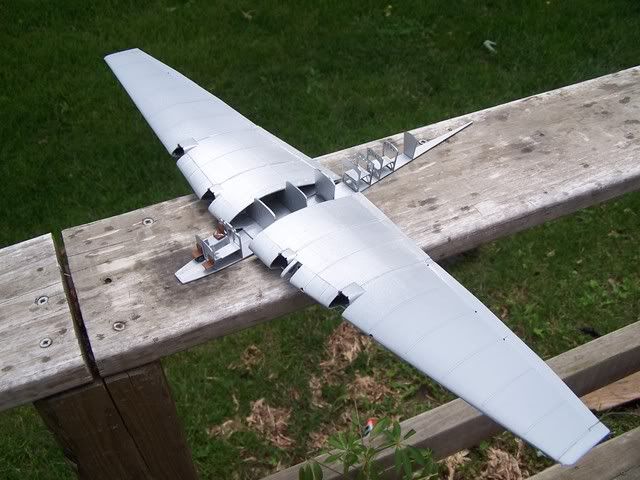
I knew what I was getting into when I bought this kit, but I’ve wanted one for a while. So, presenting ICM’s Tupolev TB-3.

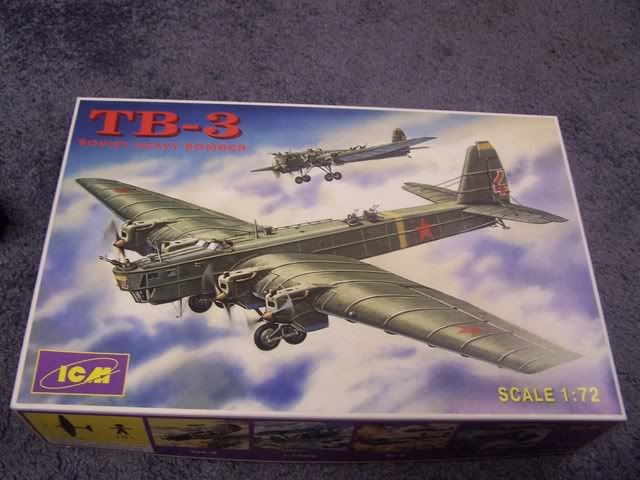
You may be curious why I called this the most overengieered kit in history. A quick glance at the parts layout will reveal why:

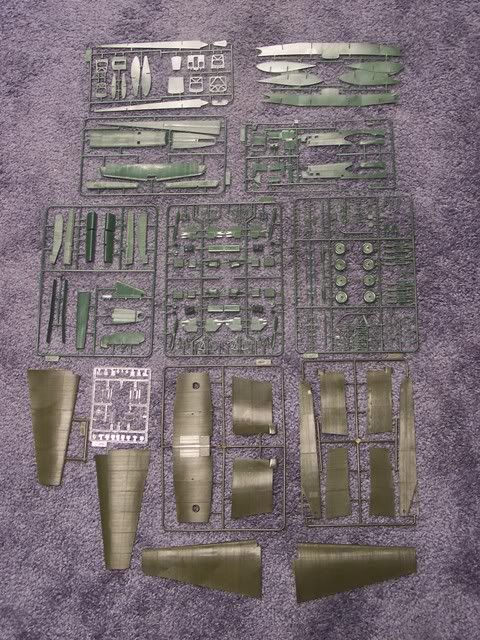
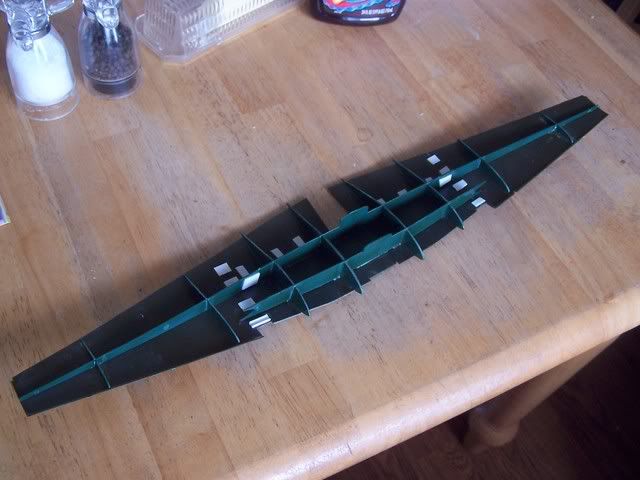
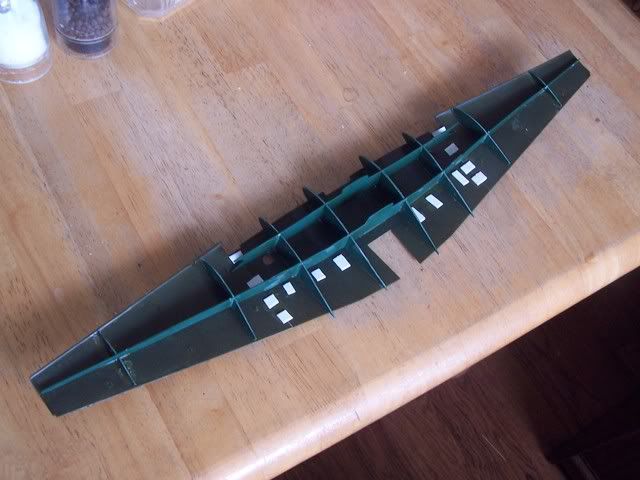
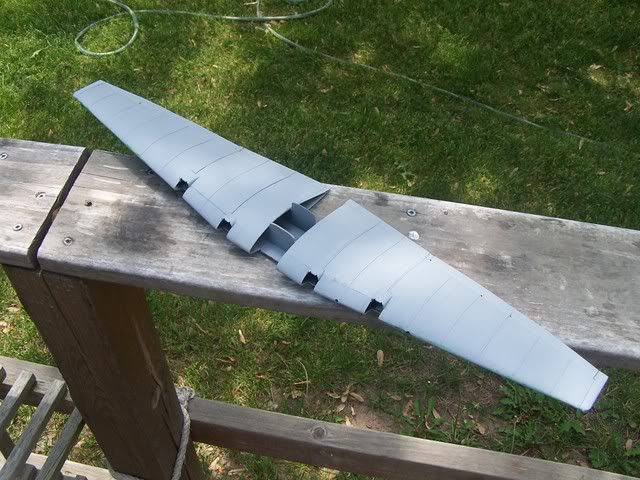
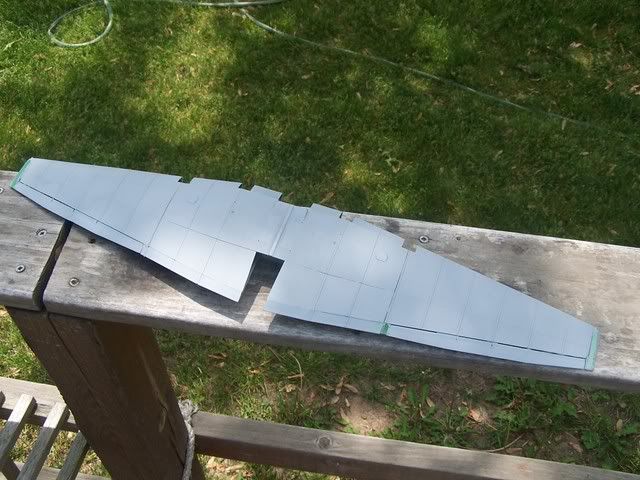
Let’s take a little tour, shall we? Okay, lets’ start at the bottom. All those darker green pieces? Wings. The skinny ones are part of the fuselage, but mostly it’s wing parts. The center and center right sprues contain small details- engines, props, wheels, and the like. The center left sprue is a bit of a shmorgasboard- leading edge pieces (more parts of the wing!), elevators, some fuselage pieces, etc. The next two sprues are some more fuselage pieces and the beginnings of the tail.

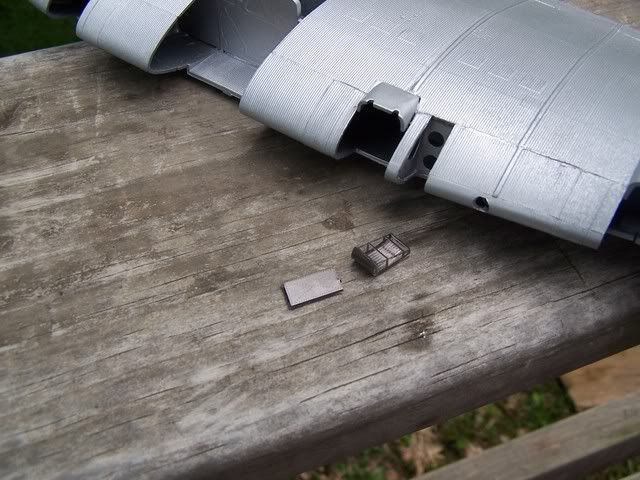
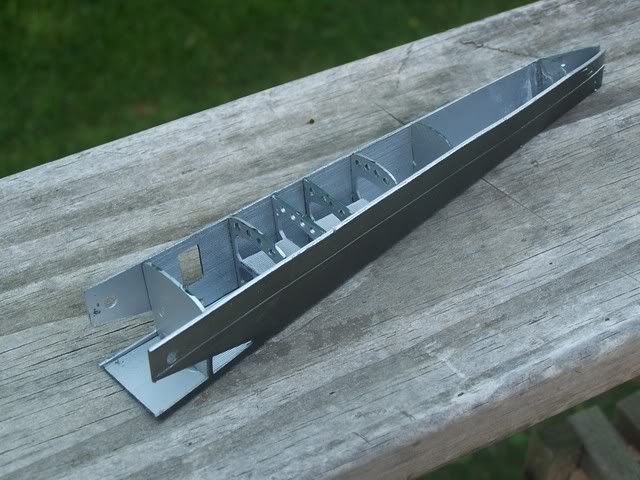
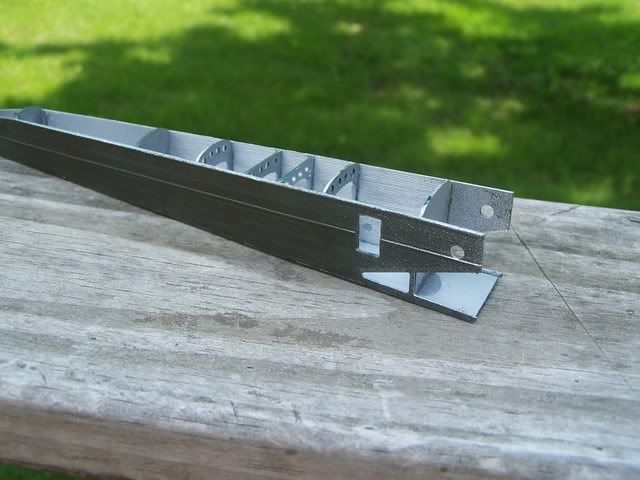
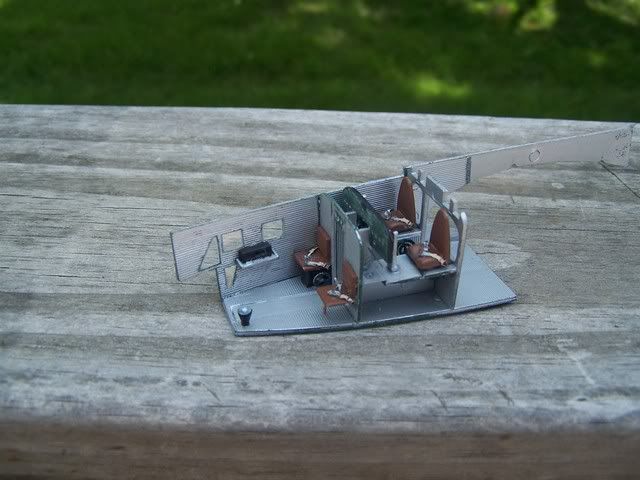
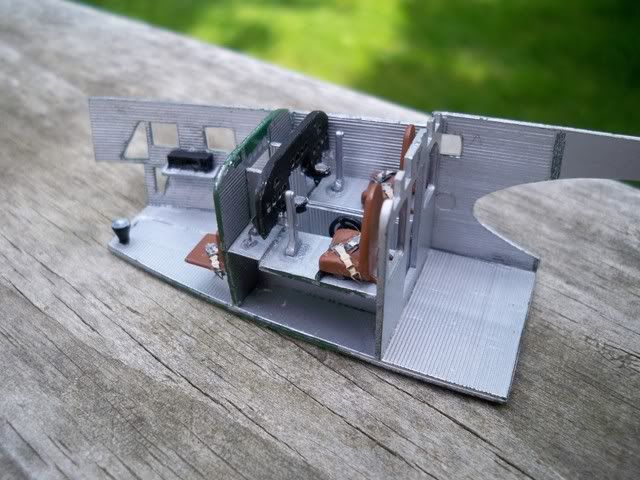
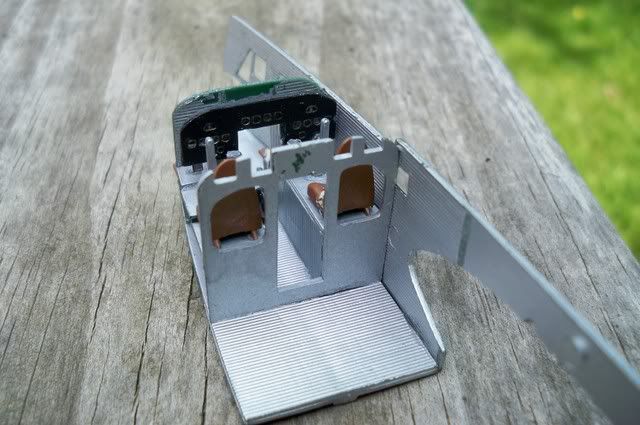
The upper sprues are the MOST interesting. See all those flat pieces? They go INSIDE the fuselage and wings. Yup, you get REAL ribs and formers with this baby! (Wait, we’re still building plastic models here, not balsa flyers? OK, just checking.) You see now why I called this kit overengineered? No? That’s to bad.

I’m planning something REAL special for this sucker. I got a few obscure references coming, I need to buy a few more kits, and for the first time I’m actually going to spring for a PE set (gasp!).

All I can say is stay tuned… [:-,]

Congrats, friend, you just bought yourself a whole world of hurt!

I have been watching Ebay for the “Zveno” version for a while now, doesn’t come up too often. Where did you get yours, if I may ask? I’m just as much a glutton for punishment!

1/72nd torture. Yikes I don’t think I have the patience to build anything like a bomber smaller then 1/48. This should be interesting to watch you build.

I got mine at my LHS for about twenty bucks. I’m going to try and keep a positive attitude and take it one step at a time. I mean, it’s not every day you get to build a kit you’re not allowed to putty or sand (due to the courragations).

One quick word of warning- the kitted version of the ‘Zveno SPB’ straight OOB never existed. You get a great early-model TB-3 with two great late-model I-16s. This combination never flew- only early-model TB-3 with early model I-16s or same, only late- to late-models. You’ll either need to backdate the I-16s to make Zveno 6 or (more difficult, but not impossible) update the TB-3 to represent a REAL Zveno SPB.

Two sites that may be of interest:

http://vvs.hobbyvista.com/Modeling/Tupolev/TB-3/Duffy/index.php

http://vvs.hobbyvista.com/Modeling/Tupolev/TB-3/Sekularac/Zveno/index.php

That looks formidable, but the most overengineered kit in history has to be the Special Hobby Lodestar.

It’s been on the bench for a year.

Two sets of tails, two sets of engines, two sets of cowls, and the chemical toilet has a lid!

I’ll bet that by the time I’m complete I used less than 60% of the parts. Thanks, for $ 50!!!

This looks pretty good to me.

Lucien, do you follow Bruce McCall?

Heck, for that matter, are you Bruce McCall???

You must enjoy punishing yourself!Be prepared for some serious build difficulties!Here is the completed Zeno!

OH-MY!

You’re in for it… you’re right. A good bud of mine down the street has that kit built. Those corrugated wing panels are layed onto the wing frame and you have correctly anticipated the joys of putty’n dang gaps! Totally worth it. Wonderful model once completed! (imo)

Don’t know how tall the corragations are, but a friend showed me a neat technique for replacing raised detail. You place tape on either side of where the raised detail needs to be- nore layers the taller you need. It can be wide or narrow. Fill in the gap with Mr. Surfacer- build up layers if needed. Remove and and you have raised detail.

I used this to restore some raised detail on a Monogram Panther I’m building and it’s darn near impossible to see the difference.

Can’t wait to see what you do with that kit- you always do some of the neatest stuff!

Other builds I’ve seen of this model have used sheet plastic to bridge some of the gaps, namely the upper wing-fuselage joint. If done right, it (supposedly) looks like one more corrigation.

I’m going to do my best to leave puttying to a miniumum- lots of sanding down of interior surfaces BEFORE gluing, as opposed to filling seams AFTER gluing.

Good luck on that monster. Keep us posted on your progress.

Darwin, O.F. [alien]

Well, even though I don’t have any of the PE stuff for it yet, I was still able to begin tackling the monster. Breaking with tradition (as with this kit you have to), I did not start on the cockpit, but instead the wing. This is made up of about 26 parts, as opposed to the normal four (top, bottom, left, right). Most of which are two spars and multiple ribs. Take a look:

Lining these up correctly is ESSENTIAL for a trouble-free build down the road. So far I think I’ve done okay, although I’ve needed to bend some (most) of the parts to fit. Thankfully they are all relatively flat and only need to be bent on one axis. The result after all this finagleing is this:

A relatively nice-looking wing bottom. Unfortunately, one cannot sand any of this. Here’s why:

There is fine courrigation detail over every piece of the wing and fuselage. If done right, what you get is a beautifully correct model of the TB-3. If not, instead you get a nightmare. So far it’s been more of the former and less of the latter. In the future, however… we’ll see.

Thanks for looking!

trexx kneels in reverence [bow]

Lucien Harpress, that airplane model is in good hands. …can’t wait to see how neat-o that one comes out. Thanks for the update.

After a bunch of work and a bit of swearing, the wing for this beast is pretty much finished.

Small underwing ‘dustbin’ turrets are included in the kit. As awesome as these look, the Zveno Tupolev was unarmed. More than likely these turrets were removed, so I did likewise.

There were a few problem areas in getting this together. The upper wing panels were all too flat and needed to be bent and clamped to get them to fit. The mulit-part ailerons went in without too much fuss, but several courrigated parts had sink marks. Thankfully these areas are small. The wingtips needed to be filled and sanded on the undersides, but these parts are smooth.

The two main problems were the seperate leading a trailing edges. The trailing edges did not fit with ANY precision at all, and seams needed to be filled that ran across the grain of the courrigations. My efforts at fixing this were moderatly successful, but I’ll still be monkeying with them for a while, I think. I may cover up some imperfections with weathering. These WERE old airframes, after all!

The leading edges went in nicely enough, but even with sims one of them was too narrow than the wing parts leading up to it, creating a small but noticeable step between pieces. Also, the leading edge between engines isn’t straight- there’s a small kink.

I’ve noticed this problem on other TB-3 builds, so it’s not exclusive to me. Seeing how to solve it, though, I’m at a loss. You win some, you lose some.

Construction has stopped here for a while. I don’t want to begin construction of the fuselage before the Eduard PE set arrives, so I’m taking a bit of a breather. To tide everyone over, though, here’s a comparison shot of (hopefully) what’s to come…

Stay tuned!

That is very, very cool… just keep being careful and that monster is going to turn out great!

Kevin

After WAAAAAAYYY too much waiting, my PE set for the TB-3 has FINALLY arrived. Overall I’m stoked. I’ll be able to use everything save one or two things for the guns, but I’m not regretting this decision.

What does this mean for you guys? It means that I’m able to continue work after a long hiatus. The main fuselage interiors which I just painted are drying as we speak, actually…

Stay tuned for updates sooner than later!

That is very nice, Lucien. Now that I see the wing, I looked back at your sprue pic and it must have covered the whole living room floor!

I had luck replacing corrugations of the Trimotor, where a whole one is just not there at the wing joins, by laying a tight line of monofilament down, flooding it with CA and trimming the ends after it dried.

It’s official. I LOVE PHOTOETCH!

[party] [8-]

Before this, my exposure to PE was rather limited, due to my small budget and lack of incentive. When the situation arose that “forced” me to buy a set, namely this build, I was, at most, interested. When the set actually arrived and I started working with it? I’m officially hooked.

Since the last update I’ve been able to get a lot of work done in a short period of time. The only question is where to begin… HHmmmm… let’s try…

The Cockpit

As you can see, the cockpit is nowhere near finished. The parts total, however, is already more than the entire Polikarpov I-1 I just finished. All parts so far fit together without any problems, PE set included. The small box under the starboard jumpseat in the bombardier compartment needed to be scratchbuild, as I somehow lost the kit part. This was the only problem to speak of here.

Next on our little journey shall be a breif stop a the…

Rear Fuselage

Rather straightforward here. Not too many details here, as the stripped down Zveno mothership would probably lack most of the equipment back here. For the myriad flat parts given in the kit, this complex-looking framework went together rather painlessly.

Alrighty then. How 'bout a sub-assembly consisting of nothing but PE pieces?

Service Platform

What you see here is a mini-kit made of five seperate photoetch parts. I built this first, as I was unsure I would be able to. Apart from the spoked wheels this is a highlight of the PE set, and I’m really, really, REALLY happy I was able to get it together.

The two-part platform actually folds up into the wing and forms the leading edge of a small section right next to the engine. There’s actually eight of these (one on each side of each engine), but Eduard only gives you one. Just as well, I guess. Building any more than one would probably drive me crazy.

Well, that’s the end of the update. There’s just one last thing to do- a parting shot of the componenets I’ve completed so far. The result is a sort of skeletal TB-3 (which actually looks impressive by itself… but I digress). Hopefully my next update will be after the cockpit is completed and at least partially boxed in. I hope this is enough to tide you over until then…

Nice update Mike![tup]

Glad the PE is not giving you any trouble. That is one cool looking A/C I must say! After viewing your 8 hour build came out so well, this on MUST be very involved…well, look at the sprues! Duh!

Each time a read a favorable PE review, I move closer to ordering some! But first I need new eyeglasses![(-D]

Don’t worry guys, I’m not taking this project in some off-kilter direction. I’m just temporarily trying out a new camera for some detail shots.

A bit of back story first. All of my photos on these forums are from the same camera, a Kodak Easyshare DX6490. It’s a solid camera, but only a 4 megapixel and almost no macro to speak of. The photos of the cockpit are about as close as I can get and still have an image. In the meantime, my mom just bought a better camera, a Kodak Easyshare M1033. It’s a 10 megapixel camera that can get quite a bit closer than the other one. So, just to see how it works, I tried it on a few detail shots. Later on, I’ll yet you be the judge.

But cameras are not why you came here, right? ON TO THE BUILD!

The rear fuselage is closed up. All that’s left is the tail surfaces and upper decking. However, I’m waiting until the front and rear fuselage are attached to the wing to add the top pieces, ensuring I get an accurate fit.

This door was cut out to recieve a PE replacement later on. It should add interest to an otherwise bland area.

The cockpit is coming along nicely. A lot has been stuffed in here, but there’s still quite a bit to do. Notable in this photo are the windows- there IS clear plastic in there. The kit windows are all oversize, and are extremely distorted. I had some clear acetate lying around, so it was a no brainer to replace them. It’s not too difficult to do, and the results are worth it.

I’m dreading a certain PE part- throttle quadrents. Six TINY levers attached to a base about a quarter the size of my pinkey nail. God give me strength… [sigh] Did I mention I have to build two of them?

All of the previous photos are from my old camera. Here’s my mom’s (better) one.

Now that’s nice… Although now you can see my goof-ups that much better… [:-^]

My first (and so far ONLY) kit with actual instrument dials… I still need to do something about the bulkheads where the paint lifted. It won’t be too visible when the front is closed up, but I can still address it.

Well, that’s the update for now. Hopefully soon I will be getting a camera of my own, one which will be as good (if not better) than my mom’s. It’s for a college photography class. I’m just waiting until I get paid next.

If anyone’s watching my build article over on Swanny’s site, the next update should be after I attach and close the fuselage up over the wing. After I do this (which should be soon), I’ll start on the actual Zveno aspect of this build- the underwing trapezes… stay tuned…

[8-]

mike, I have to say that I always enjoy see what your working on, varied subject matter. Great work[tup]