Thanks Mike! Very interesting reading on a great, fun (for us) build!
Great work Mike.
Karl
Got one of the messiest steps done today- joining the wing to the fuselage. Or would that be fuselage to wing? Hm… in any case, here’s the fruits of my labors.
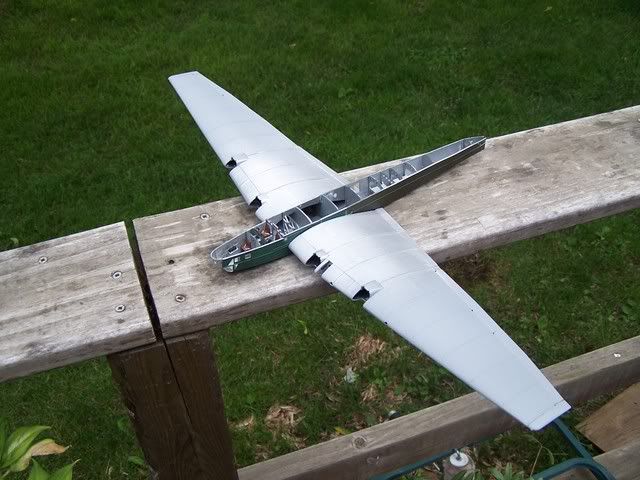
The worst part of this addition? Combining the two halves (front and rear) of the fuselage. They didn’t really match up, and I managed to break one side of the front part. Thankfully, though, I was able to patch everything up, and while it’s not as perfect as it was, it looks good enough. I can always clean it up later.
Next, some photos of the nice looking 'pit.
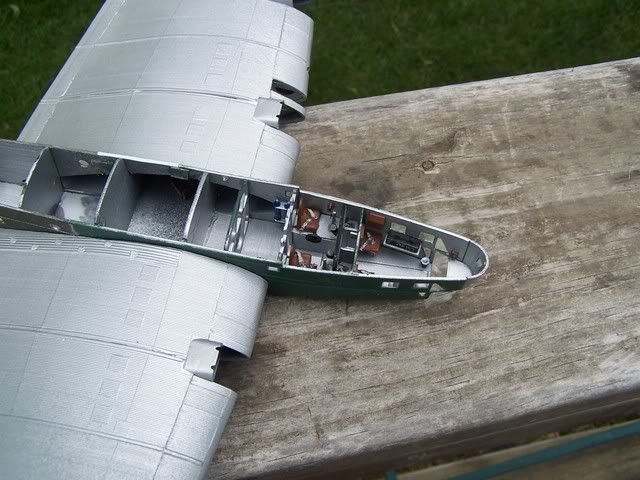
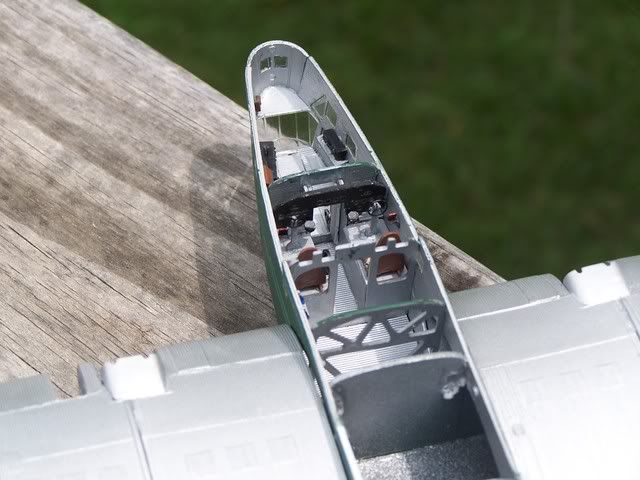
The photoetch made this area look awesome, and the replacement windows allows one to see it all. I’m really happy with it.
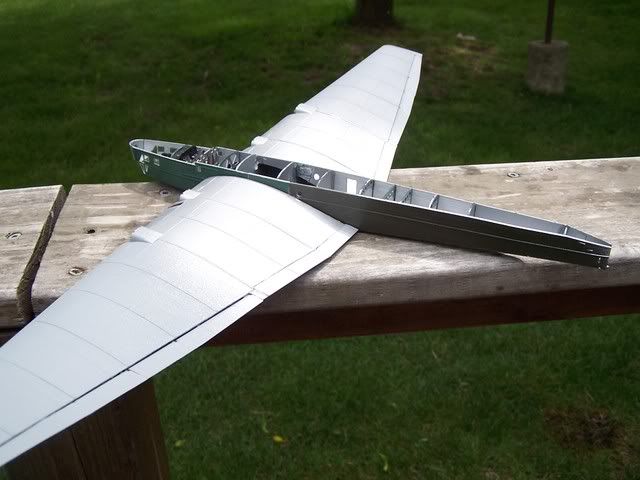
Here you can see a distictive feature of Tupolev aircraft of this era- the massively thick wing. Remember that this it a bit larger than a B-17- but check out the wing thickness.
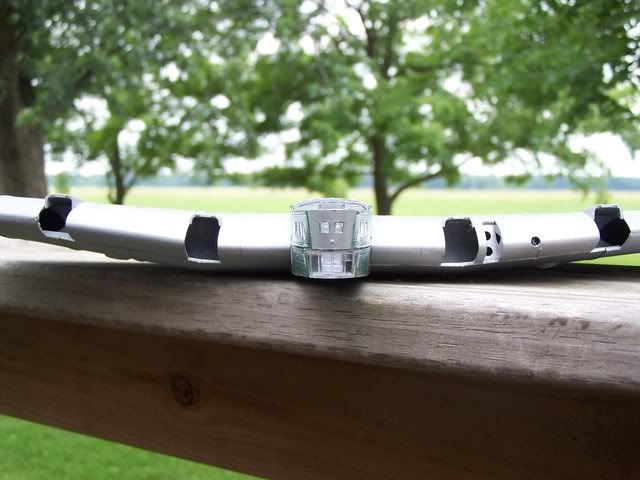
Take a good look at the interior, because it’s the last you will see it. I’ve already begun buttoning up the top, hiding most of this. Next up will be the tail and finalization of the fuselage. Just gotta remember to get the service platform out of the area I’m storing it in before I close it up…
I’m still awed by the undertaking![tup][tup][tup]
After a week-long vacation and a bit more work on my monster Tupolev, I have something to show for it. Check out the last time you will see the mothership of this composite before the paint shop.


The tail is one of the most interestingly-engineered aspects of the kit. It fits together well enough, but it requires you to fit and glue three or four things at once. When finished, the most obvious thing is the gap around the horizontal tail surfaces. I can only assume that on the real thing this was used for trimming purposes. On the model, however, it means a weak assembly of an area which usually isn’t. Need to keep and eye on this.

Here’s the newly covered-up cockpit.

Detail shot or two.


Well, this is it for the Tupolev for a while. I need to work on the other aspects of this build for a while and transform it from a “TB-3” build into an actual “Zveno 7” build.
To tide you over, here’s a teaser of what’s coming next…
Looking good! Sorry so much cockpit detail was lost with the coverup! Wouldn’t want to take a can opener to this one though![(-D]
So…With the fledgling Russian ‘Democracy’…when does this ship go into production?[:D]
very nice!> and great subject as usual… look forward to the completion!
Sweet! GREAT job!
…what fine model, you’re work is nice and clean!
…“lah da da da da… -Flying Trapeze!!” [8-]

But seriously, I’ve been getting a bit of work done on my Zveno. I’m also trying out a new background, which I like, and lighting setup, which I don’t like.
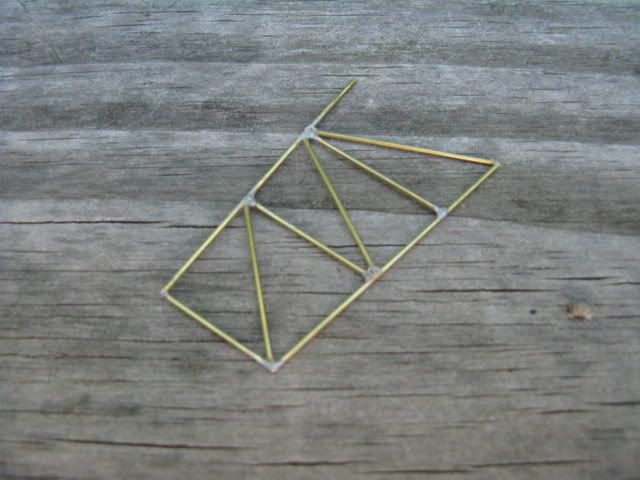
As you can see, work is definitely progressing on the coolest part of the build- the two trapezes. Both are built of brass wire. Early on I learned that brass does not superglue to brass. Therefore I decided to solder all major connections (trapeze on the right) and glue in all the non-essential connections. The trapeze on the left is pretty much completed, save for a small pyramid support for the I-16’s wing. I’ll add it later when I’m lining everything up.

This is the approximate location of the extended trapeze…

…and here’s what she looks like folded up. The I-16 hooks on the far left end. The rear fuselage is supported by a small pyramid straight back, one wing is supported by a large pyramid farther outboard (left) and the other is supported by a small pyramid on the bottom of the trapeze (the one I was talking about earlier). With all these pyramids, I’m suprised this aircraft isn’t Egyptian! [swg]
If you notice in the photos, I also did a bit of work to the landing gear.

The green pieces are kit parts. The yellow is brass. I needed to replace these parts, as the kit parts were rediculous. Wrong angle, wrong length, and full of divots from short shots. The brass I had lying around worked fine, and now I’m able to bend it to adjust the stance of the finished bird.

Work began on fixing the wheels (man the light is TERRIBLE!). I started by grinding out the middle hubs, then filling the gap with a strip of styrene (and some putty, in this case). The wheel was then painted and PE spokes glued in.

The wheels were then glued to their axles and detailed. This one is 99% finished. I still need to add an end cap, but that won’t go on until right before the bogeys attach to the TB-3. I’d like to keep the bogeys free-swiveling, if possible.

As you can see, I still have to trim up the landing gear. No big deal.
That’s it for now. I think I’ll finish the other trapeze next along with the other wheel bogey. Afterwards, I think it’ll be time to start on the I-16’s. Not sure when my next update will be (stuff’s gotten crazy since school started), but I’ll do my best to get it up ASAP. As always, thanks for looking.
Very sharp looking, Mike. Yeah, you do need more light. Sometimes the light background will fool the camera light sensor, and you have to take a longer exposure than you get with the auto setting to get the right brightness for the subject. I find that happens on nmf subjects especially.
Well, this is the first time I’m using this setup. Usually I shoot under sunlight, but due to space issues this was shot under florescent lighting. The only problem with sunlight is hard shadows which obscure detail.
I’m taking an art protfolio class this semester in which I’ll be documenting my artwork using a professional lighting setup. I may be able to borrow or find out where to find some cheap professional lighting.
Very nice, Mike. A while ago, I was wondering how you were getting on with it. Looking great, so far.
Mike, it looks great so far. very good precision with your solder. I know a lot of car modelers like to scratchbuild frames with brass. It looks like you’re been doing this for years! I know what you mean about school. I think my modeling production will drop back to zero once OSU fires back up again…[xx(]
Okay, enough work on the bomber for now (although I have gotten the other wheel set finished). Every aircraft carrier needs aircraft to carry, right? That’s where ICM’s I-16s come in.

For a little kit, ICM’s 'Rata’s sure have a lot of parts. Most of these go in the engines, but lots of detail all around. I’ve built one of these kits before…
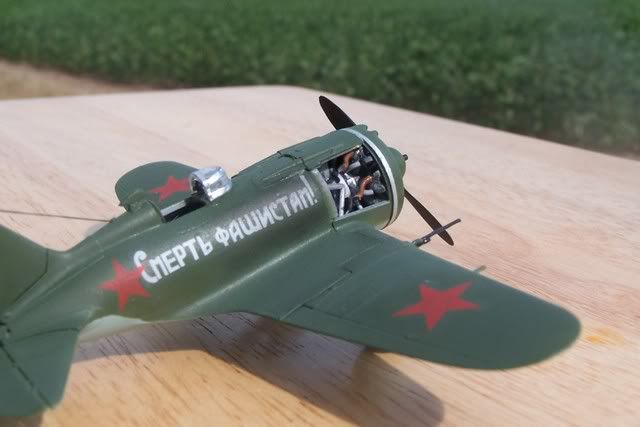
…but I wanted to see if I could improve on the original (along with the modifications needed to backdate it- but more on that in the future). So far all I have of the new builds is this…

…but hey- not too bad, right?
And finally, on a COMPLETELY unrelated note, I’m trying out a new facial hair style. Tell me what you think!

So? Worth holding on to for a while? [:D]
Nice job so far! [tup]
It’s a shame all that great interior detail is hidden from view.
I can’t wait to see the finished product!
Not to worry. I’m already planning on having one engine of the TB-3 open along with the service platform, so it wouldn’t be that far-fetched to have an open-cowl I-16 as well. I’ve done the one-panel-open I-16 before- I might take off nearly everything for the Zveno. Accurate? Who cares? I just need to see which engine looks better before I decide which one to open up.
Mike:
Mike, the I-16 enginhe looks great, but next time use a longer lense for the head shot. It’s really hard to judge the 'stash’s merits when my eyes get locked up on your nose…
Mike, is this guy your brother? http://www.georgeparros.com/photos Nice 'stache dude. I say go with it. My moustache isn’t nearly bushy enough for that, so I go with the neatly trimmed (most of the time[xx(]) goatee.
As for the Ratas… that is a lot of parts. You’ll have fun keeping them straight, I’m sure. I kinda like the idea about opening some panels up. Perhaps some last minute run-up tests revealed some issues in the engines…
The 'stache thing was something my entire Cross Country team did. We shaved the first meet of the season and didn’t touch anything until the last (Regionals). I was unanimously chosen as to having the best 'stache in the bunch. [:D] Heck, someone even called me Pre during the race! (aka, Steve Prefontaine)
I feel sorry for one of our freshmen, though… two months of not shaving his face at all- and you STILL can’t tell he has a mustache! I guess some got it, and some don’t…
I WOULD grow a goatee- but I can only connect my musatche down on one side. [sigh] I can grow a heck of an amish beard, though… but I digress.
To make is seem less tedious building the I-16s I’m going to do each step twice- as soon as it’s done on one plane, it’ll be done on the other. The best part is that the parts are interchangeable, so it’s not like I have to keep all the “kit A” parts over here and all the “kit B” parts over here. I can mix and match when and where I need to.
(BTW, I ran alright at Regionals, which was last Saturday. Good enough to qualify for Nationals in two weeks! Wisconson, here I come!)
More work on my “Rata” squadron:

Interior shots. The only improvements are epoxy-putty seatback cushions and masking tape seatbelts.

Probably my most successful IPs, outside of my TB-3. But that one, involving PE, doesn’t really count.

The two fuselages went together like a dream. This right here is about 20 minutes of work.

A day later, here’s where we stand. The I-16 on the right is going to be all buttoned up- cockpit, cowl, everything. The one on the left is going to be as open as I can make it- cowl, cockpit, etc. I drilled out the drop-down side panels and will replace them after it’s painted.

This right here is the first of a series of steps needed for a backdate to a Type 5 I-16 from the Type 18 provided in the kit. Among other things (an extra pair of exhausts, for example) the Type 5’s cowl was basically much-cleaned-up from the later Type 18. Gun ports and vents were sanded away, and the gun fairings on top of the cowl eliminated. The depressions on the fuselage will need to be filled and sanded, and various lumps and bumps were sanded off.
Not much works is left. A few details (a new canopy and ailerons and a trapeze) are all that’s left before the first painting session. As always, stay tuned for more info as it arrives.