This is the recent Special Hobby kit, 1/72 with all the resin & PE bits I could handle in this scale. A beautiful little kit of an odd machine - and I dig the Swedish markings.
Built out of box, the only additions were some bits of PE to use as hinges for the jumpseat door, and the pe rod for holding the door looked flimsy, and too short, so I subbed in brass rod there. (It’s over-scale and should be aluminum, I left it in the brass so it didn’t stand out so much.)
I used Krylon Ultra-matt camo paint as a primer, great stuff that dries quick, sticks well and cheap! Buffed that down with a scrap of denim, then hand-painted the thing with Vallejo acrylics. The olive-green pattern was applied with a mix of Q-tips and bits of foam. Clear-coated with Future, panel lines were highlighted with a dark brown Tamiya Panel Line Wash, then blended again with their weathering pastels. The decals went down BEAUTIFULLY and then sealed up with Testors Dullcoat.


My little buddy “Fuji”, who always makes an appearance to show some scale…

My assistant, giving in the final seal of approval…

(various build posts…)
Right side fuselage. Digital cameras are funny. Notice how the fuselage details are fuzzy… but those tweezers are PERFECTLY in focus!  I skipped the black-black on the various bits inside the fuselage, went with Humbrol Tarmac instead to soften the contrast. My usual weathering for cockpits etc is to dry-brush a lighter colour or metallic, then follow up with the wash afterwards to deaden the shine. In this case I drybrushed aluminum.

Main instrument panel sandwich.

Rear bulkhead, forward bulkhead. I cheated on the rudder pedals, didn’t fold them in from the sides. 

Left fuselage half. Still need to check into the buttons/fuse spots.

The engine is… less blurry in person.

Jumpseat & cockpit floor etc.

Pilots seat with belts painted & attached - note the adjustment lever on the left!

All I had time for last night was a few touchups to the harnesses (where paint had flaked off after bending) etc. Also painted the control stick (which now looks kinda lumpy in the pics, but for what little will be seen once she’s closed up, I’m leaving well enough alone. Oh, assembled & dry-fit the cockpit assembly as well. Clear coat tonight, last wash tomorrow.


A slightly grainy zoom-in of the pilots seat - see - adjustment handle on the right of the seat!!!

Took a bunch of pictures of the interior before closing it up. The wife asked me why do all of that time-consuming work if nobody else will ever see it… Well, come on,  it’s because…
  , well, it’s so
  Sunnuva…
  Don’t ask me stuff like that!!!


For the first time EVER (I think??)… I mounted a completed fuselage to ONLY the lower portion of the wing first, then attached the uppers afterwards. Worked well in this case, allowing me to fine-tune the mating edges of the uppers before I committed to glue. NO PUTTY!!!


The underside…
(I was in a fit of glue-fume driven sprue fondling over the weekend. I drilled out the exhaust stubs… but I’m not sure if I should have attached them yet!)

Topside, deck seam filled & smoothed, gun fairings and ?air filter? attached. Think I’ll try to find time this week to add a landing light as Herc did on his.

The propeller hub… 2 pieces?? WHY?? That was a thumb-cramping exercise joining the 2 pieces, but it’s done.

And I have OFFICIALLY started exterior painting! (Looks like non-slip yellow, but it is indeed Zinc Chromate) 

Good canopy pic from that Squadron publication:

The situation on the real thing:

I’ve started sanding down the rear portion of the glass. Once hidden behind the sliding of the center portion, the casual viewer (hopefully) won’t really think about it…
Spinner painted blue (too dark though…), prop faces = Testors zinc chromate, backside = black.
Underside main colour is Vallejo Pale Blue-gray; port wing underside = 7parts black + 2parts white; starboard underside = 10parts white + 1part RLM65.
All hand-brushed. This “cleanup with Windex & water” thing is growing on me!!

Alright, cracked open the Testors square bottle of zinc chromate annnnnd it looks like it has started separating?? Didn’t dare mix it for the airbrush. Looked at my bin of Vallejo and said " what would fermis do?"… Managed to mix up a match on the first go. 8parts yellow, 1part golden olive, 1part German camo pale brown…

Doesn’t the passenger look like a happy camper??
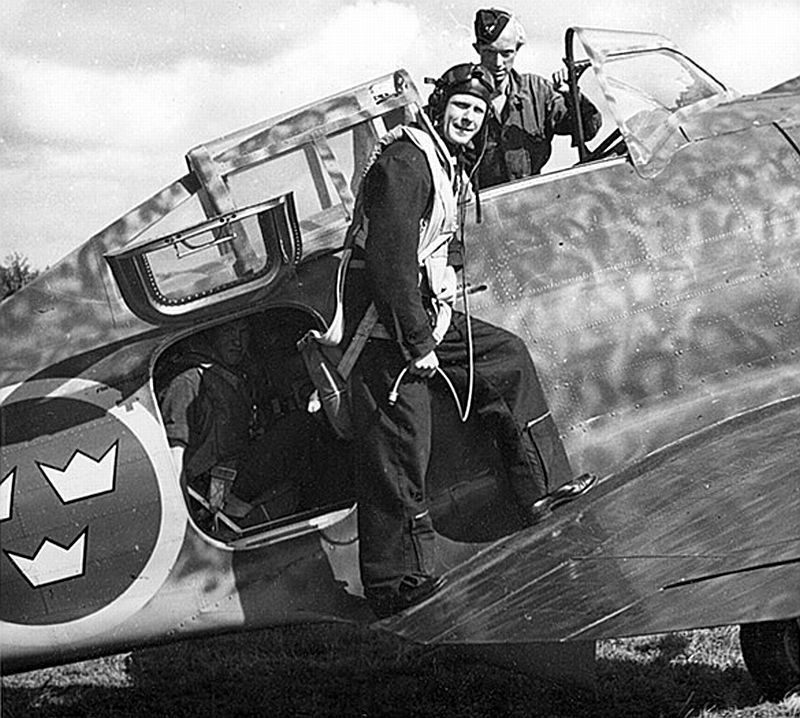
Cockpit masking & jump-seat foam plug removed…

Prop, just needing yellow tips…

Confession time. In 1/72 scale, for little bits & pieces, especially wheel hubs etc… I usually give them a wash FIRST to better define the areas that need paint, then go at it by hand. Much less hassle than trying to make a circular mask, then airbrush, then clean up, etc.

The hatch door painted…

Canopy, hand-painted…

Starting the weathering with panel line pin-washes BEFORE the future coat. I figure the lines are SO FINE to start with, that another layer of future will make it even harder to run the washes. Besides, all the camo colours are acrylics - and the ZC was futured already - so there won’t be any issues with the Tamiya panel wash interacting.


Underside clean…

Underside dirtied up…


Did some more panel line work last night while watching the ball game, also a little blending with my Tamiya weathering pastels, yellow. Took the masking off of the access door, only one little touchup required. canopy glass just placed for the time being, colour of the ZC framing is off a little bit - touch up or leave well enough alone? Landing gear bits are all ready to go now. And just before calling it a night, I gave her two coats of Future with a light buffing after each coat. Some decals tonight??
Also dug around & found a circle template with an option that is the right size for the wing roundels. So, I think I’ll be cutting a mask and adding a white disc on the black wing before that decal goes on. Considering how thin these decals are, there would HAVE to be a noticeable difference if I lay it over black.
Alright, tried my “swivel cutter in a compass” trick. Could have worked if it wasn’t a cheap compass. I KNEW I should have picked up that Staedtler math set! Free option #2, sharp needle tracing over masking tape, inside a circle template, I’d score it an 80%. Got my circle the correct size, and it’s circular, but I had to do a little cleanup of the edges of the tape, then took care of a little bleed afterwards. The result…

The colour plate from Special Hobby…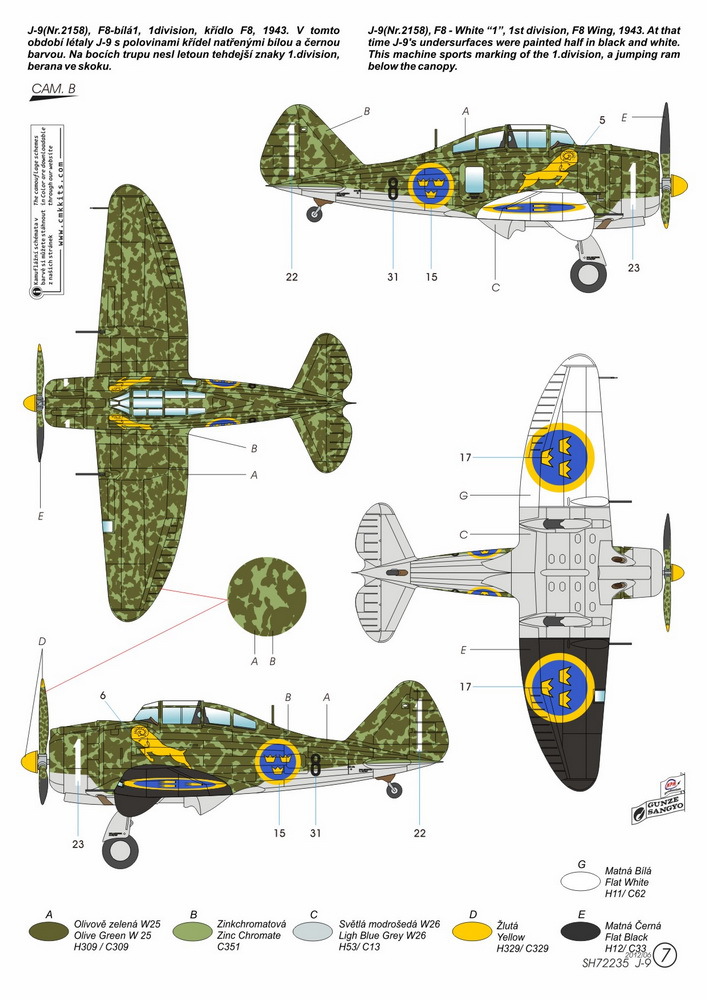
My daughter chose white-1 for me. Didn’t really think about it at the time, but this one doesn’t show roundels on the wing uppers. Need to check into that.


Again, decals printed by AviPrint (I assume the other boxings are from the same?) are probably the best I’ve ever dealt with for thickness & colour density. EXCEPT, oddly enough, the Ram unit badge. The yellow on the roundels is downright vibrant, maybe TOO bright? The white numbering is great. But the ram is a little transparent? Briefly considered overpainting with some more yellow, but that could just make things worse?

STARTED the underside decaling. Large roundel went down no problem. I sanded the white dot with an 8000-grit sanding pad, then buffed it with a scrap of denim. It FELT smooth enough for decaling, but I decided against laying decals over acrylic paint, just in case. Future applied, decal on this evening.

I also have a batch of stencils on that sheet that aren’t indicated on the decal sheet, need to sort those out tonight as well.
(I’m a BIG AVIPRINT DECALS GROUPIE…)
Stencils… how about I use the back sheet of the instructions, y’know, the one labeled “STENCILS - COMMON TO ALL AIRCRAFT” ~oops~
Pic from the maintenance depot last night. Everything is painted & decalled now. Just need to do a little weathering to the decals, finish assembly of the fiddlybits you see here, wing guns, some PE (grabhandles, gear actuators, antenna loop) final touchups and dullcoat.

Snapped a few pics in hopes of noticing some of those small items that can slip by un=noticed…


Dullcoat on the airframe itself, and the prop, now. Need to hand-brush a little on the canopy framing, and the access door. Canopy parts attached except for the sliding portion, there is one last PE handle to add there that will have to be the absolute last thing to do, same with the access door.

With the landing light un-masked.

Not completely happy with the light though. Sits a little proud, must have slipped out a little as the glue was setting. Just enough to bother me, not enough to warrant me removing it & risking me jacking up the surrounding paint.


