Last week I’ve been working on the landing gear. Black wash and the Hasegawa kit decals really dress up those areas. In the main gear bays there were many details to add, especially the strut operating cylinders, running the whole width of the aircraft. There were also the extension boost cylinders - the little diagonal ones, and also the door latches. Still missing are the door operating cylinders - they will be added together with the doors and are only kit supplied. So here are the bays:
On the other side there’s the pressure refuelling plumbing:
Main gear struts:
Front gear strut - there’s still a nice PE part to be added:
Thanks for reading - good luck with your projects and have a nice day
So here’s the next update - it was time to do some decaling. The kit I have gives you two paint options: VAQ-131, AB-615 from the Mediteranean cruise and the VAQ-130, NG-614 from 1972. I wanted to do a Vietnam bird, and I found two photos of the VAQ-131, NH-615, which was similar to the AB-615, so I decided to develop my own decals using the kit decals as dimensional help. That’s what I did and a little company called Malius Manu printed those decals for me. The biggest challenge was to get thin gray and white partition lines between some markings and the black stripes on the tail. In hindsight it would be best to mask the apropriate areas off at painting the stripes - but I didn’t do that. My idea was to incorporate those gray and white borders in the decal - it worked with white, but wasn’t doable for gray. So I did something else - I masked off and painted the right shapes on a clear decal sheet:
Then I put them on the model:
When this was dry, I put the decals on:
While not perfect, I’m quite satisfied with the results. The declas from Melius Manu react well to the mix of Micro Sol/Set, Mr Mark Softer and Solvaset - working with them is a pleasure.
So now I’m putting the remaining decals on - hope you liked it, thanks for reading and have a nice day
Awesome job on the Whale. Interesting how the stars and bars are located so far back. Even the Vigilante that was a huge plane had them up front. Great job Pawel.
PJ - with the electronics “blisters” on the sides there isn’t so much space on the sides of the hull for the insignia - I guess that’s why they are so far back. Thanks a lot for your kind words!
I finished putting the decals on and started to weather the surface - it’s also mostly done. I used dark gray paint (Humbrol 32) thinned with turpentine - put that on the surface detail, waited to dry a little and then I removed the excess with a Q-tip dampened with airbrush thinner. In places where the lines were too shallow I pencilled them in… The airbrush thinner also washes pencil off, should it slip. The next thing to do would be to put a satin clear coat on top of that and then start the final assembly. Still waiting for the custom PE to correct the wheels. Here’s what the model looks at the moment:
Thanks for reading and I hope you liked the pictures - good luck with your builds and have a nice day
Tankerbuilder - thanks a lot for your comment, and for your kind words! Nothing against floatie thingies - I’d love to tackle the brown water navy some day, or Maddox and Turner Joy for their historical significance - just didn’t get around to it yet! Good luck with your builds and have a nice day
Here’s the next update - I managed to spray a semi-matt coat on the whole model. That helped to finally blend the decals with their surroundings. With that final coat on, I could at last unmask the cockpit. I’m glad I haven’t found any nasty surprises under there, although the close up photos show all the minor finish problems that cannot be seen from the distance:
I also put the flaps and slats on. Especially the flaps weren’t that easy to put on. Also note the static charge dissipators on the wing tips - I made them out of thin plastic fishing line, so as to keep them from breaking off:
At the same time I also installed the arresting hook:
You could say - just a few more details and it’s done - but such things usually take me a lot of time, so let’s see how it goes. I hope you liked it - thanks for reading and have a nice day
I wish you had not said there are finish flaws, I’ve been trying to spot them for a few minutes, now I have eye strain and have yet to find any… It’s just a beautiful build, a so-so kit made into a real gem of craftsmanship. I have thoroughly enjoyed following your build and the texts, very informative and helpful for me in my own hobby efforts. Thanks for all of the posts and photos.
Hello Patrick - thanks a lot for your kind words. As the Book says - seek and you shall find… I feel good to know I could help somebody with my writing here. Thanks for your comment and have a nice day
I’ve got my Whale almost done - the only thing left is the correct main gear wheel - I’m still waiting for custom PE to correct them. The thing is the kit’s wheels are correct for so called “Version” - EA-3B, RA-3B, TA-3B and ERA-3B - but incorrect for “Bombers” - A-3B, KA-3B and EKA-3B - that had smaller brakes.
But for today I installed the wire antennae - made them of stretched sprue:
Also note the AN/ARR-15 antenna on the rear cabin window looking like shades - the decal was provided by Hasegawa without telling you where to put it.
I also spotted some missed panel lines on the underside - I pencilled them in, and also added a tie-down ring at the base of the arresting hook, a holdback fitting (the yellow arrow points to it) and the refuelling hose drogue. I also painted the lights:
I also fitted the crew access/escape hatch and the catapult bridle attachment hooks (from the Eduard PE set):
So, like I wrote the only thing left now are the wheels - I’ll let you know when I fix this. Hope you like it - thanks for reading and have a nice day
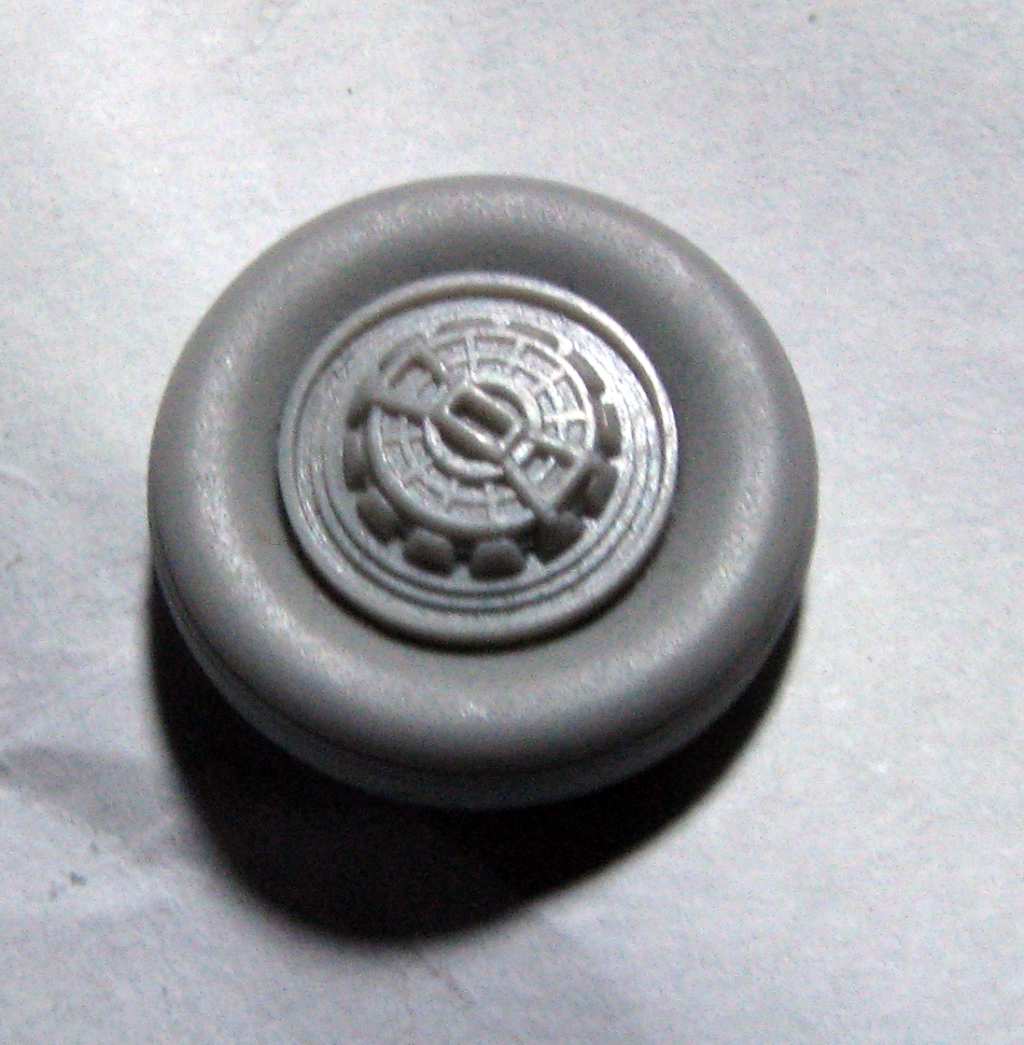
It’s the main landing gear wheel, which would be correct for the so called “versions” variant of that aircraft, but not for a “bomber” - and the EKA-3B belongs to the bombers.
It’s wheels should look something like this:
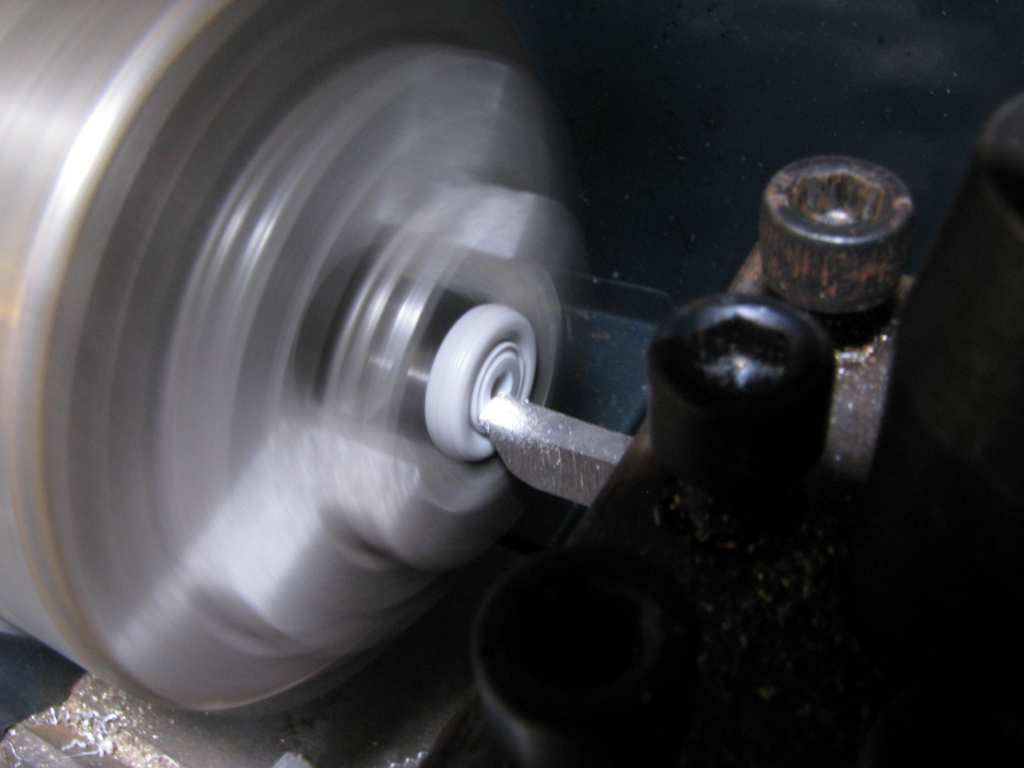
That means work. First I got to my trusty lathe and took the unnecessary part out. I really needed to man up on this one for fear of destroying something:
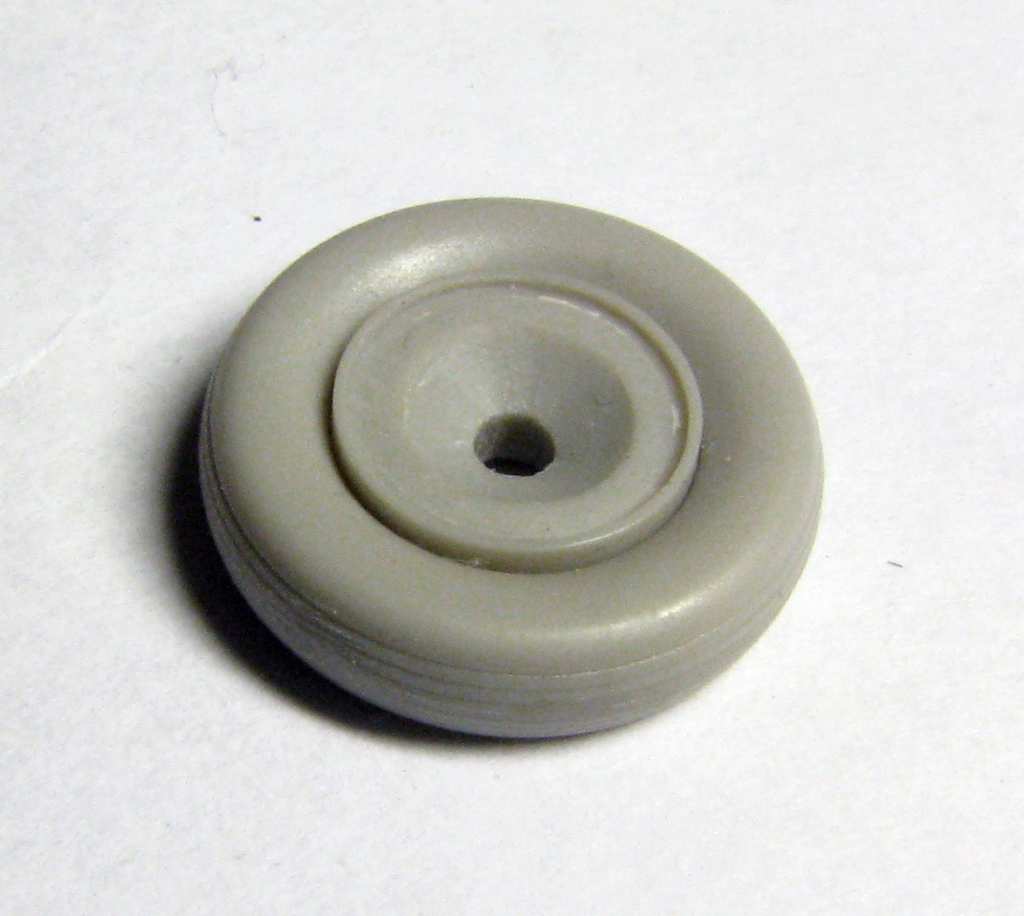
What I got was a very clean wheel:
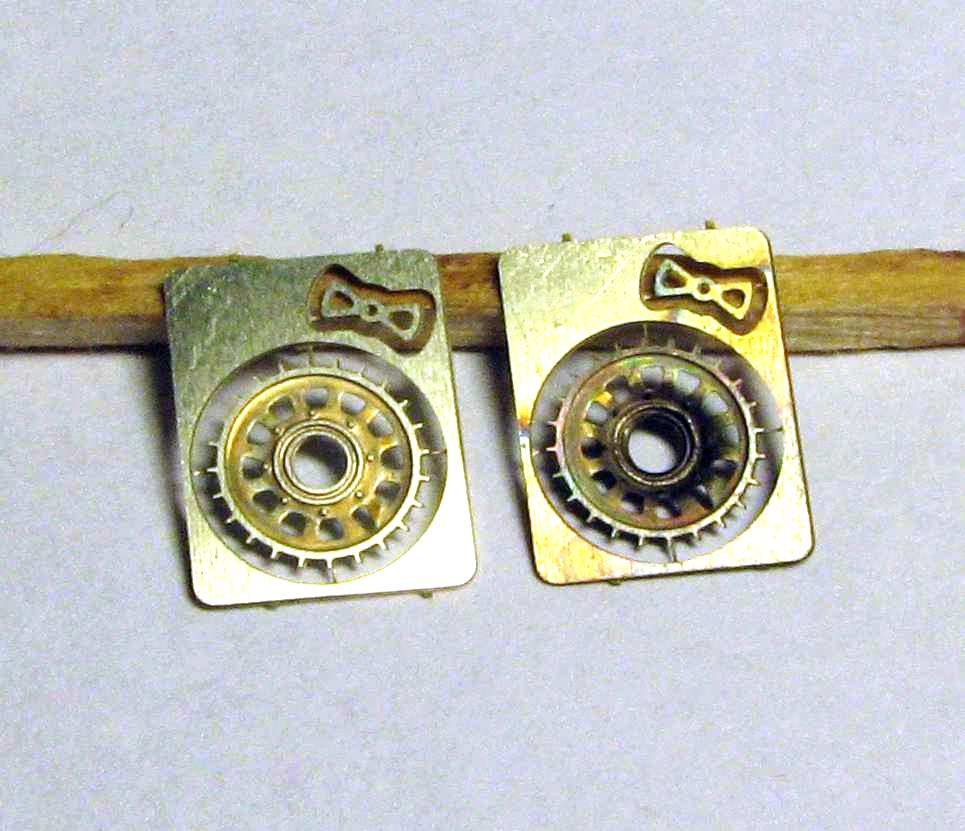
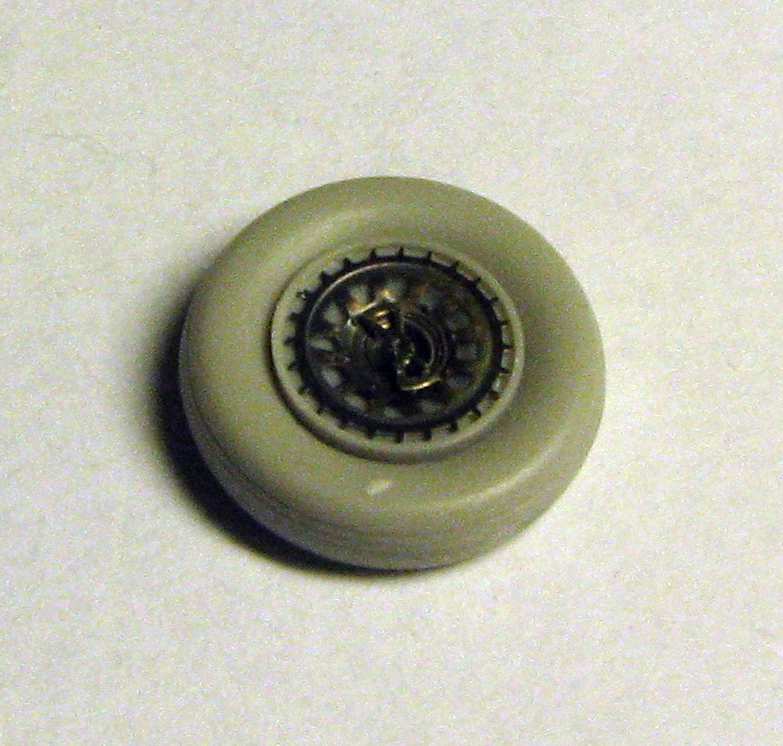
Now I had to add some detail. I designed my own custom PE part in CorelDRAW! and let a small company etch it for me. That’s what took so much time. After I got the parts, I had to shape them. I have built a matrix out of two pieces of iron and turned a brass punch on my lathe. One gentle tap of a hammer and the part was shaped, like on the photo below - on the left - BEFORE, the original part. On the right - AFTER the shaping. You can see the heat discoloration on the part on the right - that’s because I heated it with a gas torch to make the material softer and to prevent it from cracking:
Now the easy part was to cut the parts out and glue them to the styrene:
Now I’m going to paint and weather them. I hope you liked it so far - thanks for reading and have a nice day