I’m starting a new Vietnam-themed project. It’s the EKA-3B Skywarrior, or Whale, as the machine was known by the crews. I’m building my model out of a Hasegawa kit number 00924.
OK, let’s see some photos, right?
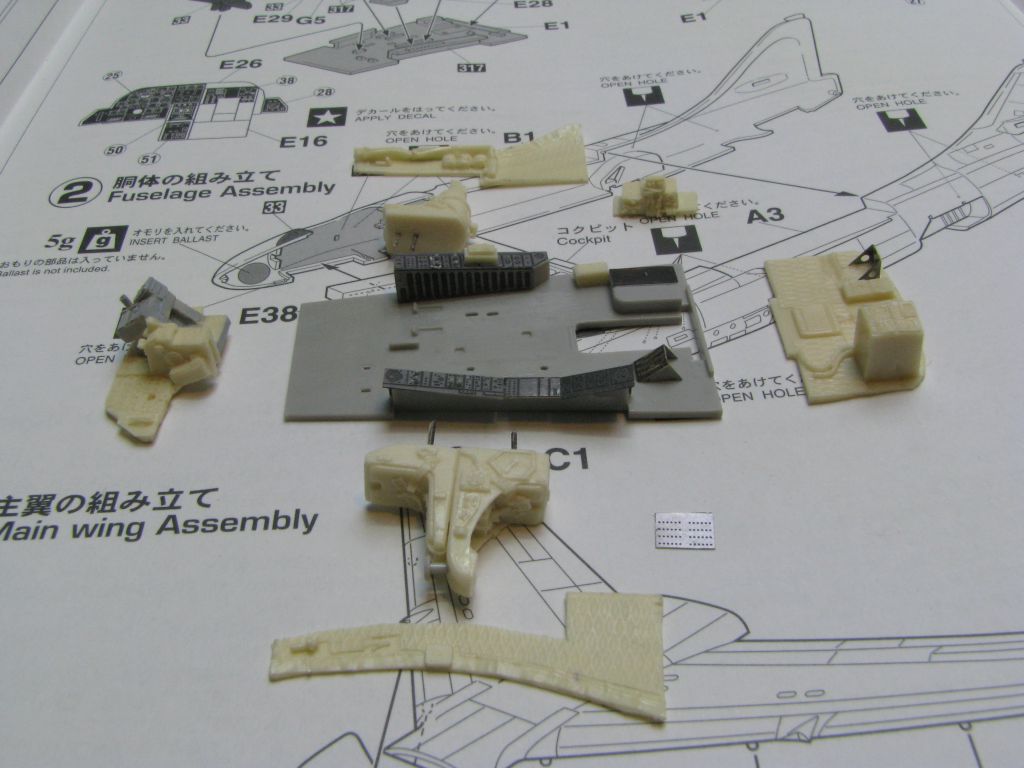
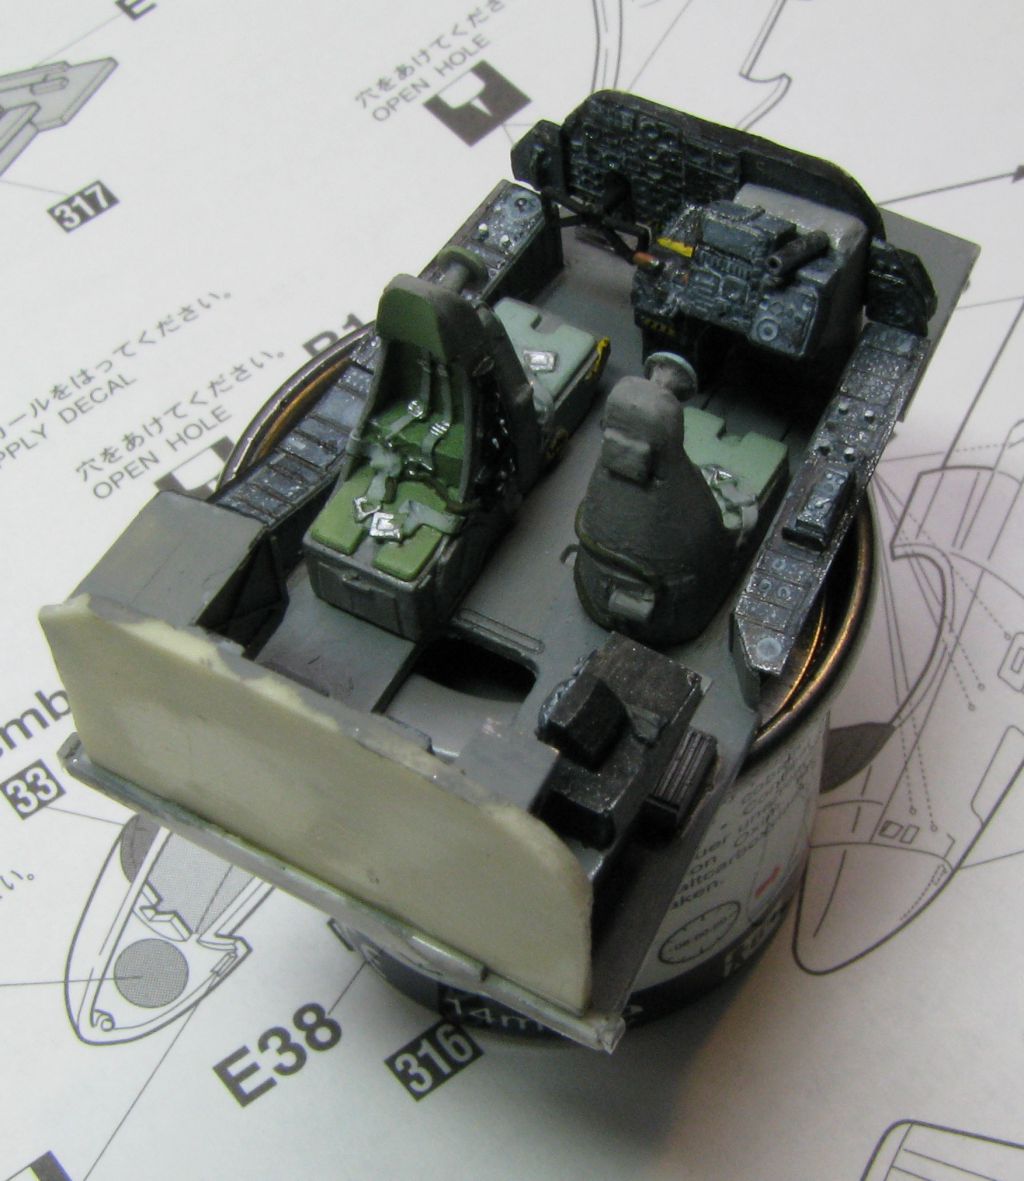
What we got here is a mix of original hasegawa parts, Eduard PE parts, and resin from a California company Obscureco - they have very nice parts, I especially like the cockpit walls.
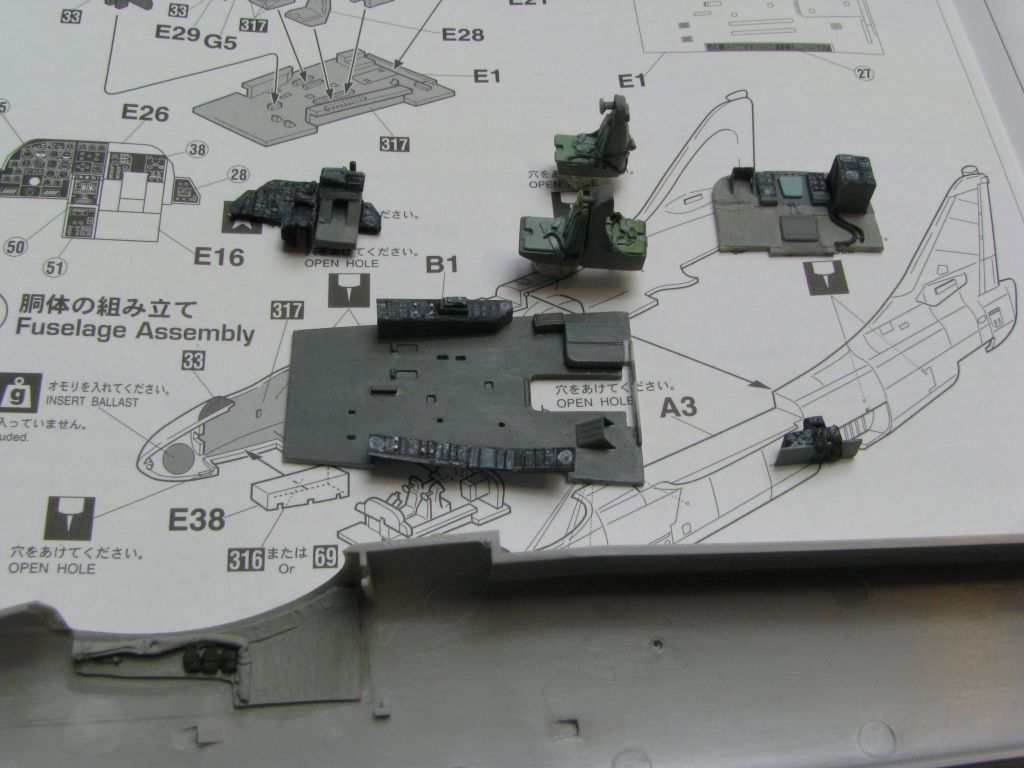
I went on to paint the interior - I used Humbrol 140 grey for most of the cockpit, Humbrol 64 grey for the soundprofing and Humbrol 33 for the panels:
The seat cushions were painted with a custom-mixed blue-green colour, and the switches were picked up with a white wash.
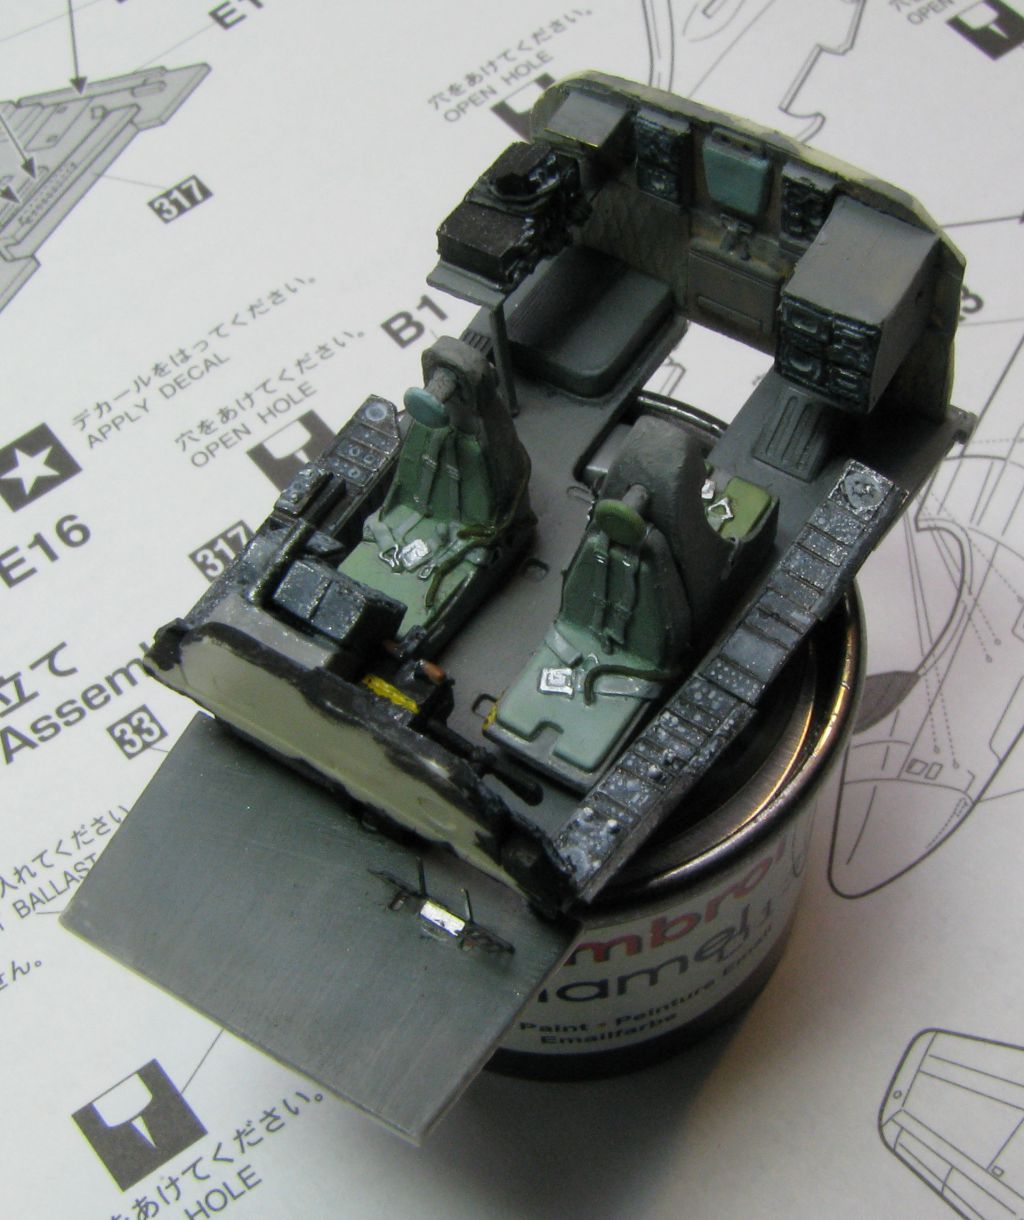
After some tweaking the cockpit now looks like this:
As you might have noticed from the photos, I’m going to build the escape hatch open - seems to be a very interesting feature of the aircraft.
More to come soon, thanks for reading and have a nice day
I had to scroll back to confirm that this cockpit is 1/72, excellent work, Pawel. I was thinking that it was 1/48 scale at least. I was stationed on Ranger during Vietnam and remember these aircraft well.
Thanks a lot for your comments and your kind words, subfixer! Do you remember any squadrons you had on the deck then? What year was it? I’m tempted to do the VAQ-130 tanker with those five black stripes across the tail, but for now I’m still open to other ideas. Thanks again, have a nice day
I’m building a whale too, and also recently found the Obscurco cockpit. You are doing amazing work! I needed a break because I’ve got so many ‘firsts’ in my build and am scratching a bunch of stuff way beyond my skill set. But your 'pit is looking fantastic.
MAgather - Thanks a lot for your comment! You’re building an electronic Whale - right? I don’t know if the Obscureco cockpit would be good for you in that case. Eduard detail set would be OK, though, with modifications - it even has the correct lower crew hatch for your version. Let me post two links for you, maybe they will help you:
Yes, I’m doing an EA-3B. Those are somer great links. I will be using them. My guess is the cockpit is an A3D-2T aka TA-3B, which would have had the permanent pass through and no position for the 5th EWO. (the old bombardier or tanker operator station). I’ve got Aerograph 5 by Francillion and Heinemann so if you have a questions or need a picture just let me know what you want and I’ll see if I can locate something for you.
Keep up the good work, I’ll be watching, and as soon as I finish up a bird for the Dornier 335 GB I’ll get back on my project. I’ve done quite a bit of work since my last posting in my Queer whale thread and I’ll get a post up there in the near term.
Marty - glad I could help you some. That panorama from the museum is definitely captioned EA-3B. That book must be really something - written by the man who designed this aircraft! If you would be so kind, I would as you to post everything that relates directly to the EKA variant here in this thread - that would also be a request for other readers too! Thanks in advance and have a nice day
Sorry, I didn’t know how extensive the book was. Cockpit shots? I would love 'em! Maybe I can improve a thing or two. Thanks in advance and have a nice day
subfixer - thanks a lot for the great graphic - where did you get it from? It will help me a lot with other models and the paint scheme for the Whale is also interesting, that will give me something to think about! Thanks again and have a nice day
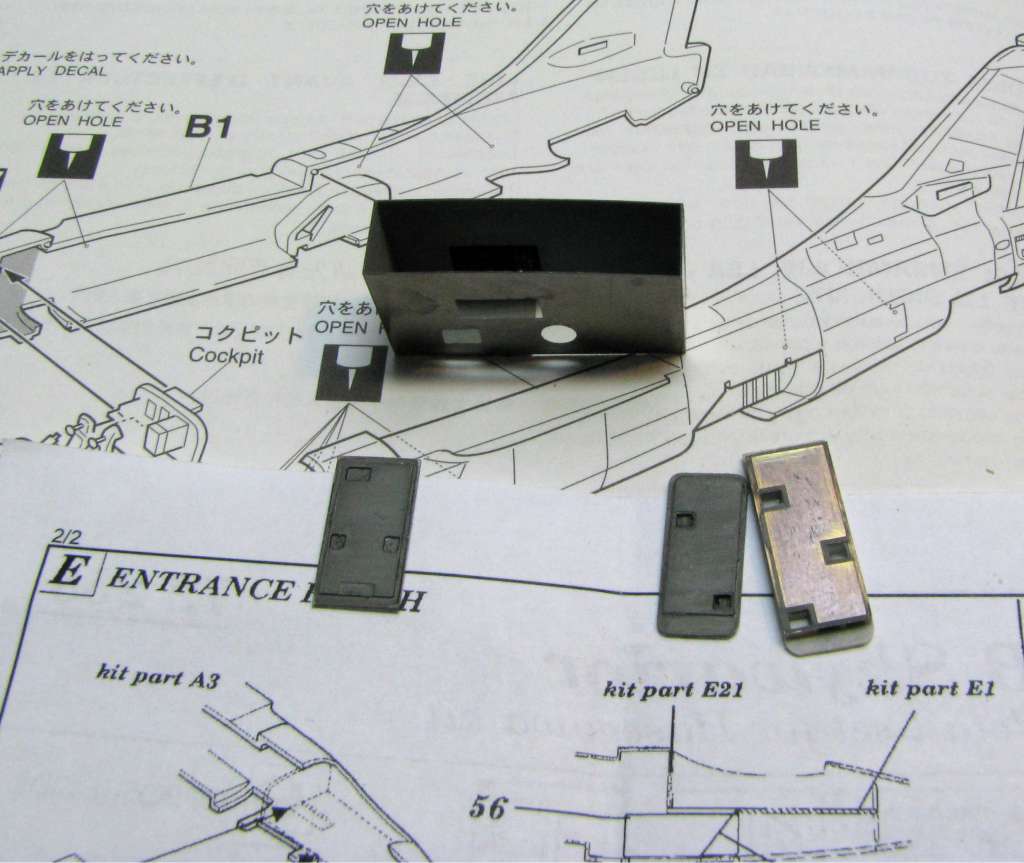
I went on with the exit “hallway”. It leads from the cockpit to the exit hatch on the underside of the aircraft, and to the bomb bay (the atomic weapon had to be armed in flight). The three doors that are necessary were done fixing the undersize etched Eduard parts to correct sized styrene sheet parts:
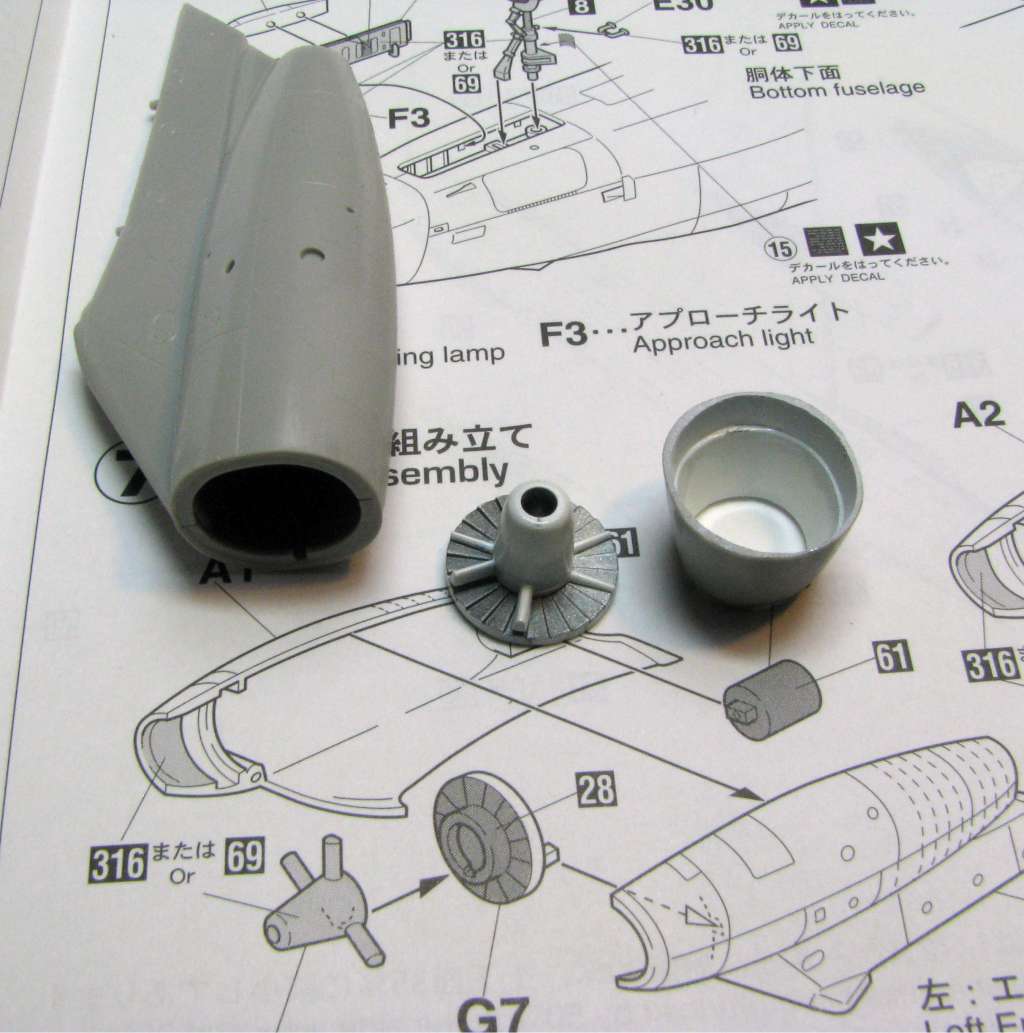
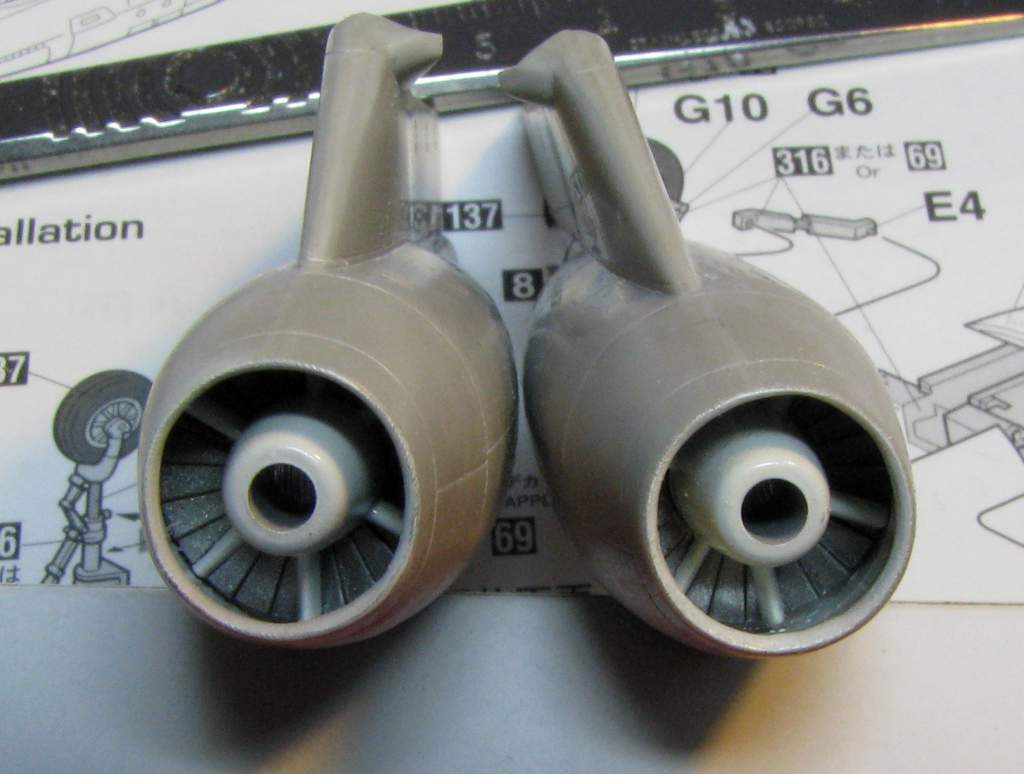
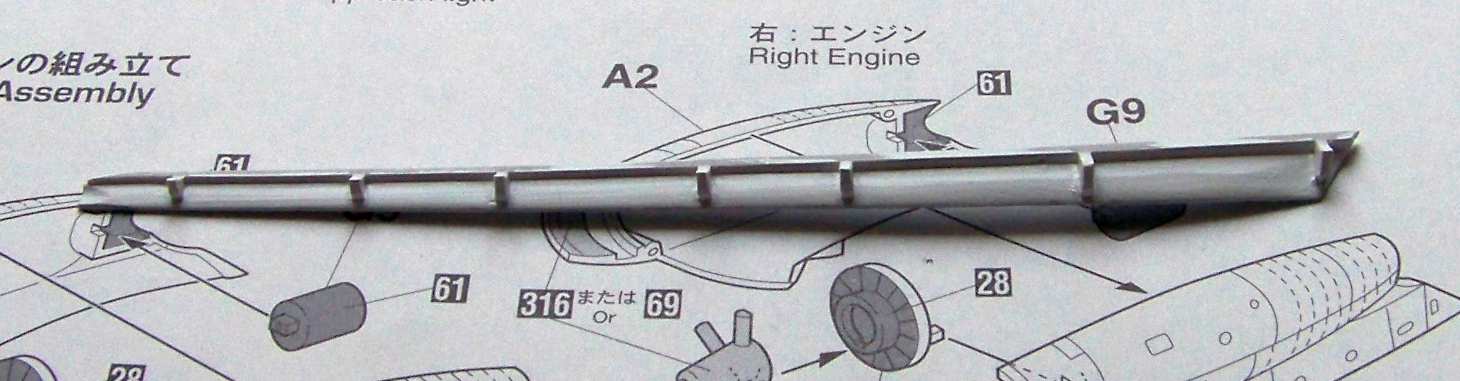
I also went on to build the engines. As I read here: http://modelingmadness.com/review/viet/laskodia3.htm , I cut off the intake part of the nacelle, and filled, sanded and painted it separately - otherwise it could be really hard:
Now I’m off to do the second engine and the forward wheel bay. Thanks for reading, have a nice day
It’s been a long time and I got some things done, today I got to photograph it.
First, I built up the engines. The result is rather nice:
The insides of the oil coolers (inside the intakes) are very nicely detailed.
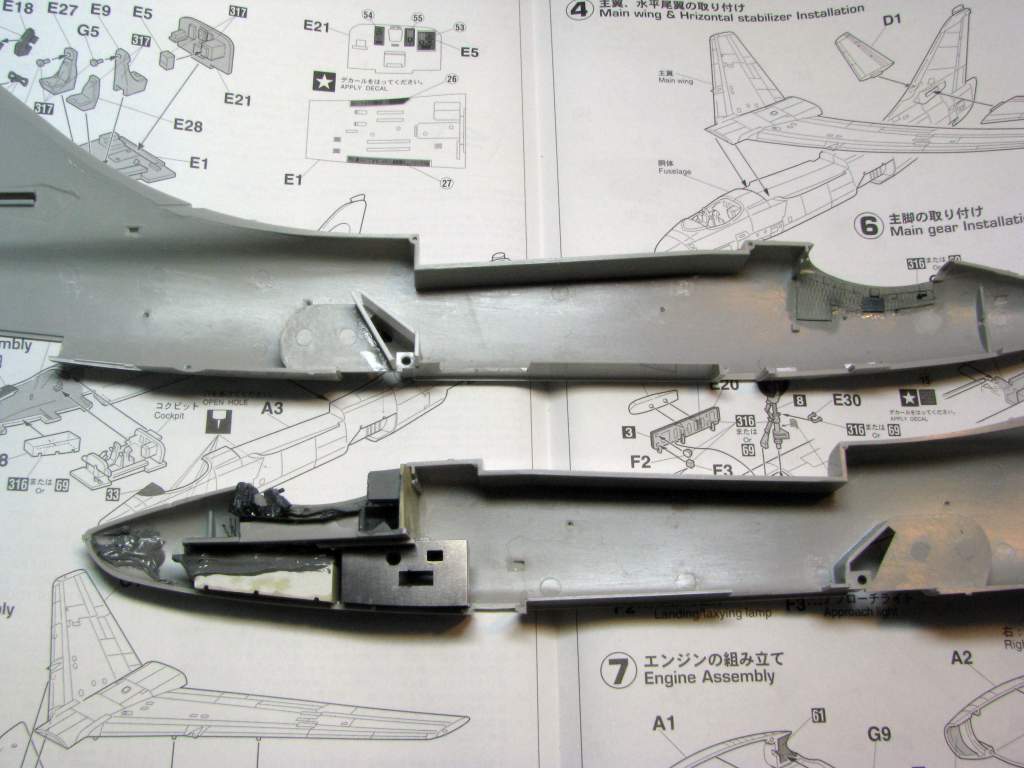
I’m also preparing to close the fuselage:
I installed the cockpit, the “hallway”, and the wheel well in the fuselage half. I glued a piece of resin casting block between the cockpit floor and the wheel well roof to prevent the wheel well from falling inside the fuselage. I have determined, that he model doesn’t realy need a nose weight, plus there is a lot of space in the forward electronic blisters, so I’m not installing any more in the nose for now. I also put some styrene sheet between the main gear bays to do the tunnel connecting them and blank off the gaping hole that would be there otherwise.
Now I’m going to glue the fuselage halves together, filling the seams will probably be a lot of fun…
Wow! That is one great job you’ve got going so far. My eyes are getting too bad for 1/72nd scale stuff. Can hardly wait to see the finished product. Keep up the good modeling!
Thanks a lot, DevilDawg! It will probably take me some time to finish this one, because I build slowly, but I hope it will turn out nice. Thanks again and have a nice day
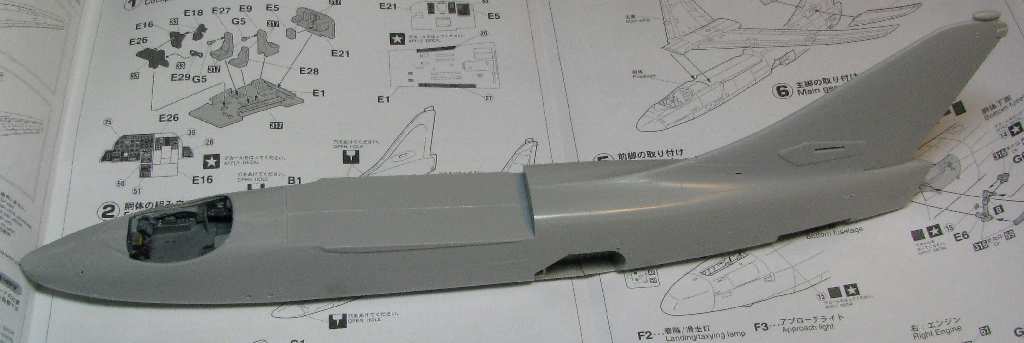
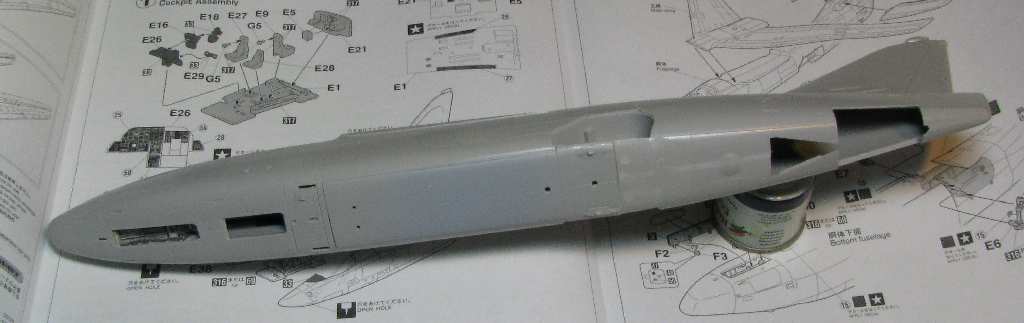
It’s been a long time, during which the work has been going on steady, although slowly. I glued together the fuselage halves and filled the seams:
It’s good to remember to open a slot just before the forward wheel bay for an antenna, that the more modern Whale variants had. I also dry fitted the “anti buffet fence” behind the crew entry hatch - on the bomber it eased the flow of air around the open bomb bay and enabled a clean drop of bombs. On the EKA-3B variant the bomb bay couldn’t be opened in flight, and the fence was also deleted - that’s what I’m going to do on my model, too. The slots on the sides of the fence are for retractable catapult attachment points. Behind the fence there are the bomb bay doors, dry fitted.
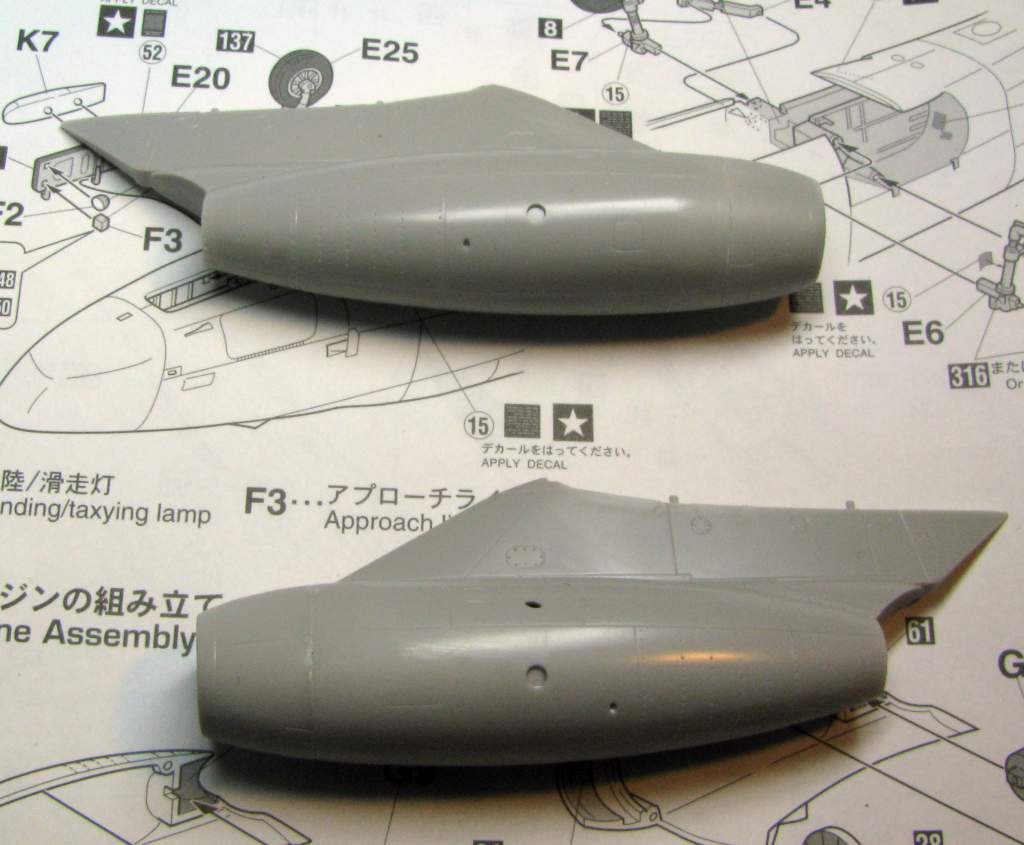
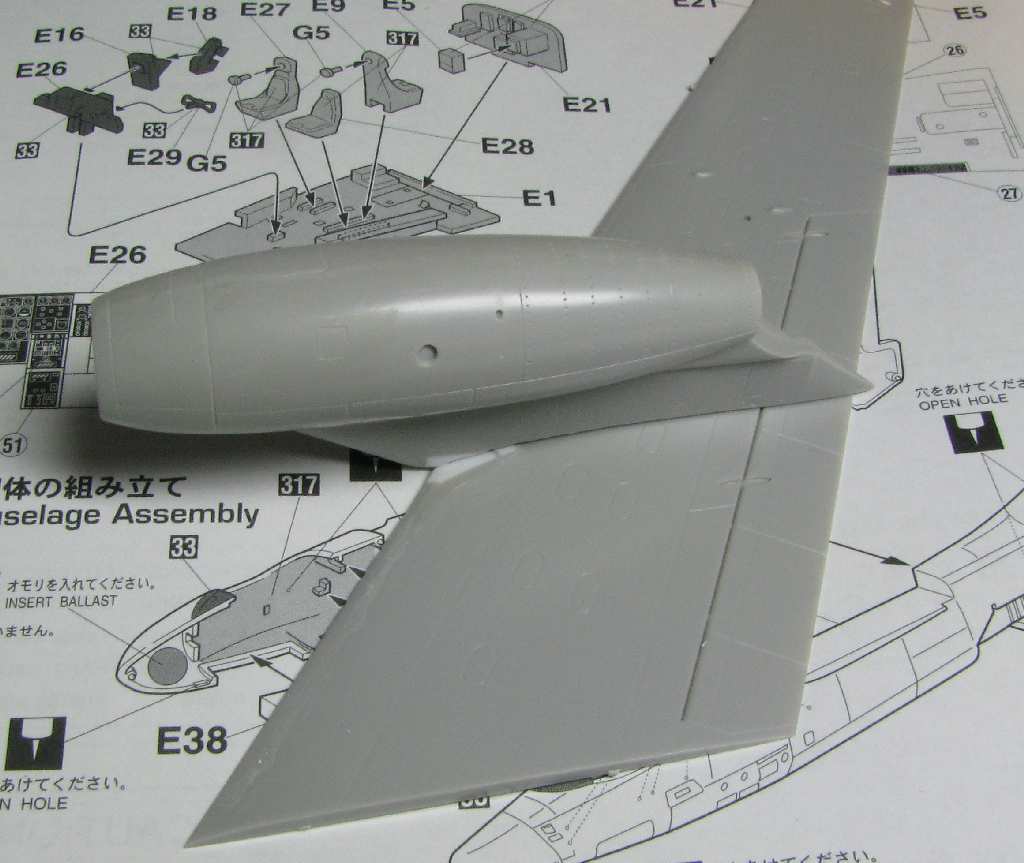
I also started working on the wings - I didn’t do much so far, yet there’s a lot to write about. You see there were two wings variants on the Whale - basic and the so called CLE wings - in essence widened a bit. My machine should have the basic wing. And the Hasegawa kit shows a curious mix of basic and CLE wing features. The shape is a basic wing, and the details were taken from the CLE wing. Take, for example that little fairing where the wing leading edge and the leading edge of the engine pylon meet:
For a basic wing it shouldn’t be there:
More on the differences can be found in this excellent article:
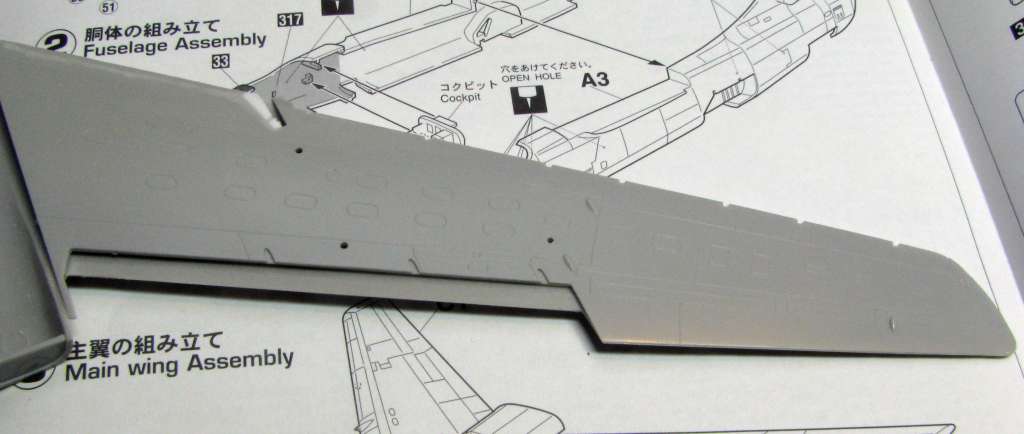
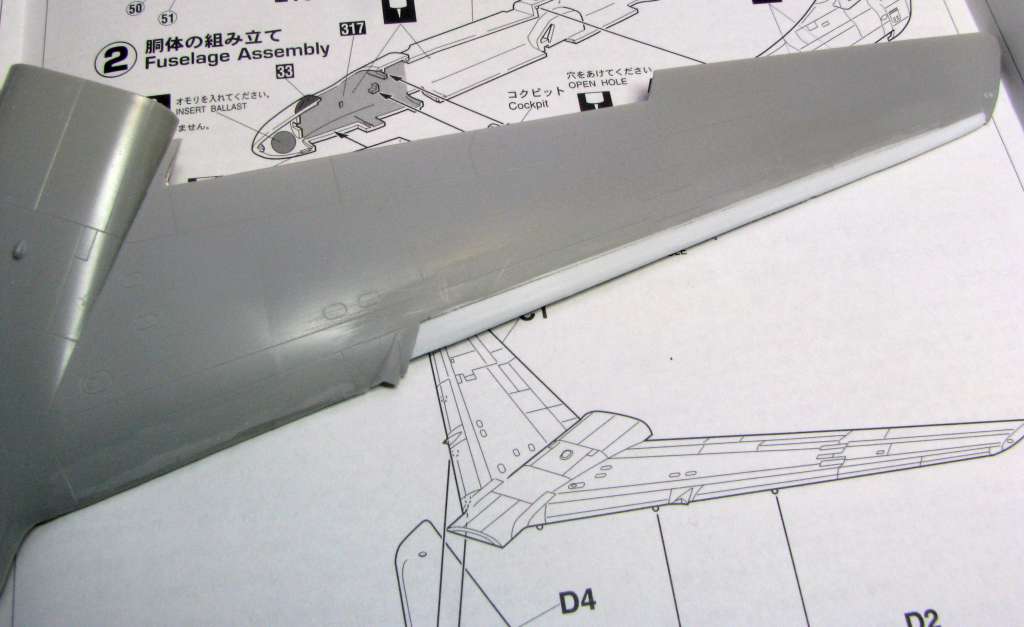
The work on the wings continue. Wing is already cut up, the cut off parts will serve as a base to do the slats, the flaps will have to be scratchbuilt. For now I work to show the slat bays and the wing looks like shown on the photos below:
And now for the opposite side - thanks for reading, have a nice day
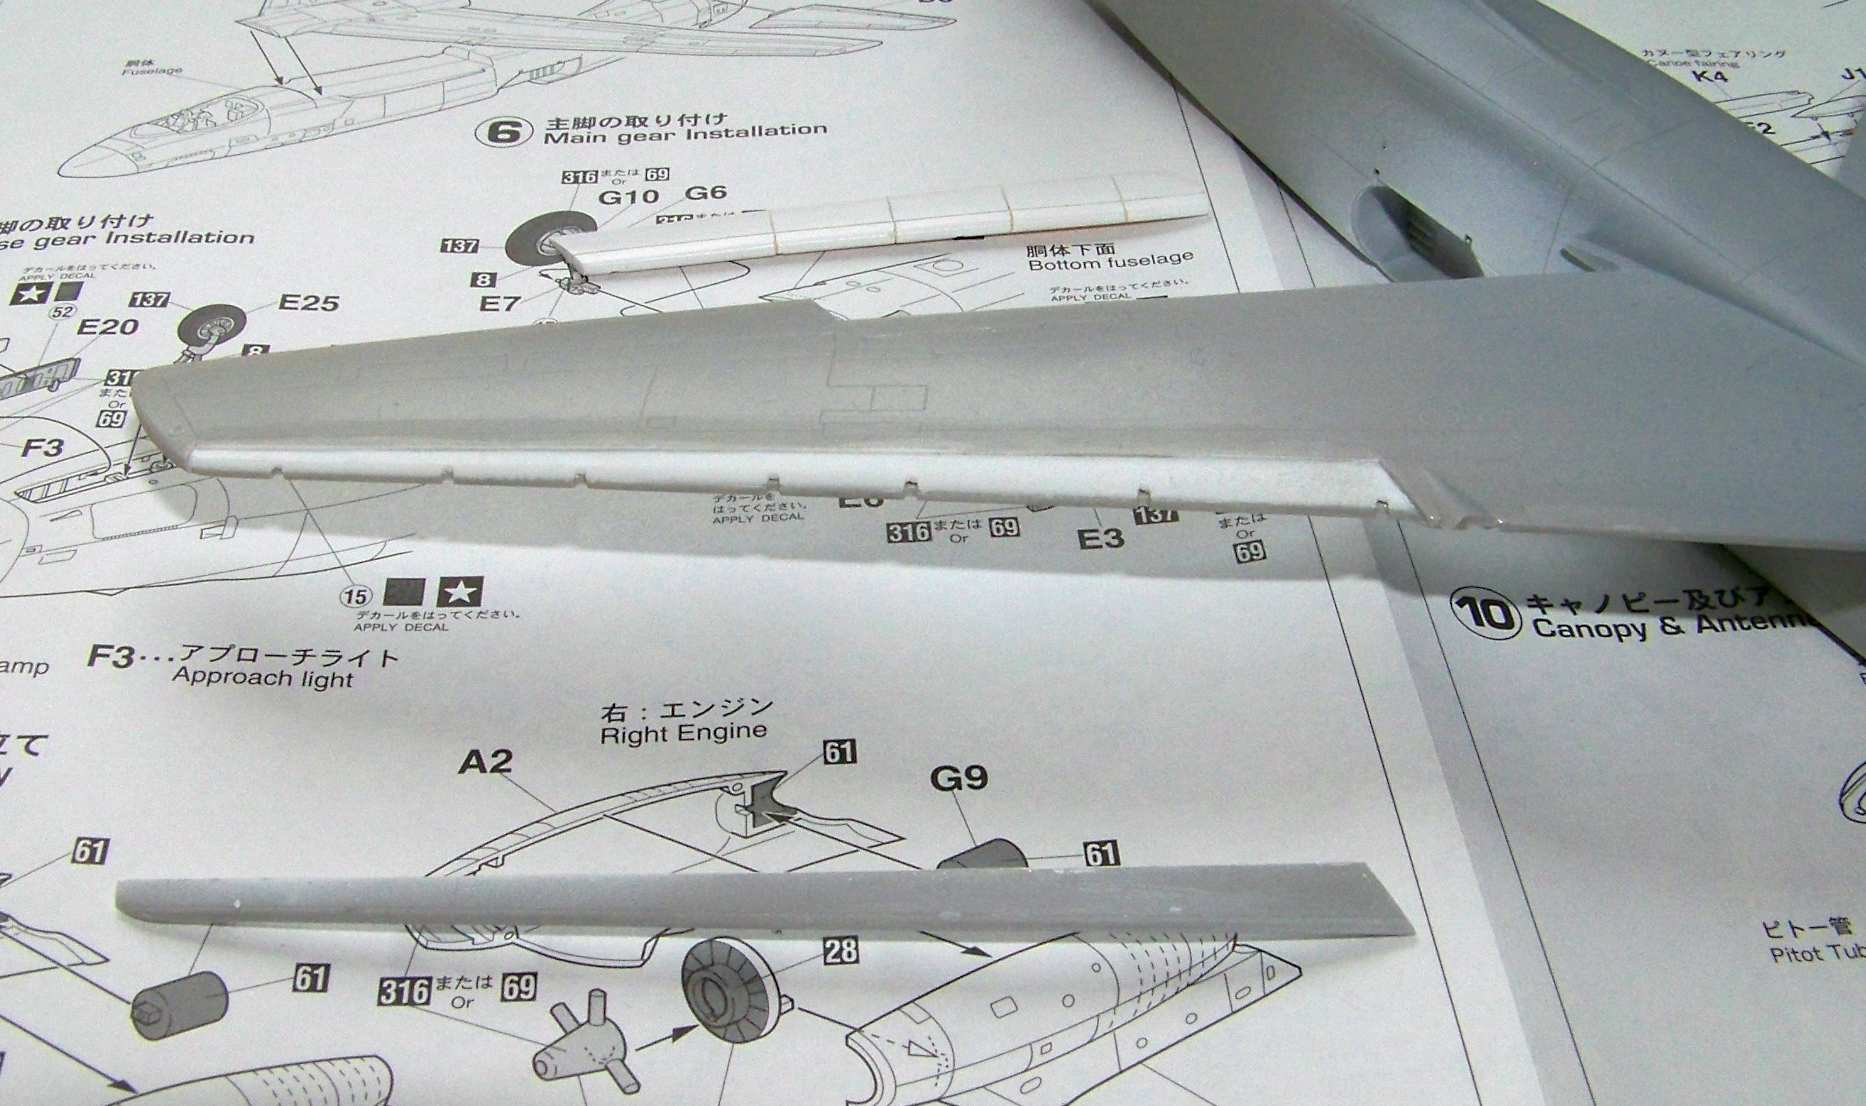
That Whale didn’t get much attention in the second half of the last year, but hopefully that’s about to change now. After I posted last time I was able to glue the wing to the fuselage, and fill and rescribe that joint. Recently I resumed my work on the flaps and slats. The right wing now looks like on the photo below:
I started working on the slat attachment points. While not very accurate, I couldn’t come up with a better way to reliably hold the slat to the wing. I’ll try to build it like that and see how it turns out:
I hope you like it, thanks for reading and have a nice day
eka-3b-1218.jpg)