1/72 B-52D with Big Belly Mod, Operation Arc Light

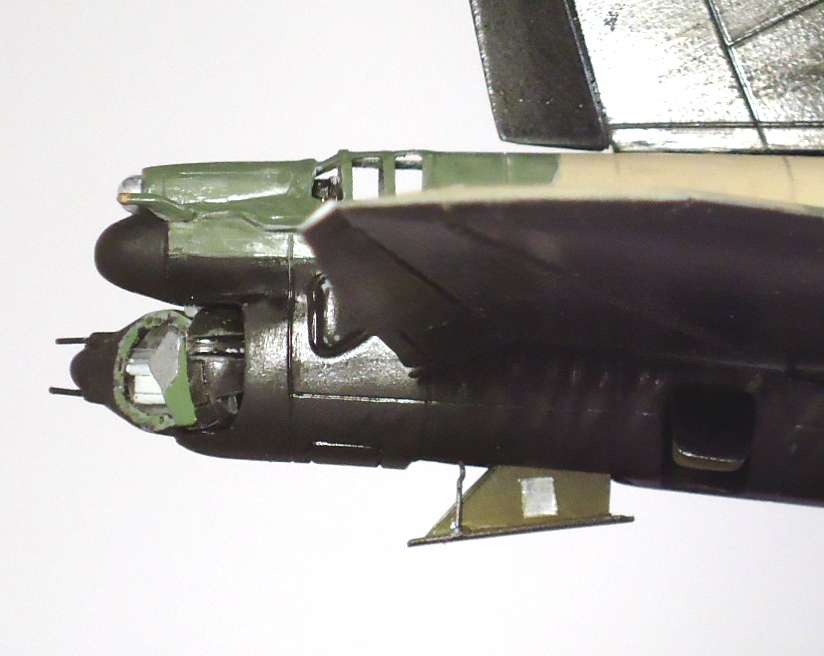
Russ, more fantastic work. I never new the BUFF was such a porcupine!

Thanks for the all the great descriptions as well.

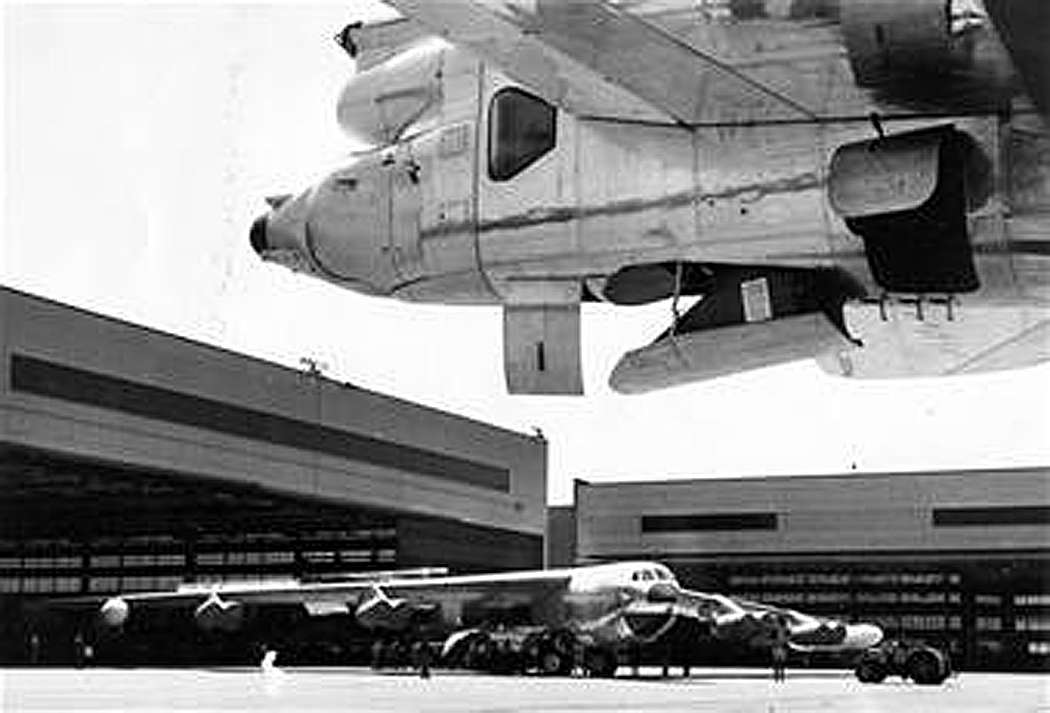
As we can all see in the photo above, that soft-yellowish bronzey looking semi-circular object just behind the antenna farm is a actually a tail-hook.

Yeah, the crews of battle-damaged BUFFs used it to make emergency landings on aircraft carriers

in the South China Sea…[whstl]…errrr…I have a rice paddy near Laos I can sell yah…

Russ, all those vents and antennas make it look very realistc.[Y]

Not trying too cause you any additional grief here, but are you planning to do anything about that aft-starboard wheel spread situation?

Dom

Thanks, Dom! Ahh yeah, that was an arresting hook…lol! [:D] [Psssst!! You guys with the happy suit – this way! … [clwn]

Hmm…they look straight to me… / \ [*-)] (j/k bud). Yes, I plan to correct that. I saw it too when I posted the picture. Thanks for pointing it out though.

Russ

Hey, Dom,

I corrected the wheel spread in Photoshop for now (I know, it just looked bad in the picture). I’ll wait till I get the wings on her before I glue the wheels permanently in place.

Cheers,

Russ

Hey Russ,

it’s looking so fine, I just

wanted to make sure it wasn’t just my own

warped perception, or a tiny imperfection.

I think as mentioned above, if you can document

your scratch, you are going to win something

at a show for sure!

Dom

Not a problem, bud. I always appreciate your being concerned.

Russ

I finally found a clear green plastic I could use for the right wingtip navigation light (got it from a plastic clip) so here are the two wingtips completed.

One thing that presented a problem - the thickness of the left and right wingtips is different (who would have thought? [:D]), so the lights don’t look exactly the same. But since they are at opposite ends of a long wingspan, I don’t think it will be noticed.

Cheers

Russ

Russ,

Good innovations there.

Uhhh…the wings also have different airfoils, and

the wing roots terminate in different places along the

fuselage, both length-wise and depth-wise.

I ended up filling a good portion of the topside of the

port-side wing, between the inboard engine and fuselage,

to get it to match reasonably with the other.

Also, the fuselage halves have different sectional shapes

from tip-to-tail. One side is a little ‘rounder,’ and the other

is a little ‘squarer.’ Let me know which is which, if we agree

i’ll buy you a beer…

The thing is, as long as you correct a glaring error, there’s

no margin in trying to repair all of the inaccuracies of any

given kit.

Also, as long as you are building and modifying within the

kit manufacturer’s tolerances, no one can fault you if it was

a bit off of the aircraft-manufacturer’s blue-print when you

pulled it out of the box.

It’s always refreshing to note as well that on many real aircraft,

the lines, lumps and bumps are often not entirely symmetrical.

Given the tolerances of that kit, if a guy ever complains to you that

the lights aren’t exactly the same shape, you will know

instantaneously that you are talking to a certified moron…[:(DD]

Great job on the lights![Y]

Dom

Thanks for the good words, Dom! I found the same things with the wings and fuselage on mine. Just have to work around them. To quote the US Marine Corps: Improvise, Adapt, Overcome [:D]

Cheers,

Russ

Hi, All,

A bit more progress tonight. I decided to depict the drag chute tray extended since almost every photo I found shows this compartment open when the aircraft was parked.

Cheers,

Russ

Wow Russ!! That is just incredible! Your skills of scratch building blows me away! Those lights and the drag chute tray look fantastic!

Ken

Thanks, Ken! I very much appreciate the good words! [:D]

Russ

Hello, All,

I’ve had to stop work on the diorama base for a while, so I decided to try and simulate the insulation that covered the bulkhead separating the chin radome and the bomb-nav compartment (many thanks to wynder for providing pictures of the Lone Star Lady at the Pima Air Museum).

I used Testor’s contour putty to form the insulation but it became apparent right away that trying to shape it with the bulkhead in the aircraft was not the way to go. Unfortunately, I had already added the bulkhead and closed up the model before wynder’s photos were available. If I ever do another one, I will build up the insulation on the bulkhead before I install it.

I’ve also added what I believe are three power supplies on the right side of the bulkhead (again, thanks to wynder). Unfortunately, a lot of the equipment that was installed in the nav antenna compartment was removed before this picture was taken, but each picture provides a piece of the puzzle and eventually, I may be able to add more equipment.

Hey Russ!

I know that the chin radome moved forward for maintenance, giving the BUFF a temporary tremendous “underbite” look while open. Maybe you can simply add the radar dish then put on the radome in its maintenance-open position, and for a bit of tongue-in-cheek, have a guy standing right up inside the nose compartment so his legs are seen under the nose while he “takes a look around”. This way, super-detailing isn’t as necessary. In that configuration the detail you have there is already enough.

Hi, Beau,

Roger that , bud. I remember seeing them open many times. But the radome only slid forward about 2-3 feet before you had to take it off the track and set it on the ground. I debated whether to show it in it’s open position or completely dismounted. I wanted to show the antenna as well, and unfortunately, in the opened position, you can’t see much of the antenna.

My original plan was to have a tech on a B-4 stand working on the antenna with the radome on the ground. I agree, the plane looks pretty cool with the radome cocked and I might just go that route after I re-mount the antenna and see how much of it is visible.

Thanks for the suggestion,

Russ

just found this thread and your work is amazing!

Thanks, Shawn!

Nice job once again Russ! I would have to say you nailed it! Great job!

Ken

Thanks, Ken! I’m not real happy with the way the insulation turned out, but theres not much I can do at this point. Fortunately, it won’t be that viewable [:D].

Russ

Russ:

Your insulation looks fantastic!

It is the right color, it is puffy, it is crinkly,

and it has those slightly random raggedy edges and

fastener zones.

It will be long time before I ever see detail like that

again.[Y][Y][Y]

Dom

Thanks, Dom! [:D]