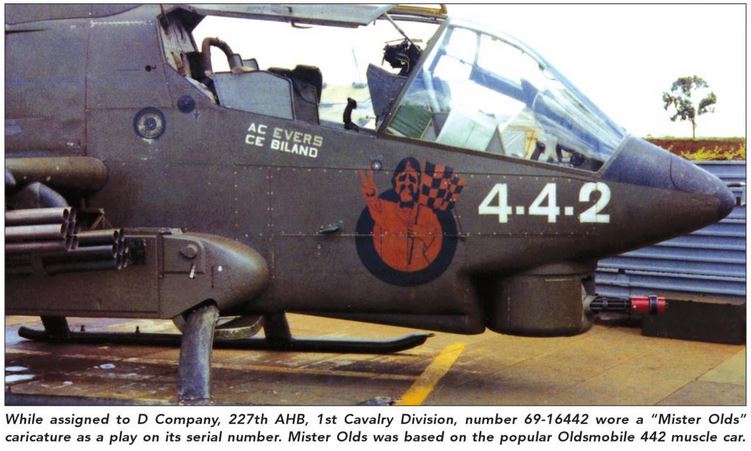
Ever wondered how it did look like in Vietnam? I did, and I came up with this photo:
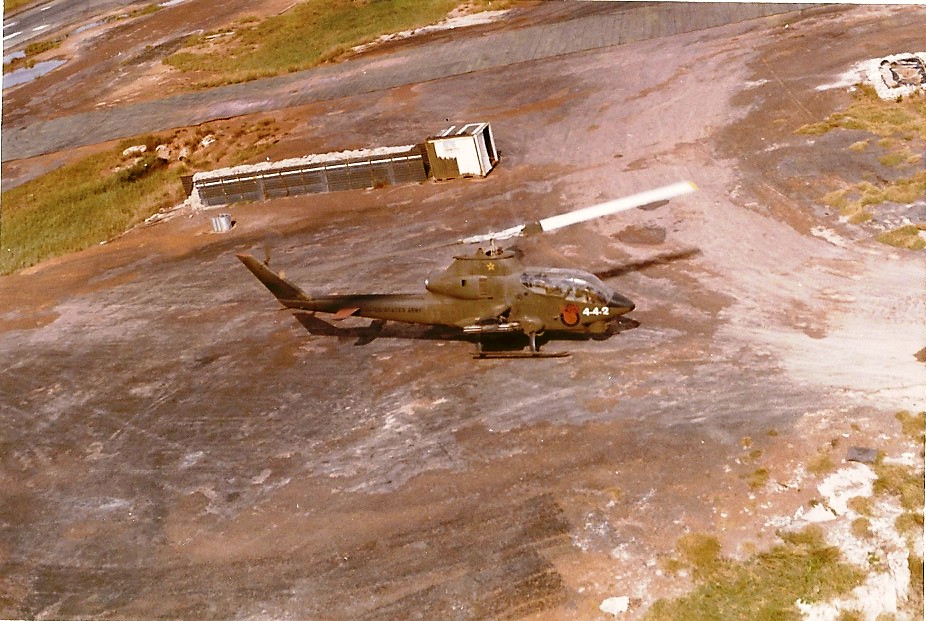
And one more:
The first photo shows it in the outfit ot D/227th, the second photo E/1/9 Cav, and this was not a transfer, but a reorganization (the unit got renamed).
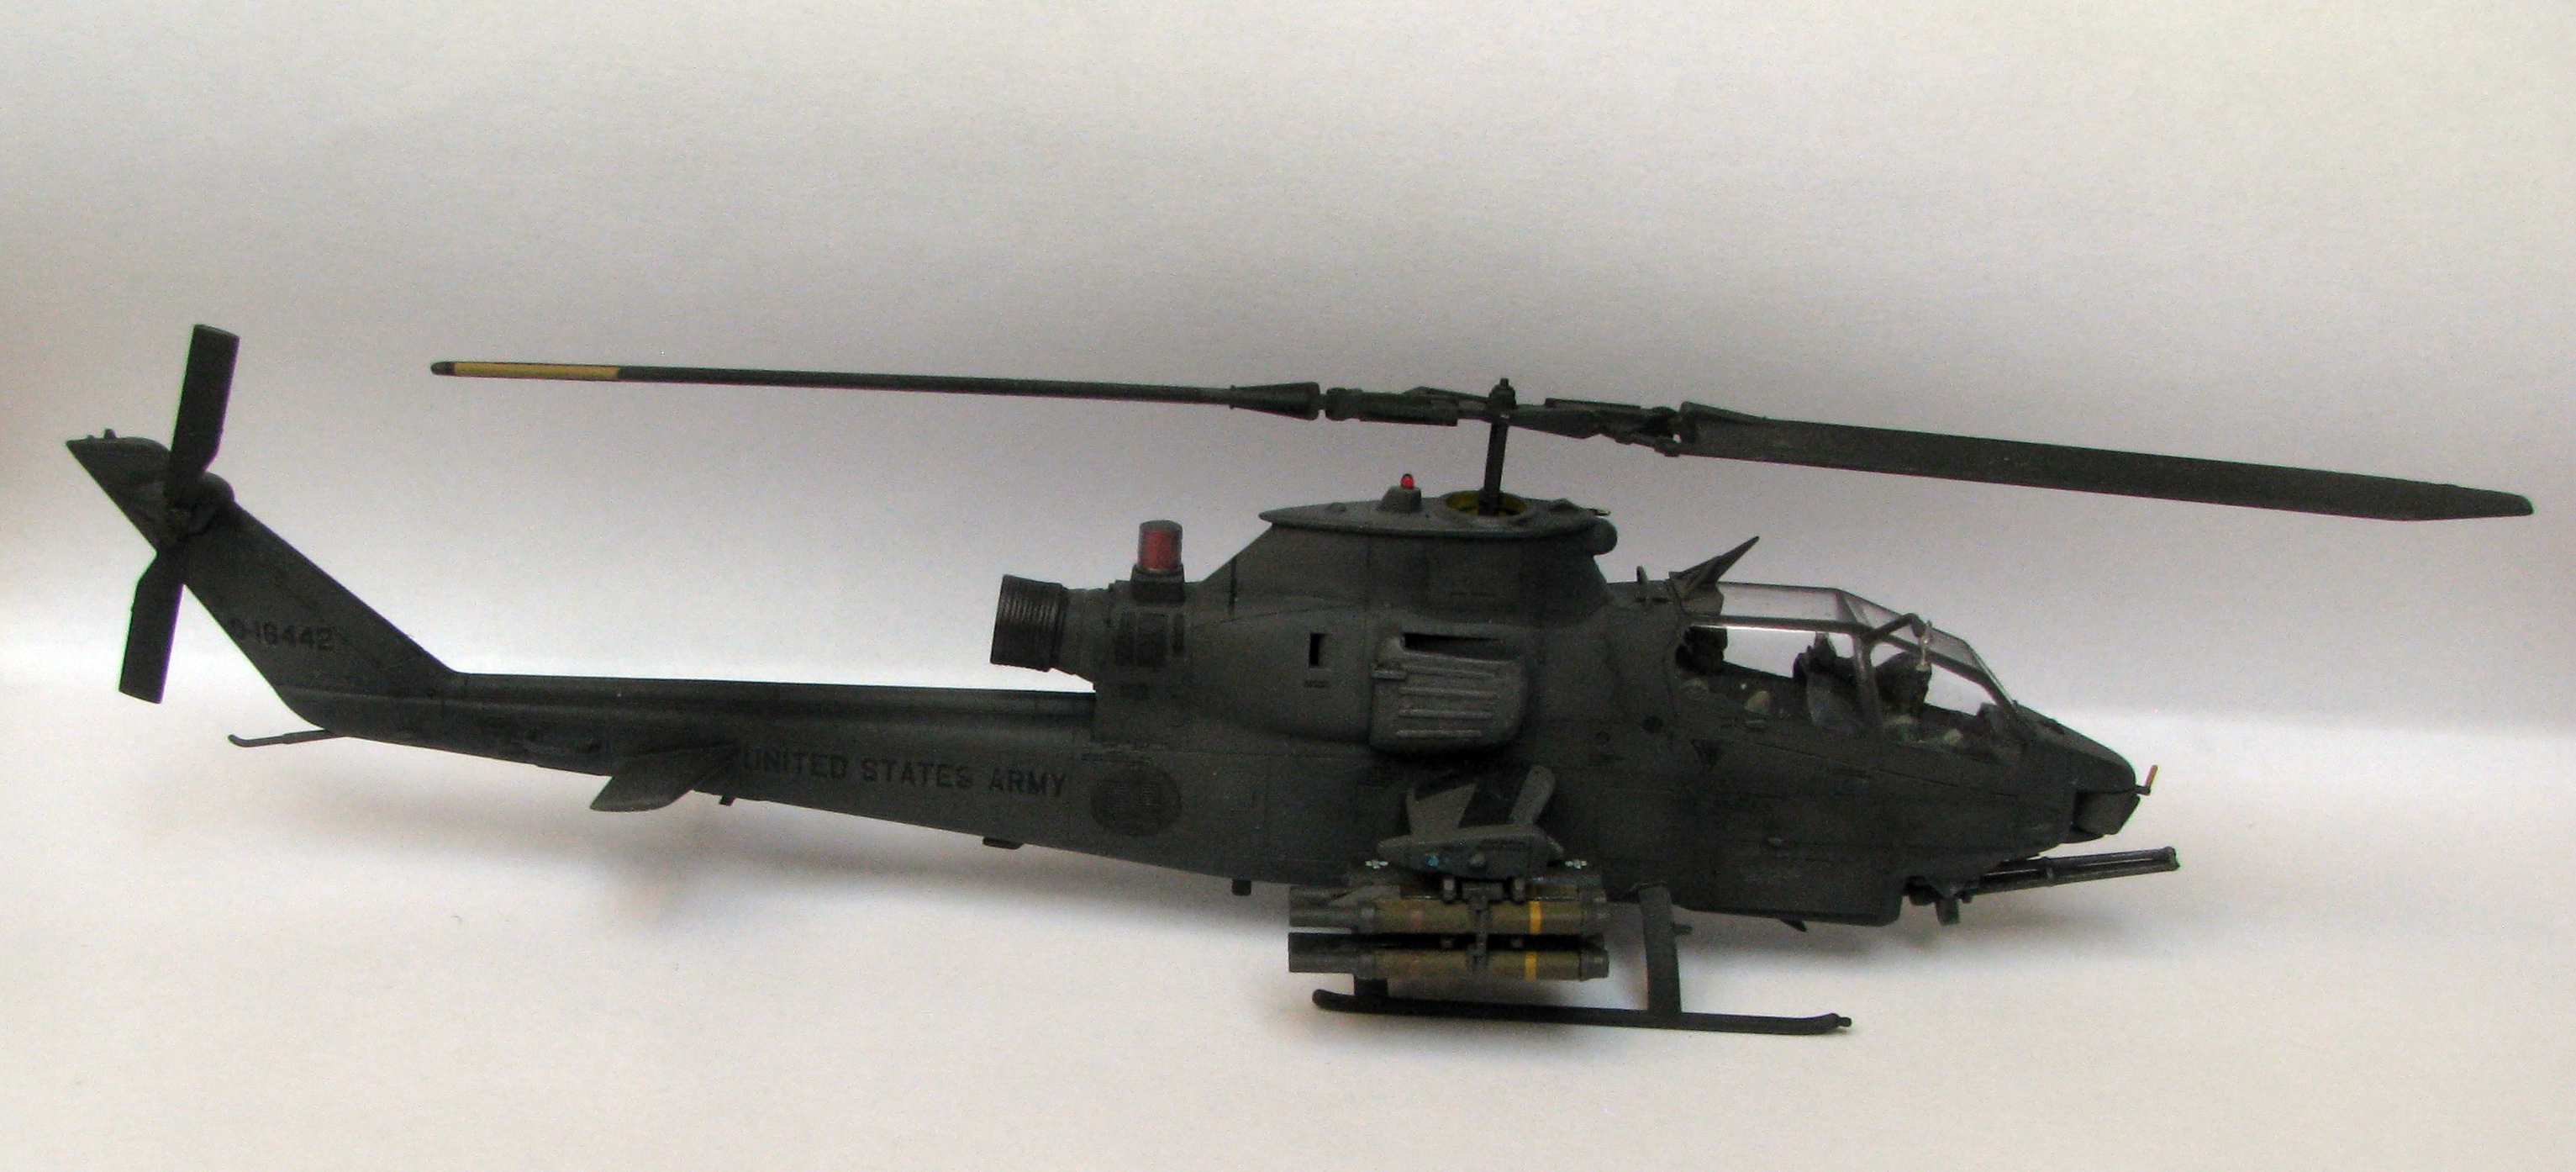
The chopper itself is equipped with an M197 minigun under the left wing as indicated by the 20mm ammo containers above the skids, and XM158 rocket launchers.
If you have any more photos or infos on this particular chopper, please help me and post them in this thread.
And as WIP needs actual work, let me post this photo here:
Thanks a lot for your comment! The plan is to have custom decals printed. I already have most of them drawn up in CorelDRAW!, including Dr. Oldsmobile himself. Do you want me to print an extra copy for you?
TheMongoose - thanks a lot! I think it shows that I had my fun shading it…
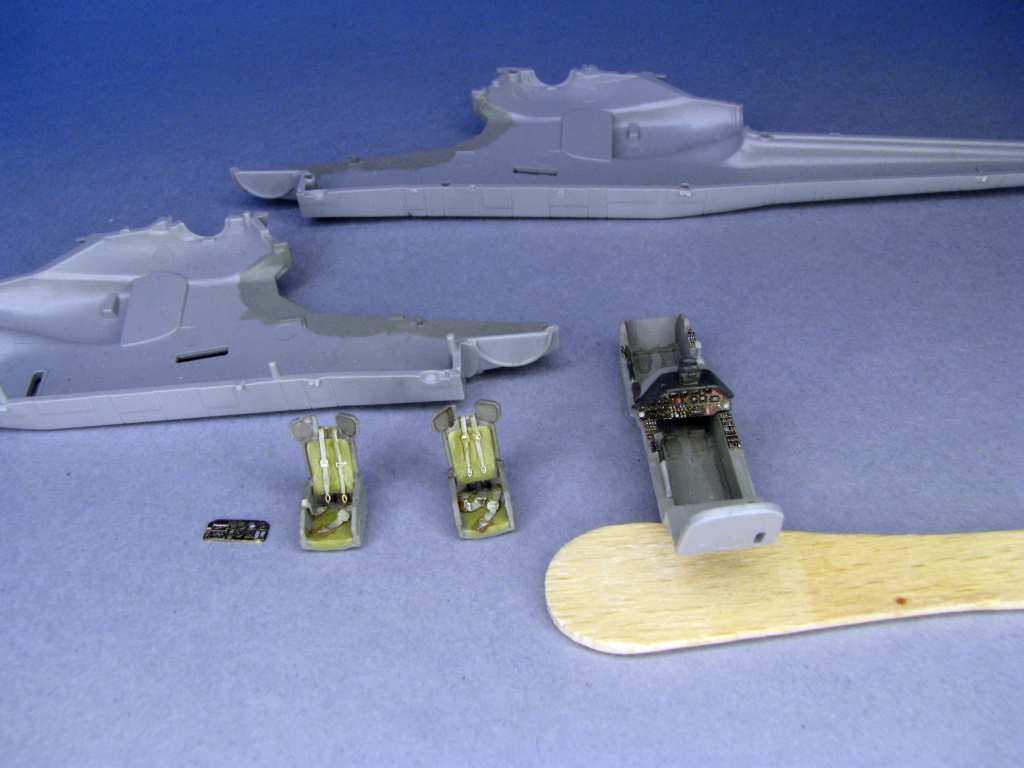
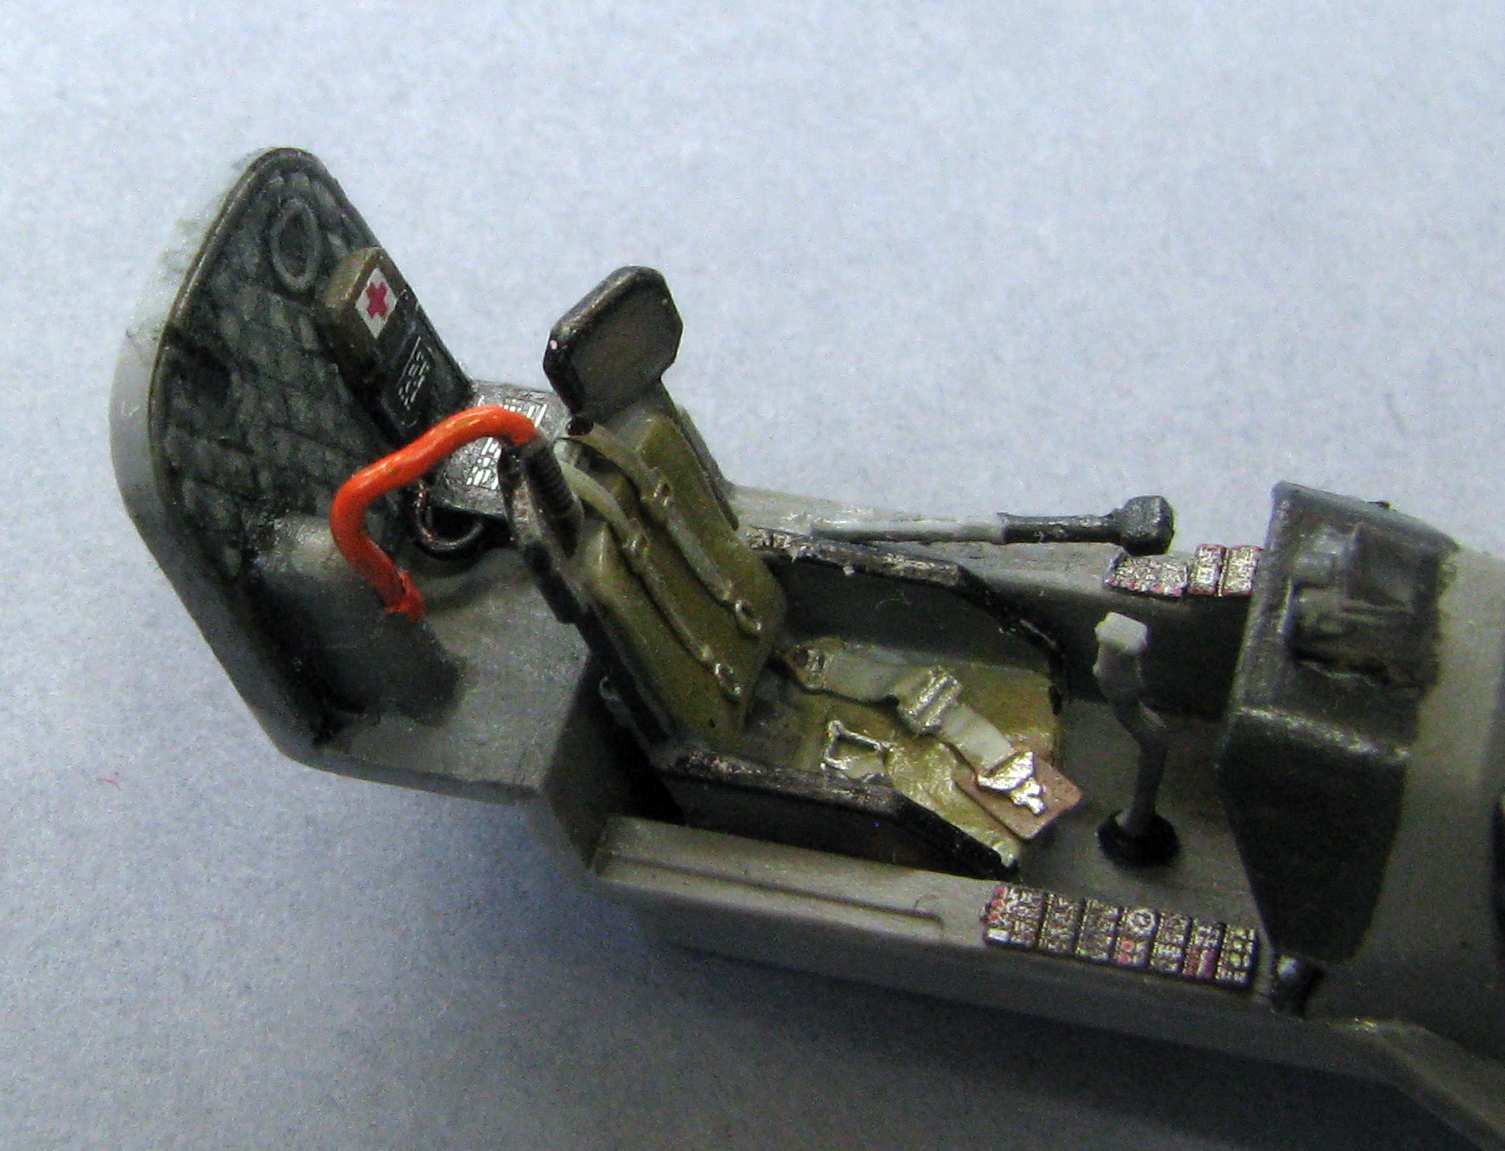
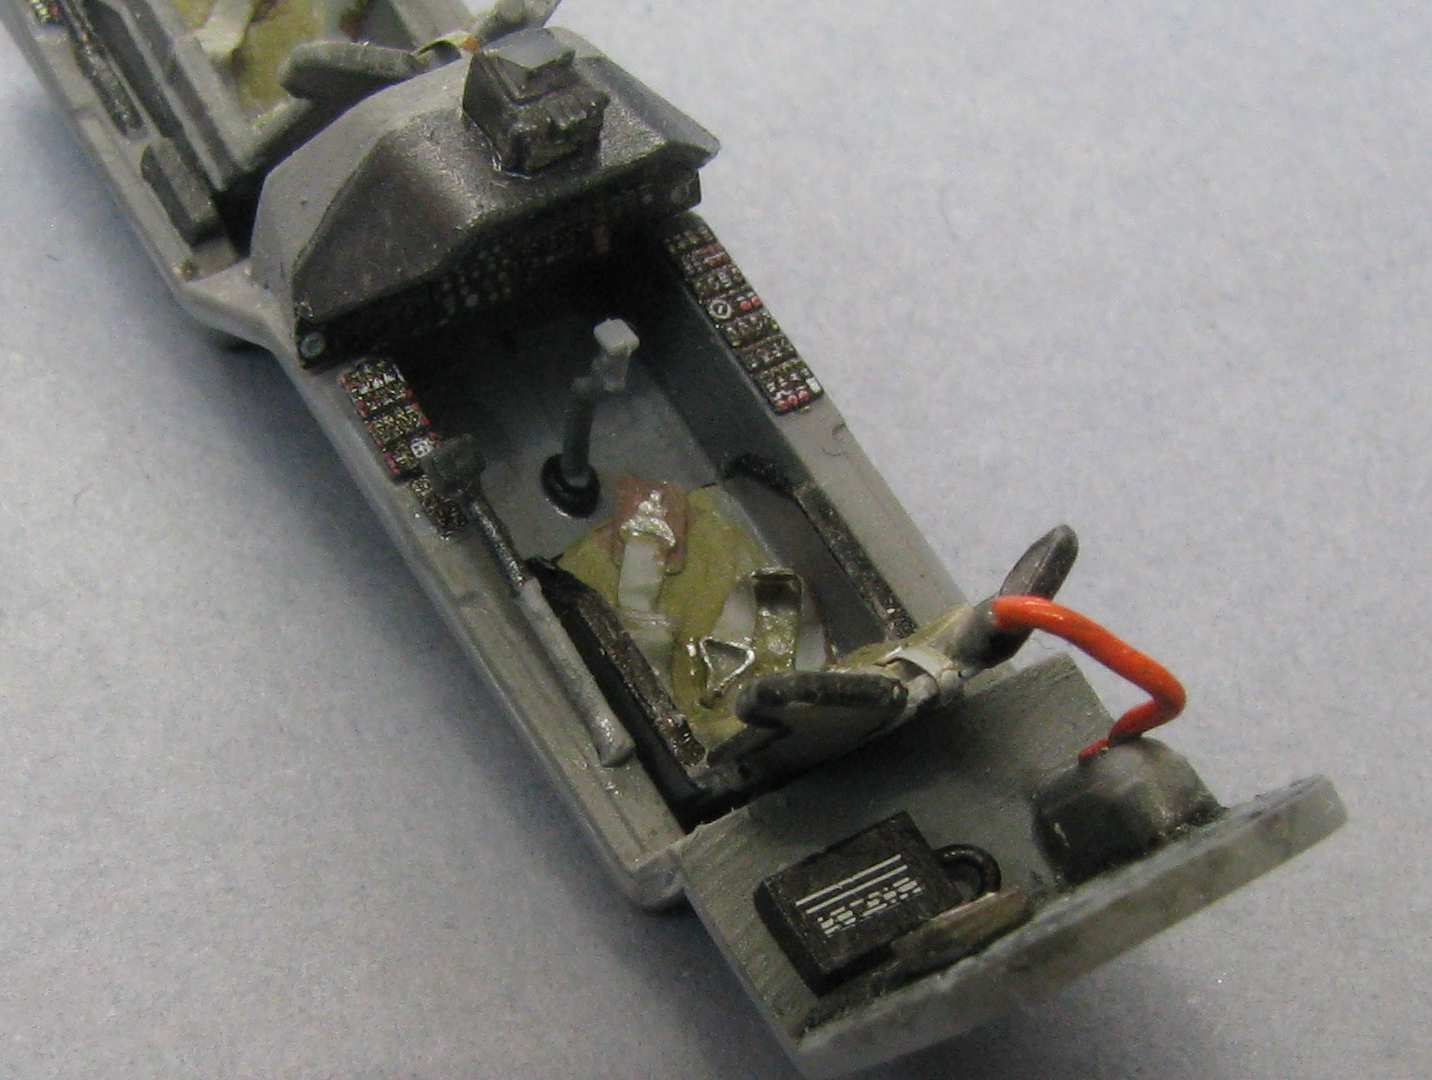
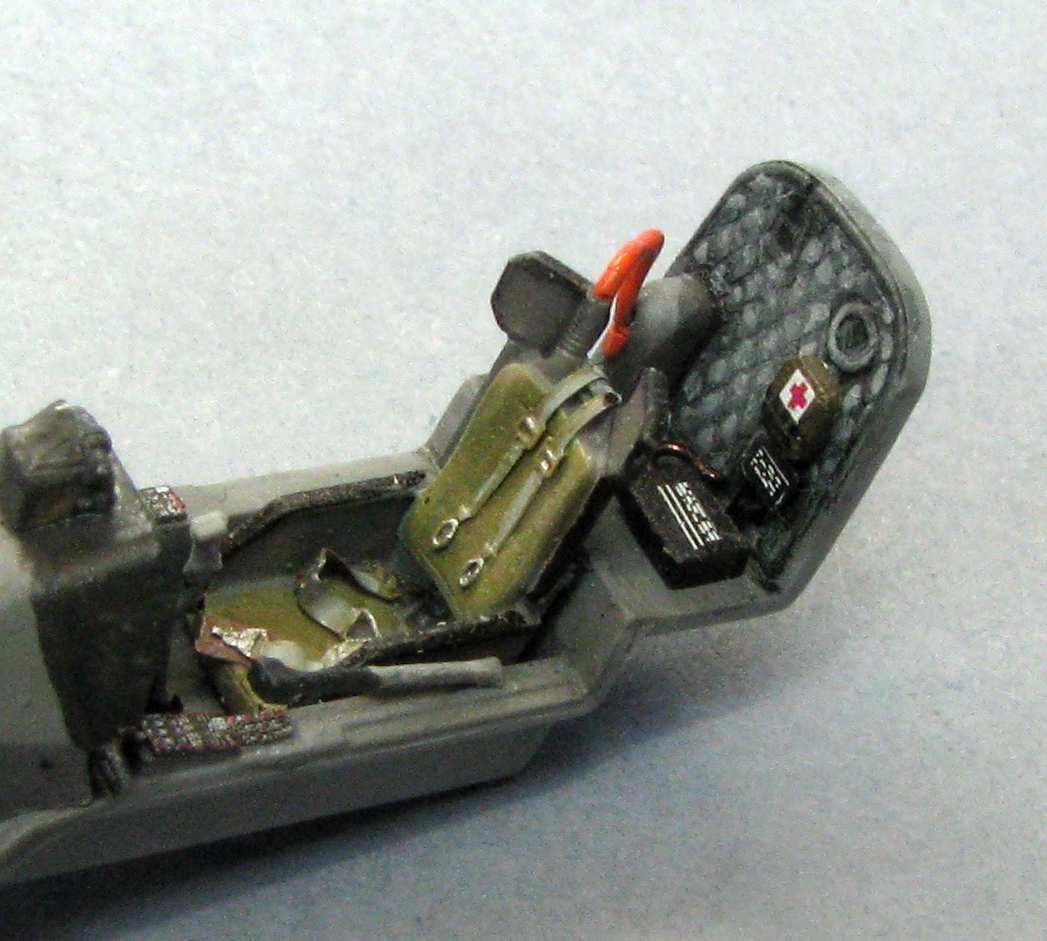
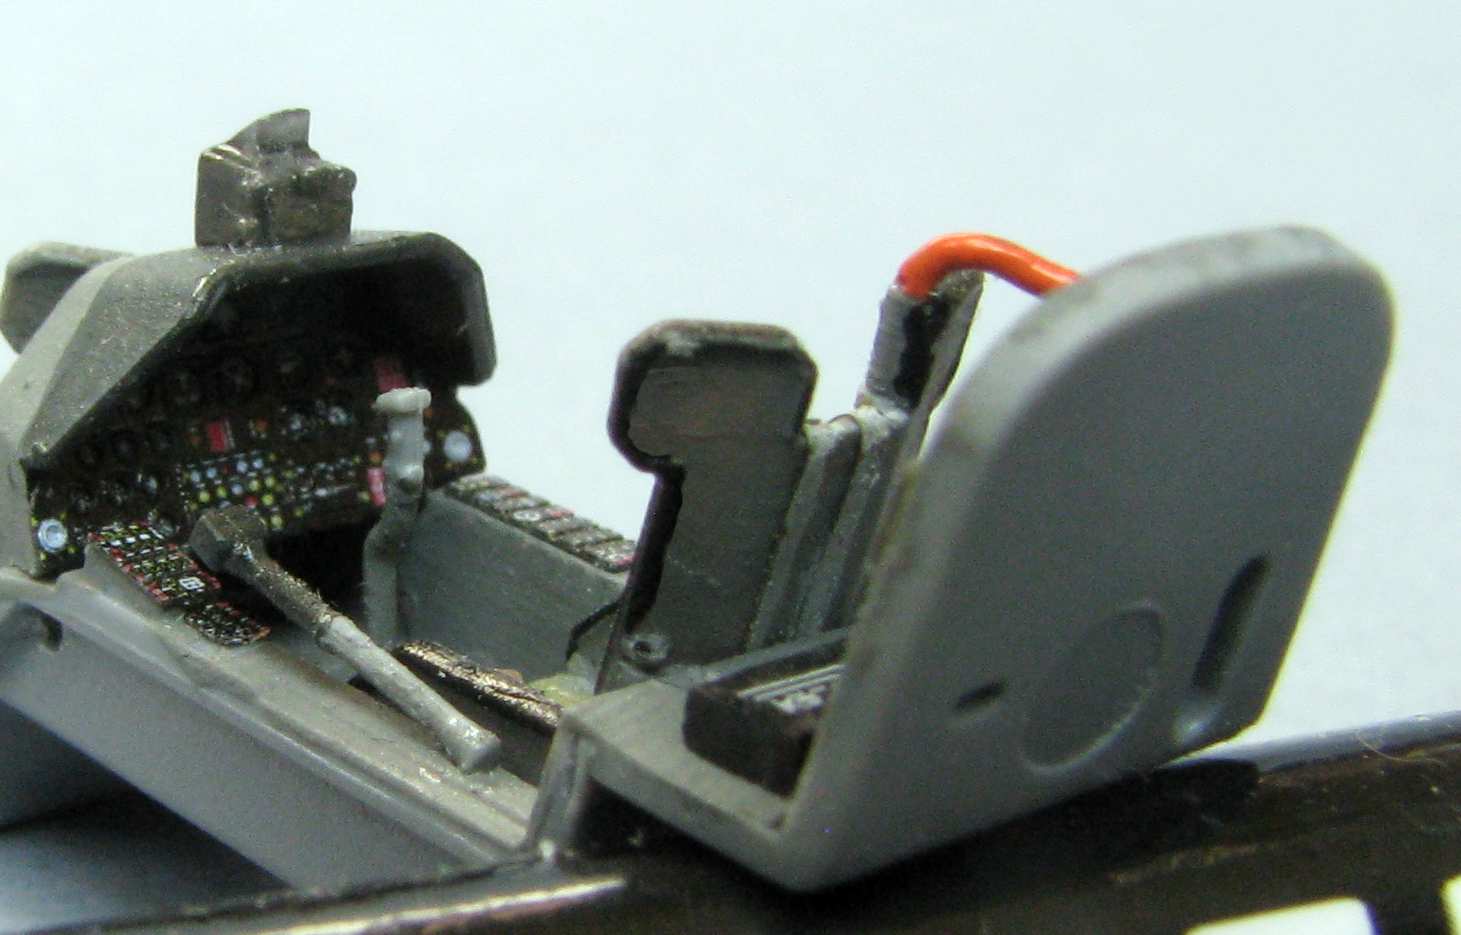
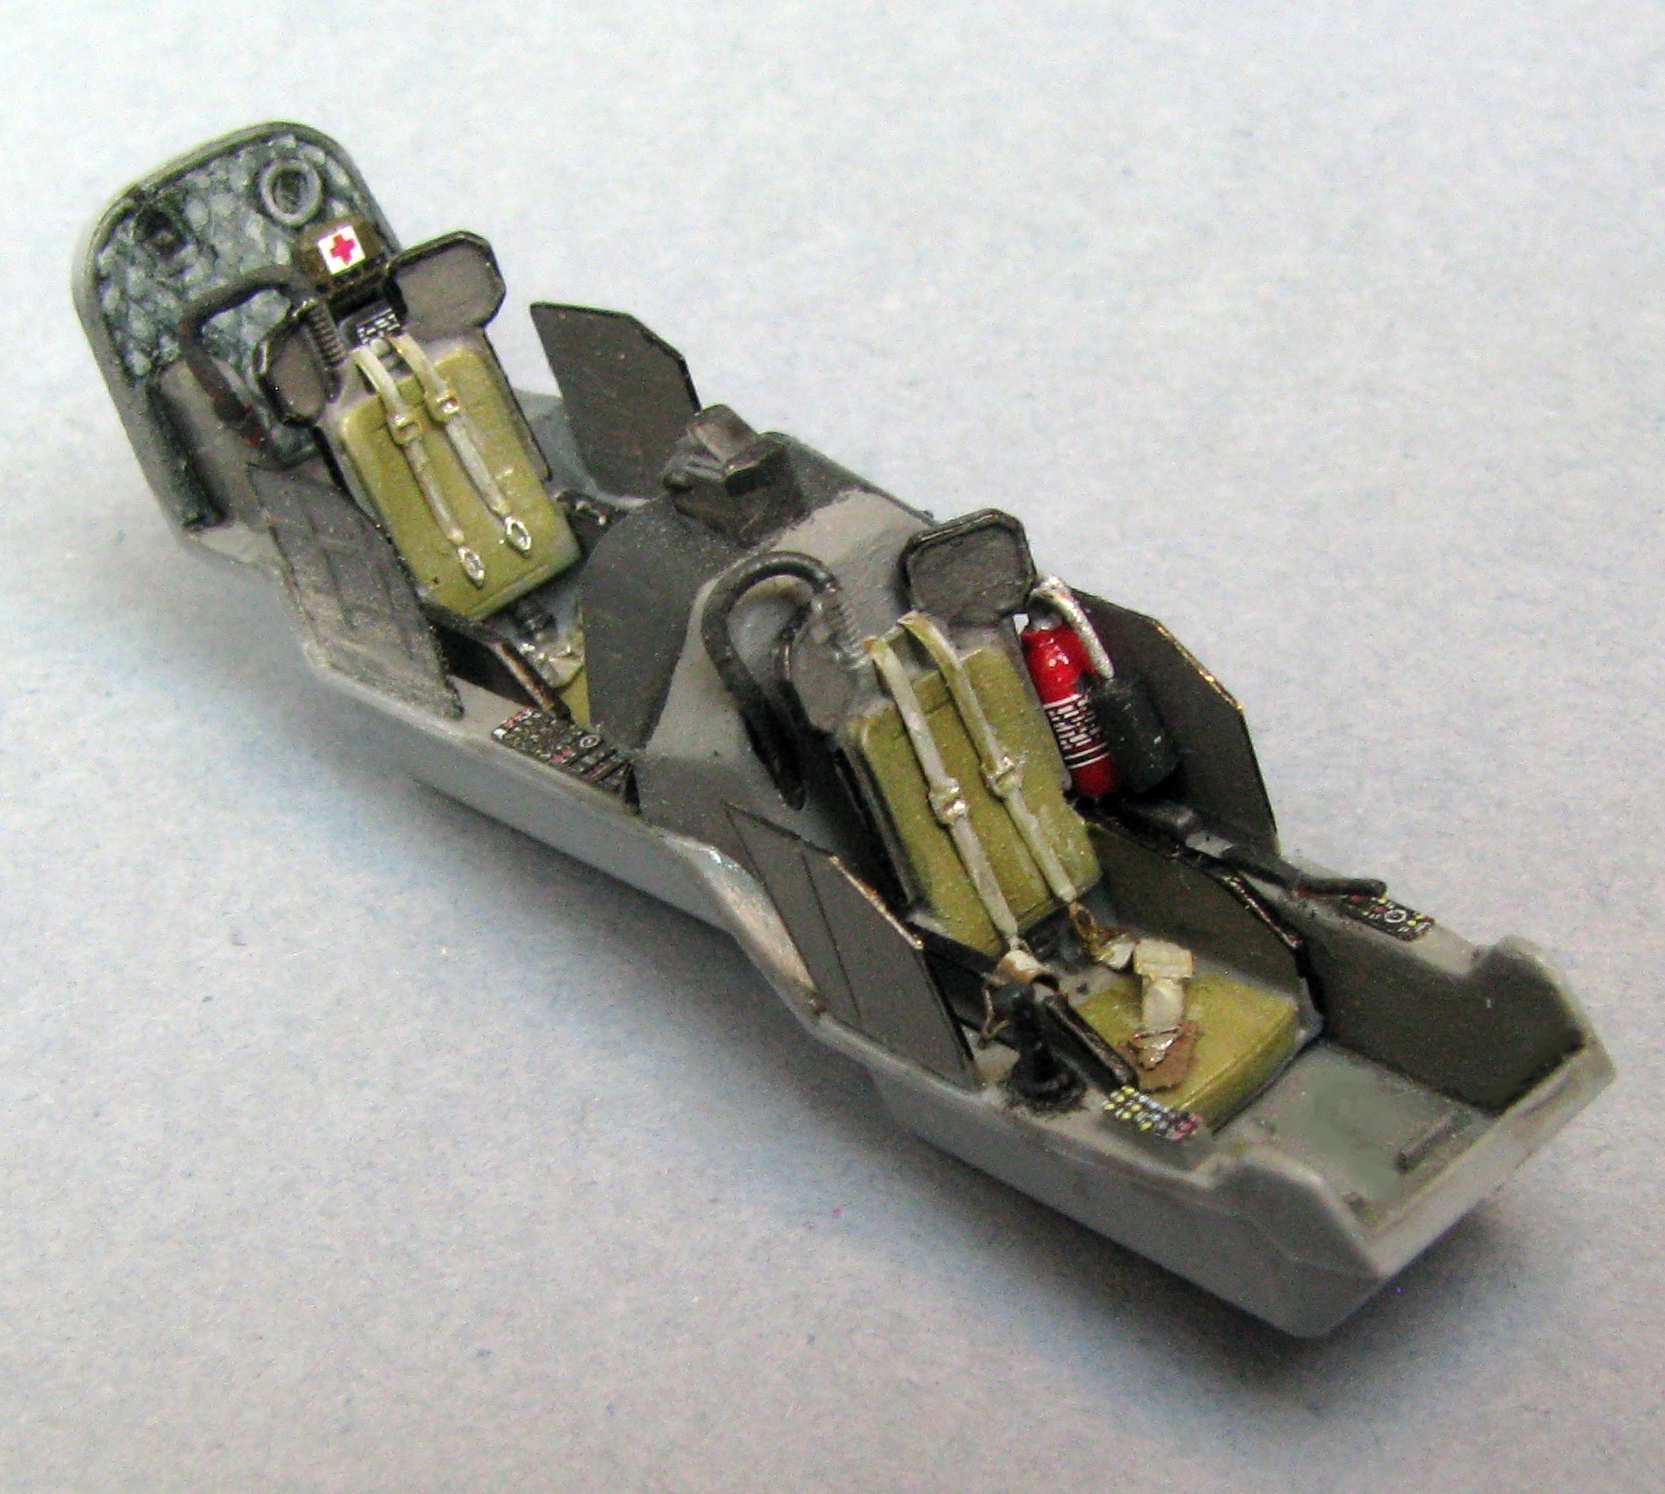
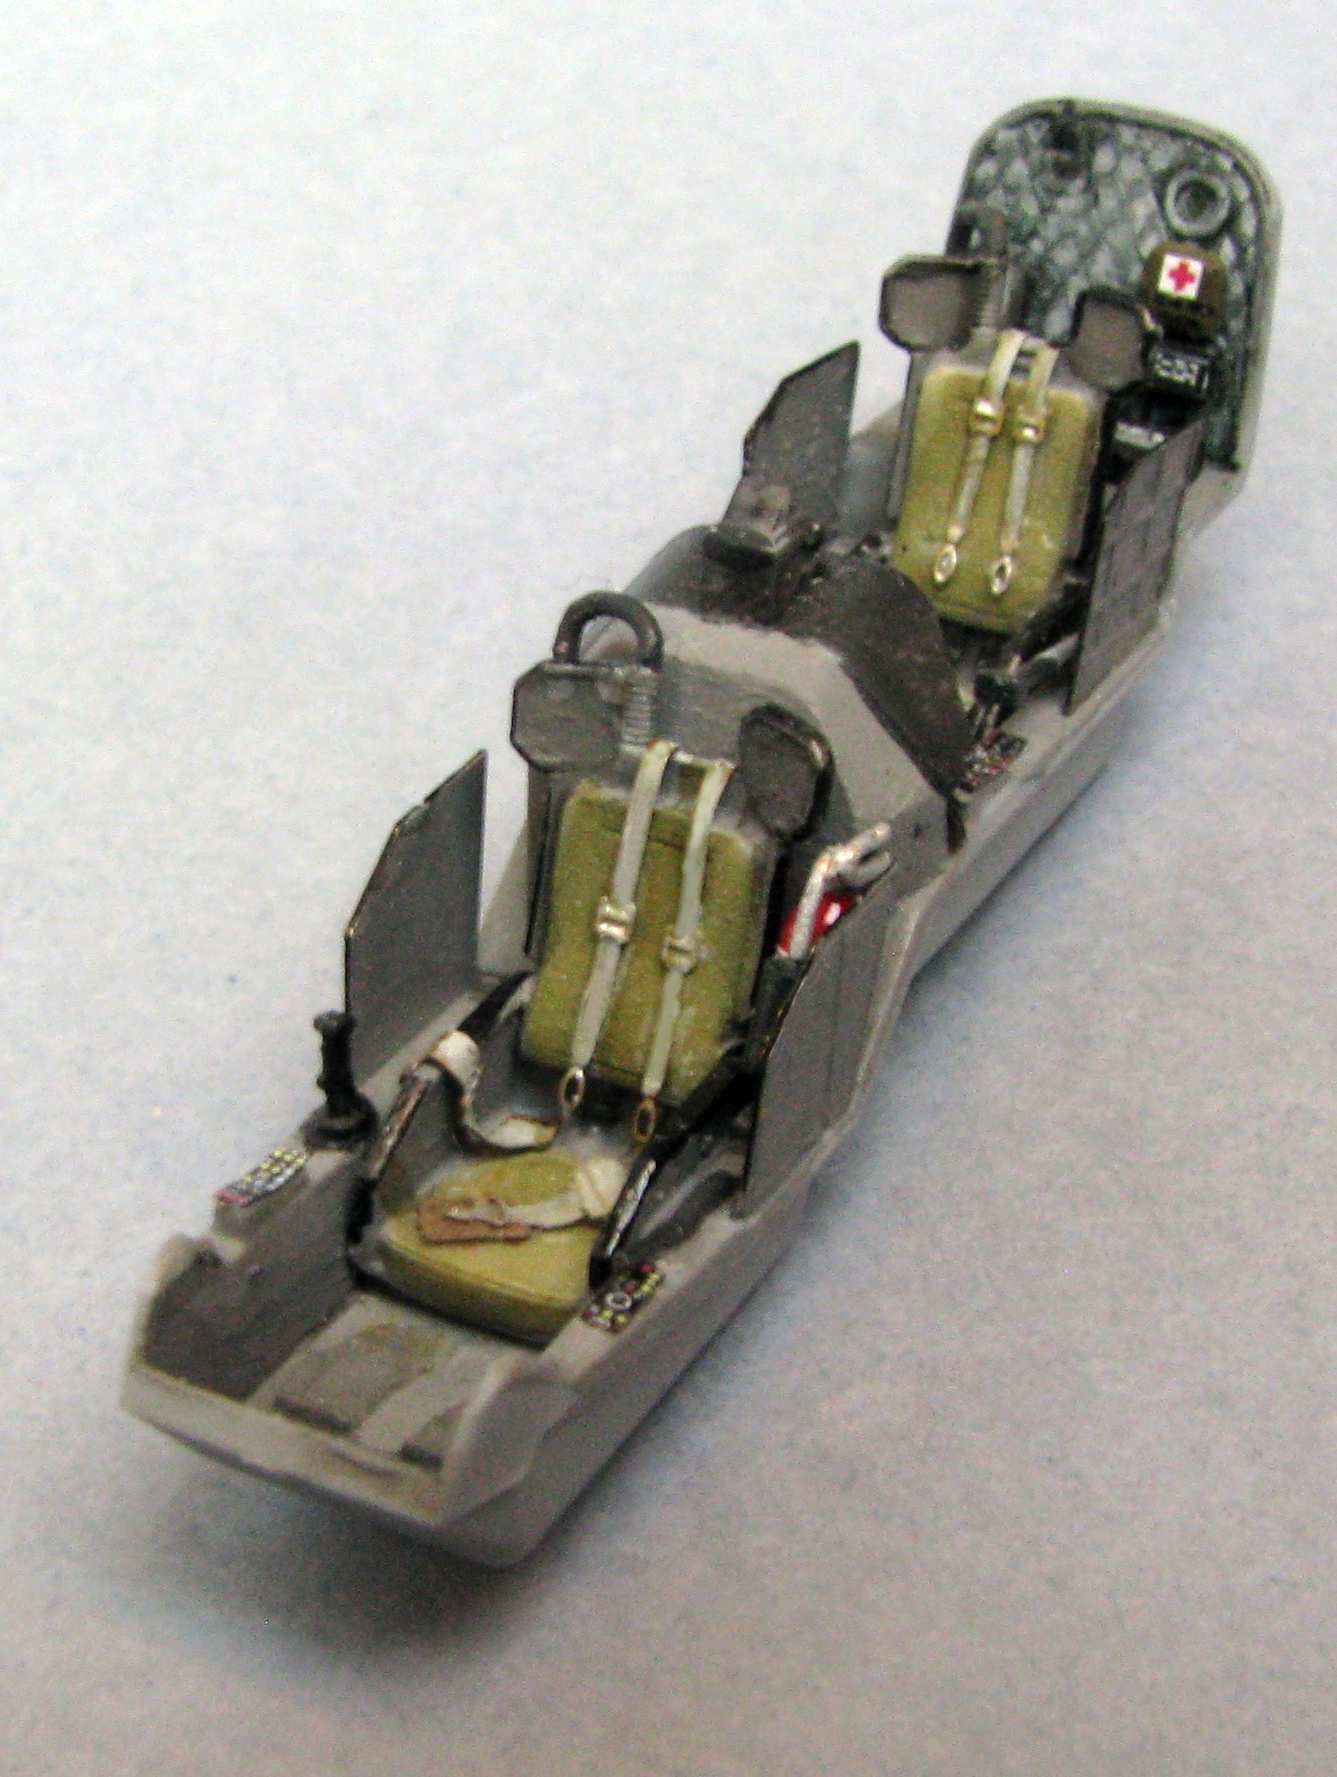
And in the meantime the cockpit is done:
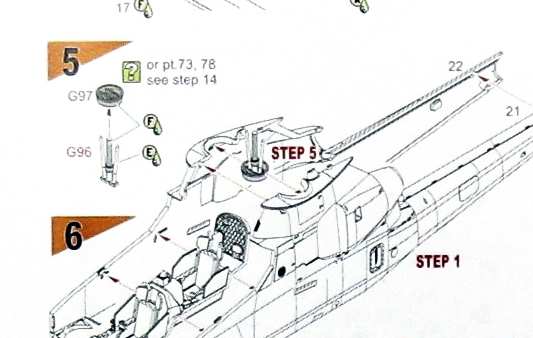
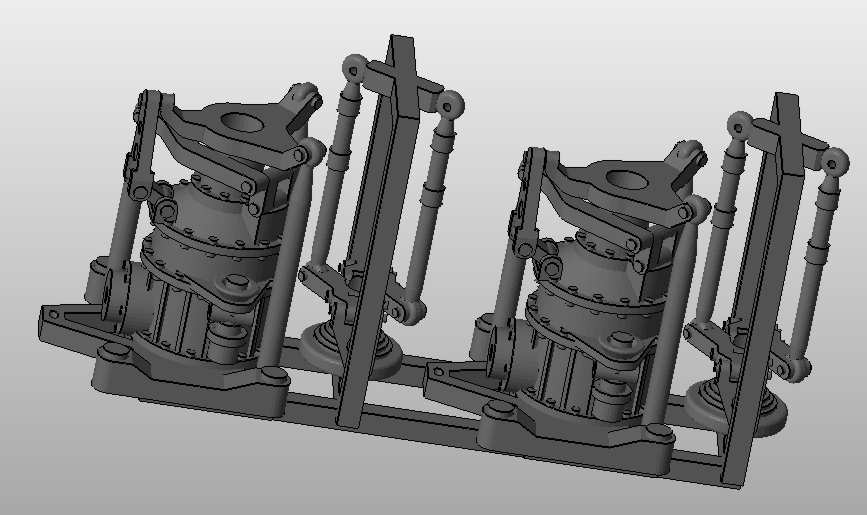
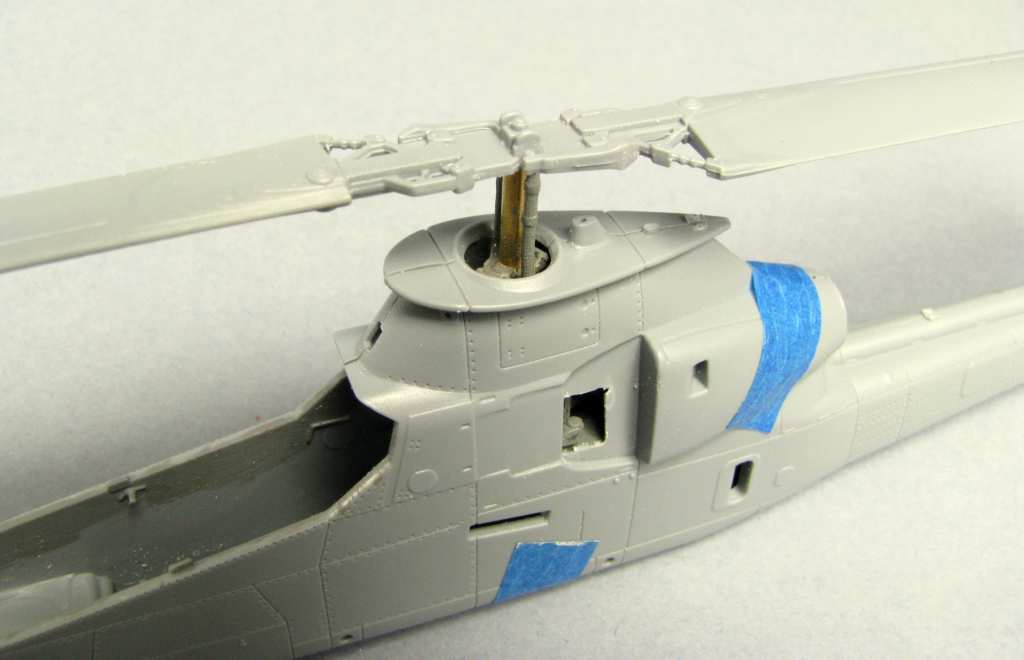
I wanted to go on and close up the hull, but one thing got me thinking - yeah, better late than never! The SpecialHobby cobra is quite a nice kit, but the way they handled the main rotor mast just doesn’t seem right to me:
That’s right - they have you just glue the mast in the hole! I just can’t accept that. I think I will try to scratch something in the style of the Hasegawa Cobra I did before, so that there’s a meaningful hole there and so I have the rotor rotating or maybe even removable - I like this option for many reasons, one of them being it helps to protect the rotor from breaking when something touches it.
I totally agree on the rotor! Definitely a smart idea. You don’t want to do allthis great work and then catch the blade on something and have it snap off.
Looking good. I also agree on redoing the rotor. I always leave them removable so they can be removed to transport to shows or just move them around safely.
Unless you are going to open up the side panels to show the transmission, none of that will be seen. On AH-1Gs, at the base of the rotor shaft, just above the swash plate, there is a circular anti-dust shield that completely covers the opening below it. I would just cut a square of thick plastic or resin and put it in the fuselage, drill a hole in it and add a lower shaft to the kit part.
I know about that dust shield, it’s just that many photos show it being gone, and even the reference I have, when you look at it, the opening is definitely there:
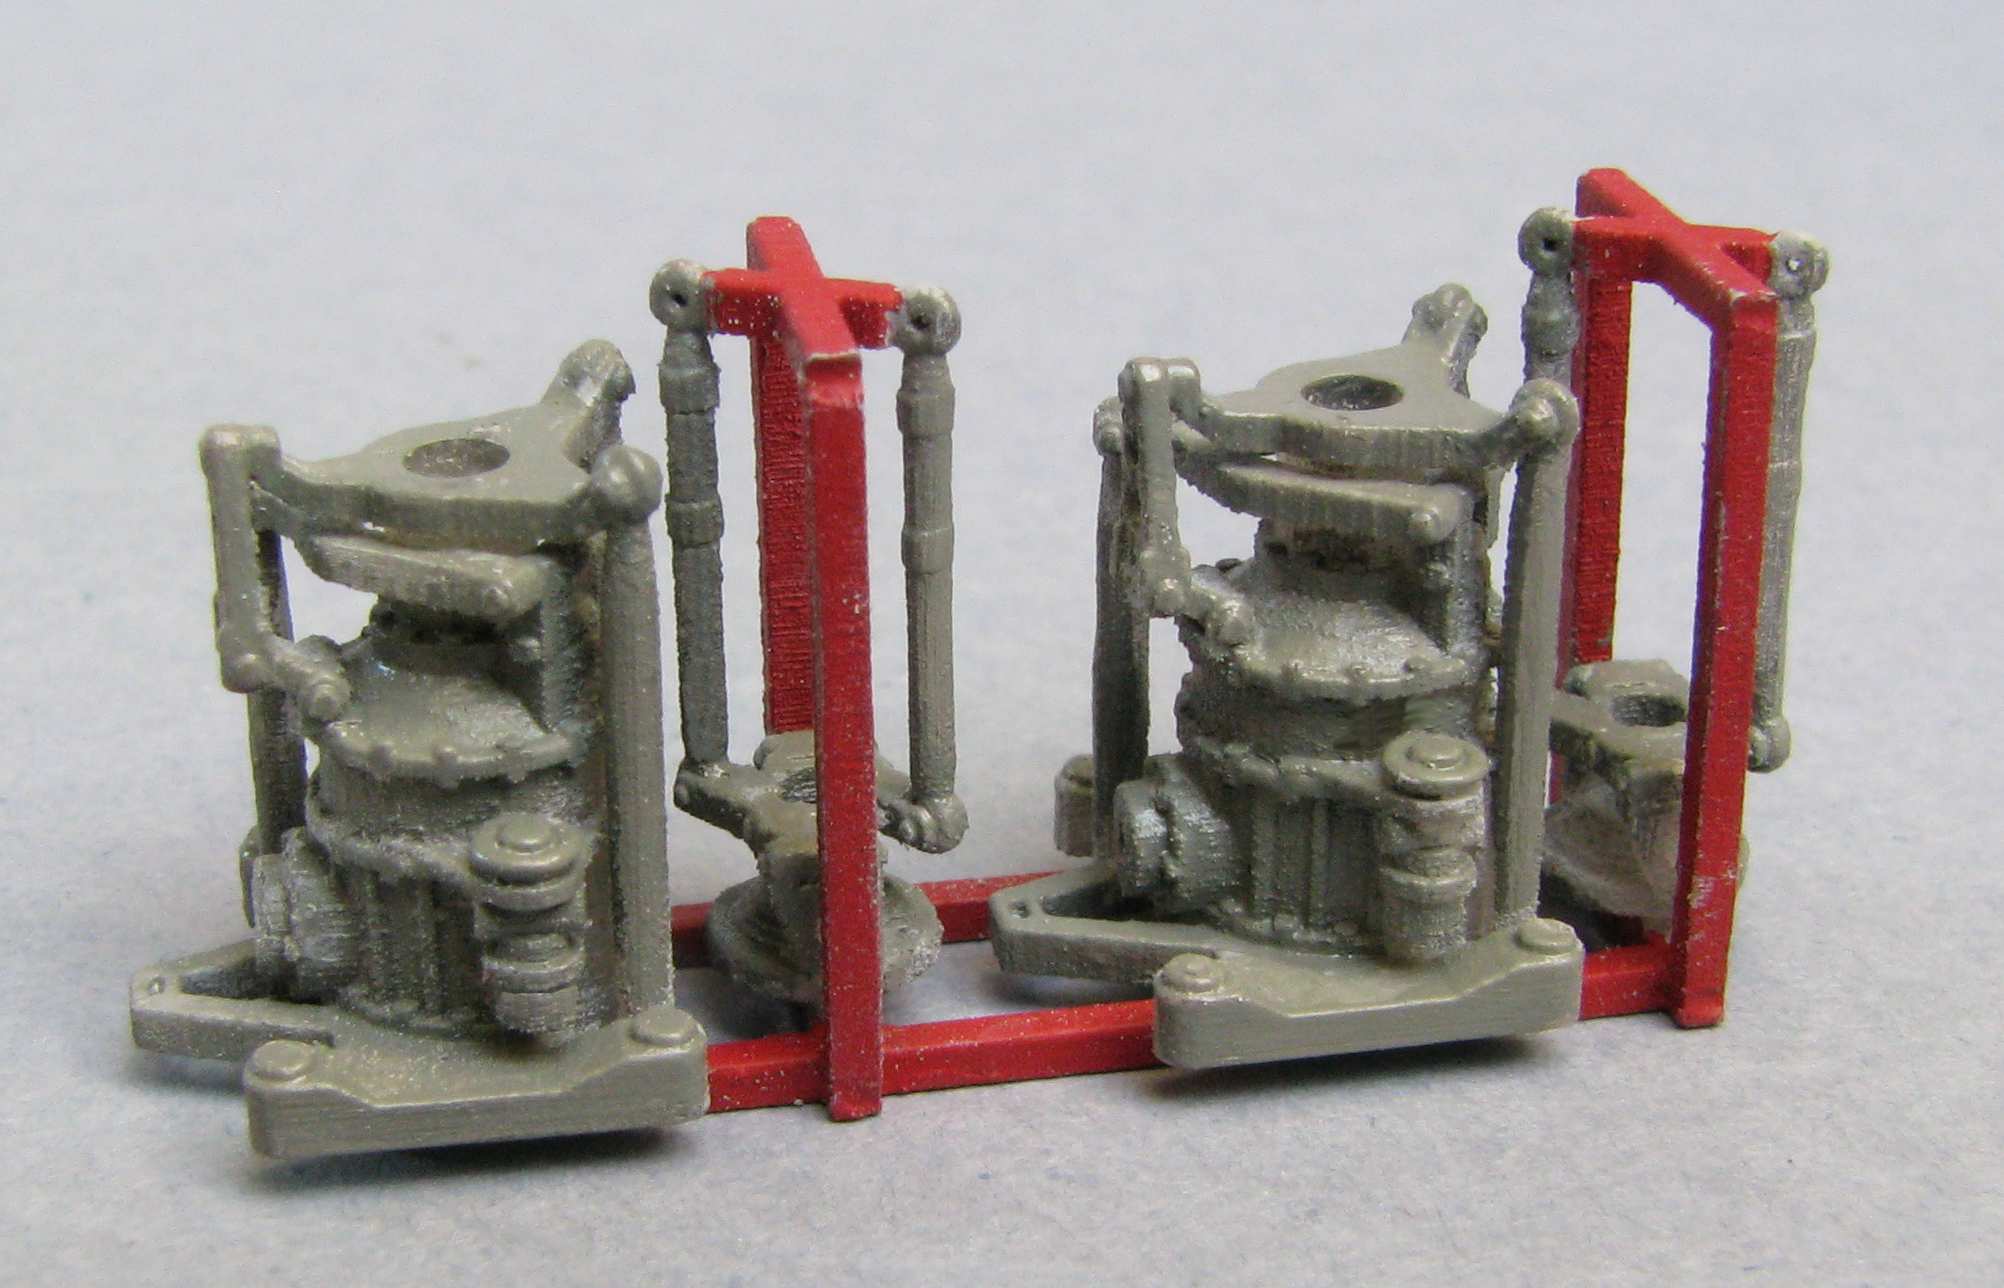
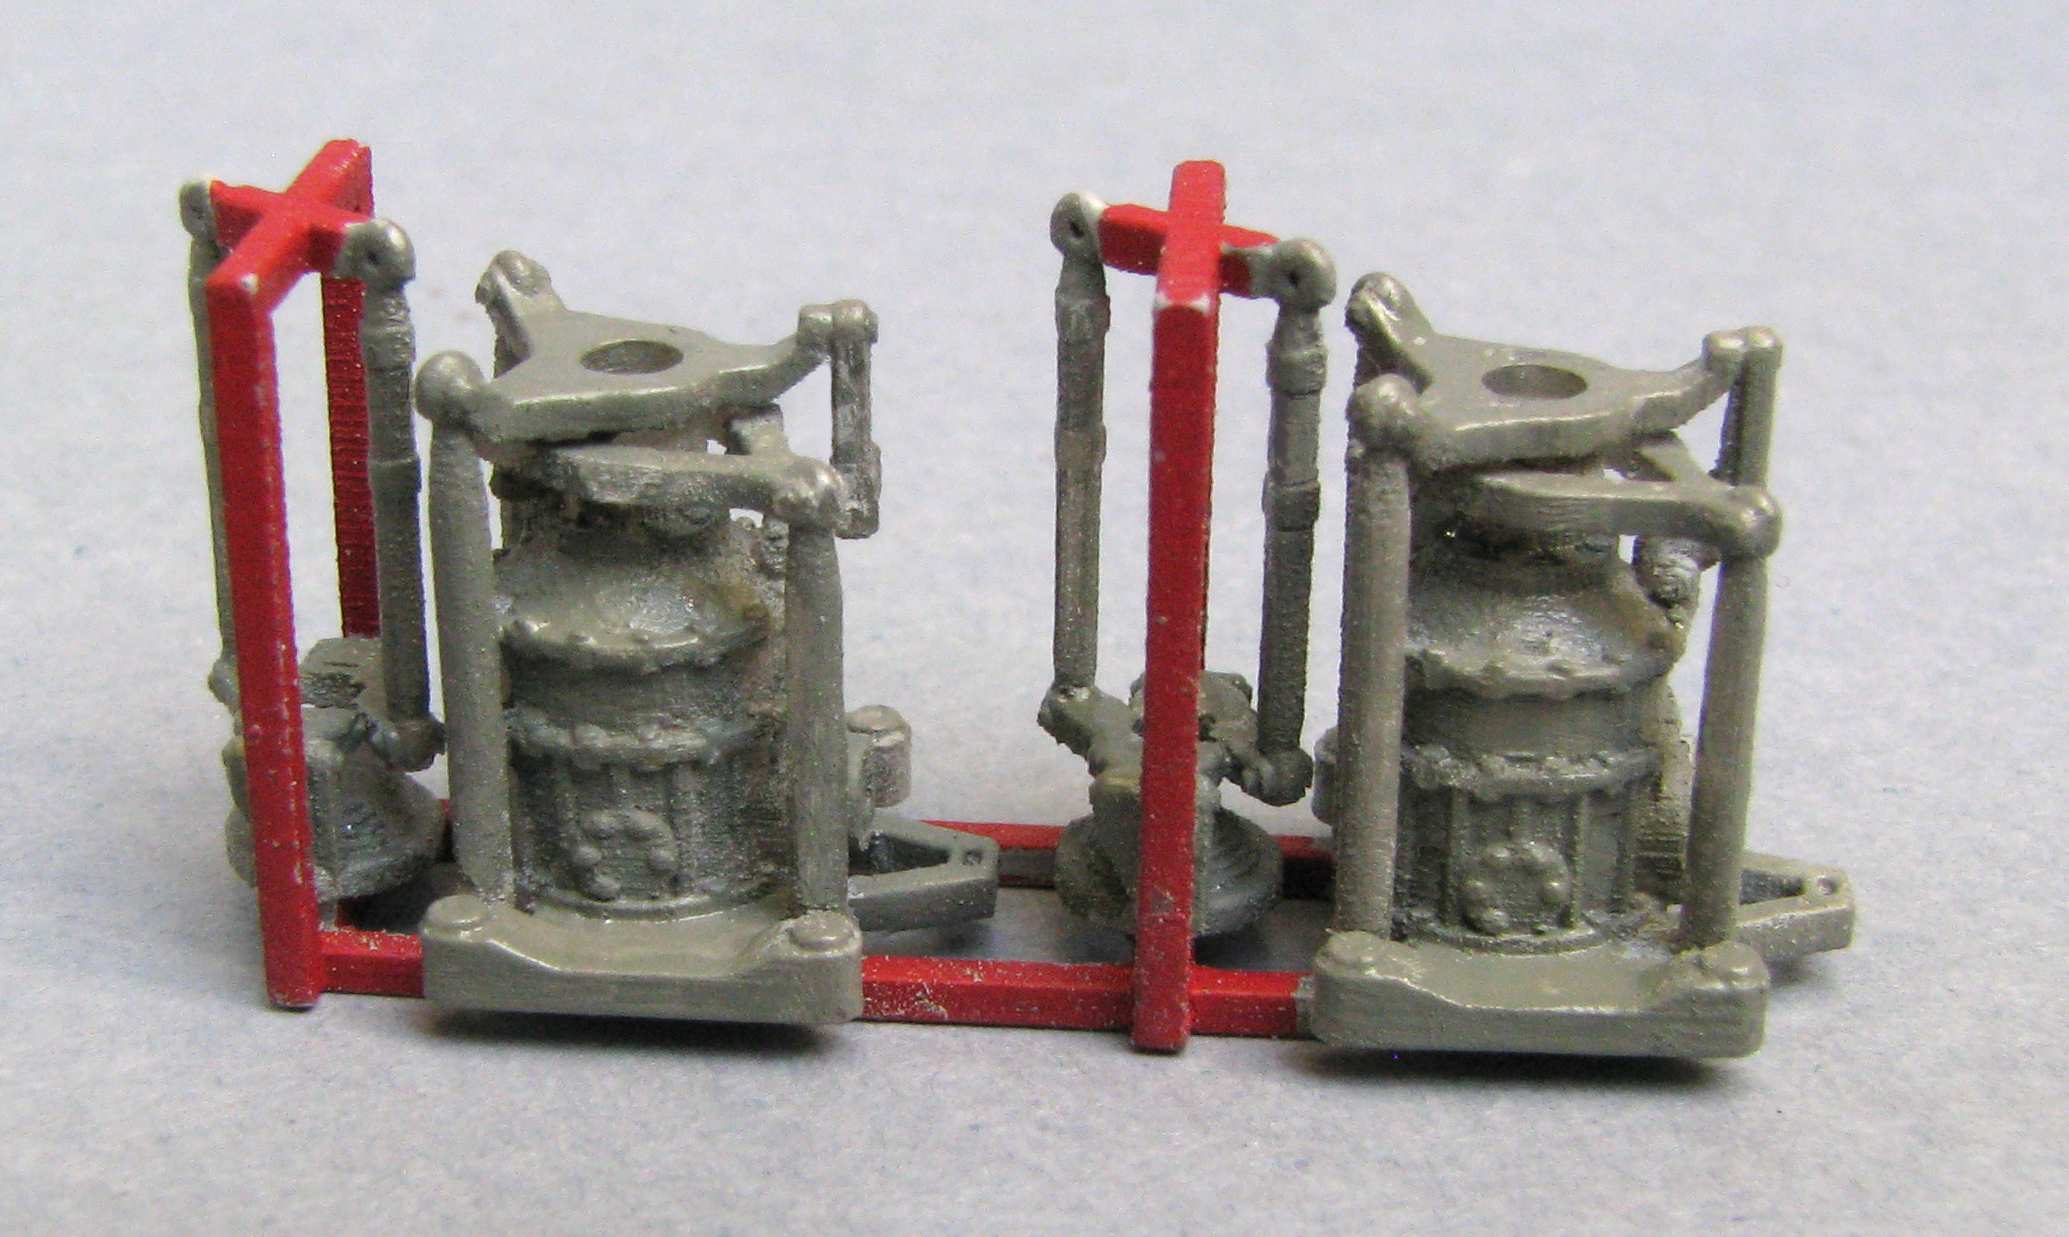
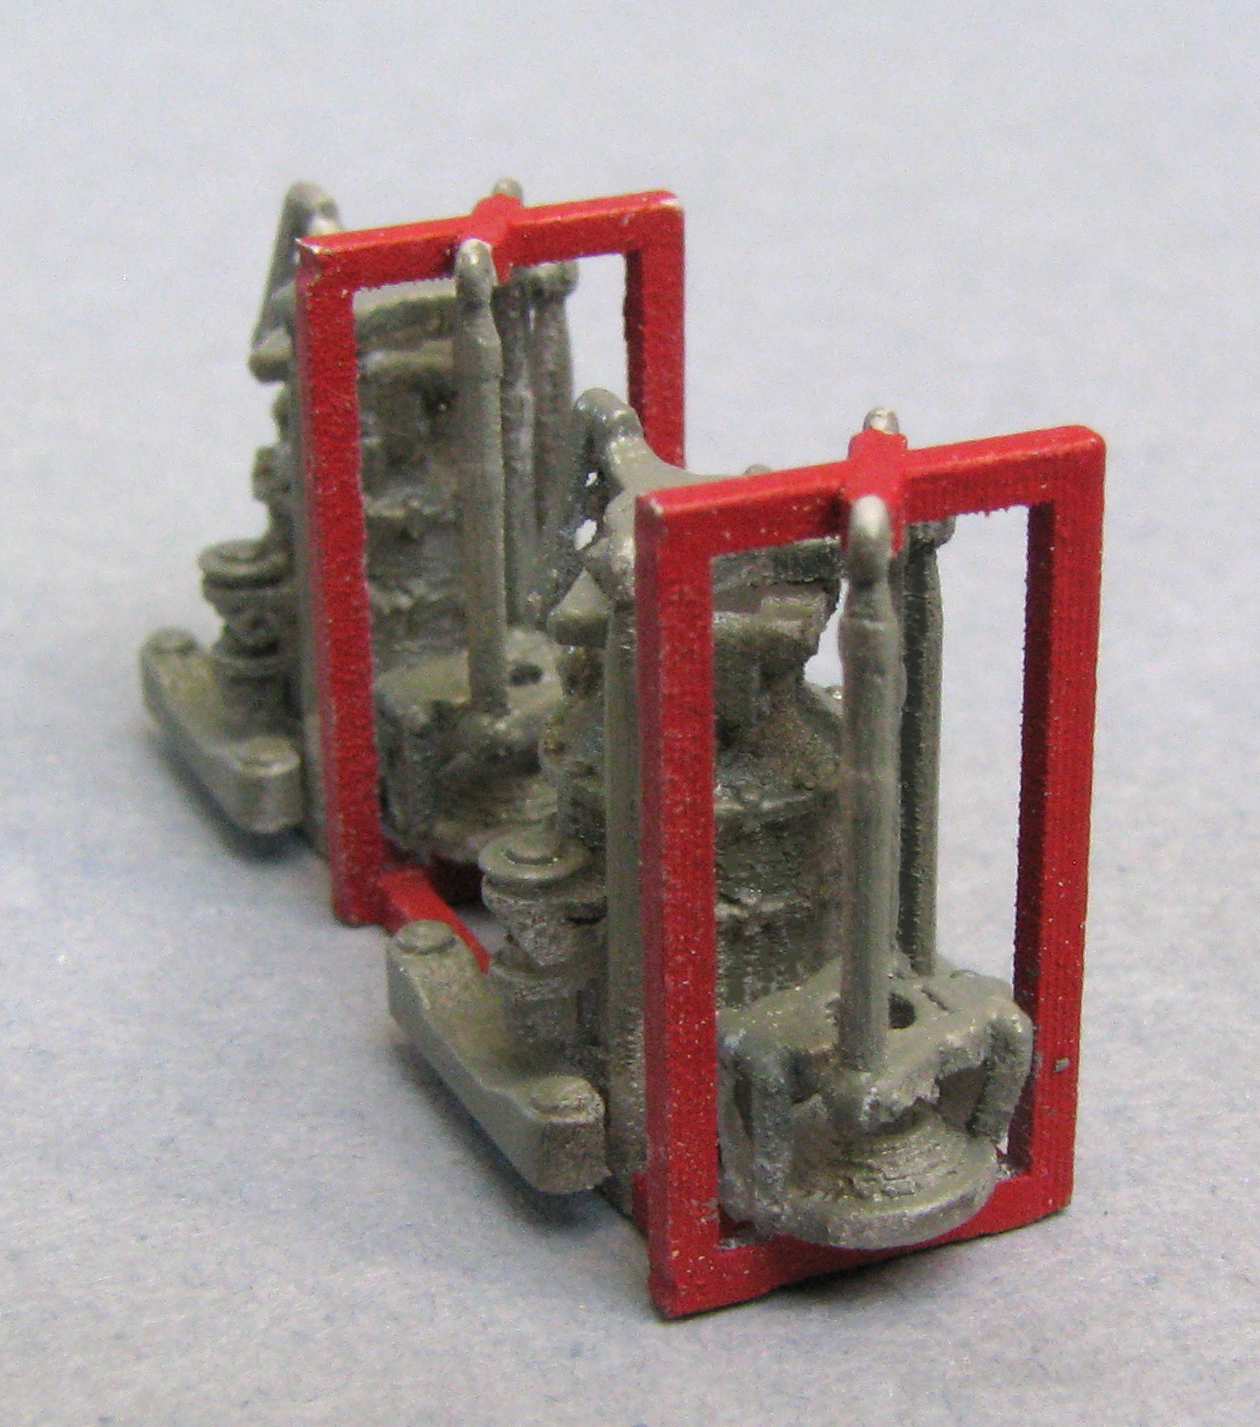
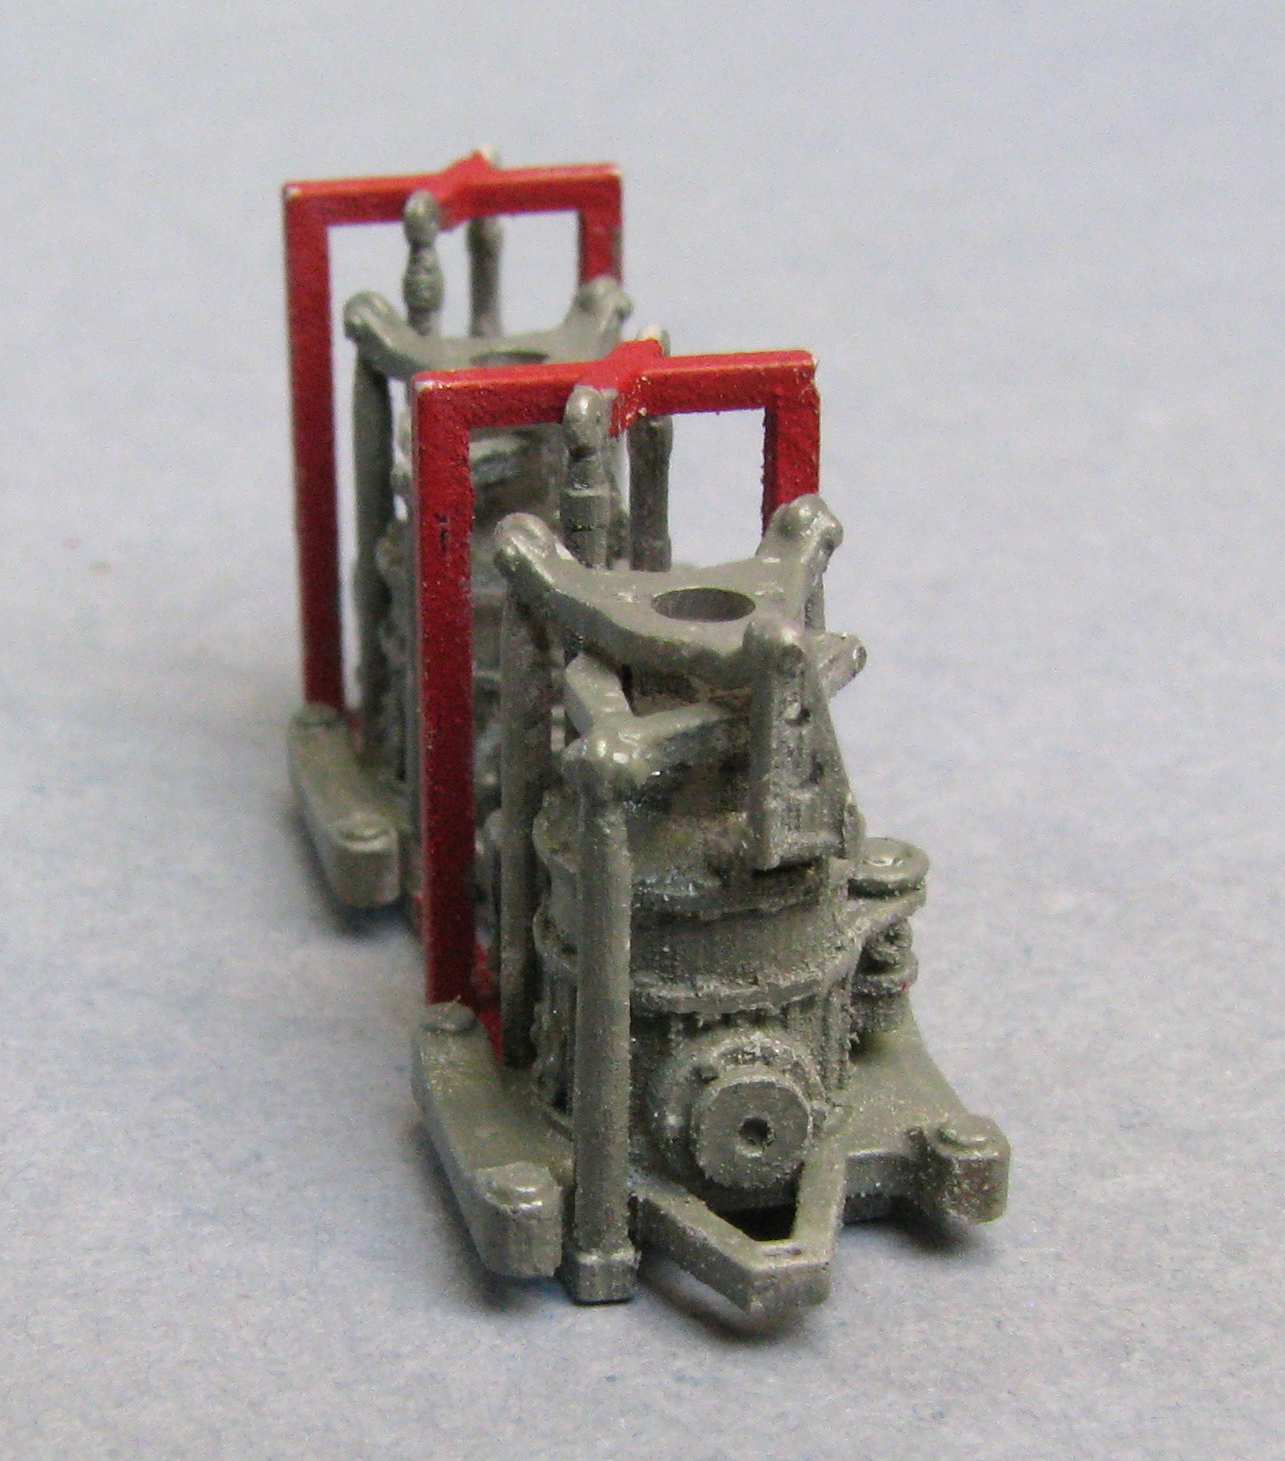
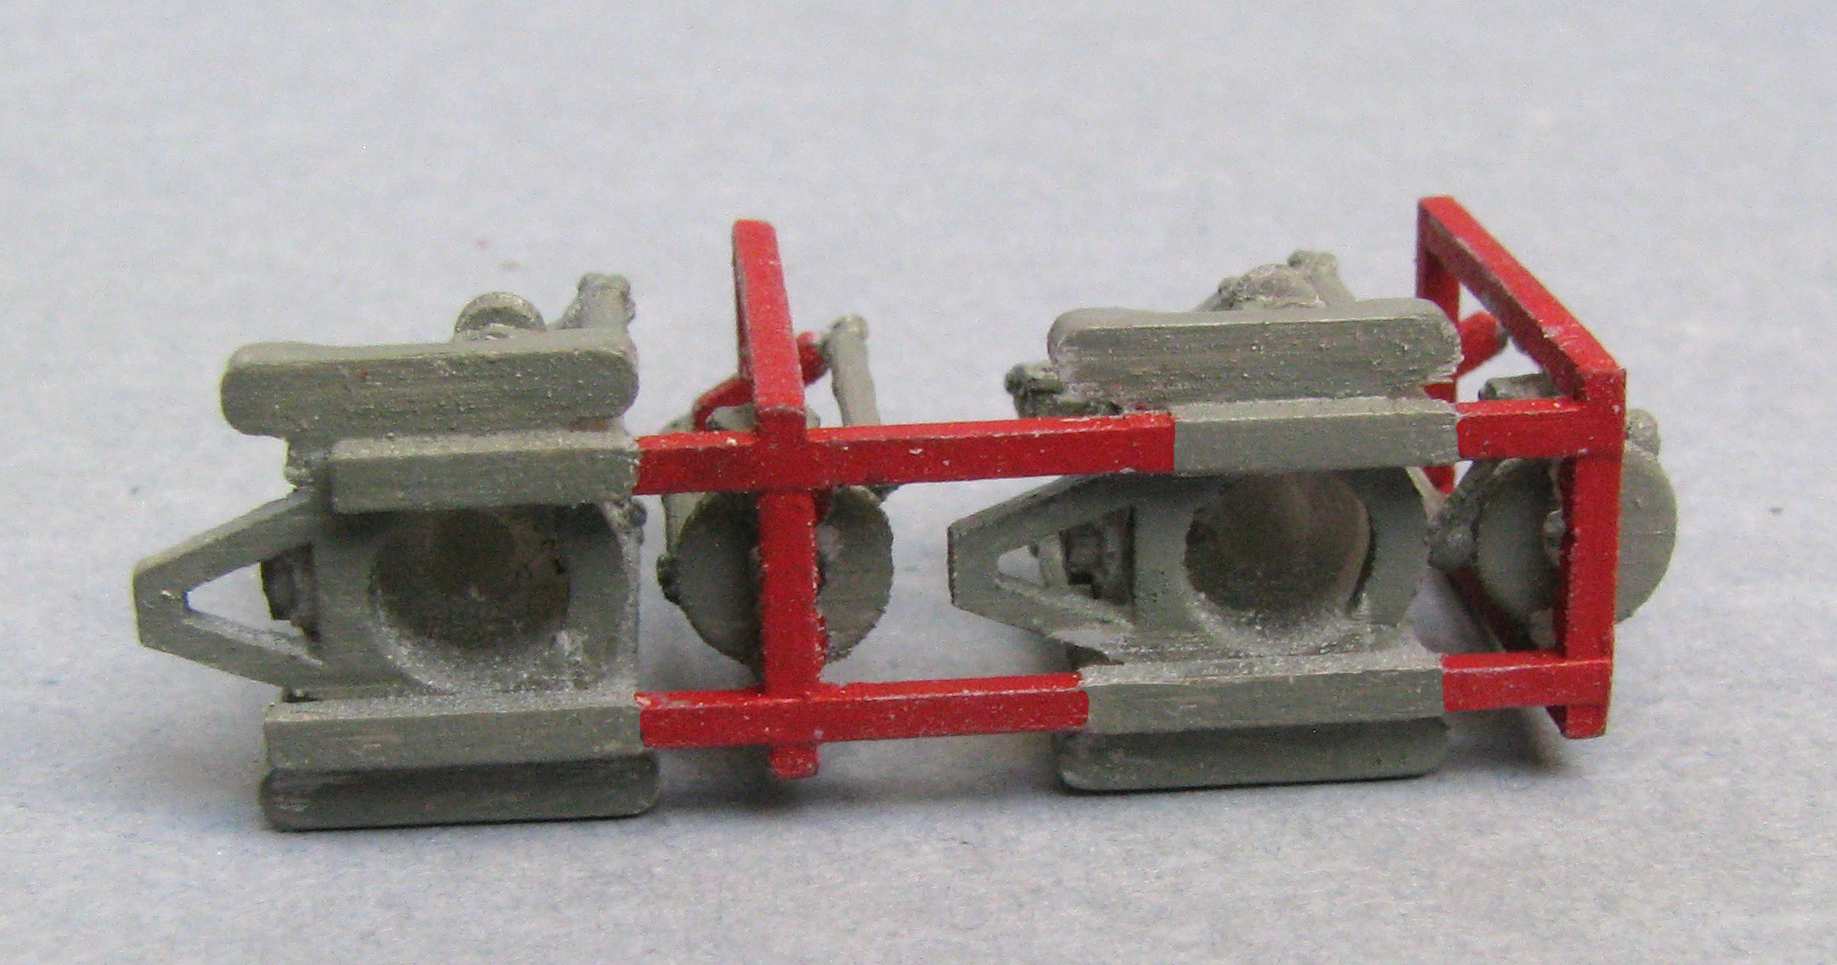
Plus I would like to have a transmission to put in other models, like a Huey, and for other people wishing to detail up a Cobra - that’s why I decided to put some work in.
Thanks a lot for your comment and have a nice day!
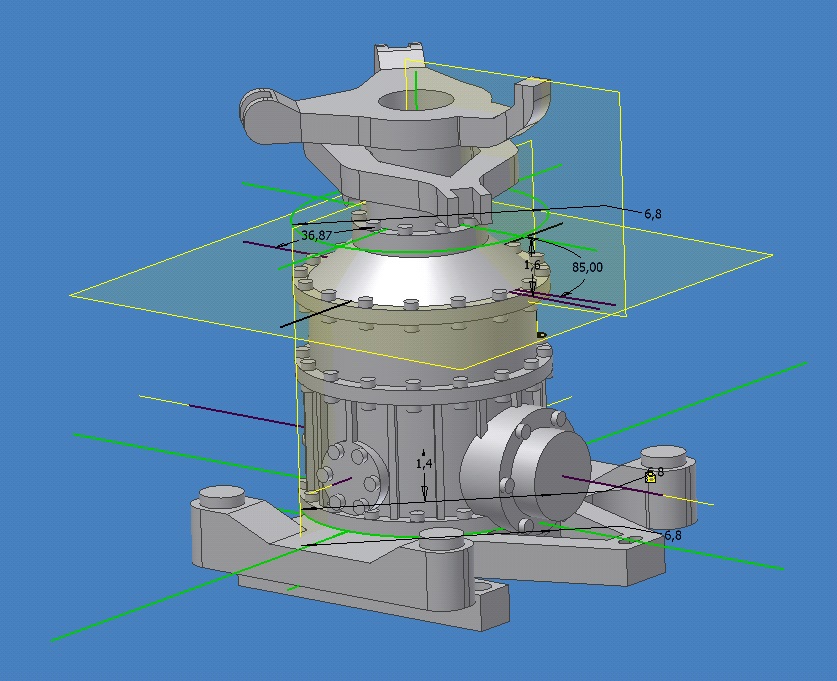
I have designed the parts so that a 2mm metal axle can be used for the actual rotor mast to make it durable and to reduce the risk of a resin part “fading” on a hot day.
Now I have to wait about two weeks until the parts are printed and shipped to me.
You did it again. That Office took my breath away! It is Awesome as usual from you!. The rest of this is going to be that way too. Thanks for such great work. It brightens my day!
Thanks a lot for your kind words and please excuse me for replying so late. This build is going really slow (as almost all my builds), but it’s not like nothing is happening at all, so let me post a little update.
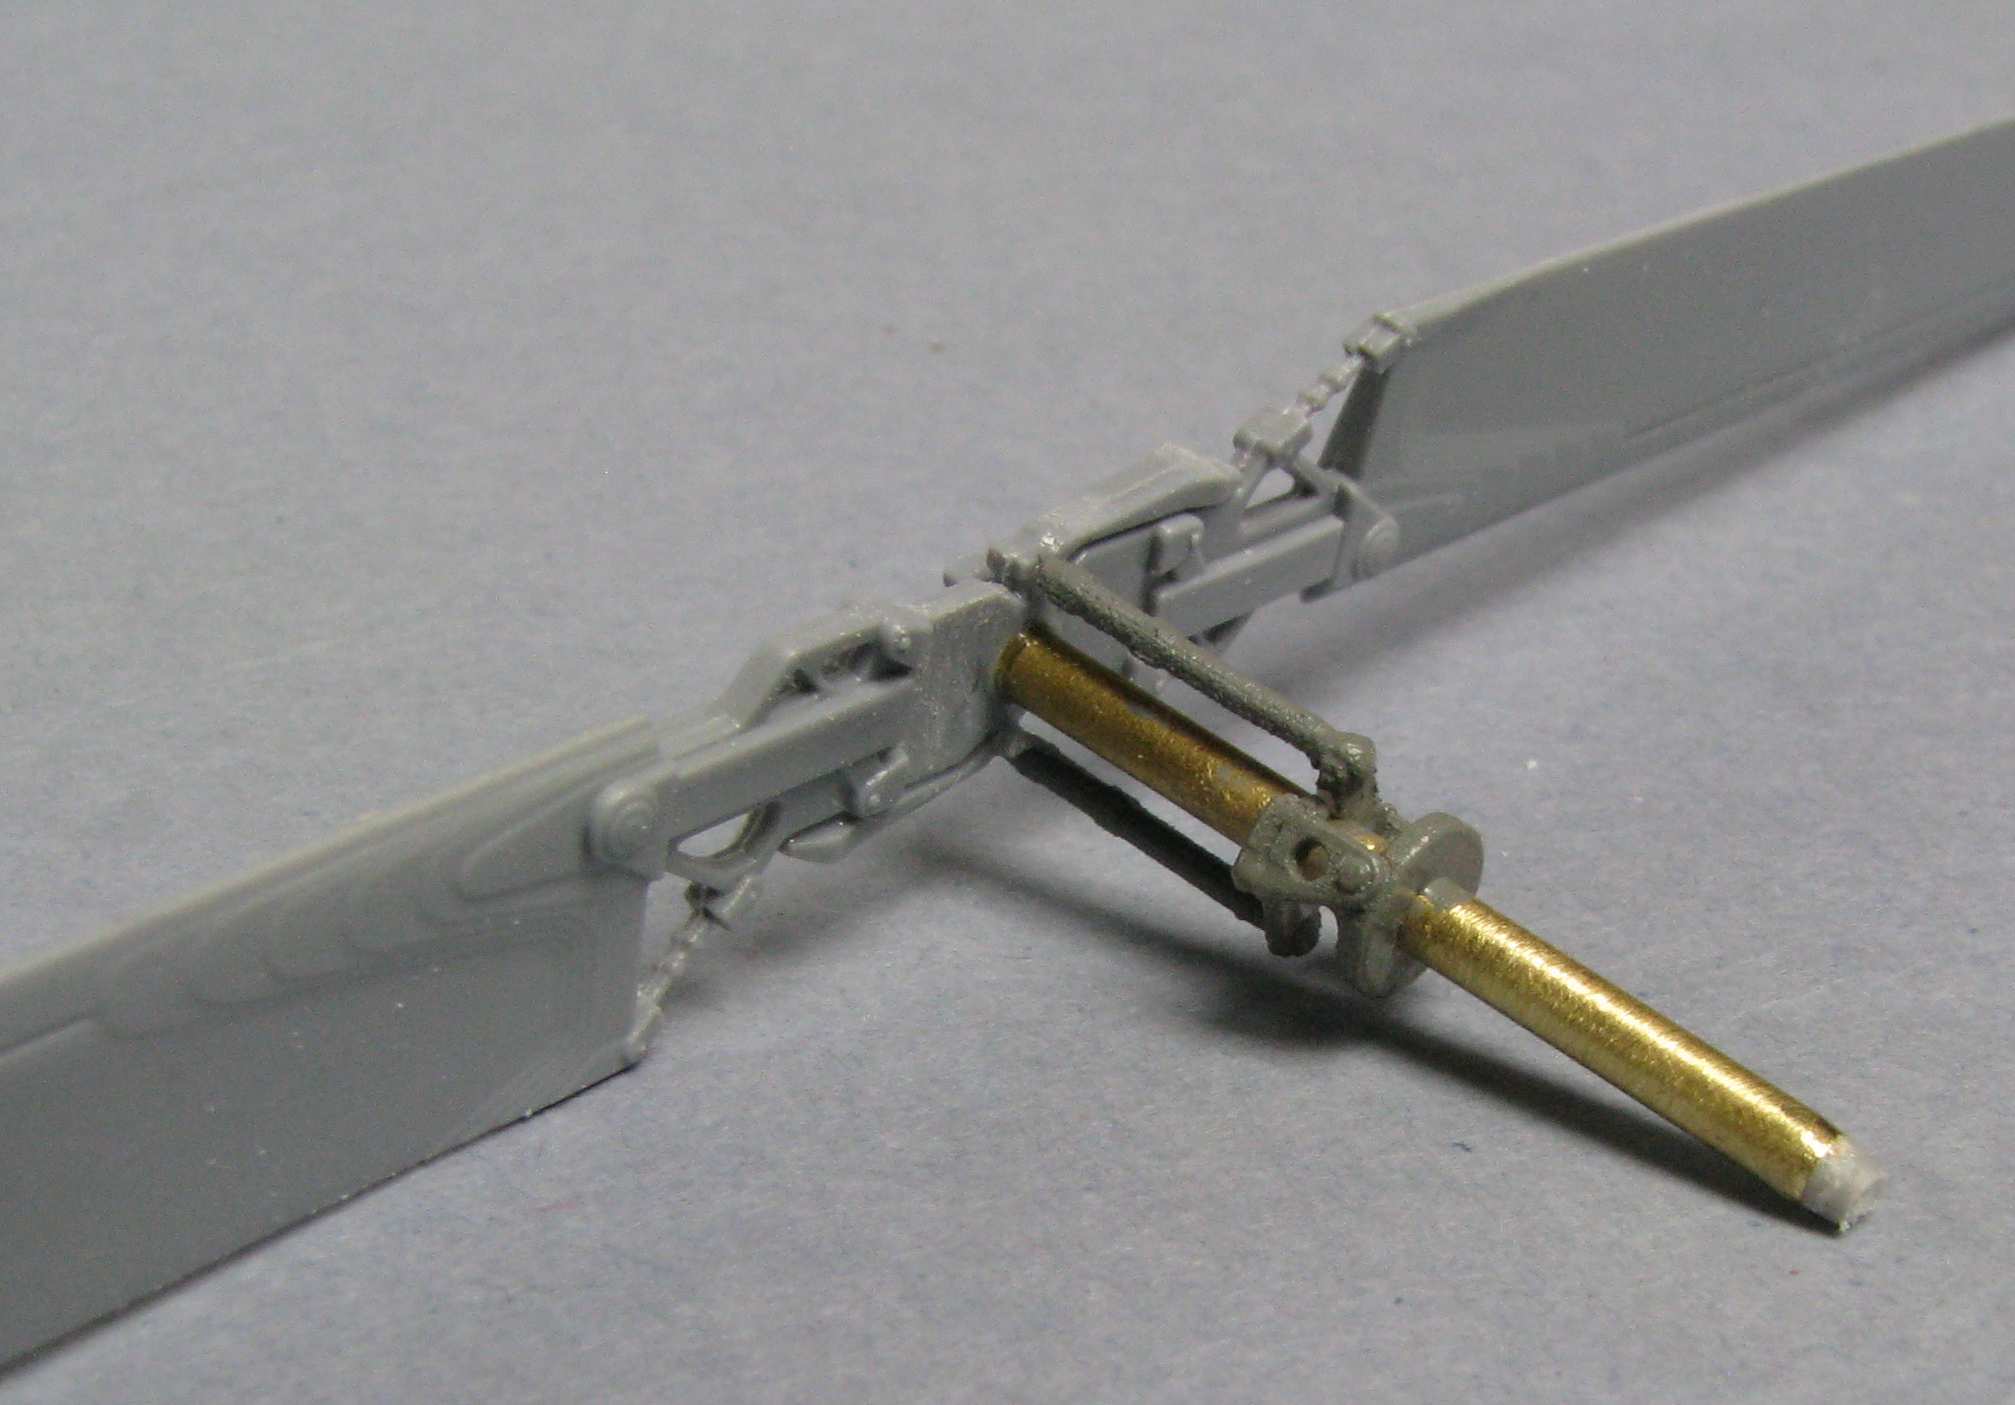
First, the tail rotor is also designed in the kit as static, which I don’t like, mainly because such a rotor is much more damage prone. I decided to install a metal axle here, that would let me install a painted up tail rotor at the very end of the build. Here’s what the parts look like - I turned the axle from brass:
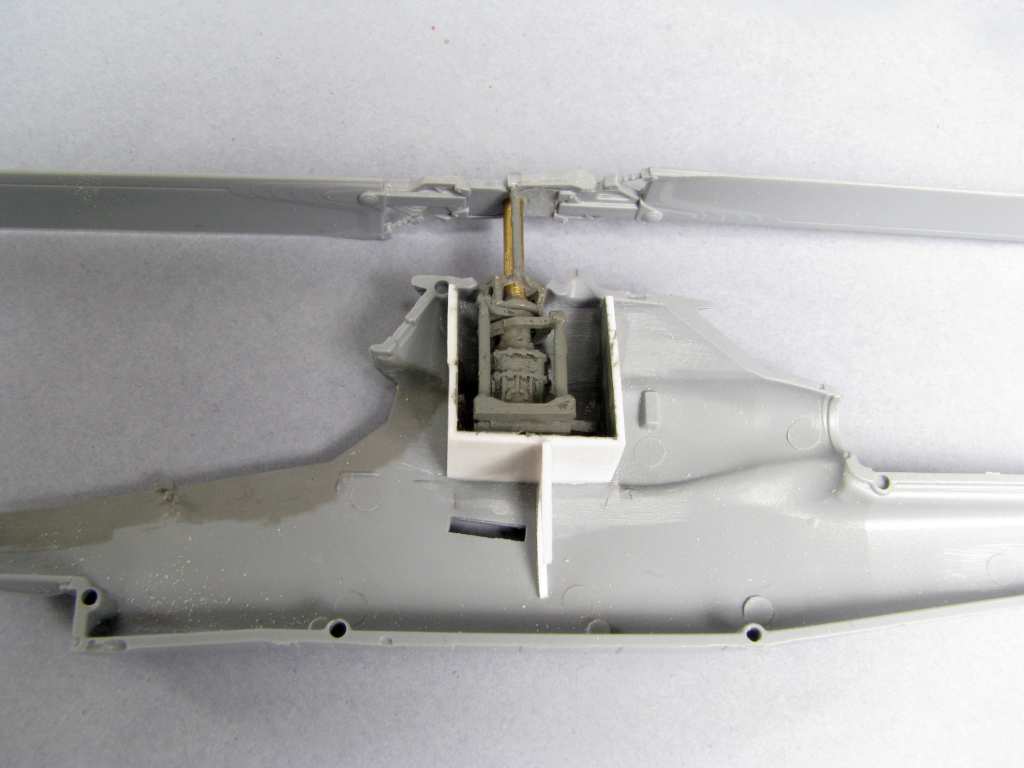
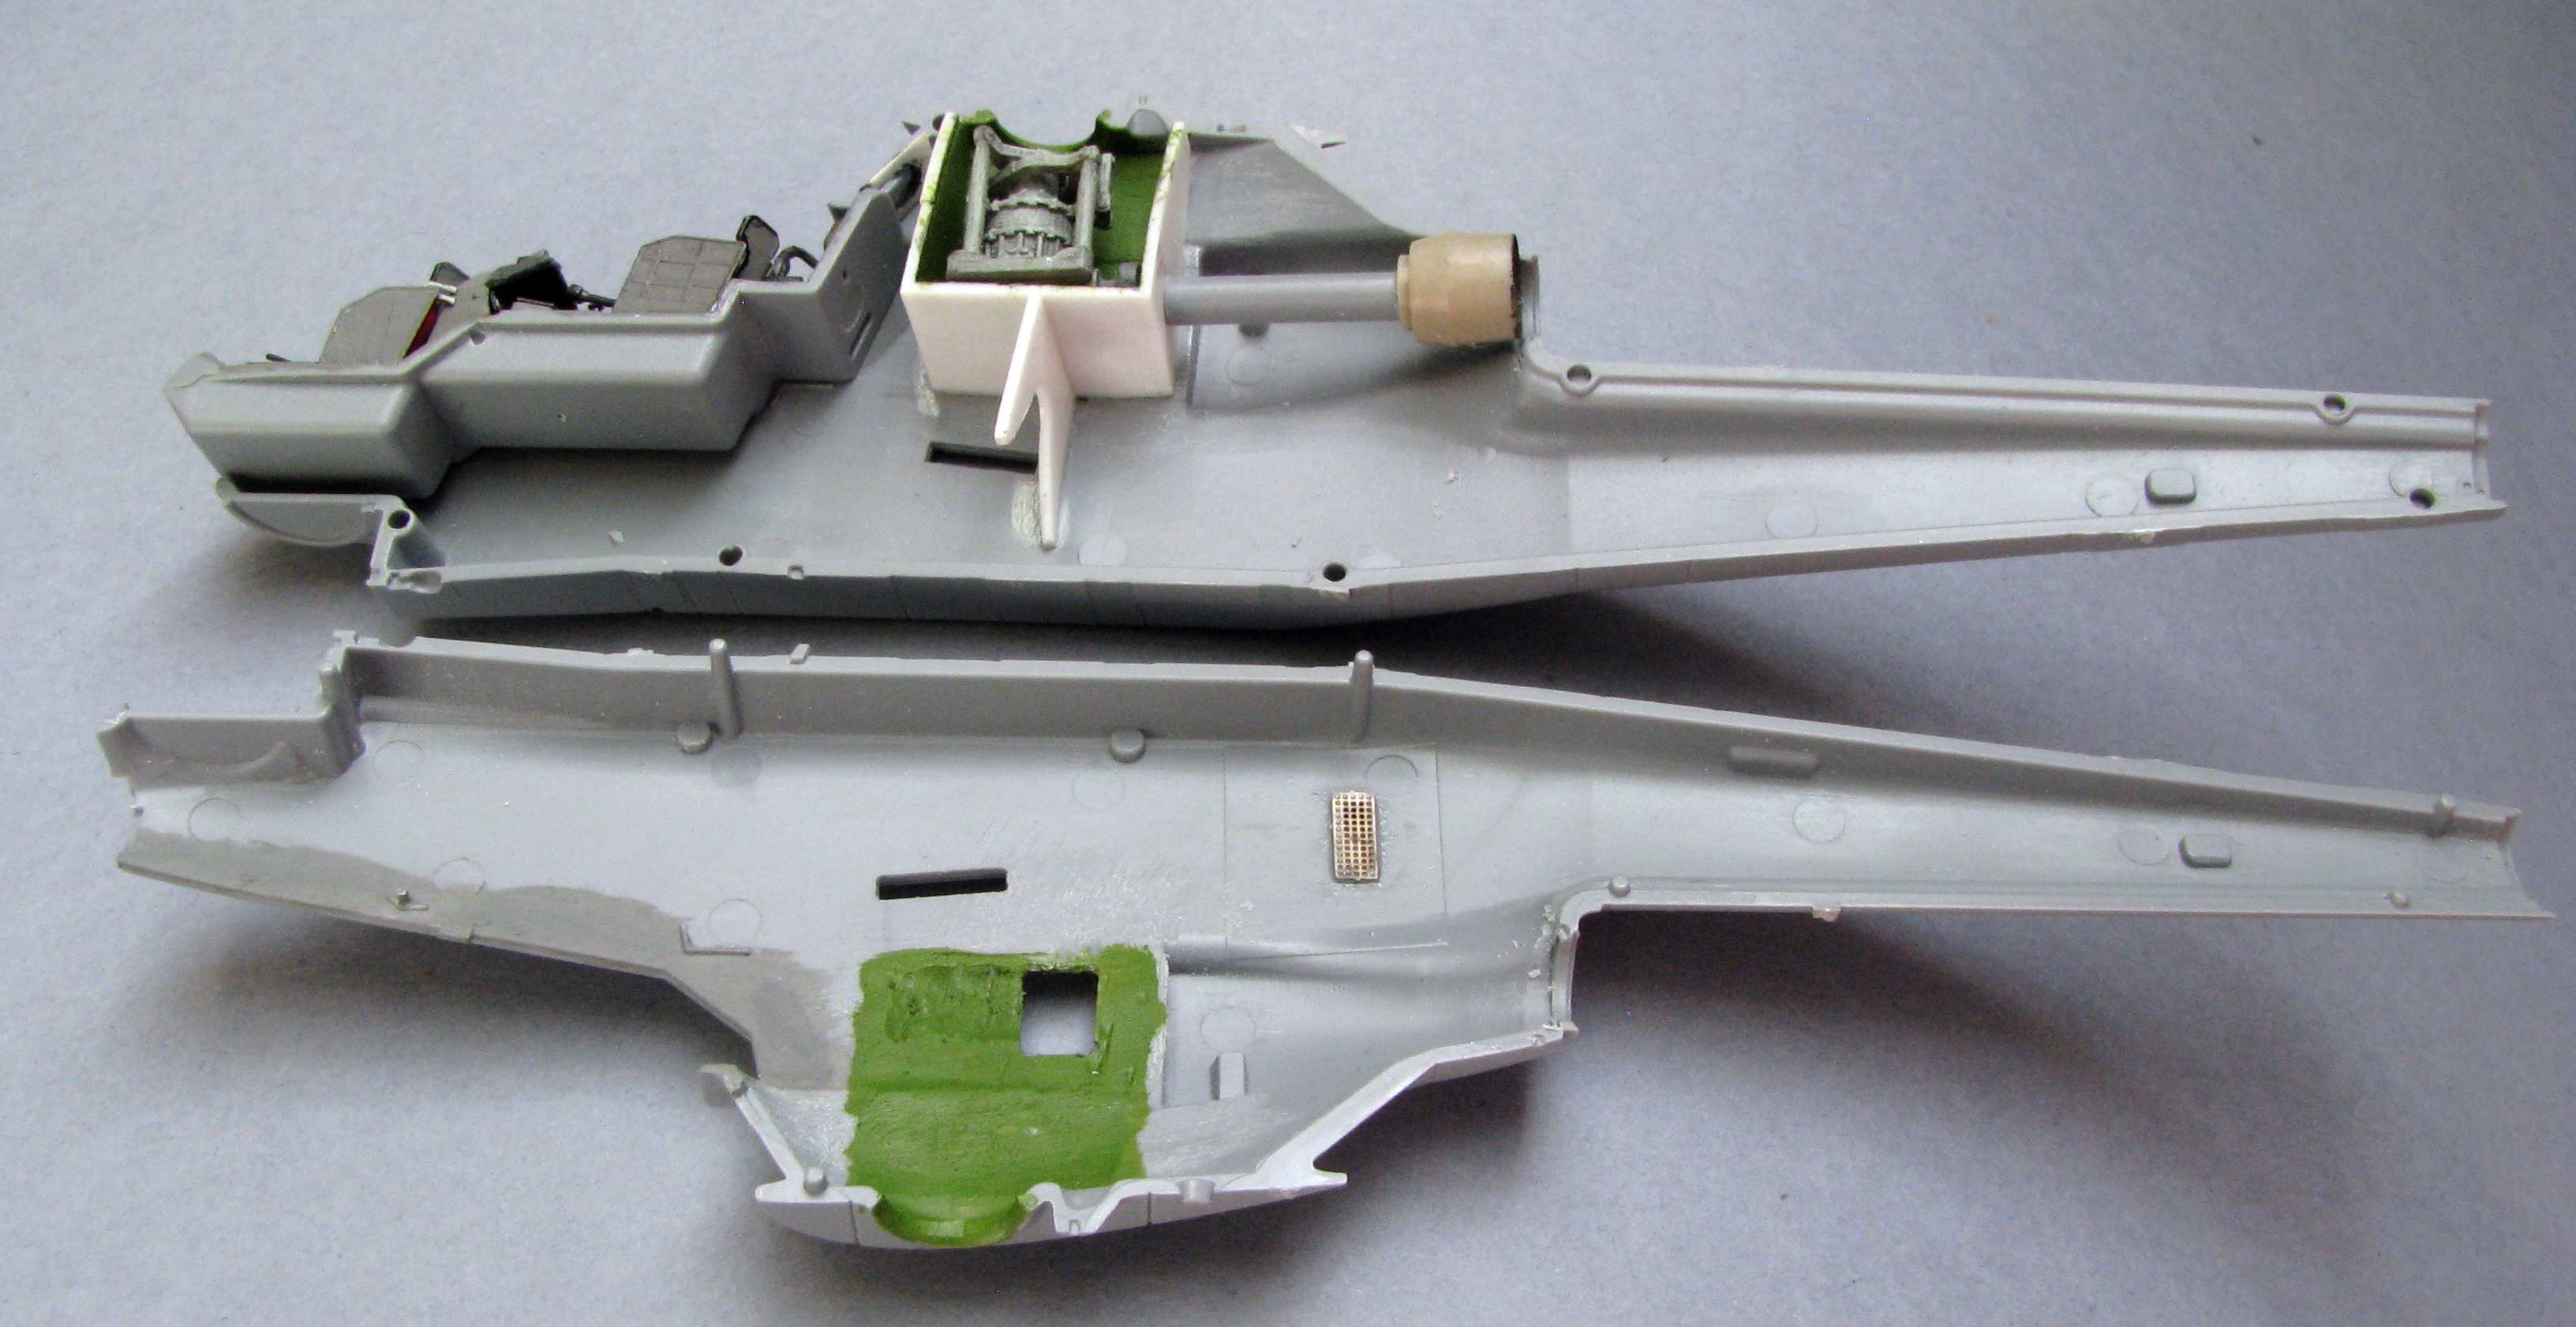
Then I started preparing the hull for closing it up at last. I painted the interior and installed the engine exhaust, but I took the part from the AZmodel kit, I think it’s a little nicer than the Special Hobby part:
Then I closed everything up and did the first filling and sanding:
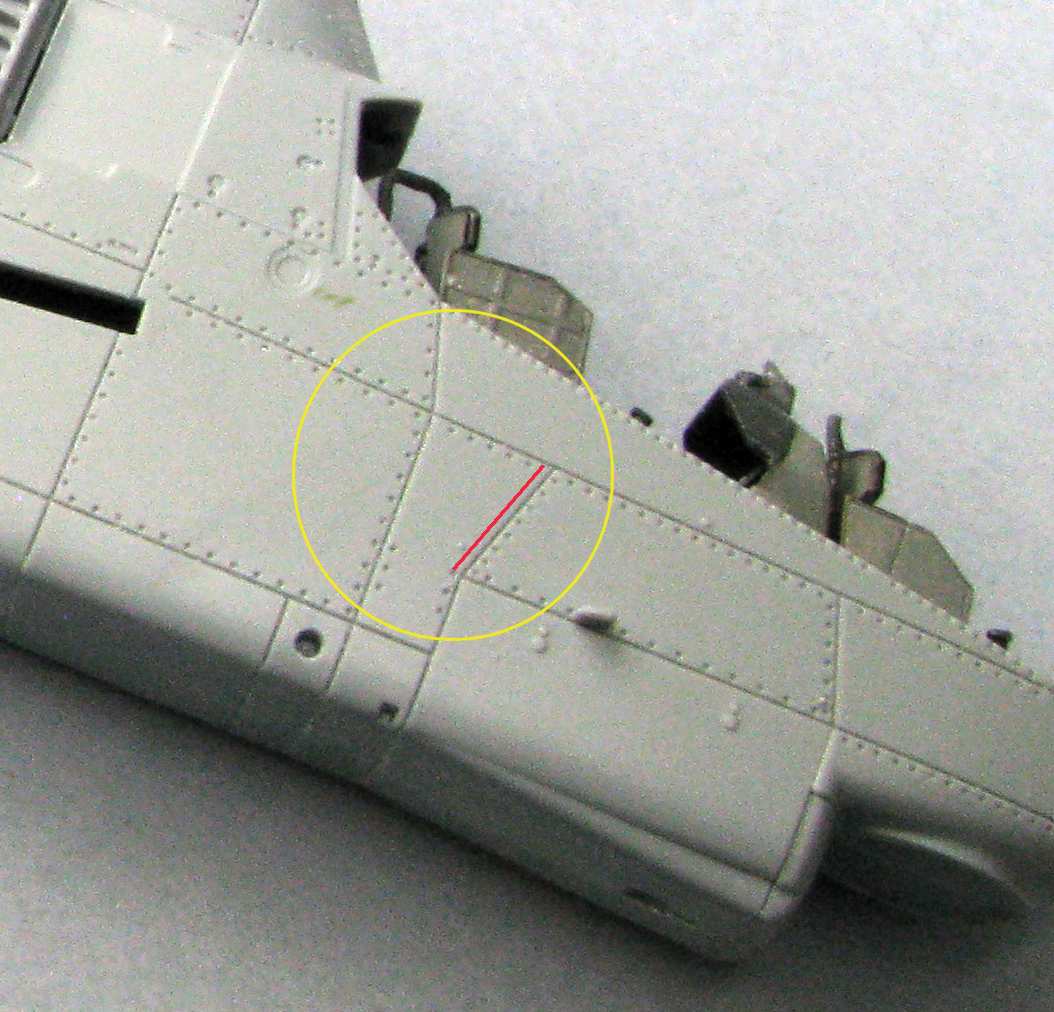
I have also discovered a little error in the otherwise very nice Special Hobby kit:
In real life it looks more like this:
Now I will have to rescribe this area, I just have to make sure my lines aren’t so much worse than the kit lines…
I have also (very carefully) filled the nose with hot lead (very small drops) and I am also working on custom decals for this one.