Coming along nicely. The transmission part fits well. Good job.
Hi Pawel,
Your model looks like it’s coming along really nice and nice job. I mostly build AH-1 Cobras and currently working on 2 more Special Hobby kits, their new 1/48 G model and another 1/72 kit of the S(Mod), they incorrectly title it a Q model though and can explain that later.
I to don’t like their rotor system either and just glue it in place, but admire you went over and above with a shapewave transmission which I didn’t know was available in 1/72 scale. Special Hobby improved on this on their new 1/48 scale kit but only down to the swash plate with no transmission. I’ve been also sending them pictures and manual drawings to do make a cowls open to see the transmission and engine. I’d like to hear more of how you got the transmission from Shapewaves because I’d like to have a 3D printed engine and cowls in 1/48 scale though.
There are a few other inaccuracies with their kit and have been e-mailing Special Hobby about them such as the rotor tower cowling access door is mis-shaped and should be more of a squared off rectangle than a long skinny rectangle and the top of the door should be parallel with them bottom of the door. The kit’s door is parallel with the top of the rotor tower cowling. I think the whole tower is needs to be taller. Another error is the 90 degree tail rotor drive shaft cover has 5 metal lock strips with dzues fasteners that should run parallel with the cover, not run horizontal across the cover like the kit has. I scrape these off and install tiny adhesive backed aluminum strips. I’m not entirely positive on the G model, but they were parallel to the cover on all our S(Mod), P, E and F cobras after the G model.
If you need any reference material on the AH-1 Cobra, I saved all my manuals from the US Army for the S(Mod), P, E and F, no G model though. They are available on-line and can be down loaded for free. Google liberated manuals and the manual titles are TM 55-1520-234-xx for the S(Mod), TM 55-1520-236-xx for the P,E and F models. Let me know if you are looking for any reference material of any part and I can help you find it in the AH-1 Cobra manuals.
I like the 442 picture, I was in C Company 227th AHB
Thanks,
Tom
lurch, Gino - sorry for taking so long to answer - I thought Iäd post another update soon… But the build goes soo slow… Thanks a lot for your kind words!
Tom - thanks a lot for your message.
If you like, you can check out my AH-1F build here:
https://cs.finescale.com/fsm/modeling_subjects/f/16/t/189173.aspx
As for the transmission - it’s 100% my design, I have drawn it up in 3D and now it’s on sale on Shapeways:
1:72 Main Transmission for the AH-1G Cobra (2x) (UHVYQVYX5) by pmroczko (shapeways.com)
To get one in 1:48 I’d have to draw it up again - scaling designs up is possible, but usually doesn’t look good, the details tend to get clunky… The doors would be tricky to draw, with all those complicated curves…
Good catch on those tower cowling doors - I didn’t notice it until you pointed it out. The Special Hobby kit looks so good in the box that looking for bugs just doesn’t feel like the thing to do… I’m not so sure what you mean about the tail rotor gearbox, though.
It would be cool to know if there were any quirks or special features the D/227th snakes sported - I know sometimes in a unit soldiers tend to do something special to their ships. Painting tops of the rotor blades is such a thing. Otherwise I’d be glad to get bach to you when I get stuck on some detail.
One thing that would be interesting right now - do you have any photo or drawing showing the two-gun turret from below? I believe there were two large openings there, models tend to omit those, I’d like to model that, maybe you could help me?
Thanks in advance for your help, have a nice day
Paweł
Hi Pawel,
I still need to set up a URL account to share pictures on this forum, it would be much easier if I could directly attach jpegs of my Army Cobras I crewed, or PDFs of the US Army manuals and I can show you details of the Cobra.
I just finished kit bashing a 1/48 scale AH-1S(Mod) Cobra using parts from 2 Fujimi, 1 Revell, 1 Italeri and 1 Special Hobby kits, photo etch and tons of scratch building to de-mod down to the S(Mod) Cobra version. I only spent 18 months and I think it came out fairly well. I’m considering getting a 3D scanner and 3D resin printer so I can start making parts, like a cowls open model.
I checked out your F model and again, I’m impressed with your scratch building. My plan is to scan existing models or the parts from them and use my pictures of my Cobras I crewed and manual illustrations to develop the 3D prints.
In regards to the tail rotor, I was referring to the vertical fin between the 42 degree gearbox and the 90 degree tail rotor gearbox. The leading edge of the vertical tail is the cover to the drive shaft has 5 metal strips that have dzues locking fasteners that holds down the hinged cover. The hinge is on the opposite side of these fasteners. These metal strips run parallel with the cover. Special Hobby’s 1/72 and 1/48 G model kit cast these horizontal to the tail. I’m not 100% positive on the orientation of these metal strips on the G model, but they were parallel with the edge of the cover going up to the tail rotor. If you have Squadron’s Walk around book, go to page 15 in the bottom right picture. You can see the metal latches next to the mechanic’s left elbow.
I can’t find any images of the underneath of the M28 turret. Special Hobby’s 1/48 kit did a really nice job of making the TAT 101 and M28 turret, although they did cast the area where spent shells and links come out at the bottom closed. You bring back memories now of having to pick up all the brass and links after a live fire excercise. I had a friend 3D print me M28 turrets that I used on my 1/48 S(Mod) and I used Special Hobby’s 1/72 M28 turret as a template if that helps to see what the bottom looks like? Squadron’s walk around has some good side images and you can see the access doors on the side as well.
As far as doing special things to our Cobras, we weren’t allowed to do anything out of specifications, however I did get away with painting our tail stinger covers a NATO blue since Alpha and Bravo company painted theirs Red and Yellow and my rotor tower doors had stencils of the Winged Warrior’s prancing horse on them. Only other thing I did to my Cobra was to draw a hand flipping the bird in chalk un the bottom during desert training. Of course, chalk washes off. Other than that, nothing special.
Thanks,
Tom
Hello Tom!
Unfortunately this forum still doesn’t give it’s users at least a few MBs for pictures - as disk space gets cheaper and cheaper this is slowly getting standard on other forums, but not this one…
I always say it’s best to concentrate on 3D design in some CAD software. There are many 3D printers just waiting for something to do, if you don’t print 24/7 it’s cheaper to have your design printed by somebody already owning a high-tech printer.
I’m glad you like my F model, good luck with your 3D designs, and thanks for the explanations on the Cobra tail.
That’s what I found out, too - looks like nobody ever bothered to crawl underneath a Cobra with a camera and shoot any photos of the turret underside.
Do I understand it right, that you were with a Cobra unit in the time of Desert Storm? Do you have any contact to people servin in the times of Vietnam War?
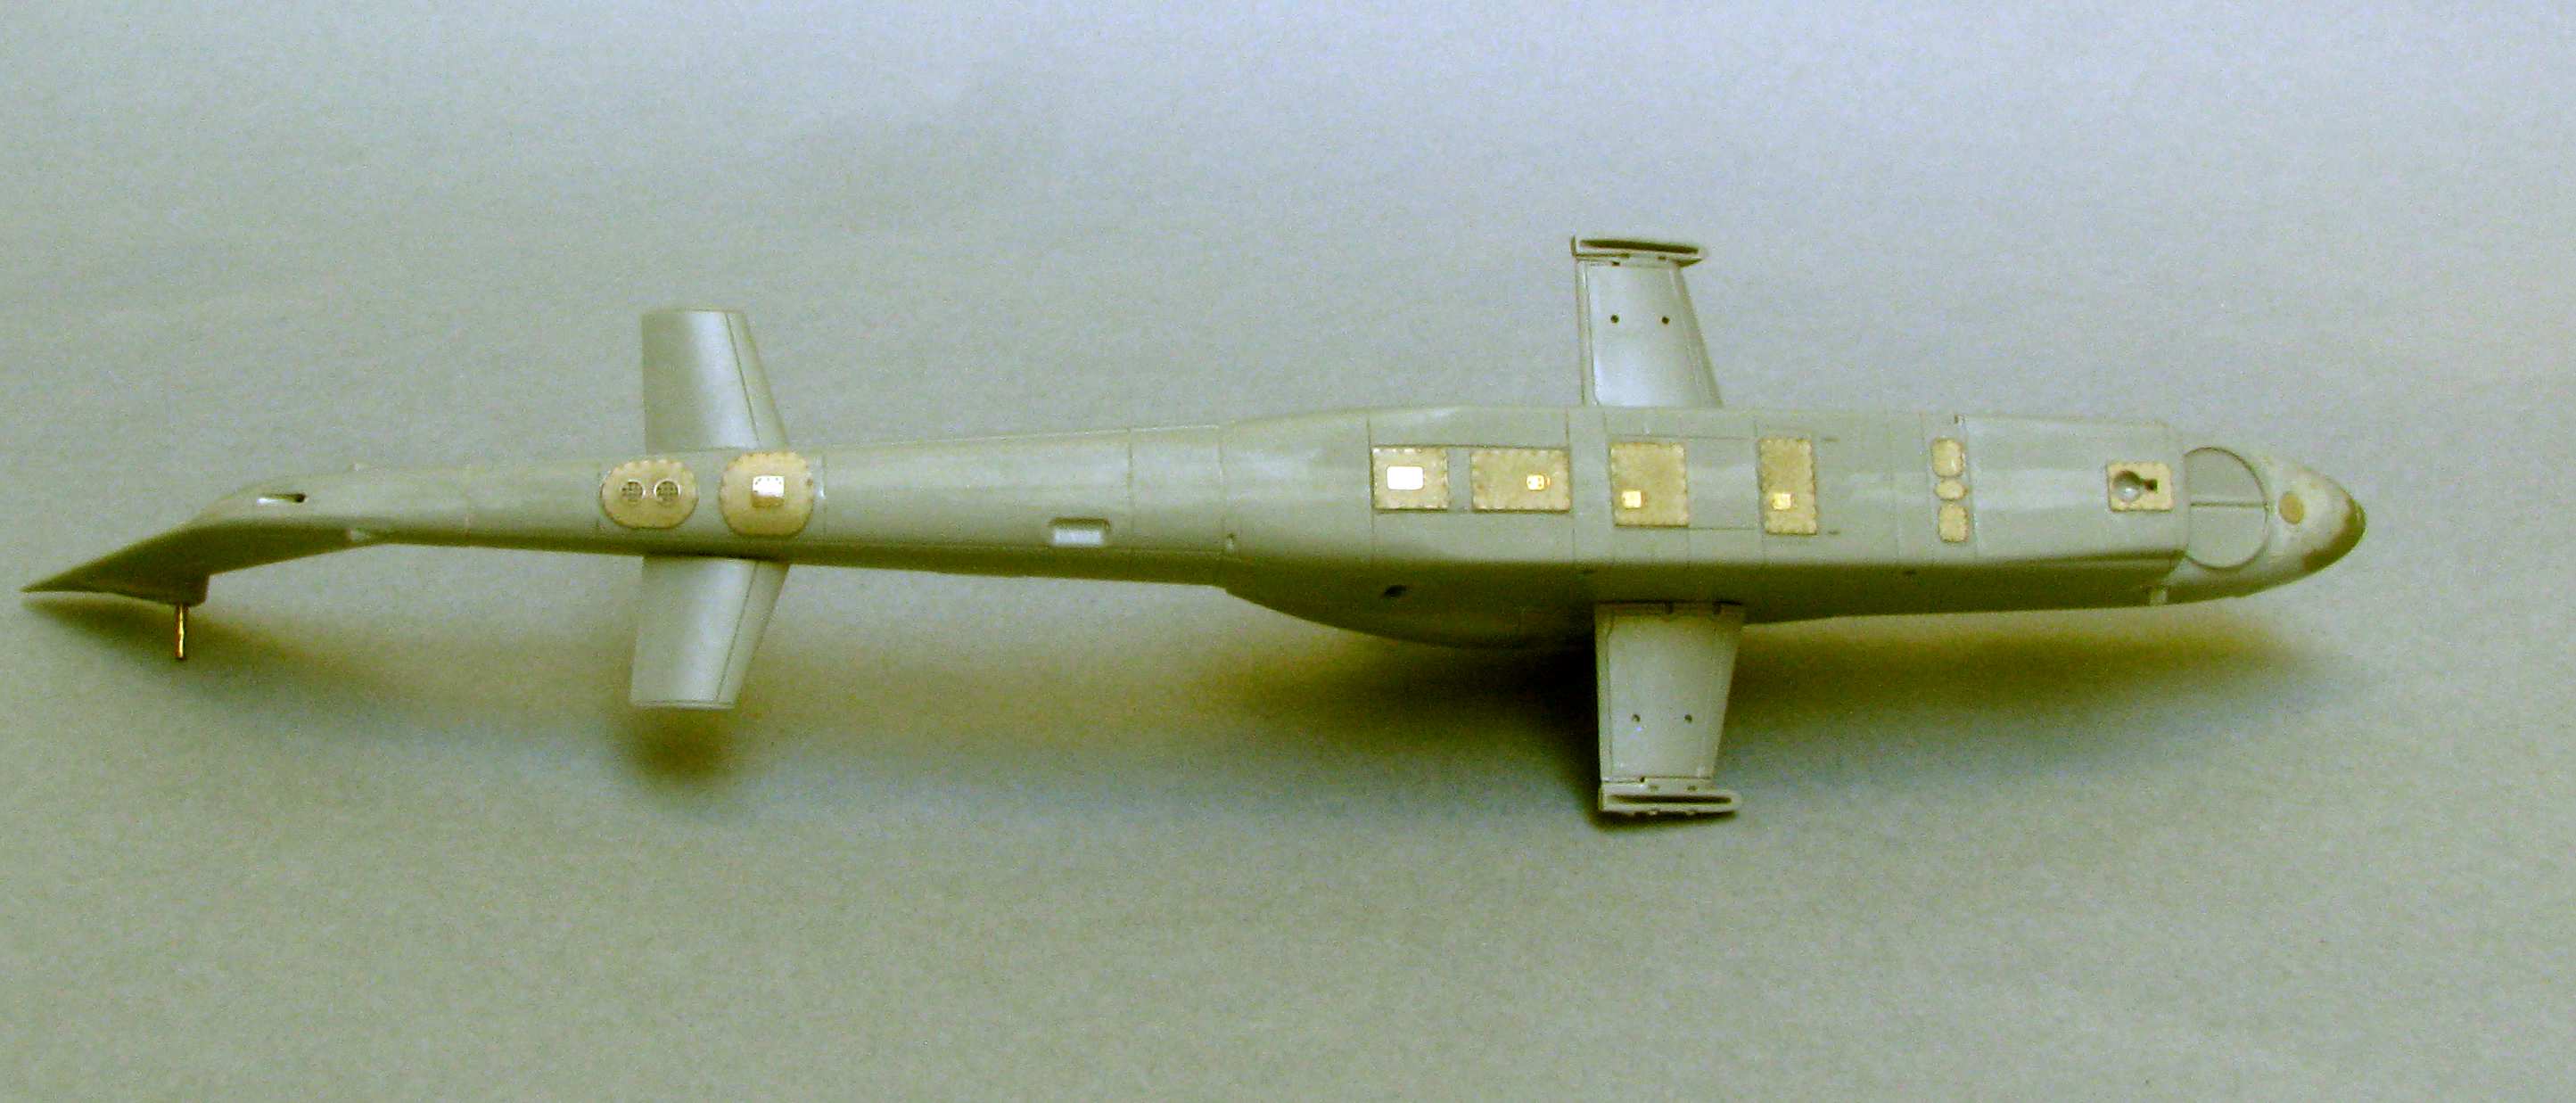
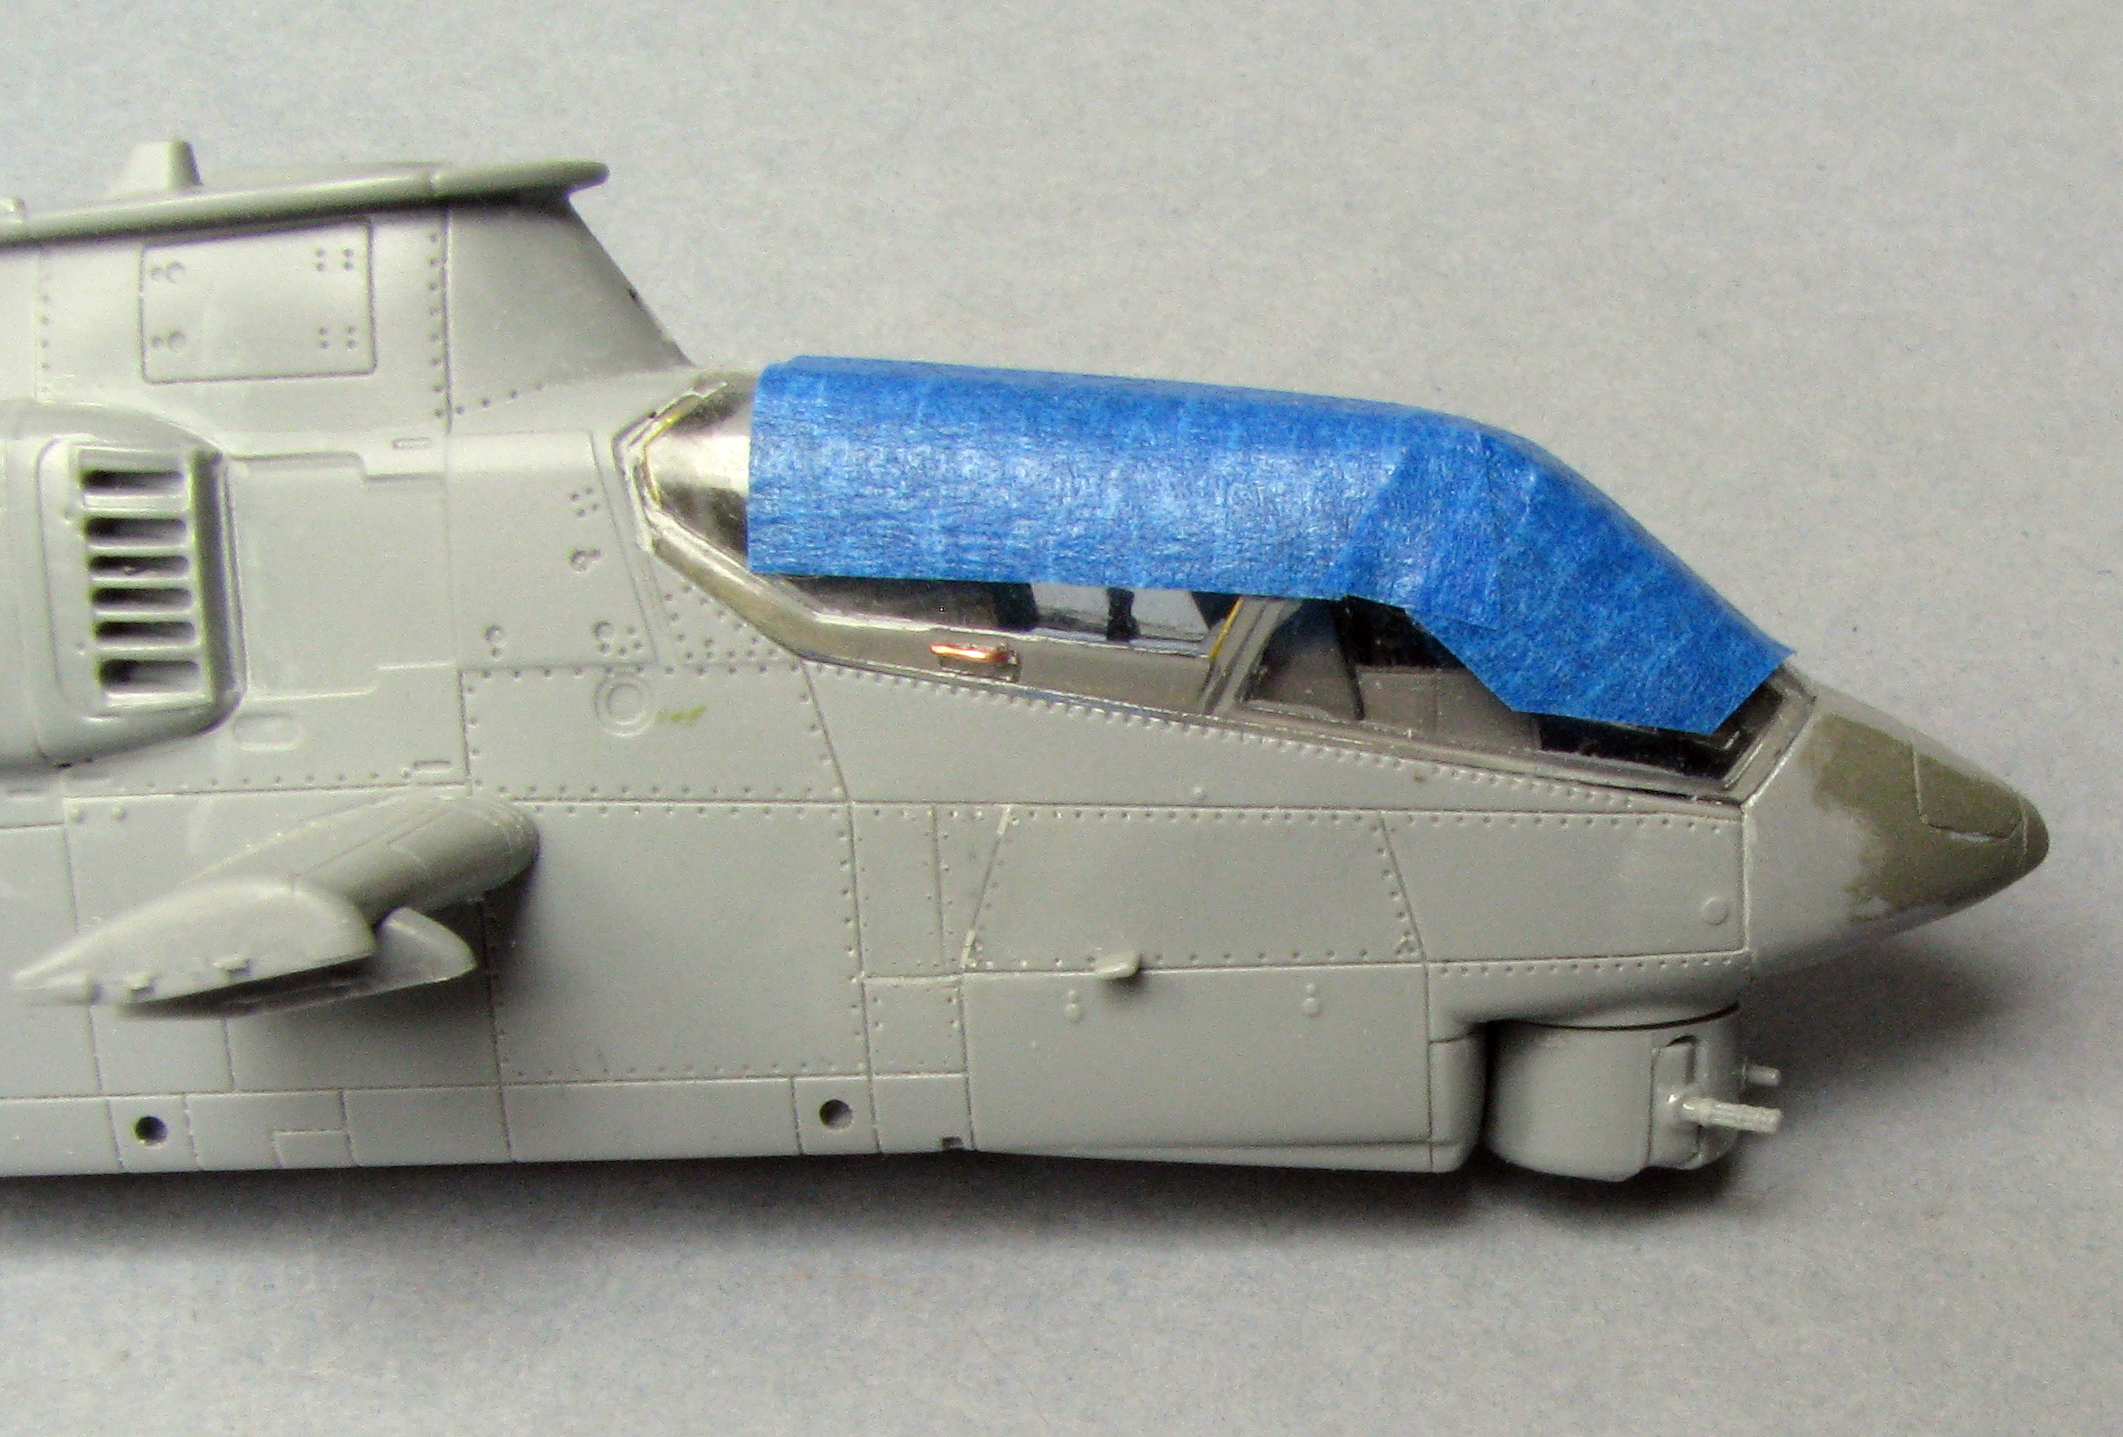
And in the meantime I corrected the fuselage side. I have also attached the nose (filled with lead) and stub wings:
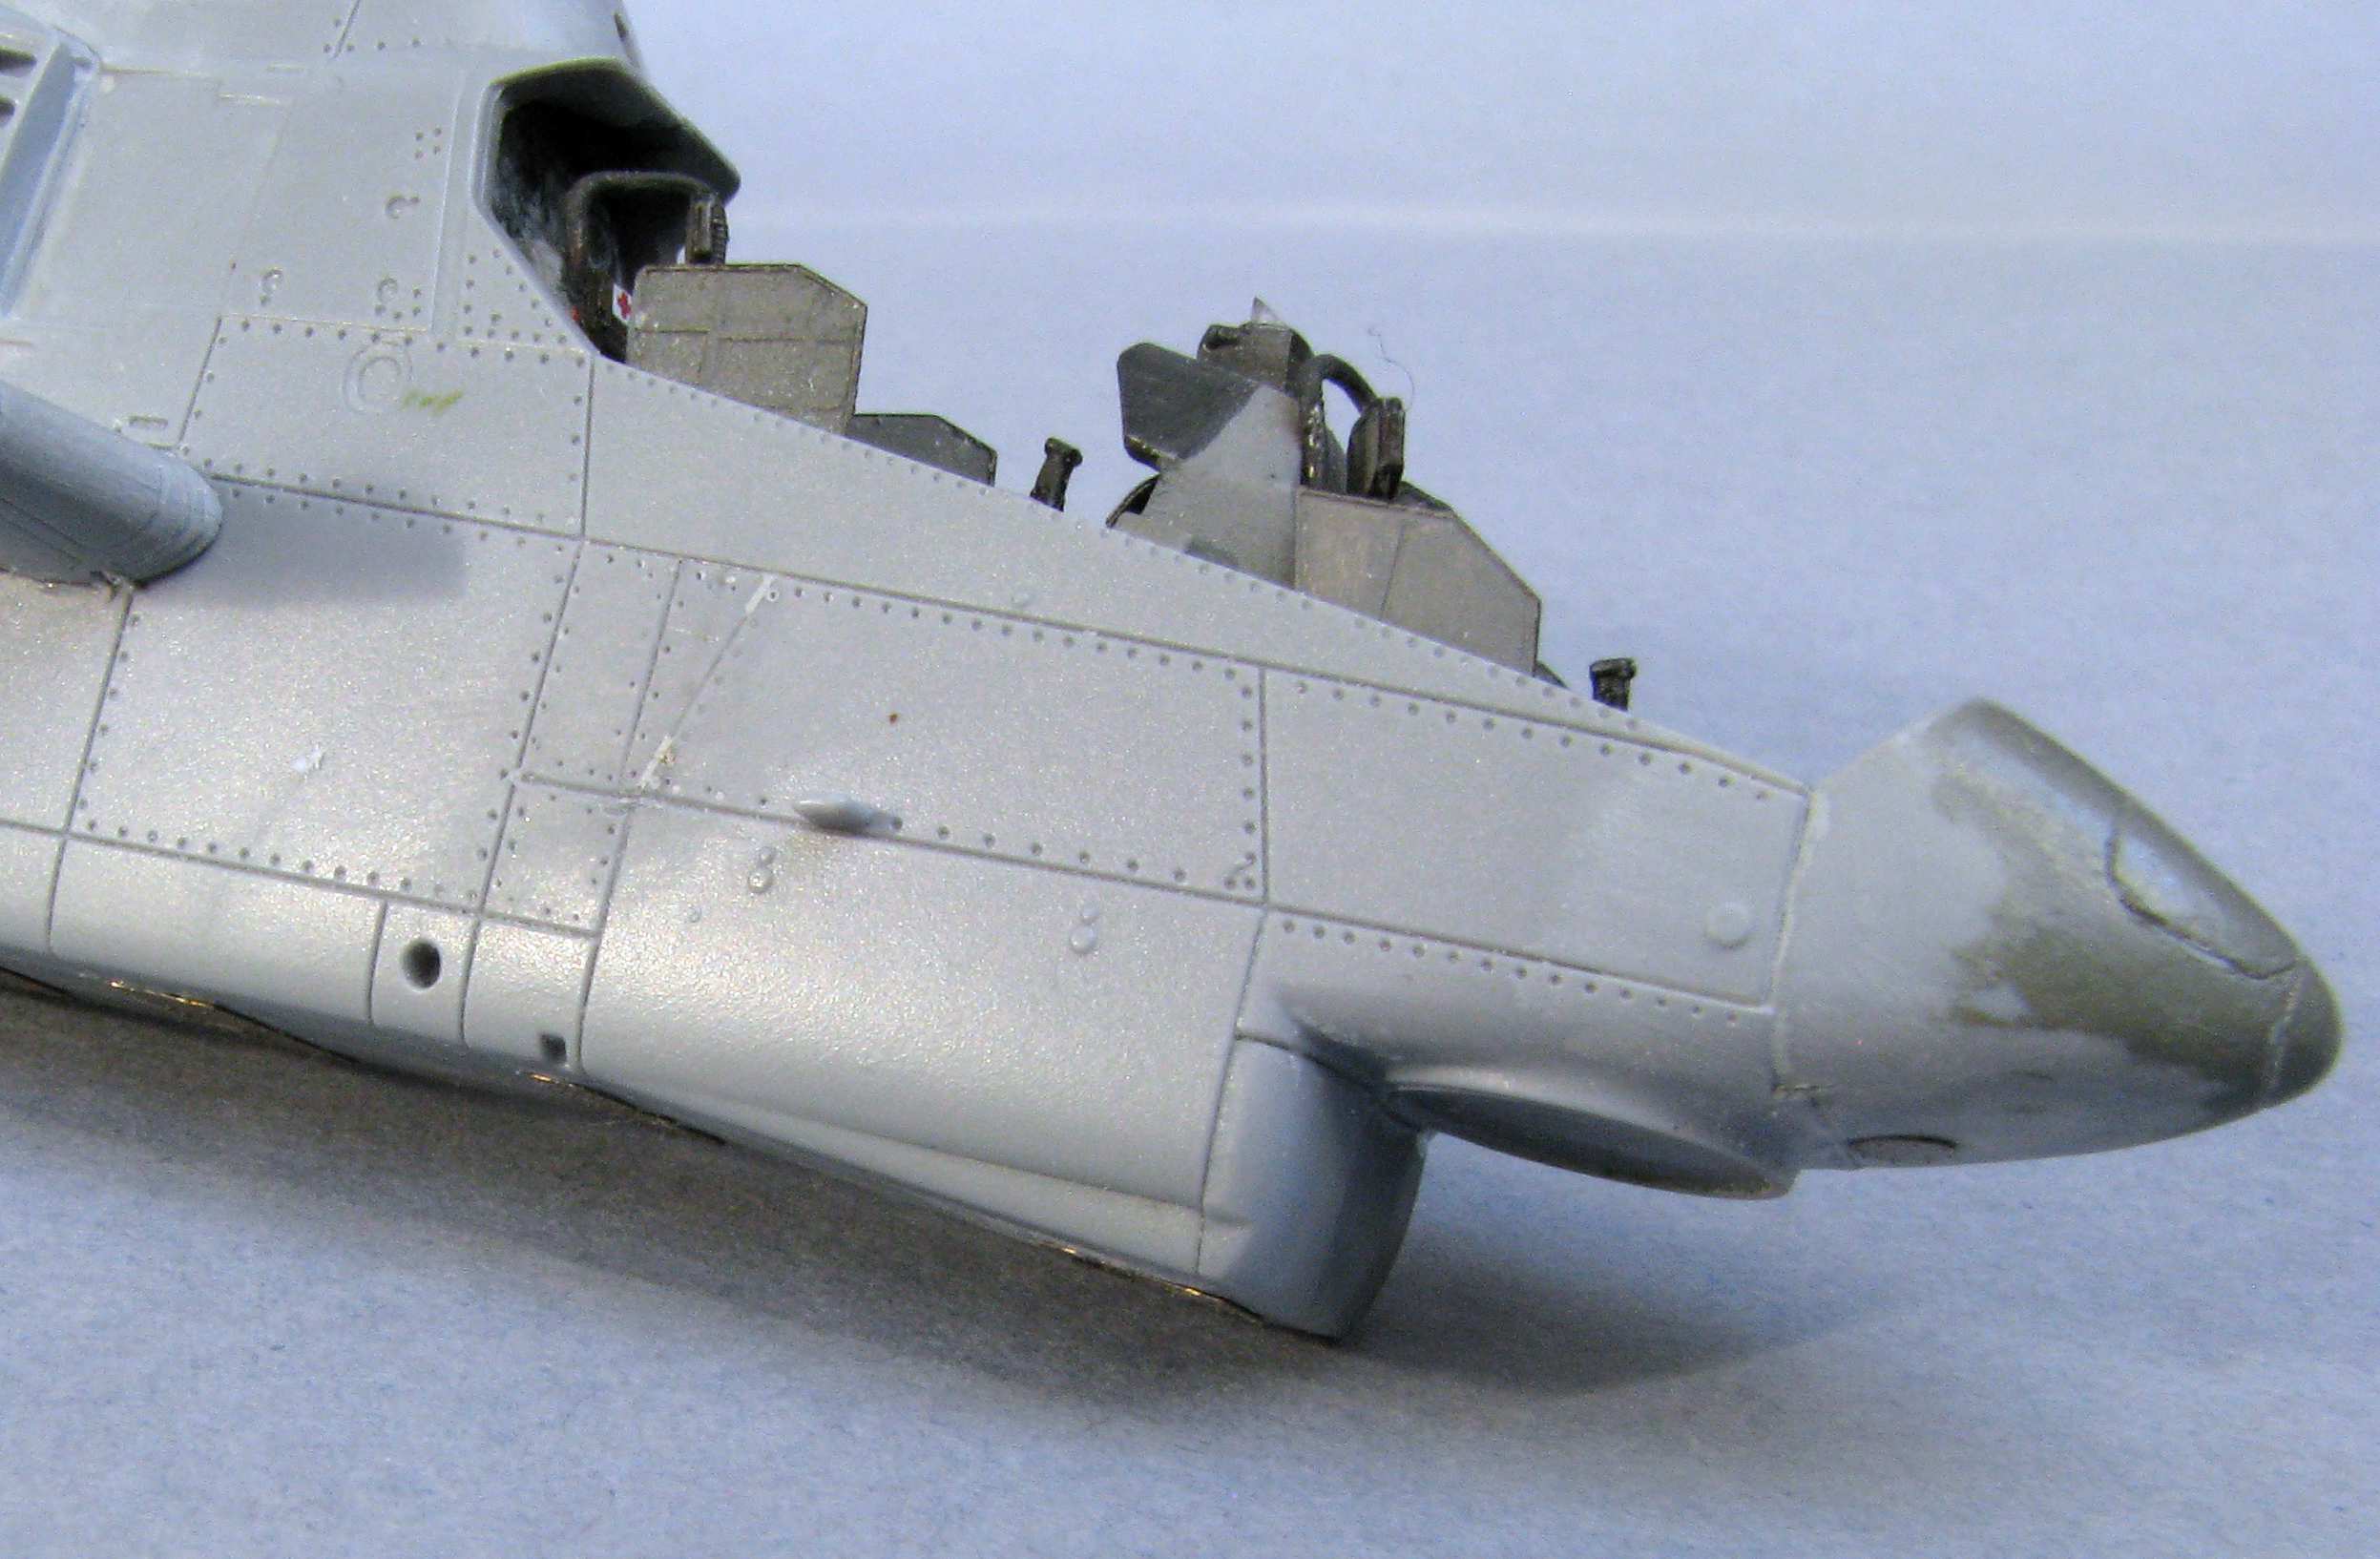
I have sanded the underside smooth, then added a few scribed lines, but mostly the PE from the Special Hobby PE set. For the flat parts I used white glue to attach them, for the curved parts on the tail CA was necessary:
I also have a vacu-formed canopy for this kit by Pavla, I’m working on fitting it and I also thinking about making the turret movable… Thanks for looking and have a nice day
Paweł
Hello!
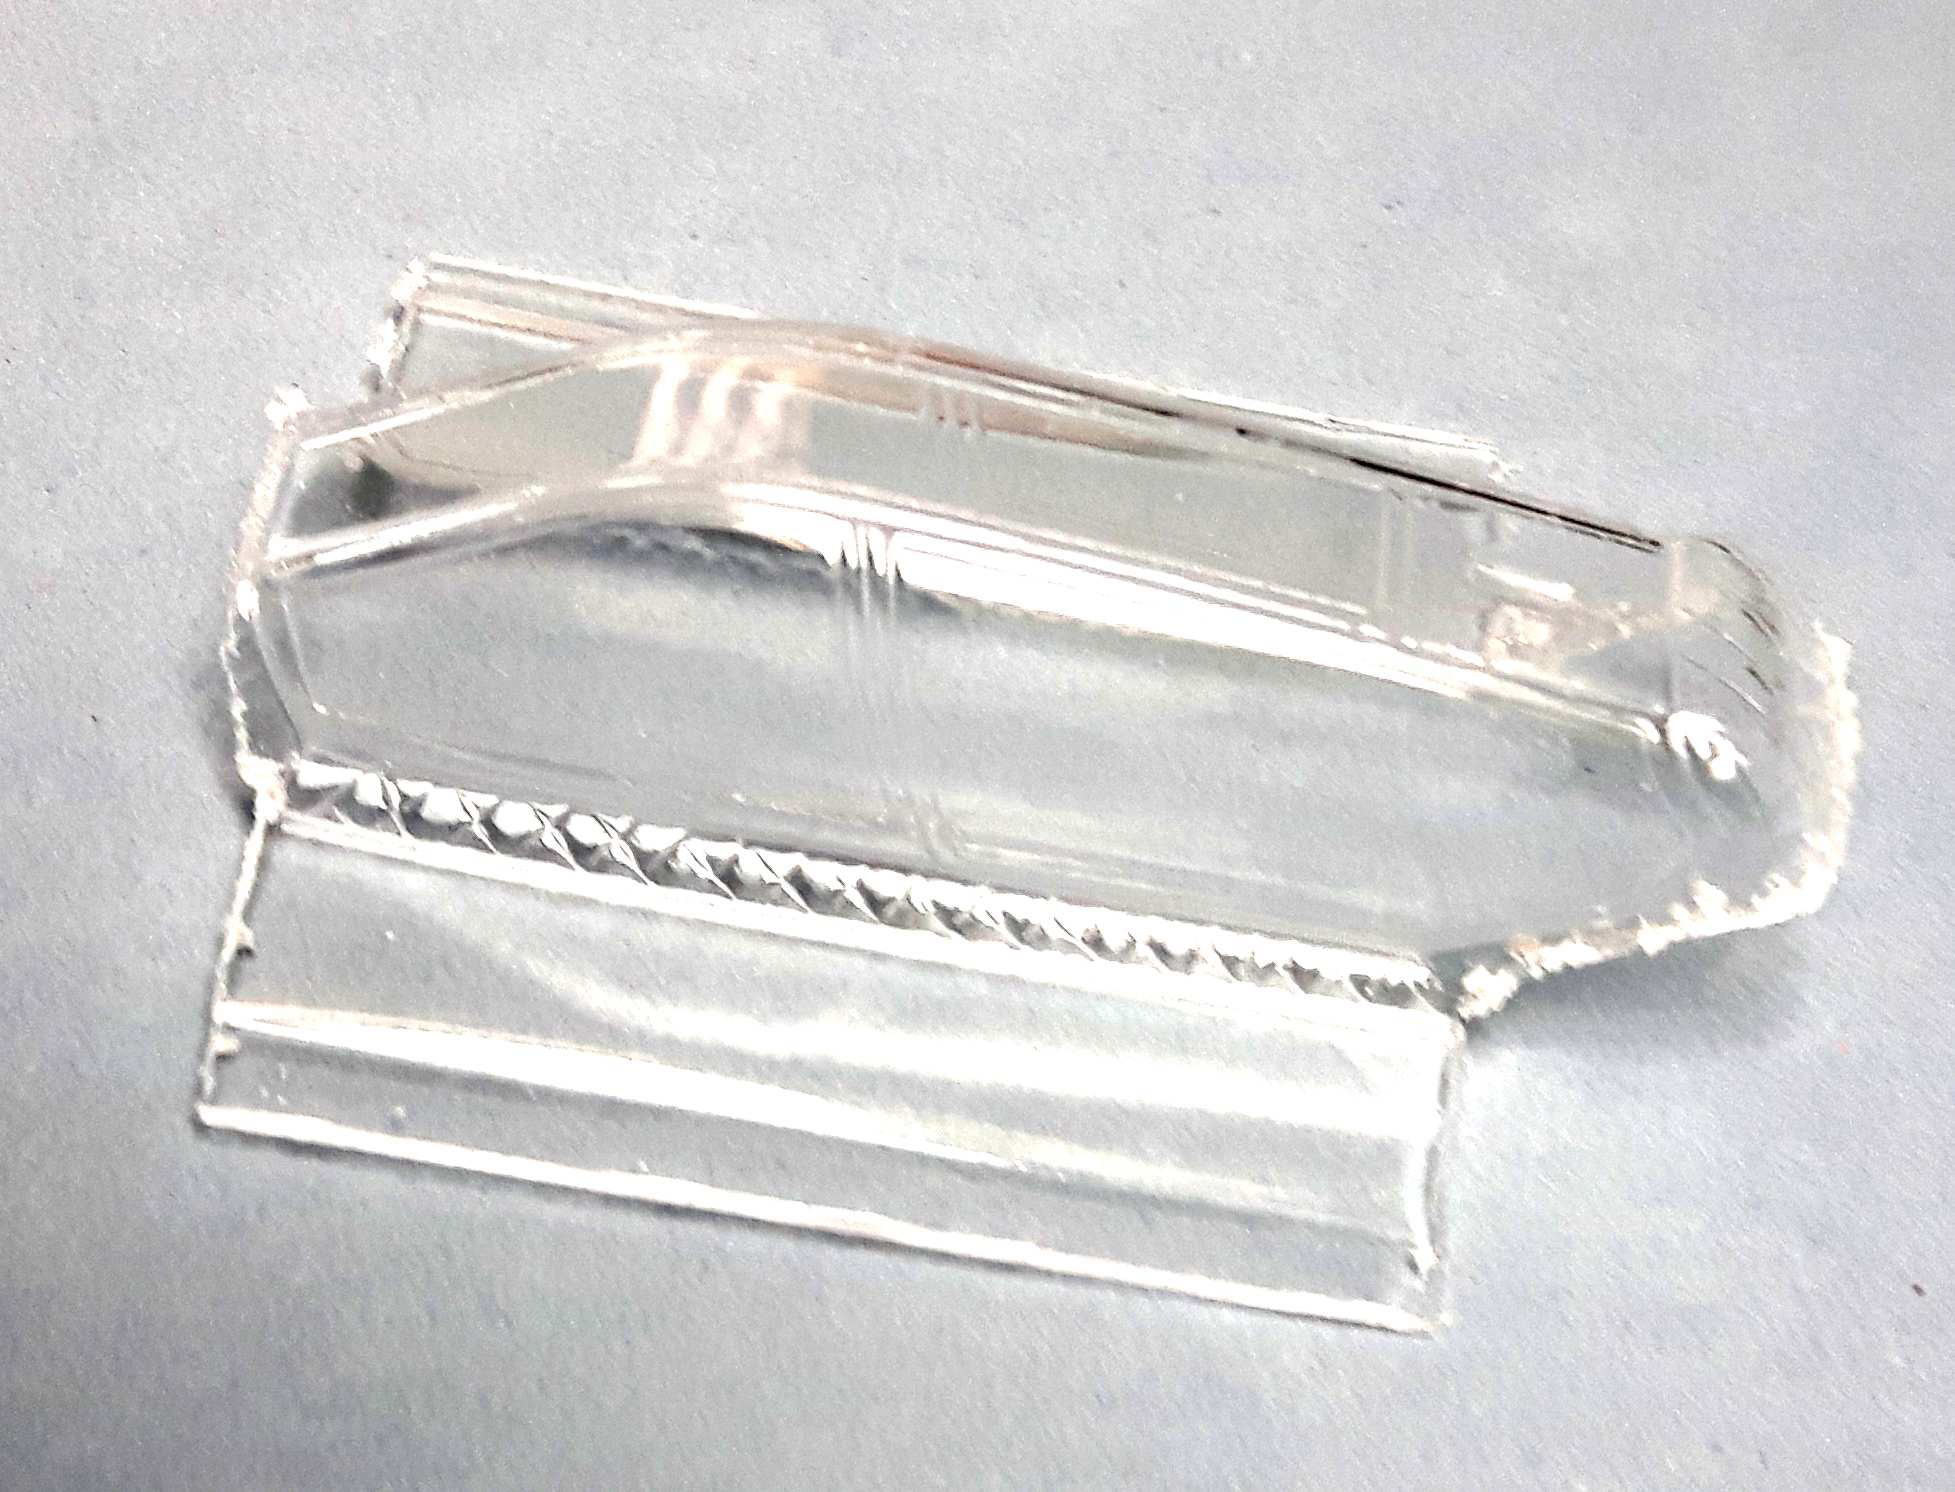
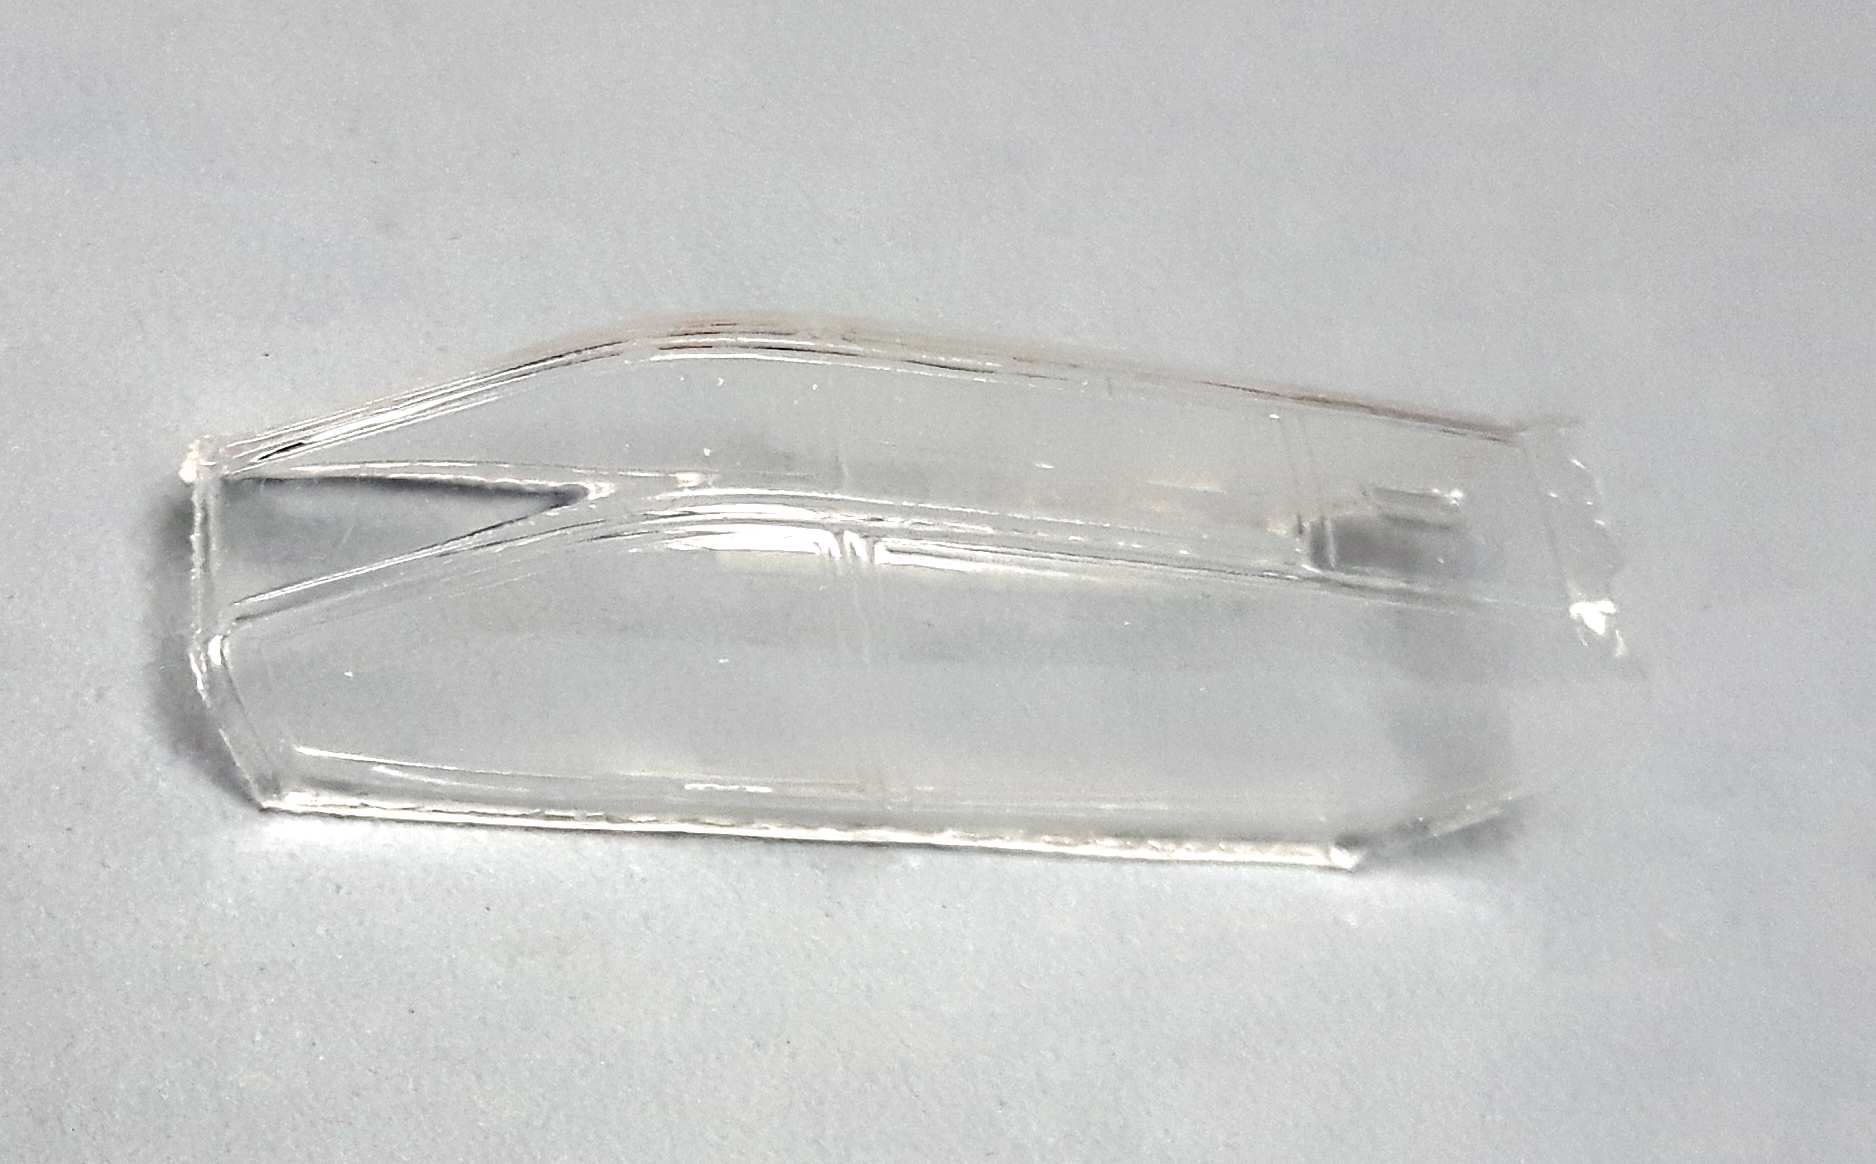
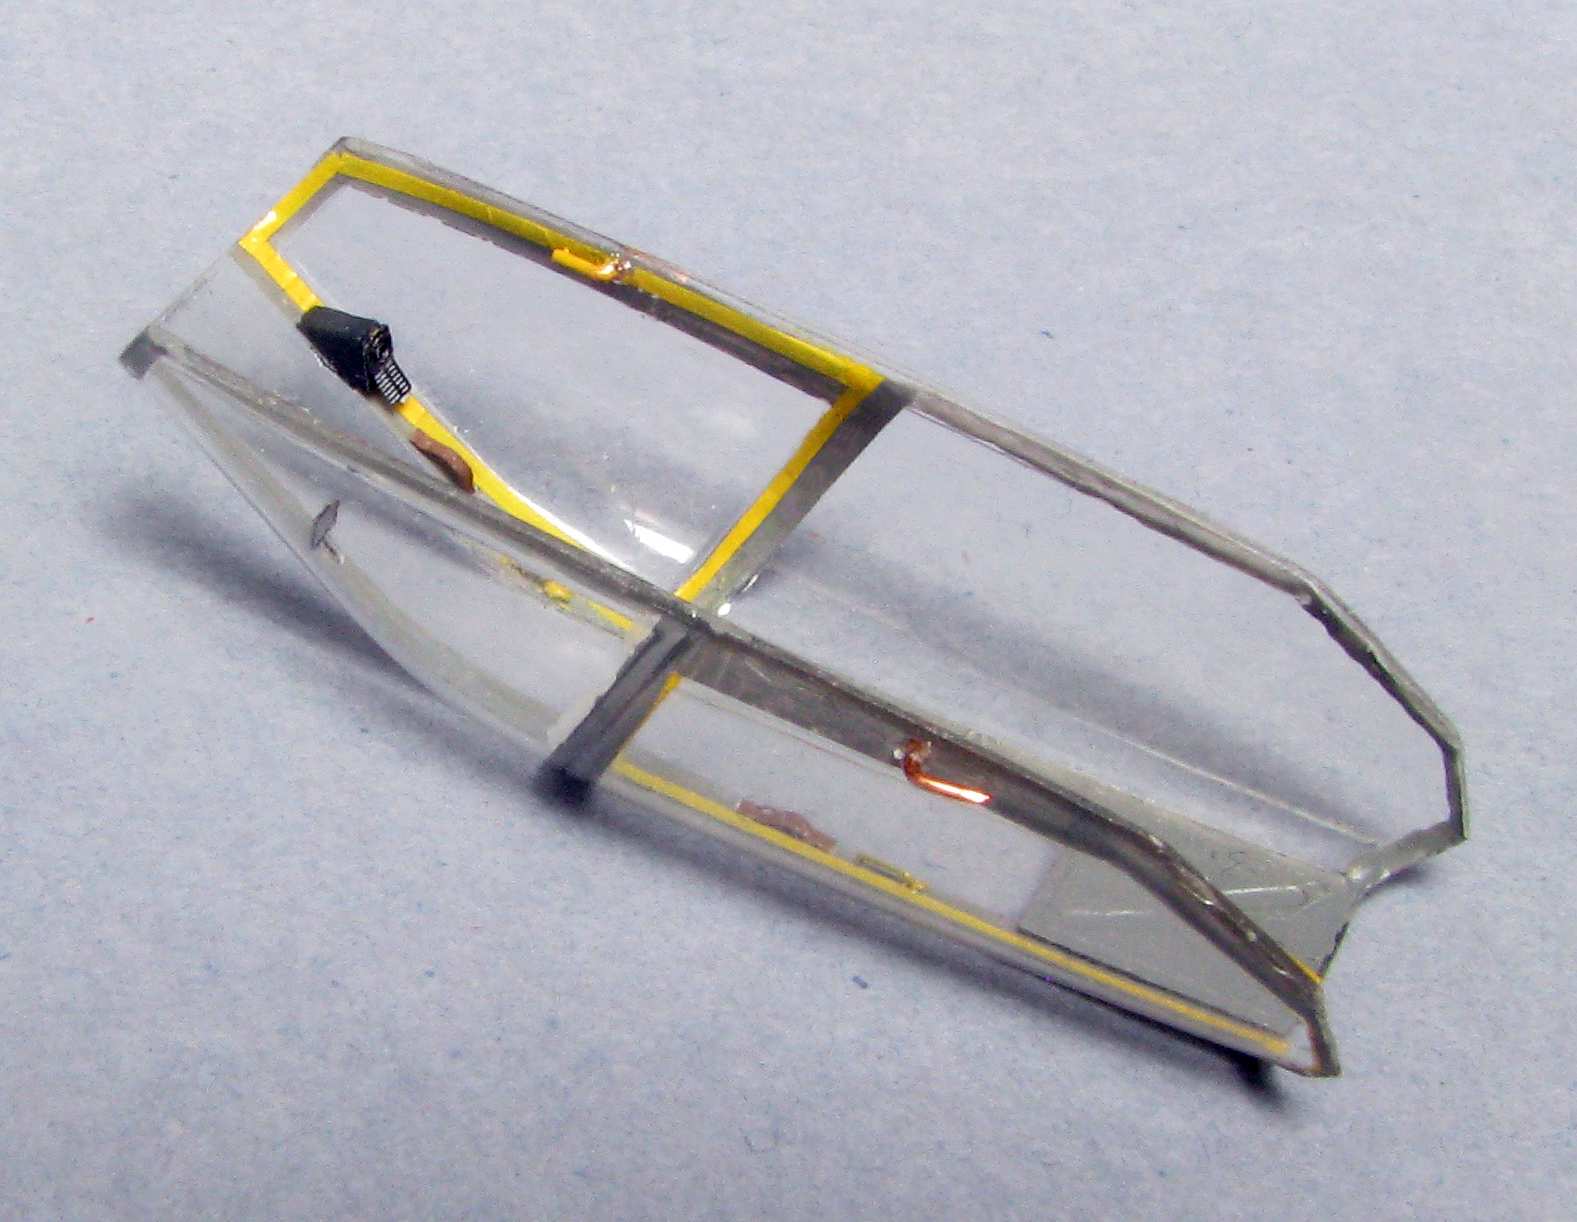
Today I’d like to show my process of fitting a vacuform canopy from this set (there are two pieces inside):

This is how it looks like OOB:
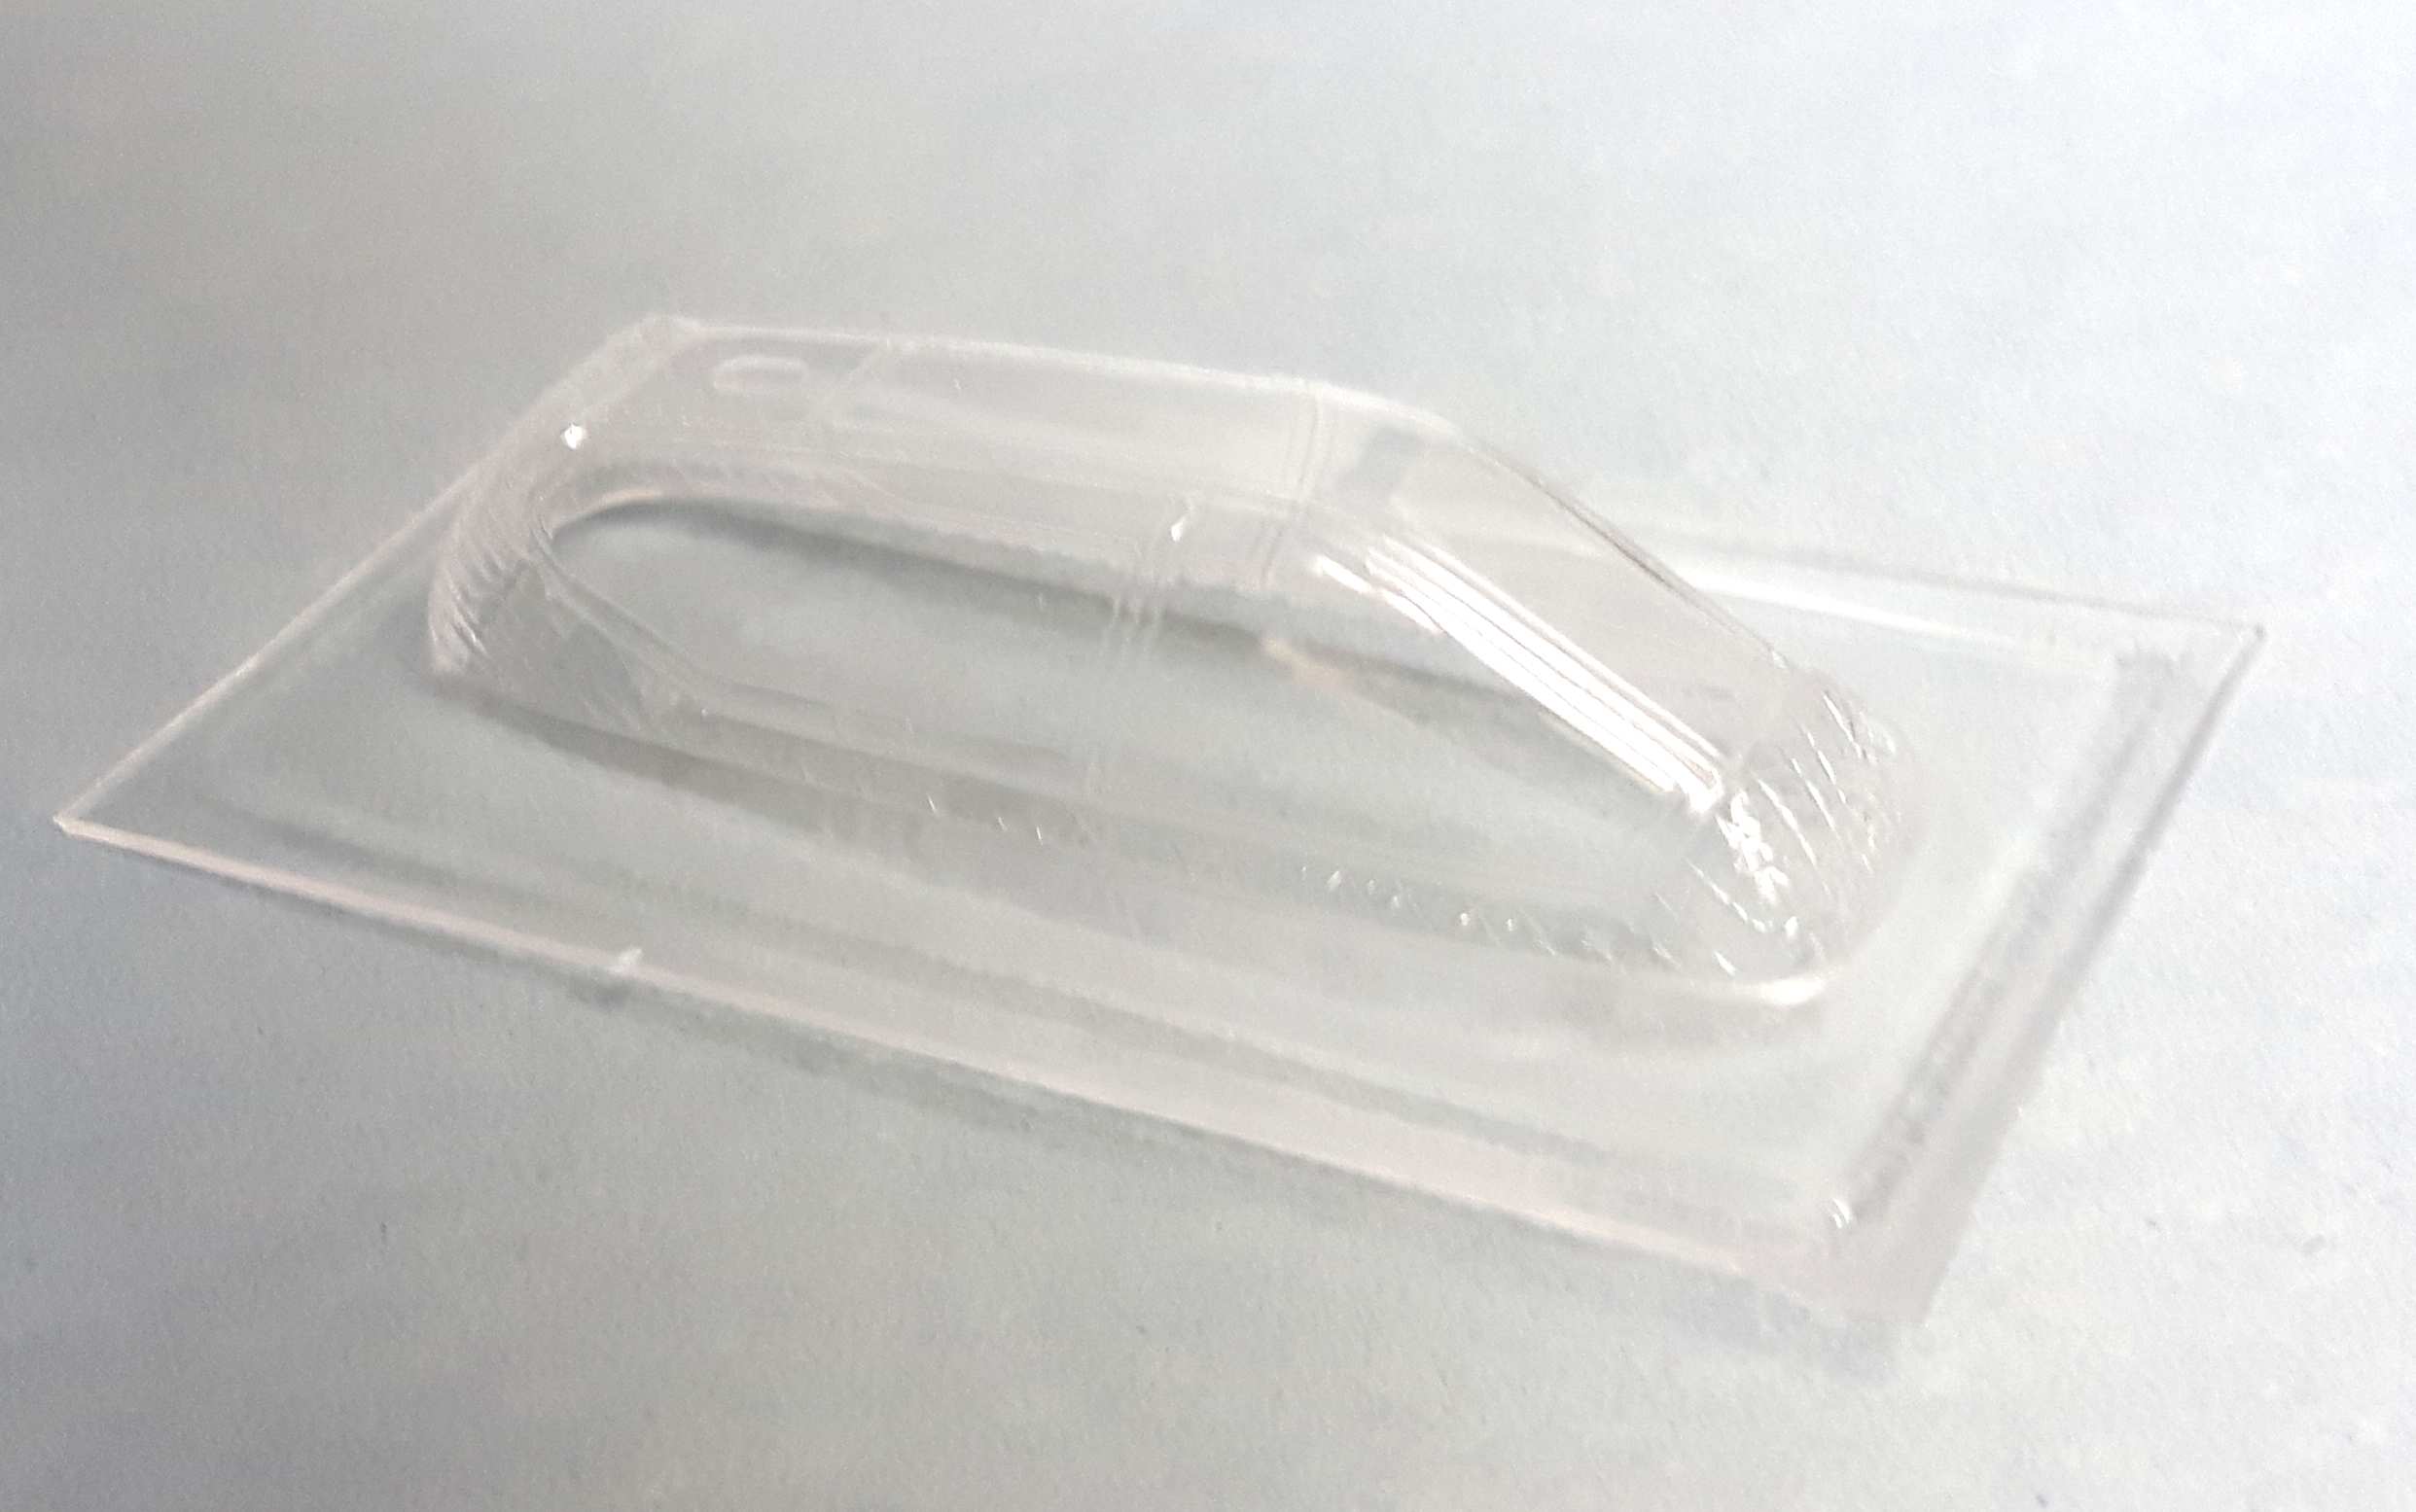
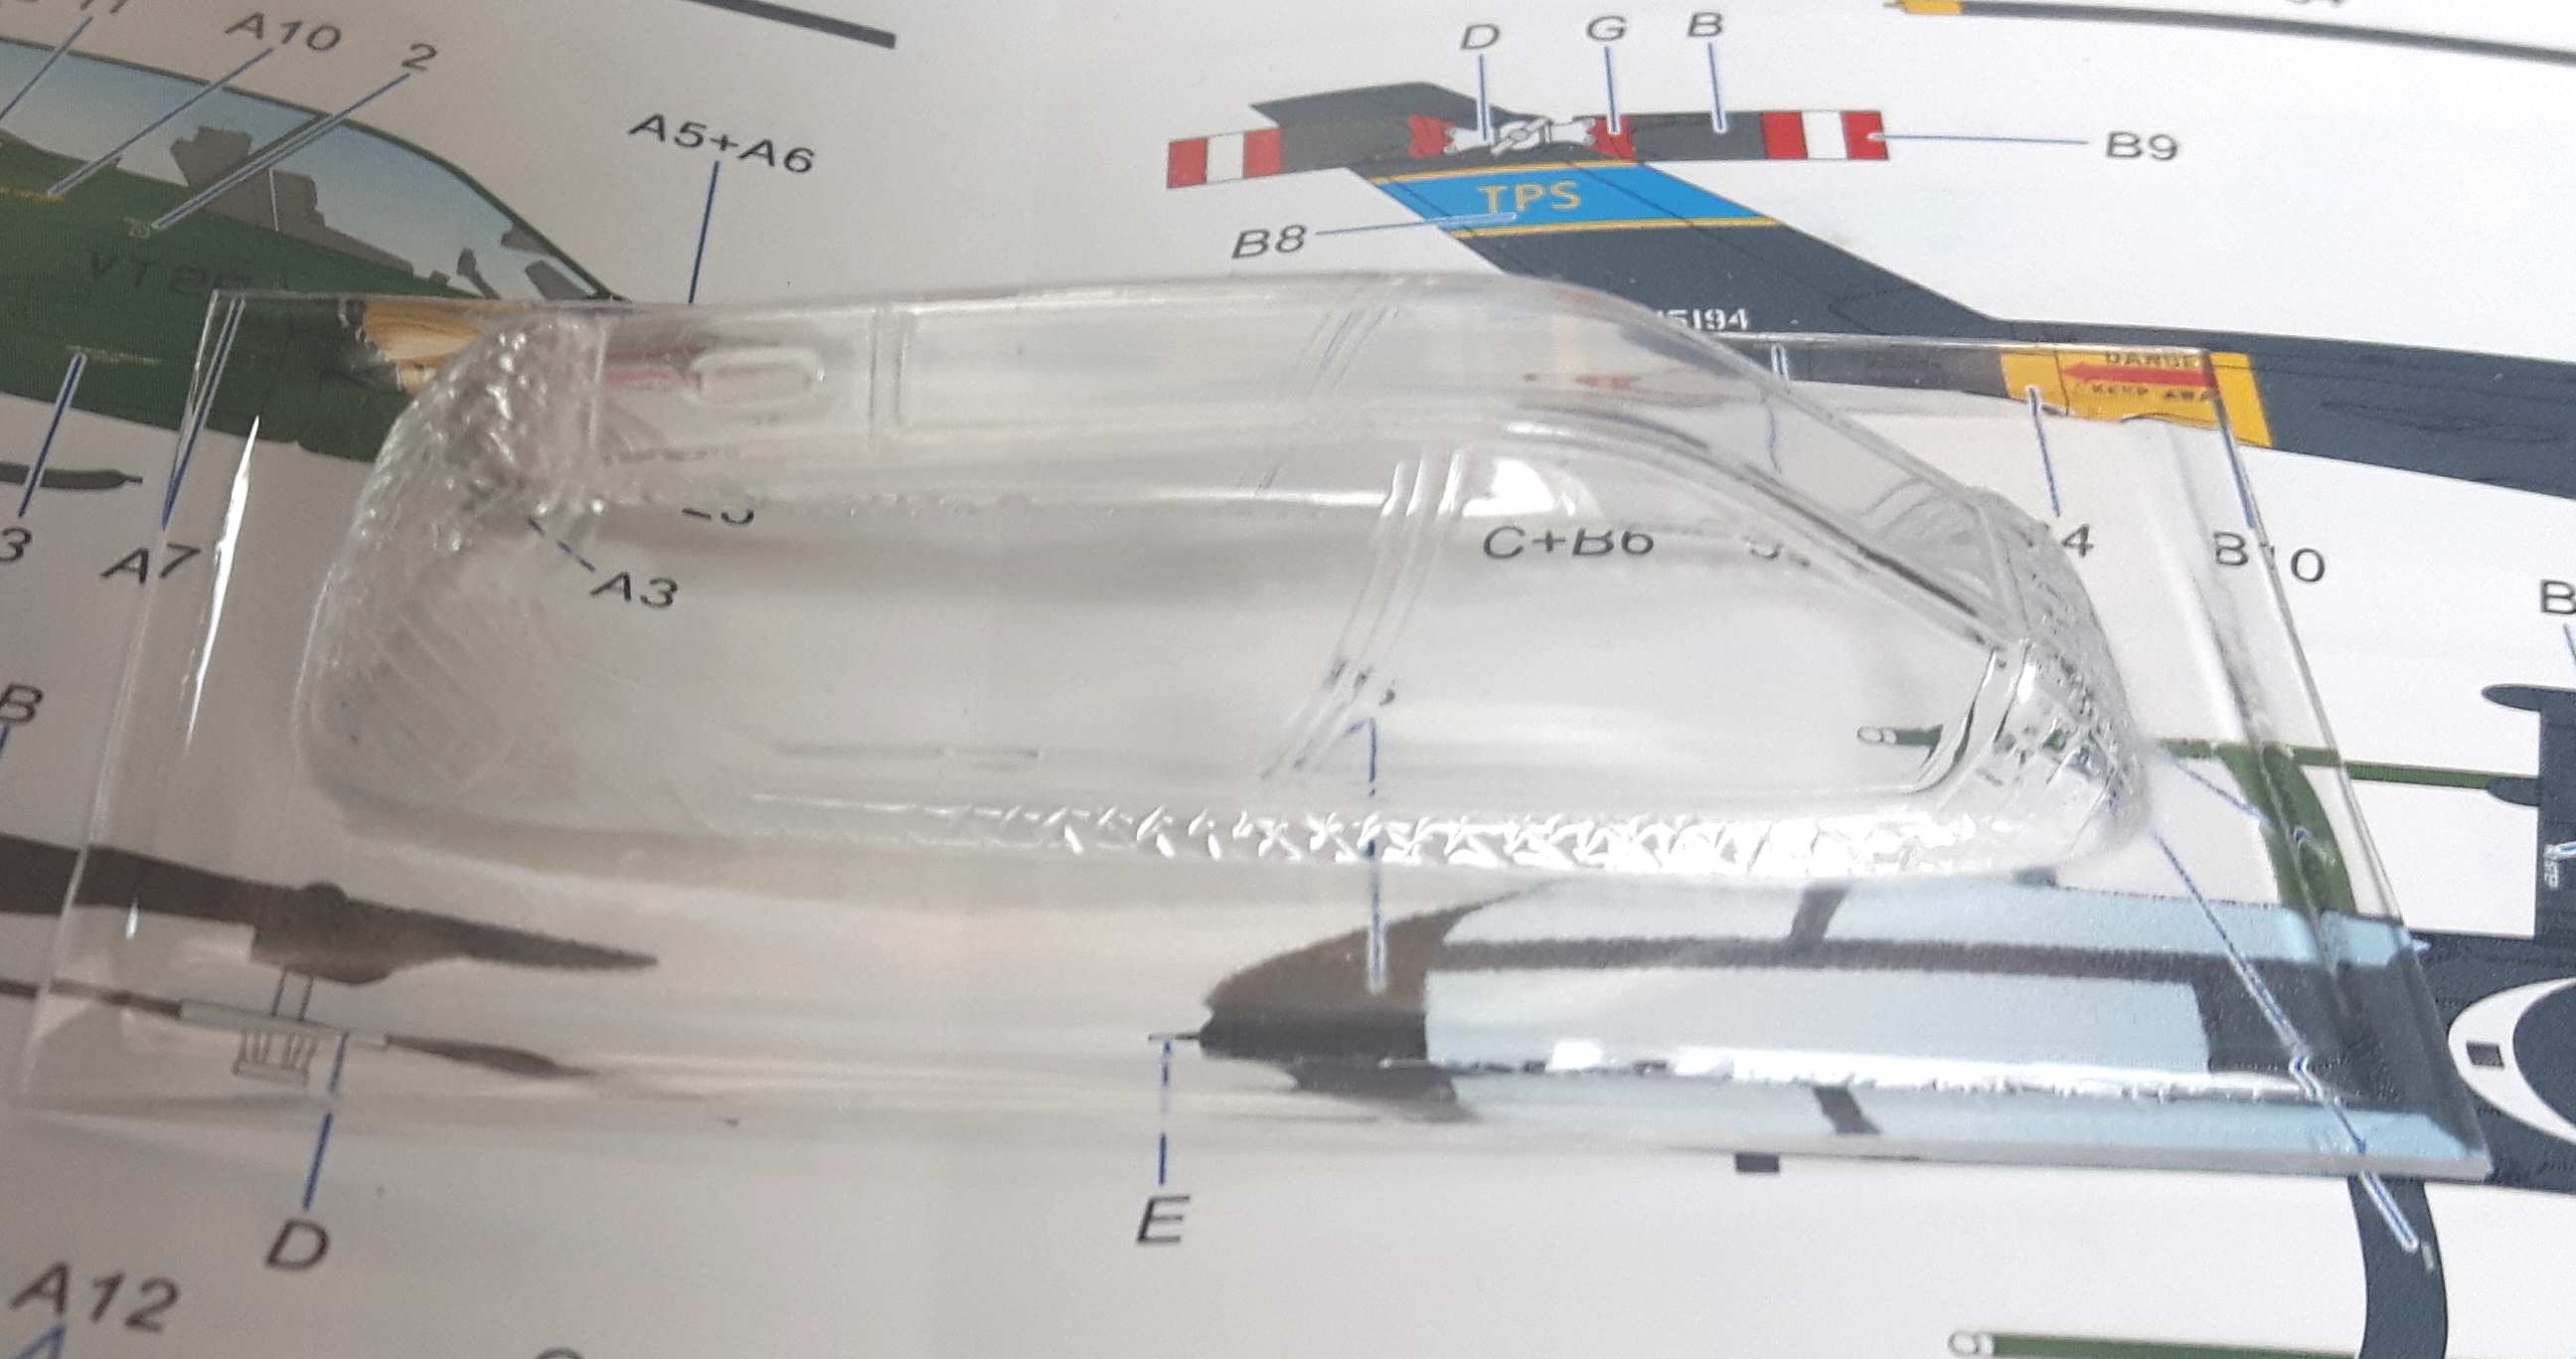
And another photo on a background that would allow you to see how transparent it is:
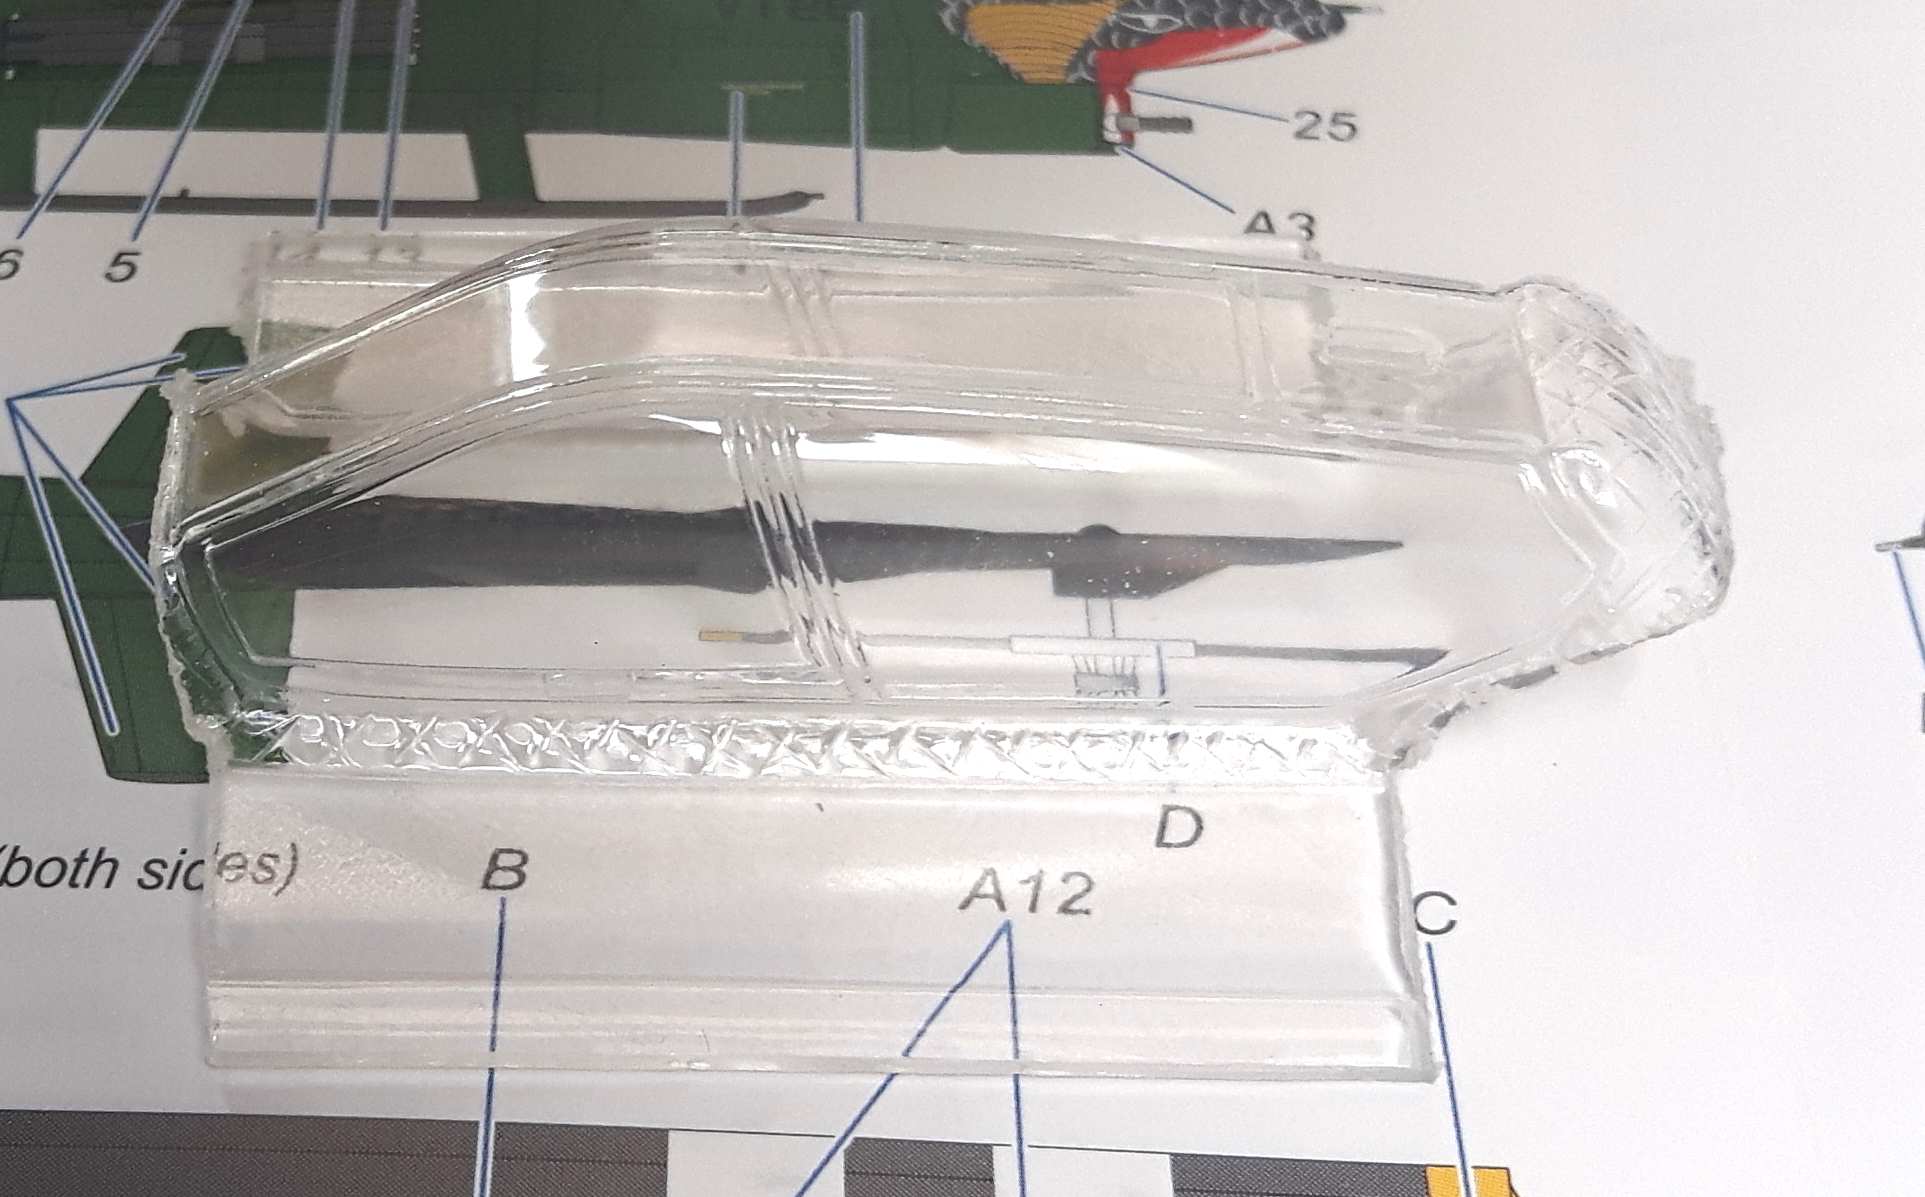
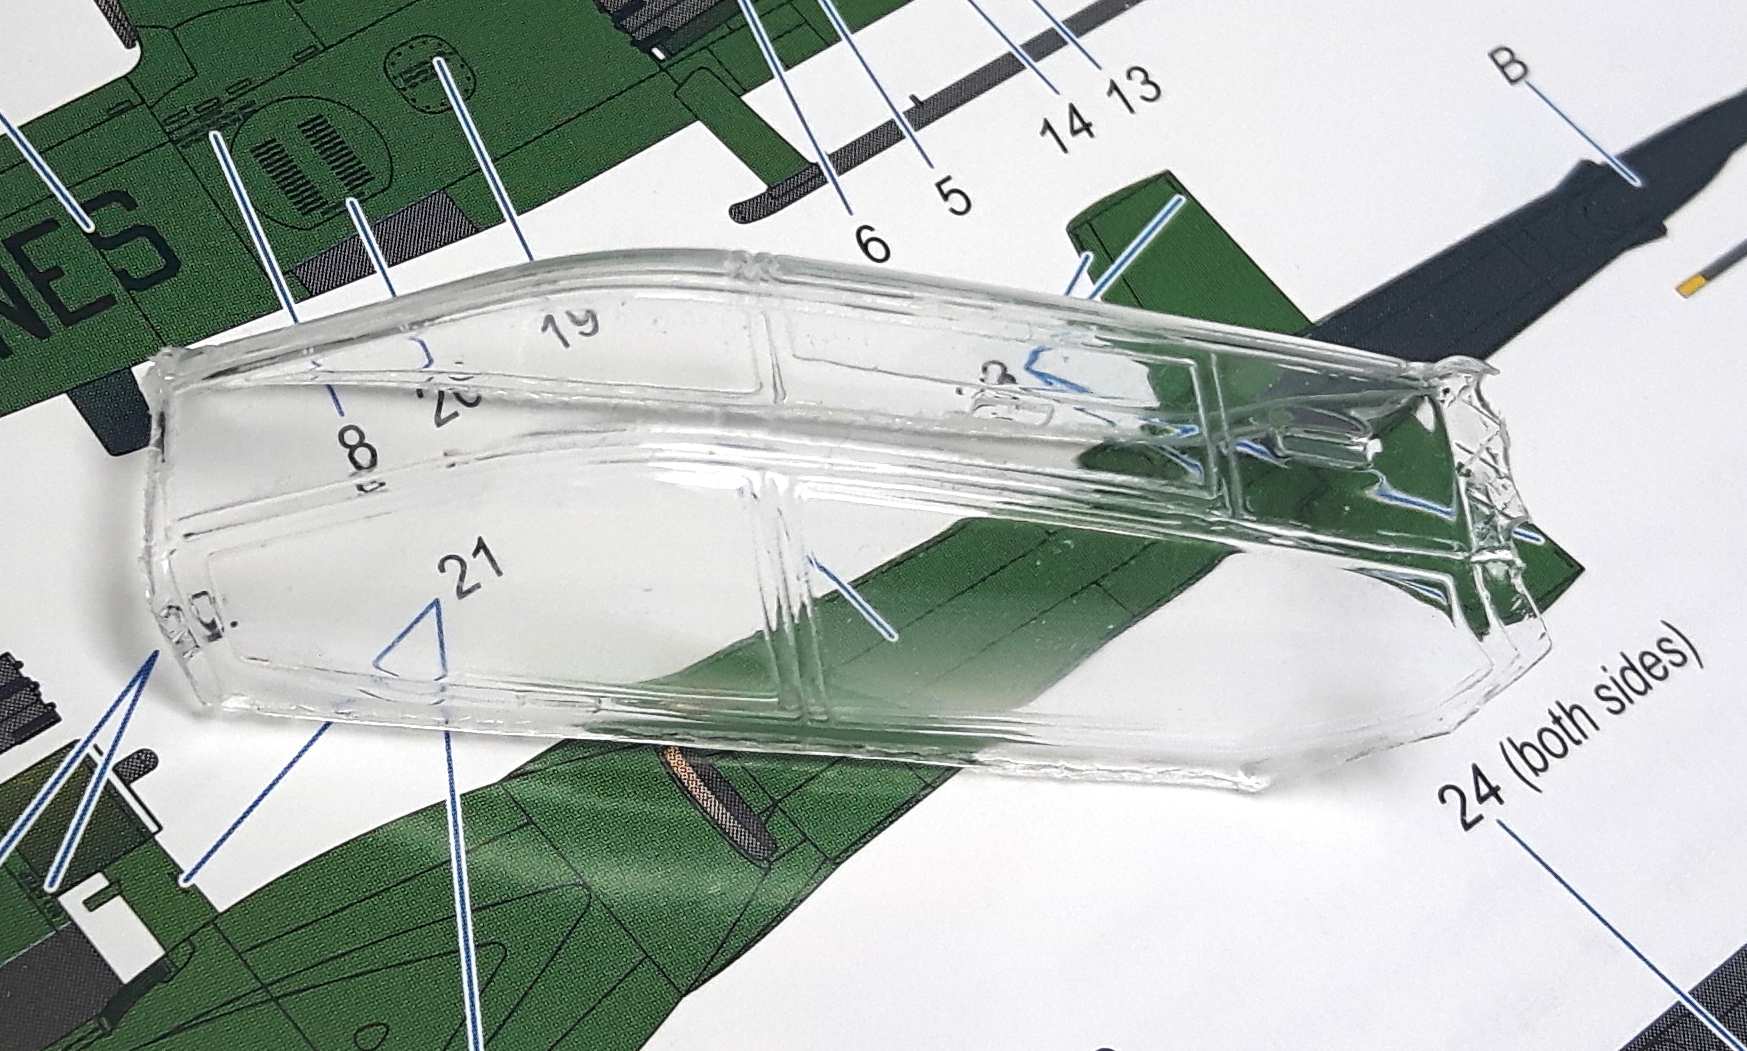
With a jeweller’s saw I have cut off the front and back first:
I hope I don’t have to stress that you have to be careful and above all make sure you don’t take out too much material…
To remove the chunk in the rear I’ve punched twosmall holes and then connected them with the outside with three short cuts:
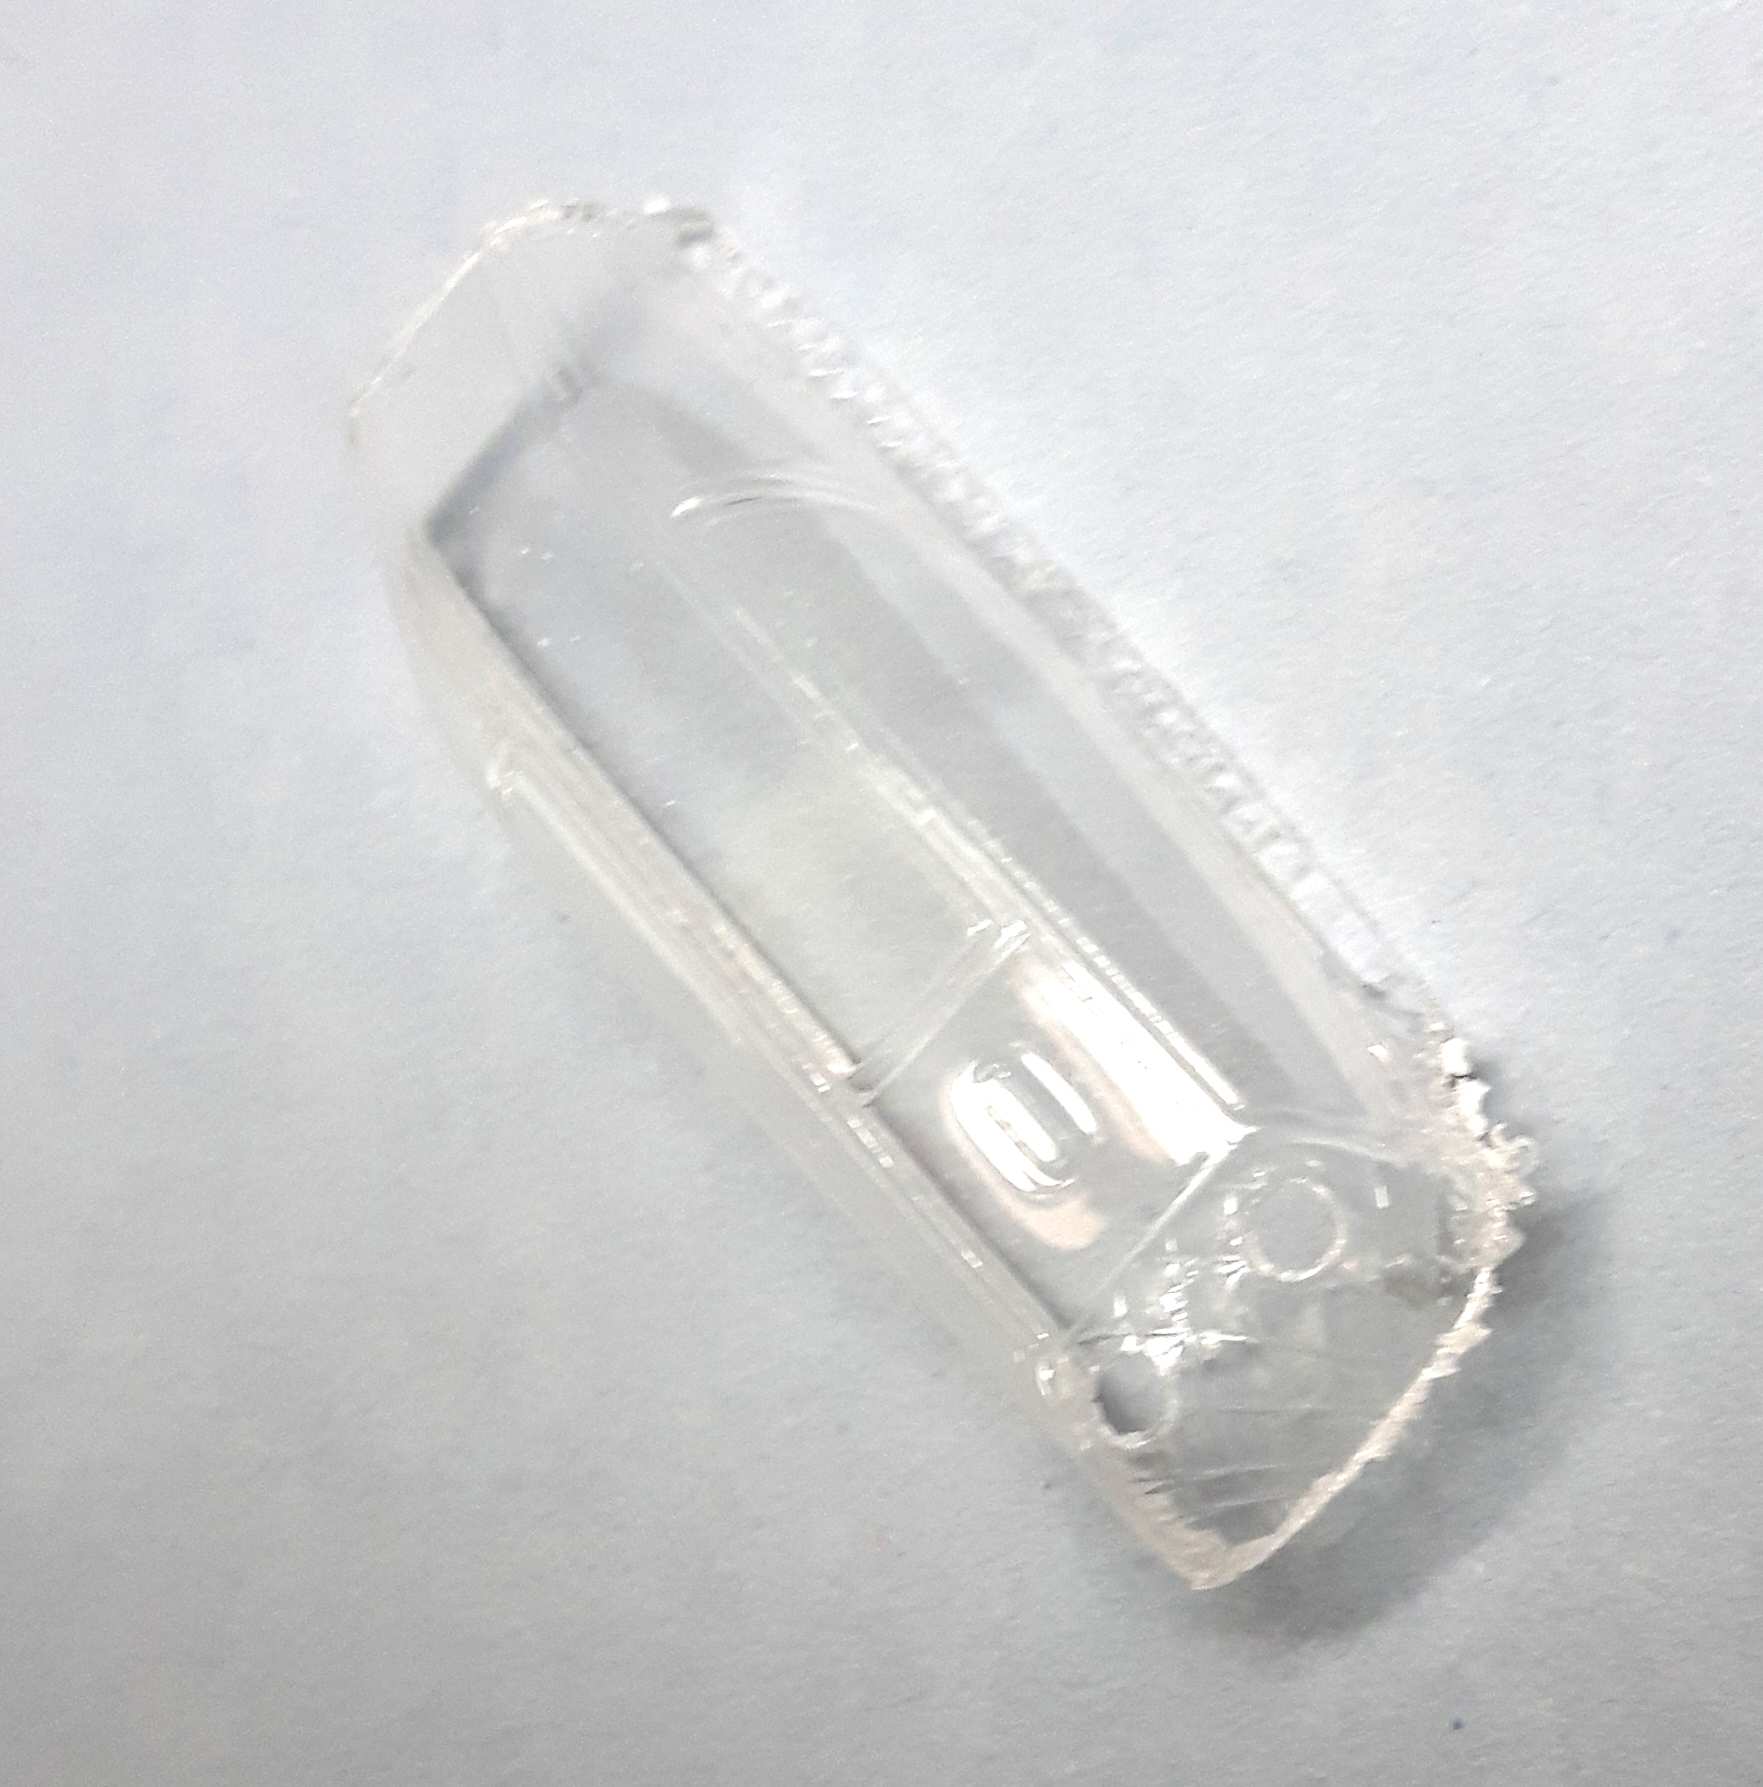
At that moment I had the canopy roughly cut out. Then I started fitting it to the fuselage and taking out smallportions where necessary:
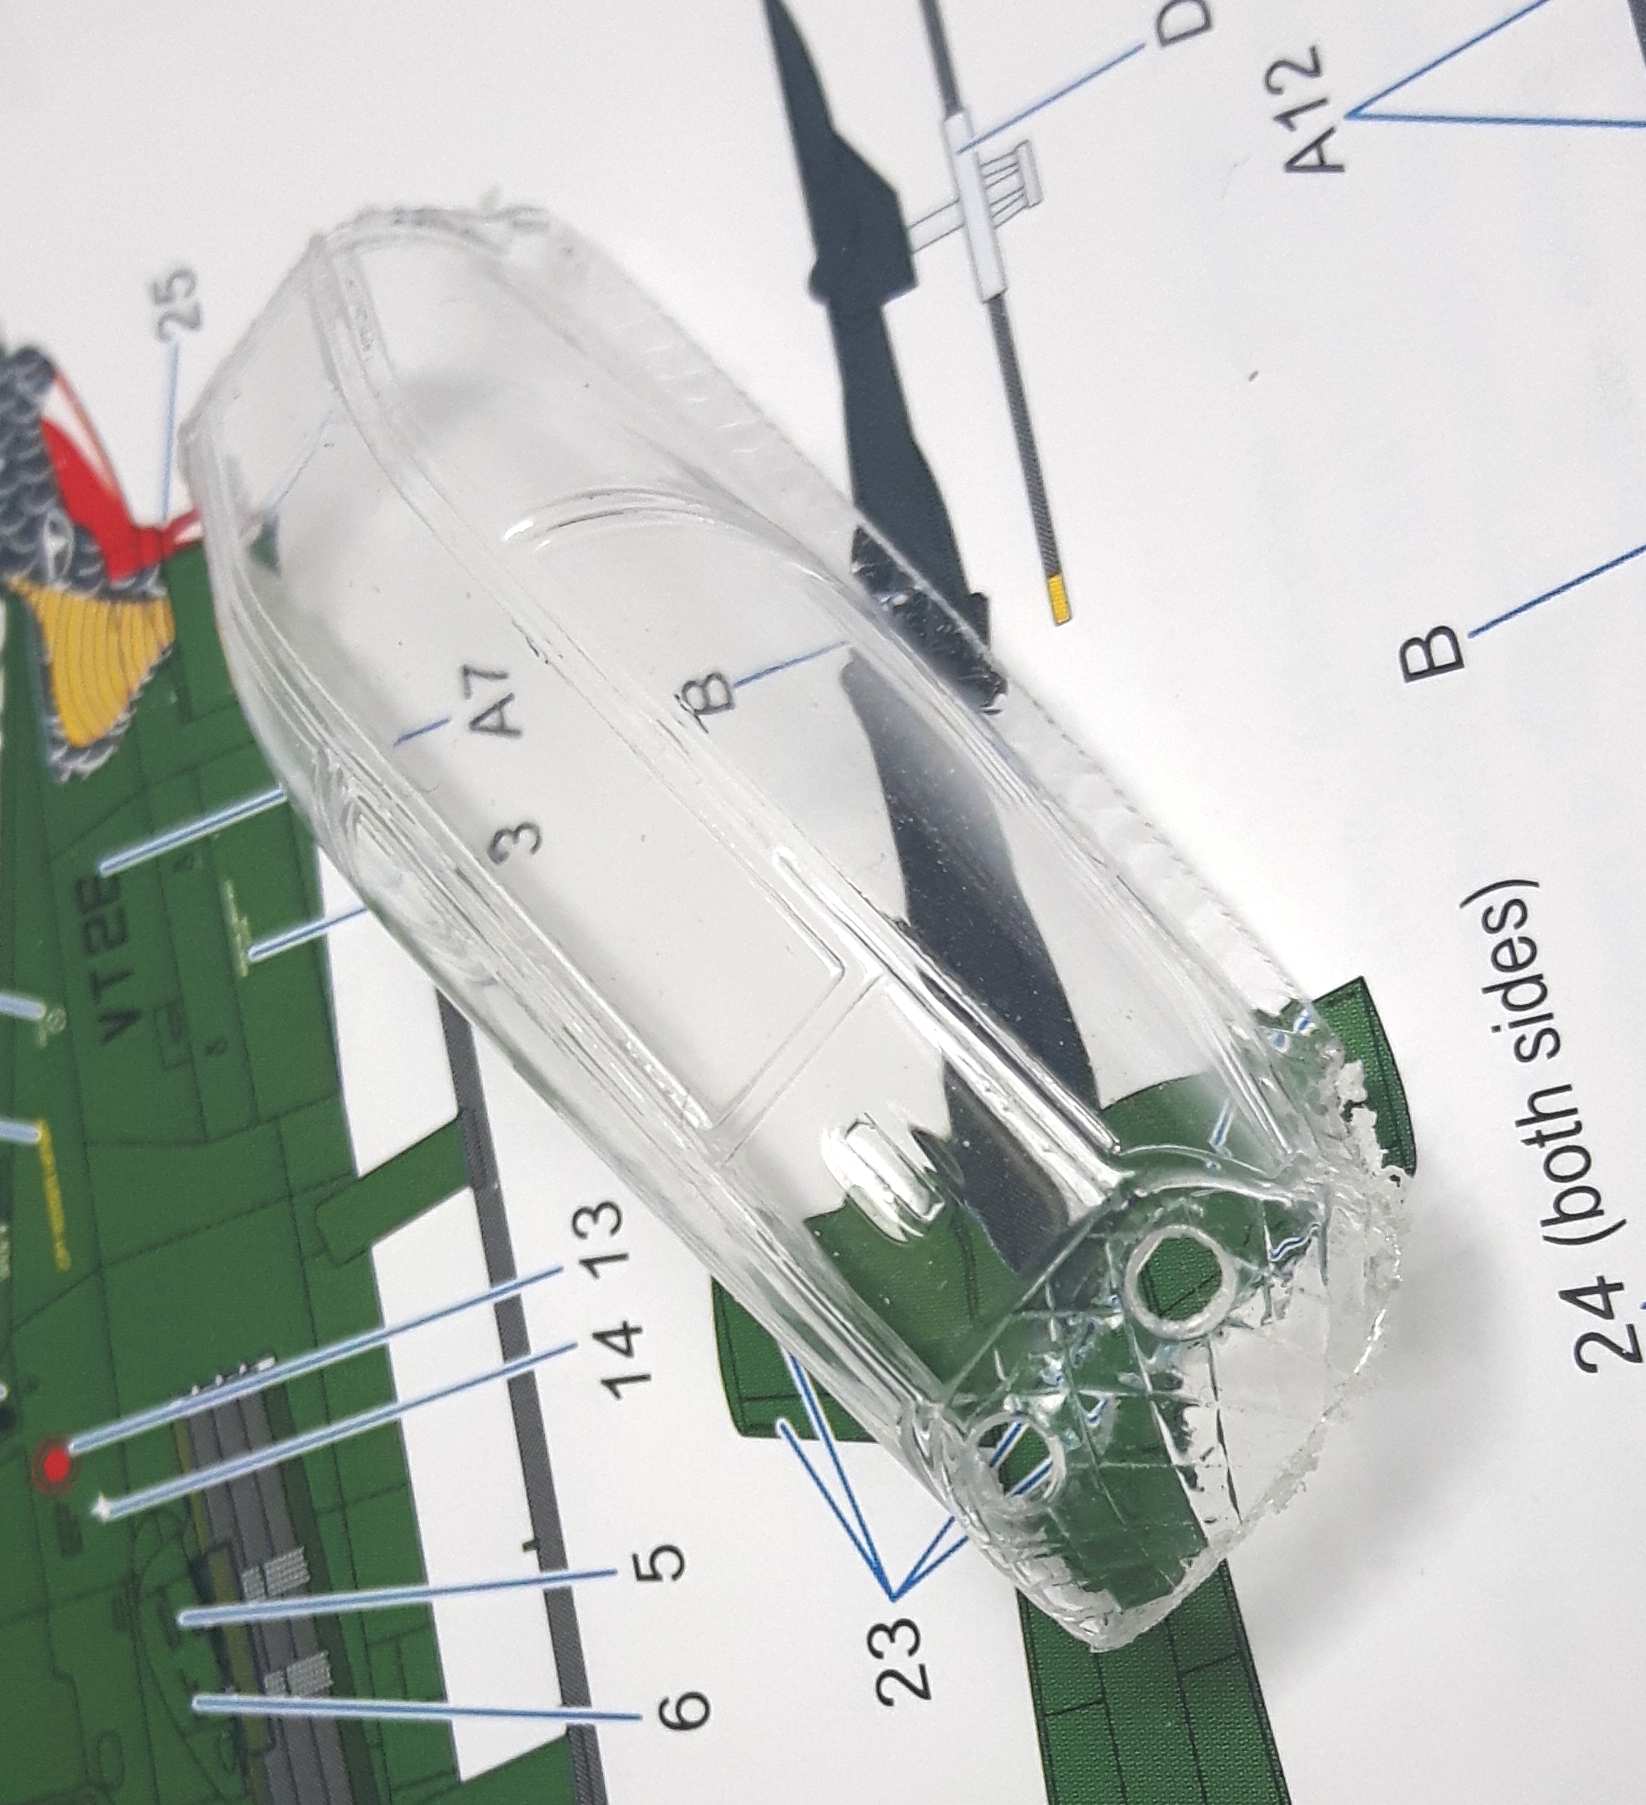
To do this I used sharp scissors (only very small cuts), sandpaper on a sanding block and fine file, and a sharp scalpel (actually only scraping material away):
This allowed me to get a dry fit like this:
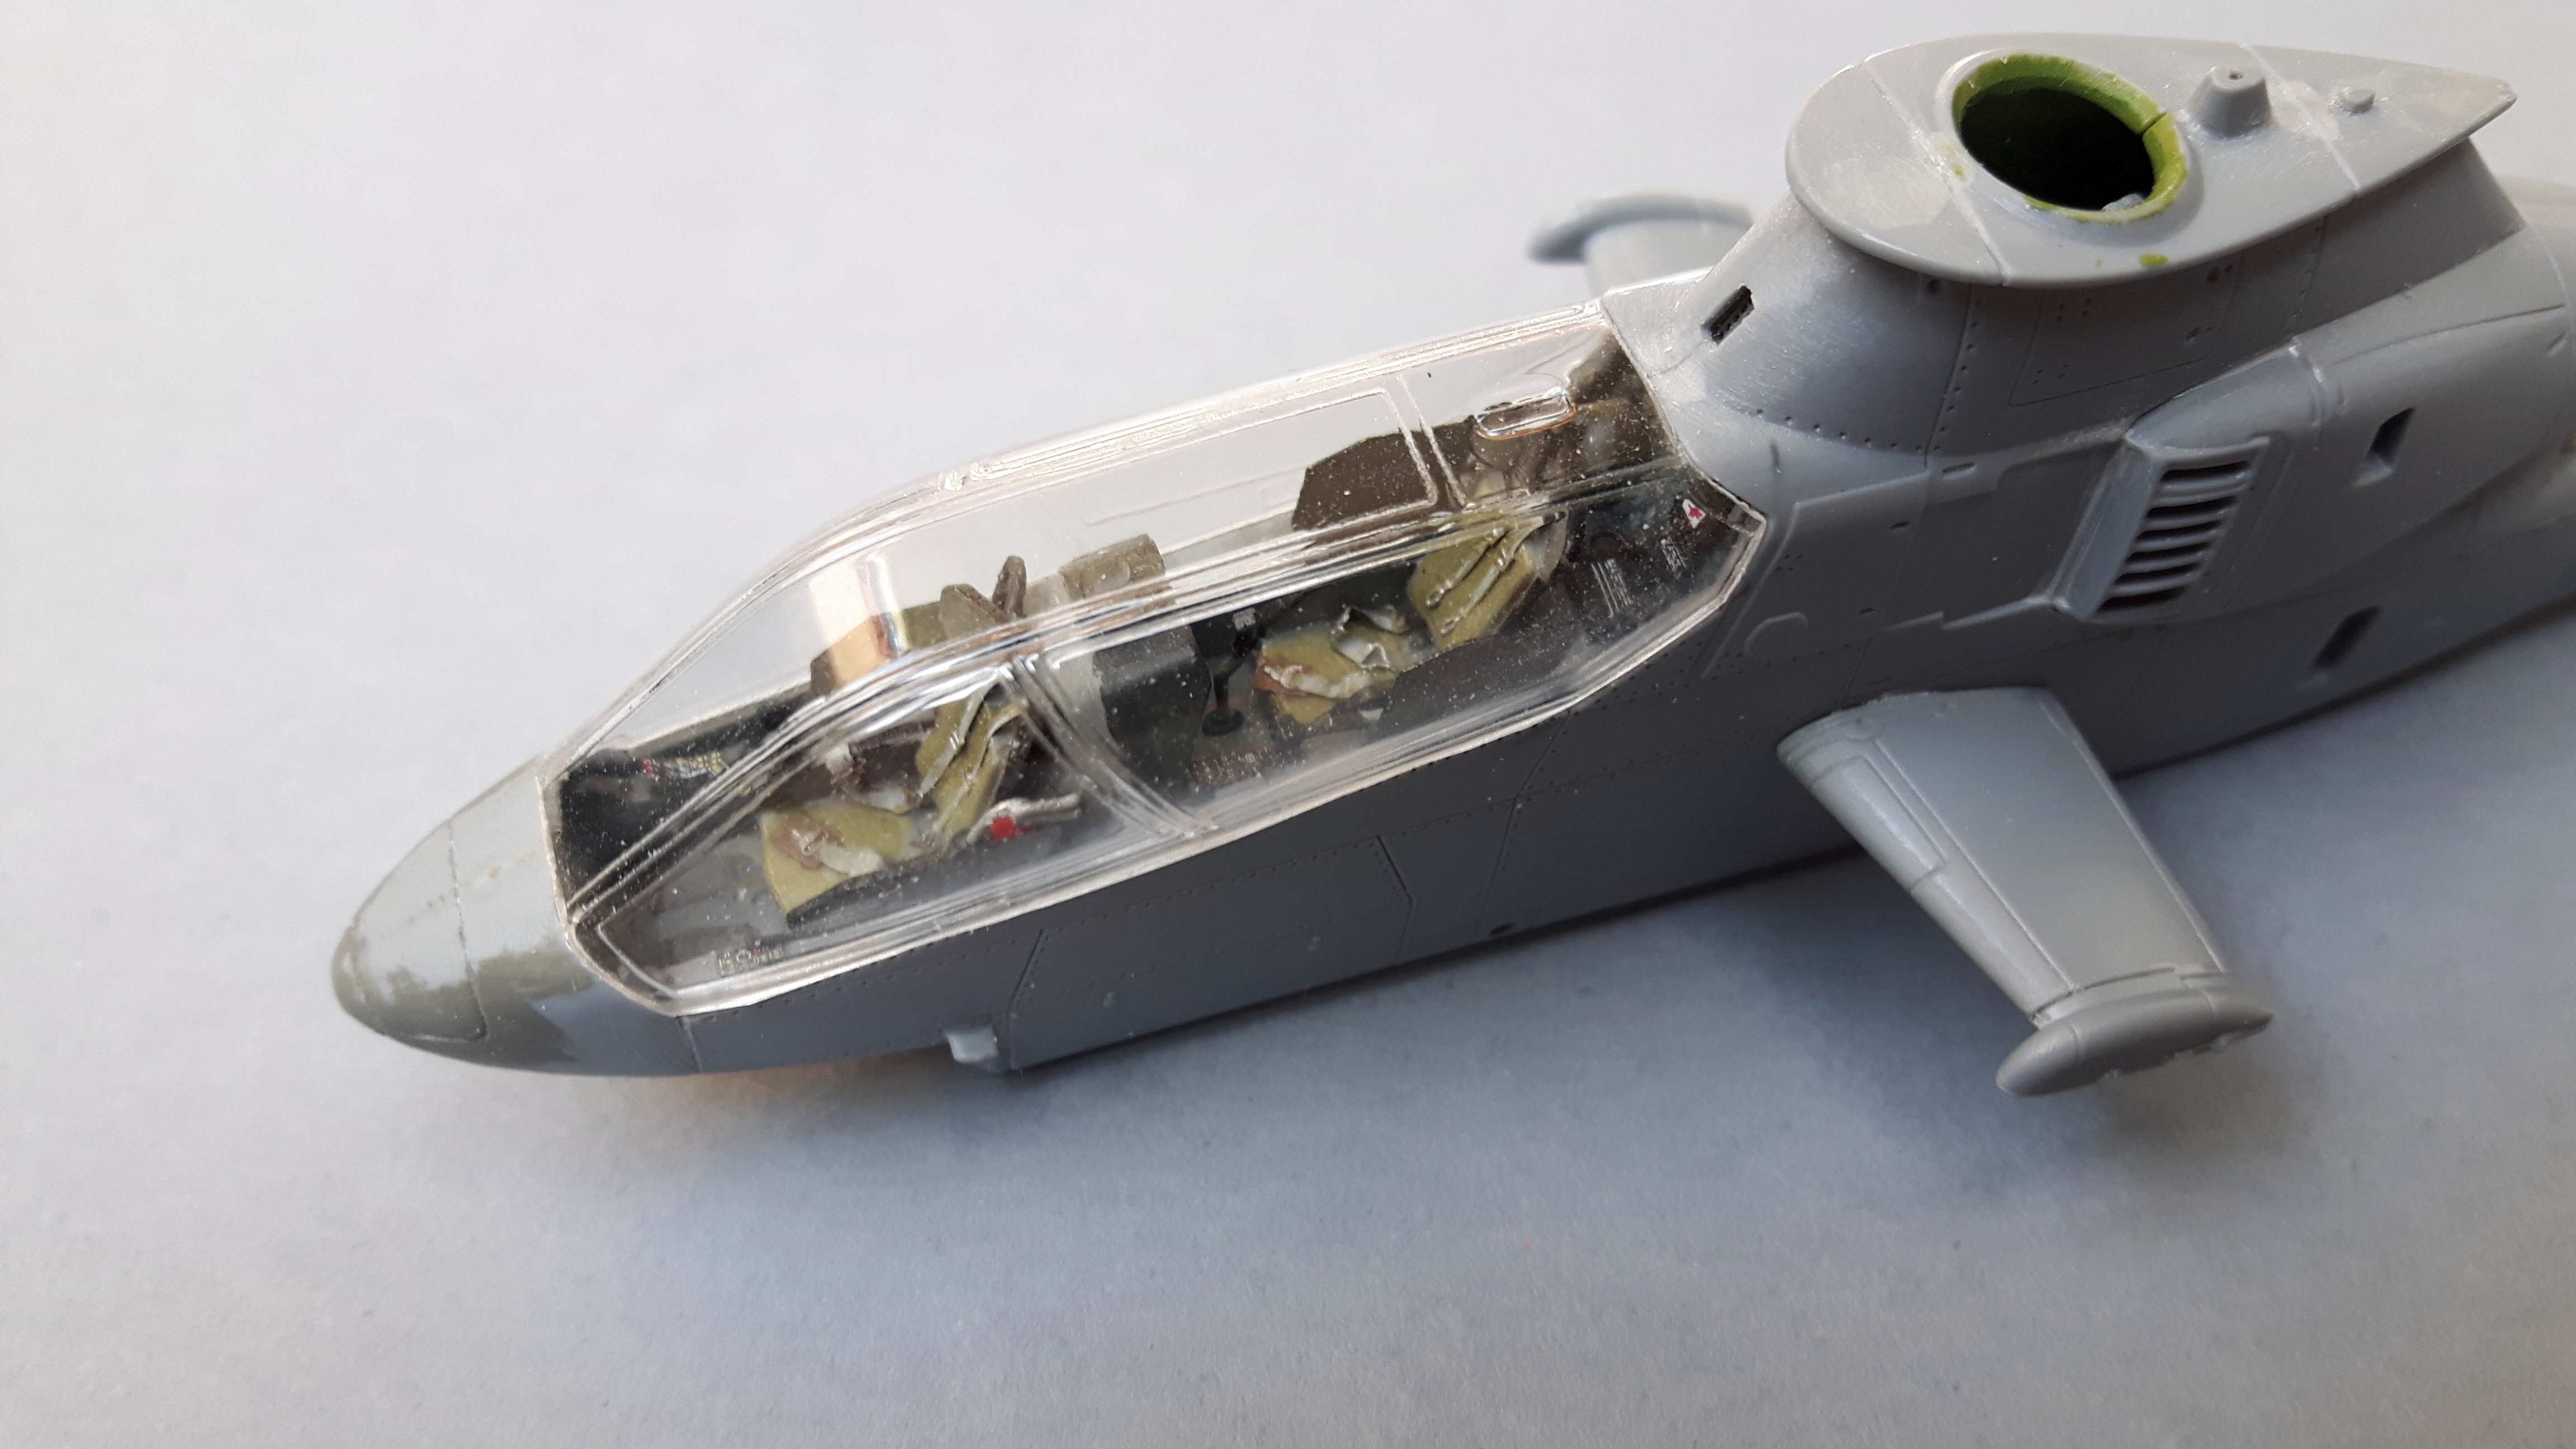
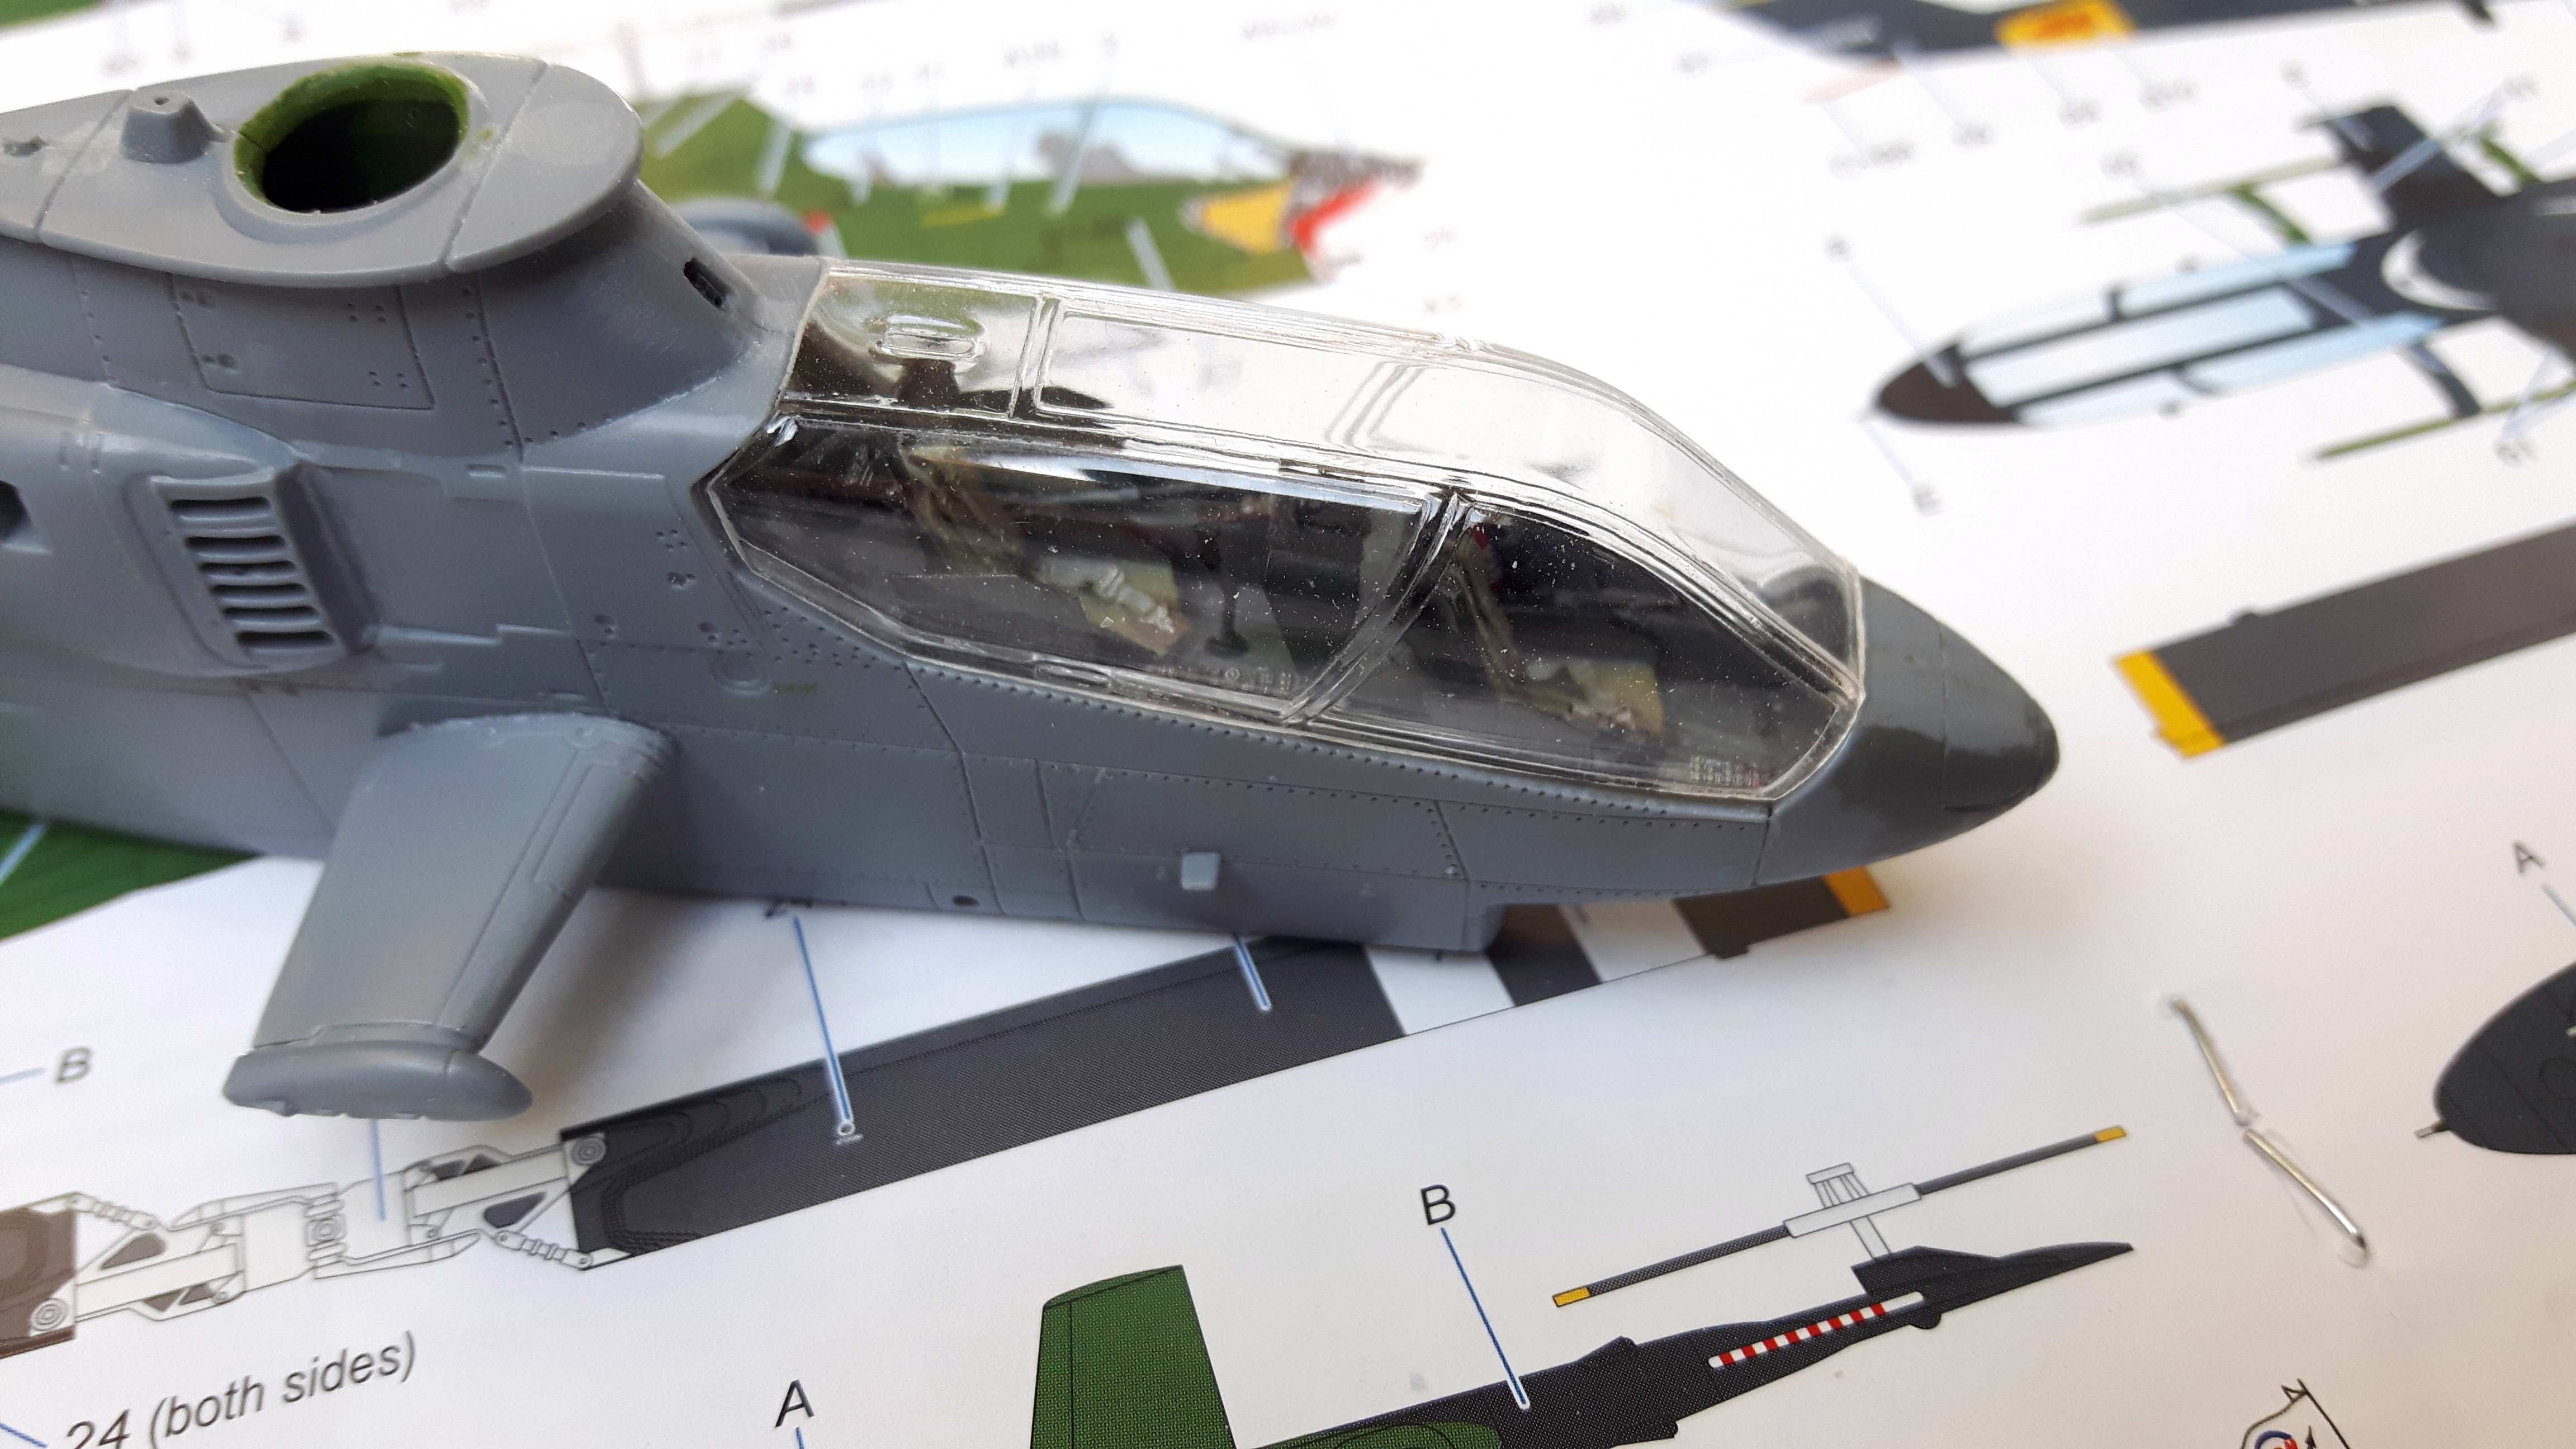
No I intend to dip the canopy in future, fully eqip the insides and close the cabin up.
Thanks for looking and have a nice day!
Paweł
Looking good. Nice job of cutting and mating the vac-formed canopy. They can be a pain to get right.

Hi Pawel, I forgot I had a drop box account so I’ll just need to figure out how to post pictures soon.
I tested attaching a drop box picture of my AH-1S(Mod). If you are able to see it, let me know. If you are able to see it, I know, it was pretty worn out, but what do you expect, its an old Vietnam war veteran, I found numerous bullet hole patches all over it.
As mentioned I used Special Hobby’s 1/72 scale M28 turret to 3D print a 1/48 scale M28 turret. It’s pretty low clearance under the turret to get a good picture and I did look through all my reference material for the underside and no luck. You might get lucky google searching for pictures of AH-1s that are on display that are elevated up in the air. There are about 75 or more at VFW posts here in the United States. Wikipedia has the listings of Cobras on display. I’ve seen some underneath M28 pictures, but can’t remember where. The AH-1G, AH-1S(Mod) and AH-1P are the only Cobras that used the M28 turret.
I got out of the US Army right before desert storm and I’m not in contact with anyone who served during Vietnam. I do know people, one was a Cobra crew chief, but I haven’t seen or talked to him in 40 years unfortunately.
I too am working on special hobby’s 1/72 kit, although it’s the AH-1S(Mod), they label it a Q which is not correct though. The Q was a development model for the TOW system and not a production standard used by active US Army units. The US Army used the S designation on all Cobras after the G until 1987 I believe and designated them P, E and F thereafter. The (Mod) stood for modified at the time and that’s what we wrote on our log pages as the model series.
Pre and post redesignations: AH-1S(Prod) = AH-1P, AH-1S(ECAS) = AH-1E, AH-1S(MC) = AH-1F. (Prod) meant production, (ECAS) meant Enhanced Cobra Armament System and (MC) meant Moderized.
What kind of primer are you planning to use? I only use Mr. Hobby Mr. Primer Surfacer 1000 on my kits from now on thinned a little with leveling thinner. I might use 500 thinned a bit more, but it absolutely smooths everything out. Depends on how much scribing and sanding I do.
One trick I use because I hate sanding and filling is to use adhesive aluminum tape especially on the tail rotor drive shaft cover. You can also make panels with the tape. Use a pounce wheel on the back side for the hinges on the right side of the tail rotor drive shaft cover, or for rivets. It works best with paper backed tape or foil. I use the same method making panels. The aluminum also works great to weather the paint for exposing bare metal. I’ll have to post some pictures of it, works great.
Tom
Nope, no pic. You have to have it on a photo hosting site like Photo Bucket, Imgur, etc… Drop Box won’t work.
Hello!
Tom - unfortunately I couldn’t see the picture at first, neither. I could post it here, but the link was destroyed by dropbox after a few hours, so looks like Gino is right here (ain’t that a nasty tendency, eh, Gino? :-).
I could folow the link, though, and eventually I’ve seen the picture. Lookin’ good, what was the serial of that machine? When I was building my AH-1F it was fascinating for me to see through how many mods those babies went through. Also, the designations had a real problem to follow those mods and at a point in time AH-1S could mean almost anything.
As for primer - I didn’t decide yet. Sometimes I use surfacer 500 from a spray can - usually for some rough surfaces. I also like Tamiya spray primer a lot, especially the white one for difficult colours. Here the colours are going to be rather dark and I’m using Humbrols, so I think I could get away with no primer at all, but I’d check the spots where I used filler with a little primer.
That trick with aluminium foil sounds interesting. A long time ago I’ve built a paper model (Ki-61 Hien) and covered it all in aluminium foil.
I’m working on the insides of the canopy now - I’d like to do the yellow outlines of the pilot and gunner doors, let’s see how this turns out.
Thanks for reading and have a nice day
Paweł
Hi Pawel,
I tried to take a lot of pictures of my Cobras when I was in the Army and so I wouldn’t forget the tail numbers and use for model building references in the future, but I can’t find or remember what the last digit of my AH-1S(Mod) serial number was. I think it was 15293, or 15294. We had 6 AH-1S(Mod) Cobras in C Company 228th AHB and we looked at the maintenace records from birth once and two of them came off the assembly line back to back as G models, served in Vietnam, were shot down same week so they were like twins that followed each other around the world and ended back up in Texas re-built as S(Mod)s. One of the twins was deemed mine, but we worked on all 6 in our company.
I do know the AH-1P I crewed was 0-22697. A picture of it is in Mike Verier’s book Cobra the attack helicopter, page 51, bottom picture. I have some really good pictures of it while we did maintenance on it in the desert.
Funny you mention the interior canopy yellow lines, I’ve skipped these on all my previous models because its such a pain in the rear to paint and was going to try cutting thin strips of left over yellow decals and give that a try. I’d like to make some custom decals for this and the canopy jettison molding on the interior canopy on the S(Mod), P, E and F versions.
I to am finishing up the interiors on Special Hobby’s 1/72 S(Mod) and 1/48 G model. I like to work on a couple kits at once. I figure if I’m building one kit, might as well build two and save painting sessions in the spray booth. ![]()
If you build another cobra after a G model and want to put the canopy jettion system in and the Helmet Sight System (HSS) in, I can share the manual drawings for these of what it looks like. My last kit I scratch built both pilot and co-pilot’s HSS rails. Every kit leaves these out. Eduards 1/48 PE for the G model has the HSS XM128 box in their kit though and used thin chrome wire for the HSS rails.
Looks like I’ll have to set up a Photo Bucket account and start positing pictures. What do you use posting pictures in the forum?
Thanks,
Tom
Hello Tom!
Thanks for the serial numbers, I’ll try to look 'em up browsing Vietnam photos, like I wrote I find it fascinating how those snakes changed over all the years.
Cutting strips of decal is my go-to method for working inside the canopy (and not only for that), but my take on it is I take leftover clear decal film and paint a portion of it the colour I need, then I cut thin strips (or other shapes) and apply them where needed.
I also work on two or three kits at a time - sometimes it’s the same type (like I did building my Loaches), most of the time something completely different to be able to take a break from one model to another.
Detail pictures or drawing s are always welcome, at least in my threads - but the G cobra used the pantograph sight, right?
What do I use for posting pictures? As it happens I’m renting a server that I use for hosting my web page, and I also use to store my pictures where I can link to. Please check out that web page: www.vietnam.net.pl - go to “Exhibits” to see my Vietnam era models.
Looking forward to seeing the pictures of your models - Have a nice day
Paweł
Hello!
As usual with me it took a long time, but I have finally outfitted the insides of the canopy. I made the framing with a clear decal that was painted first, then cut to stripes of the right width - the gray ones are about 1,5mm wide, the yellow ones are about 0,7mm wide. I have also added the door handles with 0,5mm wire put through holes drilled in the canopy. I have also added some details from the MPM PE sheet - those were glued with white glue. Amont them are the canopy release handles Tom mentioned - those are extremely tiny, hard to see even in those brutal close-ups. I think it’s time for the photos now:
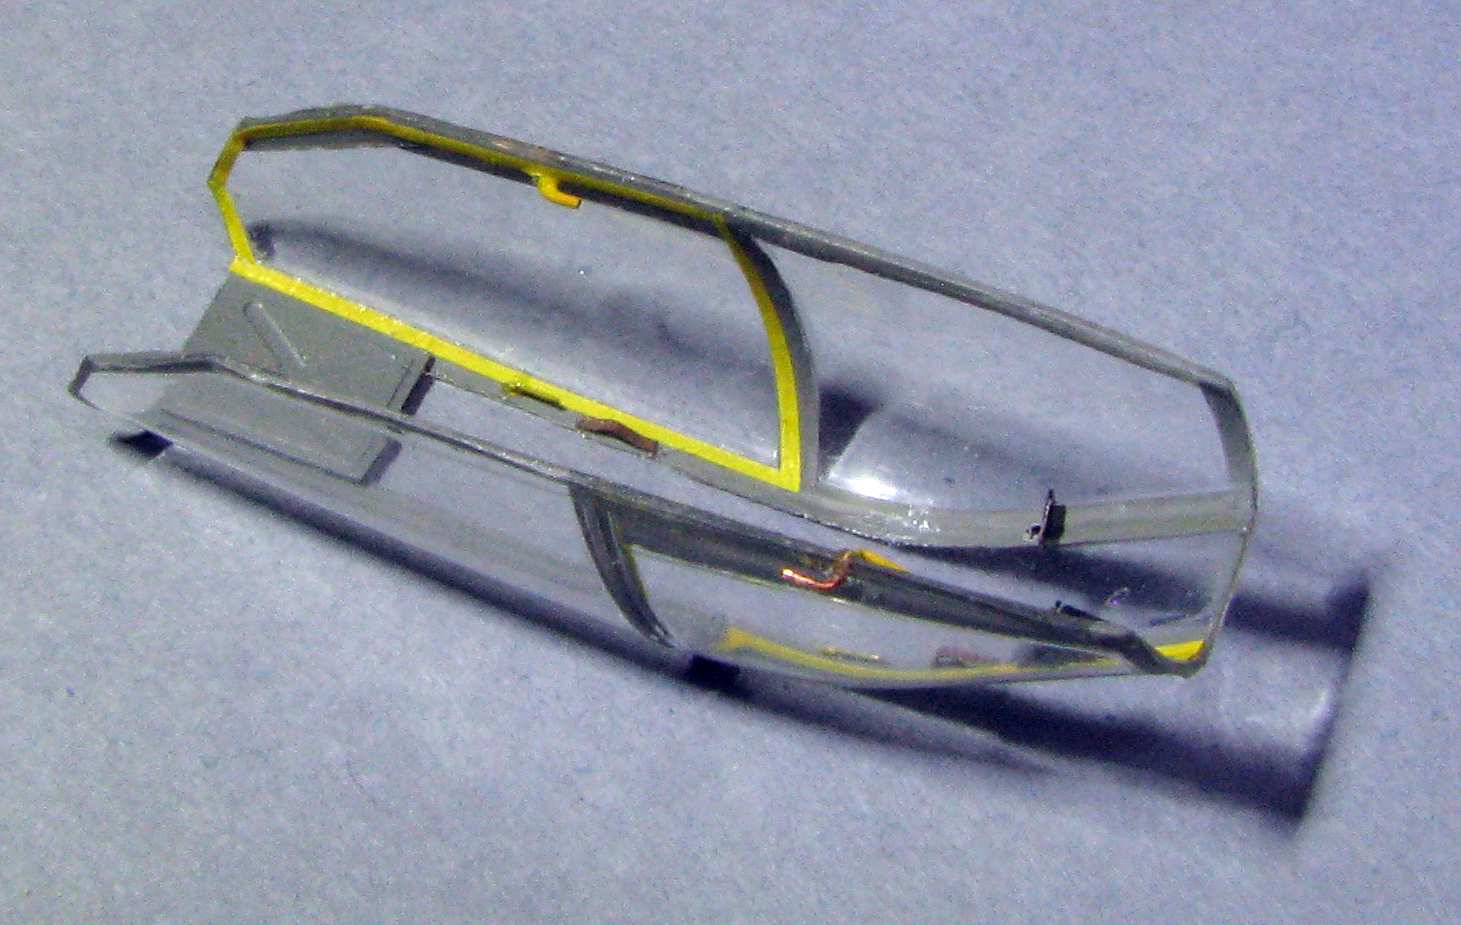

I think it’s about time to close the cabin up - thanks for looking and have a nice day
Paweł
Nice job on the canopy. It looks great.
Hi Pawel,
Looks pretty good. Now I wished I put put yellow strips on my interior canopy myself but I already scratch built and installed the helmet sight system (HSS) rails and cables on the interior side of the top canopy. The AH-1S(Mod) had a black interior so the yellow border would have really popped against the black interior. I’m doing canopy doors open to to match my 1/48 scale kit I just finished. I think I’ll do the yellow strips on my 1/48 AH-1G though , I’m almost done with the cockpit and canopy pieces are primed and interior painted already so I probably get to that this weekend.
The vaccum form canopy looks good to. I’ve always wished kit manufactures would just inject the frame and make thin vaccum formed clear pieces instead of injecting one big thick piece, but thats wishful thinking, unless I made my own kits. ![]()
Oh, I was going to tell you, I confirmed what the serial number was of my AH-1S(Mod) cobra was. I was looking at some of my Army pictures for interior references for color and wear patterns and I had my magnifying headset on and low and behold the radio call sign placard was visable in a shadow on the instument panel on the left side. It was serial number 15641, built in 1967 and I searched google and found out was in the 7/17 calvary, C Troop, 1st Calvary division. Sure enough the two brothers I told you about S/N 15642 was also in the 7/17 Cav C Troop in Vietnam. I also googled another serial number 68-15139 I took at Fort Eustis Virgina training and it’s one of the famous Cobras “Squatter Swatter”, apparently there were two named that. Microscale makes decals for it but I can’t find them on e-bay so I might just make them.
Sorry to chatter on, I was going to ask you about your vaccum form canopy and how you made it?
I also looked at the US Army Painting and Marking manual TM 55-1500-345-23 for the interior yellow strips on both doors for the AH-1 and the spec says they are 0.5 inches wide and the color is FS33538. It looks like a standard insignia yellow for color.
1/72 Scale= (0.007 inches/0.176 mm) wide.
1/48 Scale = (0.010 inches/0.026 mm) wide.
A couple quick notes with the Special Hobby G kit before you paint the exterior, remove and fill the pitot tube port on the upper left side of the rotor tower. The G model’s pitot tube was on the nose and wasn’t moved to the rotor tower until the TSU for the TOW missiles was mounted on the nose on all models after the G series. The G series also had 2 options for the landing light. If you use the clear nose tip landing light, get rid of and fill the landing light on the bottom behind the M28 turret and vice versa if you use a solid nose tip, then use the landing light on the bottom behind the turret.
Also early G models deployed in Vietnam did not have Environmental Control Units (ECS) installed. This cooled down the cockpit especially in the hot environments. I’m not sure when they switched over, and/or modified old cobras, however you can easily tell if its installed or not by if there is a circular vent on the left side panel right behind the pilots canopy. No vent, no ECU if you wanted to depict a early G model, especially one with the tail rotor on the left side.
Thanks,
Tom
Hello eveybody!
Gino - thanks a lot for your kind words!
Tom - I don’t think that would work (with that vacuum inserts on an injected frame) - the edges of the glass are most critical and almost never look good. I’m an advocate for large clear parts - like on the Huey I think the entire front should be transparent, that would give us a nice Huey at last. Recently it looks like the industry is slowly getting there.
By the way, like I wrote - the vacu canopy I used here wasn’t made by me, it’s a product of a Czech company called MH Models, and I like it a lot. BUT I made a machine for making vacu canopies and I also made some - you can read about the machine here:
https://cs.finescale.com/fsm/tools_techniques_and_reference_materials/f/23/t/151922.aspx
Good info on the serial numbers - and yeah, “Squatter Swatter” is one of the more well known Vietnam Cobras.
OK, so my yellow strips are a couple of 0.1mm wider than they should be…
Good info on the variants - my Cobra will have the tail rotor on the left side, but have a solid nose tip and the landing light behind the turret. The kit doesn’t tell you to put the pitot on the rotor pylon, but I just checked - the place to mount it is really there, I will fill that and sand it flush - thanks for pointing that out!
Thanks a gain for the comments and have a nice day
Paweł
That’s impressive work, especially for that scale. Very nice.
BK
Hi Pawel,
One reason I don’t like full vacuum formed canopies, or full molded on the cobra is I like to do a canopy open version from time to time. Some kits like Italeria and Revell 1/48 scale kits mold a break line to allow this. Otherwise you need to be very careful and precise sawing out the canopy doors with full canopy molds if you want doors open. I like Special Hobby’s kits since they mold the canopy in 5 pieces and you can pick which version you want.
I experienced an issue last night with the 1/48 scale Special Hobby G model putting the canopy doors on. I’m doing a canopy closed version since I stole the canopy opening struts for my S(Mod) and as I was fitting the canopy doors on and they wouldn’t fit because the door handles interfered with the side armor plating. Either the plating is too wide, or the outside handle was molded too far aft since I matched up the inside handle at the center line positioned with the handle forward. You can get away with the co-pilot/gunner’s door position if you split the left armor plating first like it should be since this plating was two pieces and the forward piece slide inwards and aft towards the fire extinguisher. Bell split the plating to make it easier getting in and out of the cockpit even though I can’t tell you how many times I’ve still bashed my leg on that damn corner of the plating getting in and out. The pilots door interference was too unsolvable without major re-work so I had to remove the interior handles. I’ll have to remember this on my next Special Hobby Cobra kits especially canopy closed versions.
I think your interior yellow stripe width is fine. I realized the manual reference I told you is for S(Mod) series Cobras and above with black interiors. Apologies for that. Squadron’s Gunslingers in Action No.1014 pages 25 and 26 have good color photos of both door for an AH-1G and it looks like they are over 1 inch on both sides of the door seam line. The interior handles are also black and yellow striped.
If you ever build US Army single engine AH-1S(Mod), P, E or F in the future, a lot of the repair manuals are available in PDF for free at liberatedmanuals.com. Look for TM 1500-234-XX for the S(Mod) and TM 1500-236-XX for the P,E and F models. You can just search for AH-1 to see what’s available. The -XX at the end of the manual number are the types of manual for that model Cobra and there will be a -XX after that for the volume, or -XX-XX, just read the title if it’s worth to down load. Such as the wiring diagrams are not.
The 2 serial numbers I have for Squatter Swatter are 68-15139 and 16369. S/N 68-15139 was a production block 3 Cobra, converted to a S(Mod) and ended up as a training aircraft at Fort Eustis Virginia and that’s the one I have pictures of the interior. S/N 16369 pictured on Squadron’s Gunslingers No.1014 book doesn’t fit into the serial number block information I have for Vietnam Cobras. Microscale Decals no. 48-280 also has 16369 so either my production block info is wrong or the Squadron Signals book is wrong. Just a hunch, 16369 could be a OH-6A serial number based on the book saying highly decorated scout pilot Hugh Mills flew Squatter Swatter for 2 months. I can’t find any other information on this S/N.
Thanks,
Tom
Hi Pawel:
Listen, I need you to send me your address there in Poland. I want to send the funds for the “Mossie” before they are spent! Please Make sure you do not omit any info on the return address. I want it to get to you before Christmas!! Doc
Hello everybody!
It’s been some time and other projects somehow got the priority over this one… But now I’m back. One thing that bothered me about the Special Hobby kit was that the Emerson TAT turret is meant to be glued in place - this makes it harder to paint, but also makes it prone to damage should anybody want to “turn it” by the guns, so I was pondering a way to make the turret movable, but also removable for painting. Initially I thought about using a polycap, but then it dawned on me there’s a cooler option - LEGOs! And so I’ve located a damaged LEGO axle and a surplus wheel:
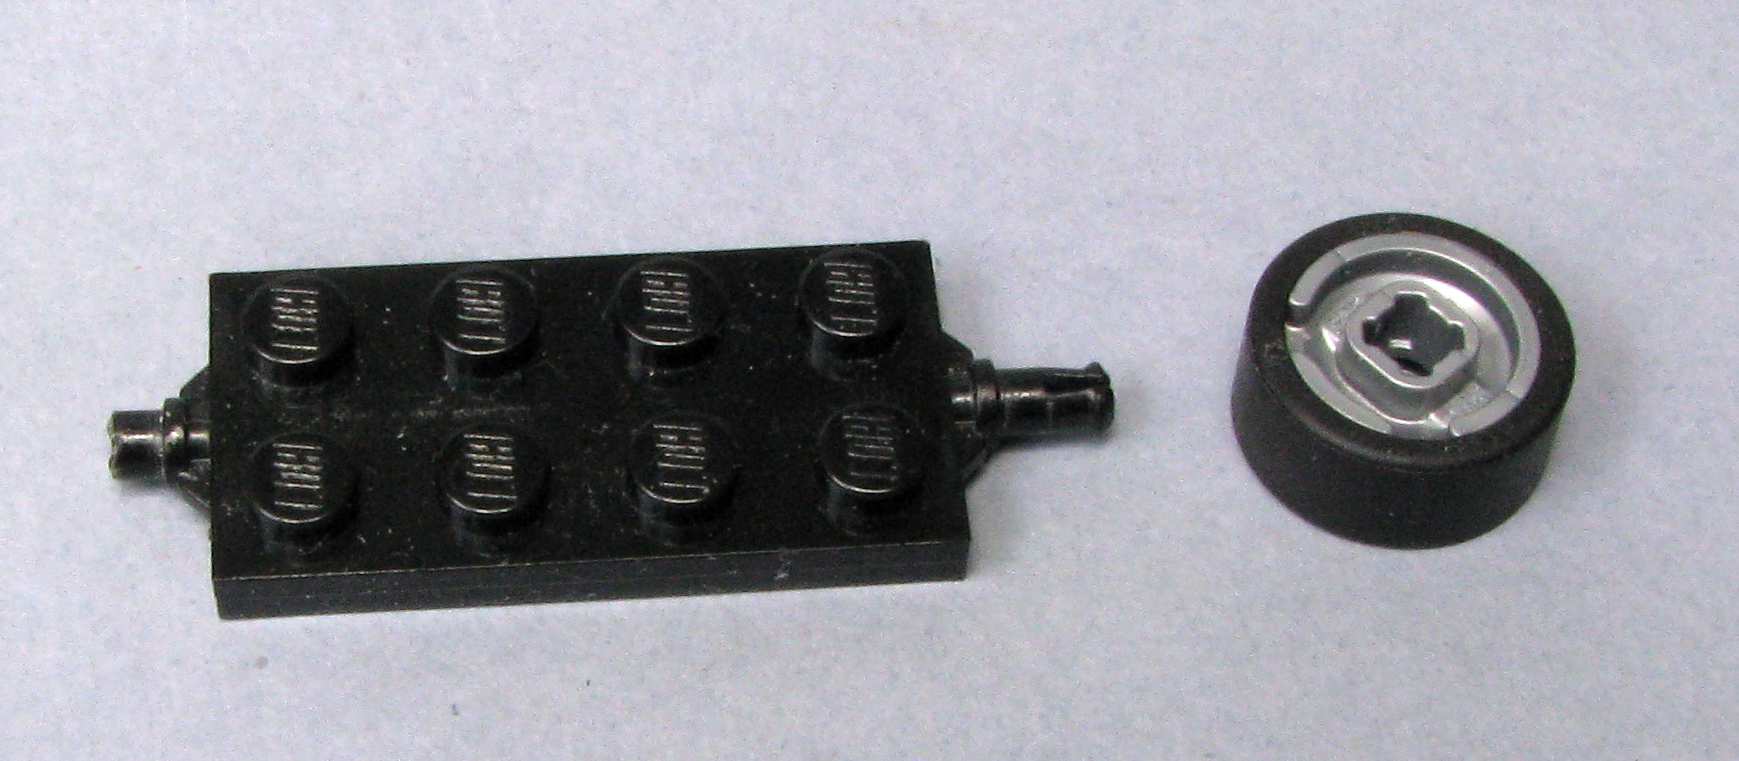
I have cut out the axle stub, filed it round and installed it in a hole drilled in the nose bottom. I have also removed the tire from the wheel and I have cut it down so that it fits inside the turret:
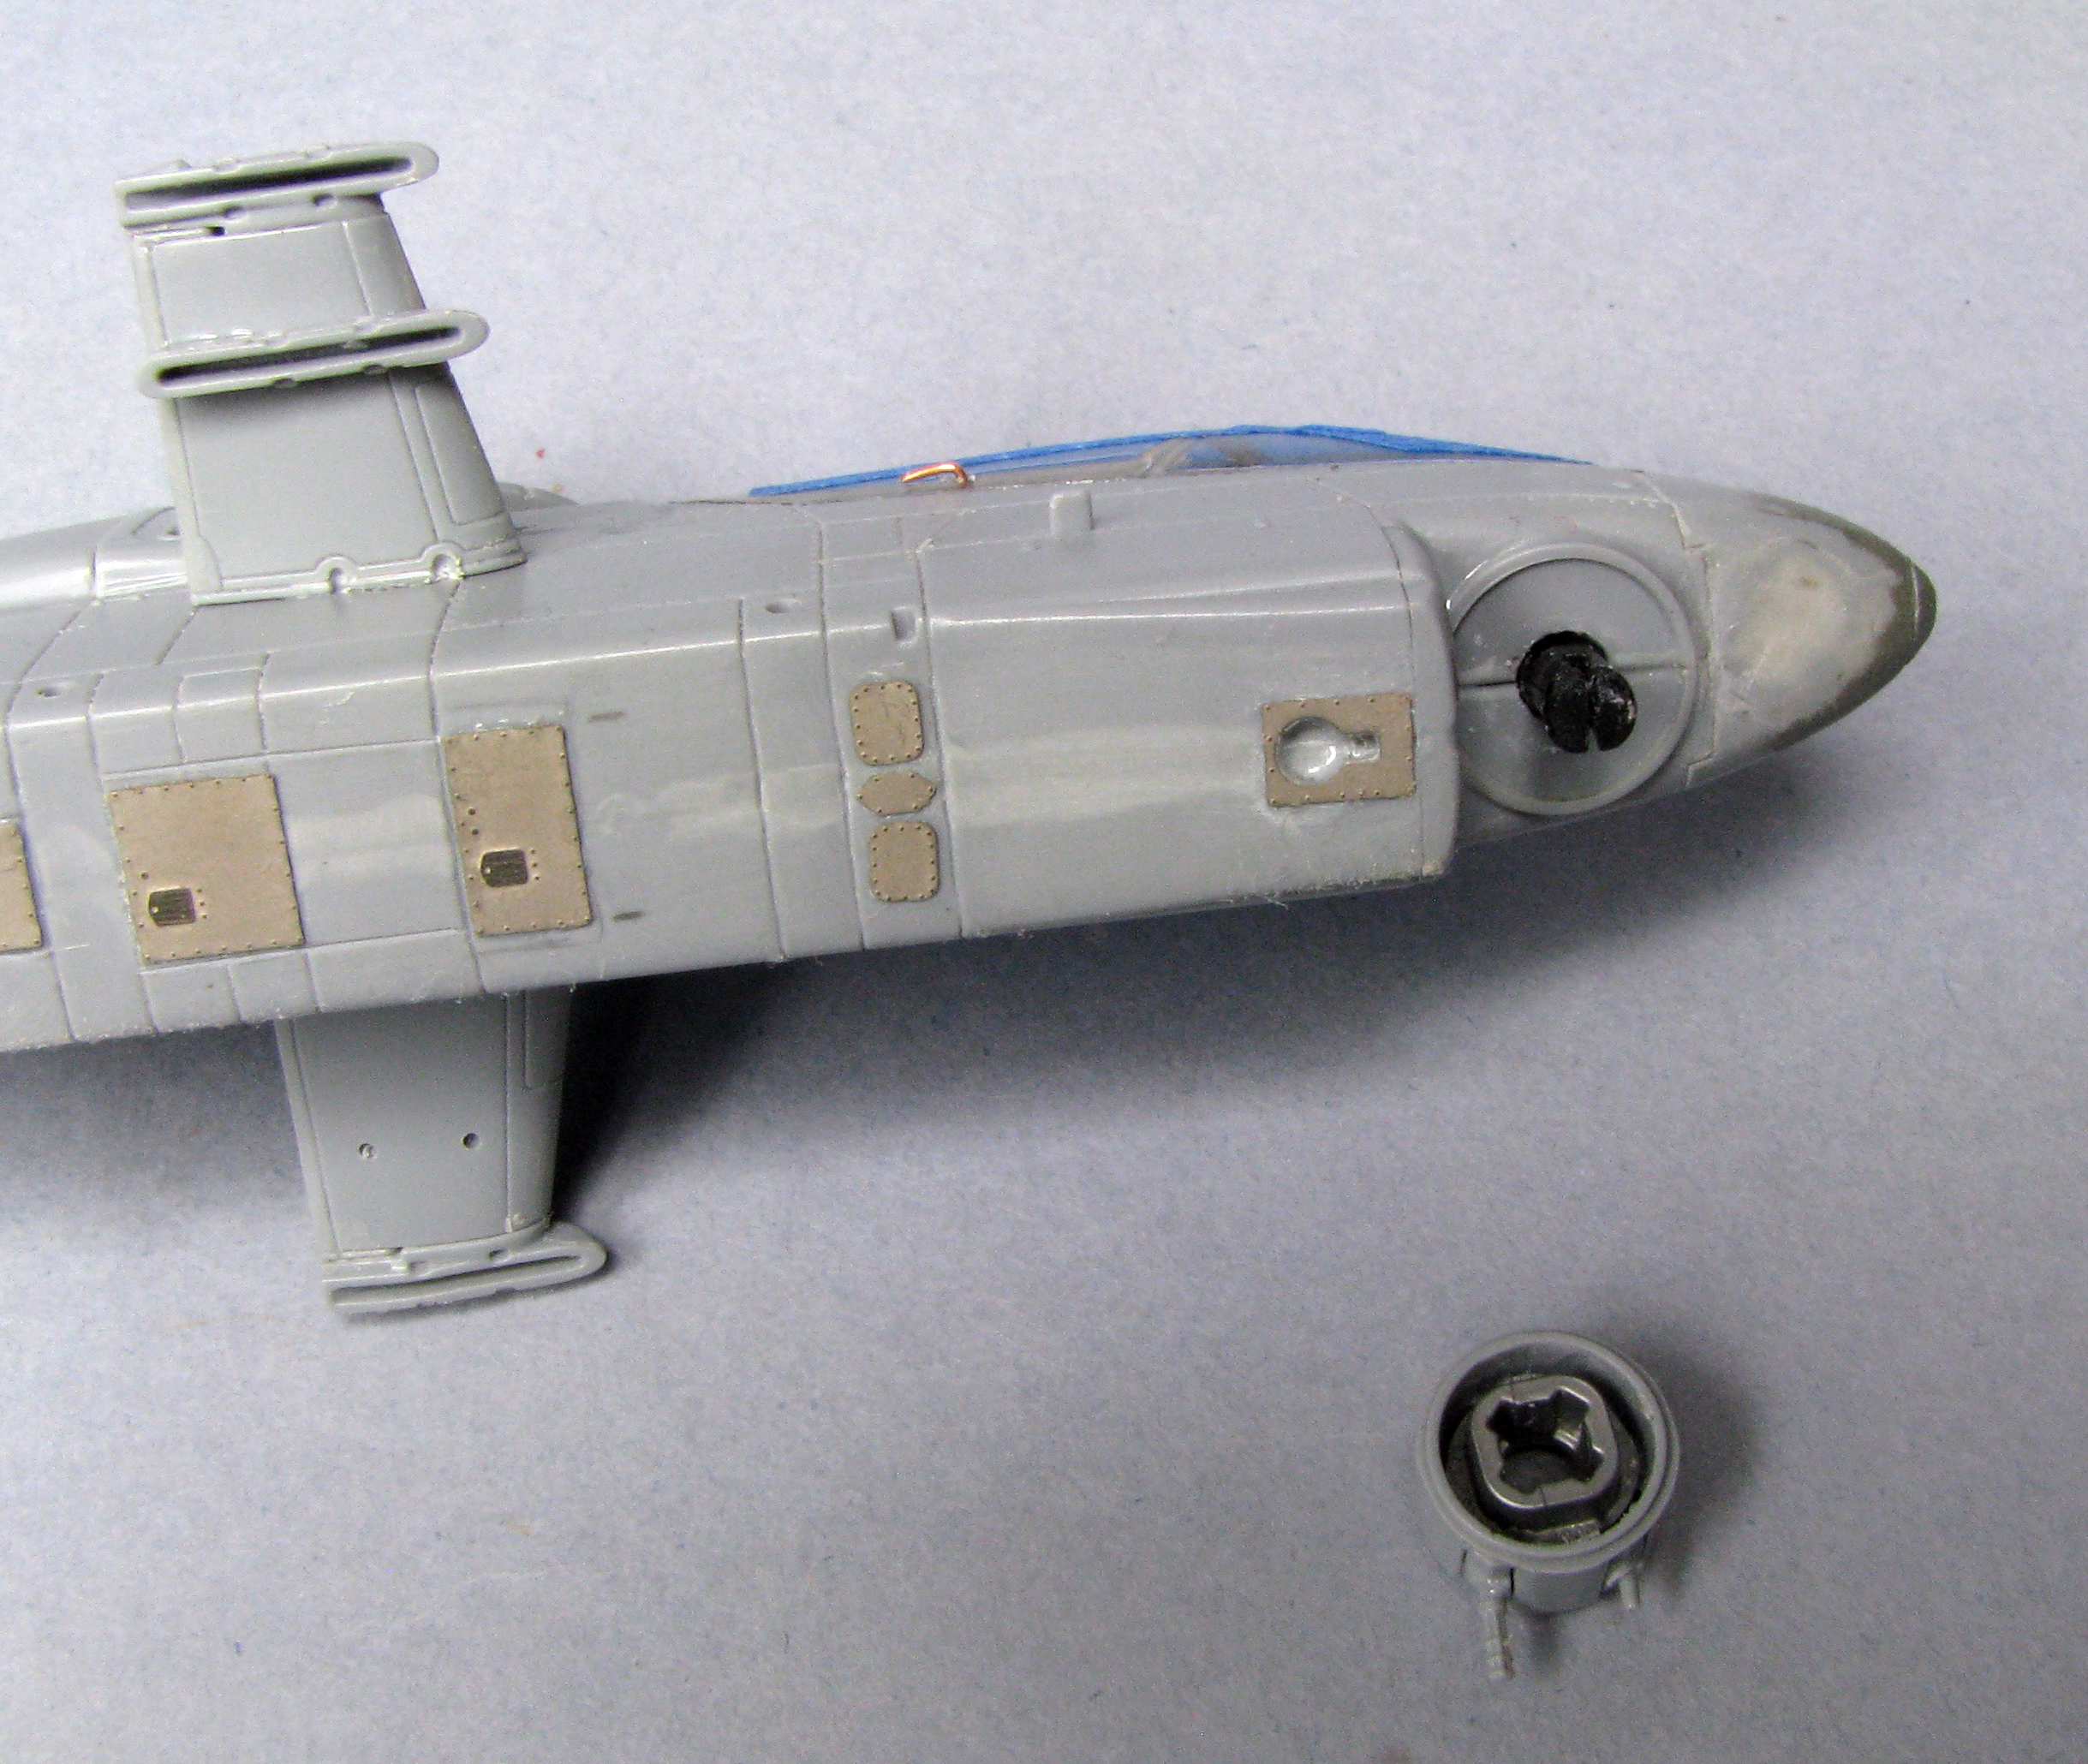
The whole affair fits nicely and can be rotated and removed for painting:
I hope to get on with building it now - most of the things are actually done, it’s mainly paint and decals now, so let’s see… Thanks for looking and have a nice day
Paweł