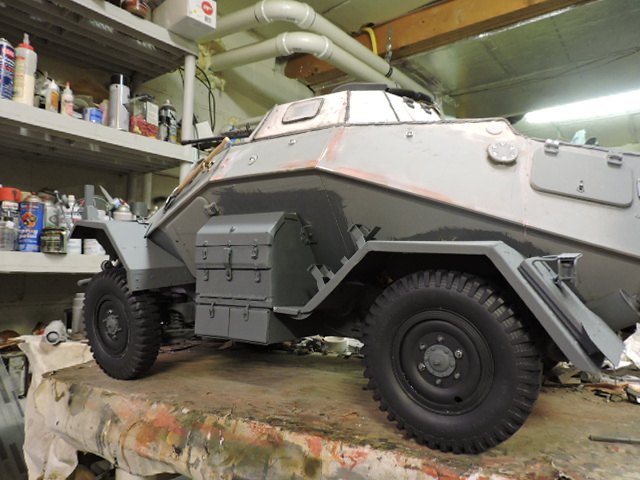
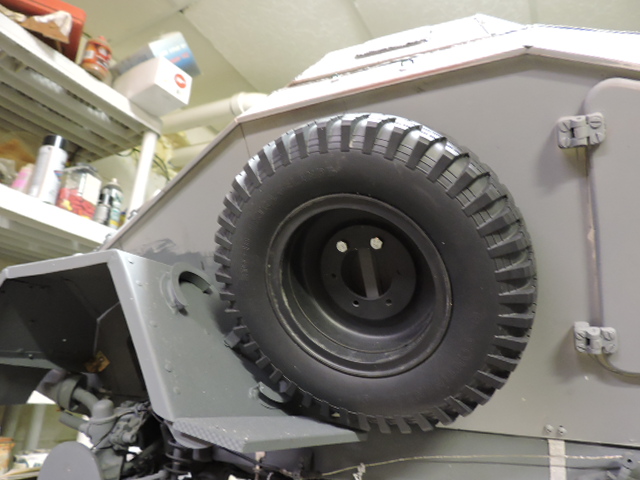
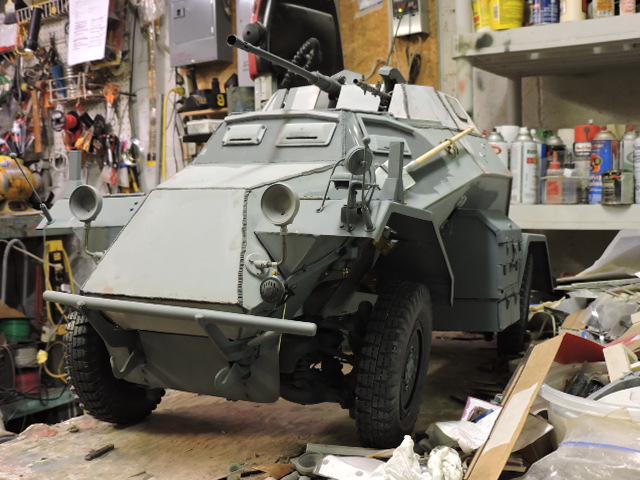
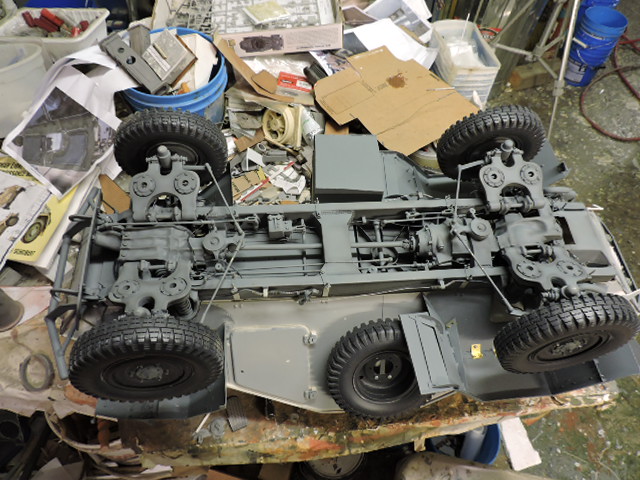
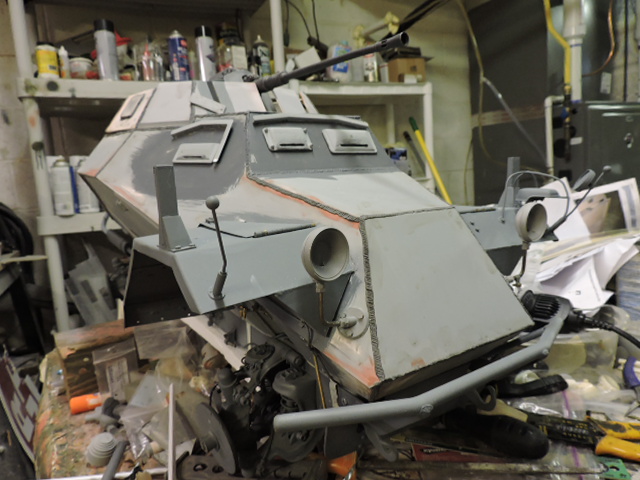
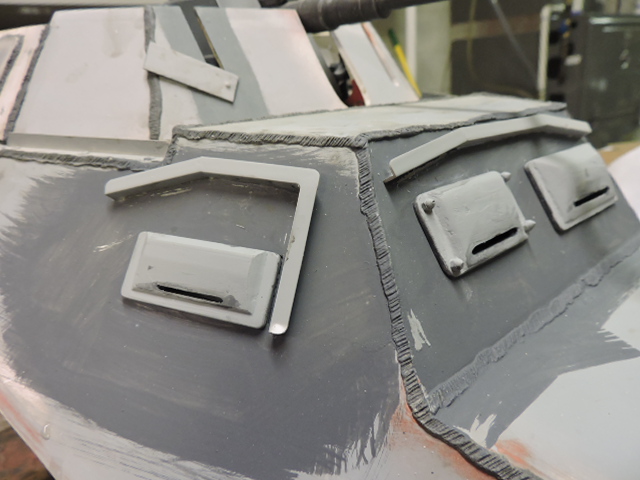
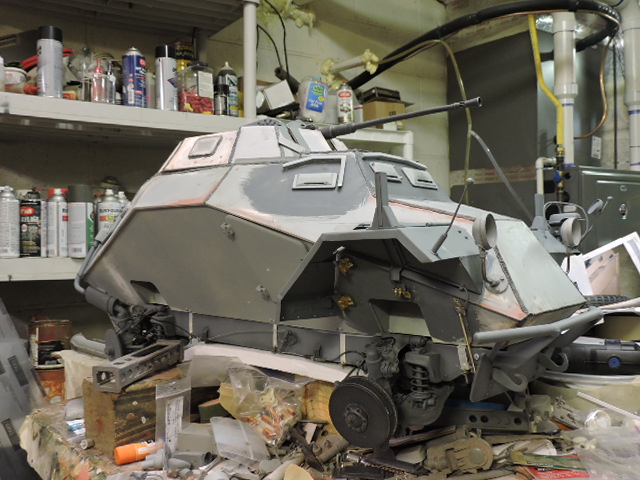
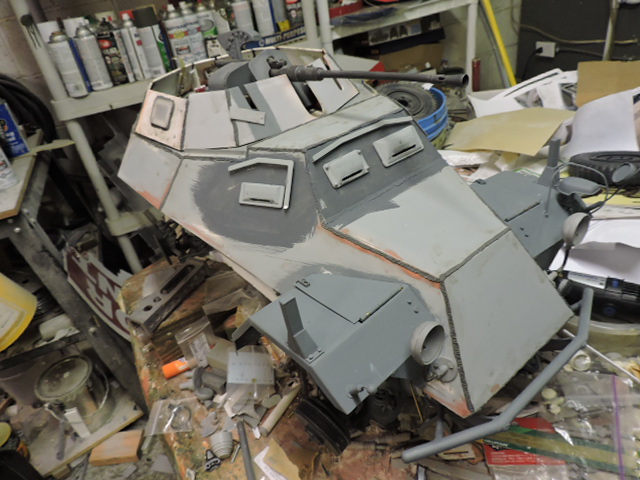
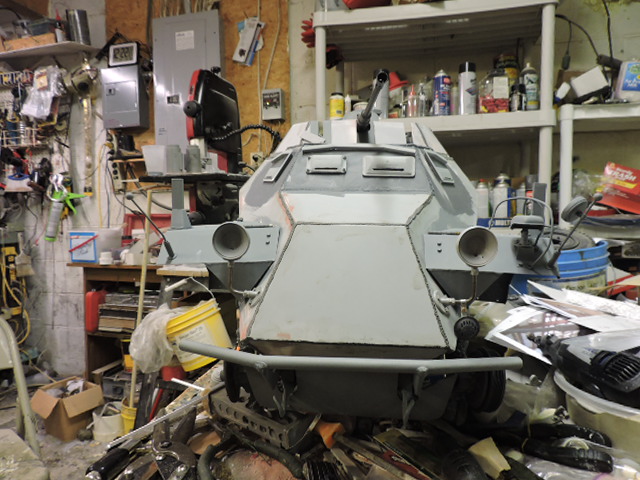
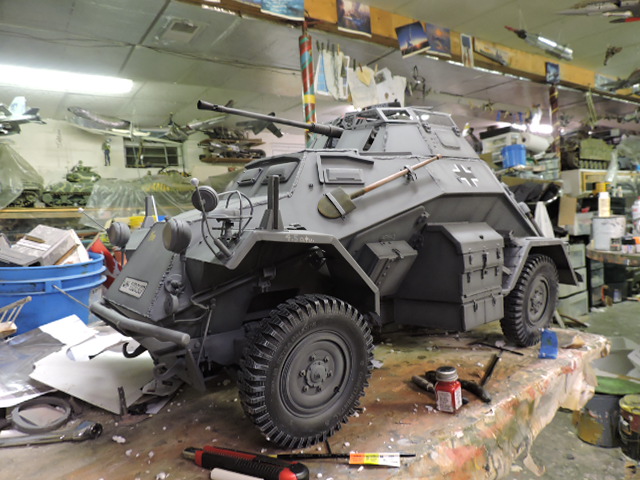
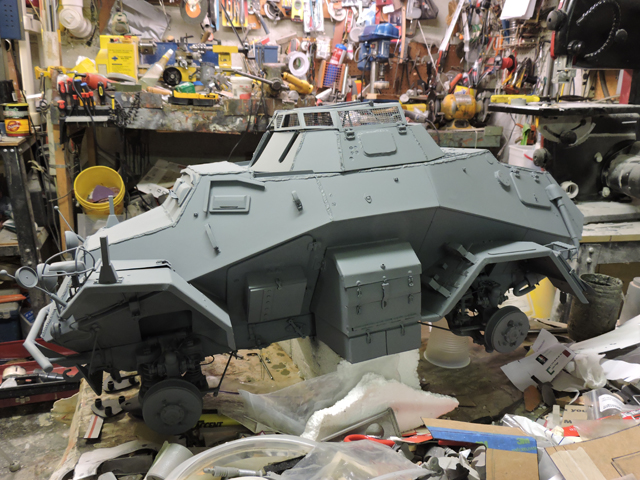
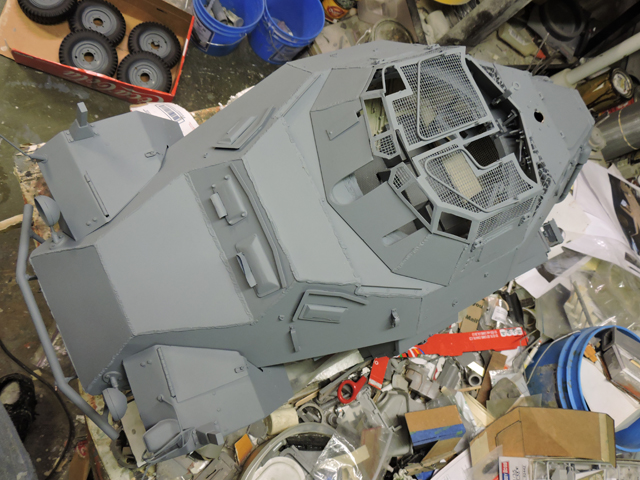
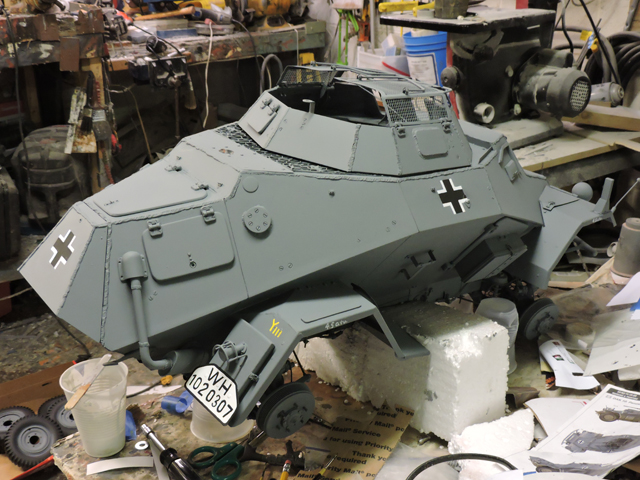
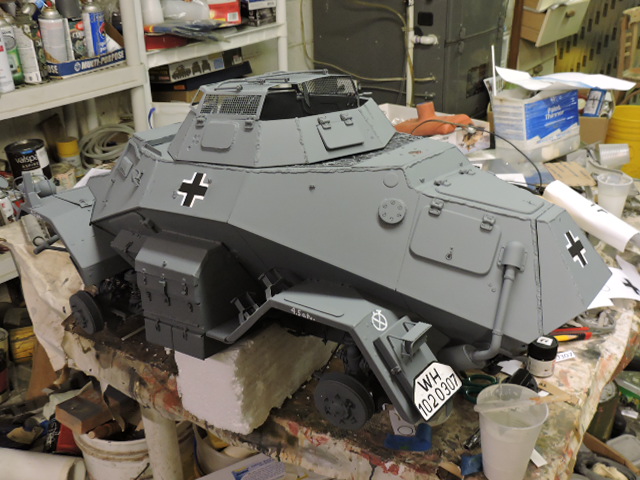
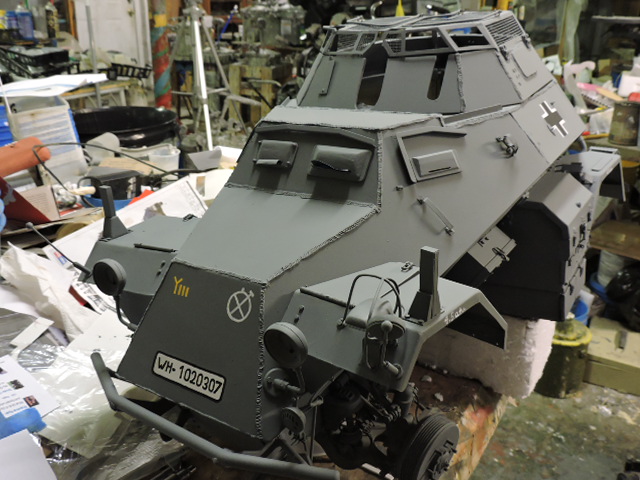
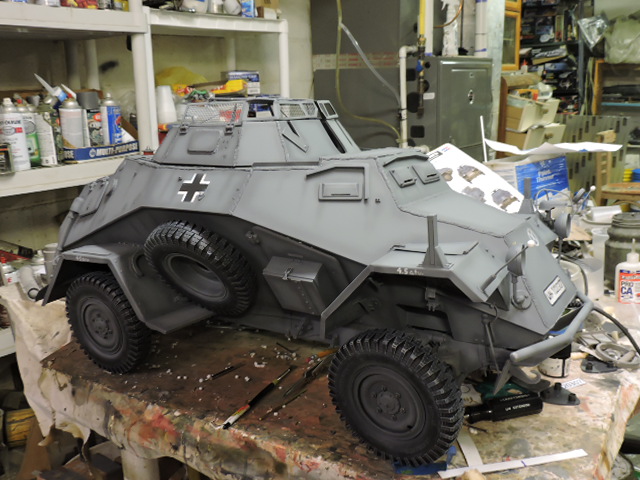
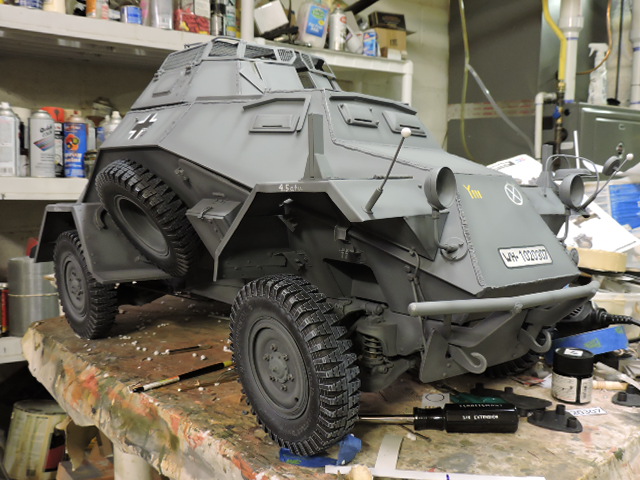
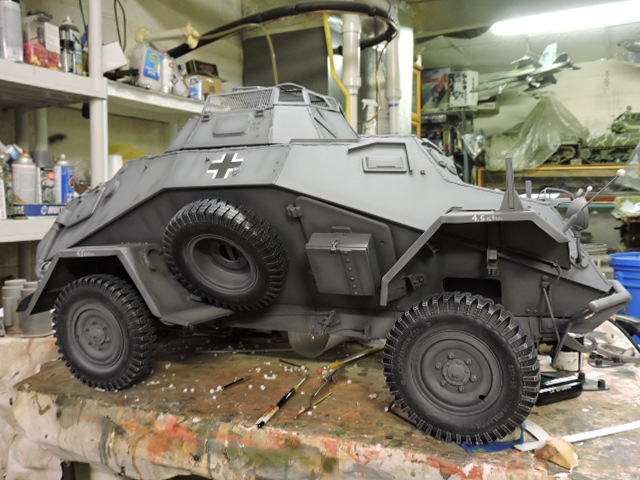
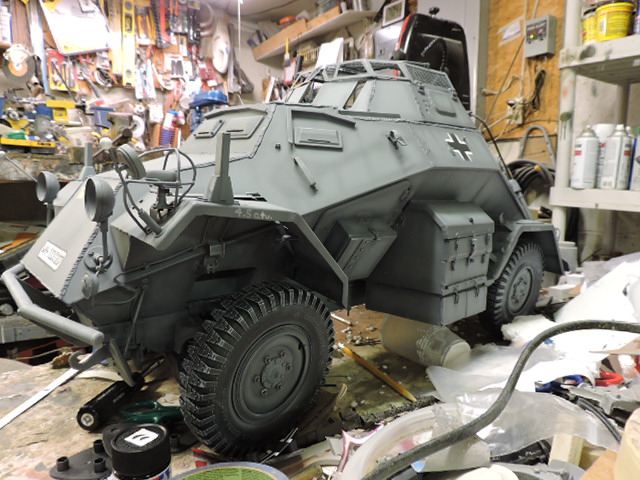
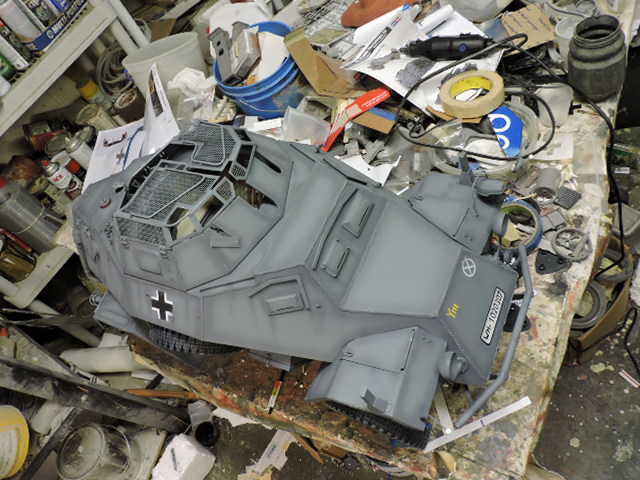
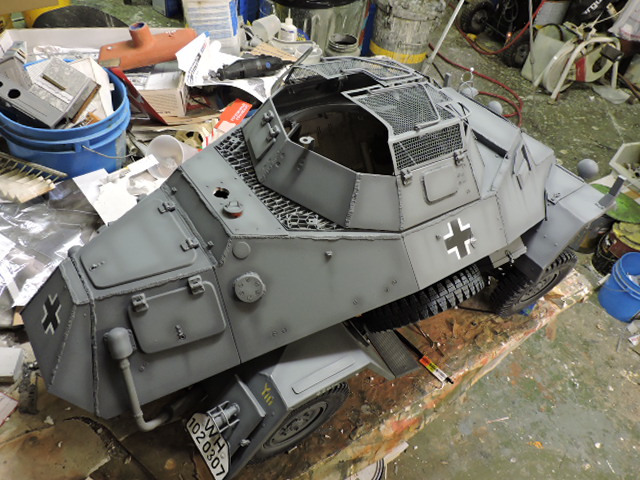
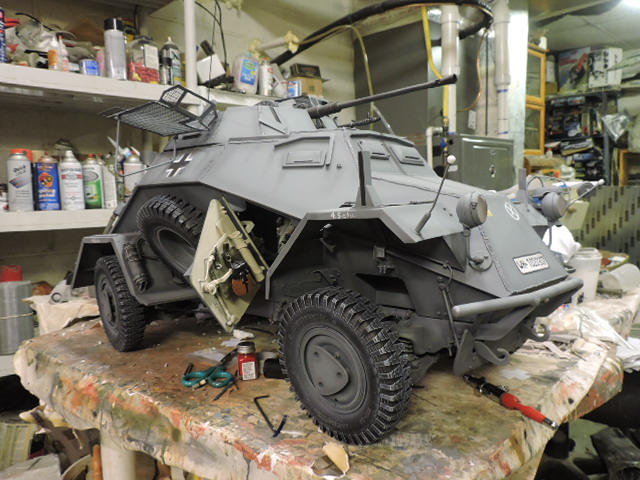
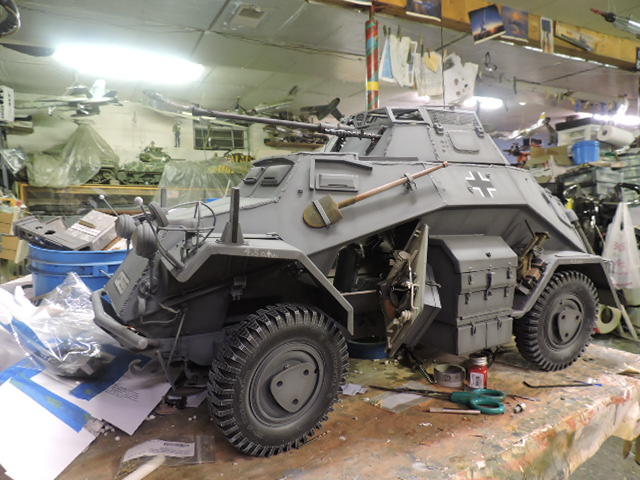
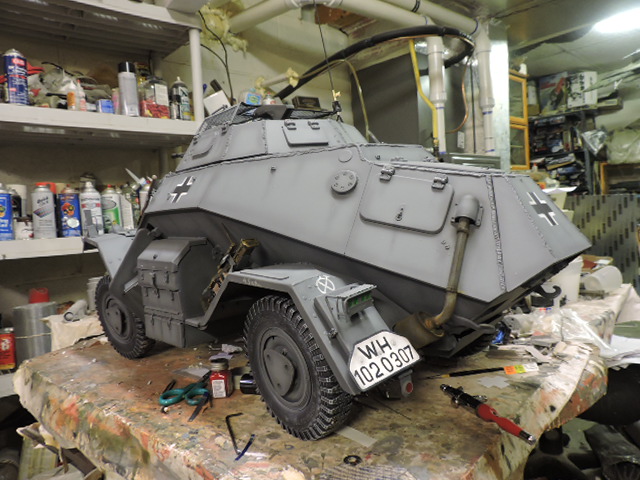
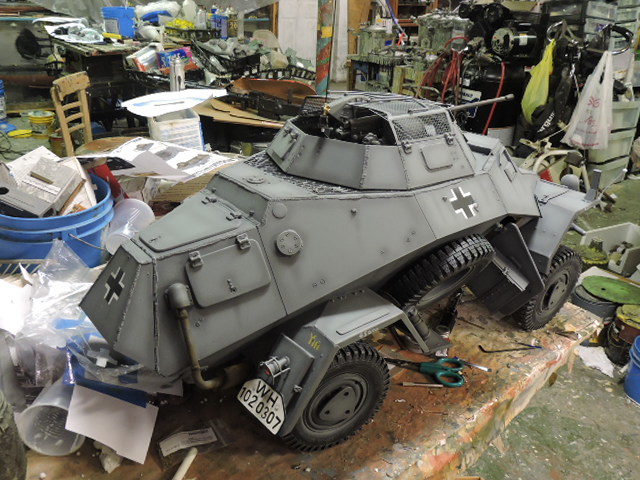
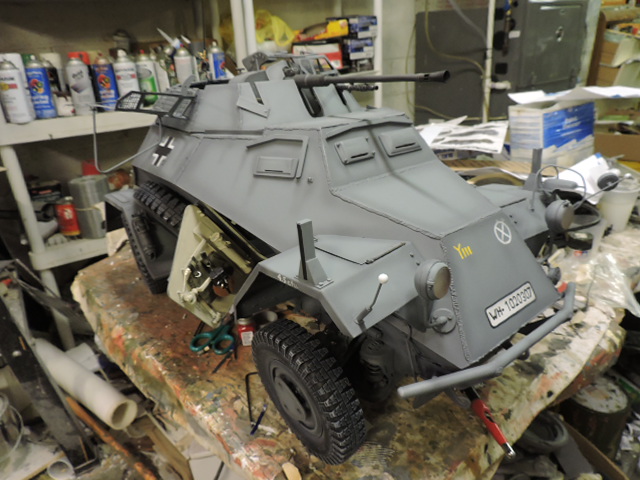
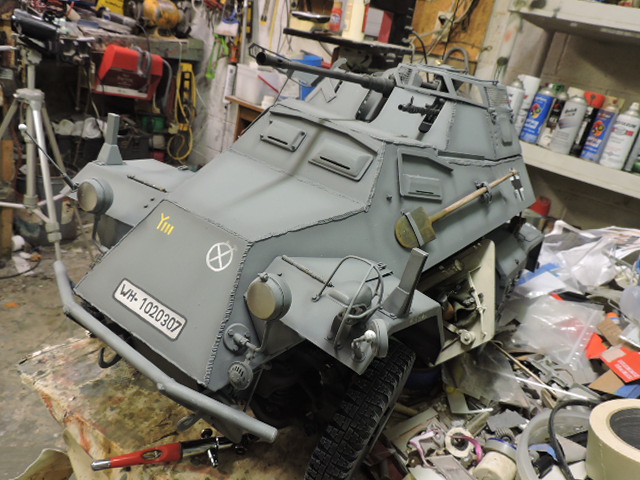
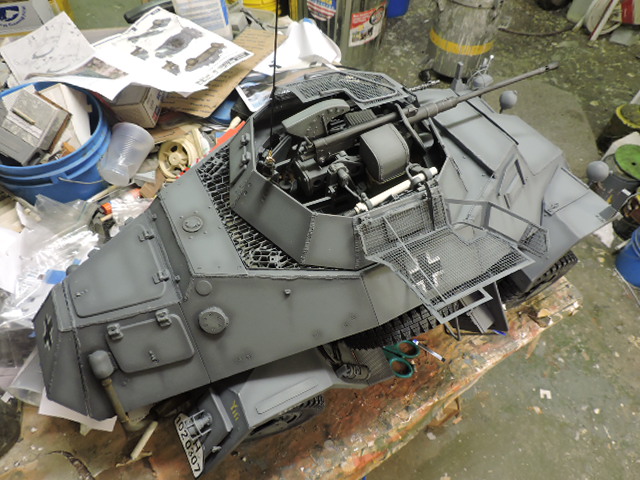
1/6th scale SDKFZ 222 armored car project

Thanks Brindos,

More parts have been completed and more and more the mount is filling in and getting closer to the finish line

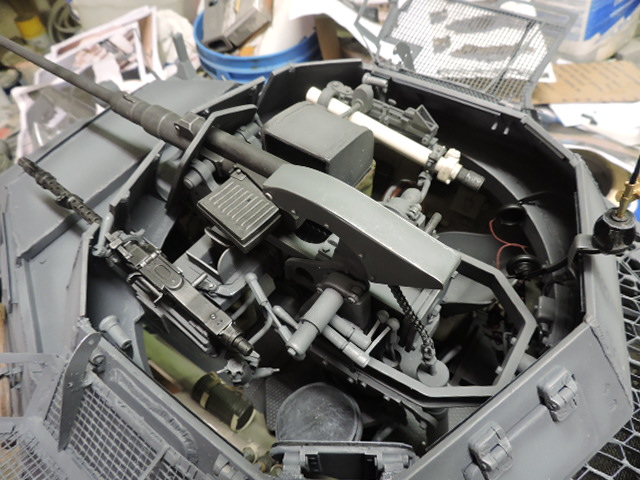
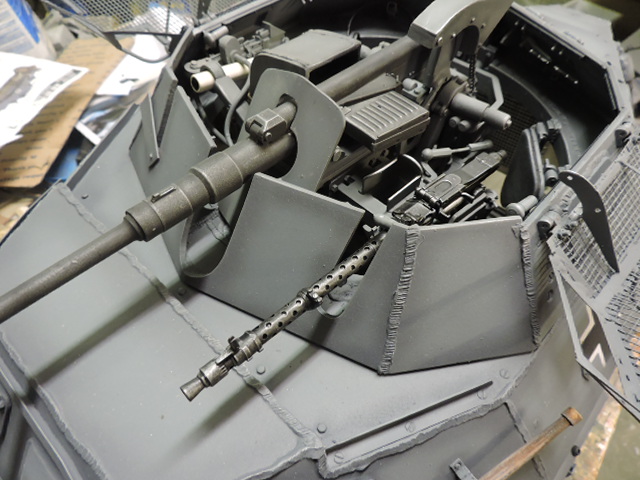
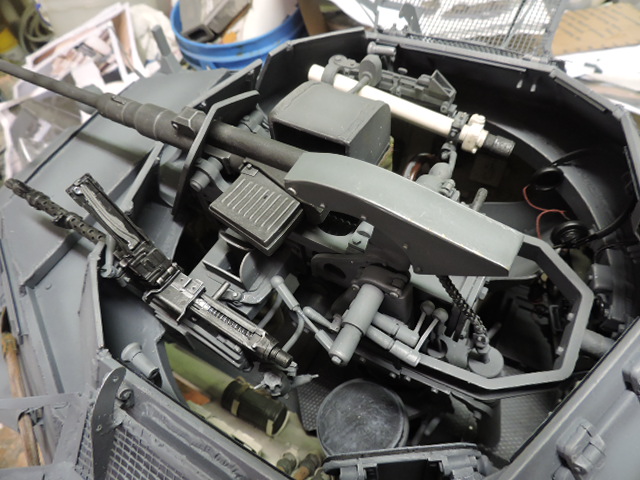
Lots of work was done to the MG34 Coax mount, and the firing linkages

On the linkages the center portion of the mount does not move with the rest of the cradle, this feature was built into the model. As for the linkages they are connected via ball and socket connectors and are actuated by the elaborate cable and foot pedal system I mentioned earlier.

The linkage for the MG34 runs to the end cylinder of the mount, this linkage is synchronized with the mount and that too was tricky to design but was able to be done on the model

No matter how much the mount elevates and depresses the linkages are stable

The MG34 Mount was designed to use the Dragon MG34, The spent built belt chute was also present on the real unit and was built into the model as well. Once done and painted a cloth pouch will be fabricated and positioned in place

More pics are posted on the ECA facebook page, http://www.facebook.com/EastCoastArmory

There are a few parts that are still in mold including the MG barrel clamp and firing linkage. Currently I’m working on the FLAK spent shell deflector / chute and optic mount. Once ready pics will be posted… More to come!

The other day I completed more of the parts and the gun carriage is now 90% complete

The MG34 clamp system and the firing linkage have been completed and mounted

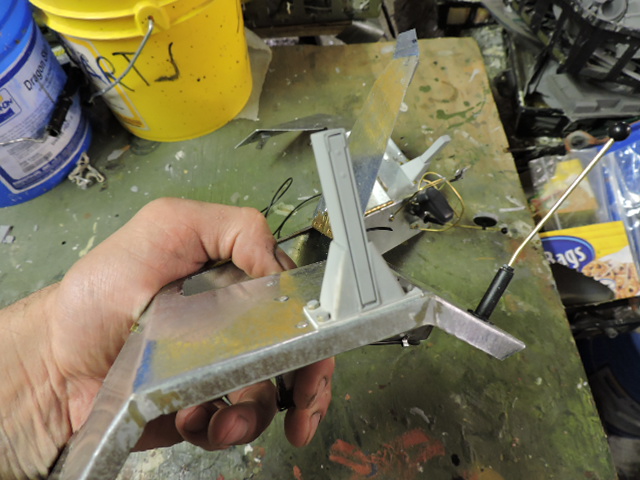
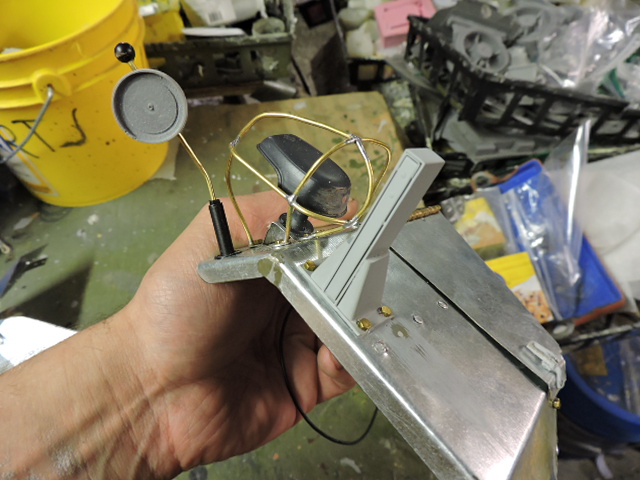
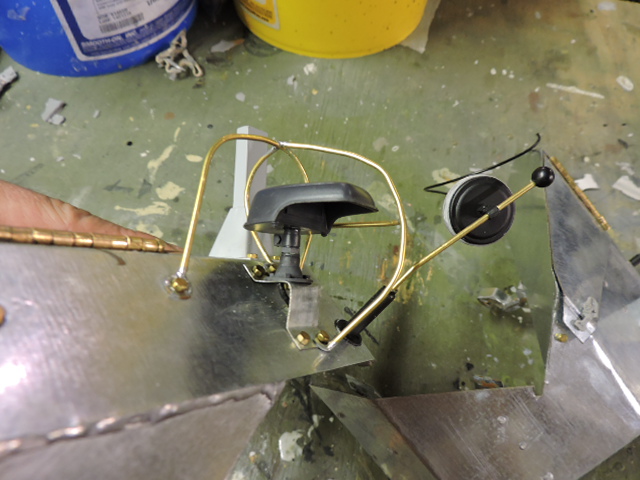
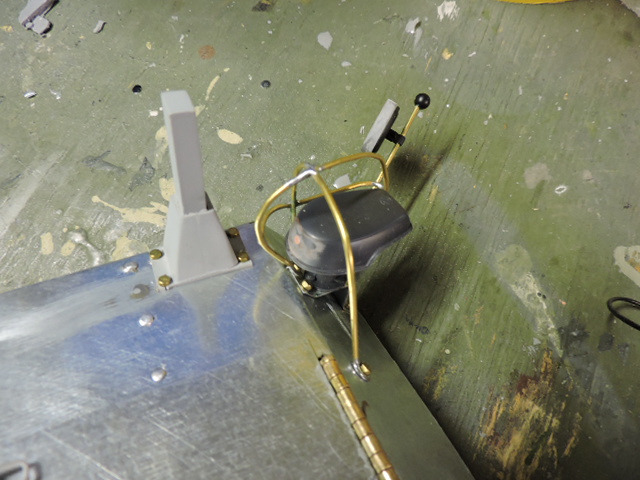
Also tooled up is a knobed canister, as for the actual purpose of this unit is unclear to me but after the next update there will be two rods that connect this component to the optic bar that will be on the opposite side of the carriage

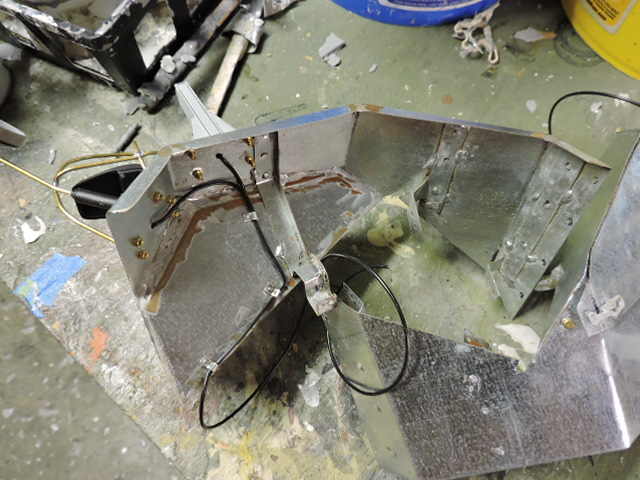
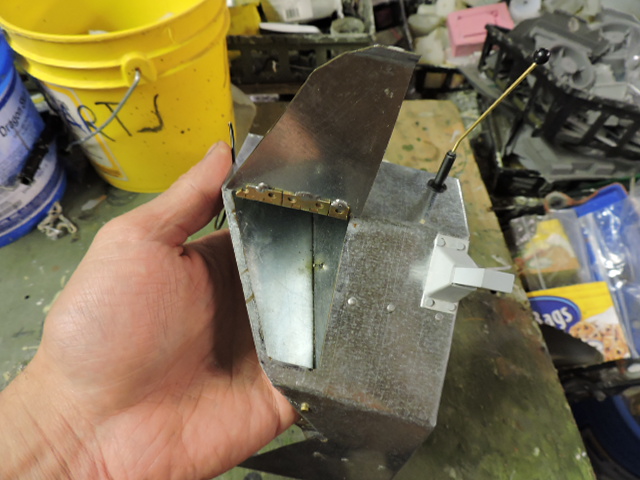
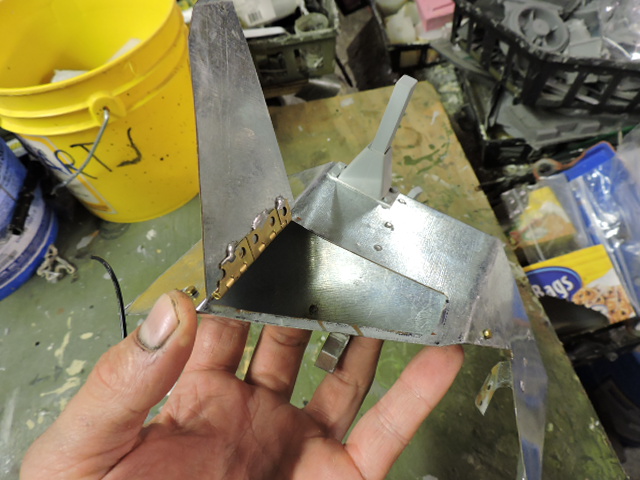
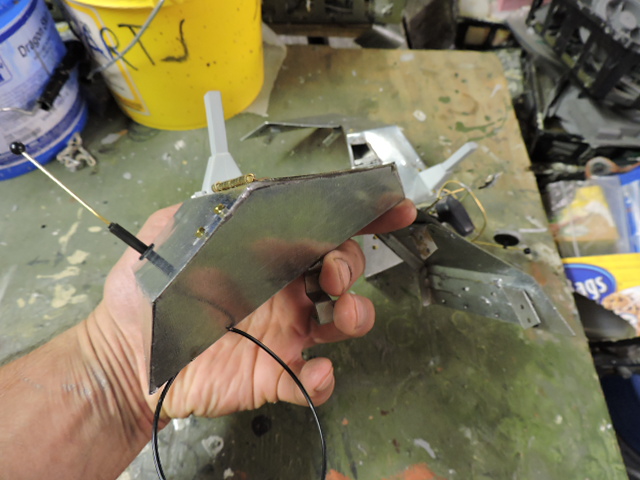
On the opposite side of the carriage I fabricated the front portion of the optic mount and the spent shell chute

The chute is a hollow casting, that once complete will have a canvas bag fabricated which on the real unit would collect the spent flak shells

[/img]https://scontent-lga3-1.xx.fbcdn.net/hphotos-xtf1/v/t1.0-9/12047082_499483496879032_2114211361505088532_n.jpg?oh=5663a3d66c113114f95d43650da40d96&oe=56CB445A[/img]

The mount is basically all filled into it’s final shape now and the last of the parts will fill it in a little further

Even with the all the details the gun and carriage still fit into the very tight confines of the 222’s turret and hull

More pics were posted on the ECA facebook page, http://www.facebook.com/EastCoastArmory/

and a video update was posted on youtube,

https://youtu.be/SxLYeRgrXUY

Currently I’m working on the last of the masters including the optic bar, optic, crank wheel and other small fittings. Once done the carriage will be complete and released on the ECA catalog, More to come!

After a boatload of work I can say that the Last of the masters are now DONE… and that the carriage is now COMPLETE!!!

The gun’s optic bar mount and optic have been crafted and fitted.

The optic bar is an elaborate component in itself. It connects to the setting transmission canister on the opposite side via two connecting conduits.

I’m not sure but I believe the way this works is that the assistant gunner can adjust another AA target crosshair on the scope from the other side by rotating the crank wheels The optic bar has some cams and clevises that look to pivot an object, but from the unit I was doing my research on didn’t have anything mounted, so What you see on my rendition is how it was on the unit I was studying. If anyone knows feel free to post below.

The crank wheel was also fabricated, It has both the frame detailing and the handle detailing, Some units were wood, but on this build I will be painting them as a Bakelite material.

The front shield was another part that was completed. It has it’s mounted braces as separate castings for better detailing.

With the carriage now complete the carriage will be added to the catalog this week. and this unit here will be painted and weathered so it can be installed to the model which will then allow me to progress to the turret detailing,

More pics were posted on the ECA facebook page, http://www.facebook.com/EastCoastArmory

More to come!

Over the weekend I burned the midnight oil and was able to the gun mount painted and completed.

The mount was also added to the ECA catalog, however I may be adding more parts to the set which will change the price,

http://eastcoastarmory.com/222.htm

With all the paintwork complete the flak gun, optic, crank wheel and front shield were all fitted to the carriage

On the wheel I painted the grips to resemble Bakelite, which was common for grips back during that time. On some 222s wood was also used for the grip panels.

Also added to finish off the unit was the two canvas bags. These bags would collect the spent shells from the Flak, (mounted on the bottom of the chute),

and the non disintegrating links on the MG34, to catch shells the MG34 also

had a shell collection bag that would clip to the bottom of the receiver (as like the M2 the MG34 is bottom eject)

Another addition that is important for this version of the Flak, is the shorter low profile 10rd magazine.

This part is essential as the standard capacity magazine will have a hard time fitting into the magwell with all the other equipment in the way. This shortened mag is a from Panzerwerks and is highly recommended.

The whole setup is a tight squeeze into the body, as it was on the real unit

With the gun FINALLY out of the way [:D] I can now focus on the turret and turret interior equipment, and grenade grills. Also the Mg34 needs to have the butstock removed as the stocks were not mounted on then the gun would be in coax mode… but that will be in a future update [;)]

More pics were posted on the ECA facebook page, https://www.facebook.com/EastCoastArmory/

More to come!

Quit hogging all of the talent!

Seriously, epic skills! [:D[

INDEED. Seriously EPIC skills!

Thanks guys, More progress was made to the model,

With the gun carriage complete I turned my attention to the turret.

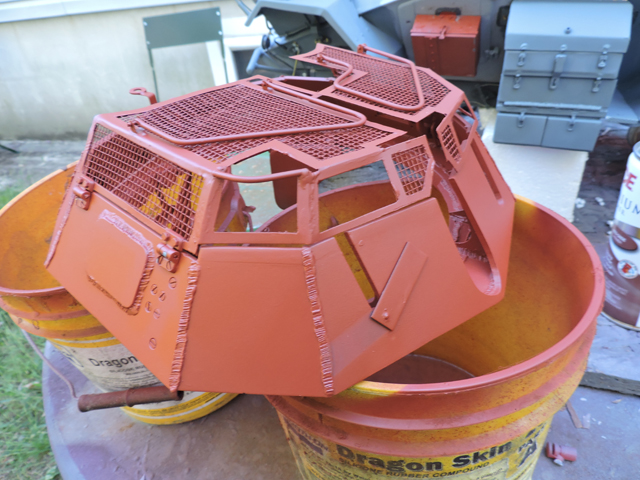
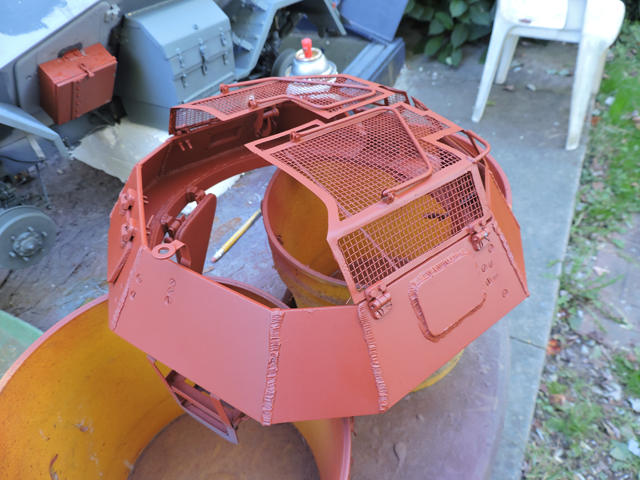
The kit turret replicates more of an early 222 with the even top turret, the later versions used taller plates for the front portion of the turret. On the model I added styrene strips that were the same thickness to these panels, they were then blended into the turret for a seamless appearance

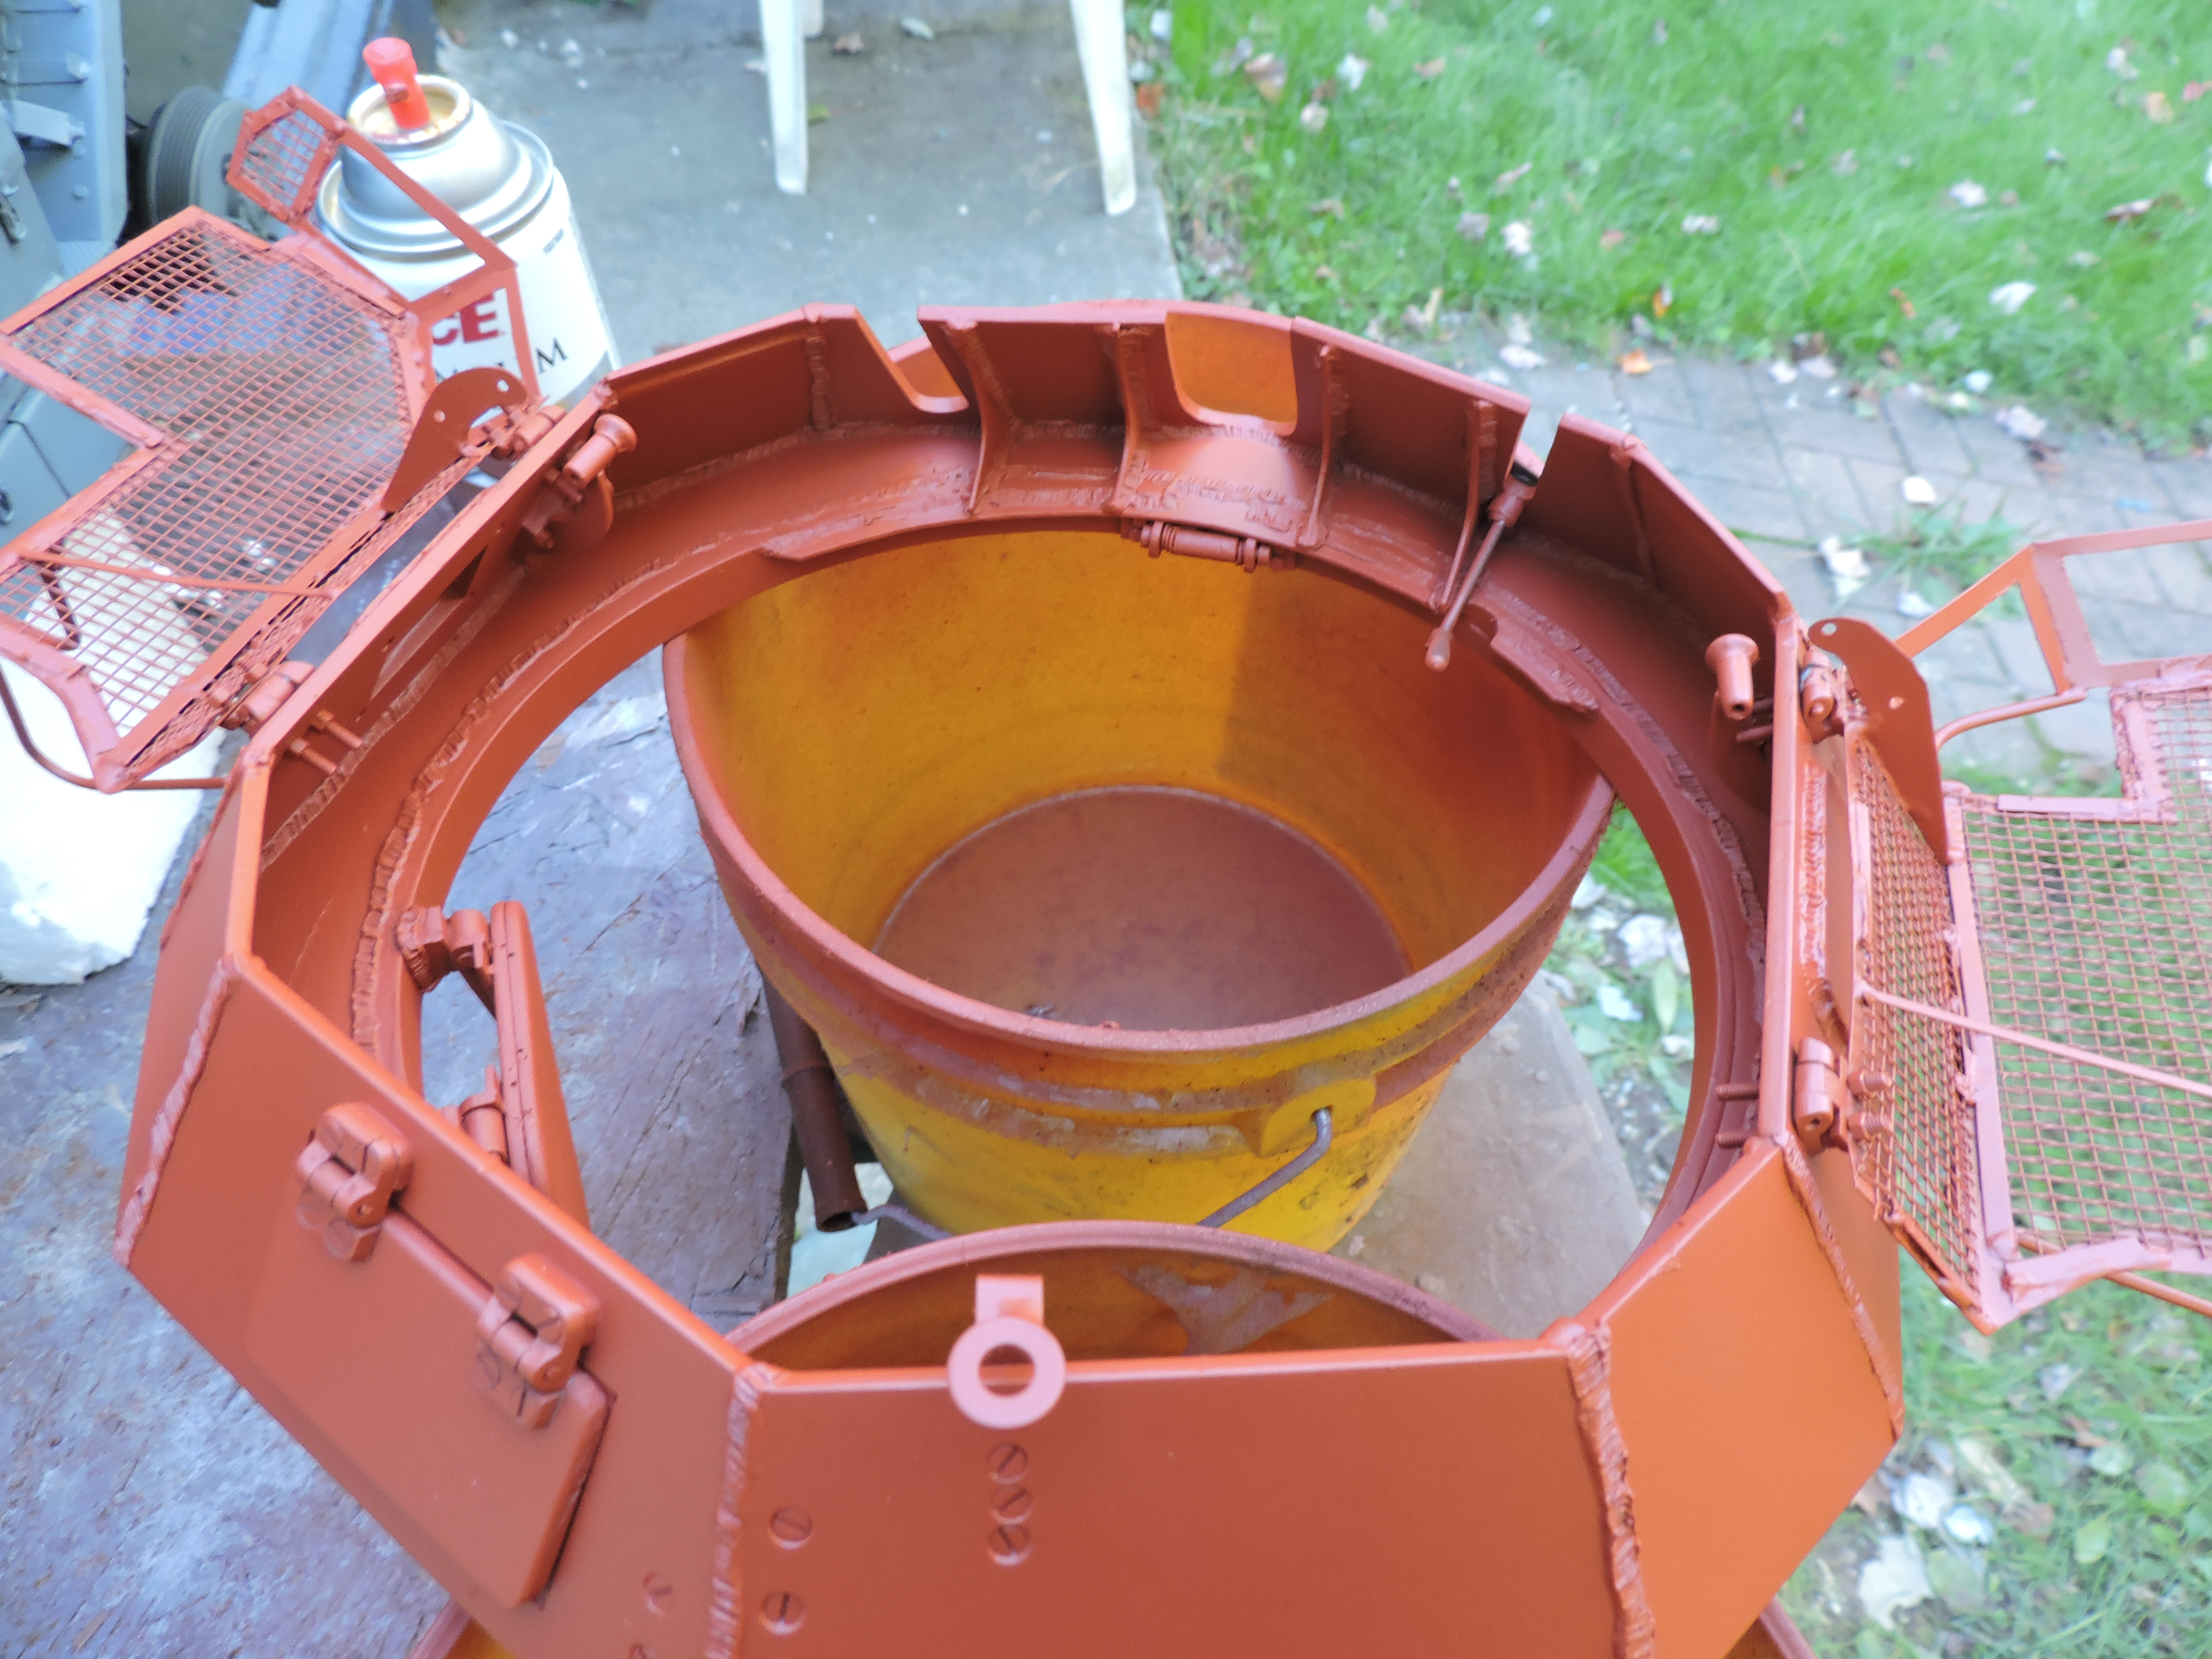
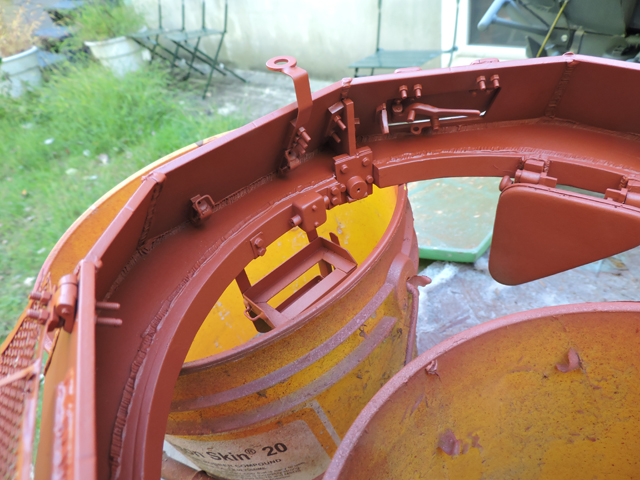
On the interior portion of the turret I added the bulkheads and weld detailing

Once these additions were made I then fabricated the turret / carriage mounts. Unlike most tanks where the turret is connected to the body, on the 222 and other vehicles with a similar gun carriage design the turret is connected to the gun carriage, which is mounted to the chassis.

The turret makes contact with the carriage at two locations, the first is in the front. On the front there is a pivoting yolk that is connected to the ring of the turret. The yolk connects to the front column of the carriage. To help keep the yolk centered there are two extension springs on each side of the yolk.

On the rear of the turret there is another bulkhead, this bulkhead has a connector plate that a threaded lug would bridge the carriage to the turret. Unlike the bulkheads in the front the rear bulkhead is bolted to the turret walls rather then welded.

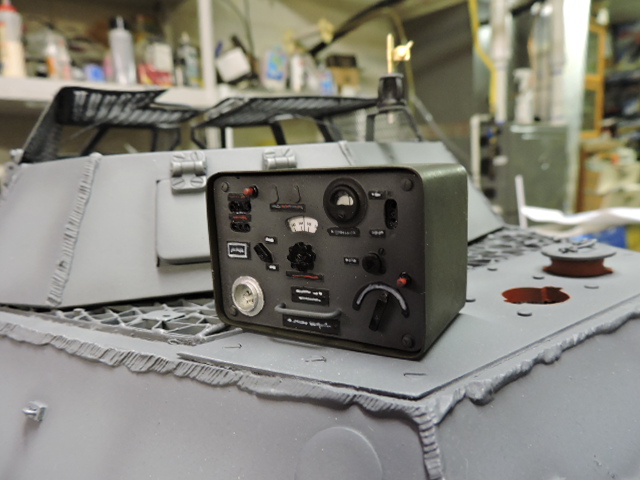
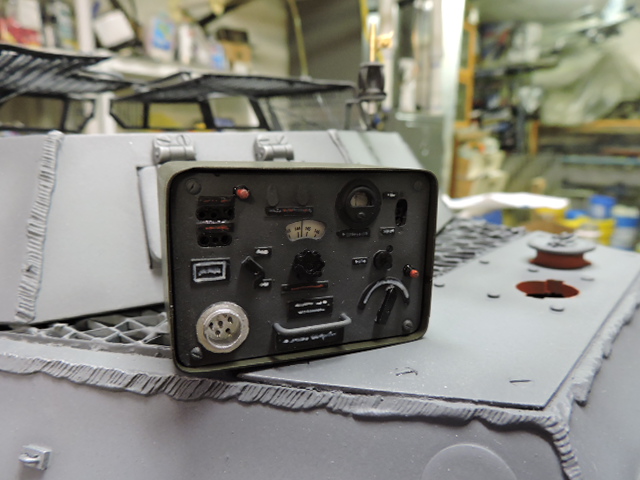
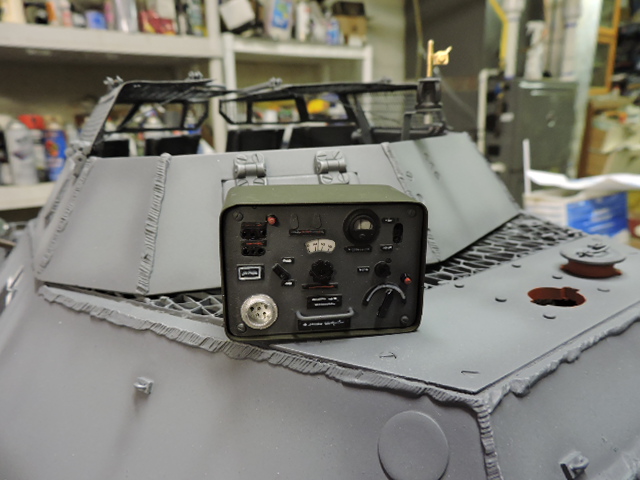
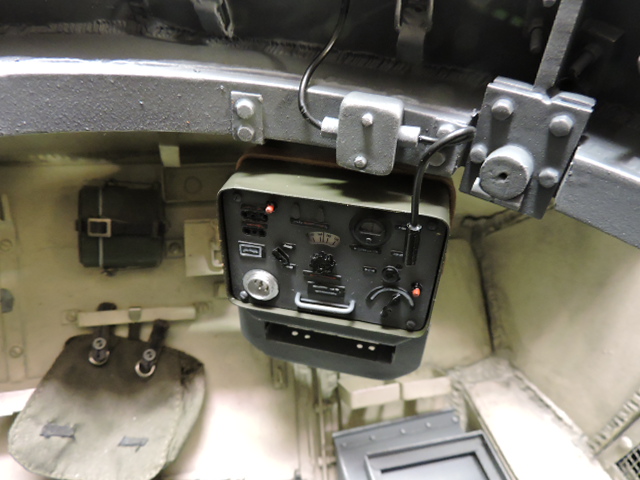
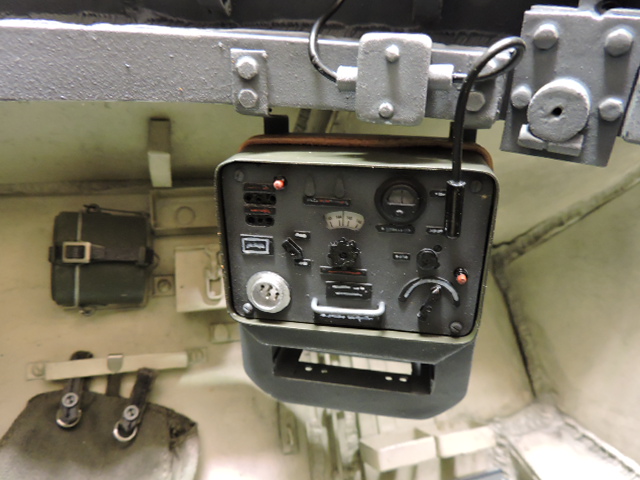
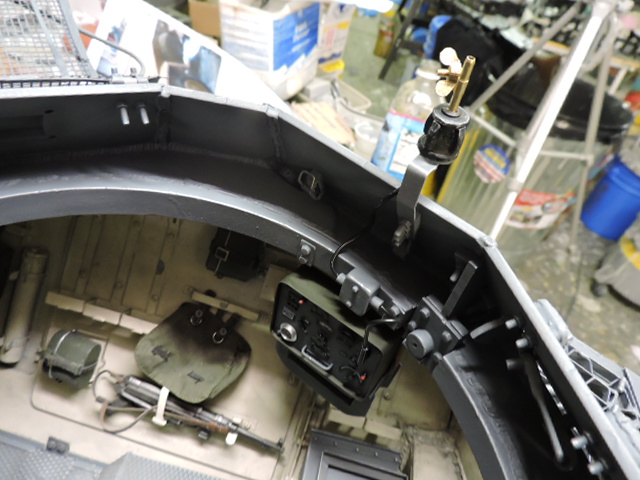
The other interior details were also fabricated, this would include the radio harness equipment. On the 222 the radio is suspended on a shelf, this shelf was scratch built out of brass, For the radio I’m using the resin set from Panzerwerk. Once the interior is painted the radio will be mounted via a leather strap.

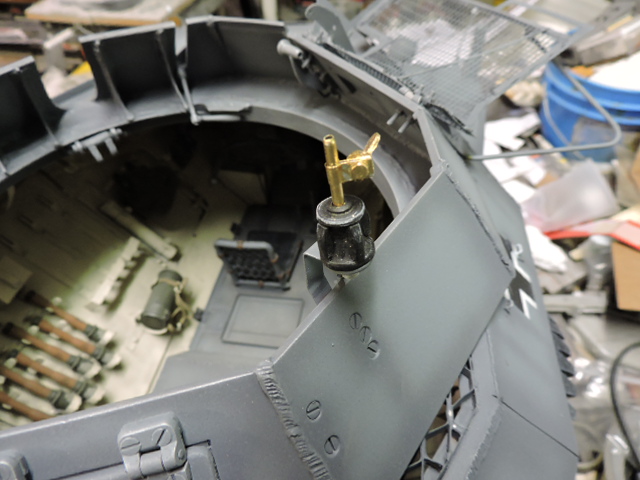
The antenna base mount was also fabricated, the construction is also all brass and metal, the base itself will be added towards the end of the build

All components are installed to the turret via countersunk slot screw fasteners, this is as per the real vehicle

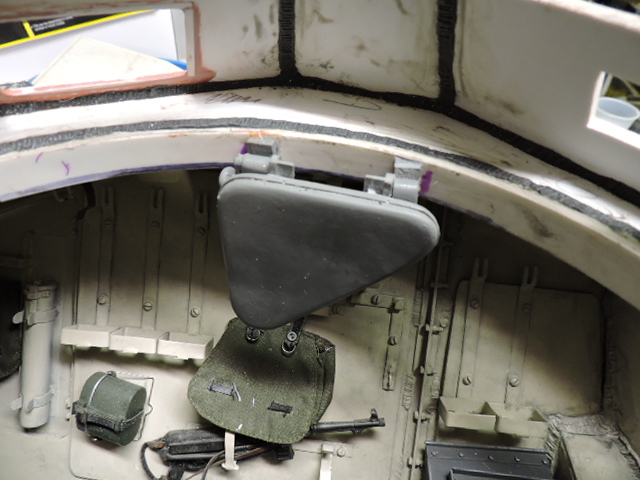
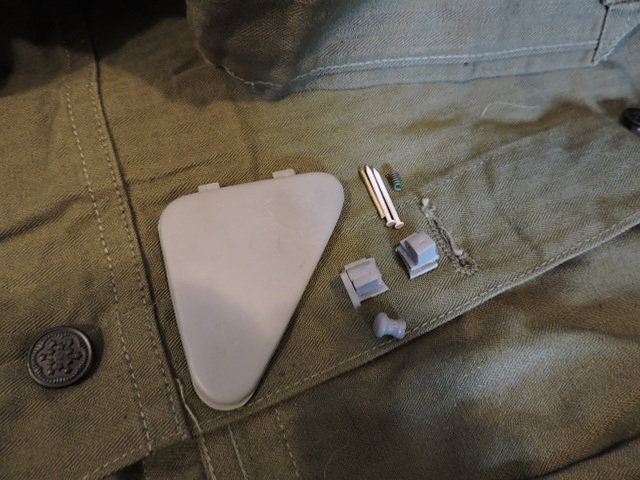
Other interior components that were added would also include two grab handles, visor port plugs, and the assistant gunner’s backrest

The backrest was able to be flipped upward with the pulling of the spring loaded knob. The backrest itself was also added to the ECA product line

http://eastcoastarmory.com/222.htm

Once fitted the backrest is directly over the assistant gunner’s stool

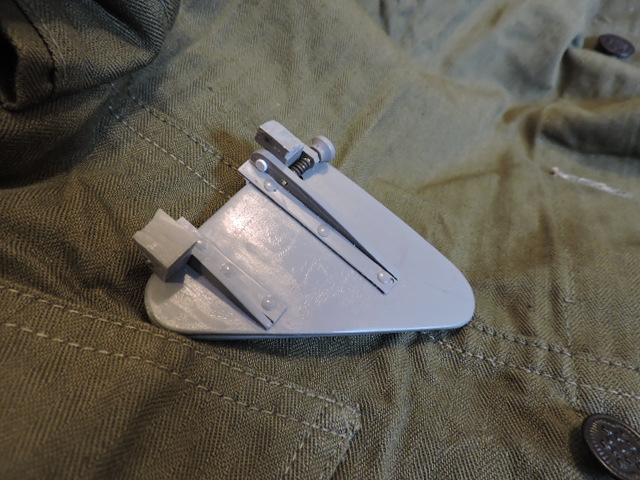
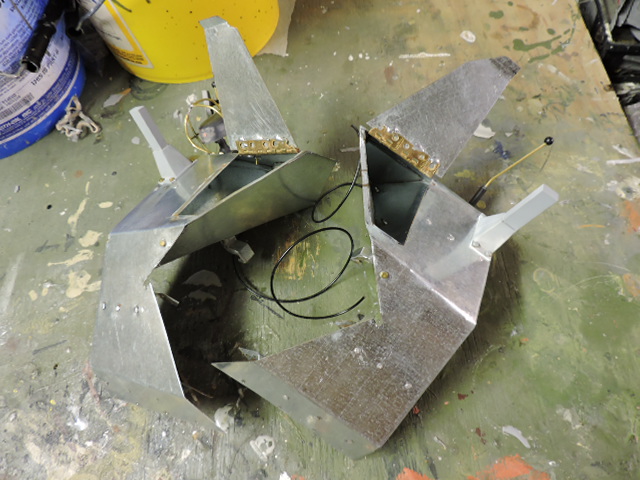
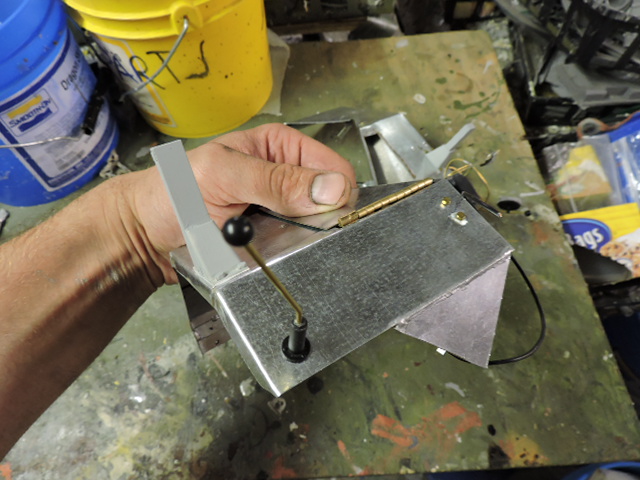
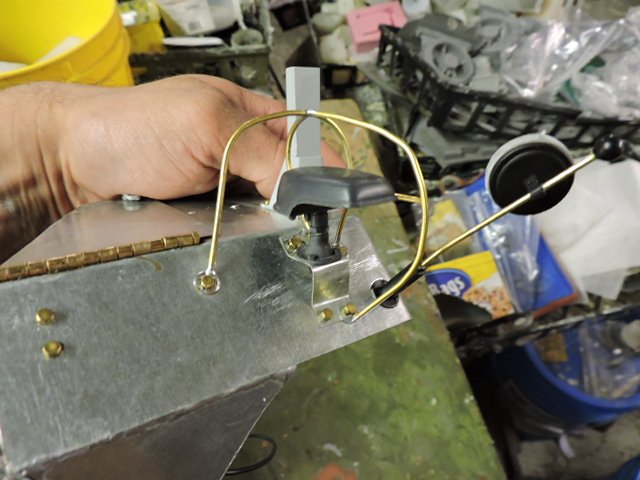
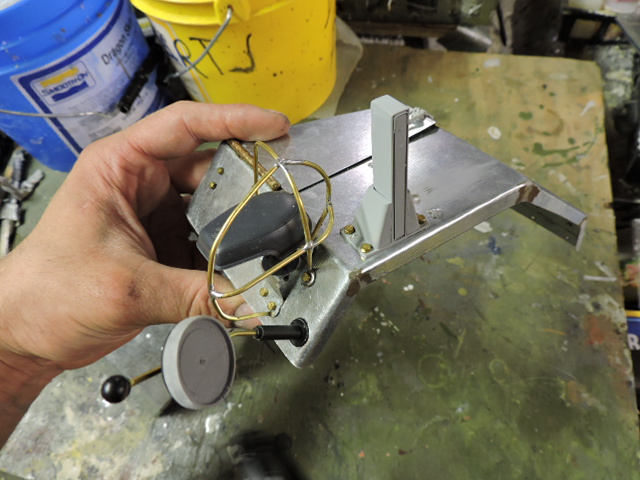
On the front portion of the turret there is a small port for the optic, to protect the optic there is a small shield that can be pivoted out of the way, This detail was also builtin into the model and is fully functional

The design is very simple and uses a throw lever for the operation

The final bit of detailing that was added was the rear hatch, Prior to adding the hatch I added a recess to the already present cutout on the turret. This was done with styrene strips. This recess is found on the real vehicle

The hatch itself was supplied with the kit but was tweaked to fit better in the recess. For the hinges I used the resin sets from panzerwerks and like on the side doors were a awesome fit.

For the interior portion of the hatch I fabricated a functional throw lever lock.

The lifting lever / lock was also fabricated. The real 222 used a spring retained swinging lever that would lock into slots on a swing plate. This detail / function was built into the model

As you can see this vehicle was a tight fit all around

More pics were posted on the ECA facebook page. http://www.facebook.com/EastCoastArmory/

and a youtube video update was added that goes into more detail on the progress

https://youtu.be/gpoX07vAkF4

I’m now working on the top turret Grenade Grills. Once done the last of the interior and exterior turret detailing will be done and the turret will be complete! More to come!!

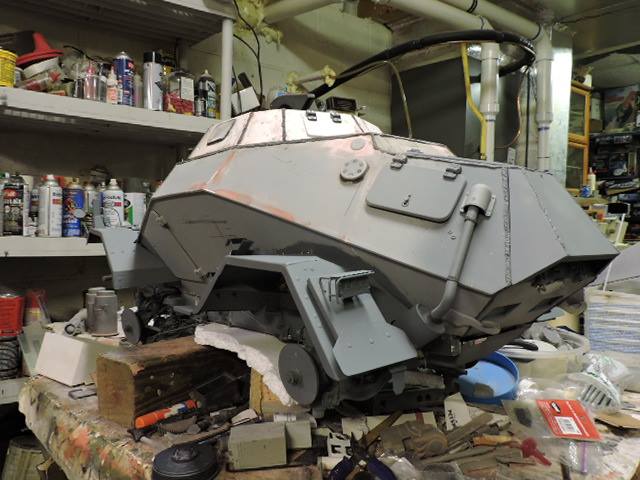
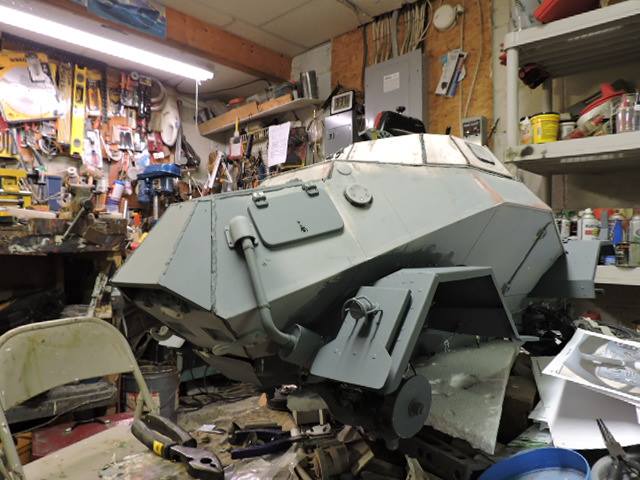
Made some more headway on the model and the model is now about 60% ready for painting

After the turret mods from last time I turned my attention on getting the model ready for it’s tinwork… which will include the fenders, storage box, and grenade grills. To get to that point I needed the complete the bodywork on the body, and add the welds.

After the welds I started with the model’s lower front details. This would include the bumper and the front shield.

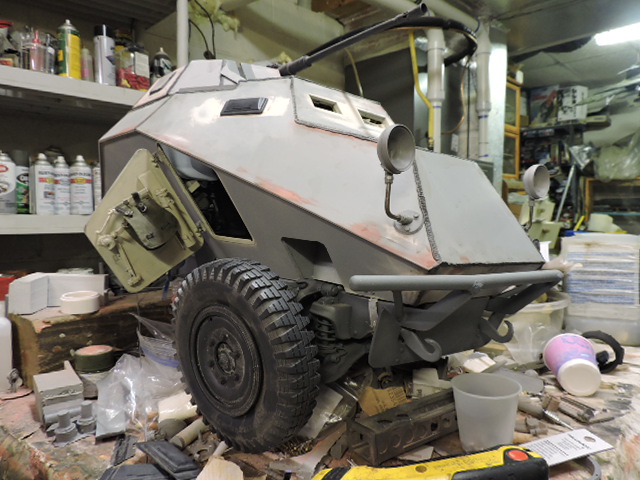
The kit did supply the shield, however due to the chassis that was scratch built the kit part was out of spec and couldn’t be salvaged. A new part was fabricated out of lexan. The component mounts to the front tow hook fasteners like on the real unit. The install was surprisingly simple and went problem free

The bumper was also added and is scratch built. Materials used were lexan, PVC and styrene rods. All points feature their weld details and the whole unit simply bolts onto the frame of the model. Again another issue free install

Once the front was done I turned to the rear lower details, this would include the tow hooks and the the engine hatches

The tow hooks are the kit supplied ones, but were reworked to give them the accurate appearance that they have now installed

The rear hatch / duct was another part that was added. This was kit supplied and was correctly scaled.The panels were assembled then were modded to have it’s interior details and locking system. the part was made to be functional and like the side doors needs to be opened via a allen wrench.

Once the rear hatch was completed I then focused on the other rear hatches. These hatches are also the kit supplied ones, but were again reworked to have their internal and external detailing. For the hinges I again used the awesome sets from panzerwerks

And like with the other hatches the locks are functional and use a allen wrench to open

After the hatch work I moved to the rear portion of the top deck, Towards the sides I added two access caps on each side along with another seam line, not sure what the purpose of the covers are on the real vehicle.

The last area that I was able to complete was the rear radiator cover plate. A new plate was added to this section of the model, On the plate the rivet and counter sunk mounting fasteners are present

Also fabricated was the radiator filler cover cap, This component was scratch built and was also designed to be full function like the real unit. Lift the handle twist and the part will come off

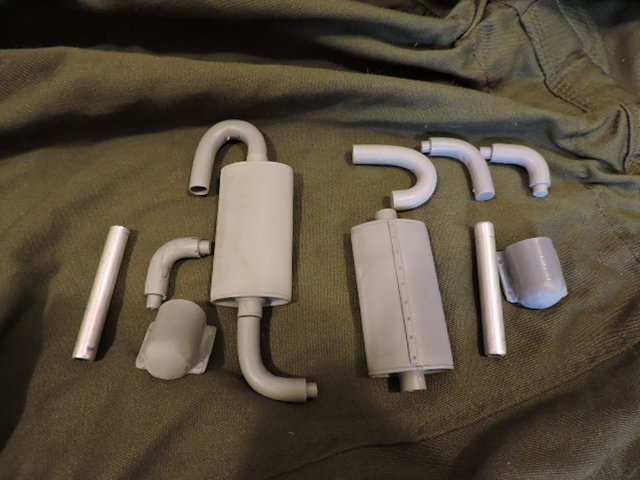
Currently all that remains to complete the model for it’s tinwork are the exhausts manifolds, headlights, and the visors. For the visors I have the Panzerwerk sets… but for the other parts I’m currently tooling up the masters. So far I have completed the 222 exhaust cover caps, and these will be added to the catalog once the remainder of the parts are ready

A youtube video update was posted, which goes into more detail on the parts and functions

https://youtu.be/Z4FuSYklgWE

and more pics were posted on the ECA facebook page,

http://www.facebook.com/EastCoastArmory/

More to come!

The build keeps chugging along,

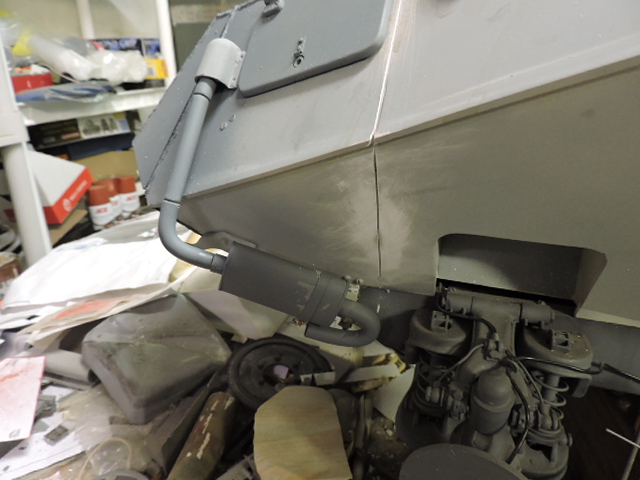
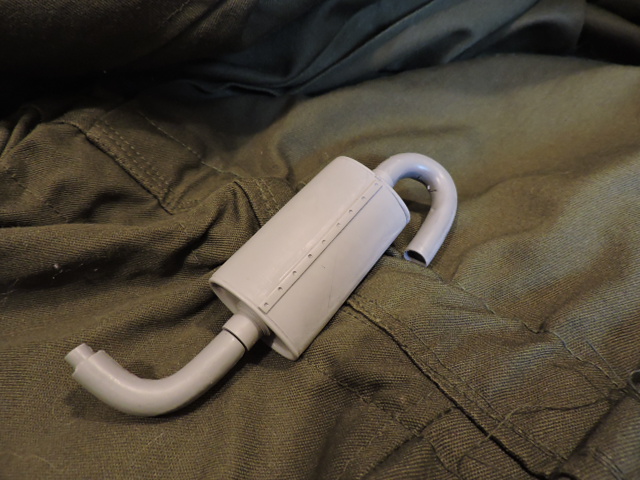
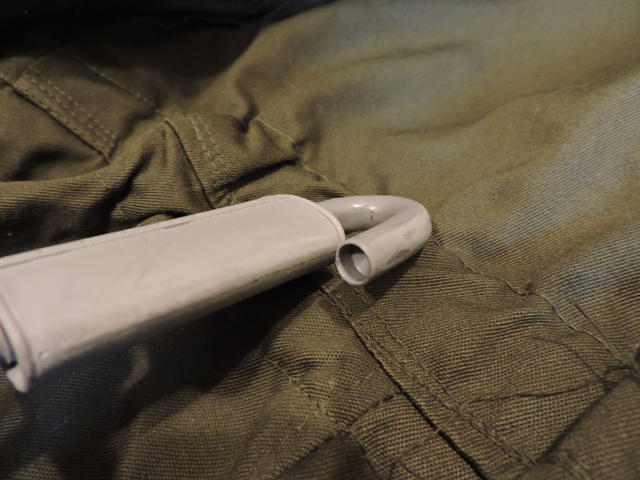
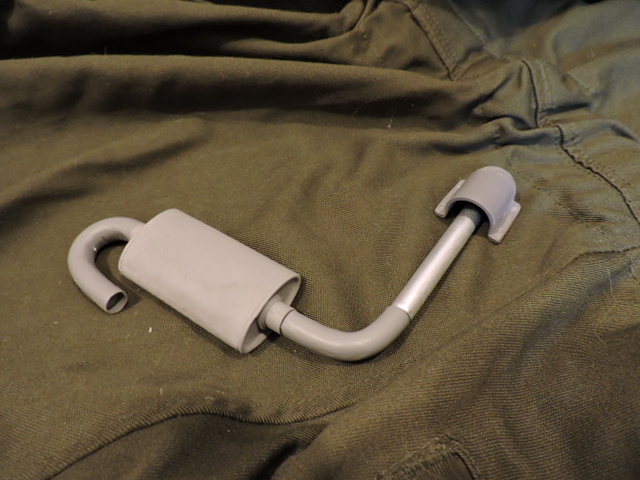
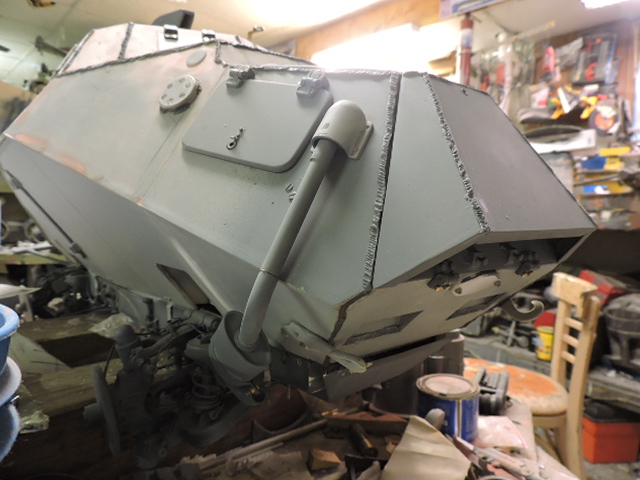
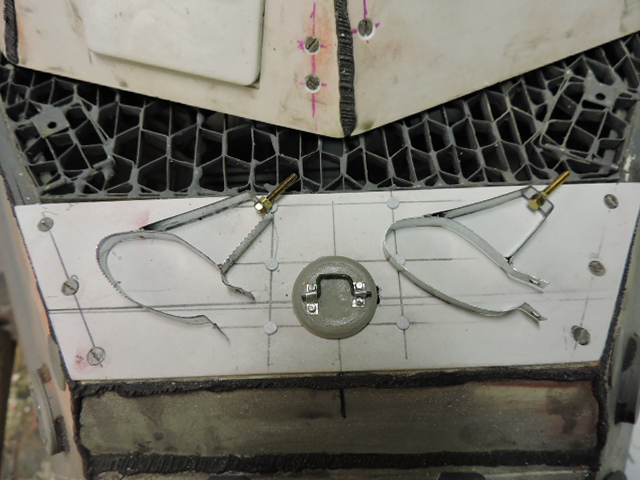
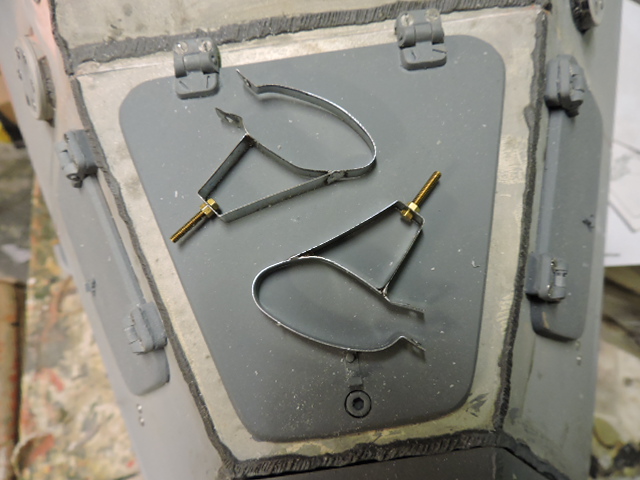
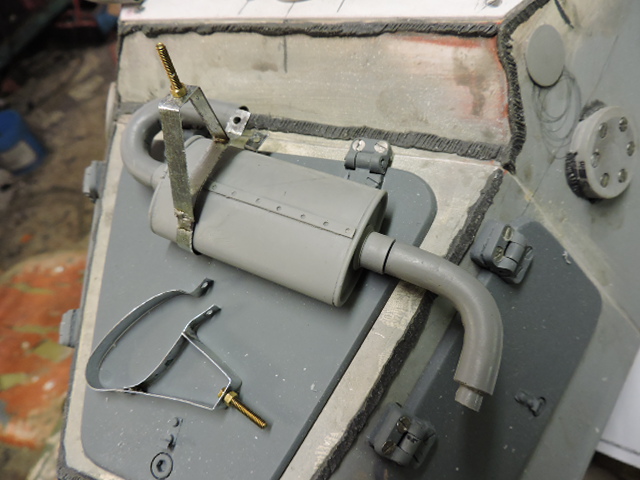
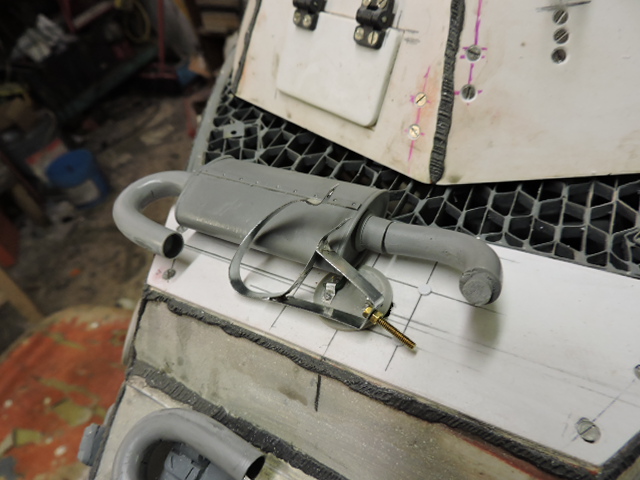
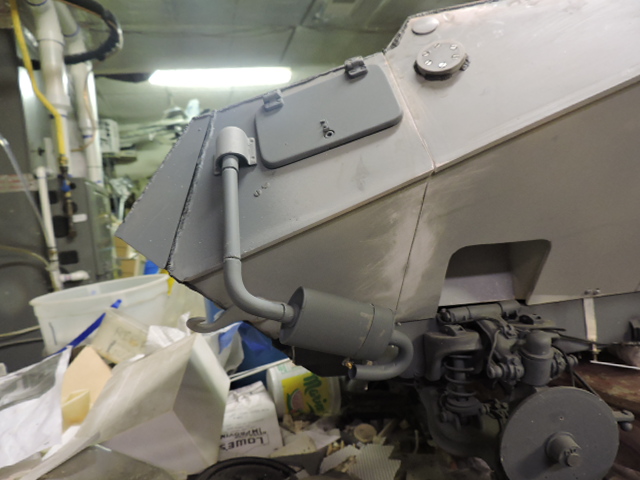
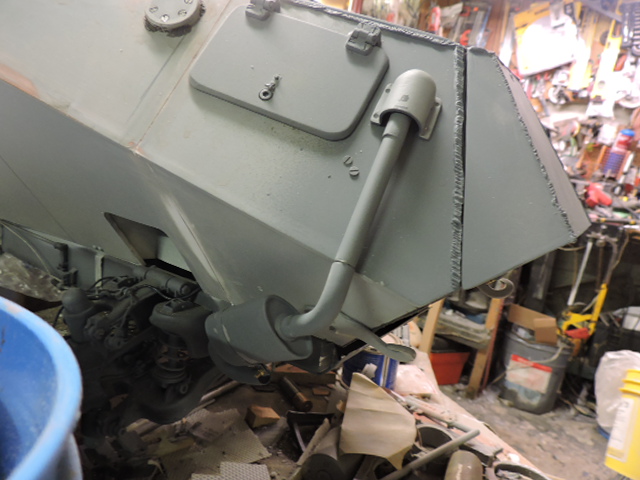
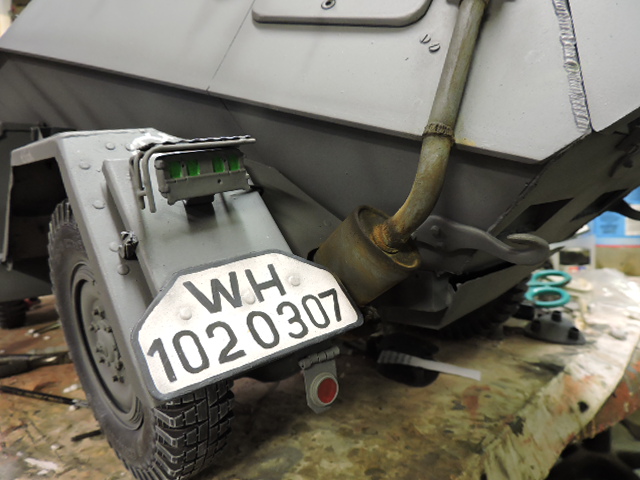
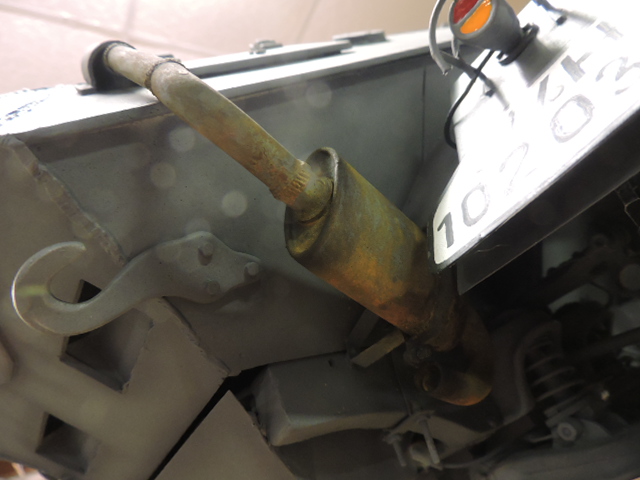
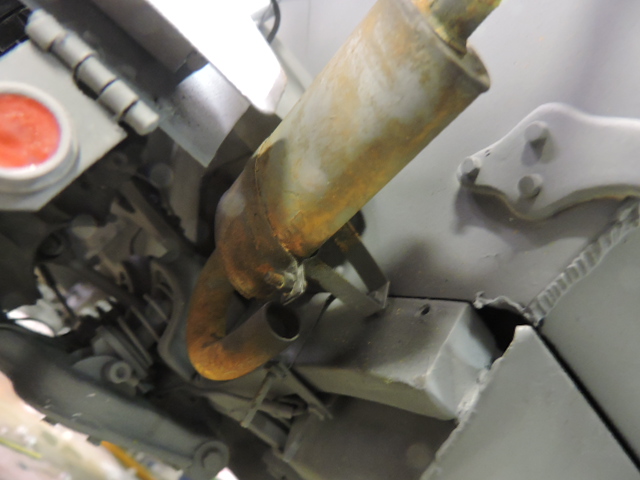
Since the last time I posted I’ve worked on and finished up the exhaust muffler system.

The sets were added to the catalog, http://eastcoastarmory.com/222.htm

To mount the muffler to the frame the 222 had a metal bracket. The bracket was fabricated out of strips of sheet metal. The fastener grips to the muffler via a faster. Another fastener is also used to bolt the harness to the frame

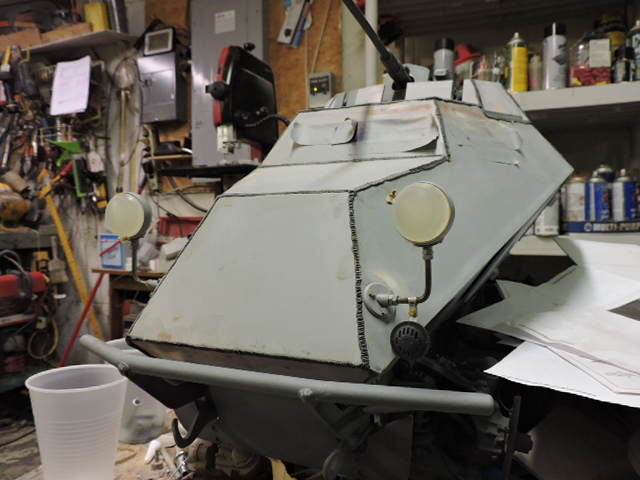
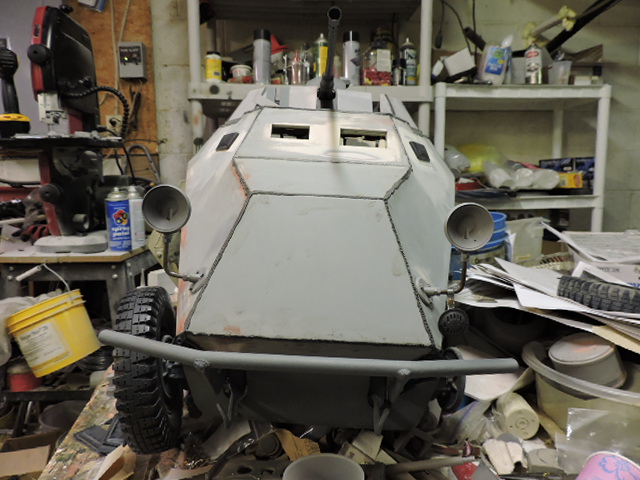
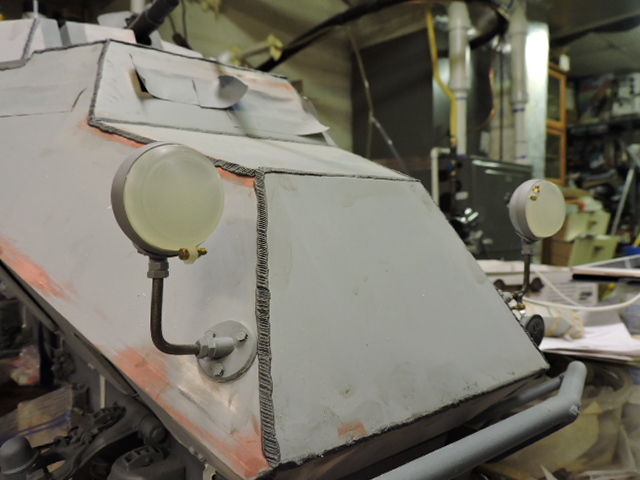
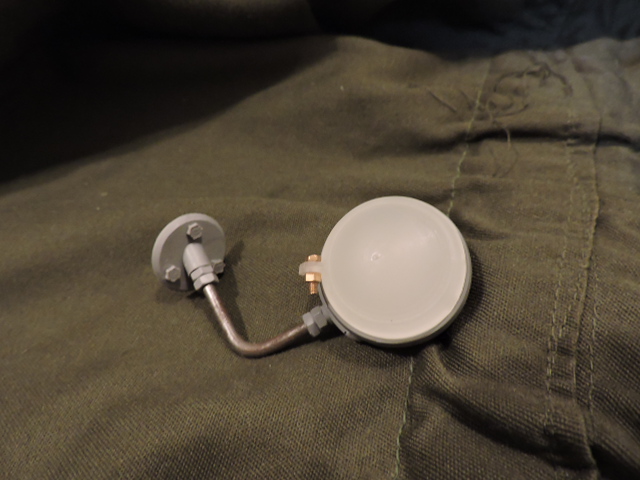
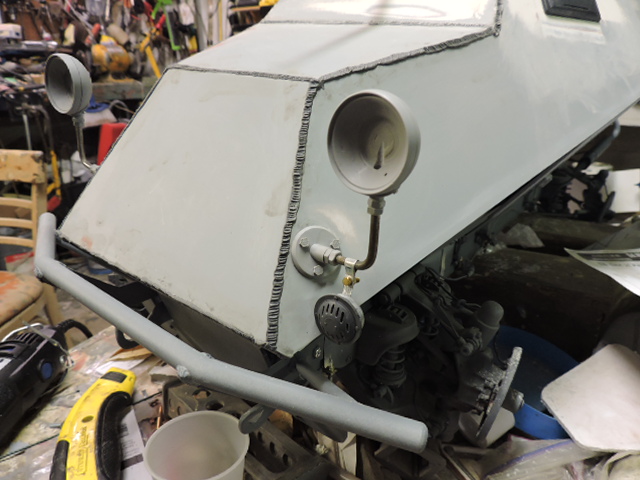
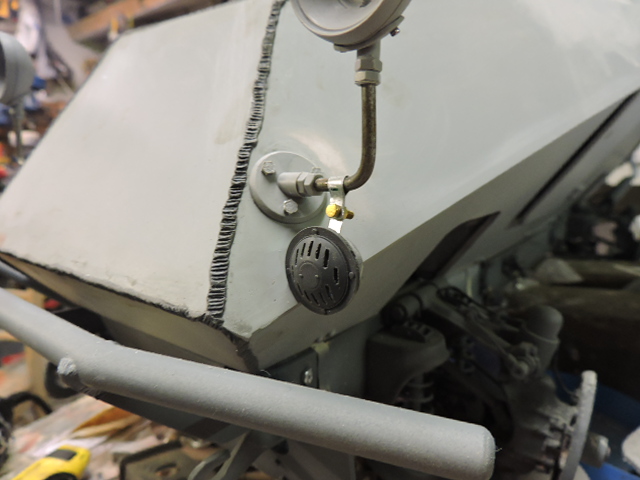
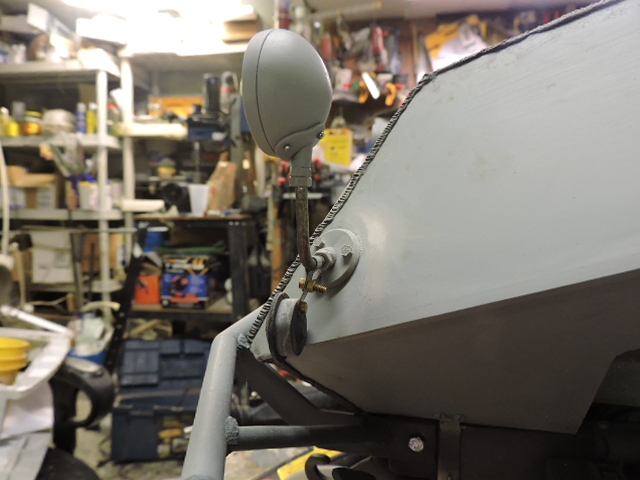
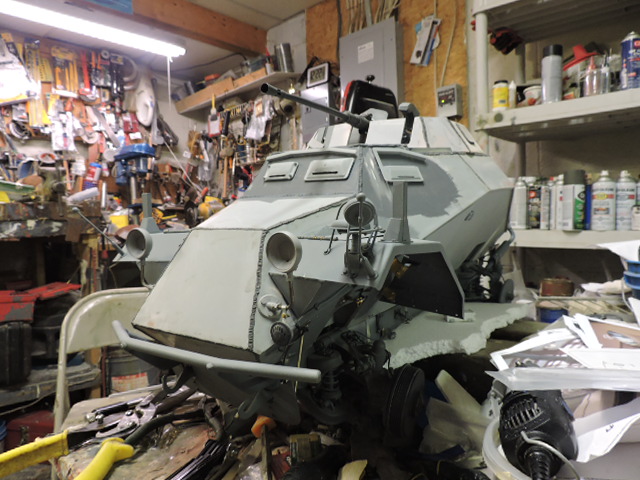
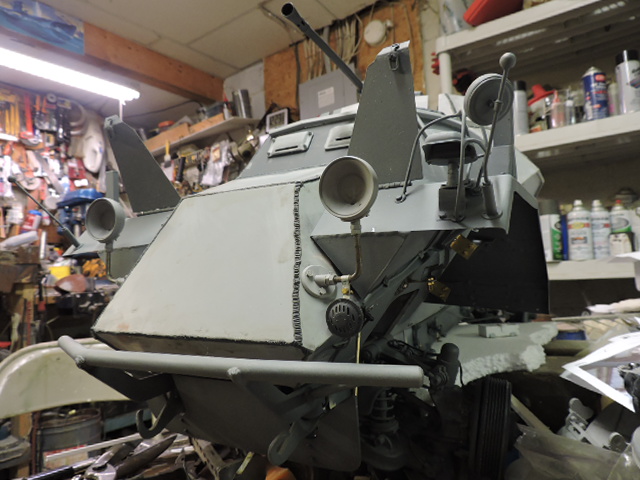
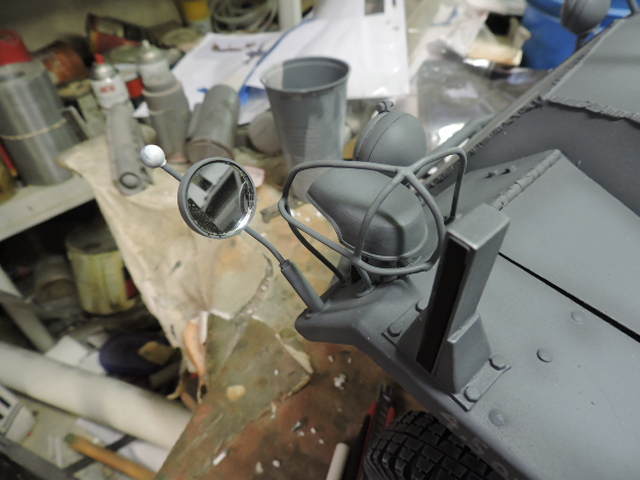
Also added was the front headlight cluster.

The headlights were also tooled and posted on the catalog,

and for the RC folks, The headlights are hollow, and have a clear resin lens portion. Being hollow can be made to be illuminated via a LED or a bulb by replacing the solid shaft with a tube of the same diameter.

[/img]http://eastcoastarmory.com/german_parts/222_headlights/DSCN7027.JPG[/img]

On the Left hand side light there is a Siren bolted to the headlight arm. For the model I used a Panzerwerk resin one I had I on hand. To mount it to the arm I fabricated a small bracket out of metal. All assembly is done via fasteners like the real unit. A power cable will be added after the tin work as it rides along the one brace for the front fender.

More pics were posted on the ECA facebook page

http://www.facebook.com/EastCoastArmory/

These were the last two parts that needed to be added before I would be able to work on the fender tin work. With them out of the way I can focus on this next leg of the build. More to come!

More to come

Hello!

That sure is lookin’ great! I especially like the horn - all Polish cars had one like it up to the nineties, yours looks very real!

Good luck with your build and have a nice day

Paweł

This has to be one of the most impressive builds I have ever seen. From the start, with simple plastic sheets to the fantastic work of art you have now, has been an eye popping collection of photos. Well done!

Thanks guys, The build keeps trucking along,

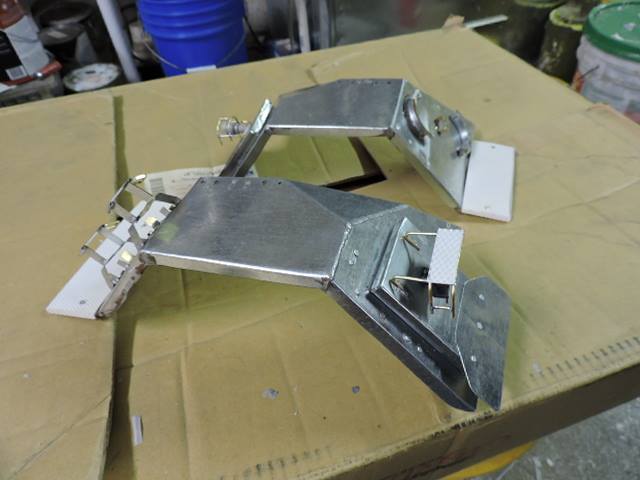
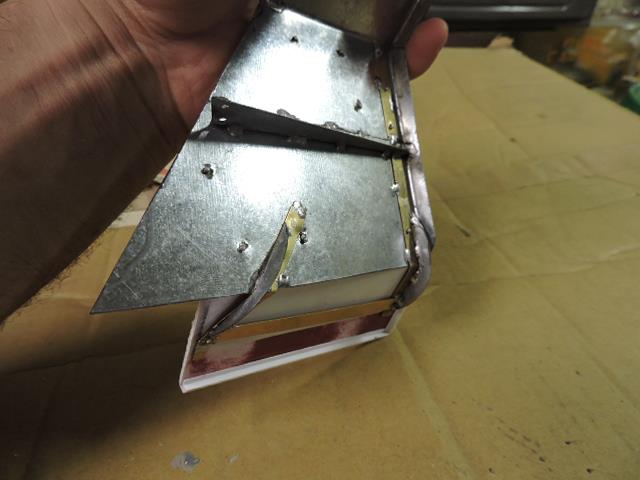
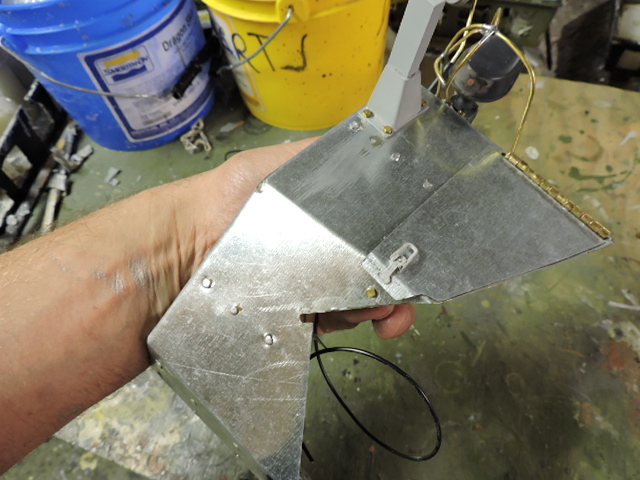
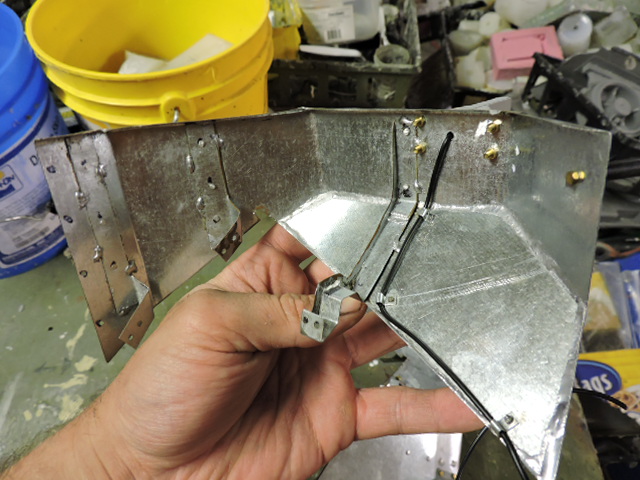
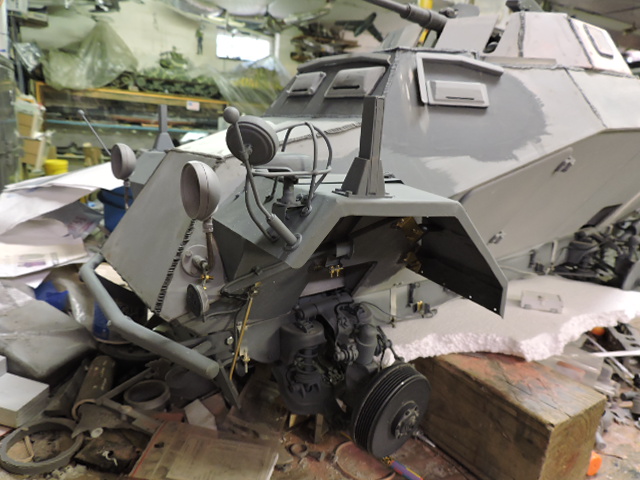
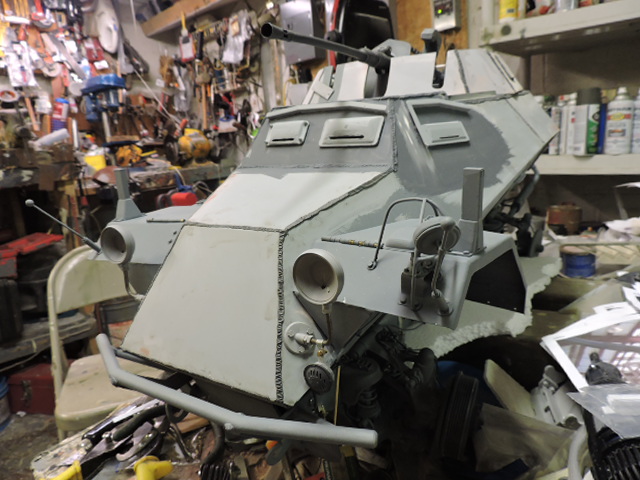
After the last post I turned my attention on this build to the Tinwork. For starters the front fenders. Like with most of my builds for the fender work I used all sheet metal fabrication.

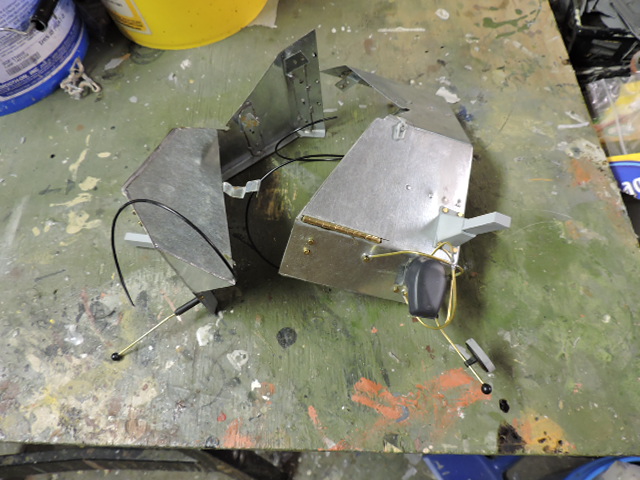
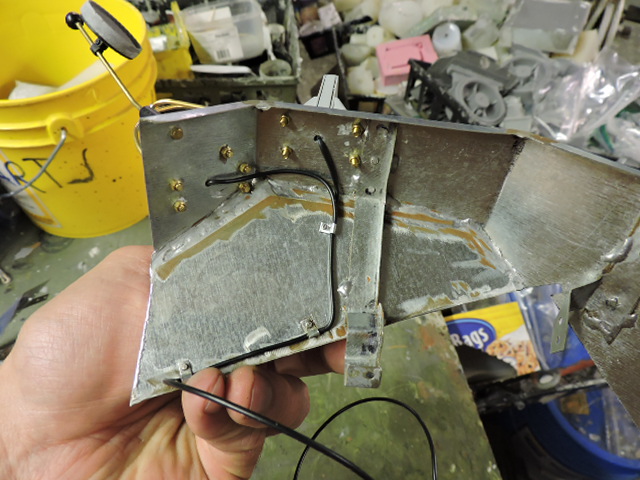
The fenders are fully detailed, on both the outside and inside portions of the fenders. All of the fenders are soldiered assembly, or fastener assembly… no glues were used on these parts.

[ing]http://eastcoastarmory.com/forumpic/222_armoed_car/fenders/DSCN7578.JPG[/img]

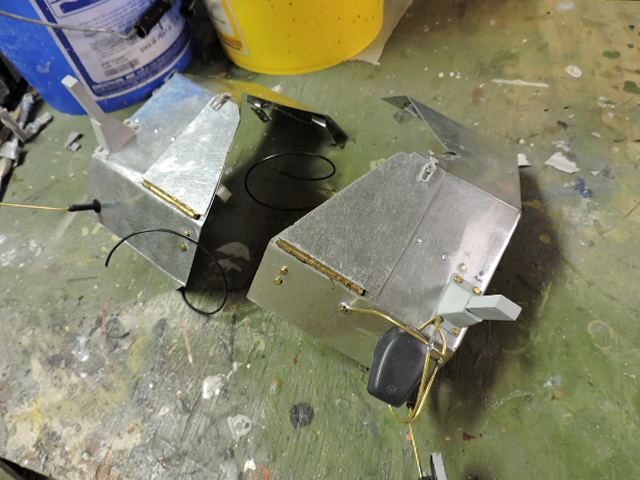
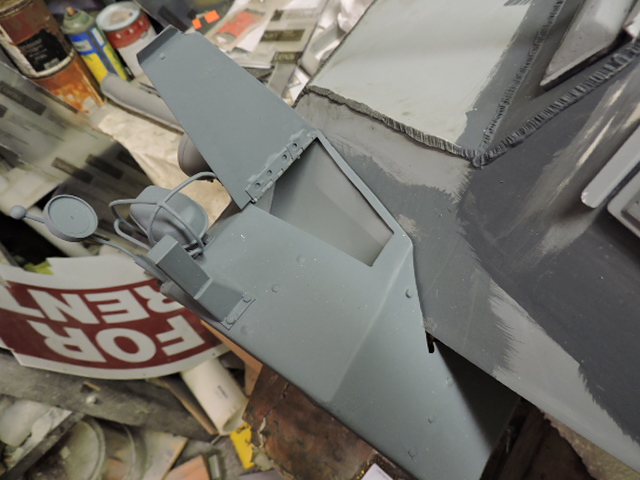
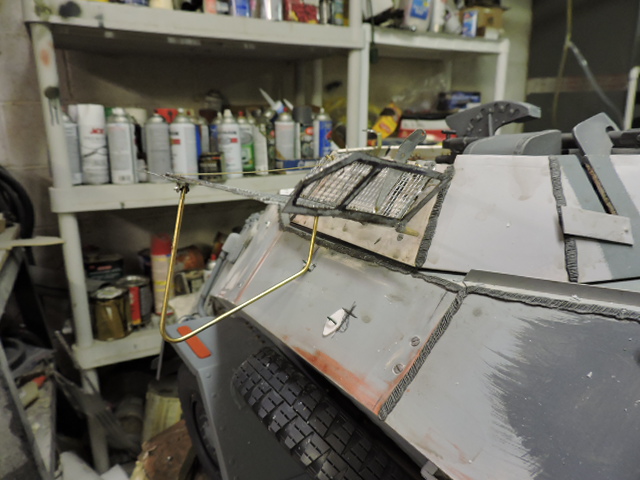
One unique feature that the front 222 fenders have it that they are also a storage container. The container is built into the fender and is accessible via a hatch door on the top of the fender.

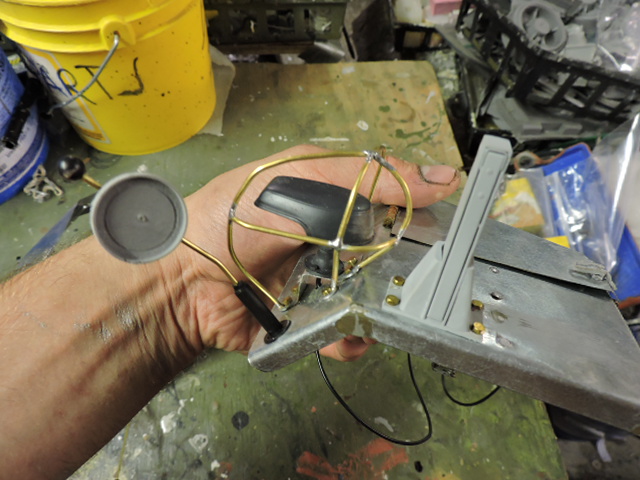
The other top details include the turn indicators and the fender clearance rods / side view mirror. and Notek light.

These parts are all from panzerwerk, however the turn indicator was modded to be for a 222 armored car, while the OOB Panzerwerk unit is for a 250 half track. also a pan was added to the mirrior mount so I can add a real disc mirror after the model is painted.

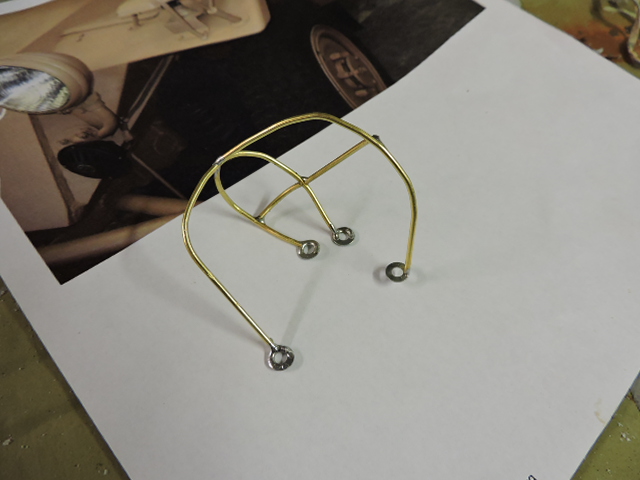
Because of the easily damaged located that the notek light was mounted the 222 had a very elegant brush guard that protected the unit from damage. This guard was fabricated out of brass rod. The guard’s feet were also fabricated as the unit is bolted onto the fender as the real unit again with no adhesives needed

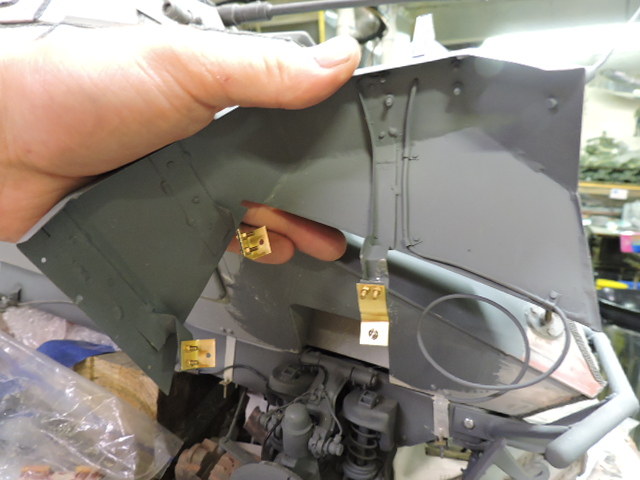
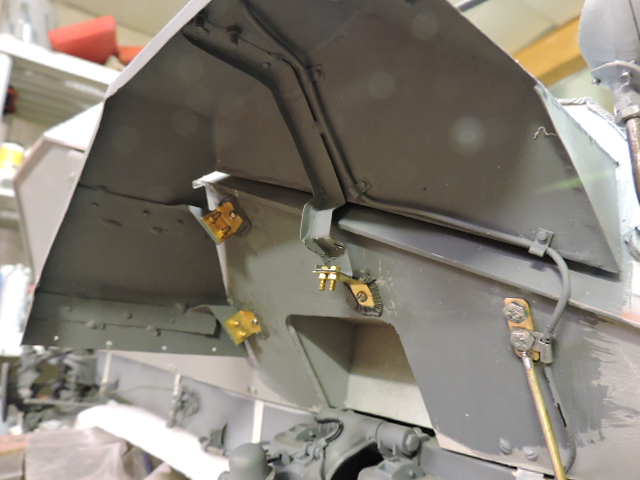
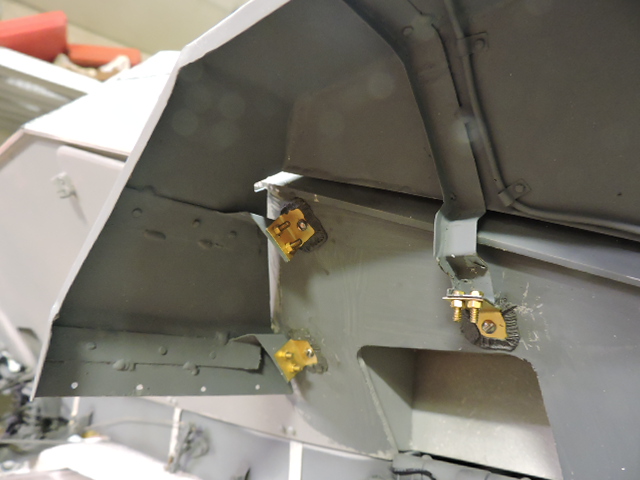
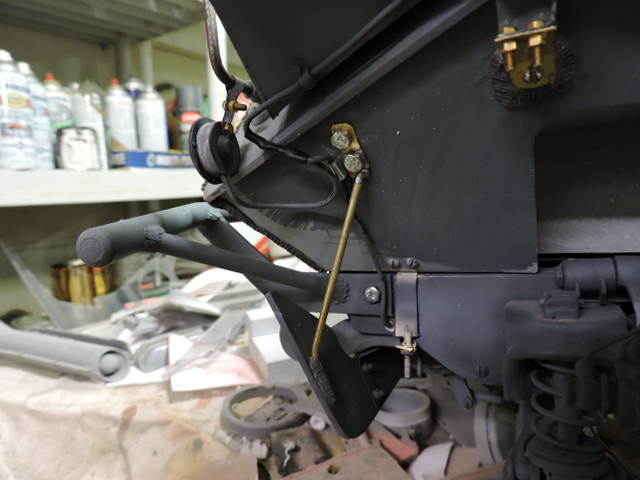
Another bit of detailing that went into the fenders were the interior rigidity / hull mounting braces. To mount them to the fender small rivets were used. Also found on the bottom portion of the fender are the power cables for the turn indicators, and the notek light. these cables are anchored in place via metal straps that keep them tidy and from running loose.

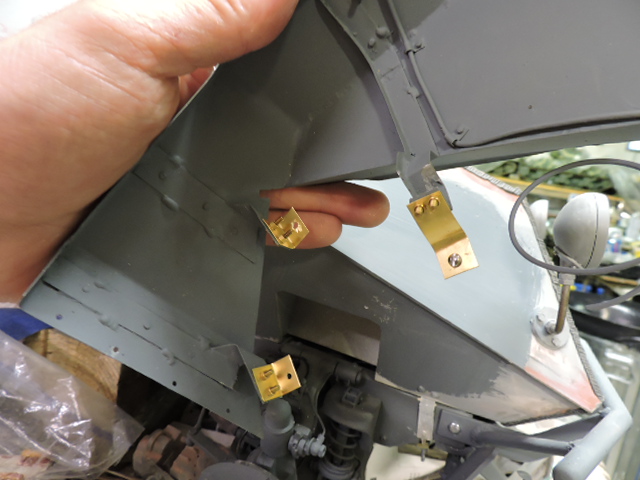
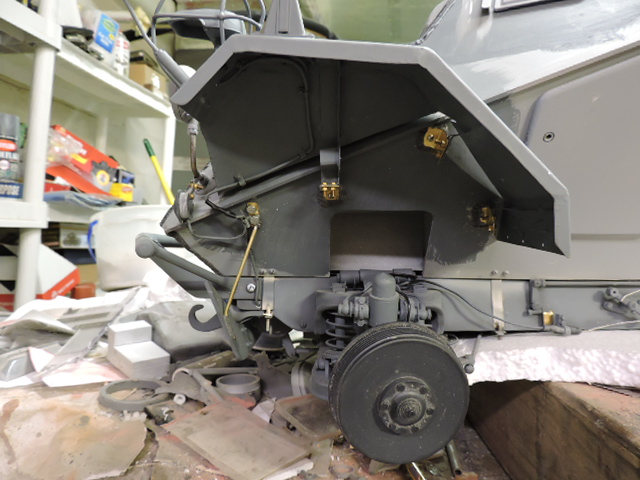
once all these details were fabricated the fenders then went into prime and paint, Once painted they were ready for install. To install them to the model Brass mounting plates were fabricated. The fender bolts to these parts like the real unit.

The braces are then attached to the hull, On the real unit these were welded, however due to the strength needed I used fasteners in addition to the sculpted epoxy welds. When on they are solid.

On the lower front portion I noticed on the real unit that there was an extra support arm present that acted as both a support for the lower armor plate, but also acted as a guide for the power cables. The arm was fabricated out of brass and added to the correct location

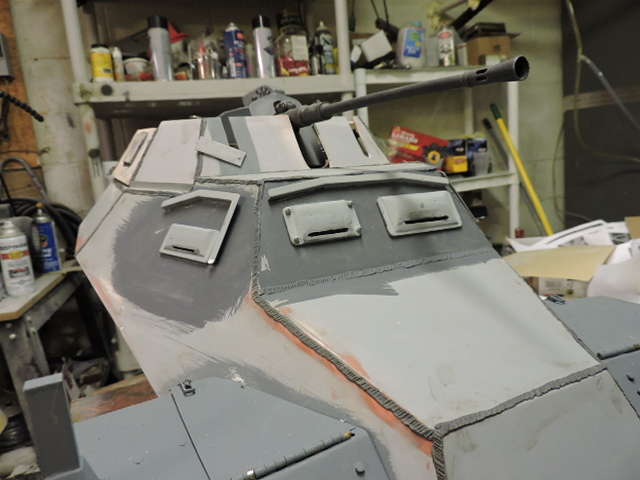
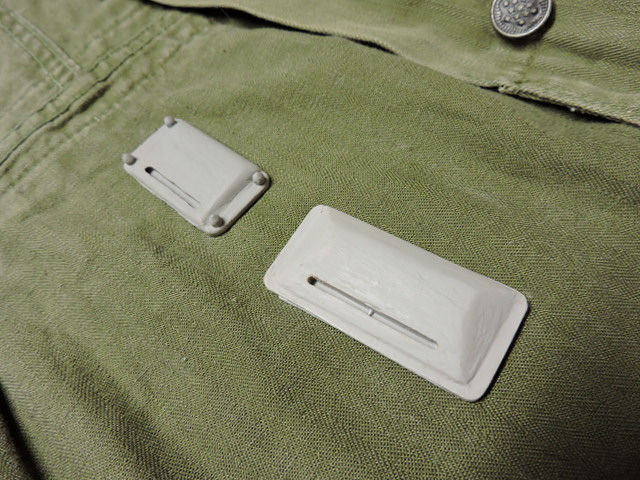
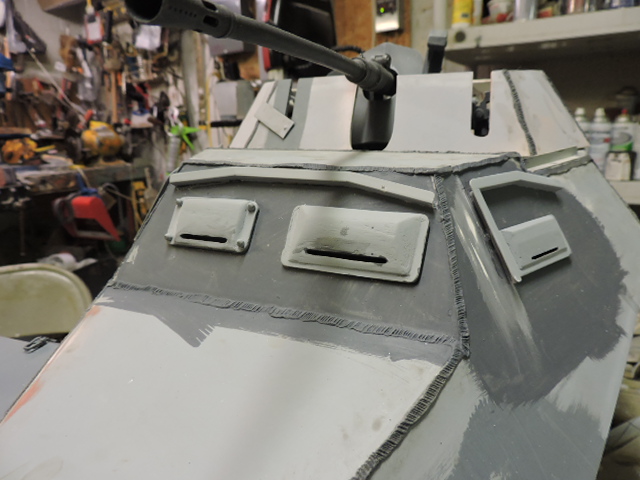
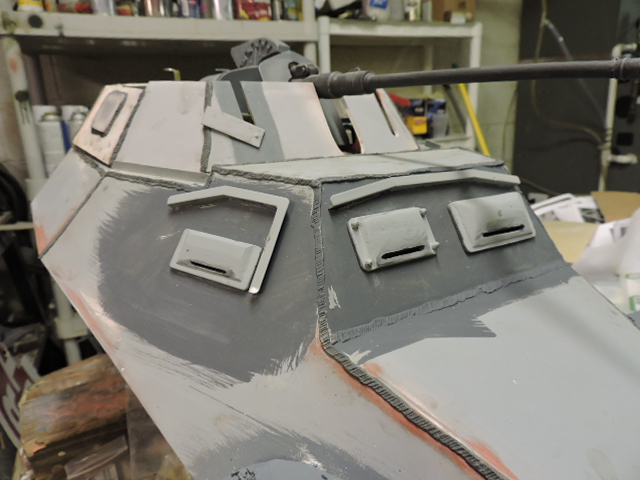
Once the fenders were out of the way I moved to the visors. For the side visors I used the set from Panzerwerks. For the front visors I tooled up a new set and listed them on the ECA catalog, http://eastcoastarmory.com/222.htm.

The gutter system were also fabricated. They were made out of Plastruct angle

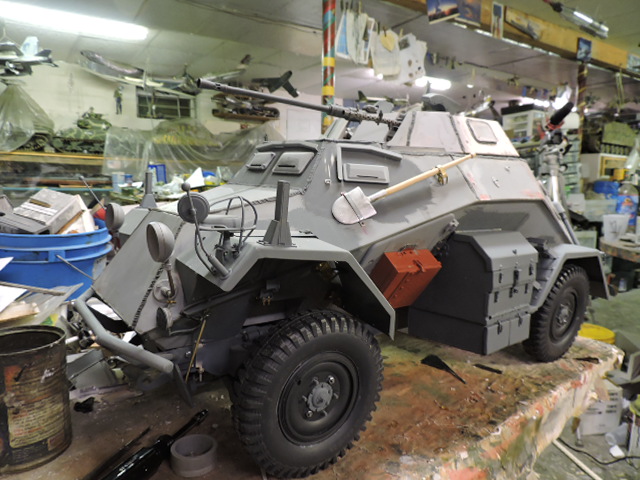
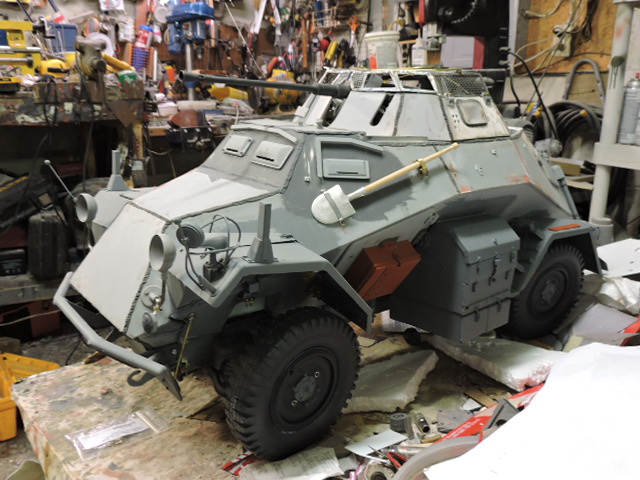
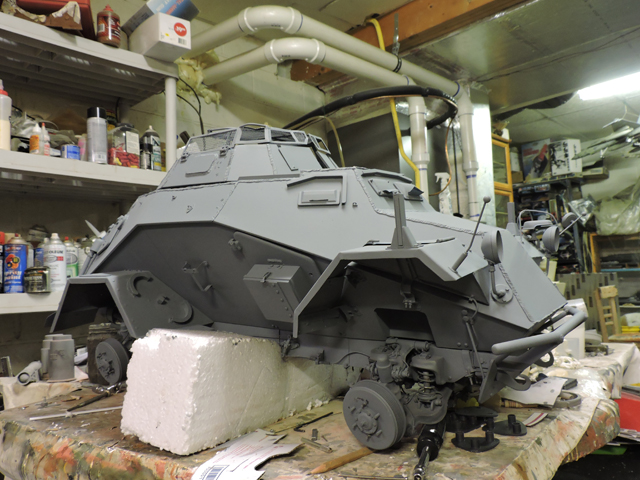
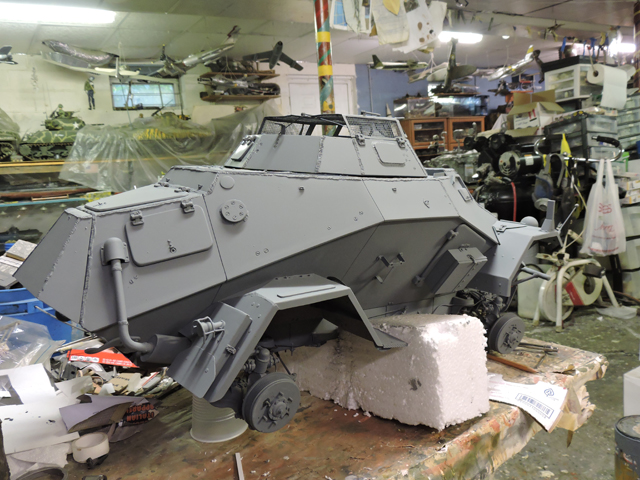
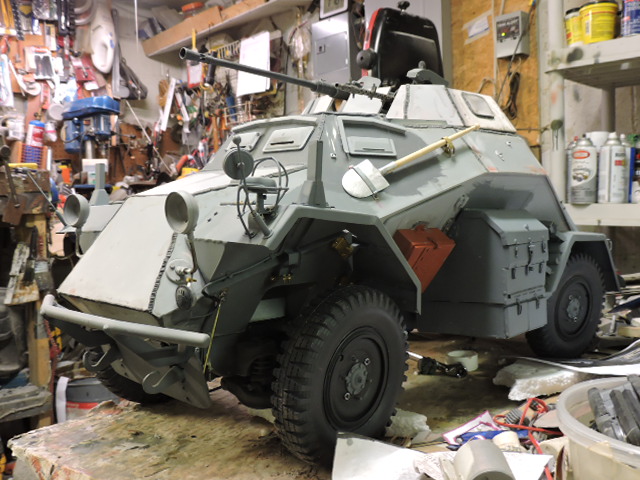
With these additions out of the way the model now more then ever looks like a 222 armored car,

More pics were posted on the ECA facebook page, http://www.facebook.com/EastCoastArmory/?ref=bookmarks

A video update was also posted on youtube, https://youtu.be/IgTfJNkJYHc

With the front portion of the model basically now complete, I have started on the rear fenders and will post them once completed. More to come!

This is just awsome.

My wife would literally kill me.

This is amazing. Have been following this build for 3 years now. Talk about a labor of love. looks like it’s close to painting stage.

With more stuff now out of the way the model is another step closer to completion!
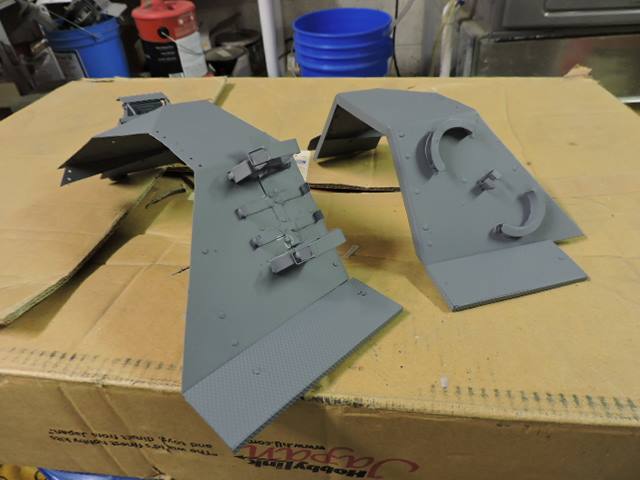
Once the front tin work was wrapped I turned my attention to the rear fender work, just like with the front fenders the rear fenders are all scratch built out of Sheet metal
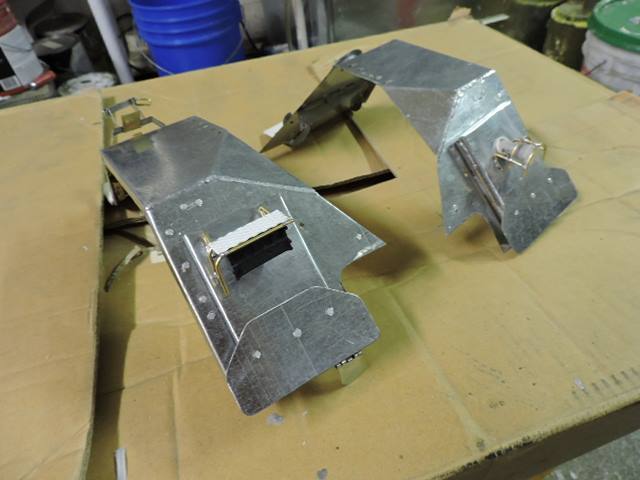
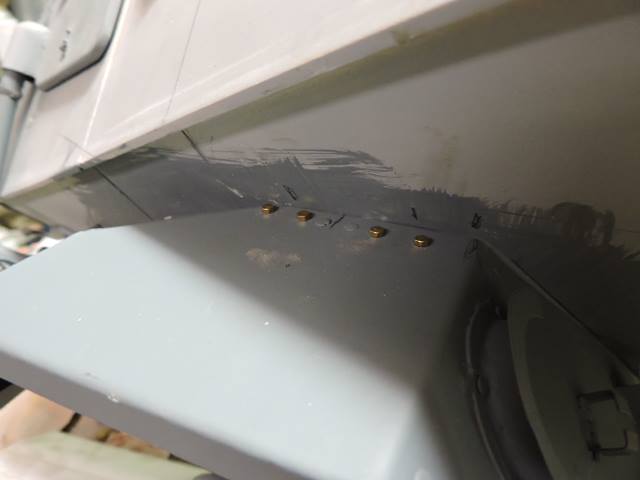
All the fender details are all held on with fasteners and solder joints. Some of the details include the fender mounts / supports, reinforcement braces, rear boxes, brush guards, and step braces.
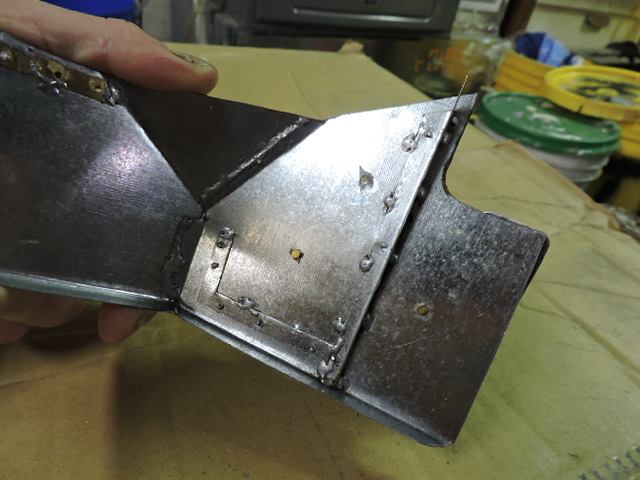
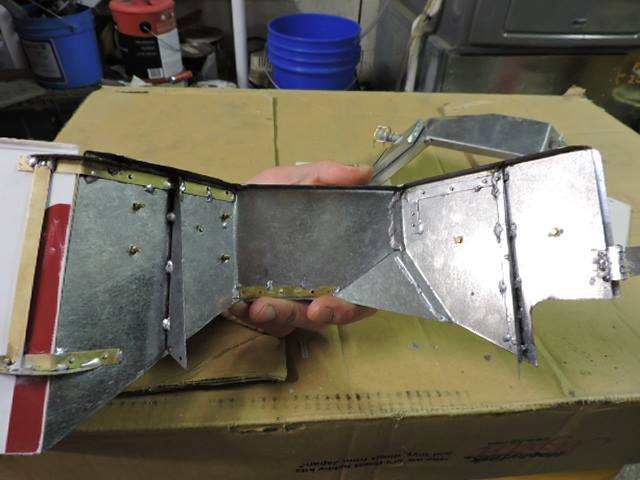
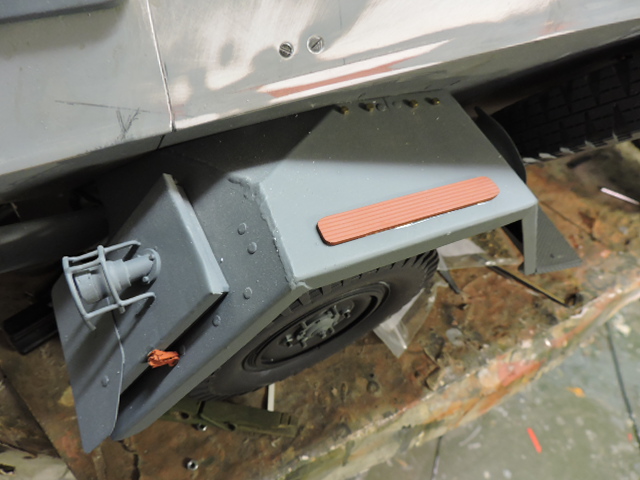
For the front foot rests / running boards the left and right hand side are different. The left hand fender has mounts mounted in a straight line, while the right hand fender has one of the supports mounted in an angle. This is done because of the spare tire the right hand fender has a smaller foot rest and angling the mount cuts on space.
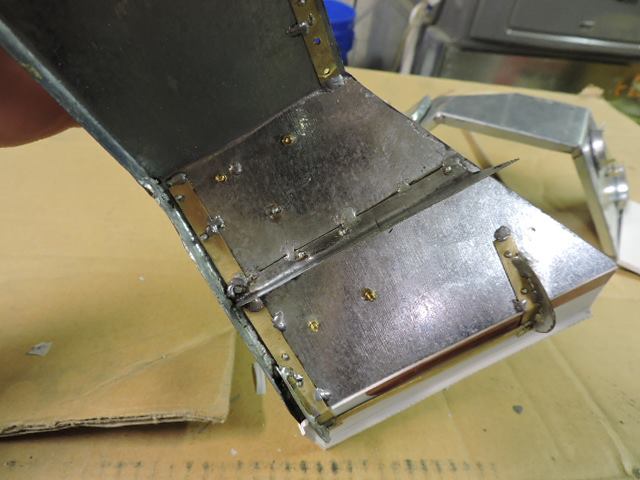
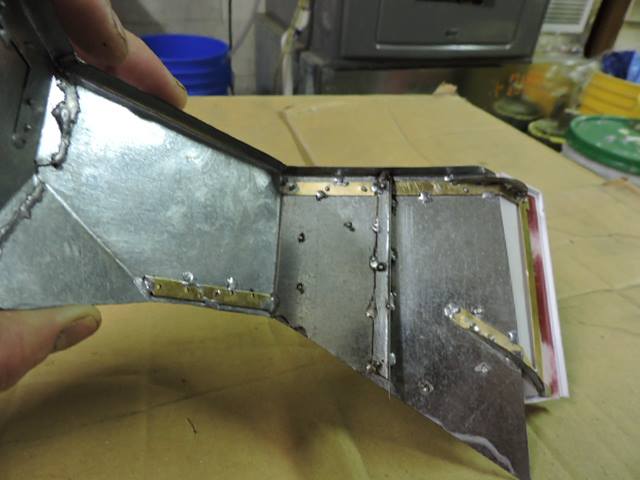
The foot rests themselves are fabricated out of styrene and plastic diamond plate. The plastic plated were riveted in place as on the real units
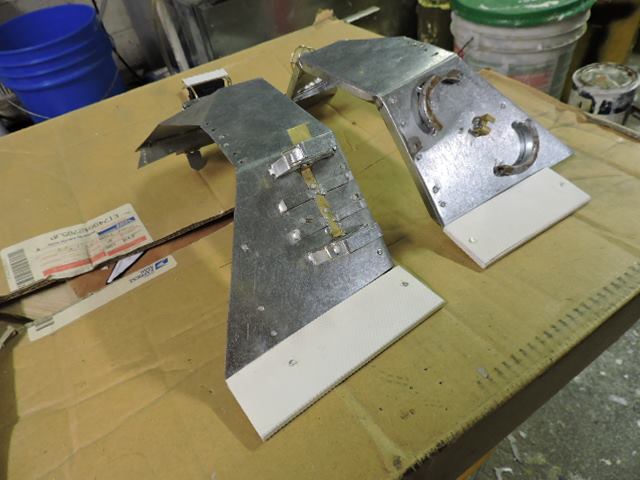
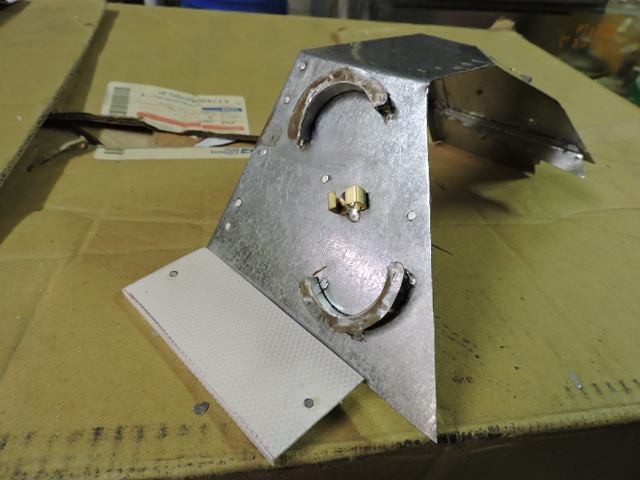
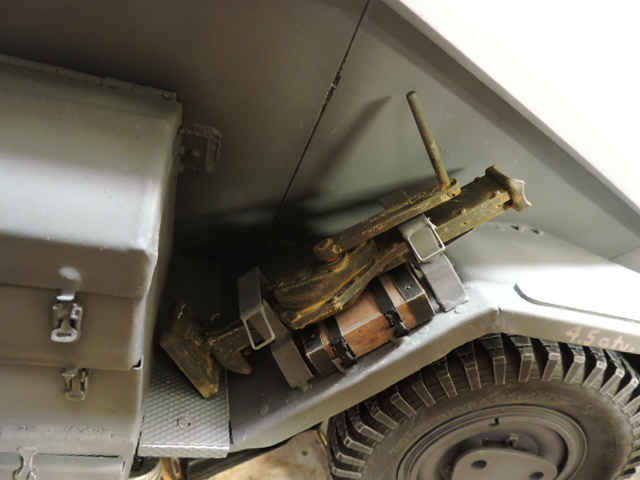
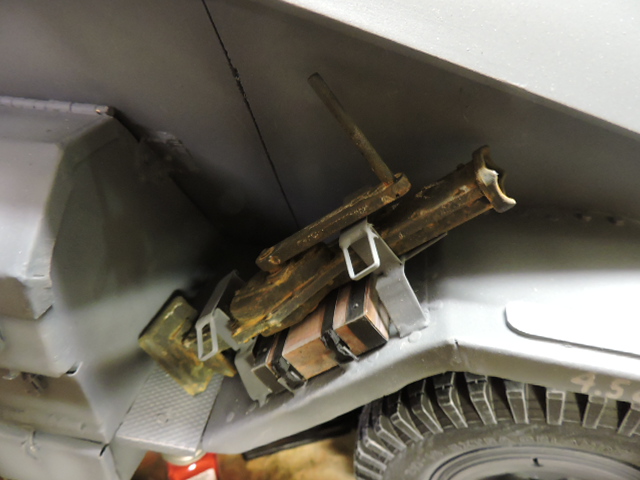
Also on the front portions of the rear fenders of are several tool mounts. On the right hand side there are mounts for a tow cable, while on the left hand side there are mounts for the Jack and jack block. On some versions of the 222 there is a small box in this location, which then moves the jack details to the left hand fender top. However since this model will not be getting the extra storage box the jack remains in this location.
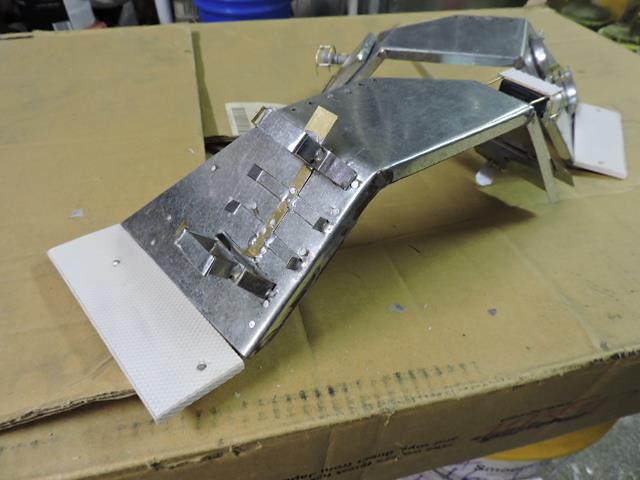
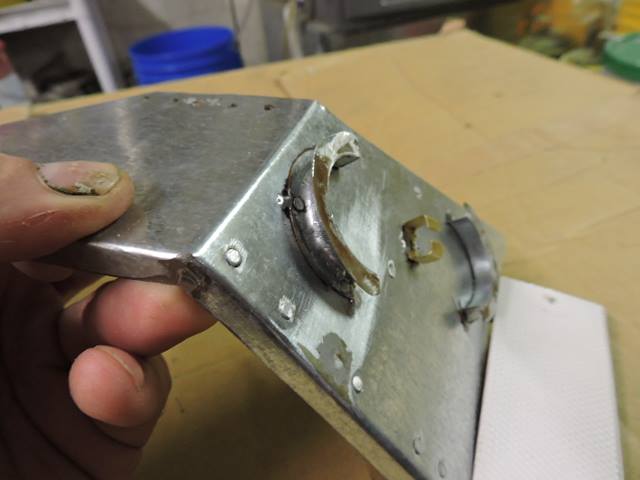
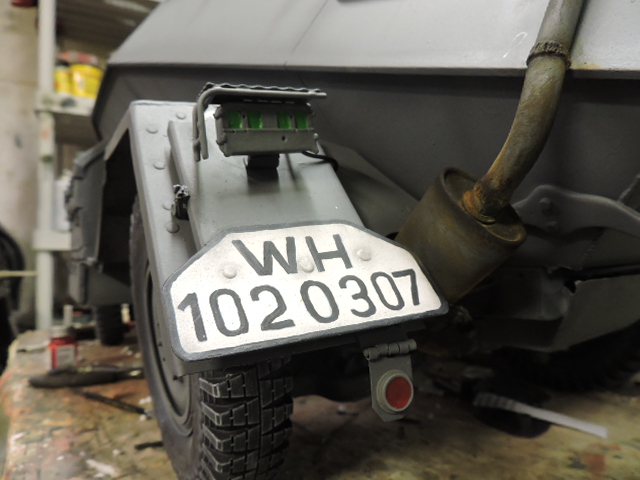
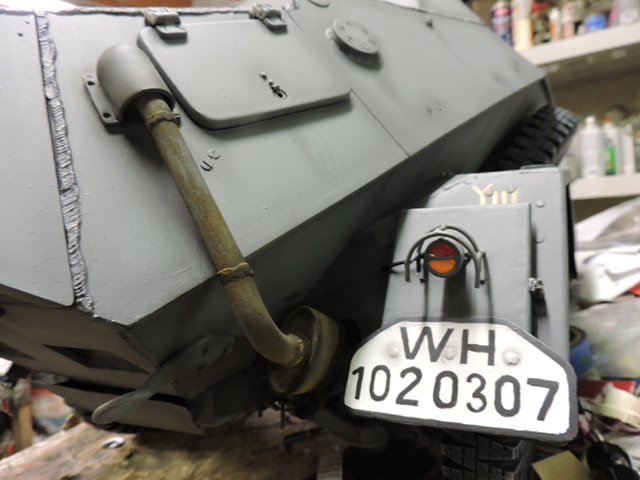
On the rear of the fenders there are small storage boxes, licence plate locations, convoy / tail lights, hinged reflector, and brush guards. The boxes were made to be functional, as was the hinged reflector.
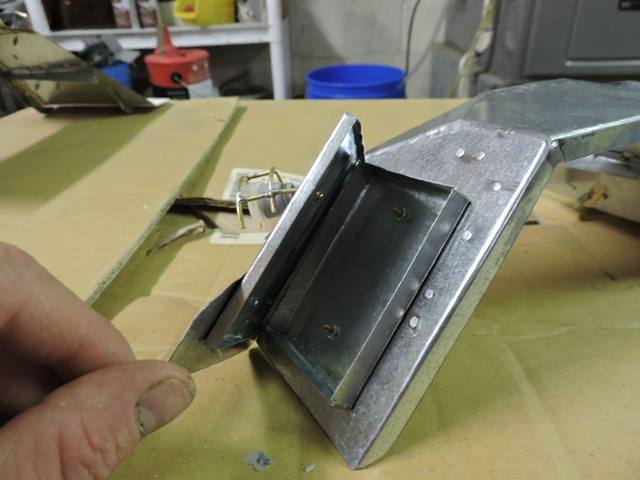
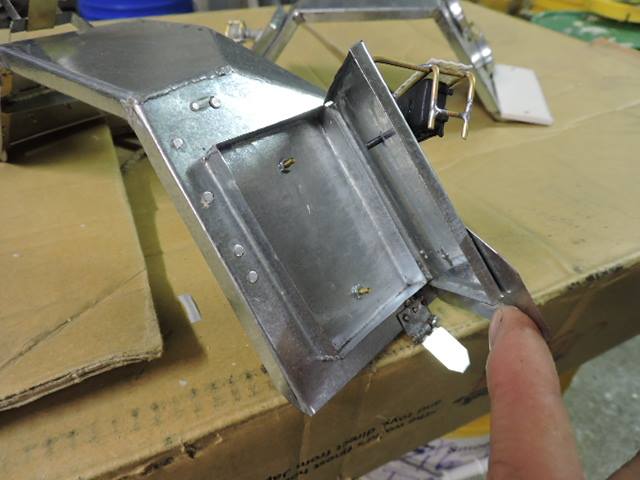
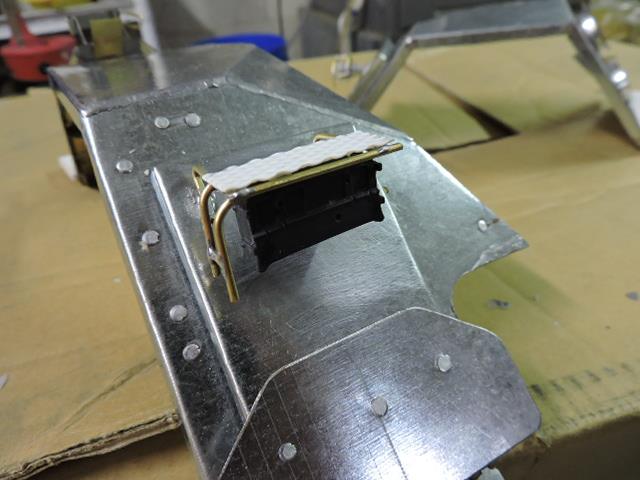
For the Notek light I used the resin set from Panzerwerk, the only mod needed to be made was to alter the angle of the notek’s mounting plate as the 222’s rear fender angle was more steeper then the 90 degree angle on the panzewrwerk. This was done by heating the resin part until it became flexible, once cooled it set to the new angle.
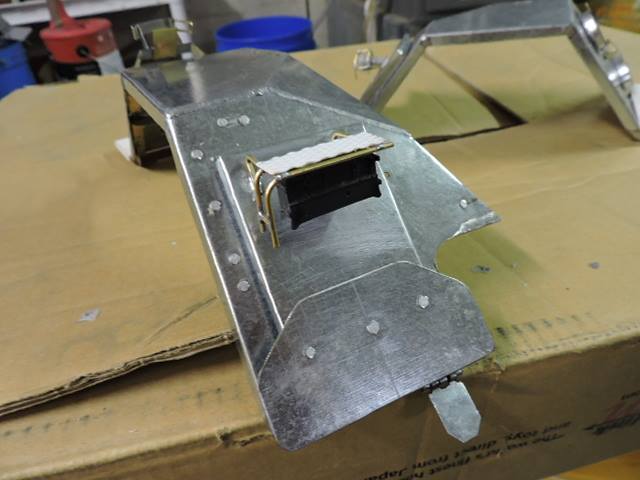
Once mounted a distinctive brush guard was fabricated out of brass and a length of diamond plate.
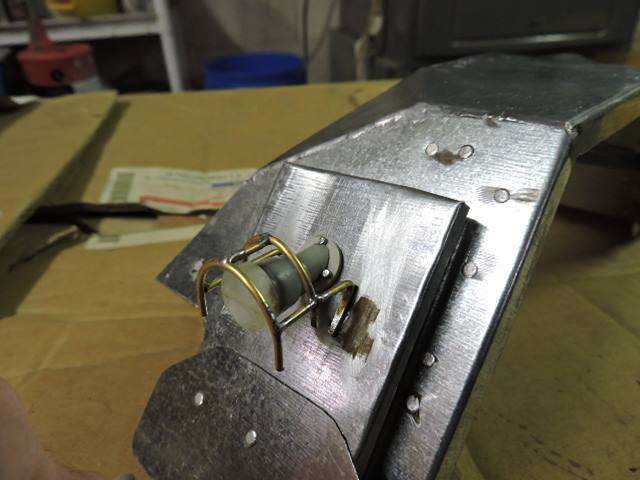
For the right hand fender the convoy light is found on the rear box. For the light I modded one of my US AFV tail lights. The light was fabricated out of two scrap cat eye lenses that were on hand in order to replicate the german double oval lens light.
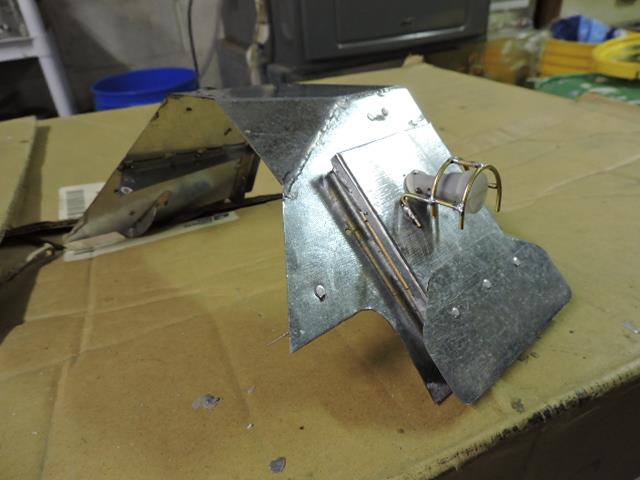
Like with the Notek light the convoy light has a distinctive brush guard protecting the light. The component was also made from brass and solder construction
Like I wrote above the reflector plate was made to be functional, and the reflector lens will be added after the model is painted.
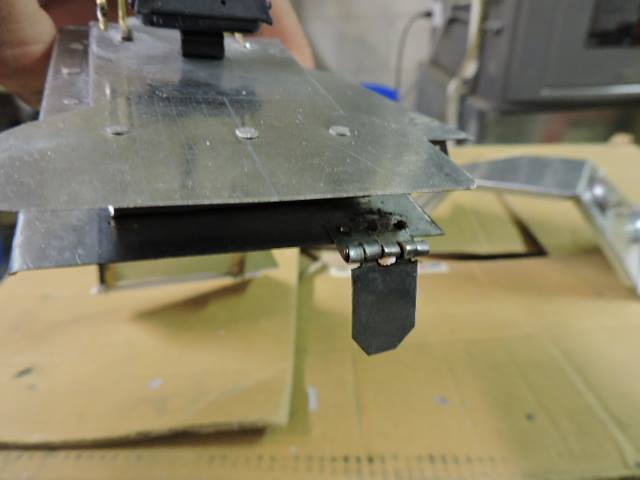
Before the fenders were mounted they were primed / painted with the base coat. Once added they were mounted to the model.
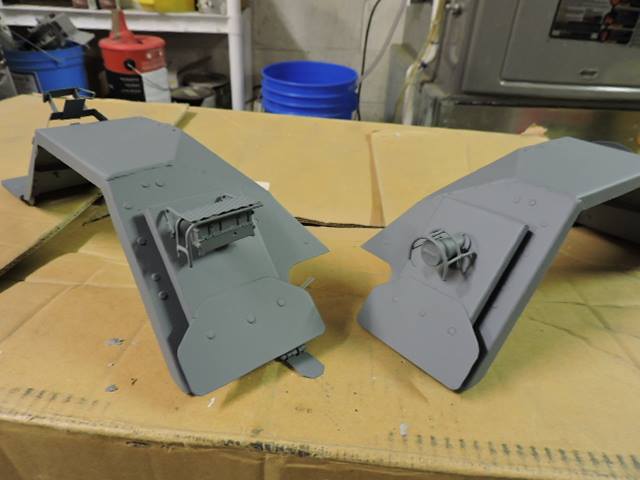
For the mounting fasteners and brass straps were again utilized like with and for the same reasons as the front fenders. After these pics were taken weld beads were added to the plates that attach to the model’s hull.
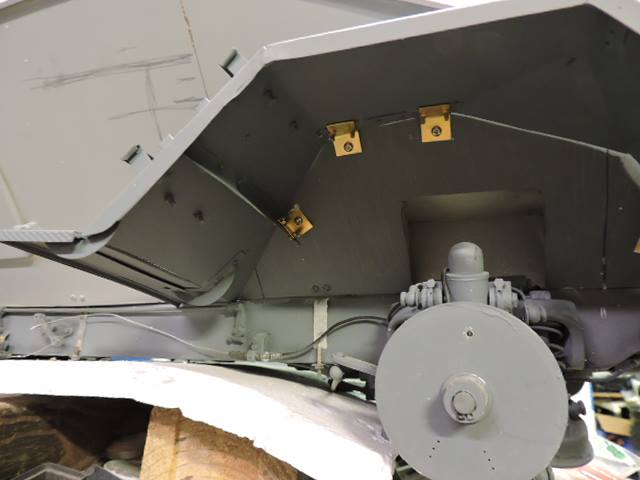
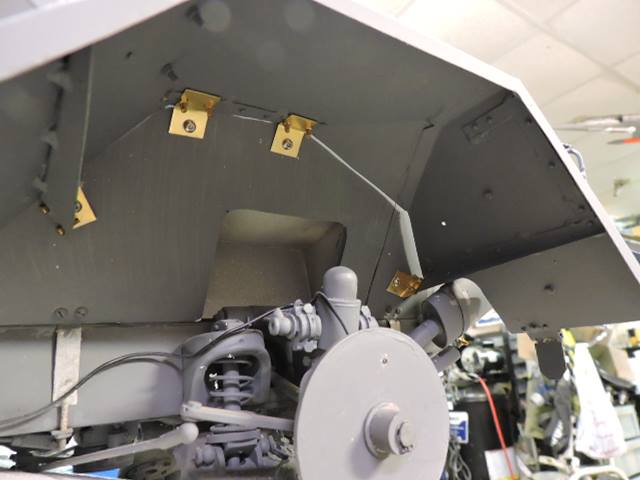
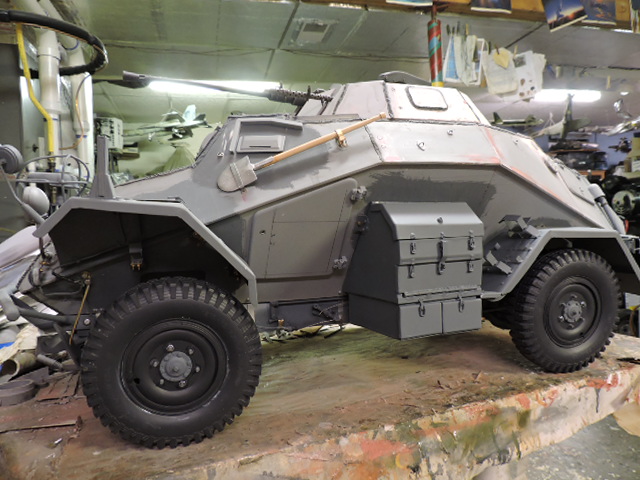
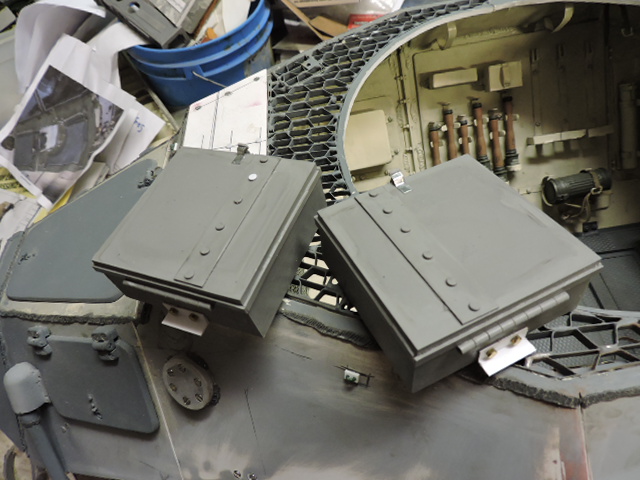
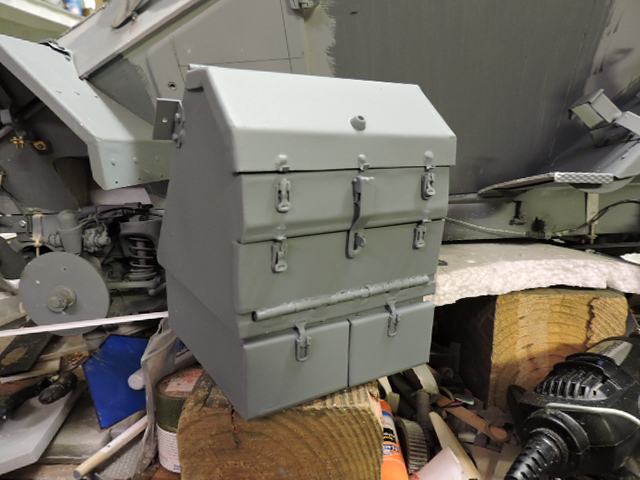
Once the fenders were done I then turned my attention to the side storage box.
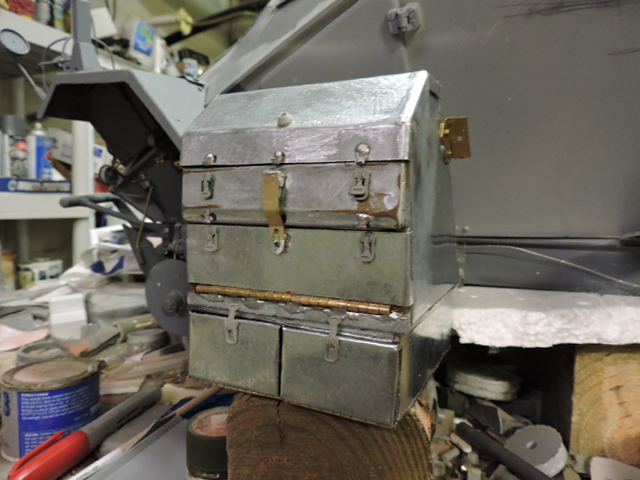
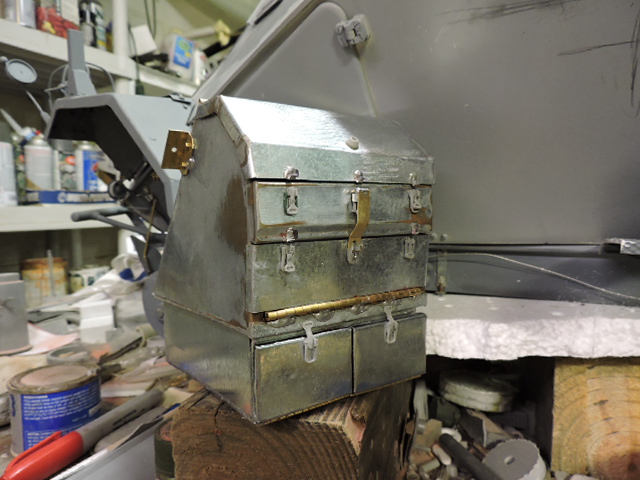
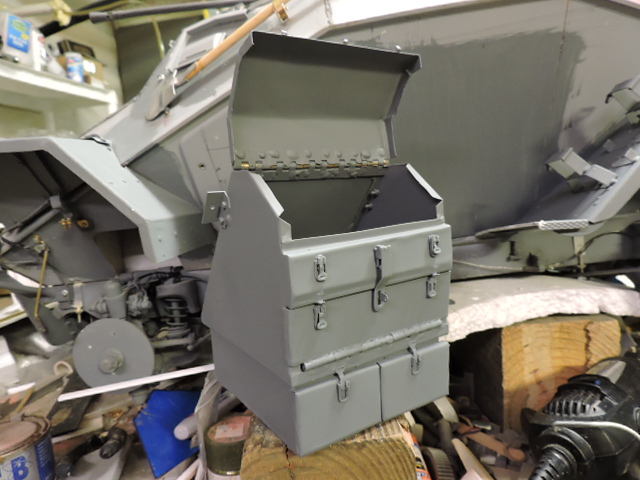
This was one of the more difficult components to fabricate. For the fabrication I went with an all sheet metal construction like the rest of the tin work.
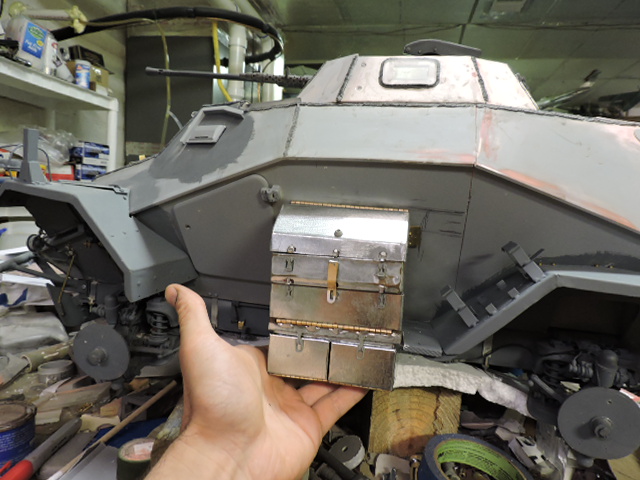
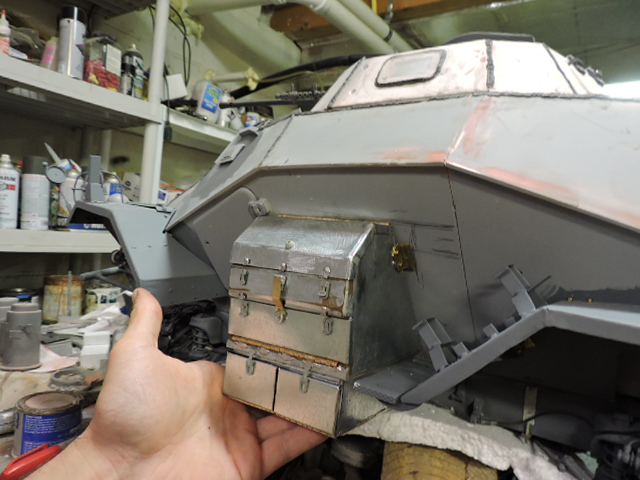
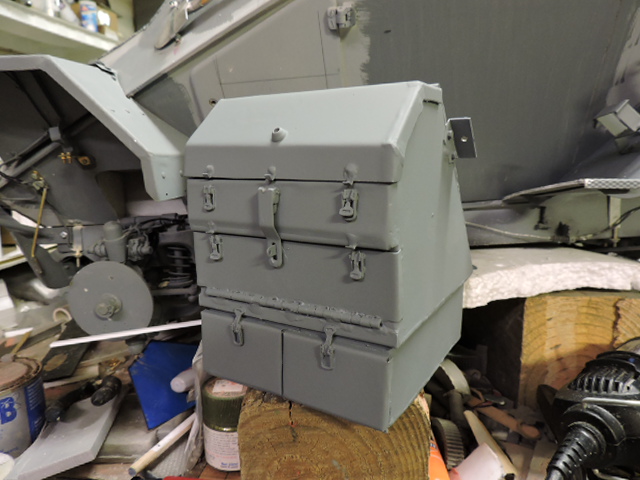
The box is made of two compartments. Both were made to be functional, there is a second set of boxes mounted on the bottom portion of the box, however on this model they are for detail only and are not functional.
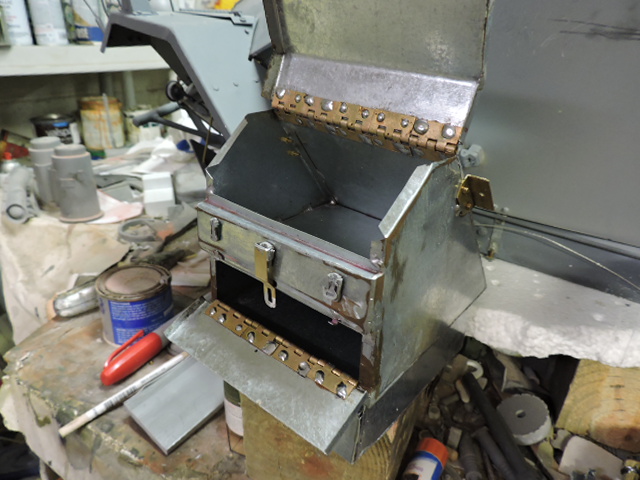
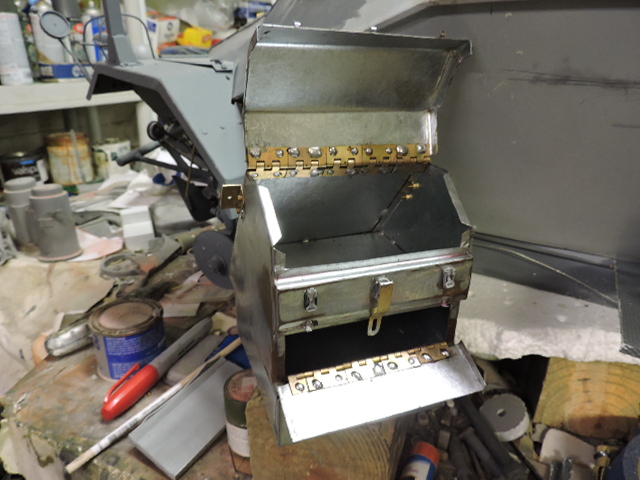
All of the latches that are present are for detail only, however the center latch was modded to be functional. And was done in order to make the top door work
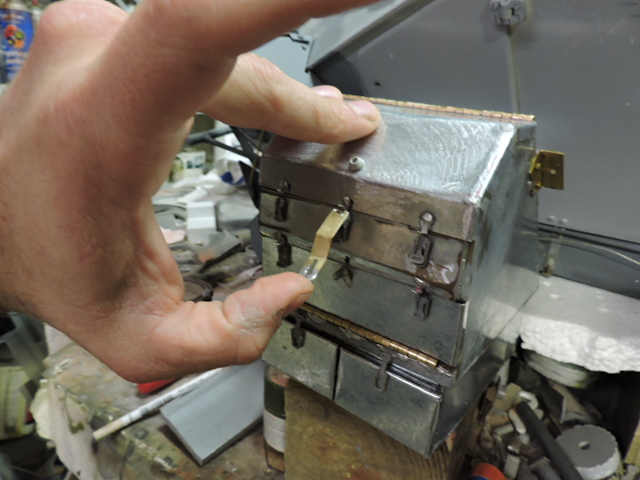
Like the other parts before the box could be mounted it was primed / painted, then mounted
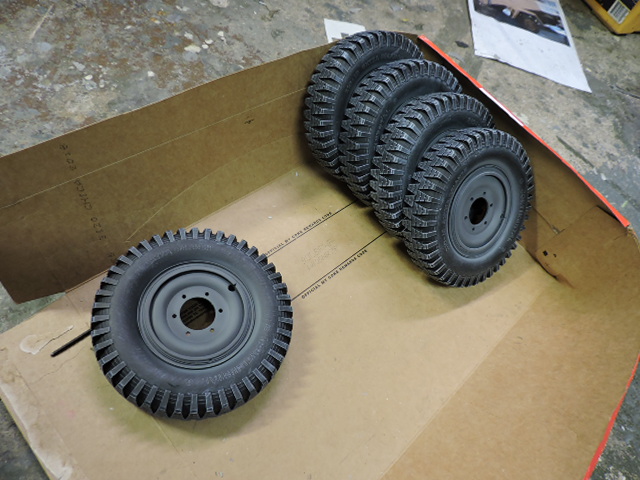
After the box was taken care of I then turned my attention to the spare tire. For the spare I will be using the Panzerwerk resin 222 wheels. To mount on the wheel I fabricated out of brass a tire mount rack.
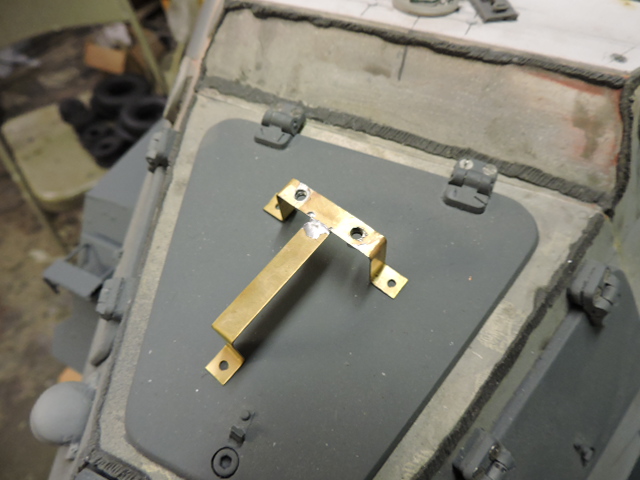
The rack is designed to have the wheel mount to it via fasteners. To make the setup work I deleted the molded in lug nuts and drilled out the holes, now the tire simply bolts on as per the real vehicle.
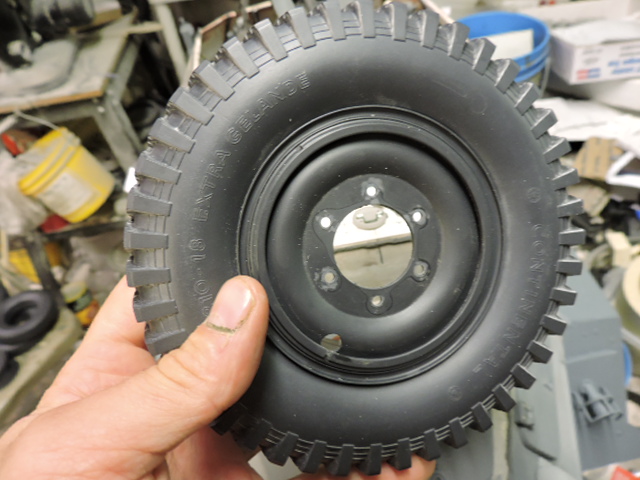
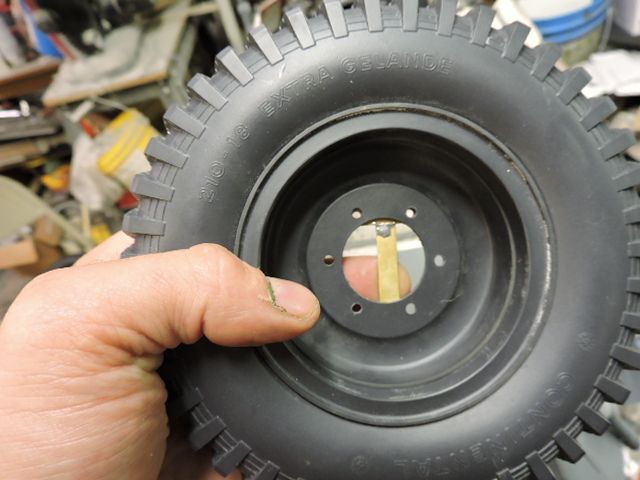
While on the wheels the model was now at the point to have the wheel hubs / drums mounted. The last time I worked on the suspension I designed the panzerwerk wheel drums to mount to my axle. Because the panzerwerk wheel hubs are a nice separate casting from the drum I needed to mod the mounting between the two as glues alone will not be a sufficient way to keep the wheels on the drums esp. as the model ages years from now.

The way I modded the setup was similar to what was done on the spare tire, first all the molded in lug nuts on the wheel hubs were deleted, and holes were drilled.
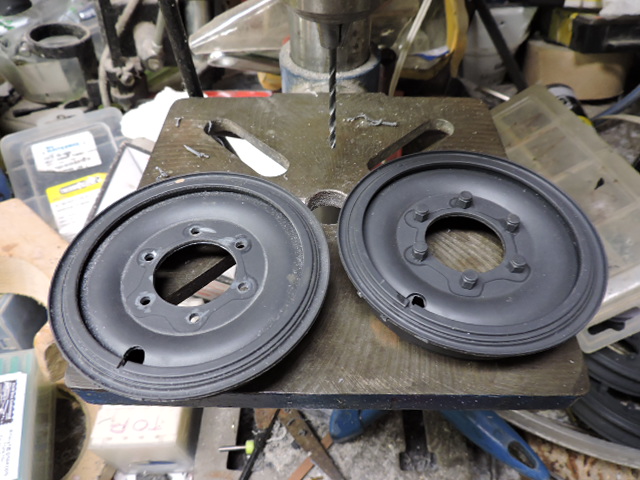
The corresponding were marked and drilled into the solid resin wheel drums
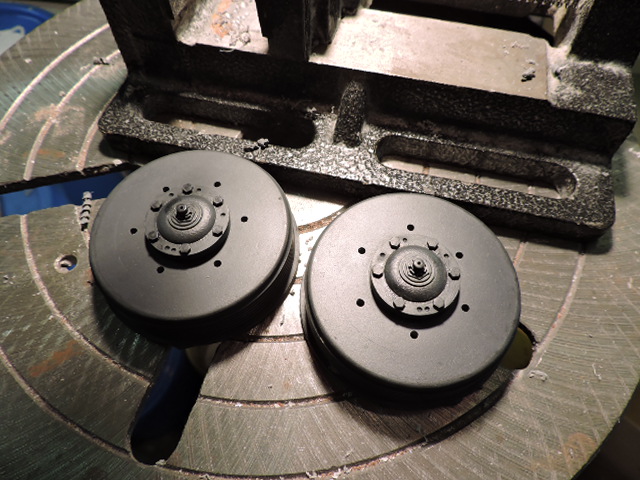
These holes will be for the threaded rods to emerge from the drum, however just having the threaded rods emerge from the resin in still not strong enough, as in my experience when you have a threaded rod glued or epoxied on a hub like this they will have the tendency to work themselves loose when threading on the new lug nuts. The design I came up with utilizes hidden cap screws. Holes were bored out on the reverse side of the drum
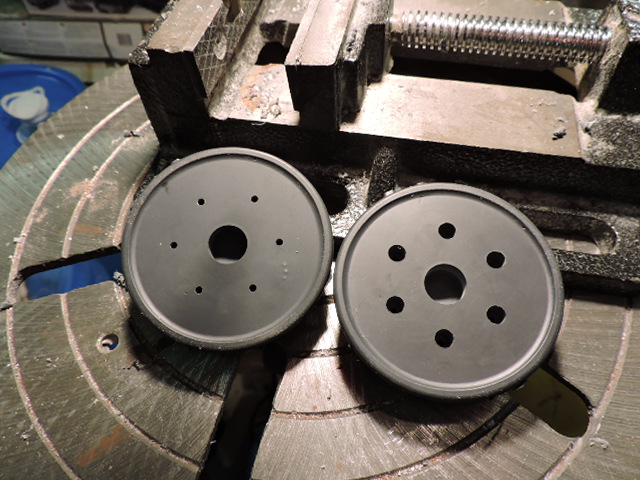
The holes are all at a set depth that will allow the cap screw to be bolted into the resin, have it’s threads protrude from the opposite end at the same level, and the cap will be flush with the surface. Since this portion of the drum will be underneath the circular cover on my suspension they will not be visible
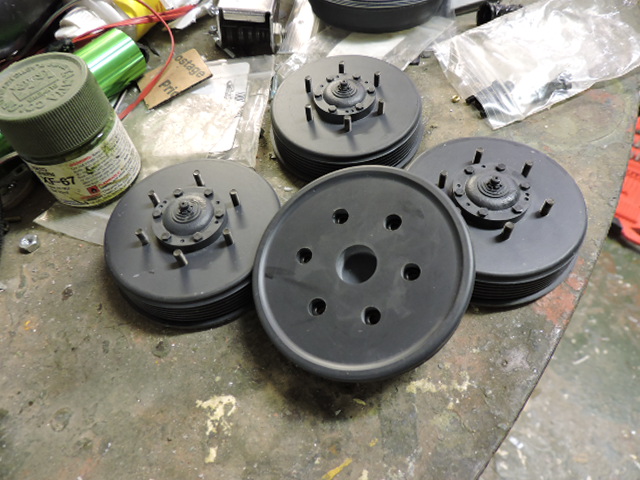
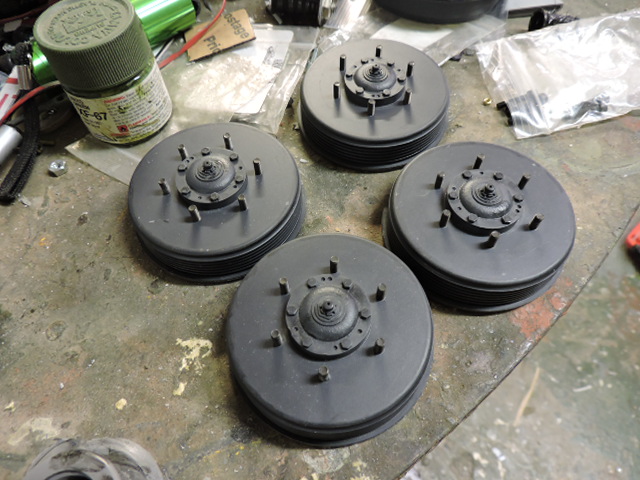
After the fasteners were added these parts went through the prime / paint steps. For the install they were epoxied onto the corresponding rolling surface on the axle
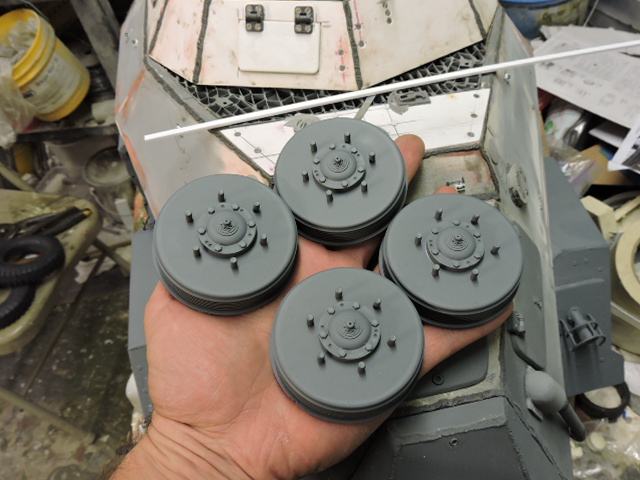
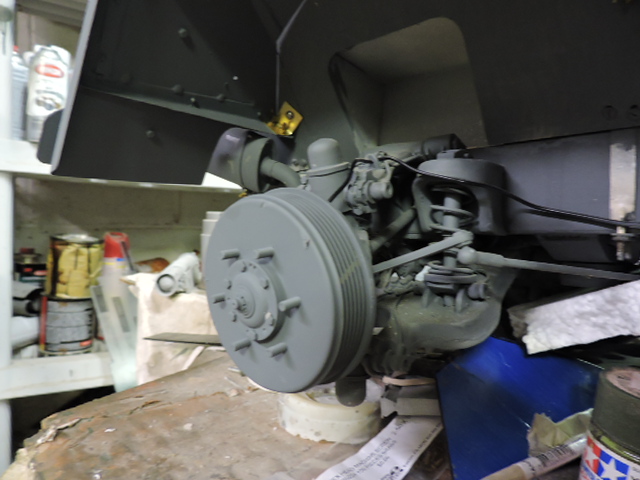
With this system the wheels all spin freely, and when bolting the wheels to the drums there is no chance of the fastener working itself loose, and the wheels are on nice and secure.
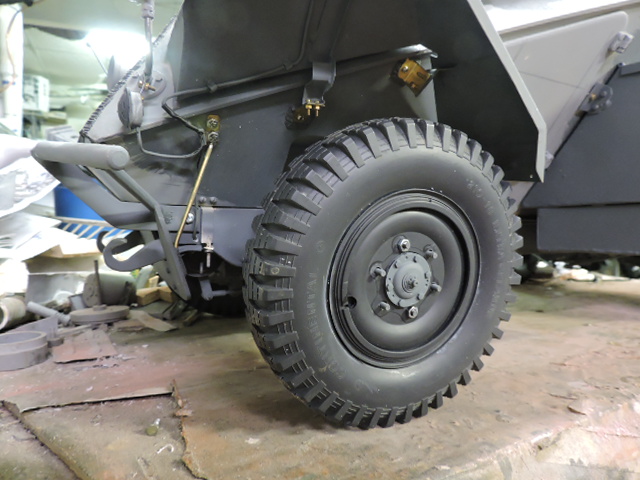
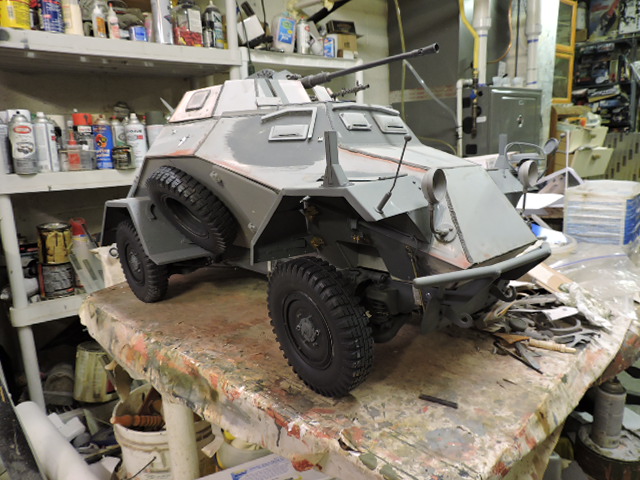
It’s also very very very nice to see the model sitting on it’s own feet for the first time esp. after all the years it’s been since I designed the suspension and have been working on this build :S
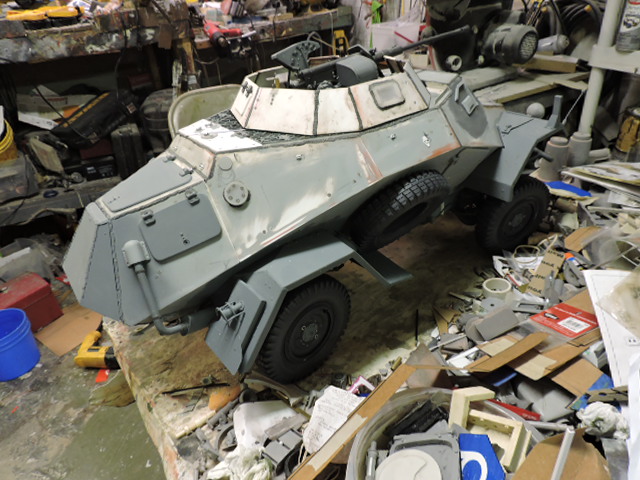
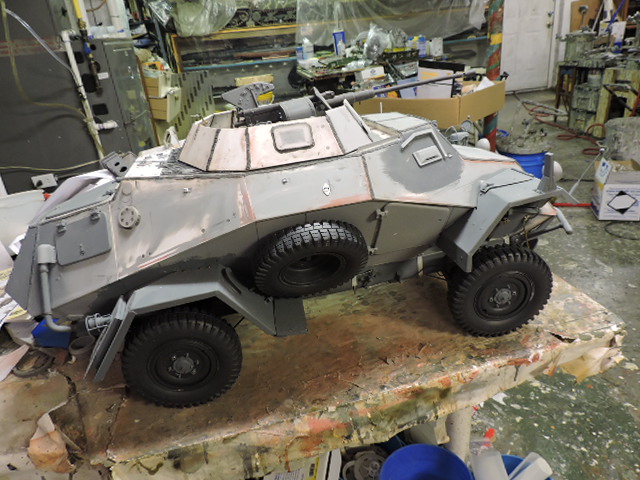
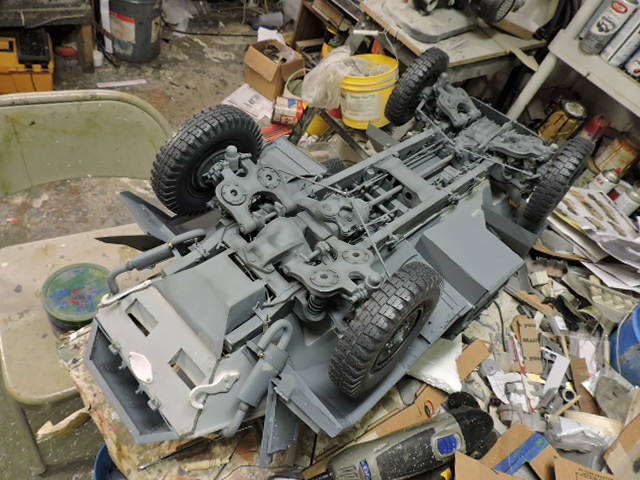
After the wheels were installed I did notice that there was some small damage to the turning clevises. This was due to the way the model was propped up on it’s chassis during construction. The model was flipped over and the repairs were made. Once repaired the model was put back on it’s feet. However it was interesting to see the lower chassis now fully complete with the road wheels.
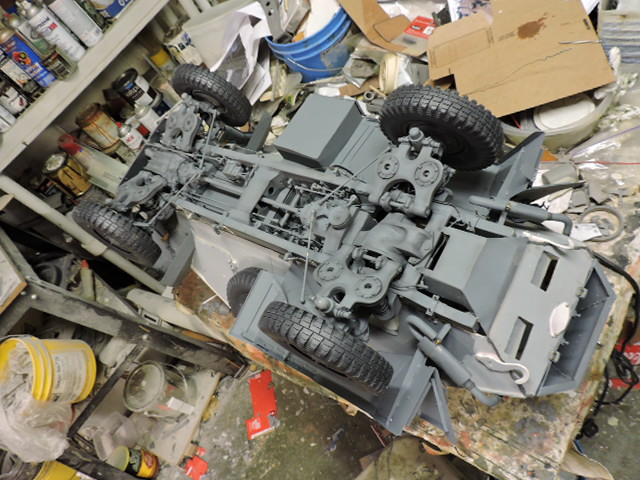
Once the wheels were done, I turned my attention to the last of the hull details. This would include the various fastener details, and tarpaulin hook mounts.
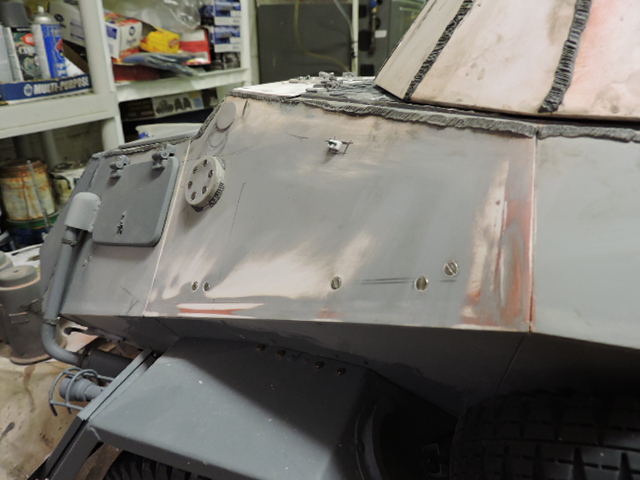
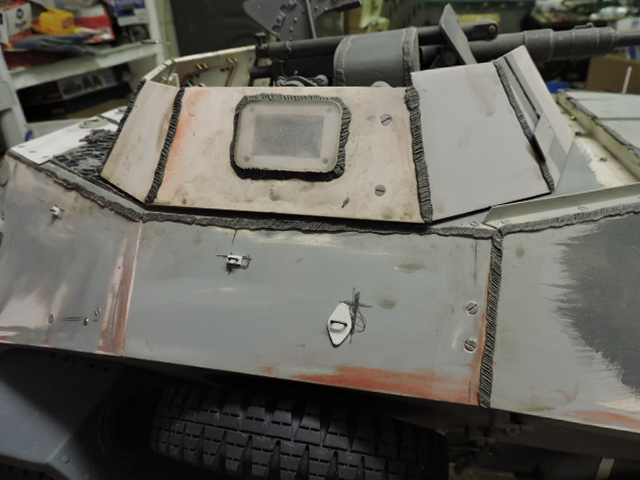
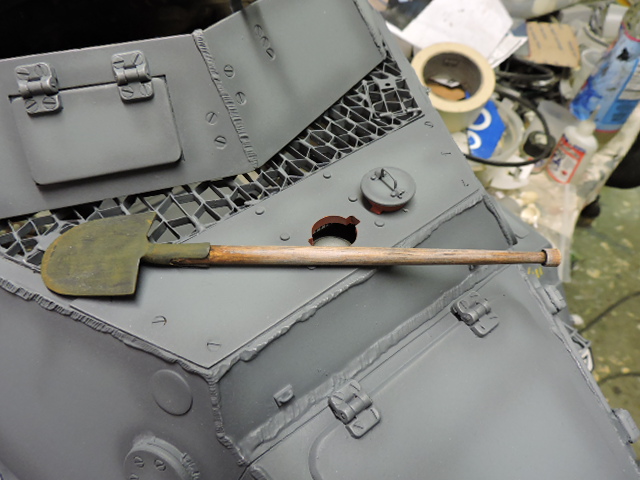
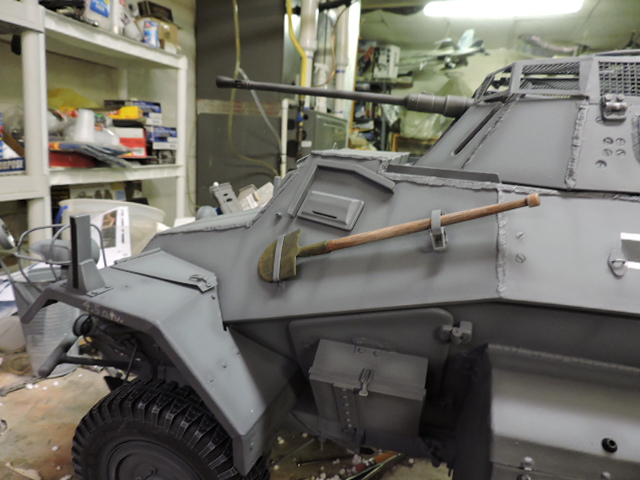
On the reverse side I added the same detailing, and the Shovel detailing. For the shovel I used a Sixth Scale Icons set I had on hand, It was a simple install and is excellent. The only part that was made that was not part of the set was the shovel head mount, as the SSI version was for a tank and are different on the 222
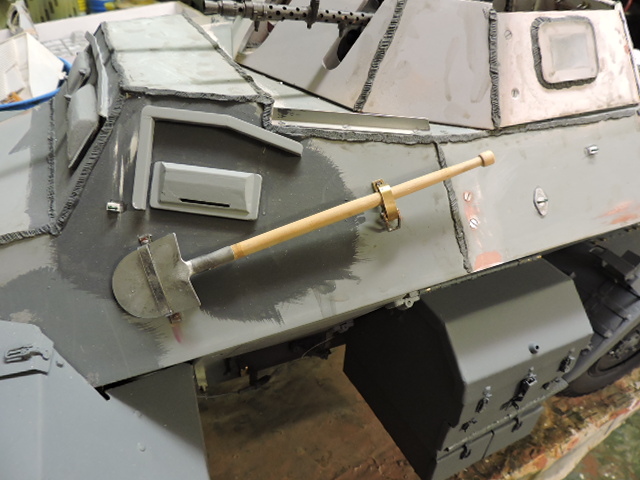
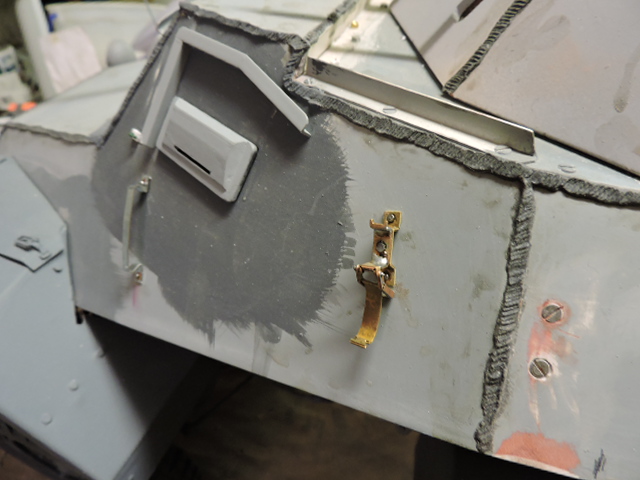
The last bit of detailing that was added was the side door box. I’m not sure what is the intent of this box, but both doors have this distinctive box present.
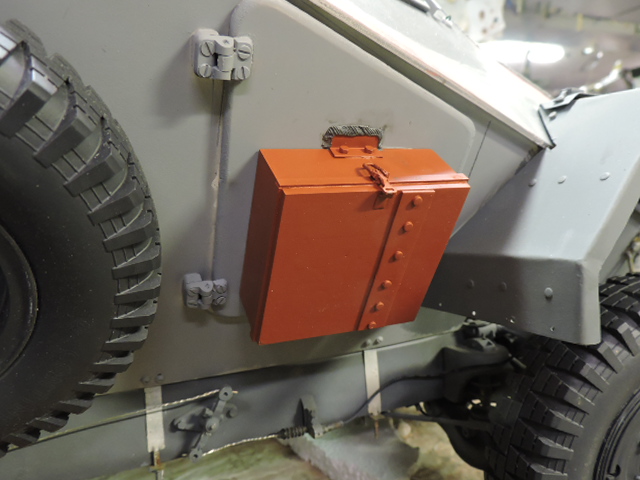
The box Will be a new addition to the ECA catalog… once my webmaster / editing computer is repaired :S.
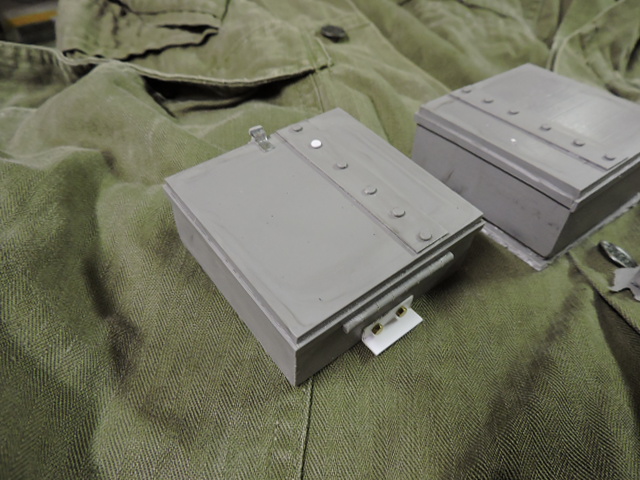
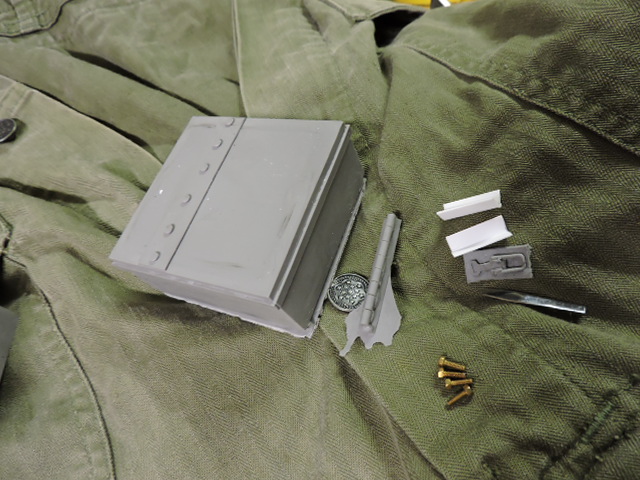
Once the parts were completed they were mounted to the hull, which completes the hull detail wise and the hull is now ready for painting!!
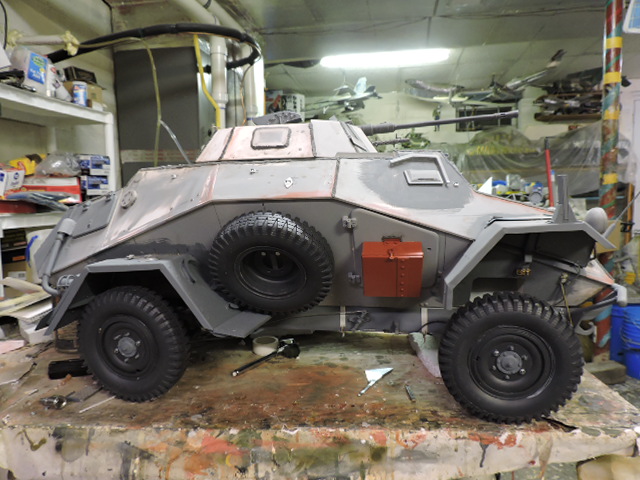
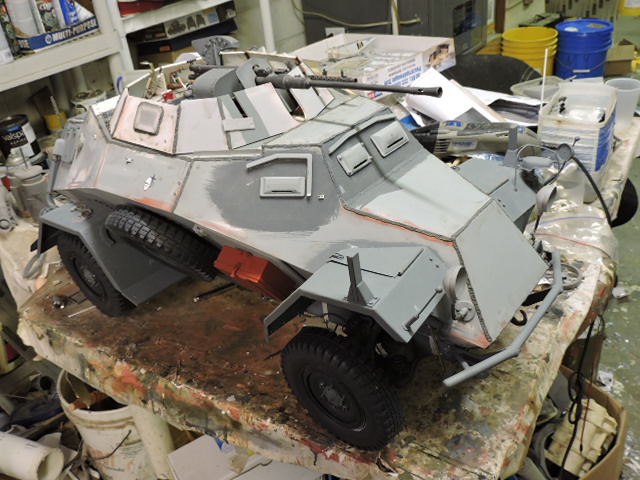
More pics were posted on the facebook page, because of all the images I’ve taken over the duration of the build I maxed out my last album, so a part 2 was made and will follow the build to completion,

http://www.facebook.com/EastCoastArmory

I also have a video in the works, but with my editing computer down it will be a about a week until I get that up on youtube.

With this update the model is now 90% complete! All that remains now is to fabricate up the turret grenade grill covers and this bad boy can head into paint / completion!! More to come!!

Good to see you still at work on this. Love those sheet metal fenders and storage boxes. I can’t seem to even fold a piece of 1/35th PE correctly half of the time and you’re doing stuff like this!

Thanks, The odyssey now has the end in sight, the model is currently 95% complete!

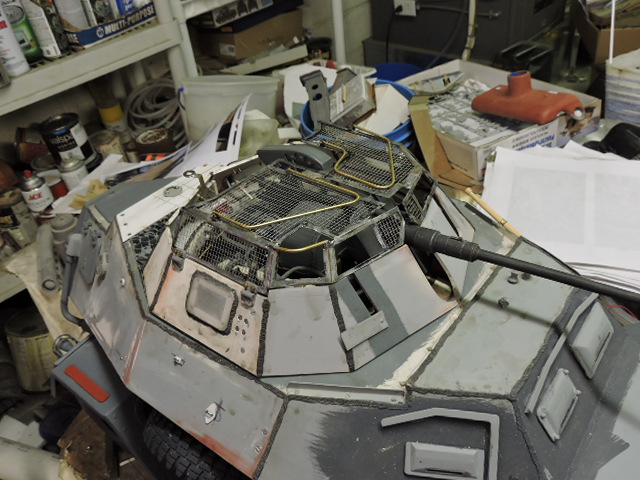
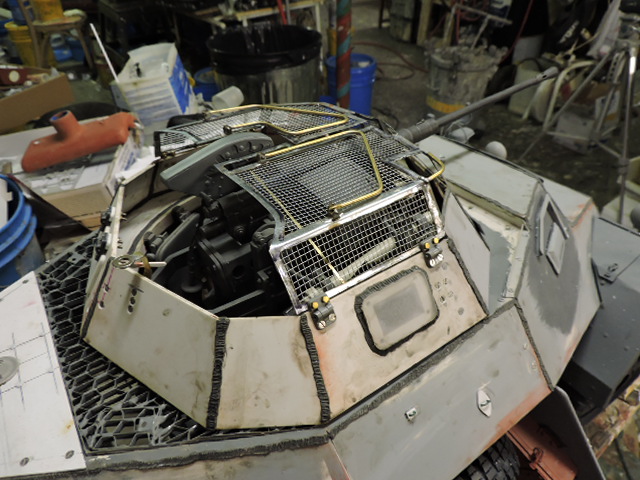
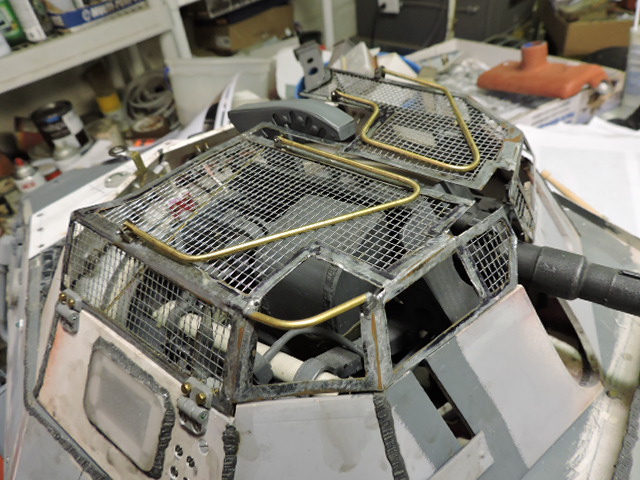
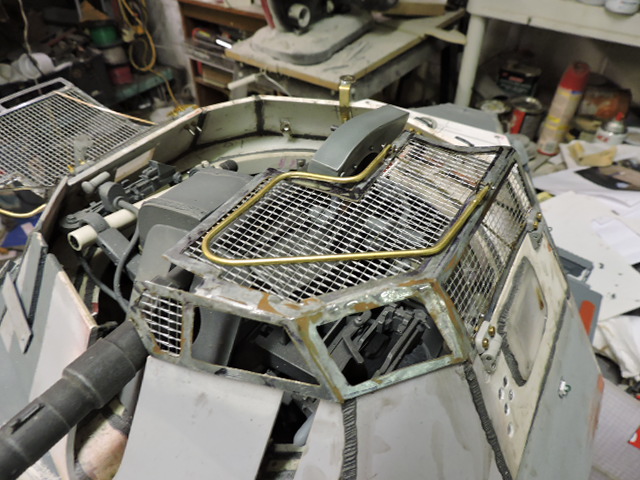
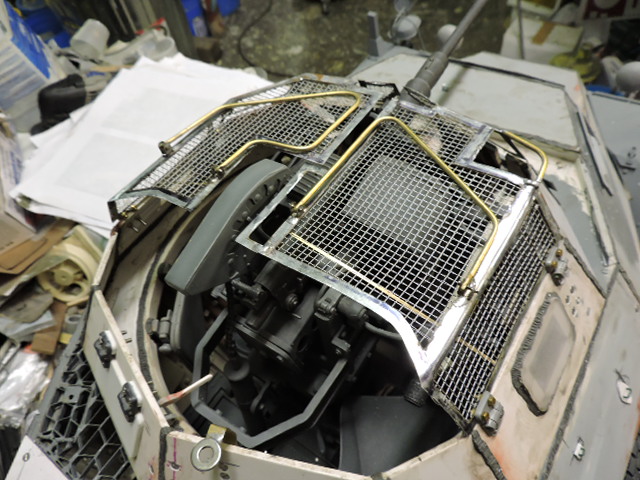
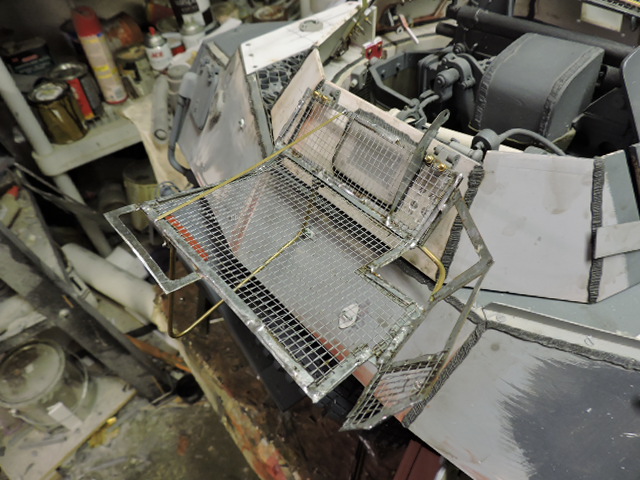
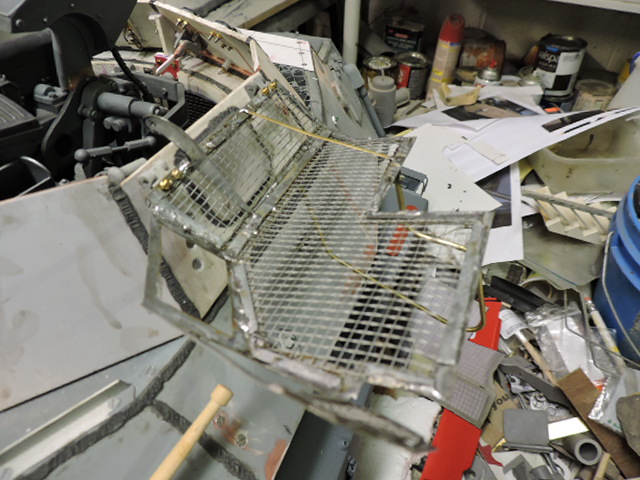
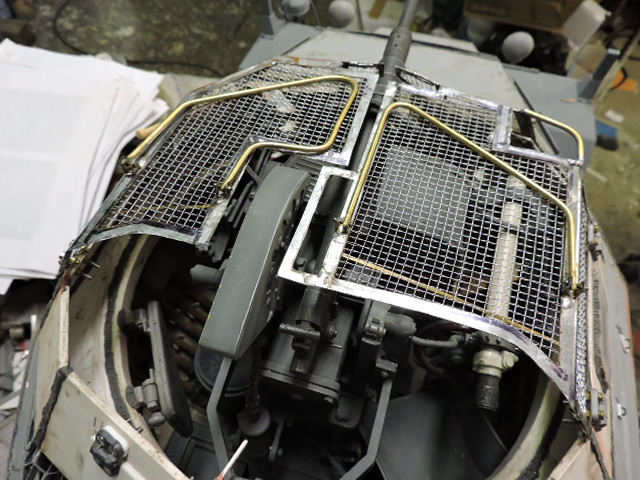
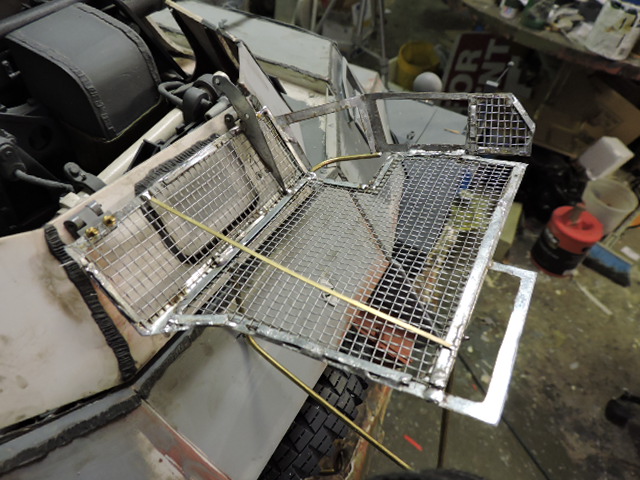
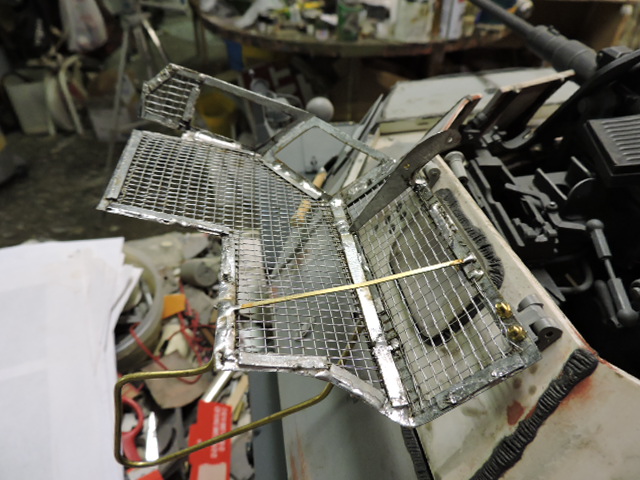
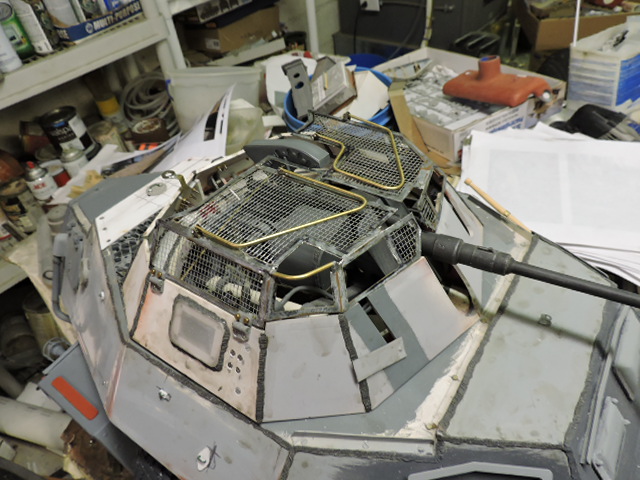
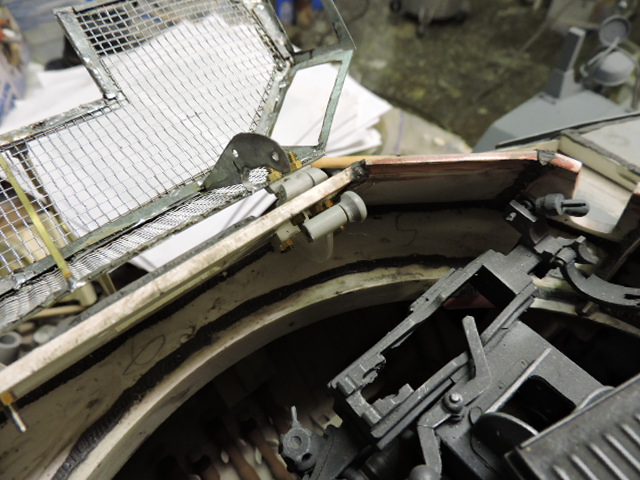
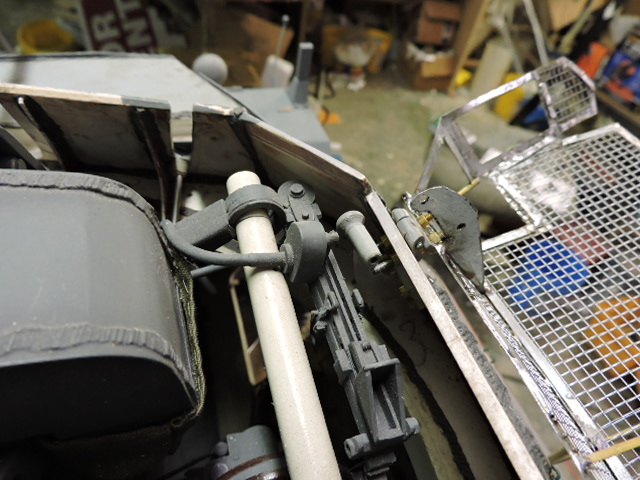
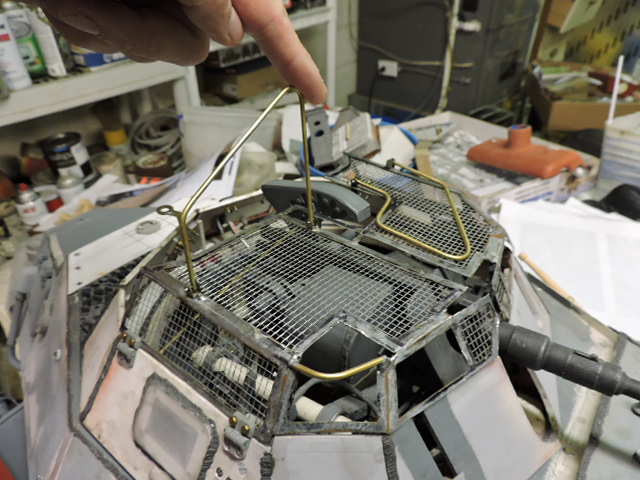
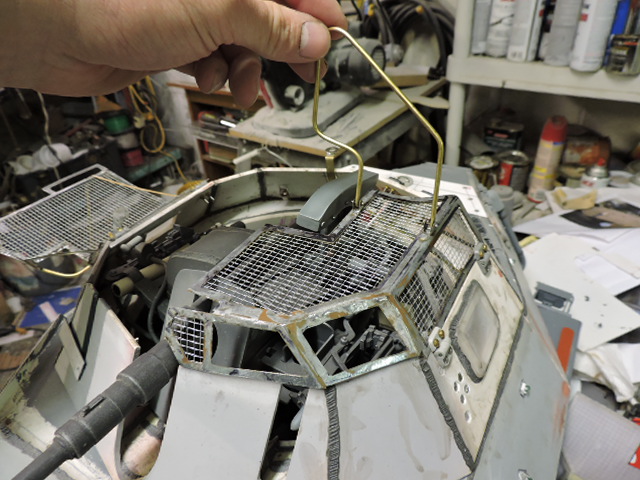
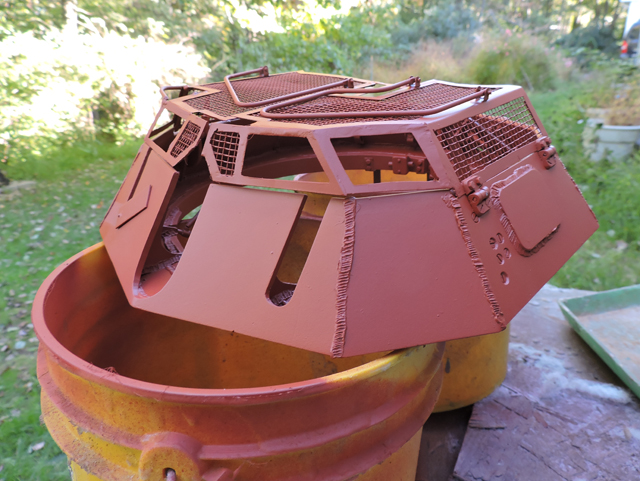
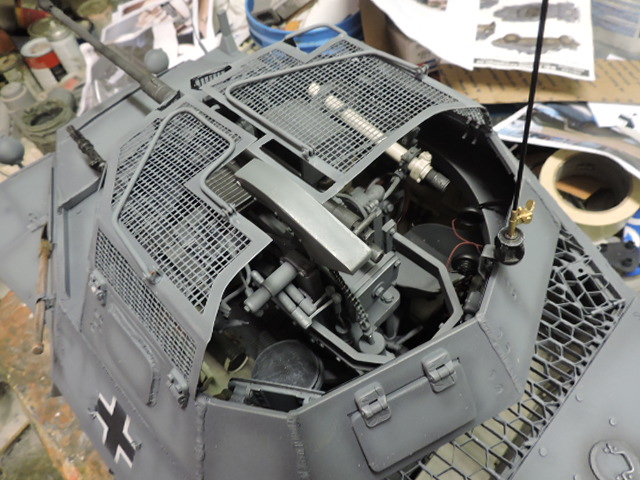
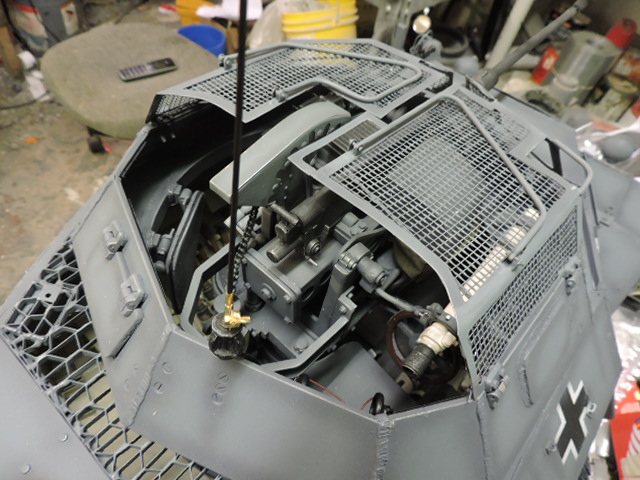
Like I wrote last the last part to fabricate was the turret’s grenade grills. These I set aside to when the rest of the tin work (fenders storage box) Were done and out of the way. For the grills I again went with all metal construction.

Also like with the rest of the tinwork the guards are all solder construction and no glues were utilized, The frames were made out of my usual galvanized sheet steel,

however the mesh is fabricated out of aluminum. Aluminum doesn’t solder, so I had to sandwich the aluminum mesh between the frame and small metal strips that are solder able. The strips solder to the frame, and the mesh is held in between.

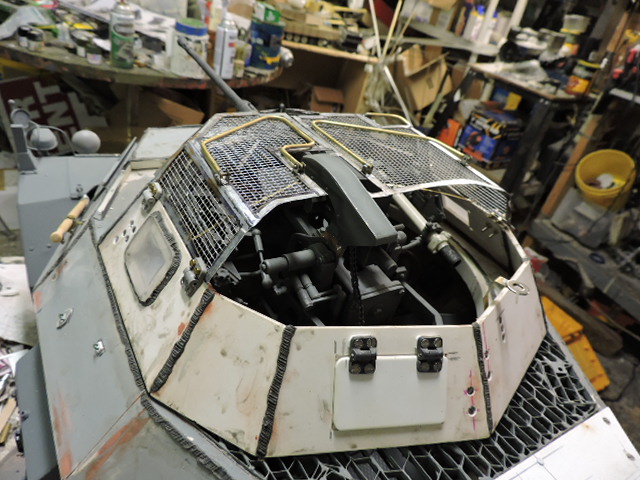
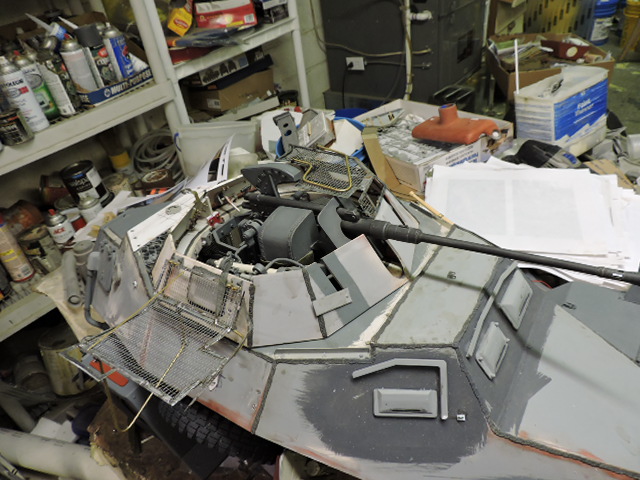
While doing some research on the vehicle it looks as if there were two patterns of grenade grills, The first was an earlier pattern and was taller than the second pattern. With the higher profile the grills had a different symmetrical shape to them, when the lower profile guards were developed the design was altered to make clearance for the flak gun chain mount.

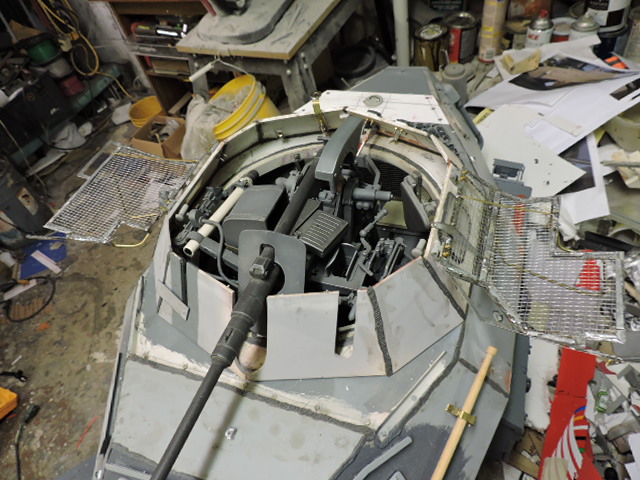
For my model I went with the lower profile unit, and the clearance cuts were built in. On the left hand guard there is a large square cut out for the chain mount. This cut out also effect the shape of the stop rail, and the internal support reinforcement strip. On the right hand side guard there is a square frame that emerges from the top corner that overlaps and fills in the left from the other side.

On the front portion of the right hand guard corner there is a cut out for the AA scope. This cutout has a reinforcement strip which is fabricated out of round bar… this is also a feature of the later low profile guards.

The grills are hinged, and are functional. for the hinges I went with the set of resin hinges from panzerwerk. They were bolted to the grills and the turret.

The grills have a stop / locking system. The lock is a mount which is bolted to the turret’s interior. This mount has a spring loaded knob that when pulled releases a lug the locks into a corresponding hole on a bulk head on the grill. There would be three positions. Closed semi open and fully open. On the model the parts were all fabricated but are for detail only and are non functional

When the grills open all the way to prevent them fro over stretching / causing damage to the grill there are two folding supports on the grill tops. These were both fabricated for the model and are full function.

After the grills were out of the way I added the last bits of details that I left out in the last update, namely the rear fender foot rest, and rear fender box latch. These were added and are mirror images on both sides

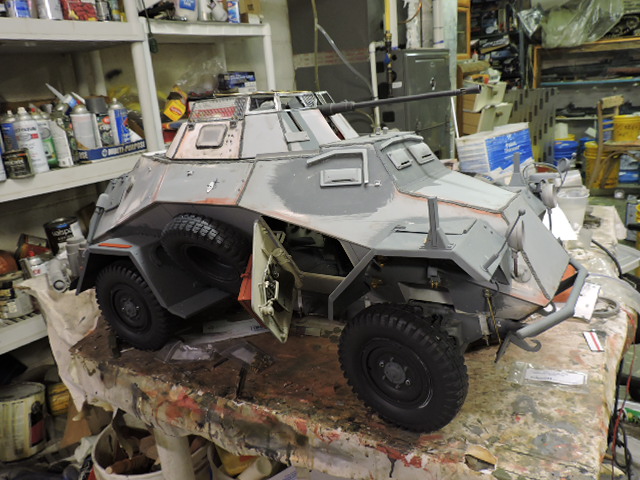
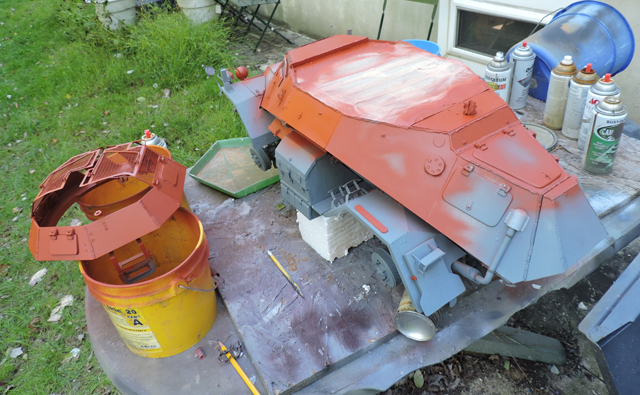
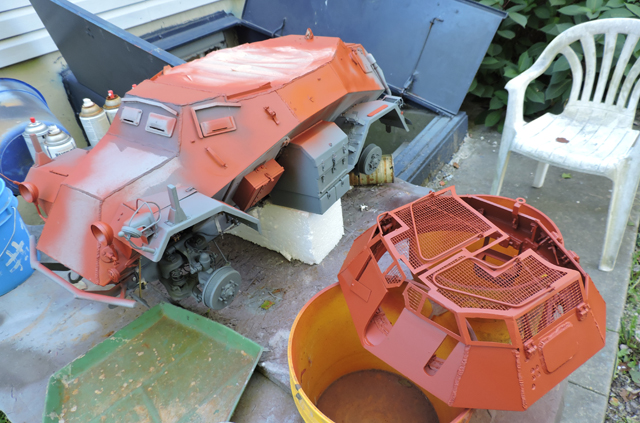
With the last bits added, the model was then ready to go into paint! First the turret and portions of the upper body were primed

After the primer, the base was promptly added. It was also very nice to see the model in one solid color especially for the first time!

After the paint was done, Markings were applied. Like with all my builds I made my own stencils and the markings were painted on. all the smaller markings were hand applied via a brush.

After the markings were applied the model went into it’s weathering, then the wheels were installed

Once the weathering was wrapped I then turned my attention to the smaller fittings. This would include the head / tail lights, reflector, shovel

I also turned my attention to the radio. For the radio I used the Panzerwerk resin radio set. The set was painted. I modded the radio by adding the prong detailing to the large plug insert, and by adding clear plastic lenses for the gauges.

The radio was then installed on the turret’s radio rack. A leather strap was also added, as is found on the real vehicle

The radio was wired to an antenna base which was also added.

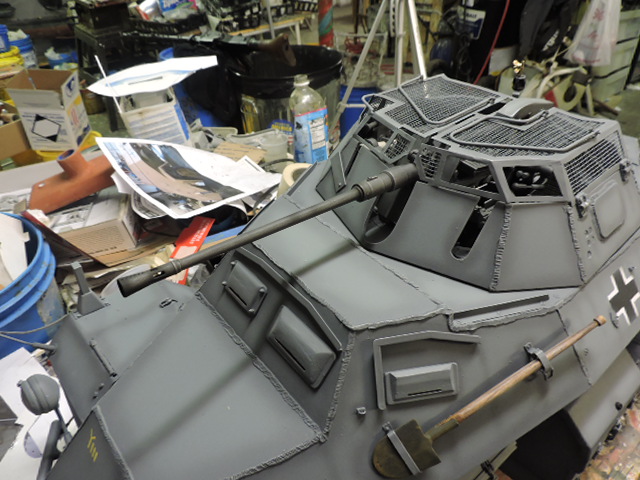
The gun was remounted to the turret. On the gun I also added the powder fouling on the muzzle break.

Currently I’m working on the remainder of the final small details and the model should be completed tomorrow!

I was also able to get the last post’s video up on youtube, and will have the other vids up by early next week.

part 1:

https://youtu.be/c_FuQxU9TwQ

Part 2:

https://youtu.be/jayHsVh7mQQ

More pics were also thrown up on the ECA facebook page, http://www.facebook.com/EastCoastArmory

More to come!

Wow she looks even better with paint. It’s got to feel good to be getting this close to the finish line on a project this big. [Y]

Well, Everyone I’m happy to say that the model is officially…
[<:o)] [<:o)] [<:o)] [<:o)] [<:o)]—FINISHED— [<:o)] [<:o)] [<:o)] [<:o)] [<:o)]

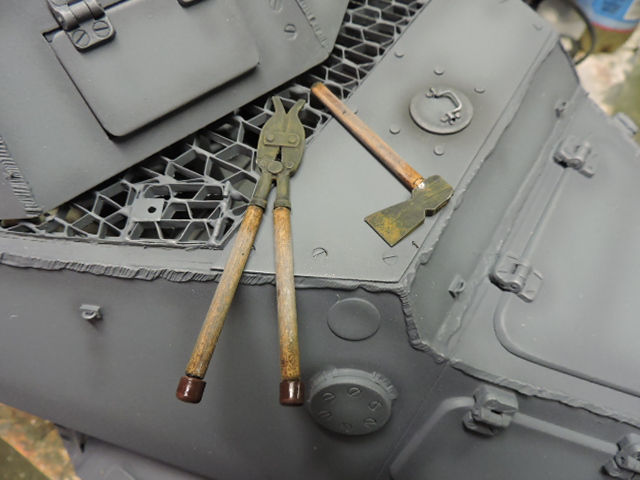
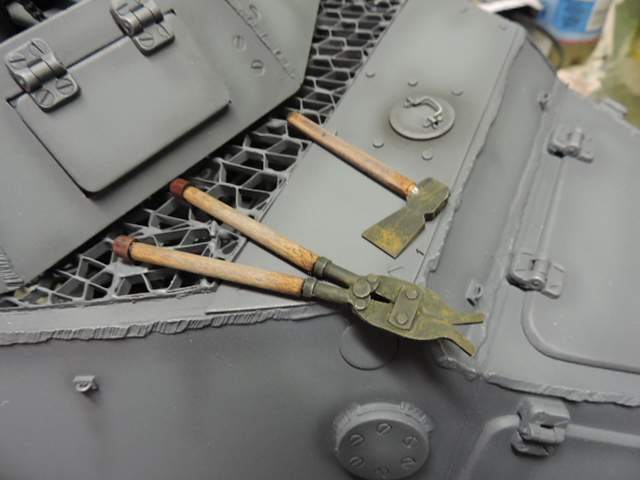
since the last post The last of the tools were added. This would include the Ax, clipper, Jack, jack block, and tow cable

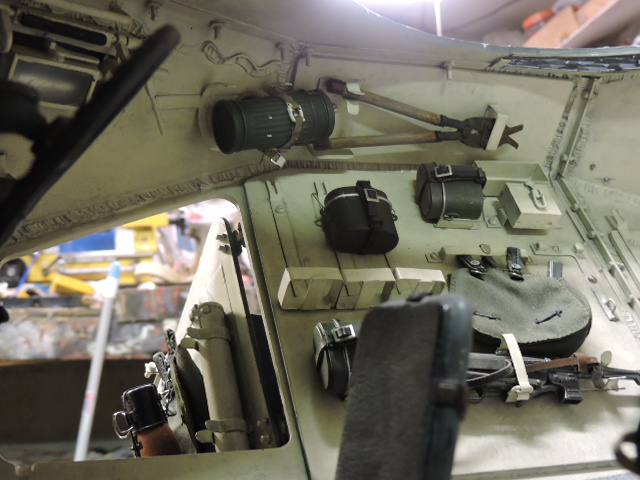
For the Ax I used a small German ax from Sixth scale Icons, the parts needed no mods outside paint / weathering. For the Clipper I used a white metal casting from Armorpax. The clipper’s molded in handles were removed and wood handles were added in their place. The molded in end knobs were recycled and were painted to represent the Bakelite material that the knobs were made of on the real unit

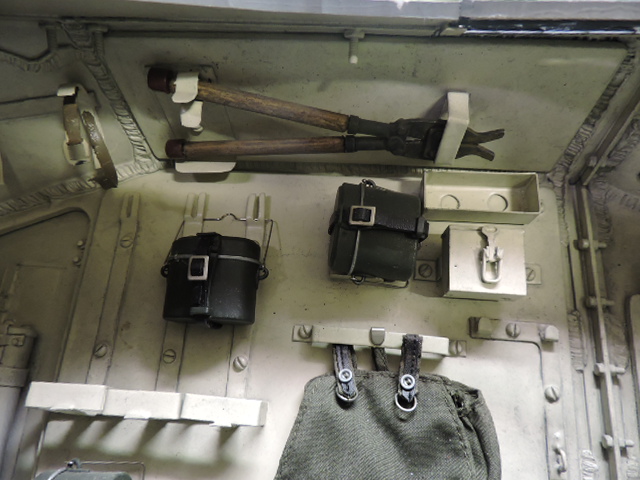
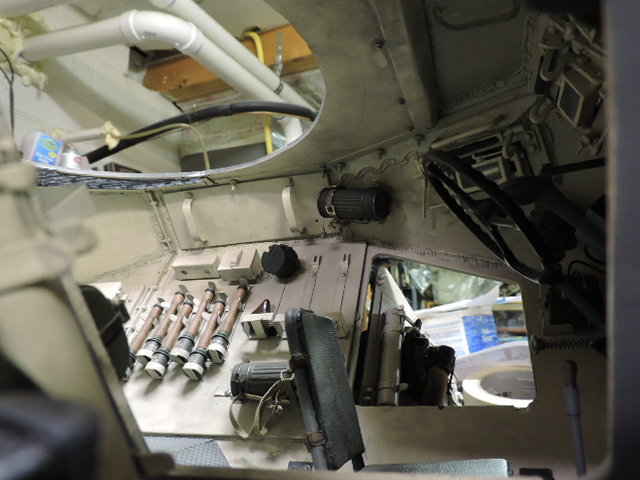
Once weathering was done they were mounted to the interior mounts that I fabricated back when I was building the interior details.

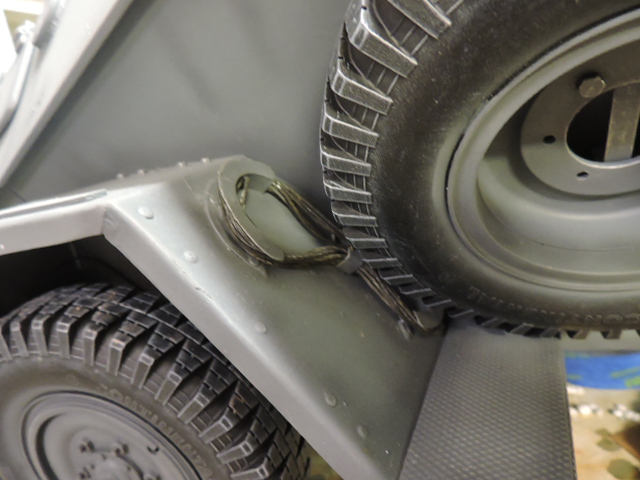
For the cable I fabricated a tow cable out of flexible framing cable, after it was painted/ weathered it was spooled in the cable mounts on the rear fender.

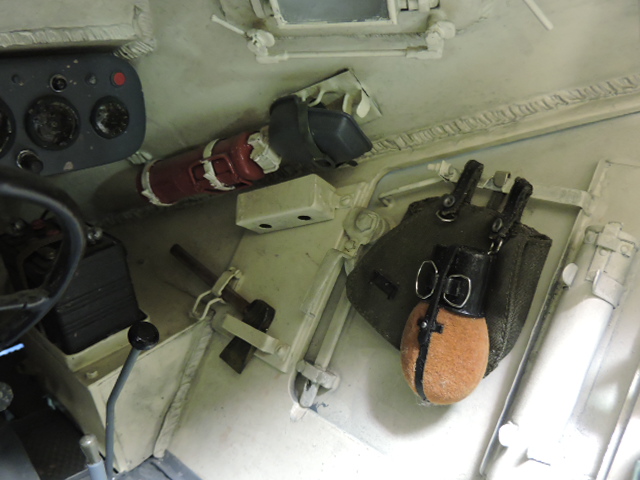
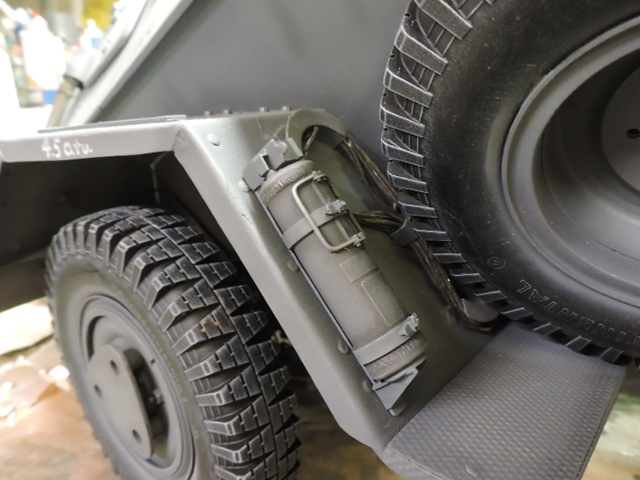
After the cable I mounted another Tetra fire extinguisher. Like the first one used on the model’s interior this unit was also from armorpax.

For the Jack I casted my own light german AFV jack, The Jack block was fabricated out of real wood, both were weathered and mounted to the jack blocks on the other rear fender.

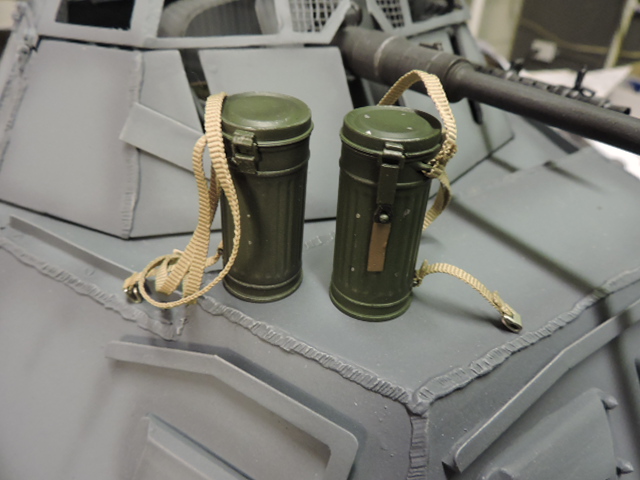
The last interior detail that was needed to be added were two german gas mask cans… I acquired these from Monkey depot and were from Dragon. They were simply added to the canister mounts that were built into the interior

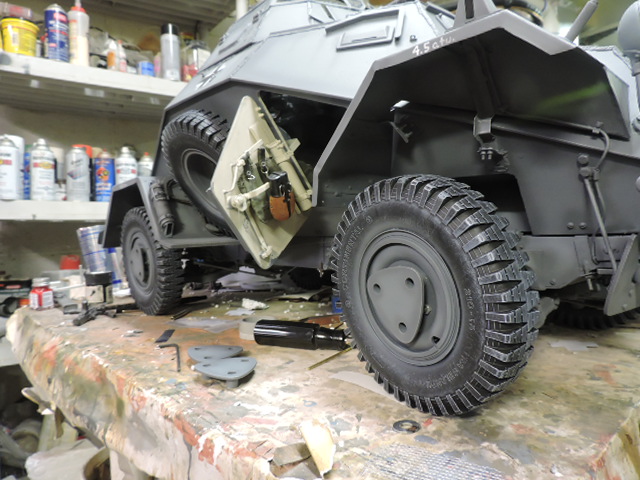
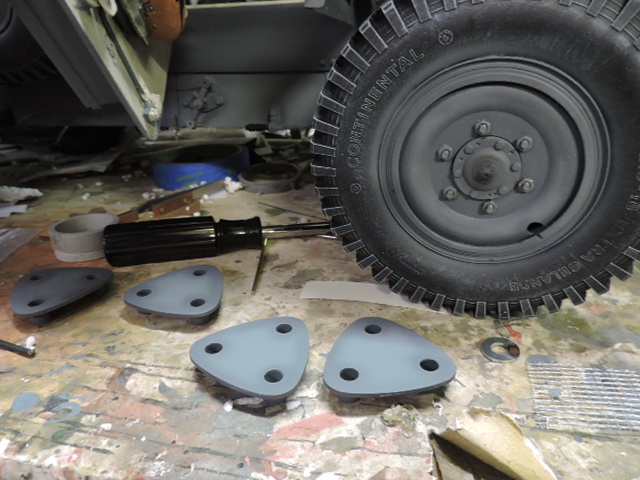
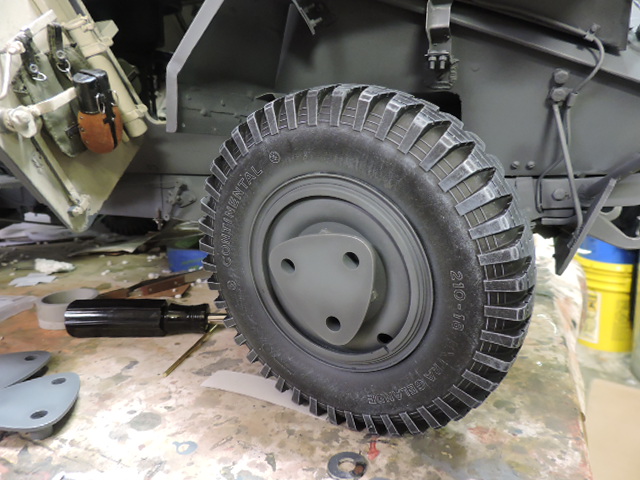
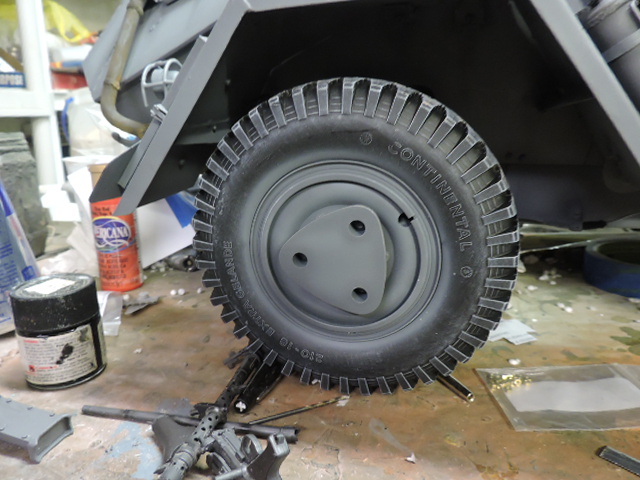
On the Model’s wheels I added the center hub protector plates. These plates were designed to protect the center hub from shrapnel which could damage the unit and knock out / disable the car.

It was a good concept, however having seen many wartime pics of these pieces off I would think that they were tossed by the crews as they made getting to the lug nuts and changing a wheel more difficult and time consuming.

The ones on the model were supplied with the panzerwerk wheels and were added with no mods needed. They simply mounted over the wheel lug nuts

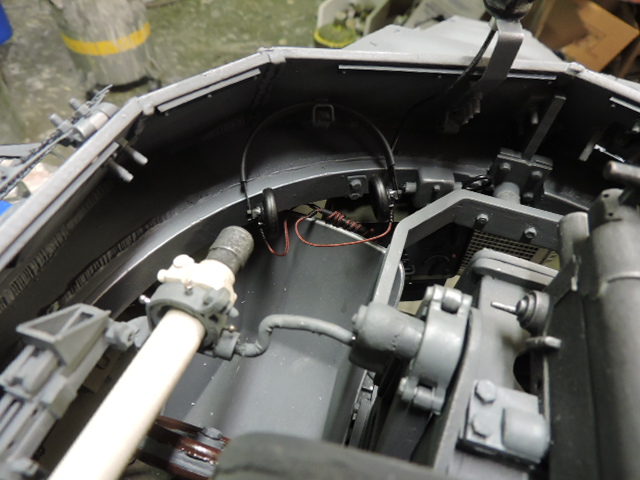
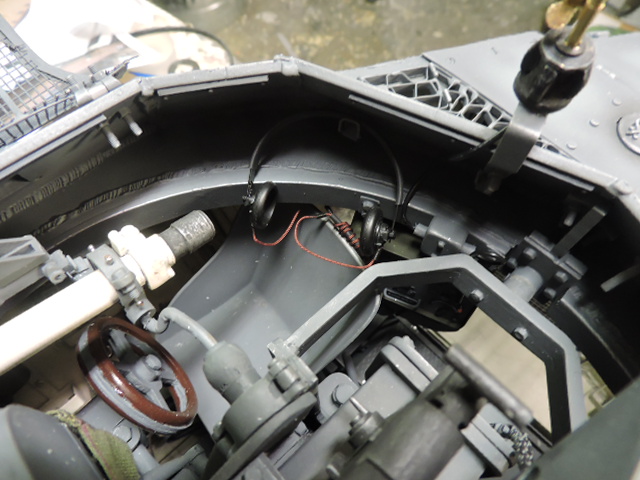
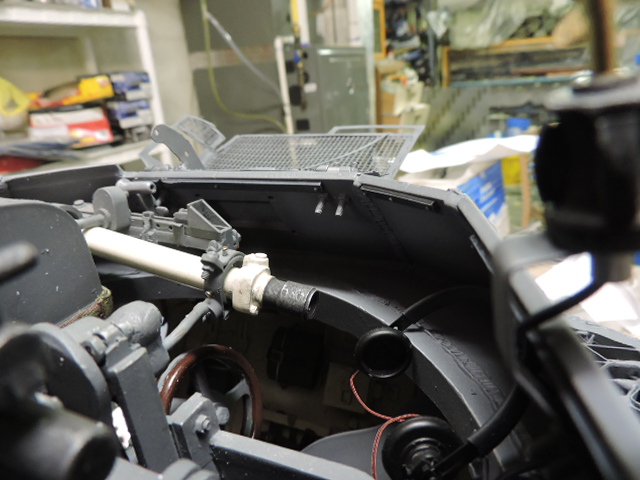
To finish off the turret, the antenna rod was mounted along with the radio head set and throat mic.

The headgear was Dragon and mounted directly to the Panzerwerk radio with no mods required… they just plugged in!

On the rear portion of the turret’s top corner there were strips of rubber that were used as headrests. On the model these were fabricated out of styrene strips with fastener detailing added.

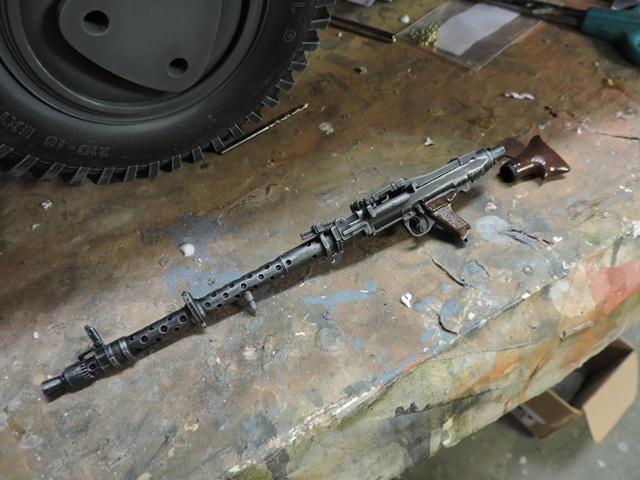
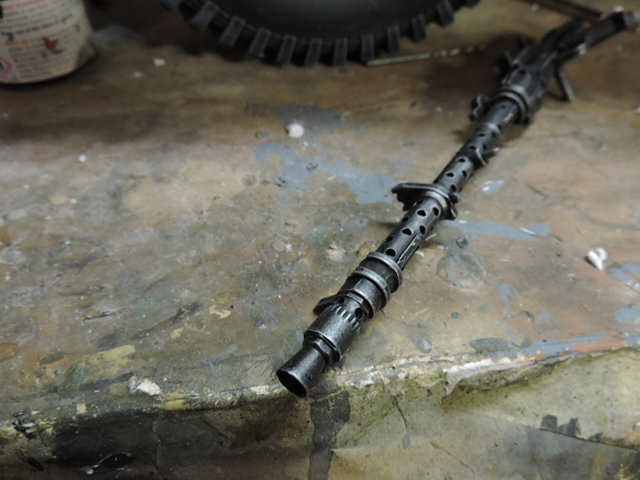
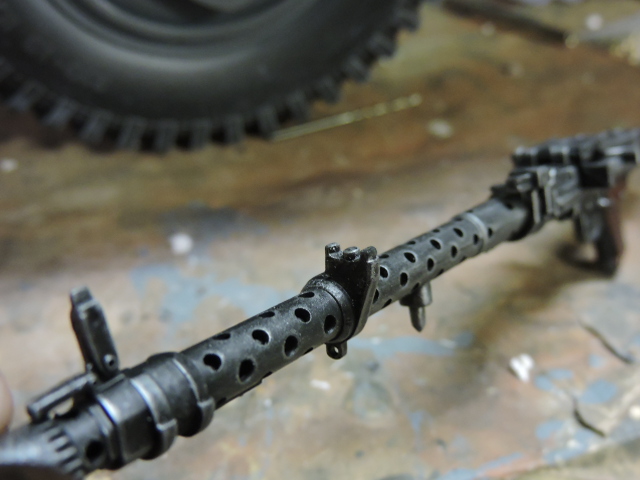
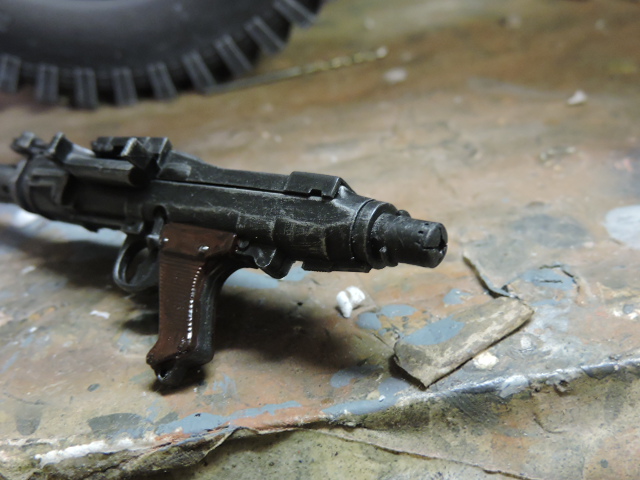
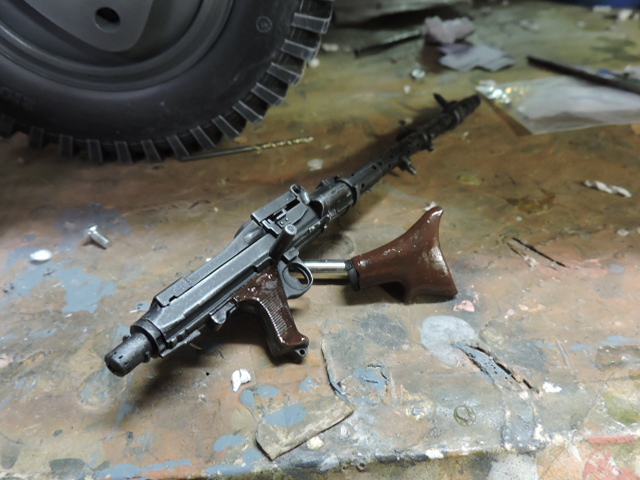
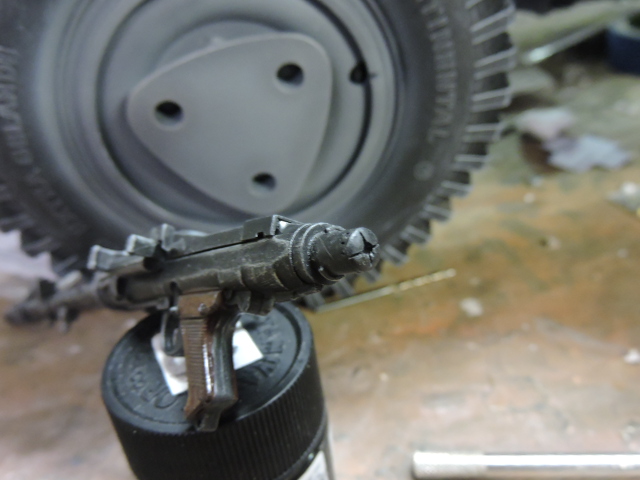
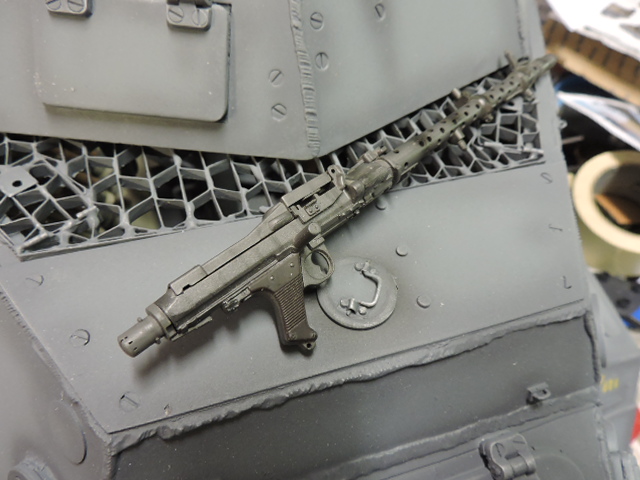
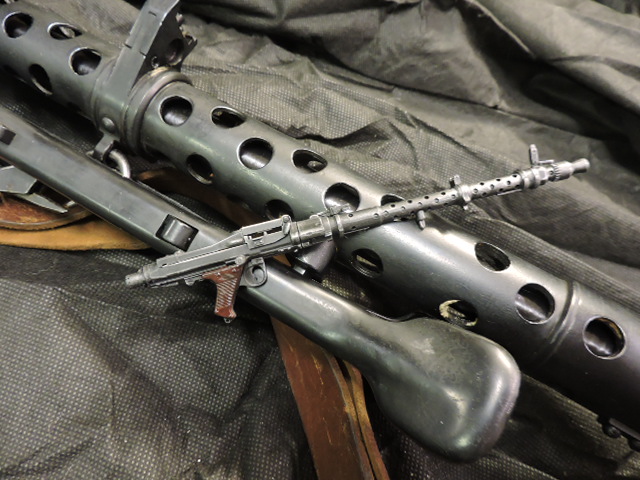
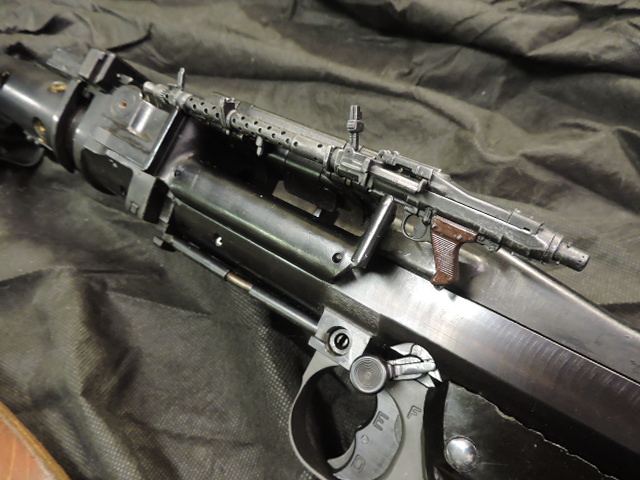
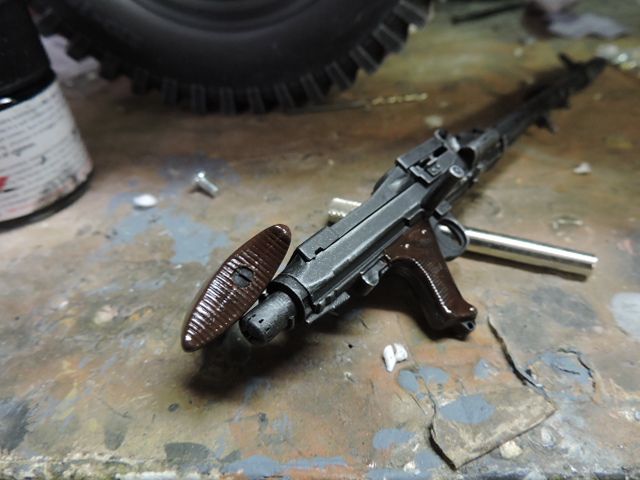
The last fitting to be added to the turret and probably the most notable was the Coax MG34. For the base gun I used a wrecked Dragon prebuilt MG34. This one was one of the AA versions which would have originally had the spider sight and Bipod. These parts were missing from the gun and the model had some other superficial damage.

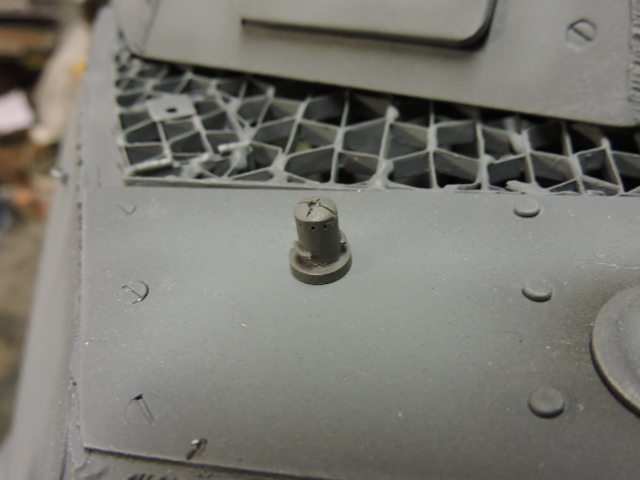
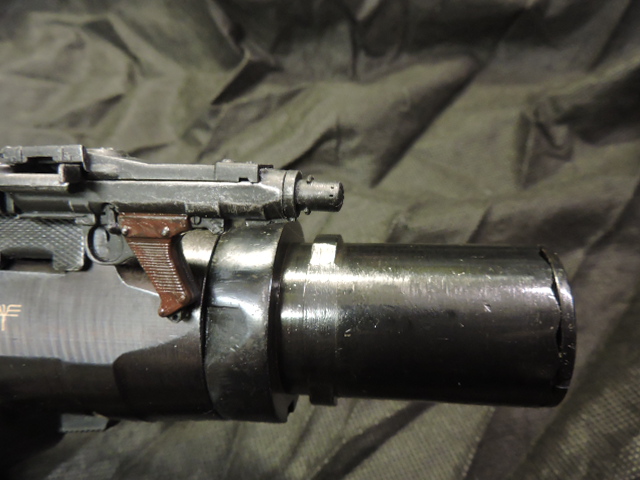
The superficial damage was repaired, the gun muzzle was drilled out, the molded in bipod mount was deleted, and the over scaled spider mount tube was deleted for a more to scale spider mount peg. The most important mod that needed to have been made was to the Buttstock

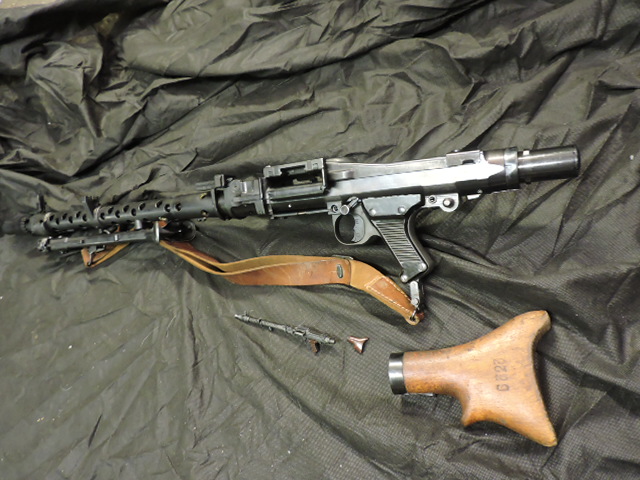
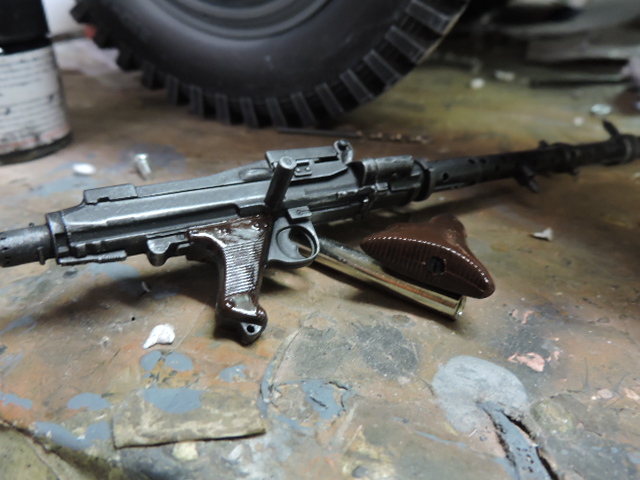
Like with all German AFV the Buttstock was removed off the MG34 (or MG34T) when placed on a vehicle mount, this was done to save space in the vehicle. The MG34 has a unique feature of a quick detach buttstock. with the push of a tab the stock rotates and is removed. When removed the buffer tube is exposed.

The buffer tube detail was fabricated and will be added to the ECA catalog shortly

The gun was repainted and weathered,

The original buttstock will be positioned on the interior of the model, The buttstock was reworked in having it’s internal tube added, and the tube’s mounting slot screw detailing added. The stocks are painted to represent red Bakelite which like above was used frequently on weapon grips during this period.

The gun was added to the mount on the turret completing the turret’s interior detailing!

With last bits added the model was complete, felt strange when the last part was added as I’ve been working on this build for such a long period of time :S

A youtube video update was made going over in more detail on what was done to the model,

Part 1:

https://youtu.be/ercqeOhiVtc

Part 2:

https://youtu.be/_zR8p-BdqoQ

Also more pics were posted on the ECA facebook page,

https://www.facebook.com/EastCoastArmory/

With the model now done, Next nice day I get I can take the model outdoors for some nice outdoor dio shots, then she will be put in a display case, give the shop a real good long overdue cleaning, then off to other builds! More to come!

This project is simply amazing. Thank you for inspiring me to go further in my modeling. You, sir, are amazing! [:D[[:D[[:D[