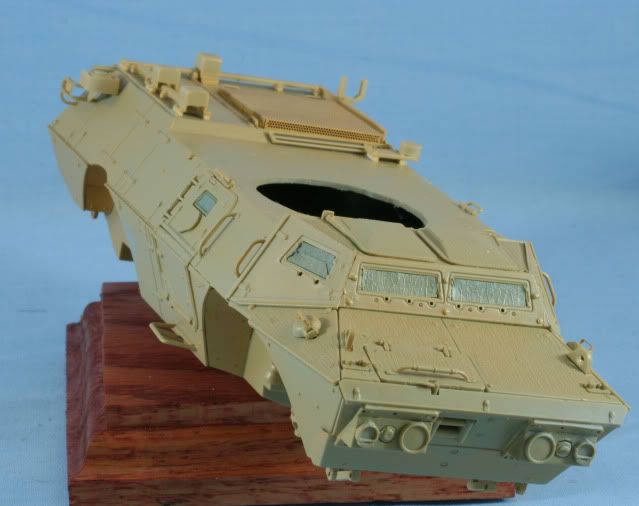
1/35 M1200 Armored Knight, WIP, 09-18-11, COMPLETE

Fire Mission

1/35 Trumpeter M1117 with Formations M1200 Armored Knight conversion set.

Introduction

The M1200 is a wheeled armored vehicle that carries the equipment needed to quickly bring in guided bombs, missiles and artillery shells. The M1200 contains a laser designator, a laser range finder and GPS, plus radios and computers that take target position data and transmit it to distant artillery units, or bombers overhead, and get the firepower on the target. The M1200 Armored Knight evolved from the desire to provide enhanced protection to Fire Support Teams who perform the targeting mission in high threat environments.
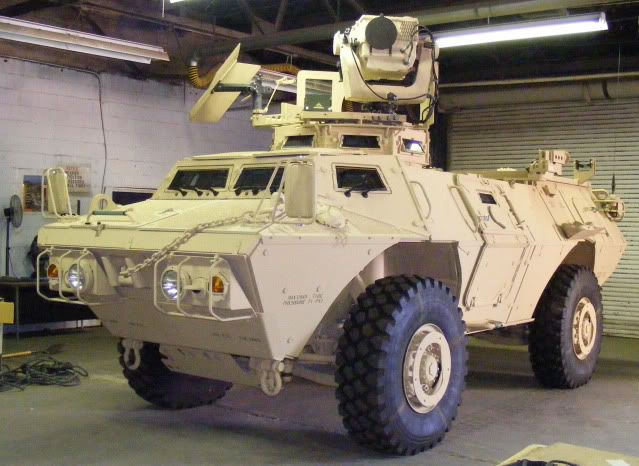
This photo is one of the 150 photos supplied with the conversion set on a CD along with detailed instructions via a slide presentation.

The build

I will be using the Trumpeter M1117 Guardian kit as the base kit for this build.
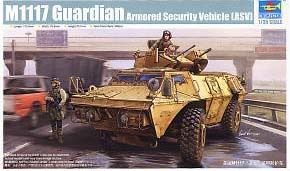
The M1200 conversion set is from Formation Models. This is the catalog page view of the conversion kit.
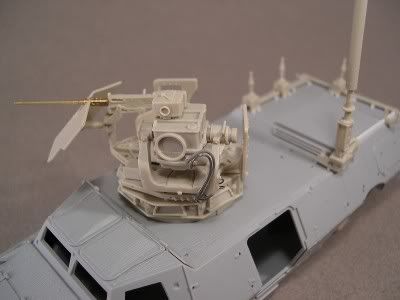
I will also be adding resin tires from New World Models

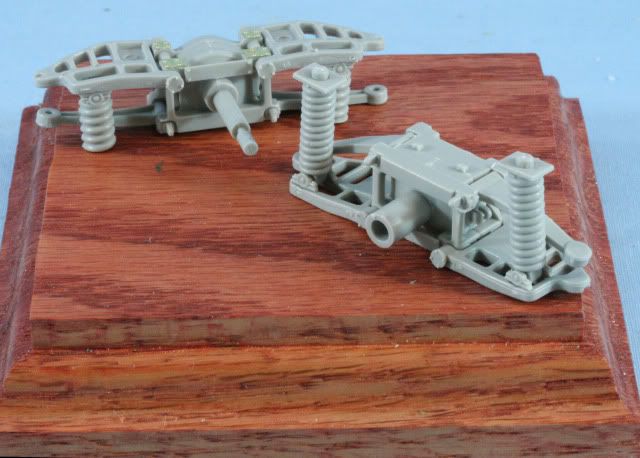
Well, off and running. The first three steps involve the assembly of the suspension and drive shafts. I left the wheels off for painting. The PE is part of the kit supply. The assembly was straight forward and the fit good.
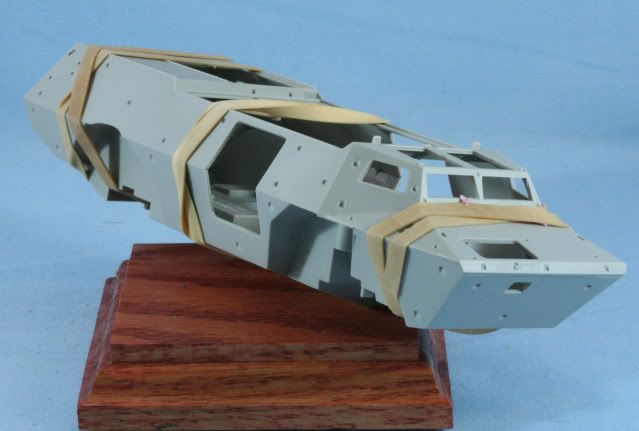
Step 4 has the two body halves assembled. There was some slight warp to the body halves so I used some rubber bands to hold them in place after which I injected liquid glue onto the inside seams.
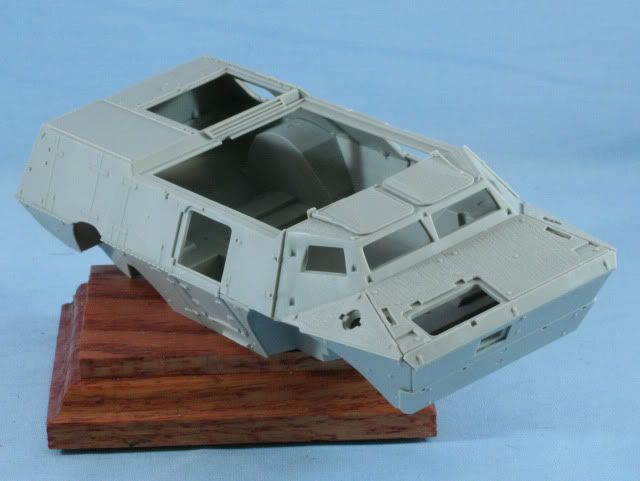
Step 5 adds the armor panels around the outside of the body. At this stage of the build I am leaving off any small grab handles until later. Again the fit is good and the instruction clear.
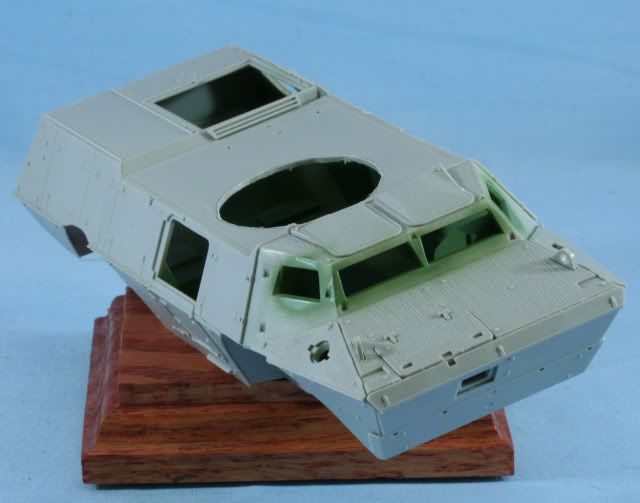
Part of step 5 is adding the main roof. Part C7 has a .765 hole for the M1117 turret. This hole has to be expanded to 1.375 for the M1200 turret. I made a paper template with the smaller diameter inside the larger. Then I cut the template and used the smaller hole marking to properly line up the template on the part. After marking the larger hole on the part it was time for the Dremel.

Before gluing the panel in place, I sprayed the inside and widow insets on the front and on the side doors using Tamiya Cockpit Green. At least what little might show will be the right color. Now was the easiest time to do this painting.

Here is the view after fitting the roof
Step 6 includes adding some details to the bottom side including PE armor panels in the wheel wells
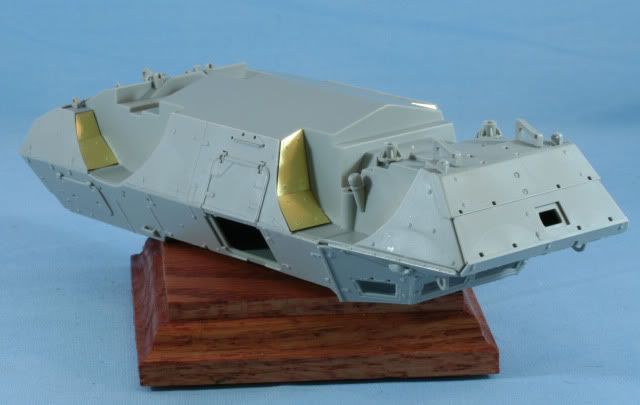
Steps 7 & 8 adds a number of details including the PE engine grill, side doors, rear door, front panels with windshield glass, and numerous access hatches, grab handles and details

In all cases the Trumpeter instructions were clear. The kit parts are excellent for both fit and detail. All of the pin marks are well planned and let you model without the need for putty.

At this point I wanted the get the M1200 conversion antennas on the vehicle. Step 22 of the conversion instructions requires removing the required parts from the casting blocks and with supplied styrene strip, adds feet to all the parts. These parts are well cast but delicate. Removing and cleaning must be done carefully. Step 23 assembles the parts onto the model.
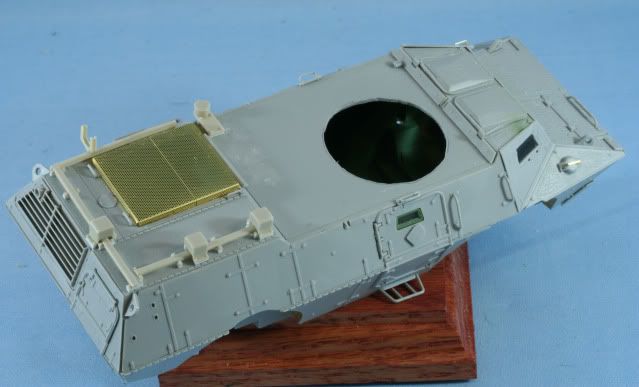
Here is front view
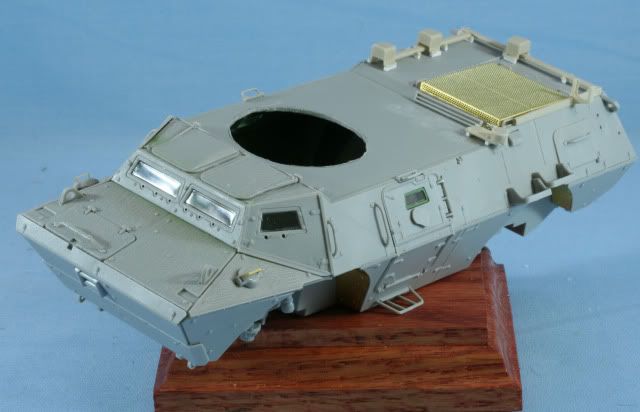
That’s it for now. A few more details on the body section and it will be ready for prime time. Then it will be onto the Armored Knight turret, the heart of the conversion kit.

As always thanks for stopping by. Your comments good or bad are always appreciated.

Rounds Complete!!

Looks great so far. I’ve been wanting to see a WIP on this kit. Looks like Trumpy did a good job on the anti skid surface.

Can’t wait to see more.

Jet - Thanks for stopping in. Yep, Trumpy did a nice job. It is well done and matches the real deal very closely. The kit itself is very nice. The only odd thing is they include the interior handles of the side and back doors, but no other interior [^o)]. I guess I will have some leftover handles.

The grille on the top rear over the engine comes with a PE grille or for those who feel the don’t want to play with PE, a plastic grille. Obviously the PE grille looks much better.

The kit fits very well and almost falls together. It has been a pleasure thus far.

Rounds Complete!!

Definitely not something you see done very often but cool looking nonetheless! Will be following this one to see you work your usual magic Mike. [B]

Nice piece of rolling stock there Mike… I am assuming that this one’s for you?

Bill - Thanks for stopping by. You know me, I am the different [proplr] It is a unique vehicle with lots of cool technology.

Kevin - thanks for the visit. Yep this one will go to the display case here at the Villa [^o)]. And now for something different, a vehicle with a big eyeball.

When I think of the old hammerhead and how “advanced” we thought that was…I feel like the stone age!

Rounds Complete!!

Nice work so far. That’s one mean looking truck!

Very nice start. I’ll be watching this one closely.

Bronto - It would look great in the garage but I am sure it gets crappy fuel economy, in not comfortable and is loud…sounds good to me! [:D]. Thanks for stopping in and for the comment.

Gino - Thanks for the peek at the FIST hotel on wheels. Life has come a long way from the hammerhead.

Rounds Complete!!

Like Bill, it has been a few weeks since the last update. Summer chores and holidays have slowed the bench time down.

I began working on the Formations conversion set. After making the roof hole bigger in the vehicle, the next 9 steps involve assembly of the turret. Some of the parts are small but all are very well cast with no marks or voids. The parts are well marked and have little or no flash. In other words……perfect! The instructions are outstanding as they are a Power Point photo presentation, again outstanding

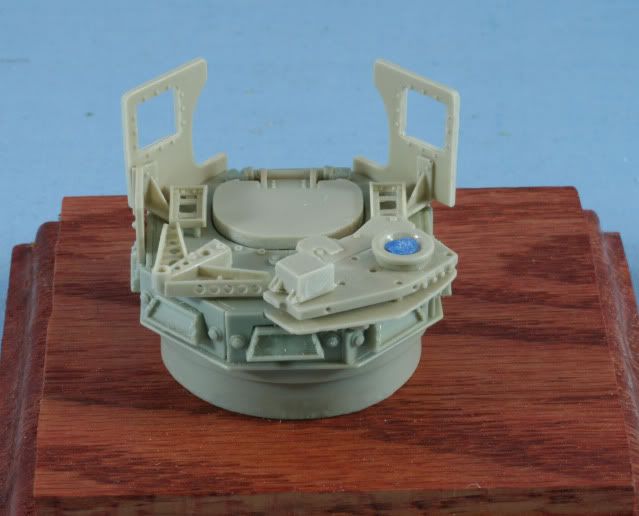
Here is the main turret assembled. In step 3 the instructions call for the placement of the wiring cables. I will take care of those after painting.

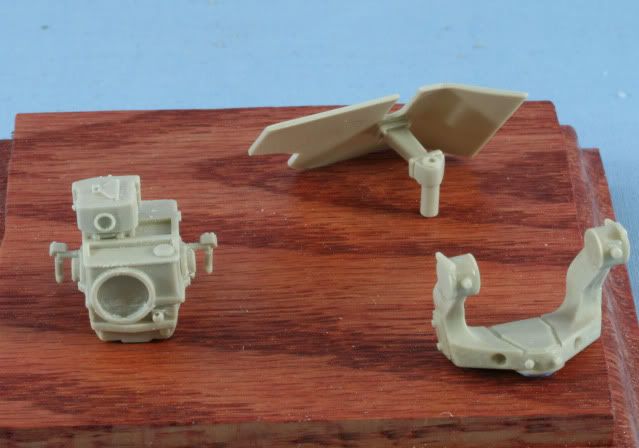
Along with the main turret is the assembly of the electronics package, the package yoke for mounting and the weapon shield. I have kept all of these separate to facilitate details and painting.

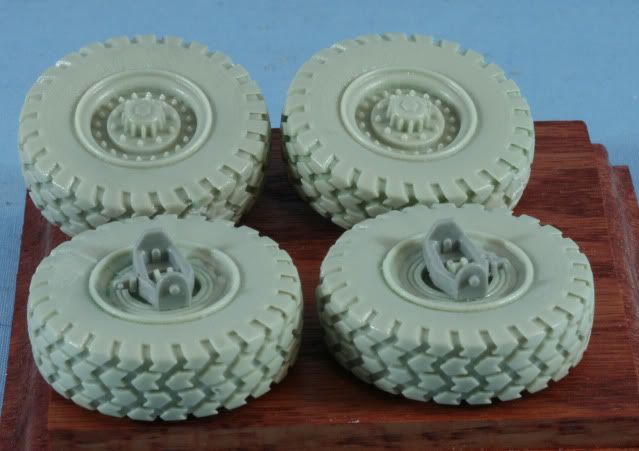
The tires are resin from New World Miniatures. Again the molding is excellent. Where the pour block is removed I used a pointed Dremel grinding bit to restore the tire tread pattern. The tires are cast with notches to match the kit parts for the attachment to the axels. Here is the tires cleaned up and ready for painting.

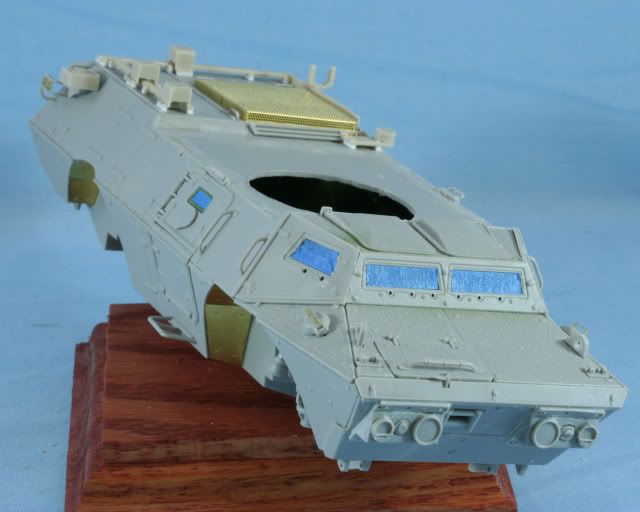
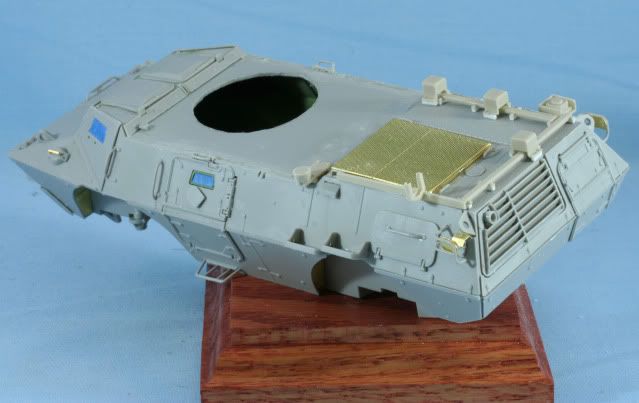
The main vehicle had the last few resin and kit details added with now just a few left off for ease of painting. The windows are prepared and it is ready for the paint hood.

Here is the rear view

Here is a view of the vehicle with a prime coat of Poly Scale Tan. I used a tan color rather than a dark primer since the finish color is sand. I feel it is important to have a prime coat, especially with a mix of resin, PE, brass and grey styrene to get everything a uniform color.

That’s it for now. Now with everything primed, it is time to move on to finish coat and details.

As always thanks for stopping by. Your comments good or bad are always appreciated.

Rounds Complete!!
Very nice Mike. The conversion looks really nice. Great job so far.

Gino - Always a welcome visitor…thanks

Rounds Complete!!

Another one of Mike’s, “Hey guys, bet some of you ain’t seen this before” builds taking shape. And taking shape nicely. To be entered in JerseyCon perhaps? [whstl]

Mike, looks great so far.

Those resin tires look outstanding.

Marc - Thanks…you know me, always building the strange and obtuse. As for Jerseycon…??? I hope so.

Jetmodeler - Thanks for stopping in and for the comments.

Rounds Complete!!

Heya Mike : )

I saw this conversion in the Formations web site it looks to really cool and I am sure you will do it justice!

From your pics the fit looks real good. You have a knack for picking some very interesting stuff …bet it is done by September : )

bill

Bill - What a pleasure to have you stop in.

Rob at Formations has done an excellent job with this set. It is well worth the money. As for interesting…you know me…different and obtuse.

Now as far as September…[whstl] of course. Hoping I see you there [;)]

Thanks again old friend

Rounds Complete!!

Glad to see you are also getting in some bench time in between the summer chores Mike, looks good in the primer, can’t wait to see it “advance” to the next round! [B]

Bill - Thanks…between work and summer chores it seems weeks between bench time…[:'(] Ahhh what happened to the good old days [*-)].

Rounds Complete!!

Looking deliciously delicious so far Mike! [:P]

(A little different from what you’re cooking up right now but, I think (no one there seemed to know [:@]) that this is the basic M1117 ASV…)

Keep on chuggin’!