1/35 M115 8 inch Howitzer, WIP, 03/04/12, Complete

Fire Mission

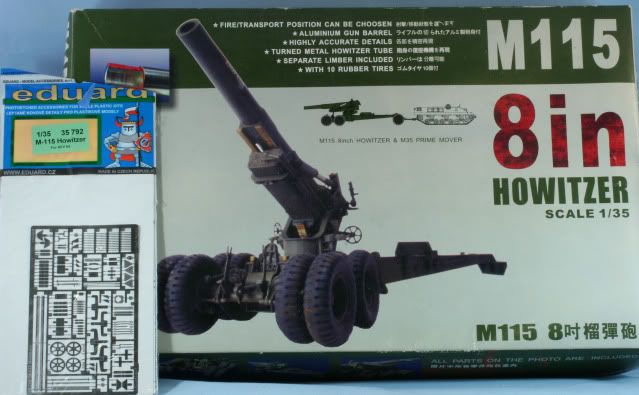
1/35 AFV Club M115 8 inch Howitzer

Introduction

Originally designated M1 8 inch howitzer, it was developed during the 1930s. It saw service during WWII & Korea. It was towed by either the M4 18 ton tractor or the 7 ½ ton truck. It was also possible to be towed with the M35 prime mover. During the late 50s and 60s the weapon served in NATO as a nuclear artillery weapon. The M115 upper carriage and gun was used on an M4 chassis to produce the M43 8 inch HMC. Later the same upper carriage and gun were mounted to form the M110 8 inch self propelled howitzer.

The same lower carriage and upper carriage were used to create the M59 155mm gun, originally designated M1. Also, the same upper carriage mounted on the M110 with the 175mm gun made the M107 self propelled gun.

The M115 remained in service with the US military through the early 1980s and has seen and is still in service with many other countries worldwide.

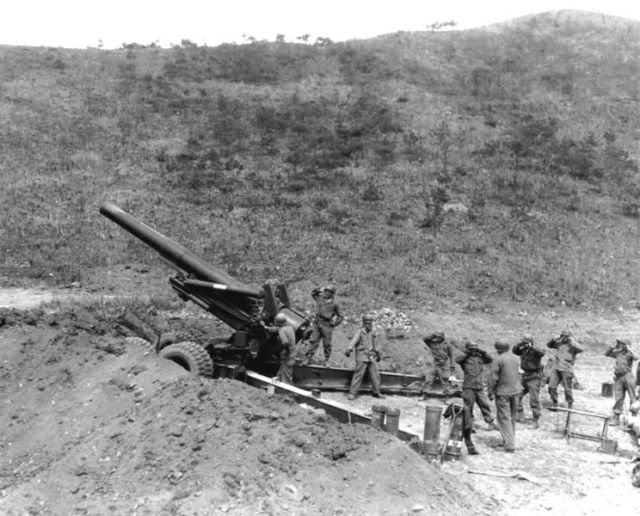
Below, is an 8 inch howitzer in service during the Korean war and the basis of this build

The build

I will be using the AFV kit with Eduard photo etch.

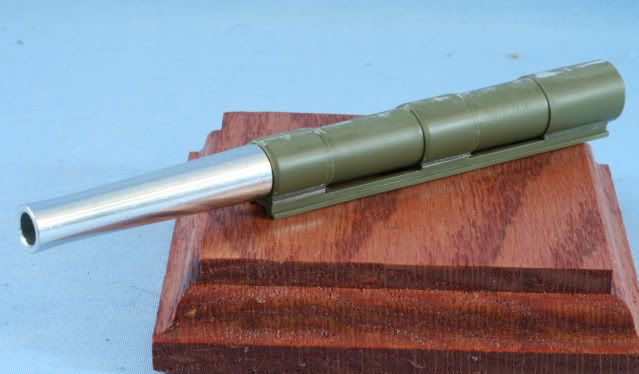
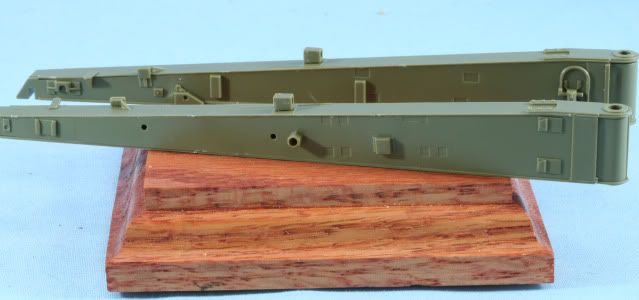
I started by skipping the first few steps, which are the upper carriage and barrel and moved to step 4 which begins the lower carriage. The first two are steps are 4 & 5 which deal with the assembly of the trails. Since I will be using the Eduard PE set, the clips to hold the spades in transport mode were not used in favor of the PE versions. Here is the bare styrene assembly

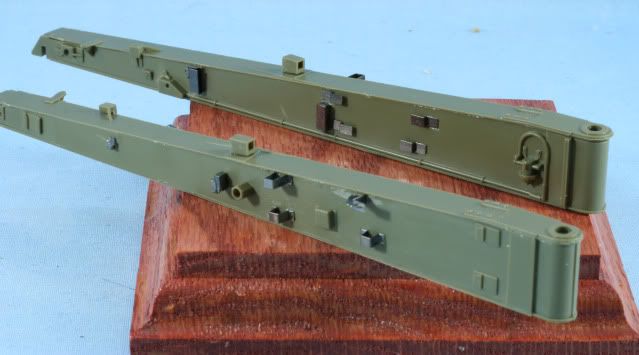
After assembly of the PE parts, here are the trails

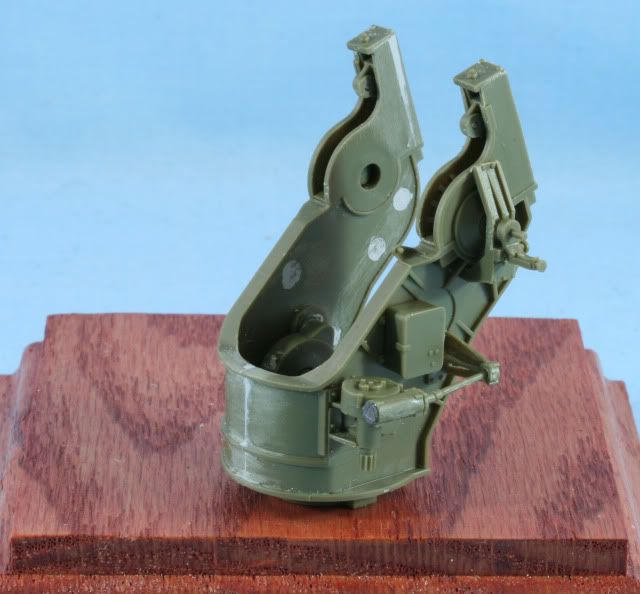
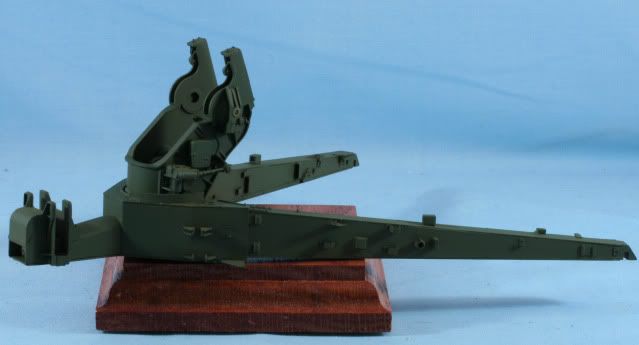
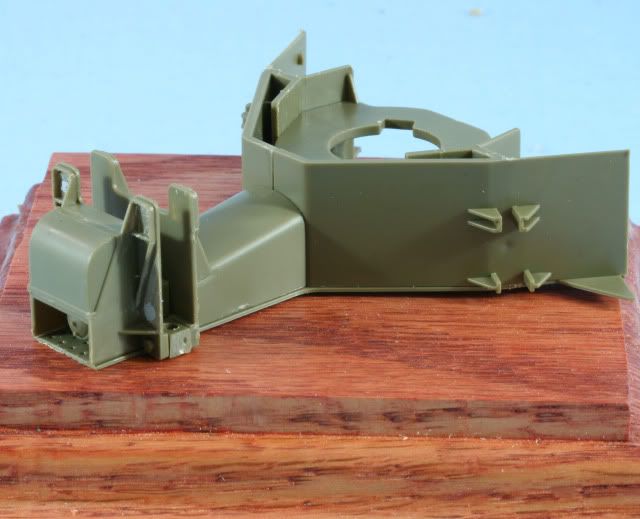
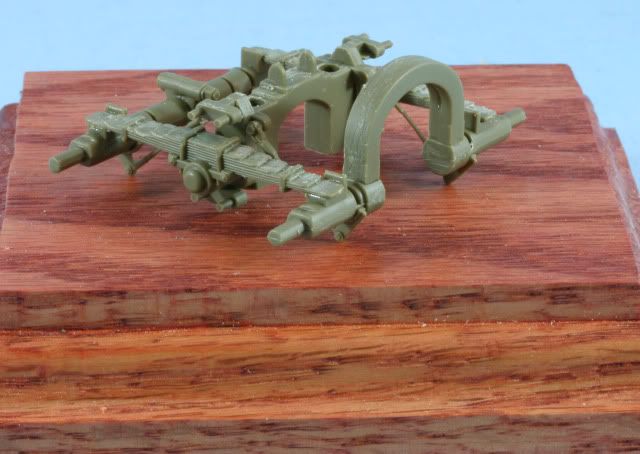
Step 6 is the assembly of the forward section of the lower carriage. Part of this step requires connecting the trails, which are locked in place by part A31. In order to facilitate painting of the trails, I will leave the trails separate and at least prime the trails OD before finalizing this assembly. Part A5 will have some ejector pin marks, which will require filling. Here is the forward end prior to paint.

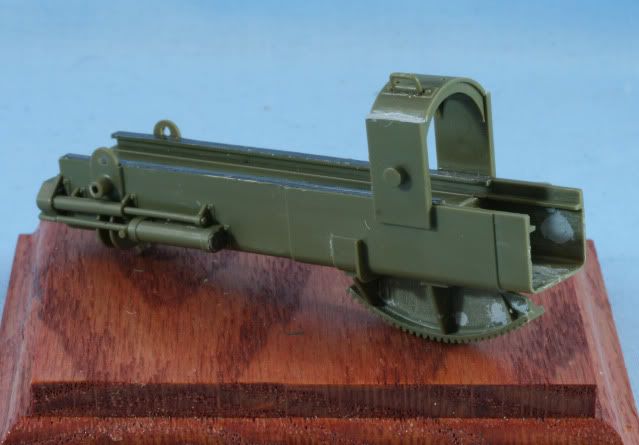
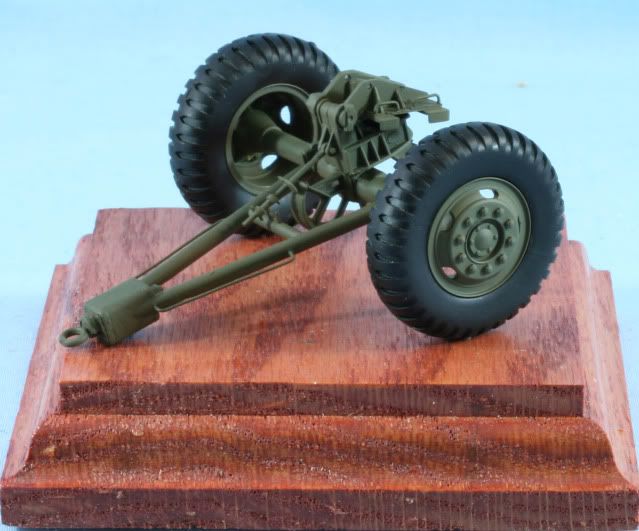
Step 7 is the frame assembly for the wheel carriage. Care needs to be taken with some of the suspension arms and their removal from the sprue. Also parts B40 and B42 need to be checked for ejector pin marks… Here we are after step 7

Step 8 assembles the brake system to the wheel carriage. I will be adding the brake lines later but pay attention to the brake assembly part B4 and its direction. There is a nub on one side for the connection of the air line. This should be pointing inward or each side is a mirror image. The instructions show this incorrectly.

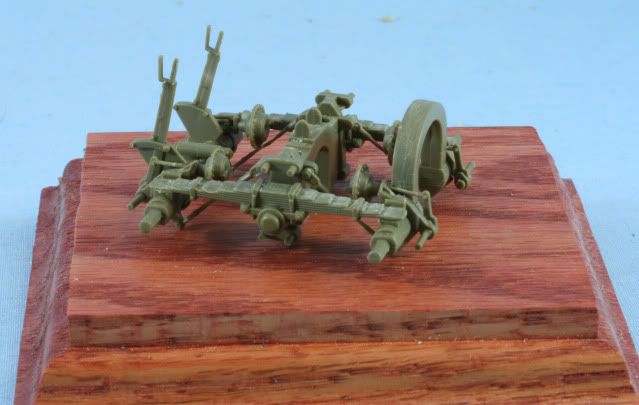
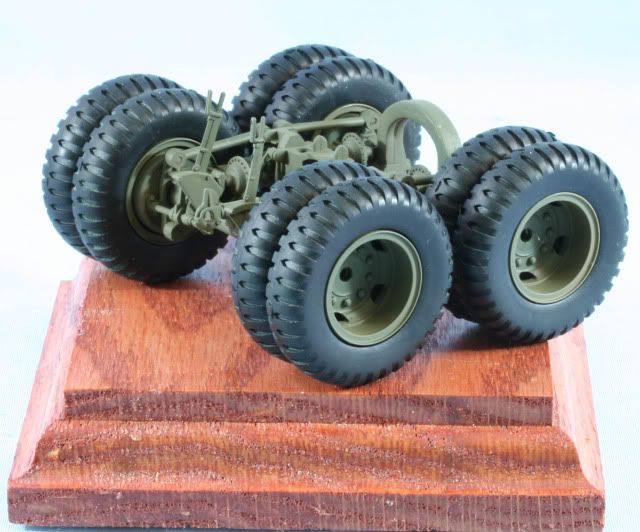
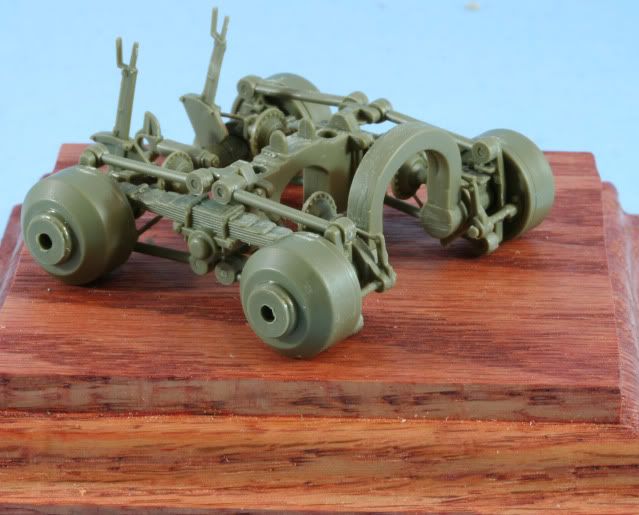
Step 9 is the assembly of the wheel drums and stabilizer arms. Here is the completed step 9 assembly

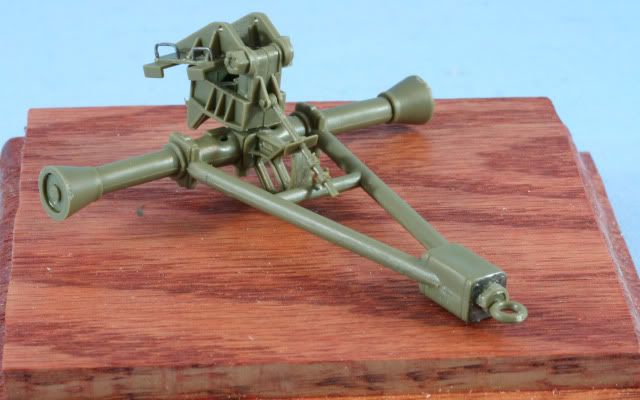
While waiting for glue to dry on the above assemblies, I skipped to Step 14, which is the assembly of the transport trailer. The main part B18 requires a bunch of care to remove the mold seams and filling a sinkhole at the pintle connection. I replace the handles, parts B20 and B17 with SS 20 gauge wire. Also if you look at photos of the trailer (I used my personal and also Prime Portal) there is a long handle on each side of the yoke to allow the crew to lift and move the trailer. I added this with the same 20 gauge wire. The yokes were drilled to accept the wire handles. Rims and tires were left off to facilitate painting.

This photo is prior to filling the sinkhole and adding yoke handles, more of the straight styrene assembly

Well that’s it for now. I am off and building for 2012. Next will be to move the lower carriage parts in for priming and go back to assemble the upper carriage.

As always all comments are welcome

Rounds Complete!!

I have this exact kit, I’m very much looking forward to watching your progress!

Off with a “bang” for the new year, keep us posted Mike! [Y]

Chris - Glad to have you on board, thanks

Bill - You know me…by my nature I go with a BOOM!! Thanks for the peek

Rounds Complete!!

Another green cannon? Of course please count me in! I know little about this and I am always up to learn new stuff. Looking forward to follow this…

Happy New Year Mike!

Andy - Always a pleasure to have you along for the ride

Rounds Complete!!

Mike, looking very nice so far. I will be following this one as usual. I’m sure it will come out great as usual as well.

Not sure what tires you plan on using on it, but did you see the new tires for it from Hussar over at PMMS? They look very nice.

Gino - As usual always good to have you stop by. As for the tires…this one I was looking more at a Korean theme and so I was going to stick to the military style tire.

Now the Hussar tires look great. When I get around to the M59, I will do that one with the Mack NO and civilian style tires used in WWII. I already have the Master Productions set with the tires and the WWII style dolly.

Thanks for the peek and the info

Rounds Complete!!

Going back to the beginning, step 1 has the assembly of the barrel and sled. It also calls for the assembly of the breech, which I have kept separated to facilitate painting. The seam for the two rear halves of the barrel take a bit of work and filling with Mr. Surfacer 500. After careful filling and sanding, here is the barrel with sled.

Step 2 assembles the upper carriage. There is some large ejector pin marks on the inside and a major seam where the two halves come together. Again, another bunch of work with Mr. Surfacer to clean up the assembly and here is the assembly. I left off the panoramic telescope for painting and the delicate hand wheels until I begin final assembly.

Also is the assembly of the recoil sled. Again, the assembly is two major halves which has a major seam along with injector pin marks on the inside rear which may show and on one side of the elevating gear. Once the seam and pin marks were sealed with Mr.Surfacer, here is the assembly.

After all the sealing and pin mark filling I am finally off to the paint booth to prime all the major assemblies with Vallejo OD primer. Hopefully with all the filling work done the build will move along now but those who may build this or the M59, be ready for pin marks, sink marks and bunches of seams, all which require work.

As always all comments are welcome

Rounds Complete!!

Very cool Mike and lookin’ forward to seeing this one done up nicely as well. I did the Verlinden resin version of this years ago, I’m sure that the styrene option will be by-far superior.

I can offer to photo the one in the next town over (neglected and deep in the bush) but I see that you’ve got some good shots in your walkarounds on your site already. If you do need some photos, let me know as I occasionally drive by it while working on Sundays.

Have fun!

Hey Mike did the barrel require spacers or was it correct?

Tony lee

Kevin - Thanks for the peek. Resin has it’s own set of complications. As for pictures, thanks, I have plenty plus there is plenty out there. Again thanks

Tony - The AFV kit is measured from an 8 inch howitzer so no spacers needed. If you are building the AFV M59 or M40, both are 155mm gun, then you need to add the spacers. Thanks for the visit.

Rounds Complete!!

Looking good so far Mike, glad to see you getting in some bench time and keeping this one moving along. [B]

Bill - Thanks for the peek.

Soooo many people complain about the hobby costs…the most valuable thing is time…getting time to be at the bench…priceless!!!

Rounds Complete!!

Is that an a/m barrel or the one from the kit?

That is the metal kit barrel. It is pretty nice.

It’s looking good Mike. Keep up the great work.

Gunner - My brother Gino already gave you the answer. The metal portion is the front half. The back half with the sled is styrene. The styrene halves fit well but still require some work on the seam For the M110,M107, M115, M59 M40 & M43 all use a similar arrangement.

Thank you for stopping in for the peek.

Gino - Thanks for stopping by the firing point. Also thanks for posting the answer for Gunner.

Rounds Complete!!

After priming with Vallejo OD primer (which I highly recommend …… great primer) , sometimes going back to touch up a seam but ultimately primed and the a finish coat of Poly Scale OD.

I decided to go with the rubber tires supplied with the kit. After a soak cleaning in Dishwasher cleaner to remove wax and oil on the surface. Then rand each tire across a scotch guard pad to rough up the tread and give the tire some side ware. I then cleaned up the tire using clean Mineral Spirits. Allowing a day for the tires to totally dry, I mounted the tires on the rims, made up the dual tire assemblies and glued the duals to the axles on the bogie.

With the tires on the rims, I was also able to assemble the M5 Carriage Limber. This will be part of my upcoming M4 HST build, but is part of the M59 kit.

I mated the lower carriage with the upper carriage. The traversing gear and gear assembly were painted with Alclad Steel along with elevating gear assembly. The spaced there the bogie rides was also painted with Alclad Steel. The brake line inside each trail was painted with a 50/50 mix of NATO & Flat Black for the black rubber airline. More of the airline system will be added later but here is the lower assembly now.

Lastly the barrel sled and recoil cradle. After trimming the sled so it would fit and slide into place, the sled was placed. The forward edge of the sled was painted with Alclad Steel where the movement from recoil would keep the parts clean. The breechblock was painted with Alclad Steel. The block was mounted to the breech and assembled to the tube rear, after sliding the tube in place. The elevating gear on the bottom of the recoil cradle was painted with Alclad Steel. Also the inside of the tube was painted with Alclad Steel.

Next up is to begin overall assembly and add some scratch details.

As always all comments are welcome

Rounds Complete!!

OH MIKE that is some fine work my friend.[][][*][Y]

Tony lee

After completing my first artillery kit a couple of months ago, I now have a deeper appreciation and keener interest in artillery pieces. Your’s is shaping up very nicely and seems to be a very nice kit. I’m keeping an eye on your build sir!