[dto:] on the use of the stucco. Nice to see this one getting some time Mike, I can definitely relate to the RL interference problem. [:D]
Gino - Thanks, the stucco is a good 1/35 “chunk” builder. Especially for VN build where the track area always needs a chunk [;)] . Now as far as seeing it ina few weeks…[:O]…RL is real busy…I don’t think it will make it
Bill - Thanks for stopping in…another stucco fan [;)] .I am hoping for a RL break soon…I need a nice full bench day [:'(]
Rounds Complete!!
I had some time this weekend to push this one along. I concentrated on completing the chassis with the exception of the tracks.
For the headlights, I drilled out the kit supplied molded headlights and replaced them with #116 clear and 118 black MV lenses. Also I mounted the kit supplied barrel travel lock.
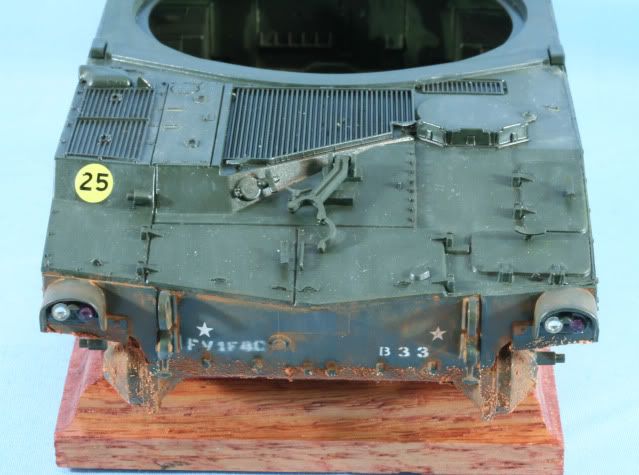
Then I worked on finishing the track area by weathering with MIG Vietnam Earth pigment. I also worked the side panel bolts and the chassis front with the same pigment mixture. After everything dried here is how things looked
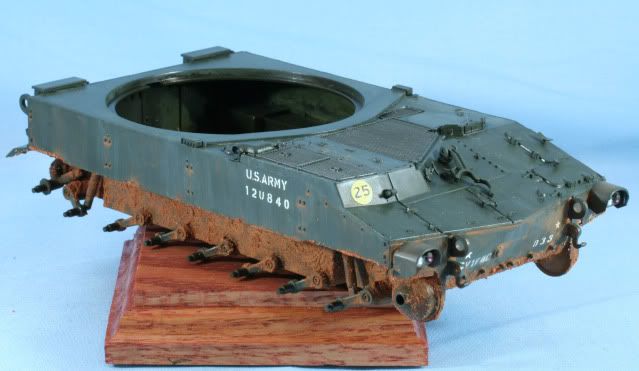
Here is the other side looking from the rear.
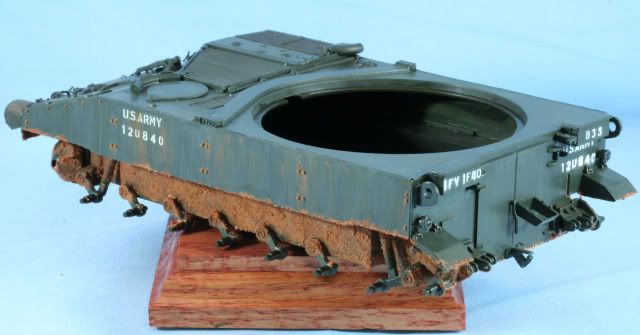
Here is an underside view so you can see all that is weathered.
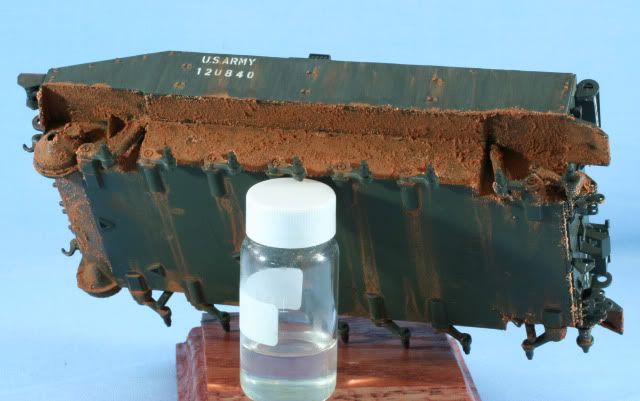
Next were the road wheels. The back of the wheels are easier to weather while off the vehicle.
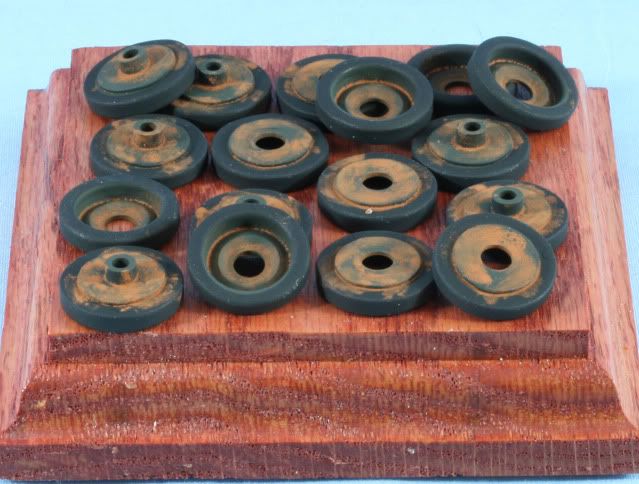
Once the wheels dried, I assemble the pairs and mounted the main road wheels. The idler and drive will go on with the tracks.
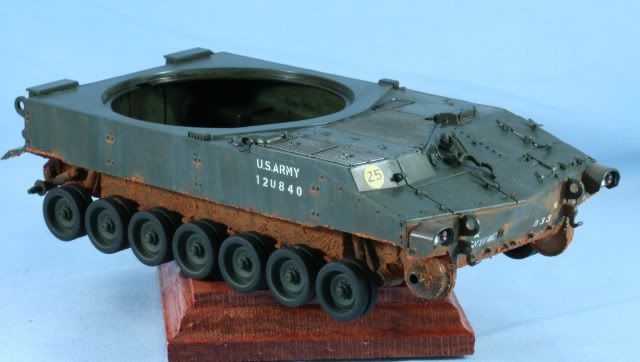
That is it for the chassis except for tracks and final weathering. Next update, on to the turret.
As always thanks for stopping by. Your comments good or bad are always appreciated.
Rounds Complete!!
Coming along nicely sir! I like the stucco weathering technique. I would have never thought to use that. Nice idea! [Y]
The MV lenses are a nice touch too. Keep up the good work!
Mac - Thanks for stopping in. The stucco weathering is a trick from Steve Zaloga. I like the way it looks and it is easy to work with. As for the MV lenses…I love the way they look, they have depth. Thanks again
Rounds Complete!!
Mike, looking great! [Y] You are very close to the finish line. Never thought about using stucco…
Mike, that loooks awesome!
This brings back fond memories for me. This model was literally one of the first ones I ever built back when I got back into modeling seriously. It’s cool to see it coming back to life! You’re doing a great job and tribute to this vehicle!
I’ve filed the “stucco” in my memory for future use!
It’s comin’ to life now Mike! Lookin’ forward to MORE! I too will keep the ‘stucco’ in mind for the future.
Some very nice “mudifications” here Mike.
!http://th50.photobucket.com/albums/f319/Scott_Andy/My%20Space%20Crap/th_59.gifKeep on chuggin’…

Man that looks great.
The MIG pigment works extremely well, it really is the only thing that looks correct. I noticed there are different shades of Vietnam dirt depending on how wet it is. Like on the side of the road it is very dry and you get that light color. As it gets more moist it turns redder. When very wet like after a rain it becomes a deep dark clay like texture and red color. This could all be done with the MIG pigment. I have tested it…the more you use the redder it gets. So if you want to get that lighter dust shade just use a bit mixed with a light color paint, if you want that dark red use more.
Most of the vehicles I have seen in pictures have the red color were you have it, fresh from the field. Then it gets the dusty color as it dries, that is usually around the sides of the vehicle or inside the wheels. I guess the heat from the wheels dries it out. But if it’s parked in the mud it will stay red. Of course unless it’s a real sunny day and it dries it out. I did a lot of research and it also depends on if it’s the rainy season or after January when the weather changes.
Looking real good Mike. Looking forward to seeing it finished.
Nate
Since so many like the stucco, here is the product information
http://www.liquitex.com/Products/texgelmedceramstuc.cfm
I added some burnt umber acrylic paste to give it the reddish orange color. That makes the MIG pigment cover much better. I like the acrylic paste to keep the stucco thick but you could also use the cheap acrylic paint.
Andy – Thanks. The stucco is clean easy and gives a nice effect. Try it you will like it
Karl – Thanks….glad to bring back good memories. File the link above for info!
Kevin – Thanks for stopping in.
Steve – Glad you like my mudifications!!
Noah – Thanks for stopping in. Yep, the MIG VN Earth pigment is perfect. The time I am looking for is around Tet. Moving into position with mud but now dried. The stucco give a nice chunky effect and the pigment, laid on heavy gives the dry deep clay red color. I still have to dust the main deck and turret. That will be part of my final weathering along with more chunky in the tracks.
Thanks again
Nate – Tanks for stopping by!
Thanks again everyone
Rounds Complete!!
Tet was during the end of the rainy season. So if it’s in January you’ll see a lot more rain. It stops abruptly in February as far as I have read.
I’m still doing the Hue Dio so I am trying to dial on on a certain phase of the battle during a certain time period that seems to be in the middle/end of February when the rain is stopping. You’ll notice when you look at pictures from the battle of Hue some seem like it’s a lot of the red and in some pictures it’s the sandy color, that later part would be when the rain stopped and the ground dried up.
I would think about lightening the color of the mud on the sides of the vehicle and inside the road wheels a bit. That’s what I see in a lot of pictures, unless you are going to do the early part of Tet, then keeping the color more homogeneous would be the way to go IMO.
If anybody is interested in the battle of Hue a book to read is “Phase line green”, it was inspiring and disturbing at the same time. It was heart wrenching reading about the Marines begging their commanders to give them fire support which they would not do as they were ordered to make infantry attacks against dug in NVA / VC positions manned with heavy weapons over and over again. A similar thing happened at Monte Cassino in WWII.
Making good progress on this one Mike, just have to keep “slogging” away! [;)]
Bill - Thanks…slogging…now there is a good term with the mud on this one!!
From one slog to another…thanks [;)]
Rounds Complete!!
Stucco on a tank? You can get the Guys at Garden State Brick Face to carve in some mortar lines[whstl]
Seriously, looks great. Will it be ready for AMPS? Are you really not coming to MCon? Won’t be the same without you.
Marc - Thanks…brick armor!!!
No it will not be rady for AMPS…slowed by RL and you cannot rush art!! As far as MCon…yep, leaving on Tues to head to AMPS. After spending almost a week at AMPS, it is tough to hit MCon the week before…sorry, I will miss it too.
Thanks Again
Rounds Complete!!
Do the locals know that you’re heading their way Mike? [t$t] [D] [<:o)] [B] [C] [cmra]
Have a blast and ‘good hunting’!
Kevin - I am sure they know…the National Guard has been alerted…extra stocks of burbon have been brought in…large quantities of Italian food have been emplaced [;)]
Thanks old friend…really looking forward to the two trips, first to the National Marine Museum and their restoration area, then the next day to a large private armor collection. Plenty of pics for the website!!
Ahhh the smell of starch and diesel.
Rounds Complete!!
Well it has been a while between my trip to AMPS and spring chores, this has been the first good weekend on the bench in almost a month.
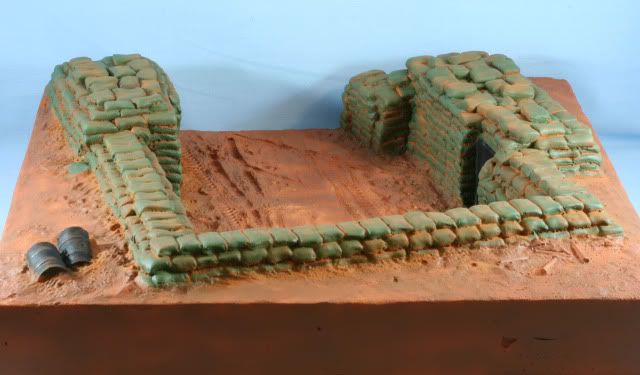
As a diversion to start, I began working on the base. I was able to pick up an old OOP Verlinden Firebase. After some body work with putty, I applied a prime coat of using a generic grey primer. The dirt areas were given a base coat of Poly Scale US Earth 505366. The sandbags were coated in Poly Scale US Mid Green 505390 and the drums were painted Tamiya flat black, Here is the basic base.
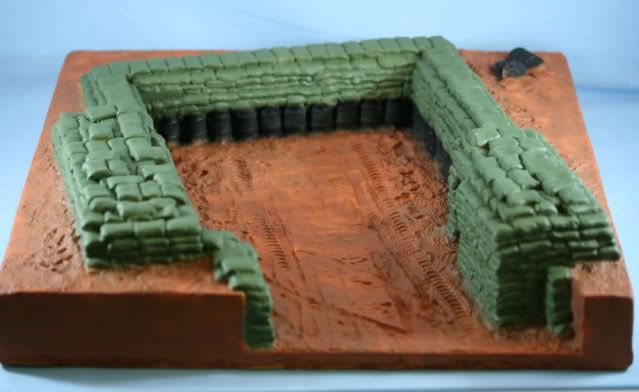
After drying, the stack seams between the sandbags was treated with a solution of MIG Viet Nam Earth pigment in mineral sprits. After drying I use a soft makeup brush to clear the excess and dust some areas of the flat areas of the bags.
Next was the drum area where the same pigment solution was used for the area between the drums. Again some of the excess was used to dust the drums. The chimes on the drums along with any side bungs were highlighted using a #2 pencil. This was also done to the two drums off to the side which are half buried. Here is the current status of the base.
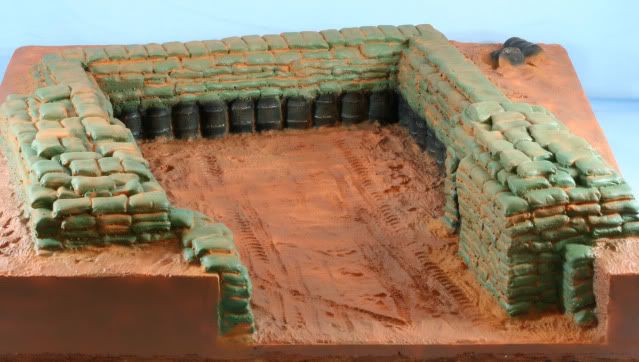
In between working on the base, I completed the assembly of the individual track links. Two sets of tracks are prepared with 78 links per side. The tracks were first primed with Tamiya flat black. Then they were painted with Alclad Steel. After drying, they were coated with future for wash protection. Next the pads were painted with a 50/50 mix of Tamiya Flat and NATO black.
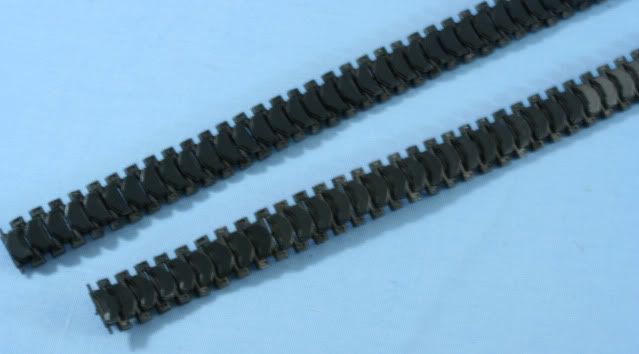
After this the tracks were treated with the same MIG solution used above to begin the track weathering.
That’s it for now. Looking at the home stretch here, hopefully the next week or two will finish up
As always thanks for stopping by. Your comments good or bad are always appreciated.
Rounds Complete!!