1/24 Airfix BF 109 Completed Group Build WIP

Hi All,

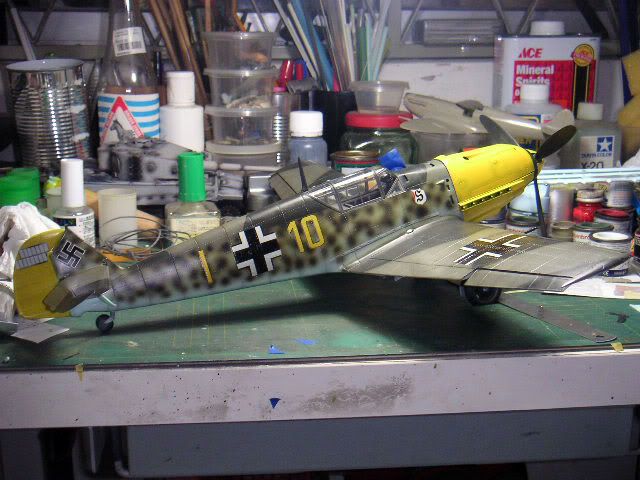
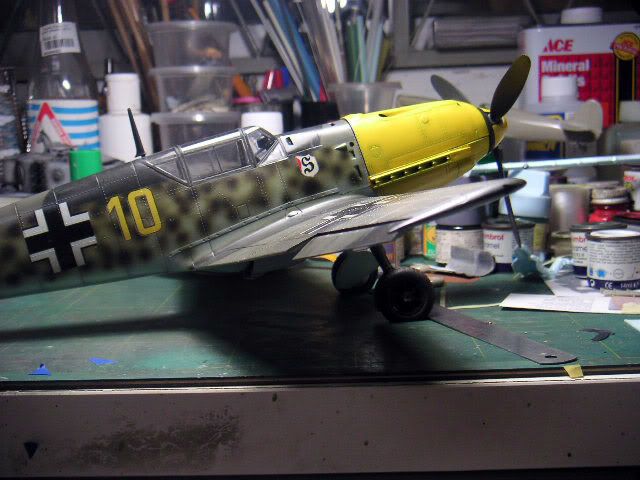
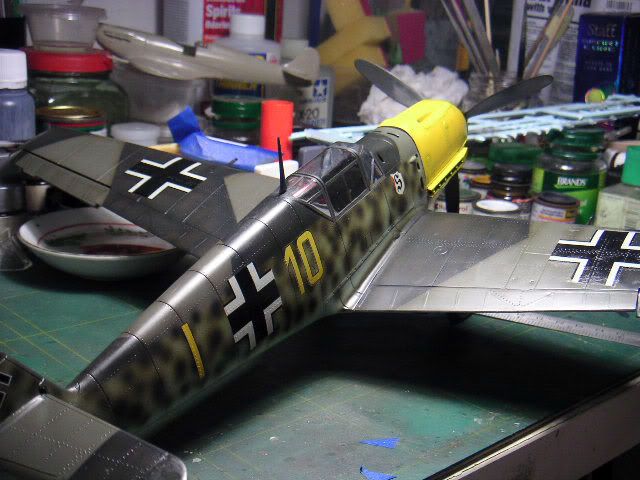
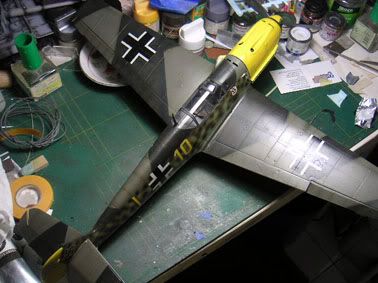
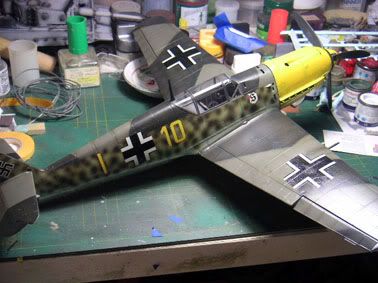
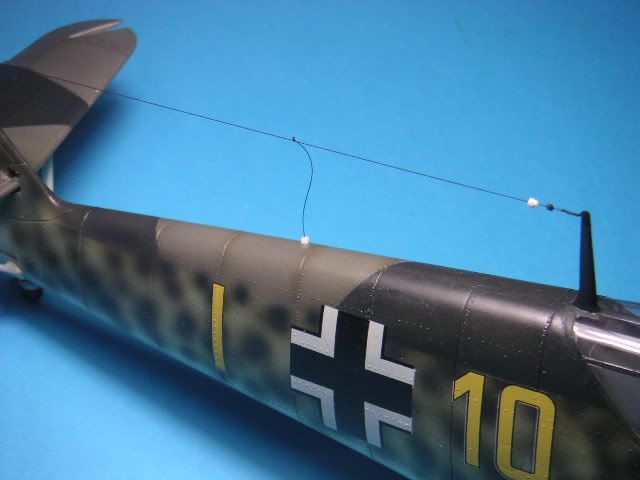
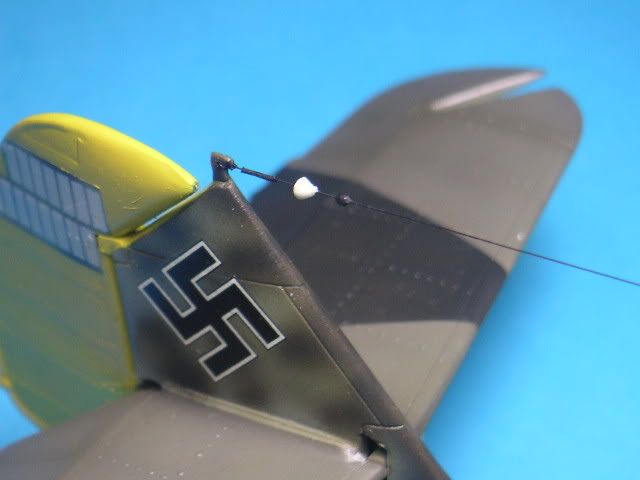
I noticed a fondness of the BF 109 in this forum built in all types of scale and thought I’d share one Group Build that I did with an Airfix 1/24 scale. This WIP has already been completed so basically you’d see the process from the box up till the final completion. Thought I’d just do a OOB build but it got out of hand as usual. The color scheme and markings might not be that accurate as 1/24 decals are hard to come by here and I didn’t want to Helmut Wicks 109.

So… trying out. Looks like the number of parts are like 1/72 except larger. An OOB build could possibly be done but the scale calls for some detailing.
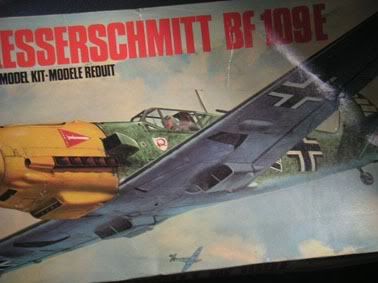
This is the box art

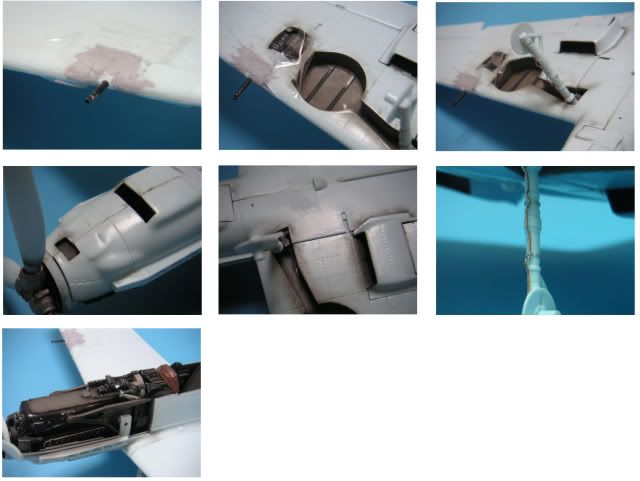
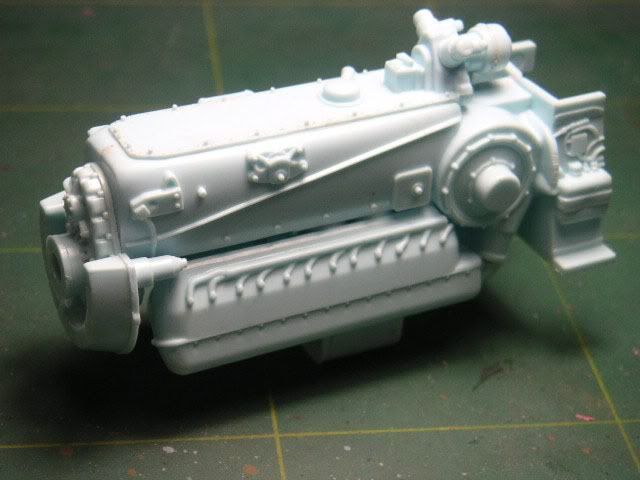
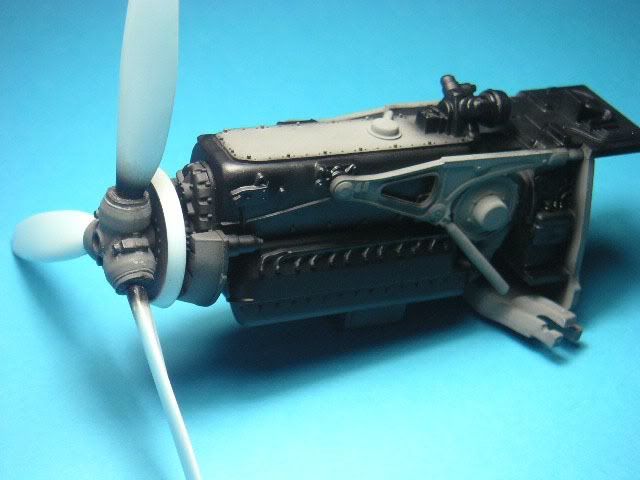
Just putting the engine together. To save time may not paint it or just flat black.

Not bad for an old kit…boleh tahan(in Bahsa Malaysia).

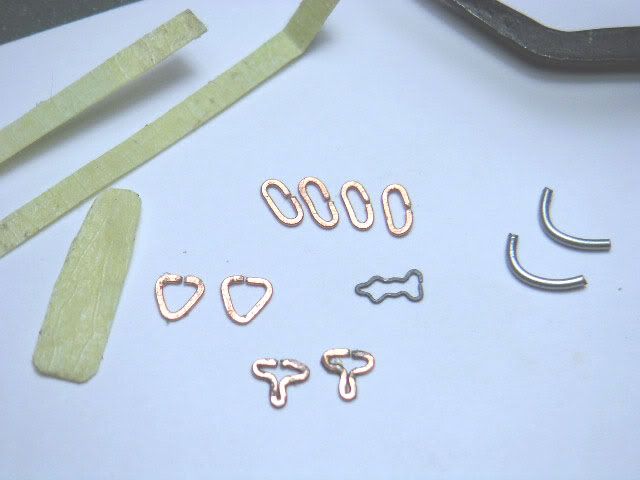
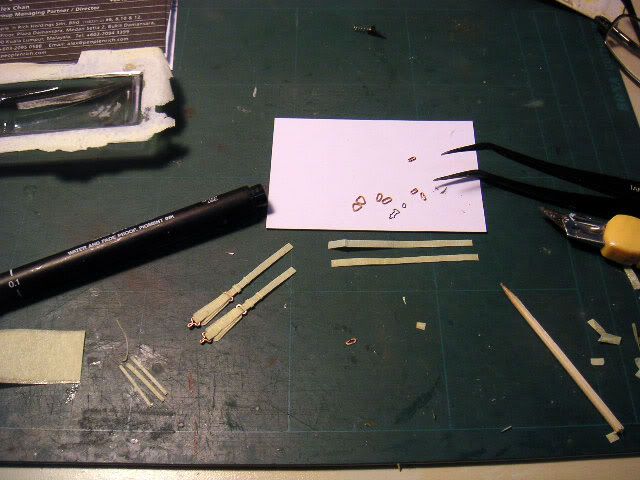
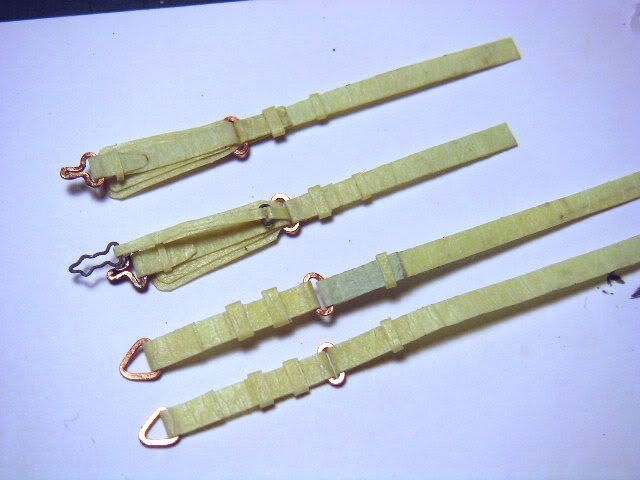
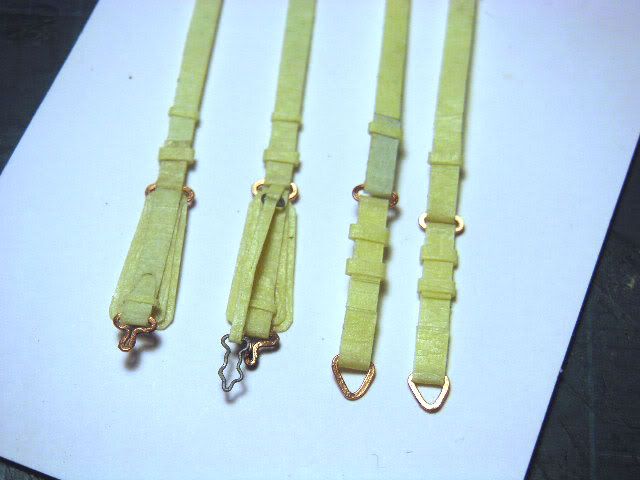
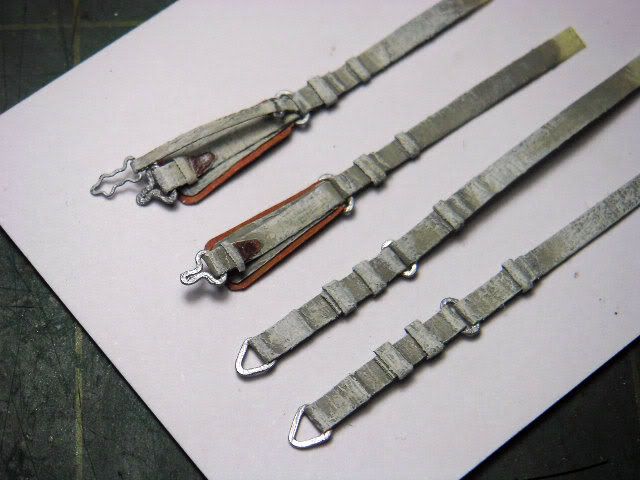
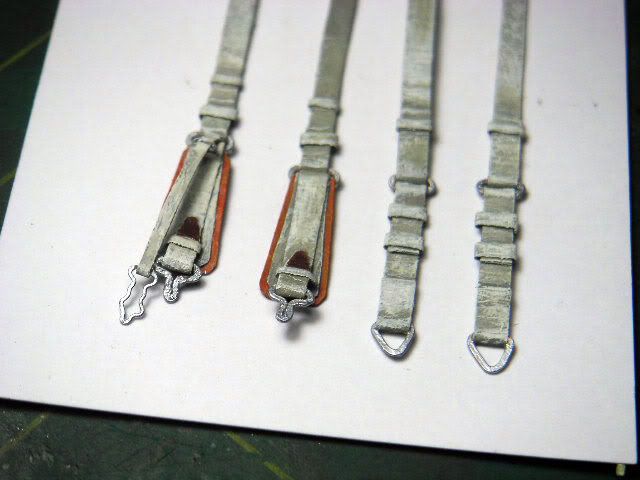
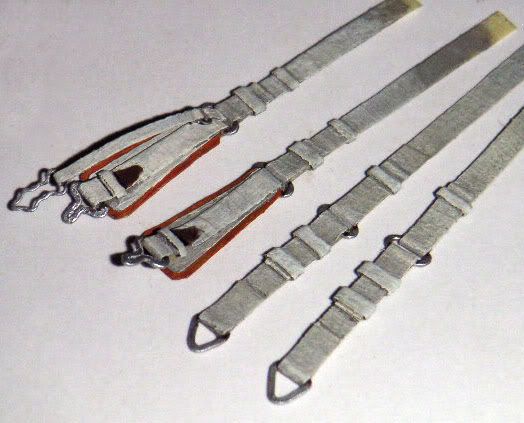
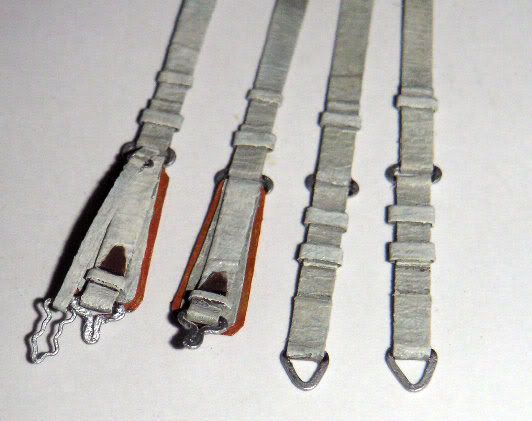
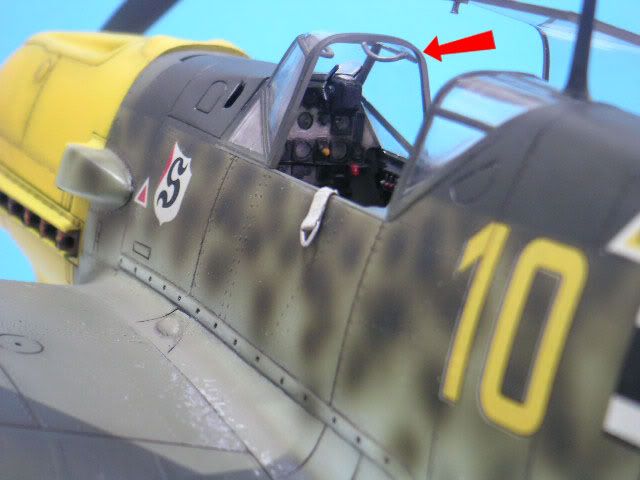
I was going for stock standard for this one to meet deadline. Perhaps new seatbelts and flaps down.

I wanted to see how far my painting skills could go for this. I see a lot of filling and sanding ahead and that will take up much of the time.

All the inerds will be patched quickly like the engine which took me only 15 minutes…anything that’s not seen when closed up gets minimal attention.

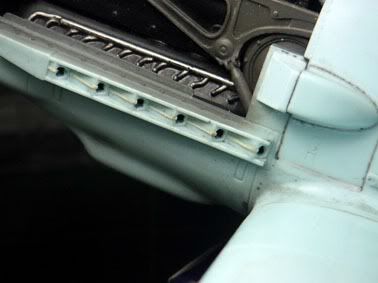
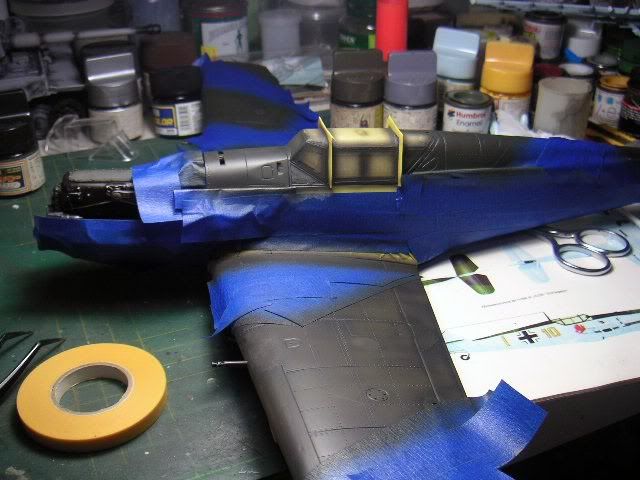
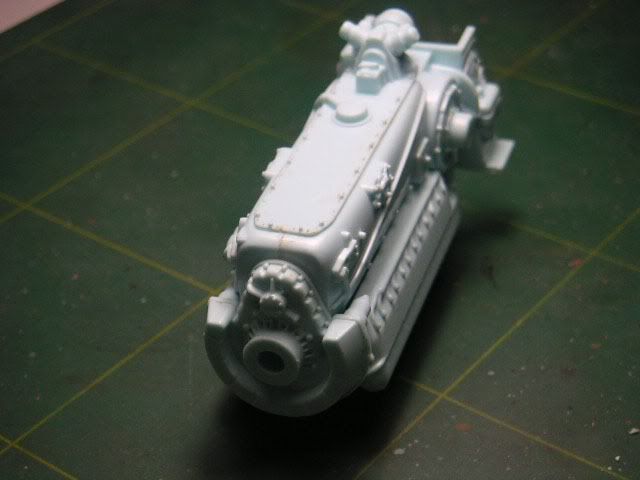
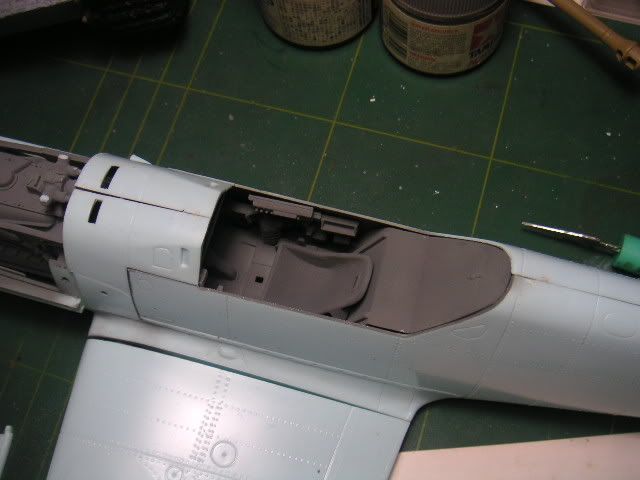
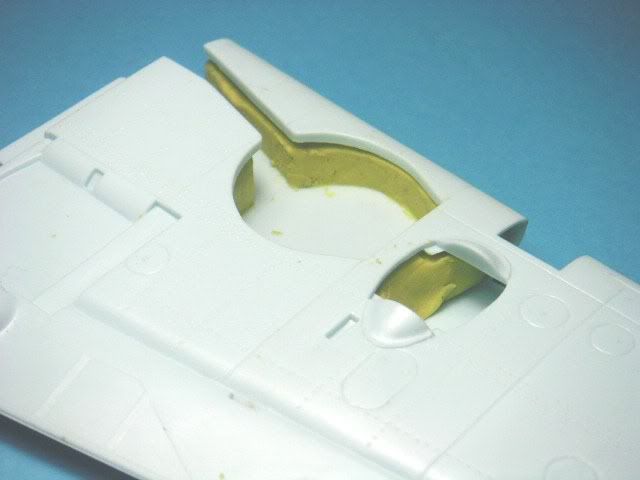
Sprayed all the interior and got all the individual components sanded and assembled. the part that’s going to take time now is the wheel well…it’s all see through. I’ll have to fair it up with side-walls for the GB. Won’t be super detailed…I’m going for painting to bring this kit up. And that was what I thought at the time.

Some little progress shots…seriously I’m going oob so I said…

The other night I was fiddling with my BF109 when I got called out for tea tarik(Local tea break).

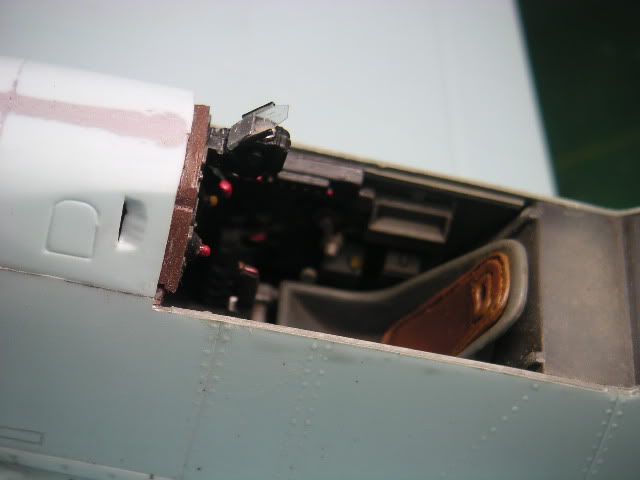
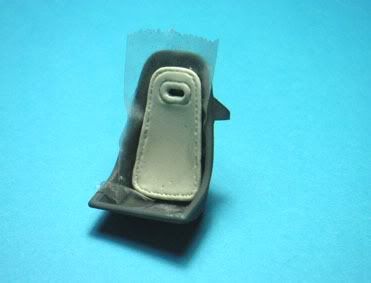
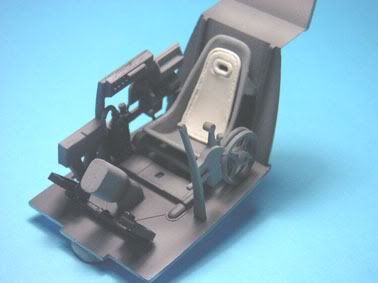
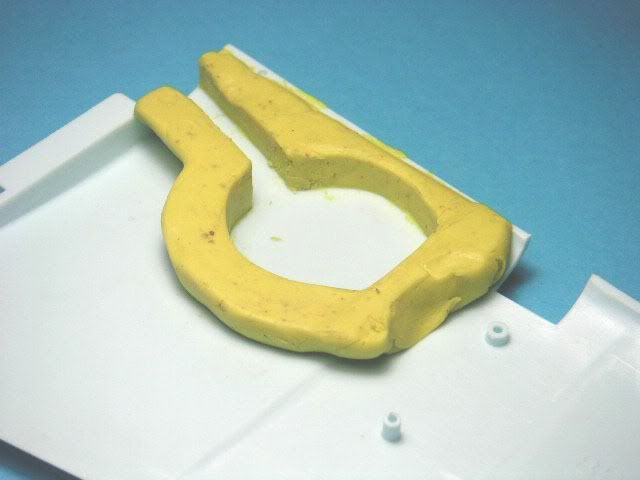
I had just fabricated the leather cussion found on some 109’s seats and brought it out for the guys to see while the bondite was curing.

[

I used cello tape to mask off the seat so the bondite won’t stick onto it. After it hardened , I just popped it out.

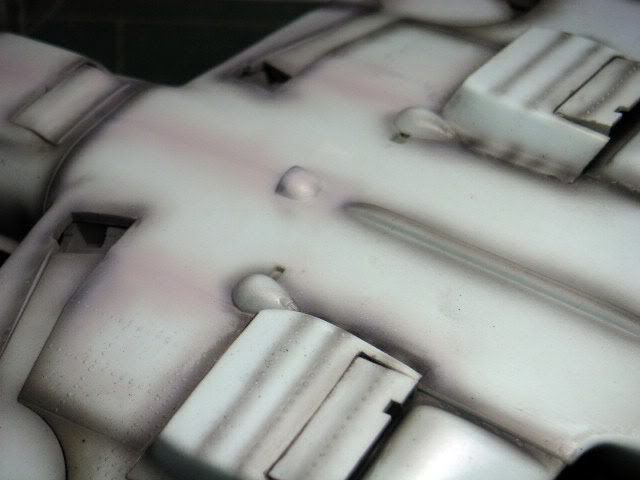
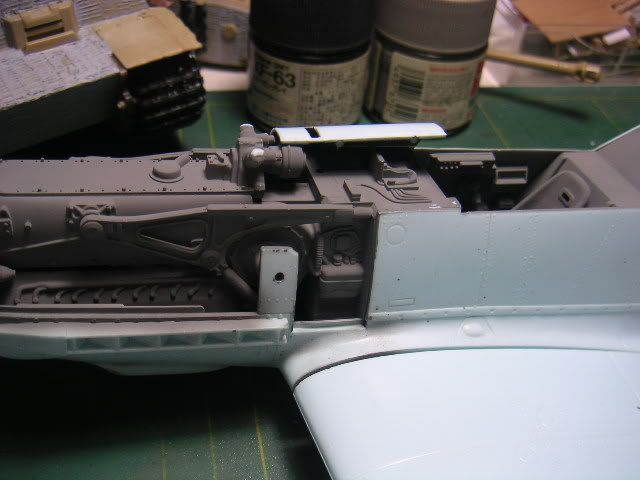
The engine got a bit of painting done with black airbrushed on. I might just give it a wash to dirty it a little. Remember…it’s oob.

I thought this was going to slow me down I managed to find a solution to get the measurements for the wheel well walls by using plasticine.

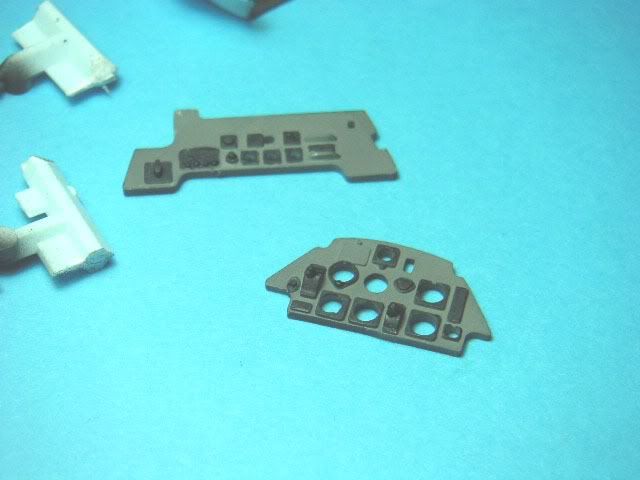
The last two shots are just some of the odd bits that needed a coat of black.

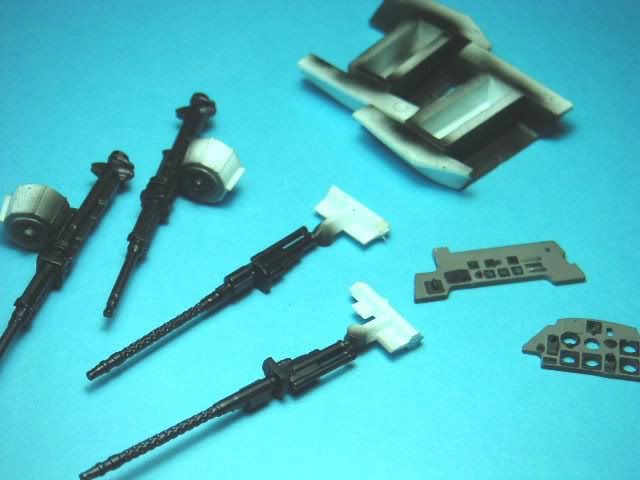
I picked out the dials in black on the control dash board.

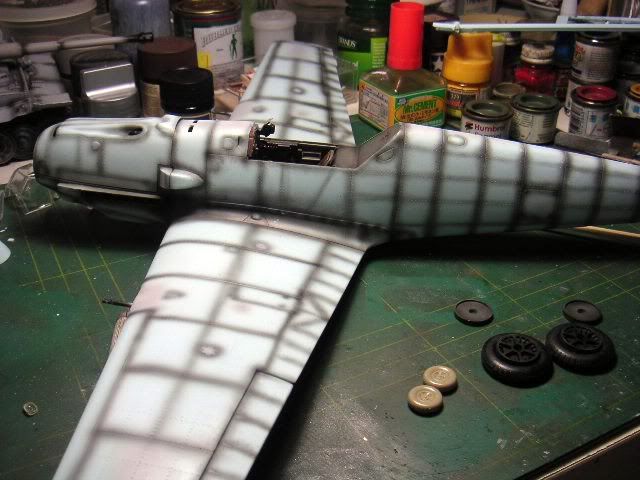
Everything looks flat now but with a little wash and dry brushing, the details will hopefully come up.

Continued in the next post…

Hi again,

I ought to call this Kit “Dimple” like the Bollywood starlet :lol: …so many all over the fuselage and wings, areas that usually have locating pins behind it. So lots of putty and sanding. The wing cannon covers needed the same attention and I used cellotape to mask of for sanding.

The wheel well had to be spruced up if not one big “lobang”(Hole). I added the two spars from evergreen from references I saw. I’m still trying to keep this build OOB but some things can’t be left undone. :rolleyes:

When I put the wings together and got the dehydral it created a huge gap at the bottom wing root that needed plastic strip shims and putty. Just look at the gap in the pix…boy talk about cleavage :lol: .

Ok, some small additions like brake lines. But notice that the engine is stock standard with no plumbing like my fellow modelers are doing with their engines.

Meanwhile I was busy in the cockpit and added some small detail to the Revi 16 B gunsight. Scratch built off course…no after market stuff here. Also lots of drilling for six vents one of which is seen just ahead of the cockpit.

The seat belts are yet to be scratched.

Hard to keep this build OOB,

Just when I’m about to pre-shade I noticed that the exhaust stacks were not going to cut it with just painting. They were too rudimentary and box like, so I drilled out the exits and added the re-enforced seem line along the pipes. It would have been better if I had not stuck the wings which obstructed the operation.

More in next post…

You’re right. It doesn’t look bad for an old kit.

Just one thing, you are going to put seatbelts on there arn’t you.[:D]

Nice work so far. Looking forward to the next installment.

regards, Rick

Thanks Rick and Jetmodeler,

Yes, seat belts were added and were scratch built. You’ll see it in the following WIP. The seat was still dry fitted at this stage.

Did the pre-shading. I have to make a point here, as 70 % of the plane will be in light colors, the pre-shading had to be neat and not over contrasting.

Sprayed over primer on joint areas to keep the base neutral and to check flaws.

The next picture shows the items pre-fabricated for the seat belts. They’re all basically wire twisted and when satisfied was hammered flat. The curved wires on the right will be for the grab handles above the wind screen…only noticed this very late from my reference and have to be added with the canopy already stuck on.

I will show the steady progress of my scratched seatbelt as I go along.

The tools I used were Scissors, Blade, Tweezers, Tooth pick, Super glue(gel) and pen for marking.

Did the waist belts just before going out for dinner.

Did these just now. I’m going for just visual representation. The buckles aren’t accurate, photoetched would be better.

From another angle.

The mornings progress with basic painting of the belts…

Another angle…a bit rough…will feather and apply wash to bring out details.

Here are more updated pix of the seat belts.

They look slightly better and less rough with the added shading and highlights.

I’m now at the mummyfying stage. The larger the scale , the more masking tape and paint used. Expensive lar. I’m going back to 1/72 scale after this, more fun and cute.

Base colors sprayed on but don’t like the shade of 02. Will perhaps lighten with a bit of white added.

Some paint peeling occurred when lifting off the masking tape, easy to remedy.

The canopy was the biggest problem. Lots of gaps to fill to mate with the body.

More in next post.

Cheers,

Richard

truly brilliant work there, ive always wanted to build 1/24 but never got over 1/32 lol anyways brilliant work congrats on your modelling abilities!!!

david

Hi Guys,

Some updates. First the tyres get some trimming to add weight to the aircraft.

The rest of the pix feature the new 02 shade added. I also added mottling as when the yellow identification was added, some form of defence camoflage was present on certain aircraft due to the massive losses in the early part of the Battle of Britain.

Added the decals and moved the wing surface camo further up the sides of the wing root and softened the edges of the camo on the spine and body sides.

Airfix doesn’t provide swastikas so I got mine from HQ. Surprizingly the Airfix decals were good.

From here onwards will be minor weathering, rigging the antenna and vertical stabilizer.

A little addition to the OOB build(couldn’t help it ) :lol:

The aerial and wire needed conductors and spring ends…

Thanks to a fellow modelers technic on making spring wire, I made two from ultra fine wire, cut it and threaded the invisible thread thru it. Then I made the conductors from bondite.

Took me a while to get it right. To secure the invisible thread, I drilled the aerial and tail and tied each end.

There was something about the propellar blades that was bugging me. Airfix got most of the BF109 dimensions right but the prop blades seem to look like paddles.

So I sanded the edges and tapered it about a quarter length from the base.

Re-painted after the sanding.

More in next post.

Cheers,

Richard

Thanks David, I’m sure progressing to 1/24 won’t be a problem especially since there are better kits in this scale in the market now. Fighter aircraft like the 109 have basic number of parts that are similar in any scale. That’s why I was bonkers enough to try building in 1/24 scale.

Cheers,

Richard

More completed shots with the seatbelts and satin finish.

The panel line wash is water color sealed with Future.

Okay, about the grab handles for the canopy. They were a pain to install after the canopy was glued down but I managed it…phew. :stuck_out_tongue:
Also managed to add lever lock for canopy cover.

Close-up.

The Airfix BF 109E-3 has it’s fair share of rivets but thankfully weren’t overkill. :stuck_out_tongue:
It’s got that ruggedness that you see in muzium displays with the wavy panels and the overlapping of the metal sheets. It’s actually quite a small compact plane.
I’d recomend this kit to anyone. It has it’s teething problems like any kit with the minor gaps to fill. My only grouse is the lack of wheel well detail and the oversized propellar paddles.

Thanks for looking, C&C welcomed.

Cheers,

Richard

two words, truly inspiring!!! i think i will try 1/24 now but from those pics it doesnt look like you weathered very much i would have made it look more old and used but otherwise amazing!!!

You’re right about the level of weathering David. These aren’t the latest pictures where I’ve added exhaust stains across the body of the 109. Don’t know if you can see it from this lates picture:

Cheers,

Richard

oh that looks better! again amazing job

Glad you liked it David. Couldn’t help noticing your Avatar, is it a Halifax or Lancaster and what scale is it?

Cheers,

Richard

that is one of my first ever plastic models and was the model that started my hobby. it is a airfix 1/72 scale “dambuster” lancaster (incase your interested was built on the dining room table and is unbelievably terrible)

Richard, your 109 looks amazing.[:D[[:D[[:D[

That is a really one sweet kit to super detail. I built one back in the late 70’s but nothing like your detailing. What a super job with the seat belts! They look right on. It looks fantastic![B]

Jetmodeler…Thanks and much appreciated. I hope you liked the seatbelts.

Cheers,

Richard

David, the first ones always will have a special place be it bad or good.[:)]

Cheers,

Richard

Thanks Plasticjunkie, glad you liked the seatbelts too.

A friend of mine said I didn’t have to buy Eduards AM seat belts. I would have if I could afford them.

Cheers,

Richard

lol nice words definetely right!!!