1/18 custom 3rd Generation Camaro Trans Am racer

As my first introduction to this forum, I am going to copy over a build I have in progress right now and catch you up to where I am with it right now.

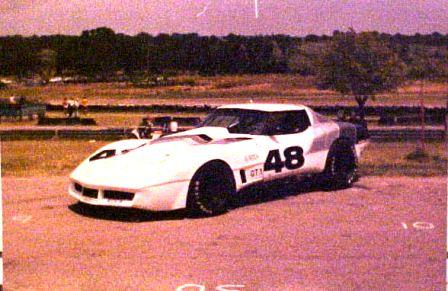
At the 1983 IMSA 3-Hour Season Finale at Daytona, my partner and I bought the 23rd finishing #46 Corvette. It was a C3-chassied/Pickett-bodied Corvette.

We took it back to our shop in Dallas, and rebuilt it from the ground up and raced it in the Sports Car Club of America amateur races in our area.

Around 1986, we were wanting to upgrade to something a little newer.

We had been in constant contact with the prior owner of the Corvette (who produced fibreglass race car bodies), and when we mentioned to him that we wanted to upgrade, he informed us that he had acquired a tube frame chassis for a 3rd Generation Camaro in order to test fit bodies to, and that he was done with it.

Jake and I drove to Milwaukee from Dallas, TX with the rolling chassis of our Corvette in our trailer, and drove back with, essentially, a new car in kit form. The tube frame Camaro chassis had the rollcage, and front and rear clips attached, but that was it. The rest of the car parts, suspension, rear end, fuel cell, brakes, etc. were in boxes.

Along with a couple of volunteers, and through some troubling personal and economic times, we persevered and produced our Camaro.

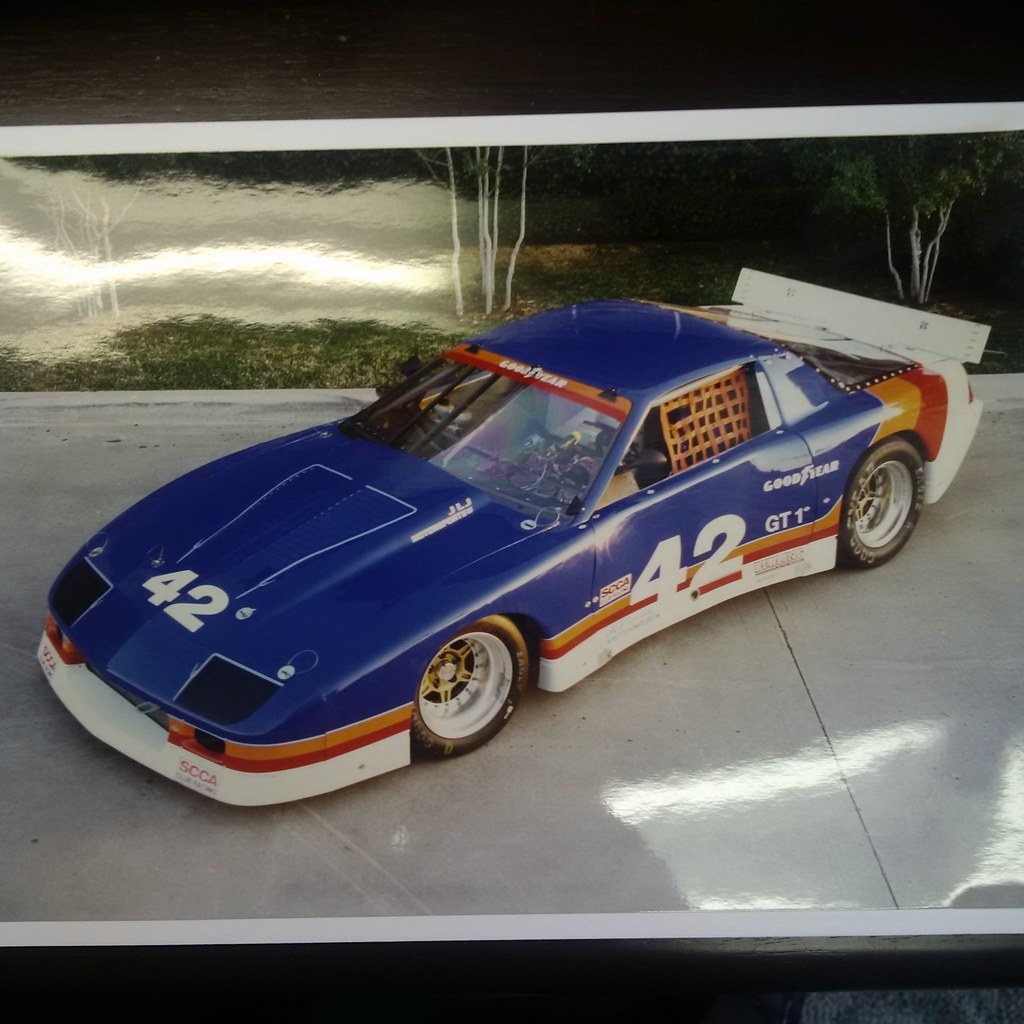
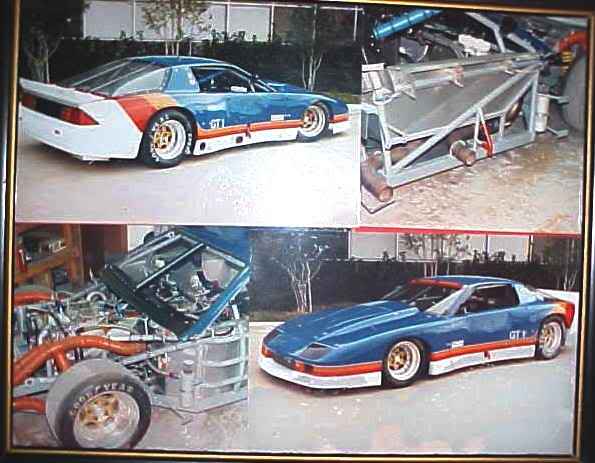
We fabricated almost everything you can see in these pictures, including hanging the body (the seller had merely mocked up his body panels with tack welded brackets and racer’s tape), completing the aluminum interior (firewall, cockpit, exhaust and driveshaft tunnel), completing all the plumbing (dry sump oil system, brakes, fuel lines, and engine cooling), completing all the wiring, and detailing and finishing.

I have been wanting to try to create a duplicate, so will be chronicling that effort here.

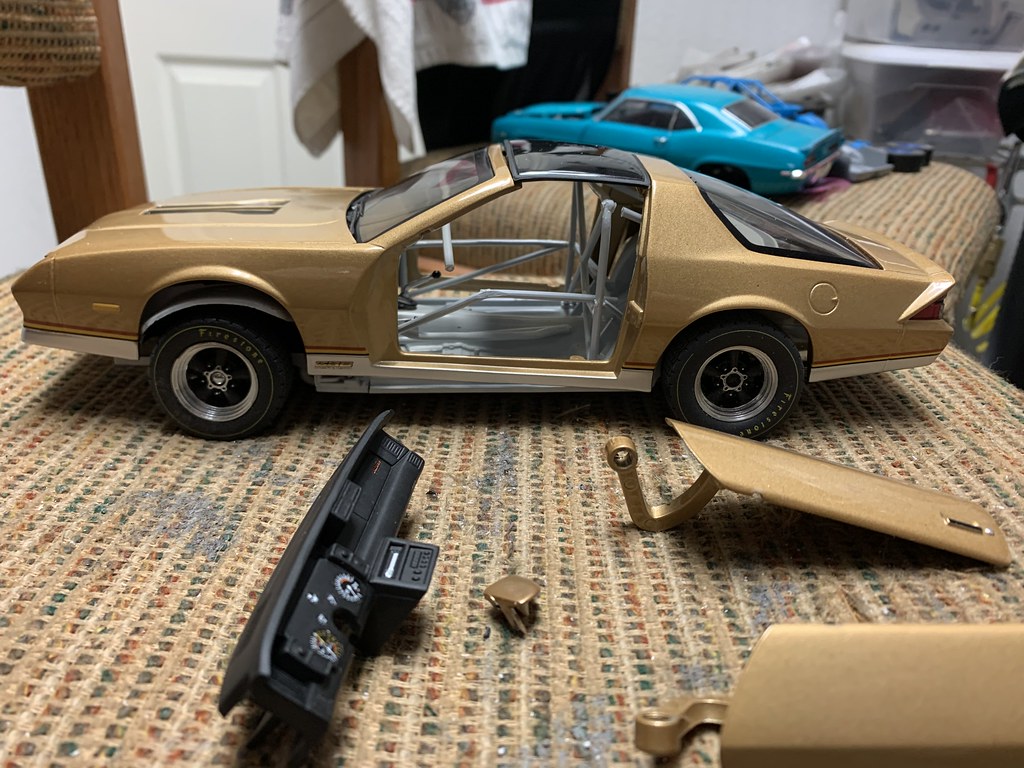
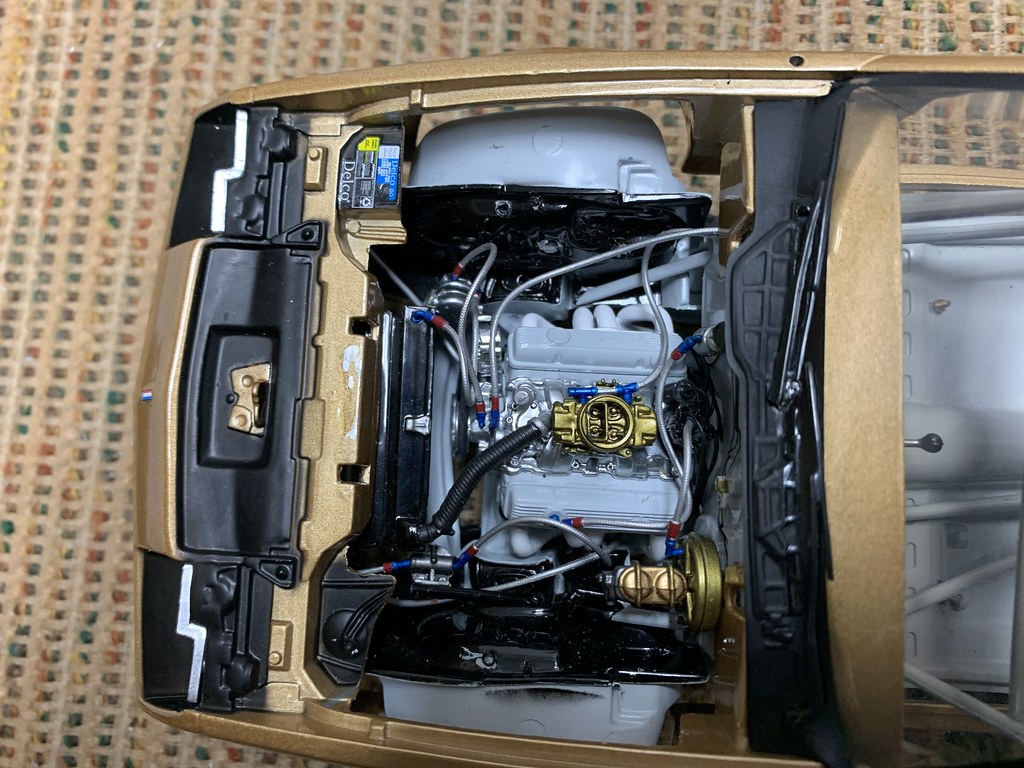
My donors will be a SunStar 1982 Camaro Z28, and a GMP 1996 Trans Am Camaro.

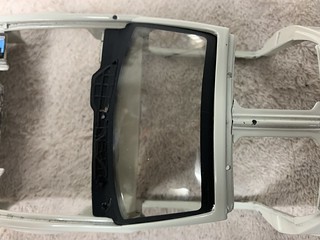
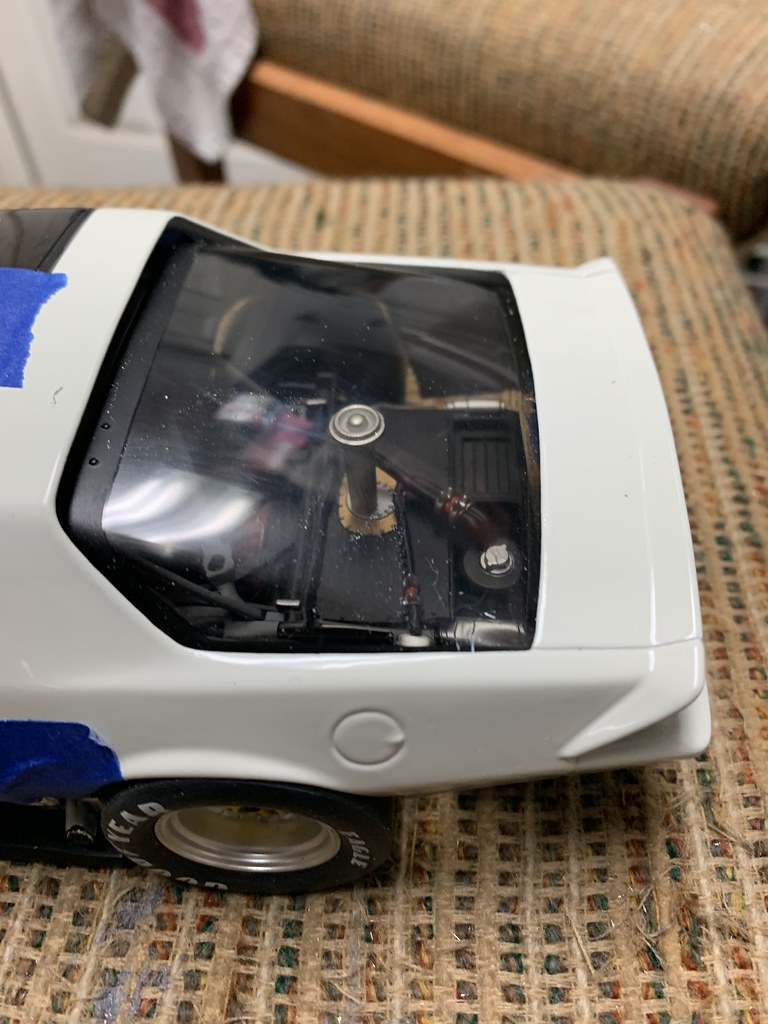
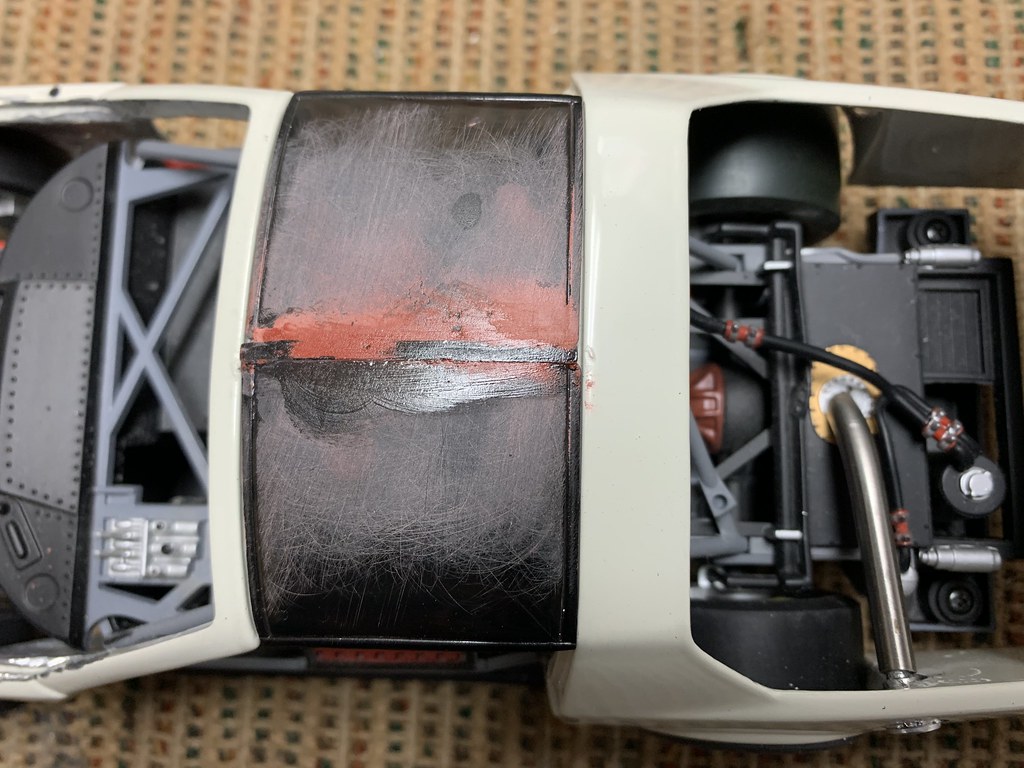
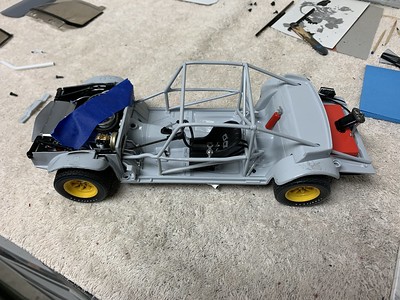
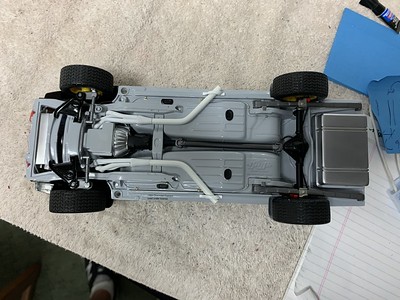
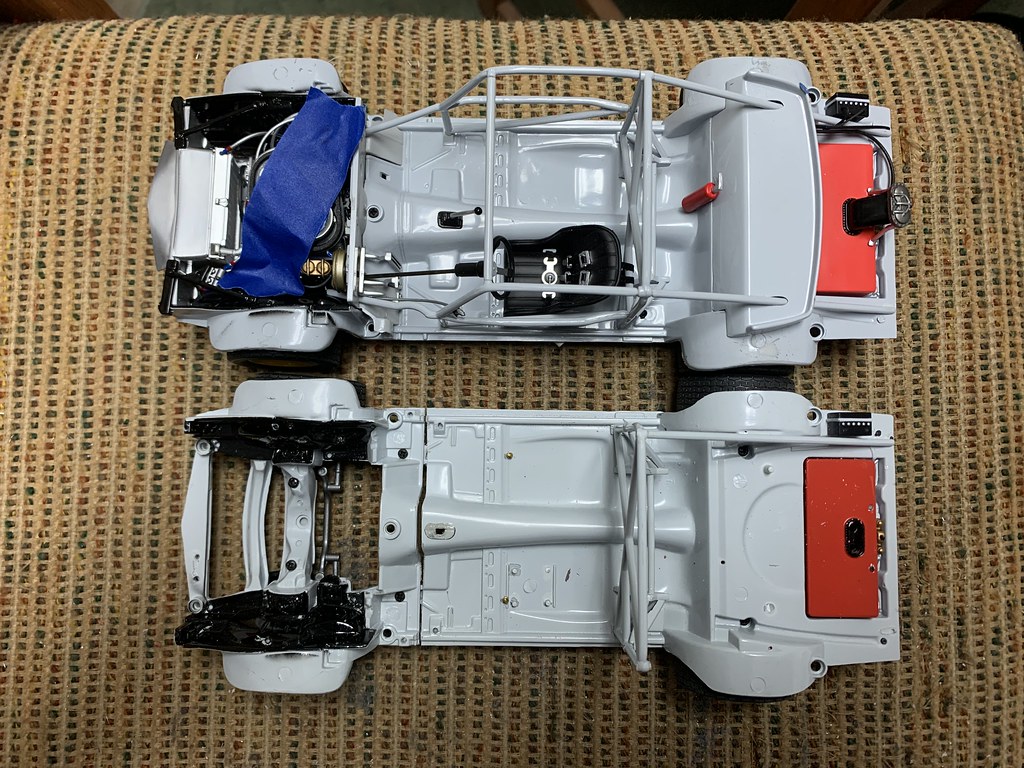
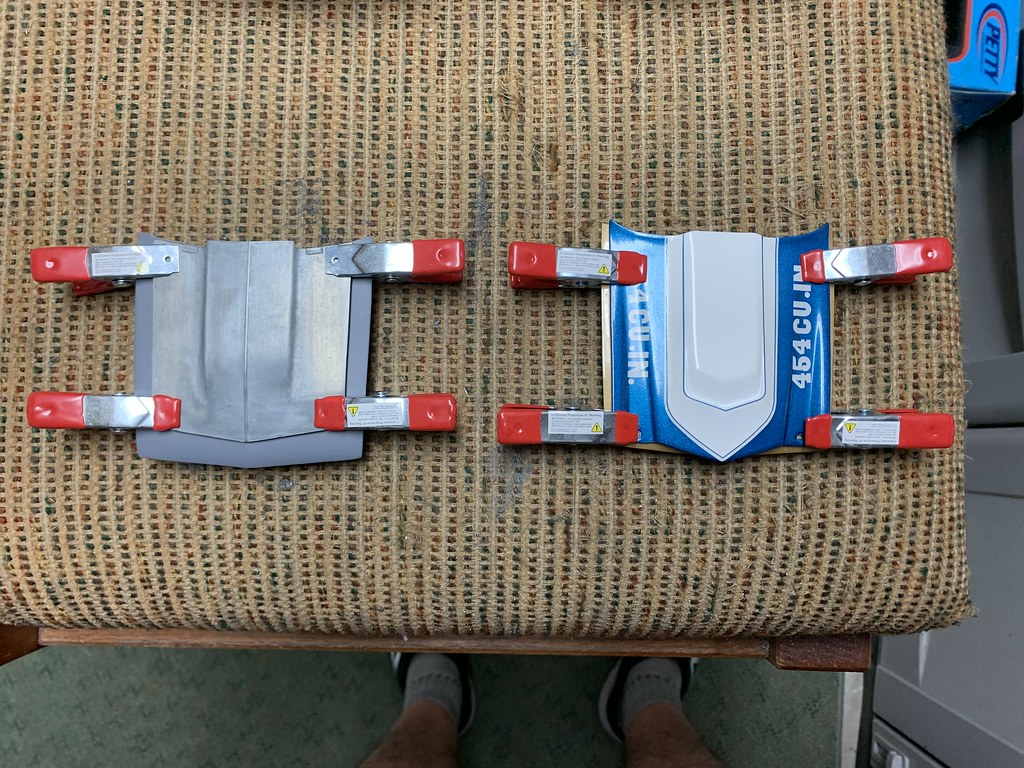
I’ll skip the boring disassembly process and go right to the staging of the two donor components.

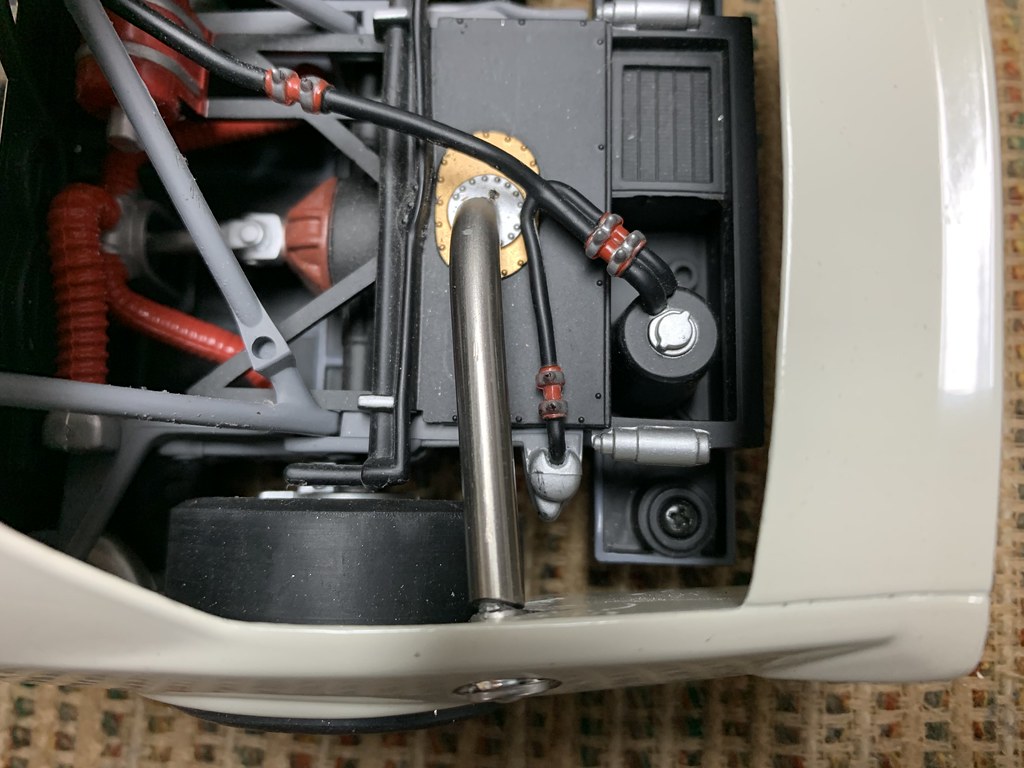
Here you can see from above that the componentry will be a nice fit.

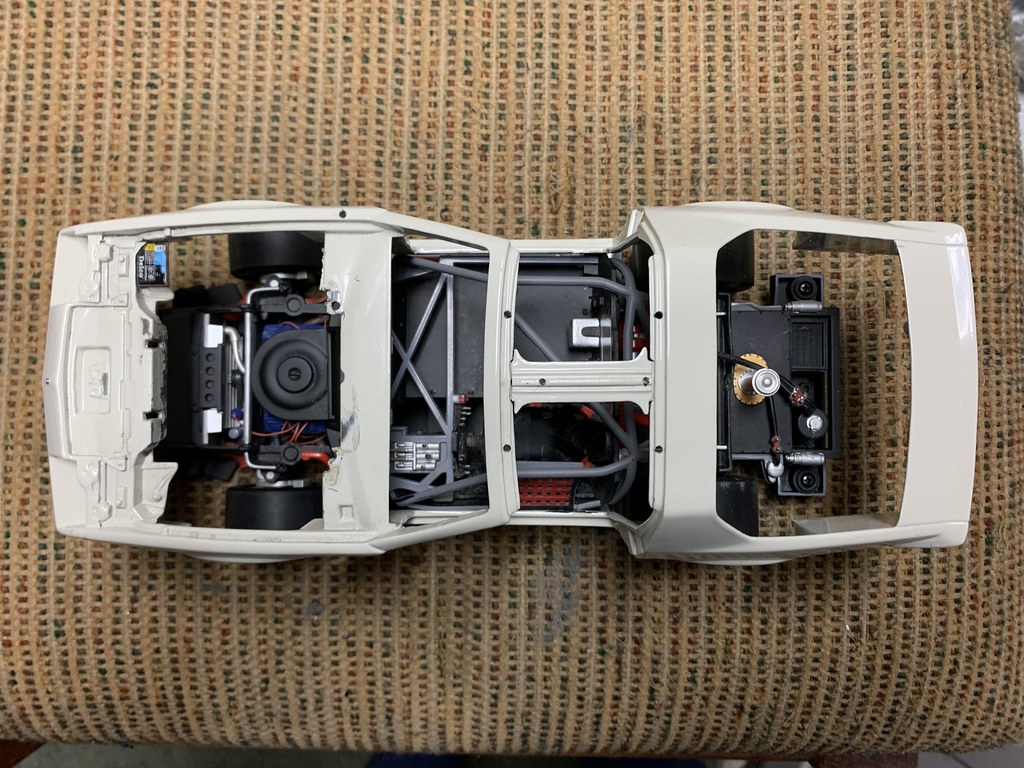
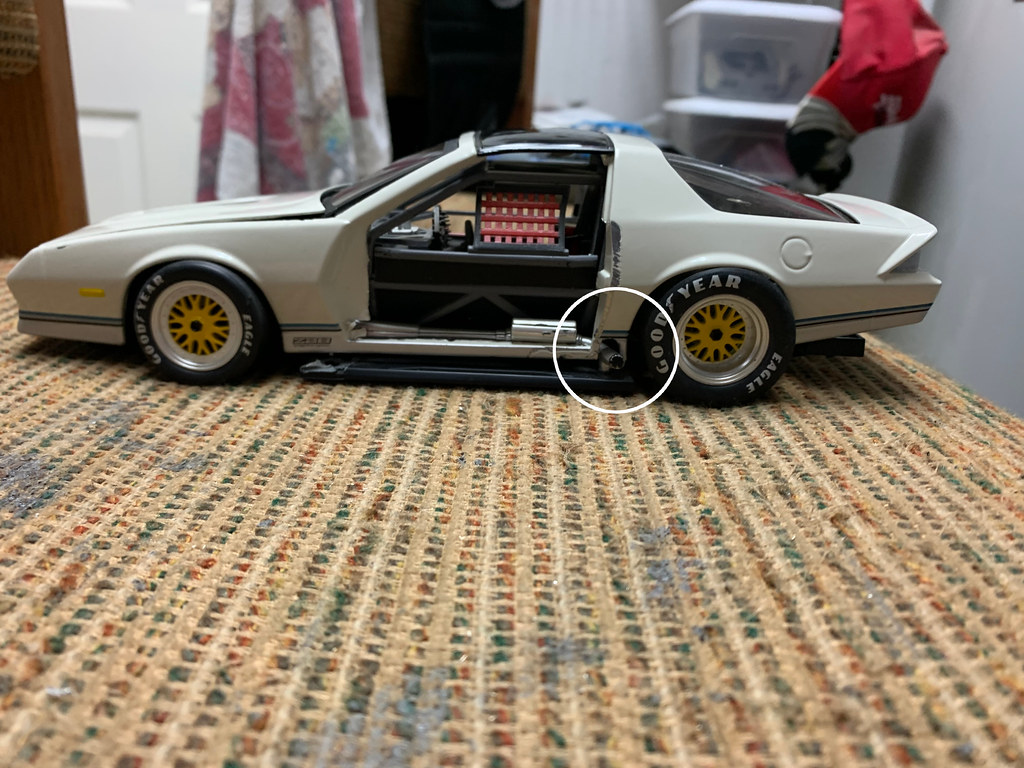
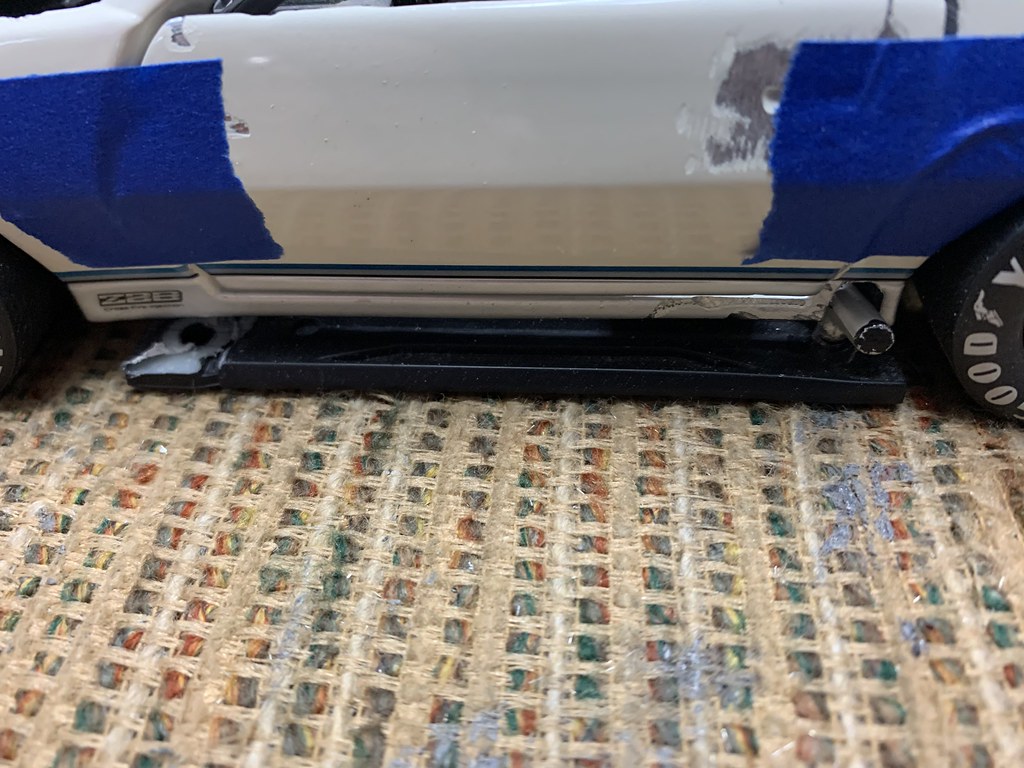
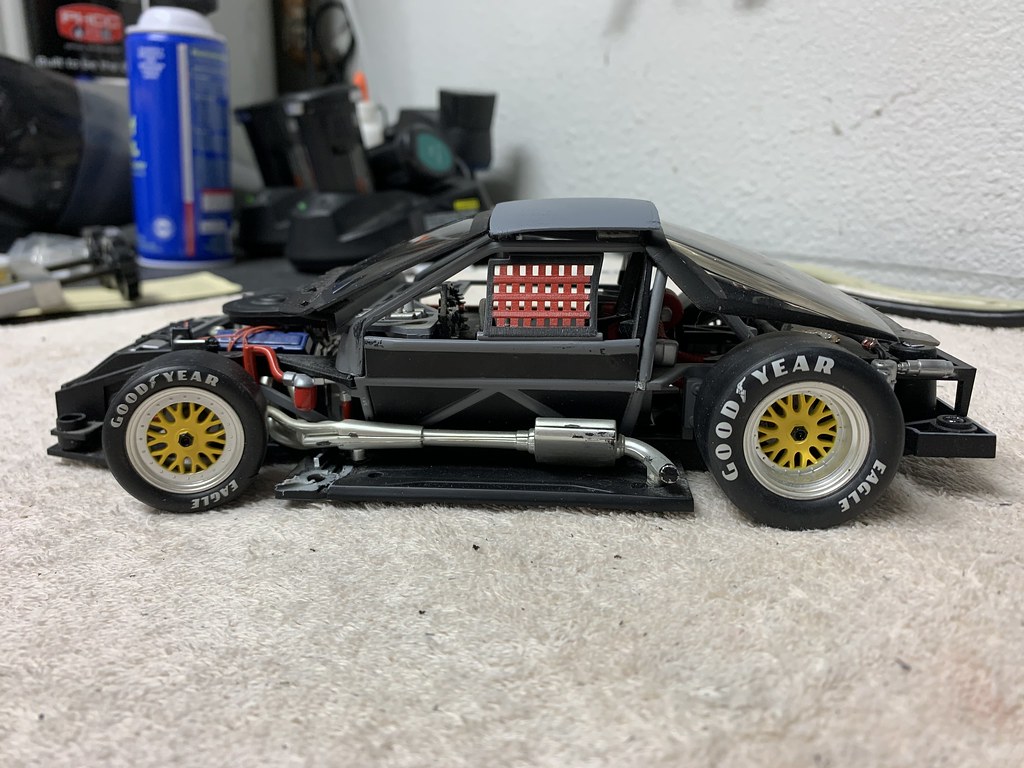
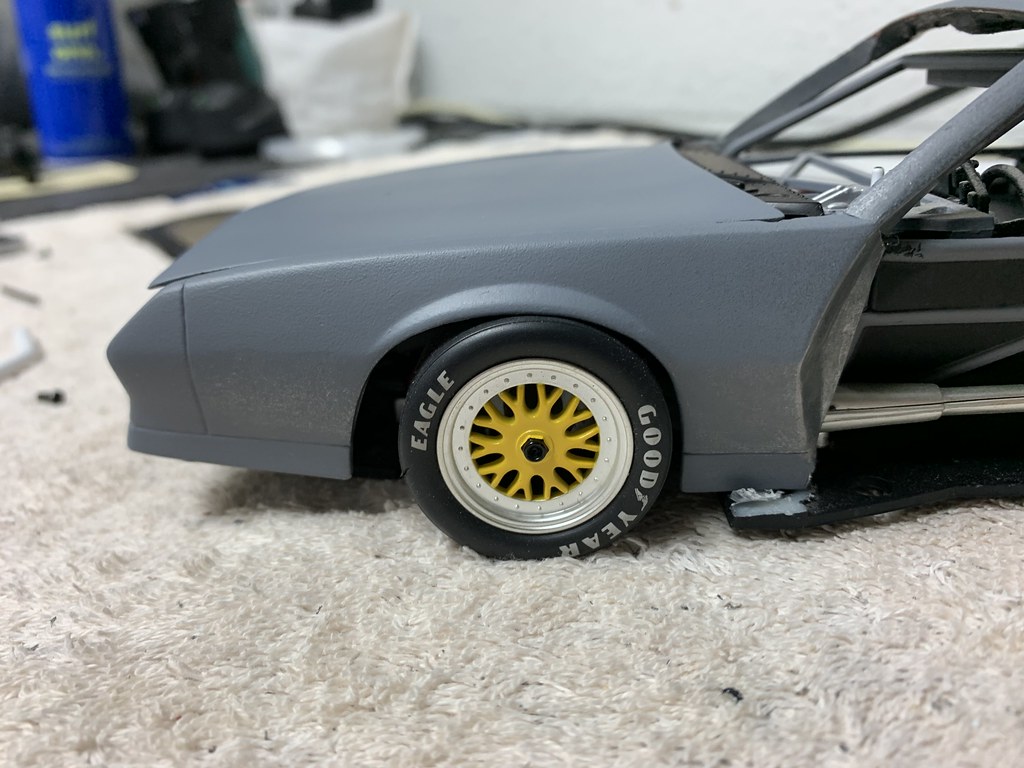
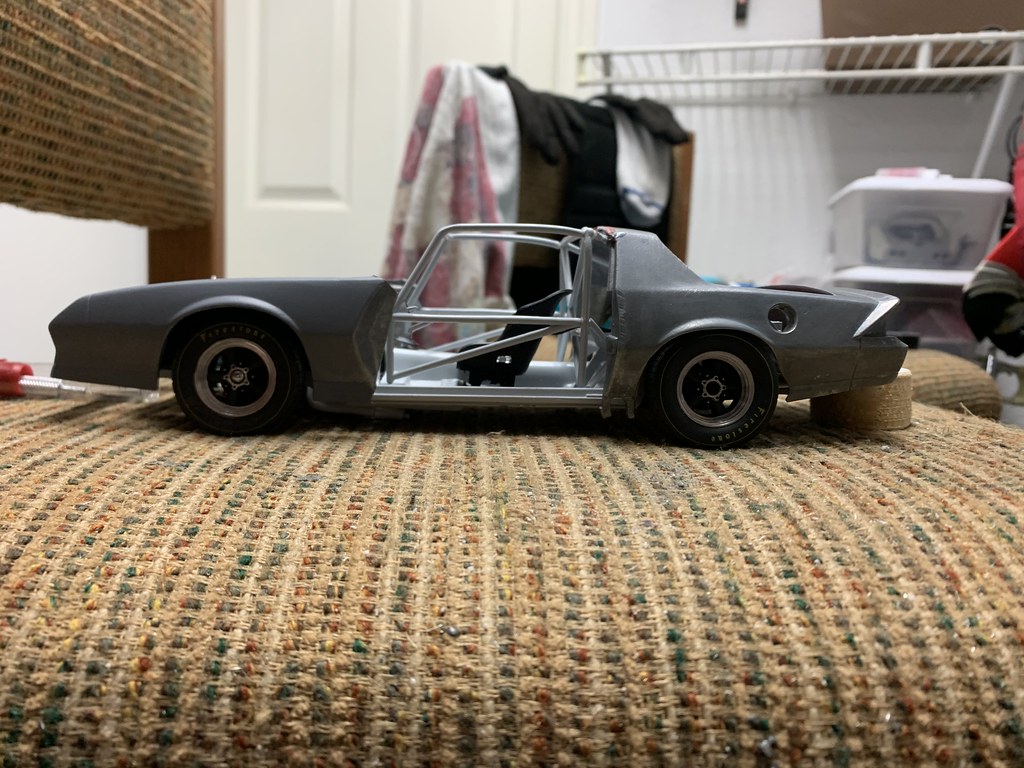
Here from the side you can see that there are already some conflicts which don’t allow the body to seat onto the chassis.

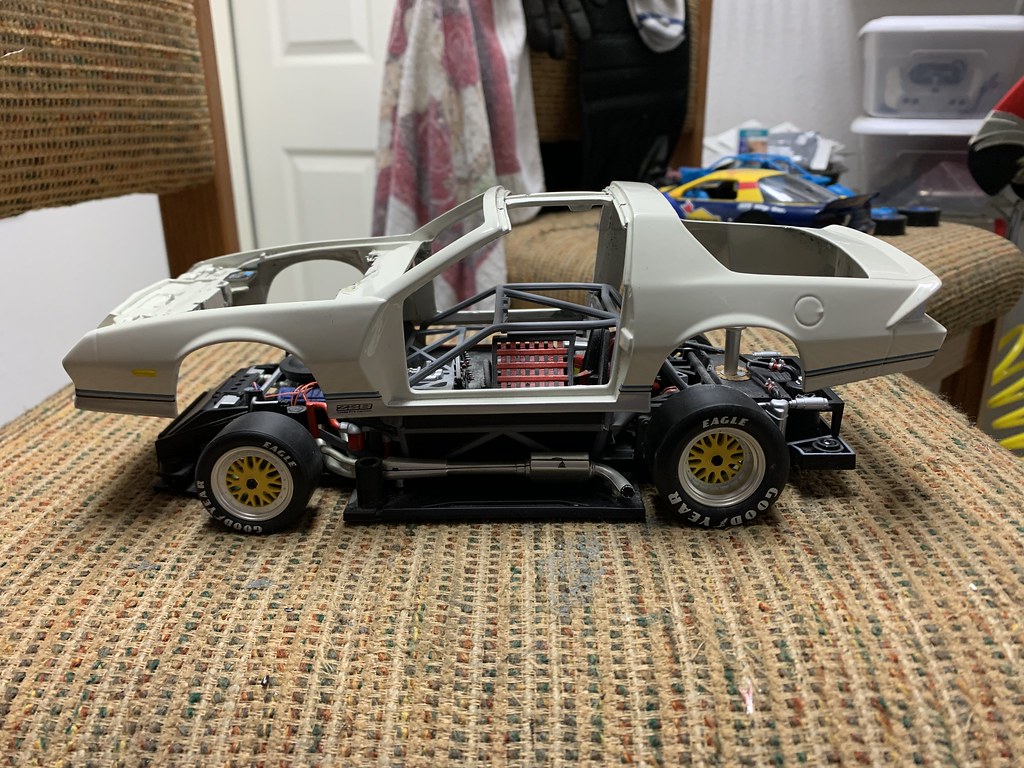
Going to be some major Dremel work.

This will be interesting. I look forward to watching your build. Welcome to the forums.

My goal is to retain the integrity of the GMP chassis. They are nicely detailed and becoming more difficult to acquire at a reasonable price. My donor was actually a previously displayed, no box model, that also had some issues with the paint.

The first issue to deal with on the body will be these “ledges” which stick inward from the skin of the Camaro body, and interfere with the rollcage of the chassis. They don’t really serve any purpose.

Next, I will probably totally remove the section between the two A-pillars of the body. There is good detail in this area on the GMP chassis, which I want to have exposed. Plus the windshield of the SunStar Camaro should blend nicely and close any gaps.

Finally, all the detail at the nose of the donor body is not necessary, as with our fibreglass replica bodies, these were simply an aerodynamic skin over the functional parts of the racer. Additionally, the GMP chassis is also well detailed in this area, and any gaps, as we did on the real racer, can be filled with aluminum (styrene) sheet.


Going fire up the Dremel tool and see what we get. (got five batteries for the bigger one, two for the smaller).

So, several hours, battery recharges, and cutting blades later, here’s where we are, and I was afraid of this.

Sides have been clearanced.

Areas below the A-pillars have been cleaned up after the piece connecting the A-pillars was removed.

Area around the nose has been cleaned up, and lots of detail of the GMP chassis are visible.

But Houston, we have a problem.

I was hoping to not have to make any significant changes to the GMP chassis, however these stalks are keeping the body from dropping into place.

I bit the bullet, and cut off the plastic stalks on the GMP chassis, which helped, but then that just removes the first obstacle.

Much more clearance had to be created at the base of the A-pillars as the body slips down over the rollcage door bars, and then once we cleared that hurdle, then we had one last challenge.

Notice how the exhaust exits the GMP Camaro body.

Well, the good news is that it has to exit the SunStar body in the same place (meaning that the chassis and donor body at least match up favorably), but this required another hole and some clearance on each side, but I think I have reached a plateau.

Here are a couple more progress shots.

The doors don’t fit, as the molded in diecast frames for the inner liners interfere with the cage, so another night of grinding and we’ll have a look at the entire package.

As you get deeper into one of these blending projects, the level of detail increases, with respect to the accommodations that need to be made to each major component.

Got the doors hollowed out, and mounted one onto the body.

One of the first things I need to consider is this major disconnect where the body and floor join along the rocker panel.

I can certainly trim back the floor pan of the GMP chassis (and again violate my own requirement to keep it as intact as practical), but there is still a gap that will need to be filled somehow.

Front (and rear) track is too wide, so I need to figure out how to flare the fenders to cover the tops of the tires. I have a choice of several pre-molded flare lips that I will need to test fit.

Will also need to close this gap, at the rear, or at least detail it to where it doesn’t simply look like two models squished together.

The dry break comes up short compared to the Sunstar rear window. Thinking about cutting it off, bending some aluminum tubing, and actually having it come out at the molded in fuel filler location on the SunStar body.

Going to try to pick them off one at a time, simultaneously.

Here’s how we look at the end of today.

From the front to the back, I’ll start with the hood. If you look at one of the earlier pictures, the hood stood up at the base of the windshield. There were some details cast into the underside of the hood that were interfering with the air cleaner and windshield base, so those have been removed.

The donor has T-tops, and of course, our car had a solid roof, so beginning to work on melding them together, and then closing the gaps with body putty.

And, of course, we’ve got the fuel filler relocated.

I will keep walking around the model, correcting items as I go, knowing full well that frequently a correction will require another one, due to the relationships of pieces changing as you go.

Diecast pieces are at the stripper, so I’ve worked on the T-tops a little. As I was sitting in my shop, it reminded me of building the real one.

Sports Car Club of America rules at the time of our build required that the car have a stock roof and windshield (eventually we would add a Lexan windshield when the rules changed). The location of the roof heavily influenced where the rest of the fibreglass body was hung on the chassis.

You can see the stock roof in this picture, which includes the front A-pillars.

In order to get our roof located correctly, I borrowed a buddy’s IROC Z and drove it down to the shop. We set the two cars side by side and moved the roof around on the cage until it looked right.

When then fabricated some mounting tabs and welded it onto the cage tubes.

With a realization that the A pillars of the diecast donor body are cast into the body, I thought these pictures, to some degree, represented the roof mounting process we went through back then.

And then just for fun, I laid on the front windshield and rear glass.

Hoping the stripper calls today and says the body is ready.

Well;

This is an interesting build. I am not usually interested in this kind of vehicle, but you caught me on this! I will follow to the end for sure!

Great to see you over here Jim. Look forward to yout models.

This is really interesting. I hadn’t considered doing anythign quite like this in the past. This opens up new doors for the future. Pretty cool work and it looks very good.

BK

I really hate that my first thread here is going to be a failure, but I have come to the realization that this isn’t going to work.

The body sits on the tops of the tires, which keep it from dropping down into the proper posture. Without a great deal of cutting and then rebuilding flares, I am going to call the initial project a failure.

However, I have a backup plan.

I have a spare GMP Trans Am Camaro chassis.

The new plan is to scavenge pieces off the GMP chassis, and use a combination of the GMP pieces and the floor pan from the SunStar Camaro to create a new combined chassis. I’m essentially planning on adding the front and rear clips from the GMP to the mid-pan of the SunStar. Here’s a few “teaser” shots.

And you might ask yourself, why not just drop the SunStar body onto the GMP chassis?

How many of you knew, without looking it up, that the 3rd Gen Camaro’s wheelbase was 7 inches shorter than the 1st Gen?

Very nice! Both the model and the real cars.

No matter what happens to the project, there is no way this thread can be a failure.

This is some interesting stuff, to say the least. I remember reading about major plastic conversions as a kid, this brings it up close and personal…turns it into a real learning experience.

Thanks and good luck on plan b or wherever you go with this.

stick with it if you can. this will be an amazing car if you can.

So this is where we currently are.

And you may ask, what have I been doing for the past three weeks? Body looks different, have you already painted it?

Well, this one went sideways early, and it has taken a lot of effort, soul-searching, and additional expense to get to where it sits right now.

One of the most complex builds I have undertaken, and lots of errors in judgement along the way.

I’ll provide the highlights, and then add a link to the full album for “progress” shots.

I ditched the late model GMP Camaro chassis, that just wasn’t going to work.

There was just no way I was going to get the body to sit down onto the chassis properly.

So, as I pointed out in my last post, I looked to a 1st Gen GMP Camaro chassis.

After a great deal of effort, I was able to shorten the 1st Gen wheelbase by 7 scale inches (about .3895 true inches), and reassemble it.

Used two 00-90 screws in the stock location to attach the two pieces back together.

Here’s a comparison between two, more or less, identical chassis.

Here’s what I cut out.

The good news is that the cage remains intact, only thing I have to cut is to shorten the bars that go forward to the front suspension mounting points by 7 scale inches.

Of course, I will also have to shorten the drive shaft (done that before on some of my other customs), as well as either shorten the exhaust dumps or build some new ones.

With the major chassis correction behind me, I then tried to mount the body onto the revised chassis, but found I had made another strategic error.

I had cut the first 3rd Gen body apart at the base of the A-pillars, to emulate how we actually built our real racer.


That proved to be a fatal flaw, as I needed the structural integrity of the entire body to allow me to mount the 3rd Gen body onto the 1st Gen chassis.

Hence, I had to source another entire model, in order to start over again with the modifications to the body.

Took delivery of the new model yesterday, and stripped it last night, and tested some fit.

You can see above that I think I nailed the wheelbase, but now I have to grind away, again, everything that conflicts to get the body to fit.

First target will be the bulkhead at the front of the engine compartment, which will then dictate as we go front to rear.

I apologize for the length of time between posts, but this one has taken on a personality of its own.

Looks like this one will work.

So, here’s where we are as a starting point.

Having defined which chassis I am using helps me visualize where the conflicts are, and a potential cure (which usually means breaking out a Dremel).

Here’s what I have removed as of now.

The two little round threaded pieces are attaching points for the SunStar body the SunStar chassis, and interfere with the rocker panel of the GMP chassis.

The other pieces are from the front of the engine compartment, which interfere with the radiator mounting frame of the GMP chassis.

That work allows the body to drop down onto the chassis. Still not perfect, but closer than I have been at any other time of this build.

Now I can reassemble the cage, and give some support to the bodywork.

Looking good.

Quick update. Been piddling and dabbling, still trying to wrap my head around where to take this build (plus, it’s been cold here, and my garage/workshop is unheated).

I have come to the conclusion that I won’t be able to duplicate my racer, so going to take this and go a slightly different direction.

Looking at hoods now.

Here is the stock one.

50606457472_5a81882672_b.jpgr

Looking at two alternatives. Will be using the same technique I used to create this hood for a fantasy Mustang.

41981472544_15880a60bc_b.jpg

What I did for the Mustang was laid the hood from a GMP '69 Z28 over the Mustang hood, taped them securely together, and used a Dremel cutter to slice through both of them, and then used JB Weld to blend the scoop into the hood.

For the Camaro, I have the choice of two different hood scoops. First is the classic '69 Z28 scoop; and next is the 2nd Gen Baldwin Corvette L88-based scoop.

Here are some side-by-side comparisons.

50708272892_08f14d09cc_b.jpg

50708274407_2ff9a14e71_b.jpg

50708276182_2e903fa849_b.jpg

Each one has its own character.

Any preferences?