The Stearman is on the shelf (photos soon) and time for my 1st airliner. Zvezdas kits of the A321 with Nazca-Decals for the new lvery American Airlines jets. Braz Models resin sharklet wingtips round out the project.
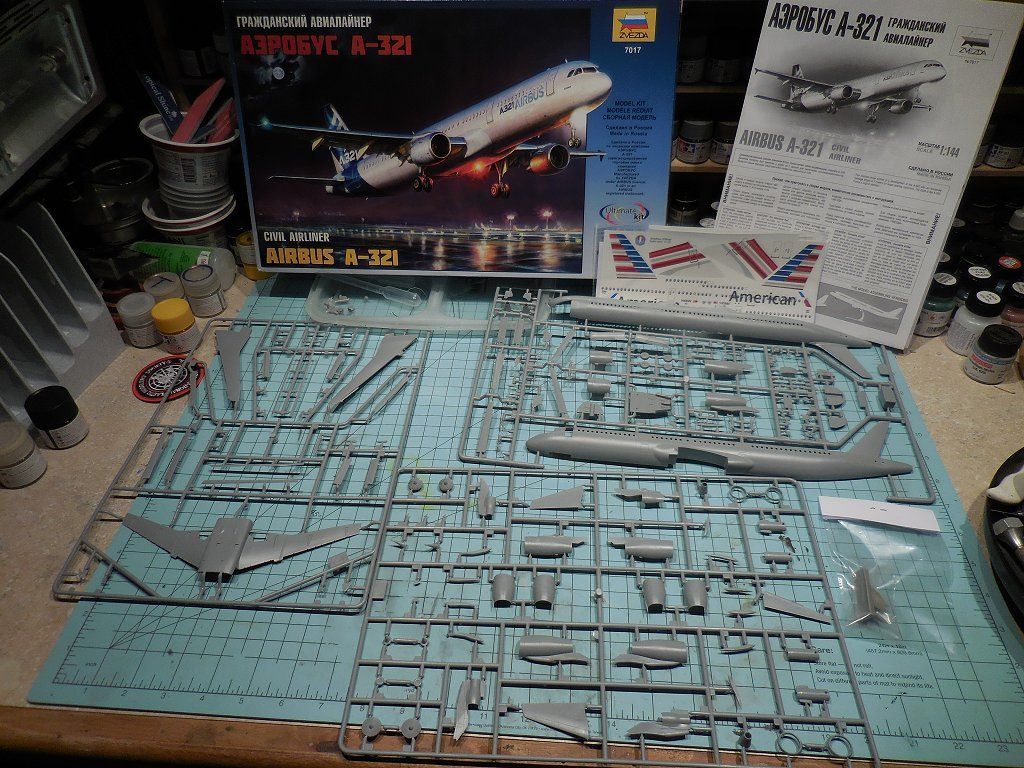
The Stearman is on the shelf (photos soon) and time for my 1st airliner. Zvezdas kits of the A321 with Nazca-Decals for the new lvery American Airlines jets. Braz Models resin sharklet wingtips round out the project.
Yes please. Let the fun begin! gk
Please turn off all electronic divices, and make sure seat backs and trays are upright and in the stowed position…
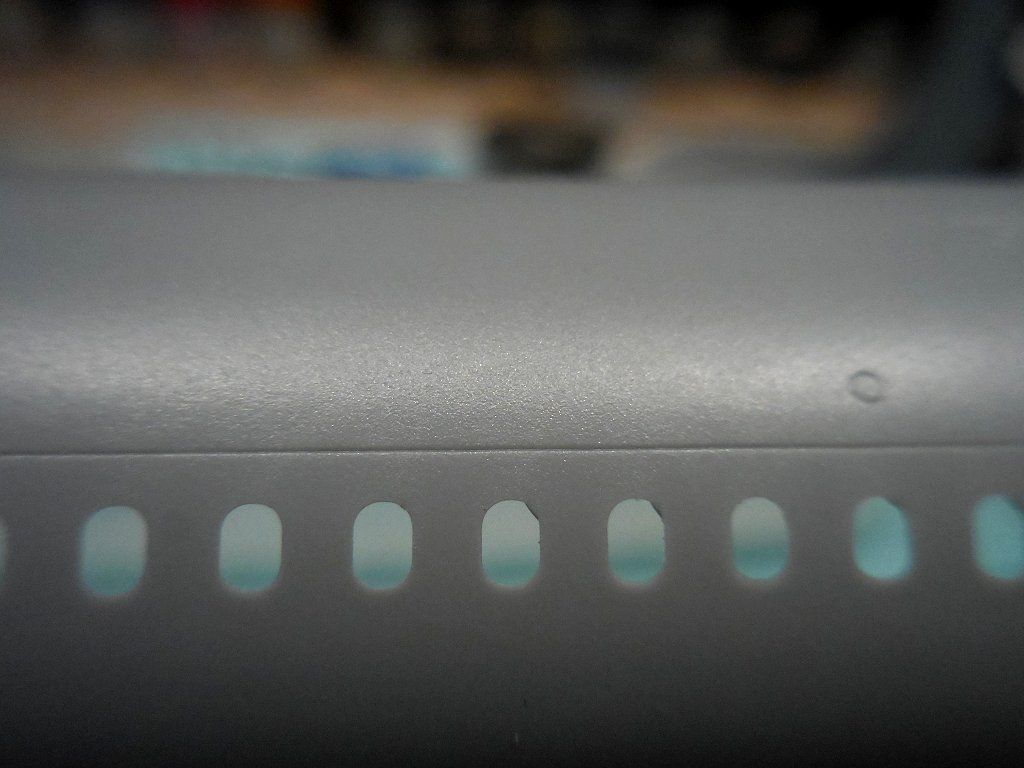
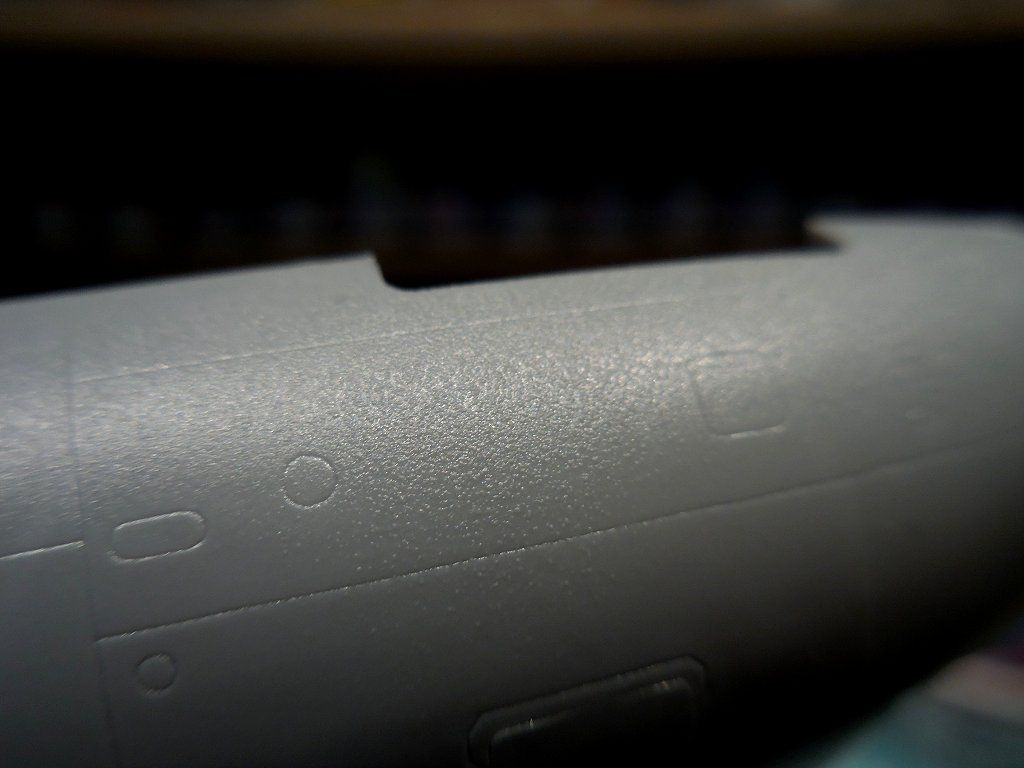
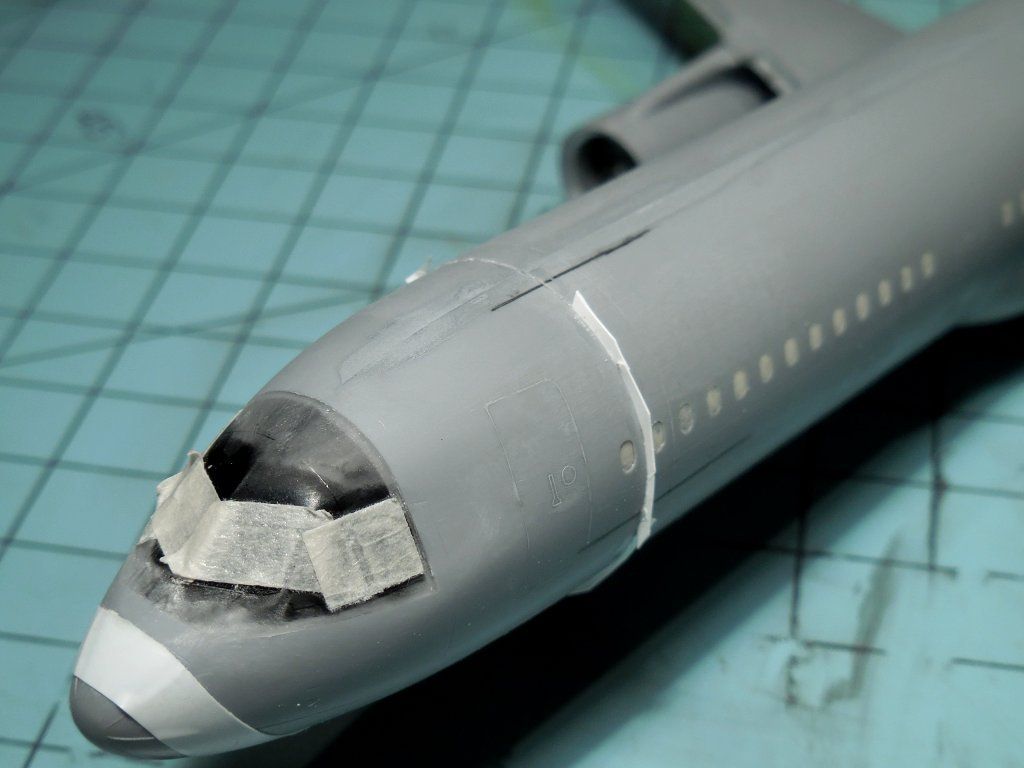
One of the thing I read in the kit reviews was that there was a bit of “texture’” on the part surfaces. I have not inspection all the parts yet but I found that parts of the fuselage has more than a bit. It gets worse as you get closed the mating surfaces. Under the windows is pretty smooth, above the windows you can see that it’s starting to get worse. It gets tot he point it looks like the parts were sand cast instead of injection molded.
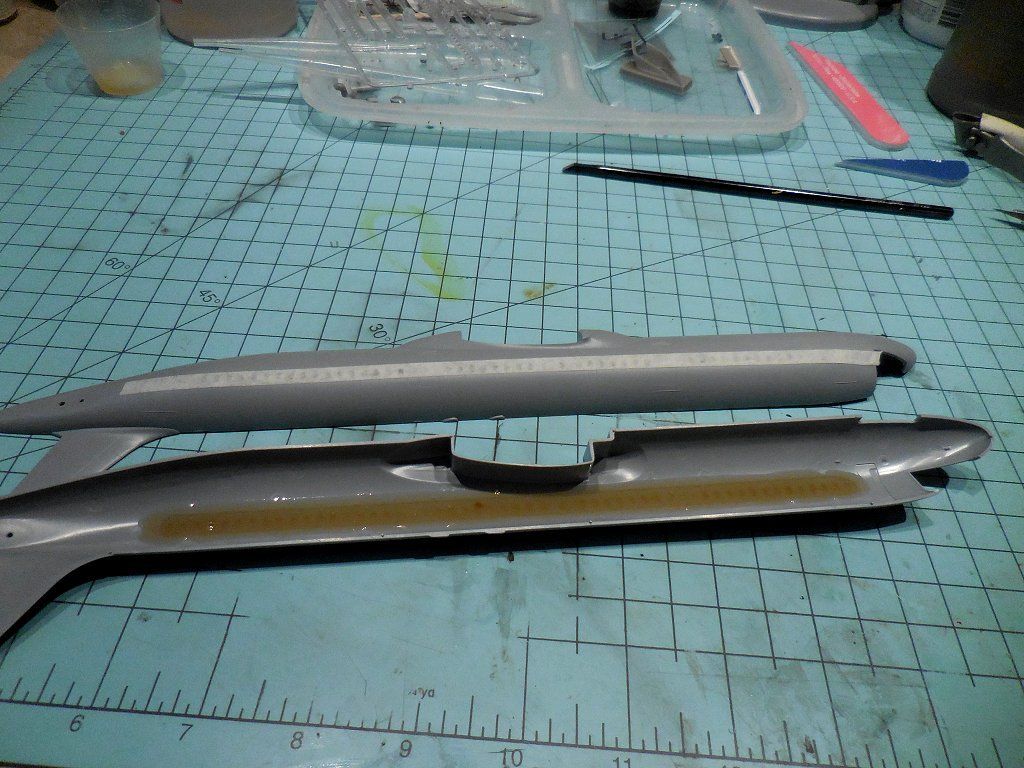
Anytime I think of something “new” I always figure of I could think of it, someone else did already but I came up with this. Gluing a plastic strip on the inside and filling all those holes seemed tedious. This was minutes. the longest part was mixing the resin. Just a few pinhole to fill.
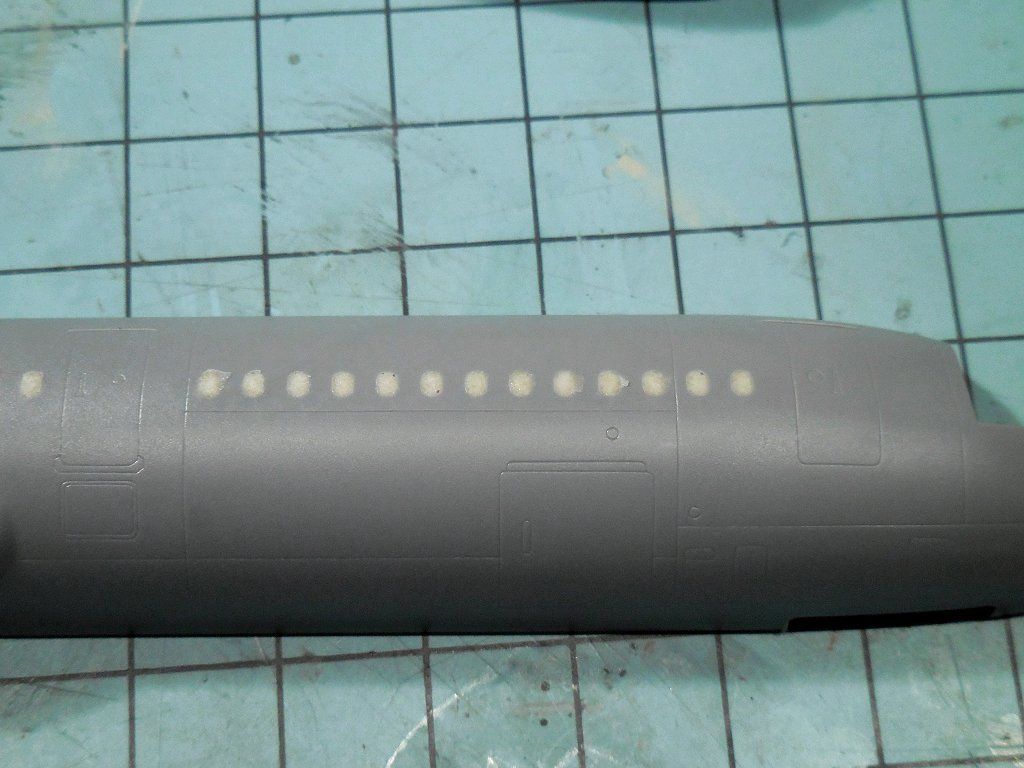
I have the A320 and texture is pretty even all over. I think primer will level mine out so I don’t have to sand anywhere except possibly at seams. I haven’t found a scheme I want to do yet, thinking the NW Airlines all silver with red from Draw Decals. I do my windows similar to you, tape on the outside and Tamiya putty on the inside. I’ve never added the plastic strip and so far, a few have been moved around several times over the years without and old putty breaking out.
You going flaps up or down? Mine will be down, gear down, on a shortened stand as if rotating. Looking good so far, I’ll be following.
Chris
Just flew back from Florida on A320 JetBlue
I was on a 320 end of jan. very nice.
I use the same window filling method Marc, though sometimes with thin superglue. Don’t have this kit but have a few of the other Zvezda offerings.
Alas, once again what I think I come up with on my own… freakin’ everyone is doing it LOL.
As I was sanding the fuselage the resin popped out and didn’t go back in 100 % flush. I ran a bead of thin CA around it to hold it in place. Luckily I had not glued the fuselage halves together yet…
Looking forward to seeing this one complete! I built Zvezda’s 787 and, I too, filled the windows. I started using PVA glue so I could have the clear window look; however, I soon found this to be a PIA so I used putty, filled them all and sanded them smooth. I ended up using the window decals off of the sheet and it turned out pretty nice. Other than the texture issue of the plastic, how is the overall fit?
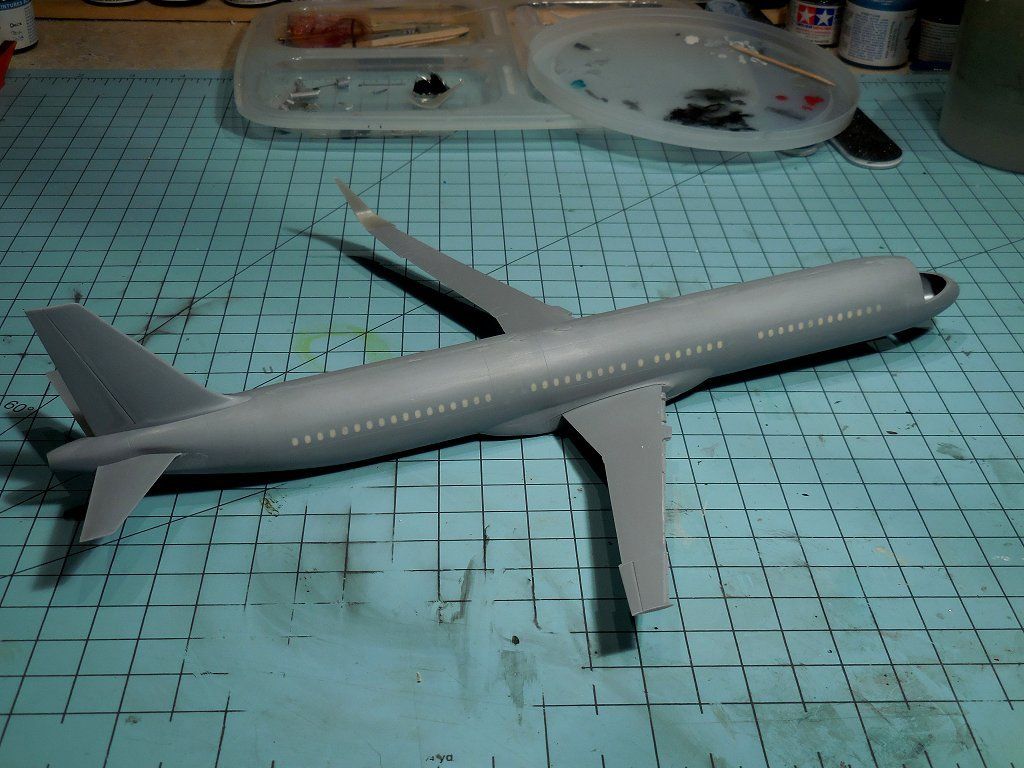
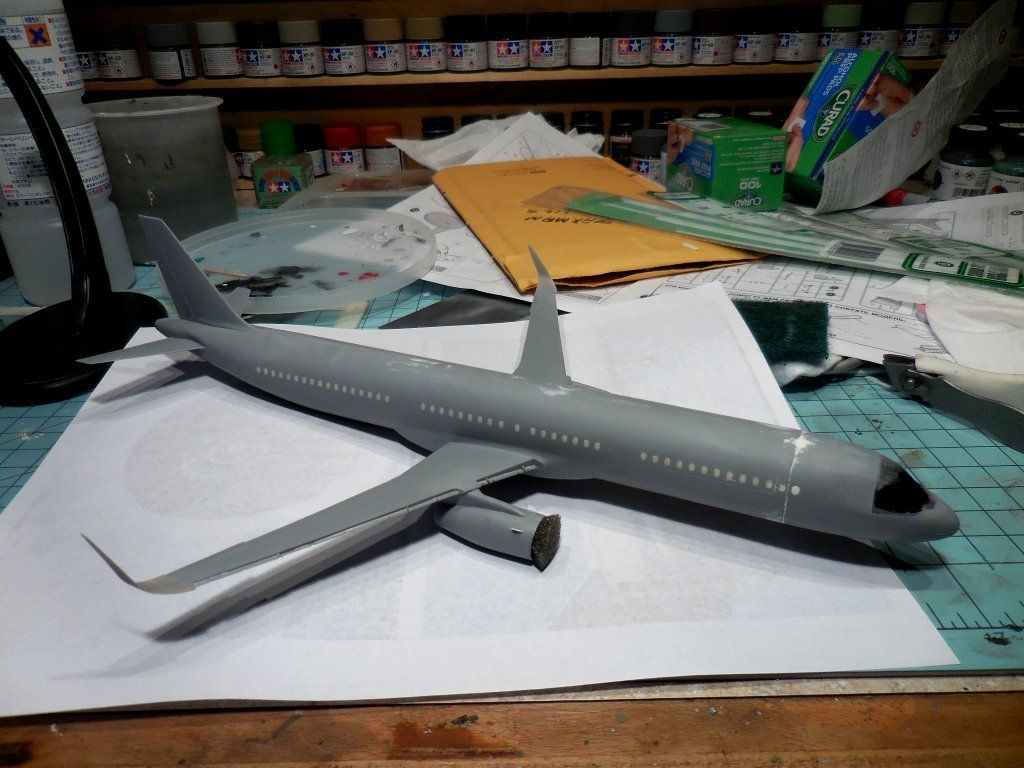
So far the fit is really good. The fuselage is together as are the wings and they fit nice. The cockpit section looks like it’s going to be fairly good as well with some minor blending. Because of the texture on the fuselage I have to sand the entire thing and do some rescribing.
The bus is slowly taking shape. Sanding of the fuselage is finally done and will be primed soon to see what needs to be fix. Hopefully nothing… yeah right. Some rescribing to do too.
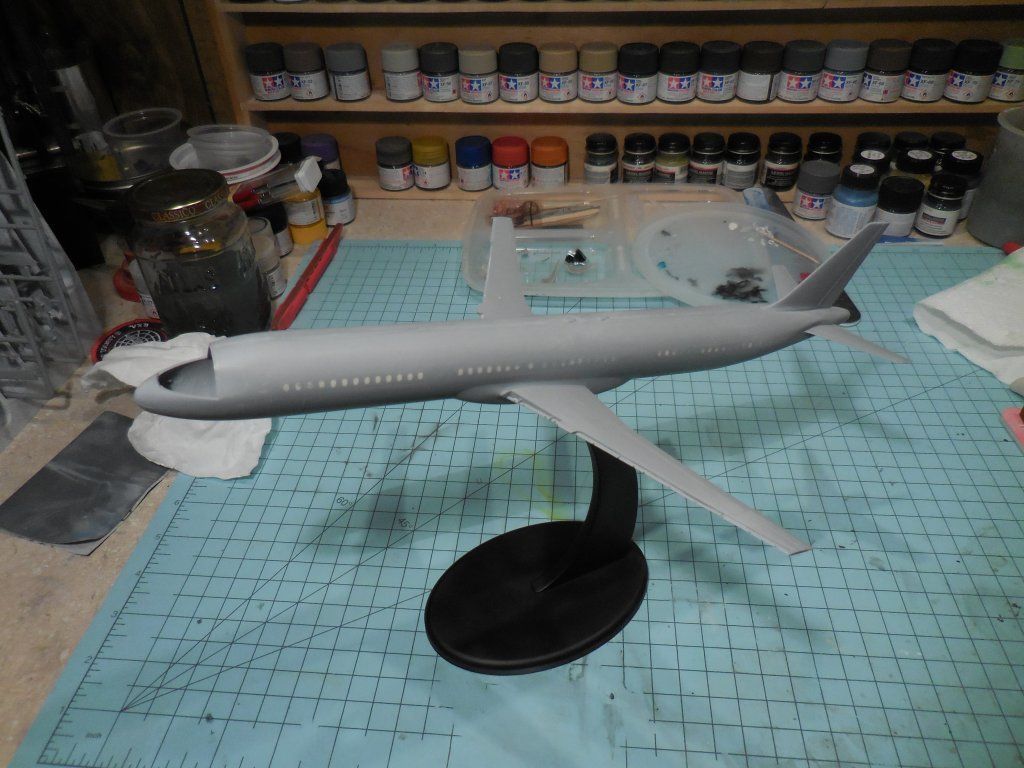
Worrying about the primer. I reworked the stand a bit. I didn’t like the recessed sides of the upright so I covered both sides with some .060 sheet plastic and rounded off all the edges. I use Mr. Surfacer 1500 black primer for the “black basing” part of the weathering for my military stuff. Figured I may as well use it here too. The white plastic bits I added were smooth as a baby butt. The primer crazed the Zvezda plastic of the base a lot.
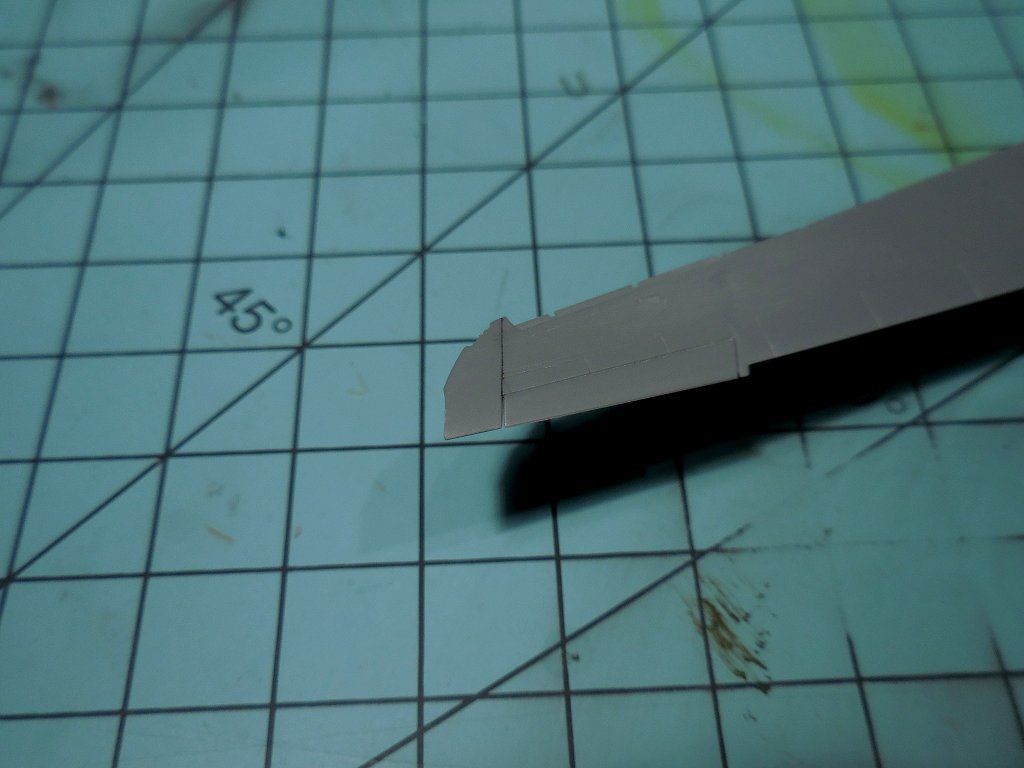
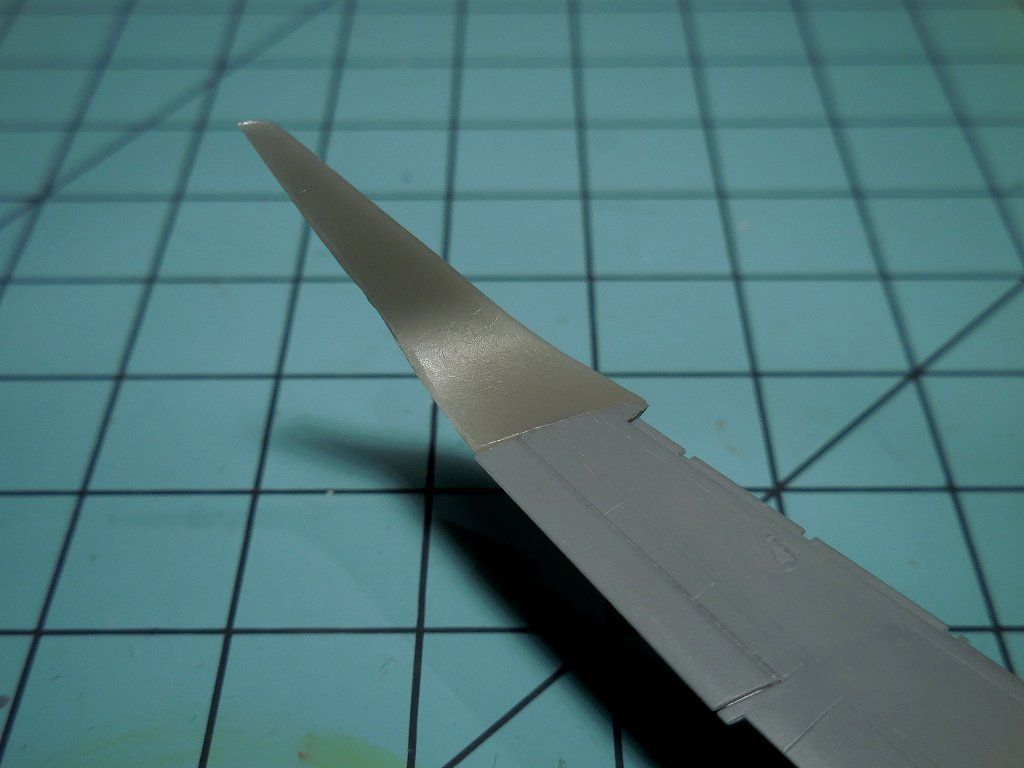
I checked the chord of the sharklet and it’s an exact match for the panel just at the end aileron. I darkened it to make it easier to see for the cut with a JLC saw. The sharklet is just held there with some blu tack but the adjustments will be very minor for a perfect fit.
Looking good so far!
[B][B] so far so good
Kevin, Crown… thanks gysy.
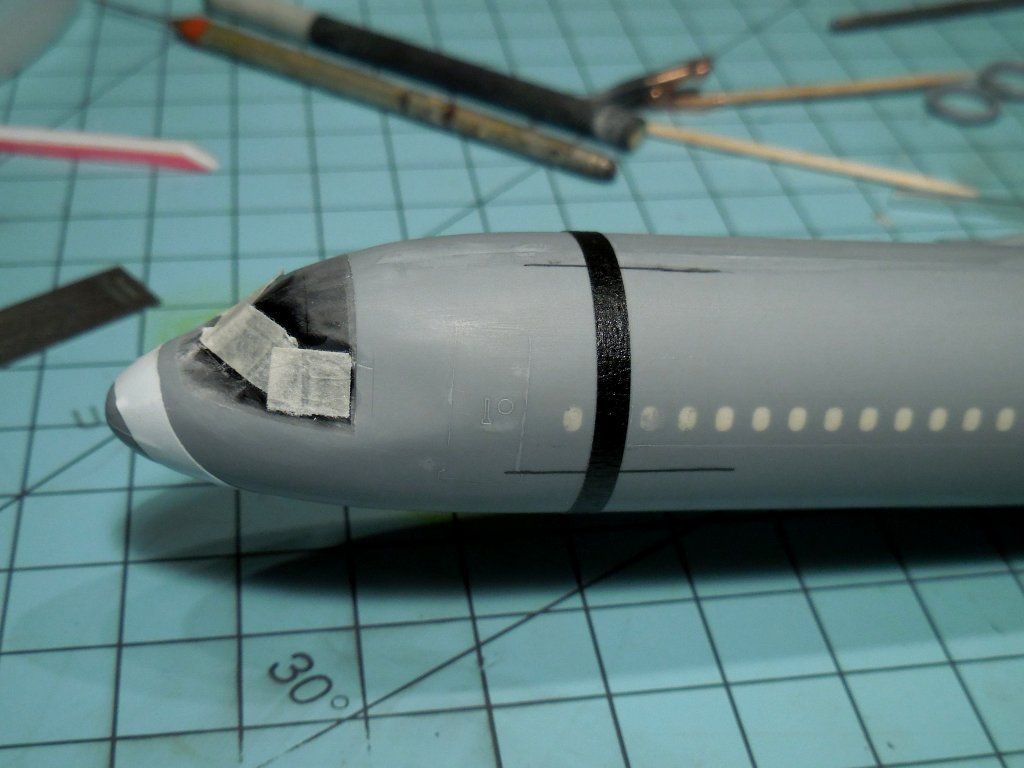
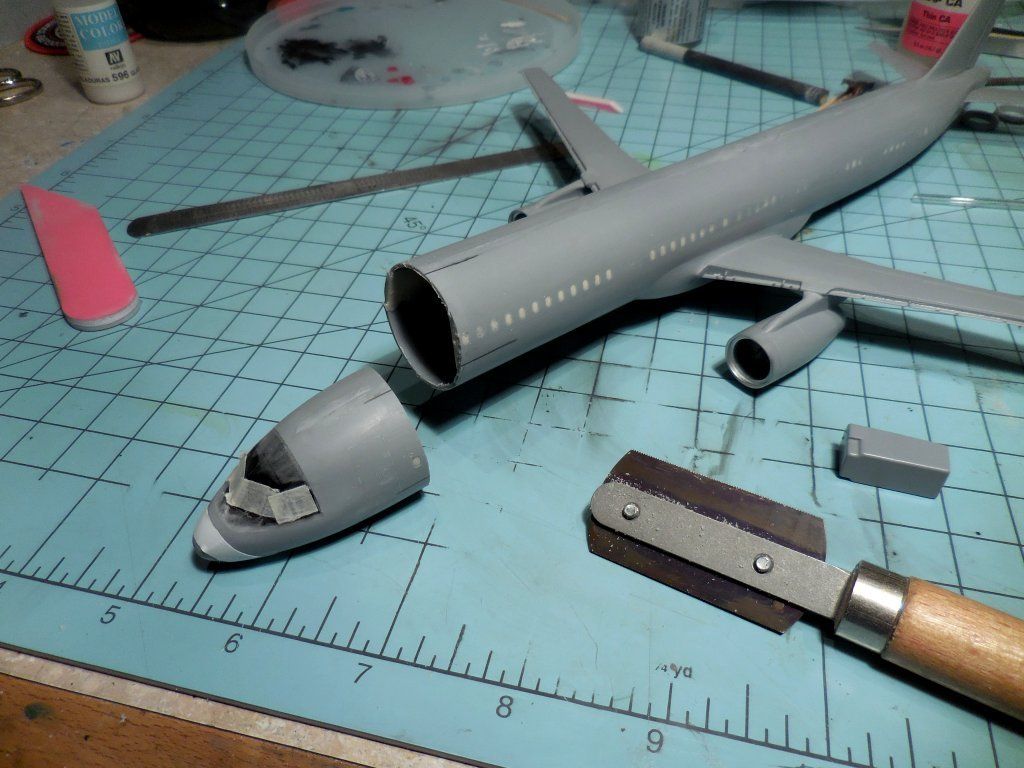
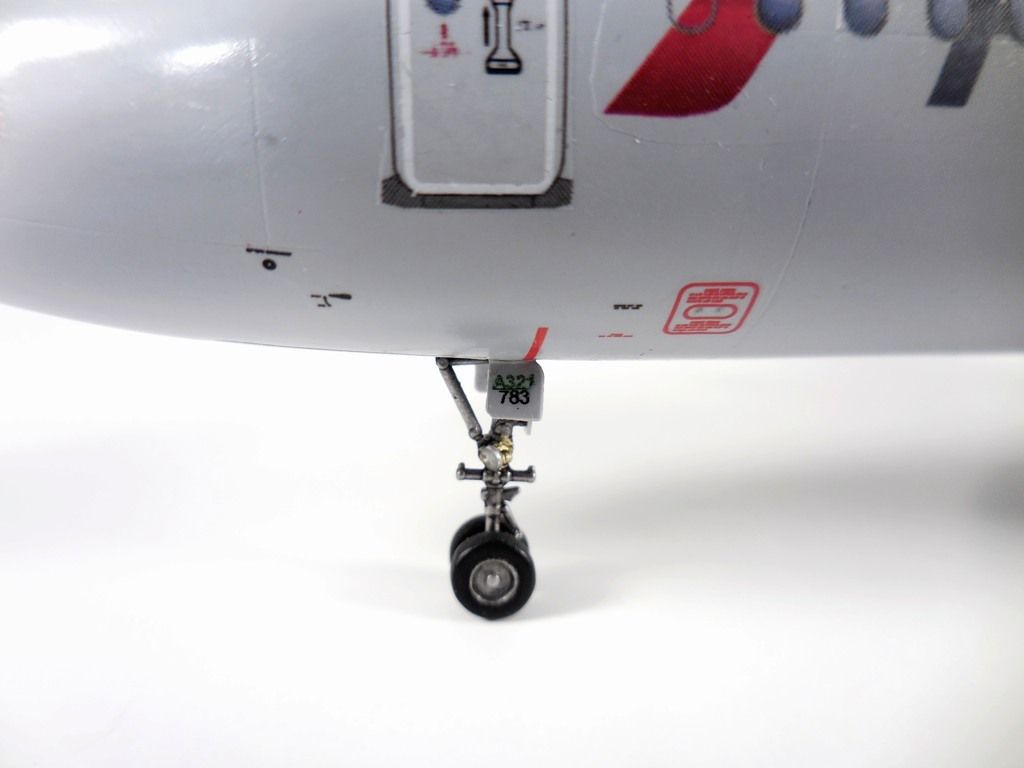
A step backwards. Looking at the hole in the fuselage I realized there’s no way attach the nose gear. Never planned on using the flight deck but didn’t pay attention to the fact the nose gear wheel well was under the floor.
So some tape to guide the saw and pencil mark to line it all back up again along with some plastic strips inside. .005 plastic to fill some of the gaps before slathering with putty. The good new is the flight deck floor and wheel well just dropped right in place after hacking off the nose.
Nice recovery. looking at this build The I have a Il-62 in my stash I’m not to crazy on Russian planes but it’s one of those Cold War airliners that I remeber on that tv show the Thunderbirds in the 60’s
Thanks crown. And re. the Il-62… build it [;)]
The thickness of the sharklet airfoil was a bit more the wing so I lined up the top side since it had the exact right curve to match. The bottom was easy to sand to shape.

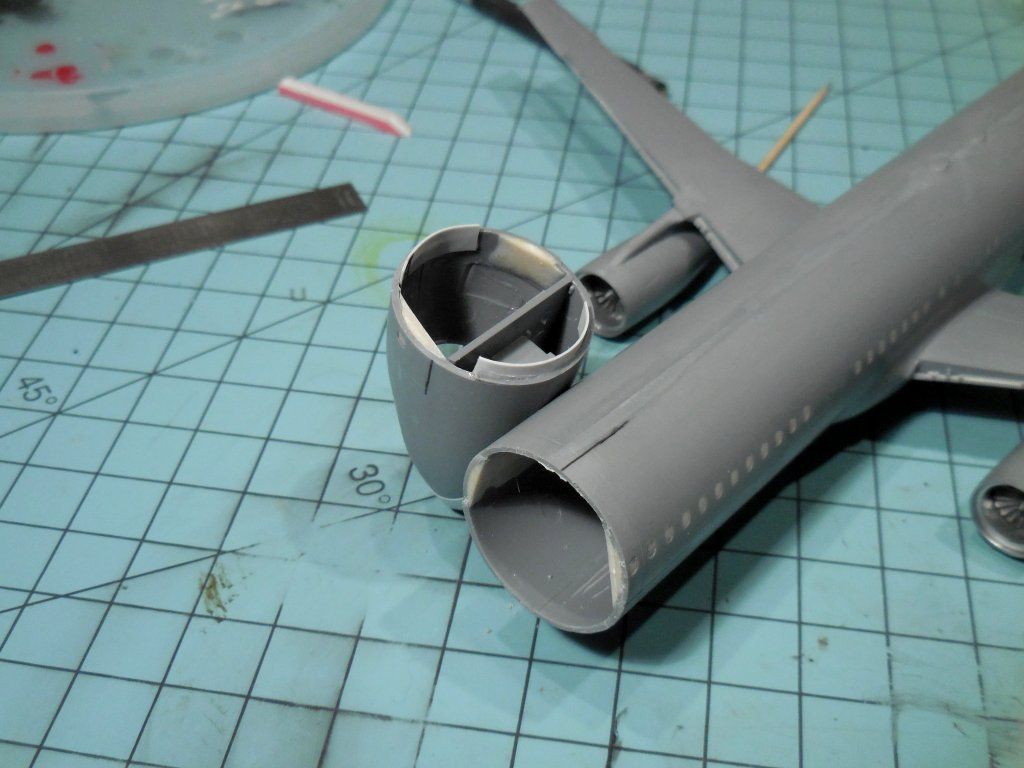
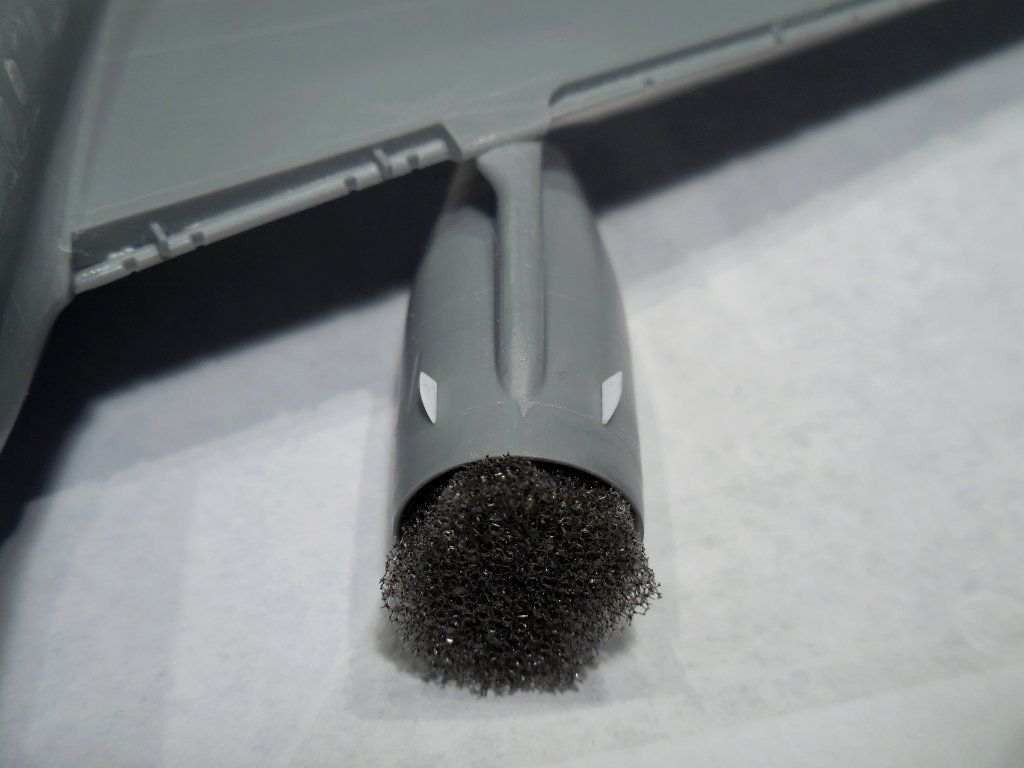
Added some fins to the V2500 engine cowls.
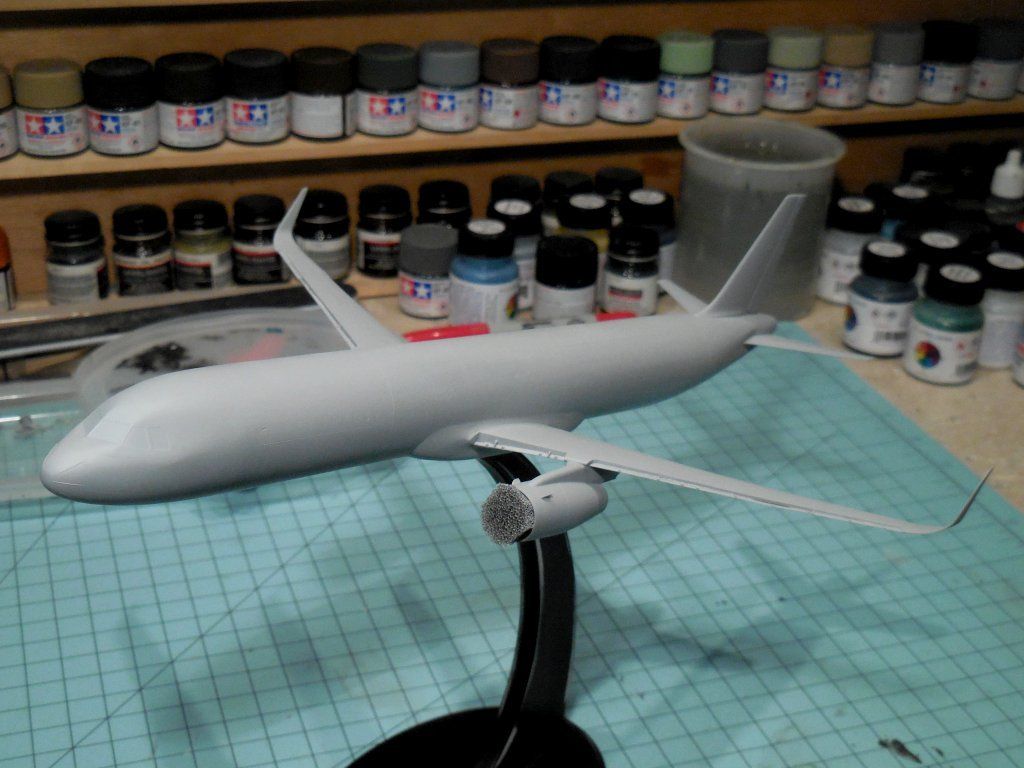
1st coat of primer to see if any fixes are needed and to my surprise 1 tiny little thing and not where the front was chopped. I had been wondering what to use for the final gray color but I think the Mr. Surfacer look like the right shade.
Been a long time without an update but it’s all done.
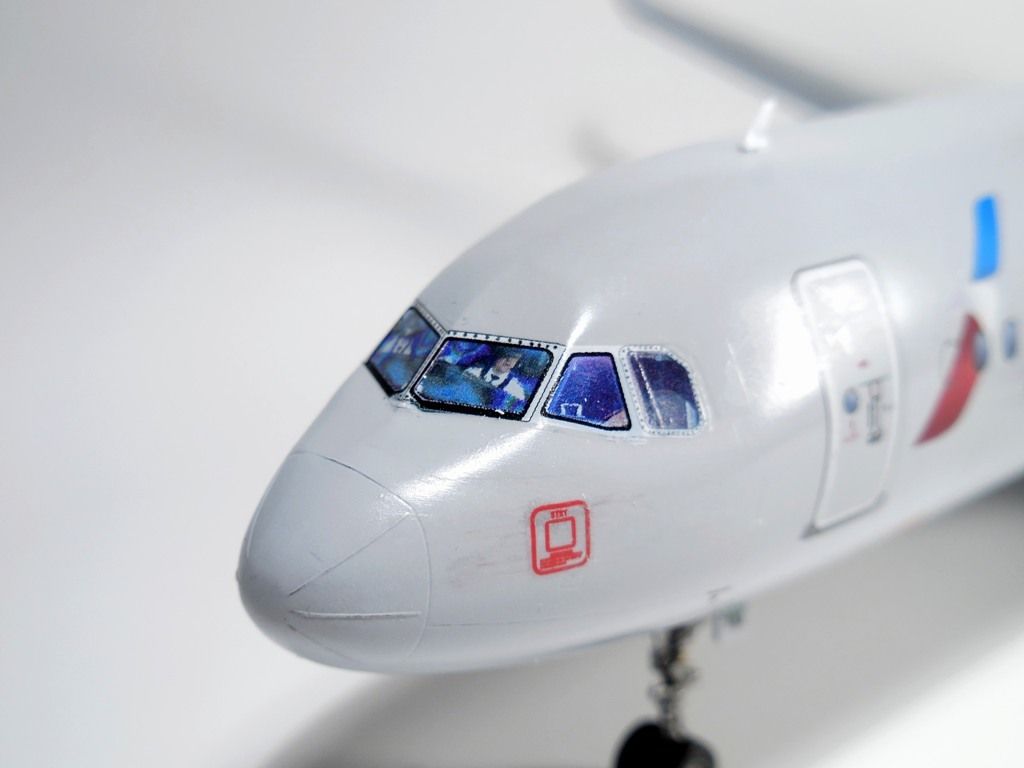
The final piece of the build arrived yesterday. Authentic Decals 3D cockpit windows finish off the build. I made the small decals for the nose gear doors.
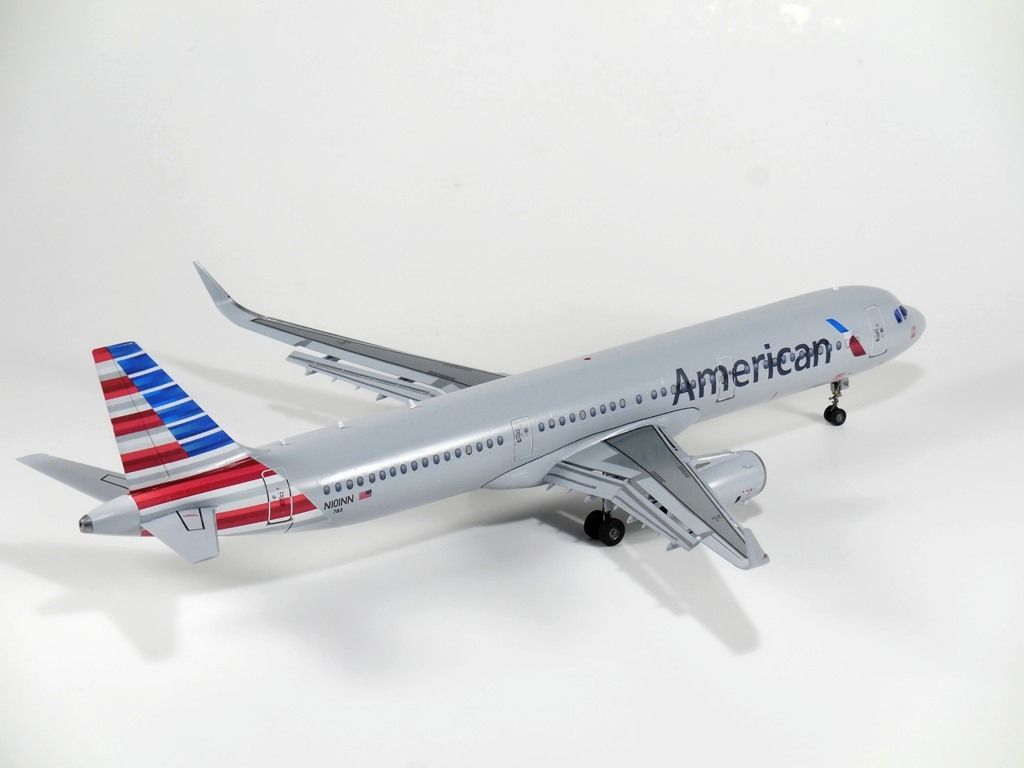
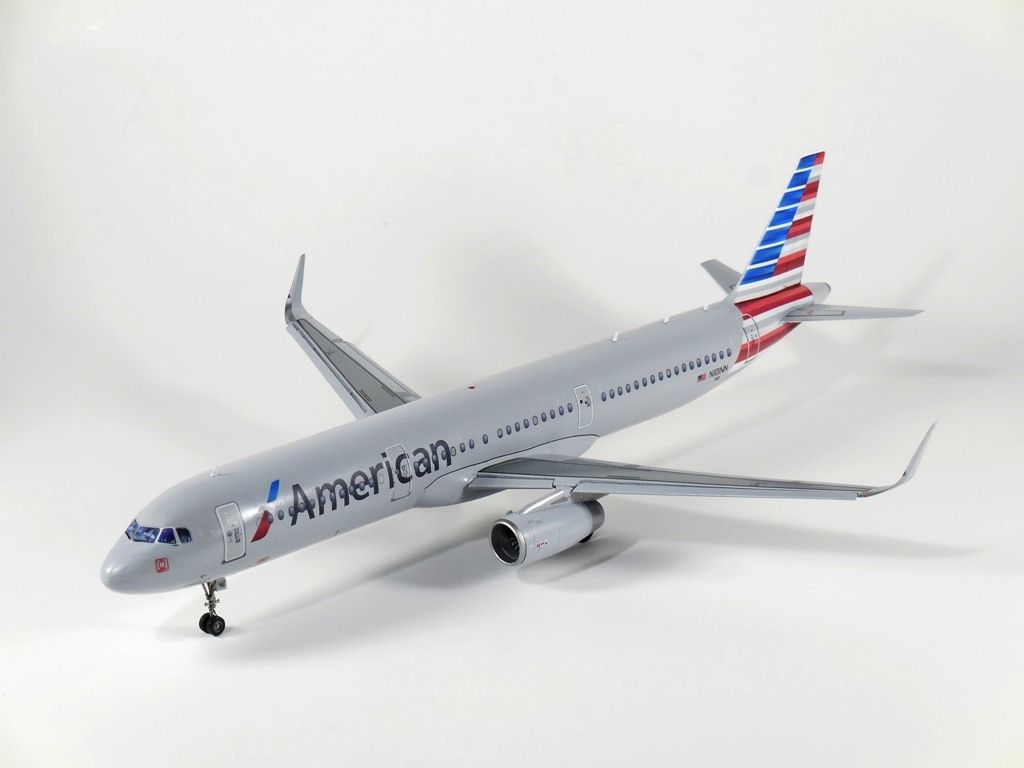
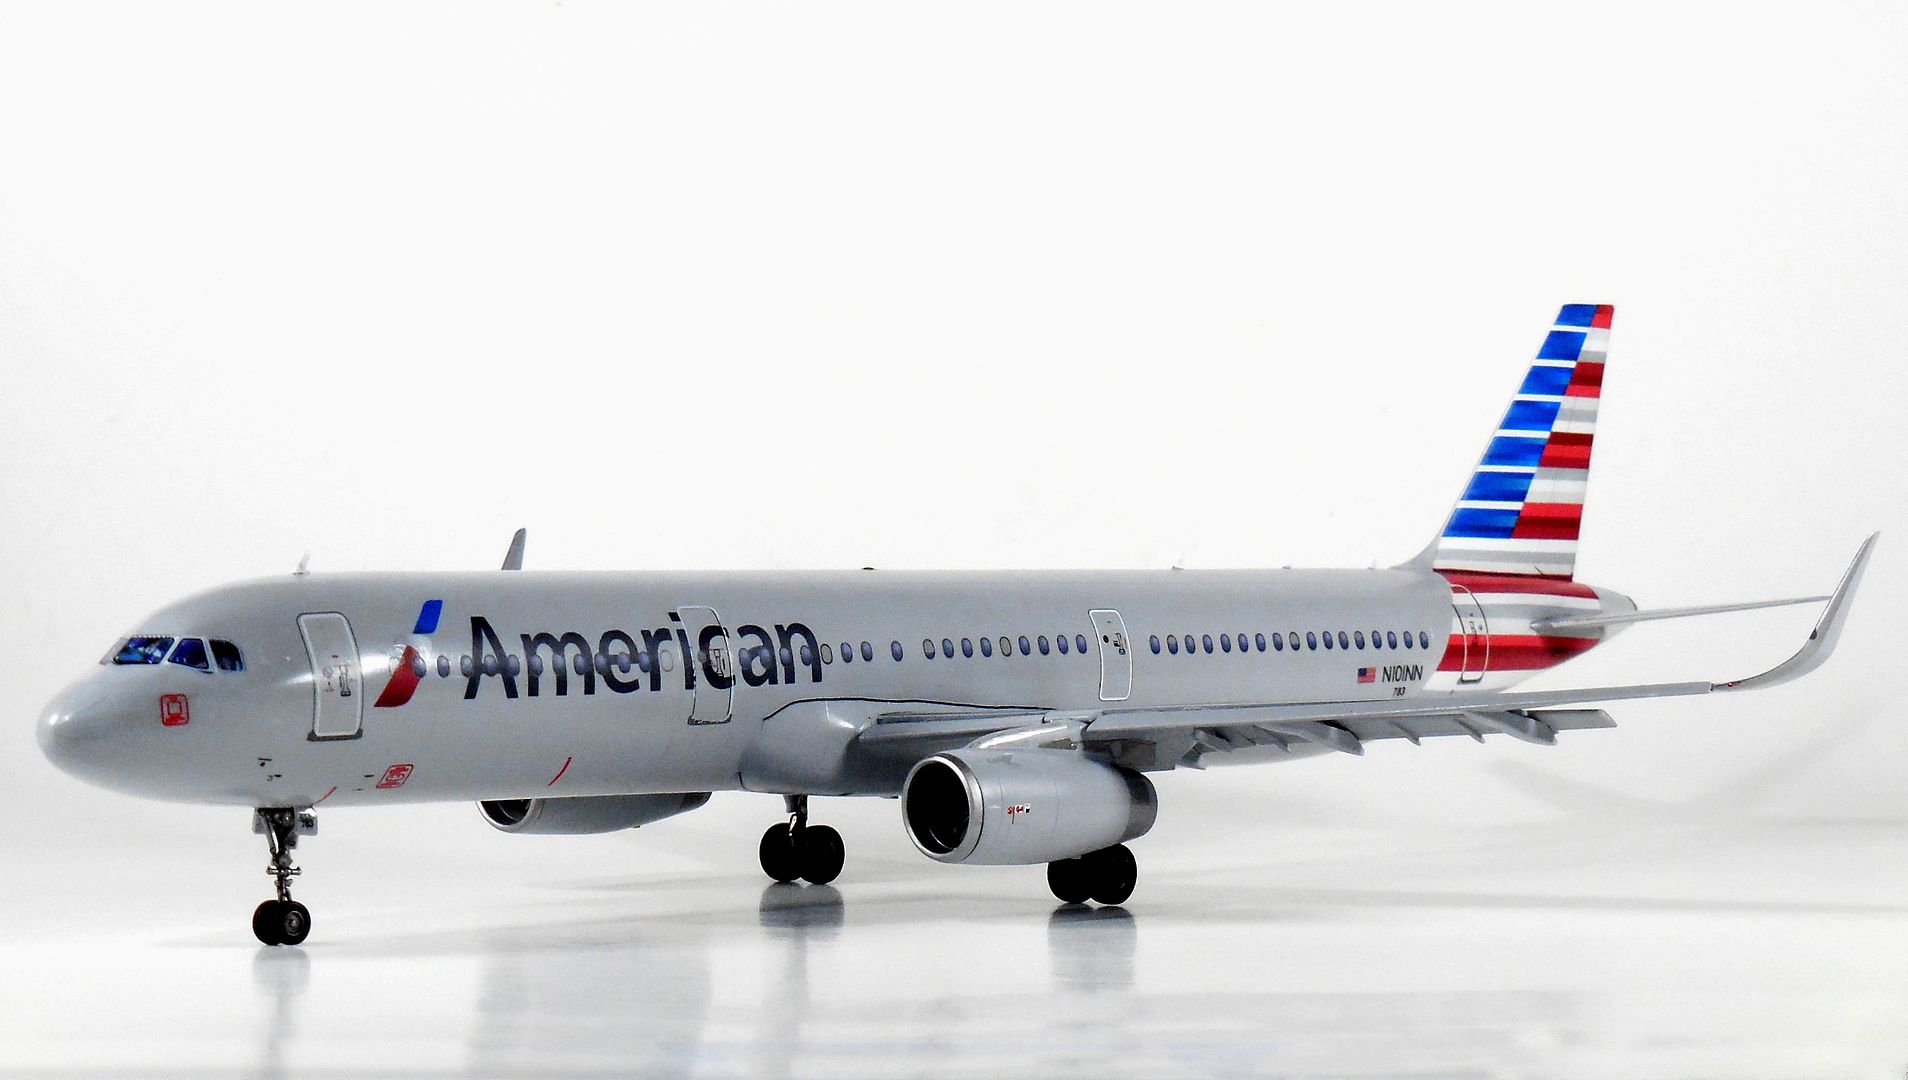
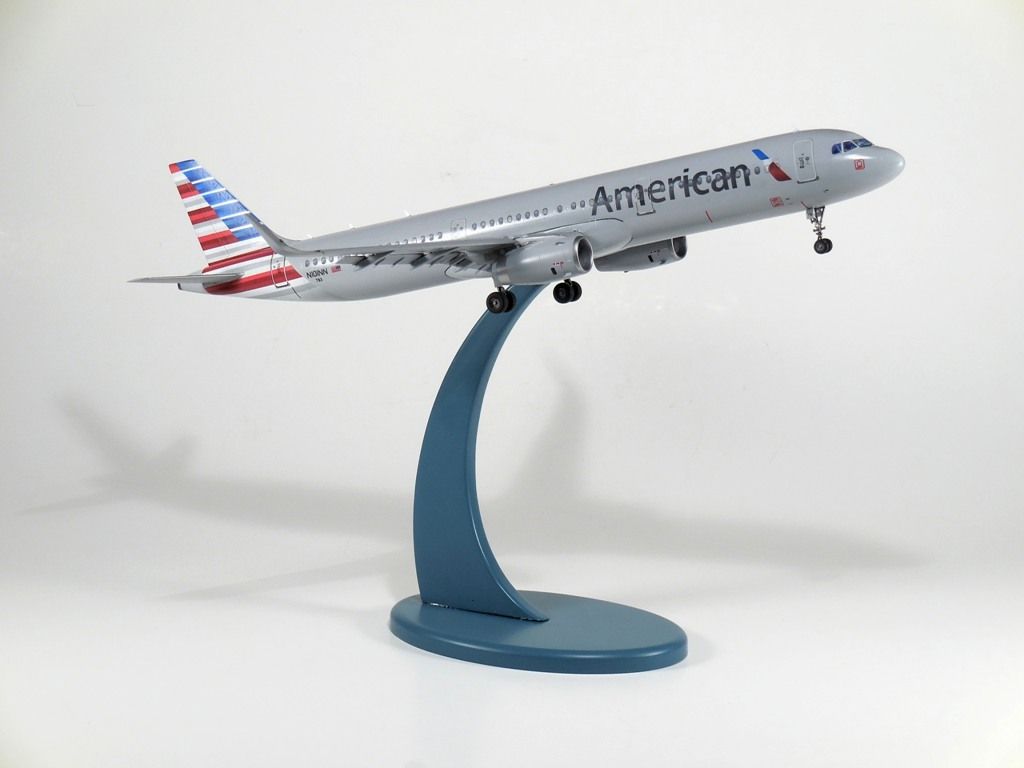
I like it. The new AA scheme is cool.