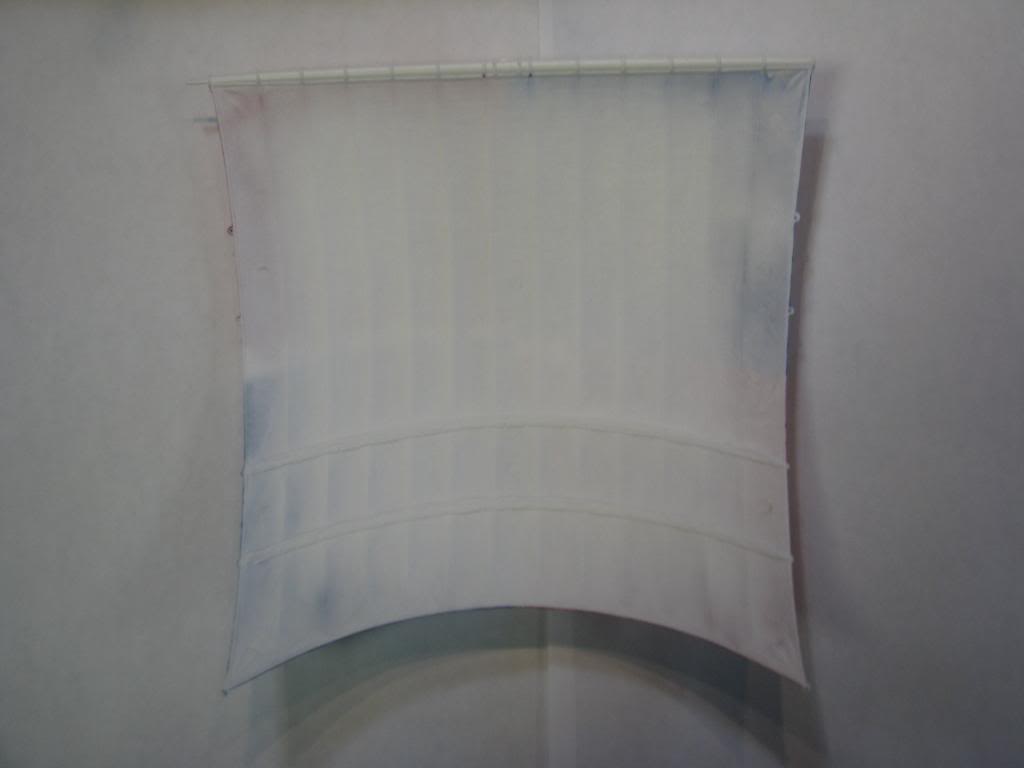
Here is the hunk of plastic which consists of the sail and yard. As you can see, you can choose whether you want to show full sail or furled. Although I chose door three on the Hanse Kogge by sawing off the yard off the sail this time I will use the sail as is.
Anyway, for such a hunk of plastic, the detail is rather nice. The sail material is quite petite and it looks to scale. The bonnet lines on both front and back, as well as the line bordering the sails is also shown.
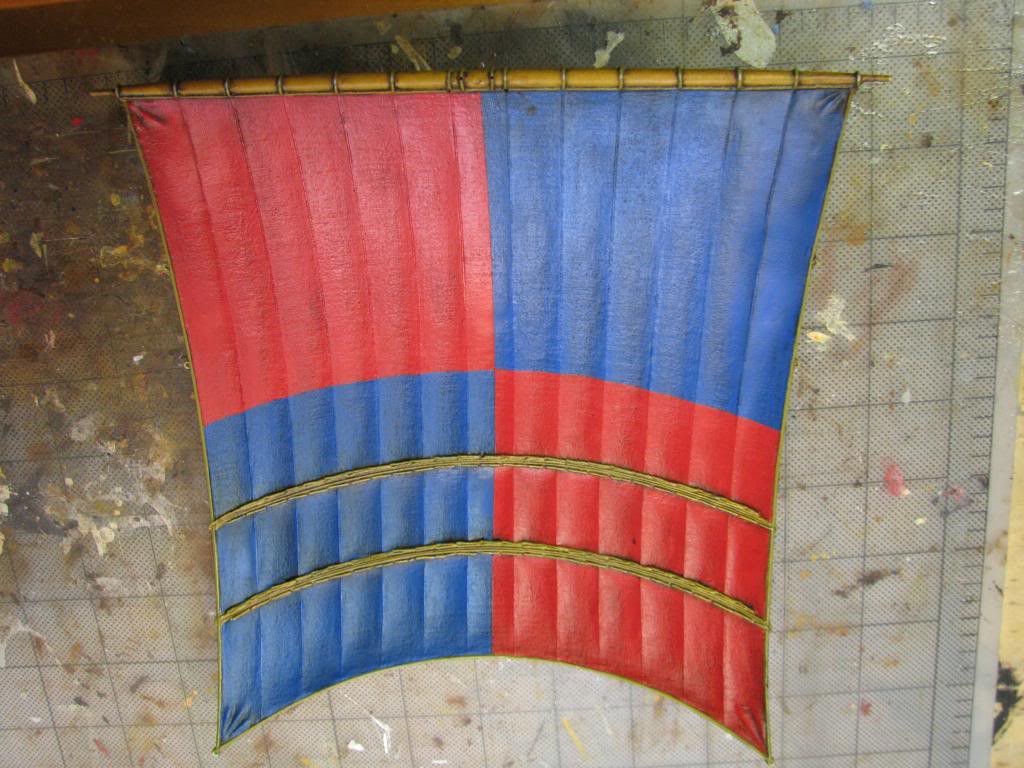
Painting this was fun. After I filled in the ejection marks on the rear of the sail with Squadron White Putty, I had to be very careful not to sand the detail away. Since the sail is billowing the horizontal line bisecting the sail had to follow the curve or it would have been really funky looking. Much patience and even the use of a toothpick was needed to finish the painting off.
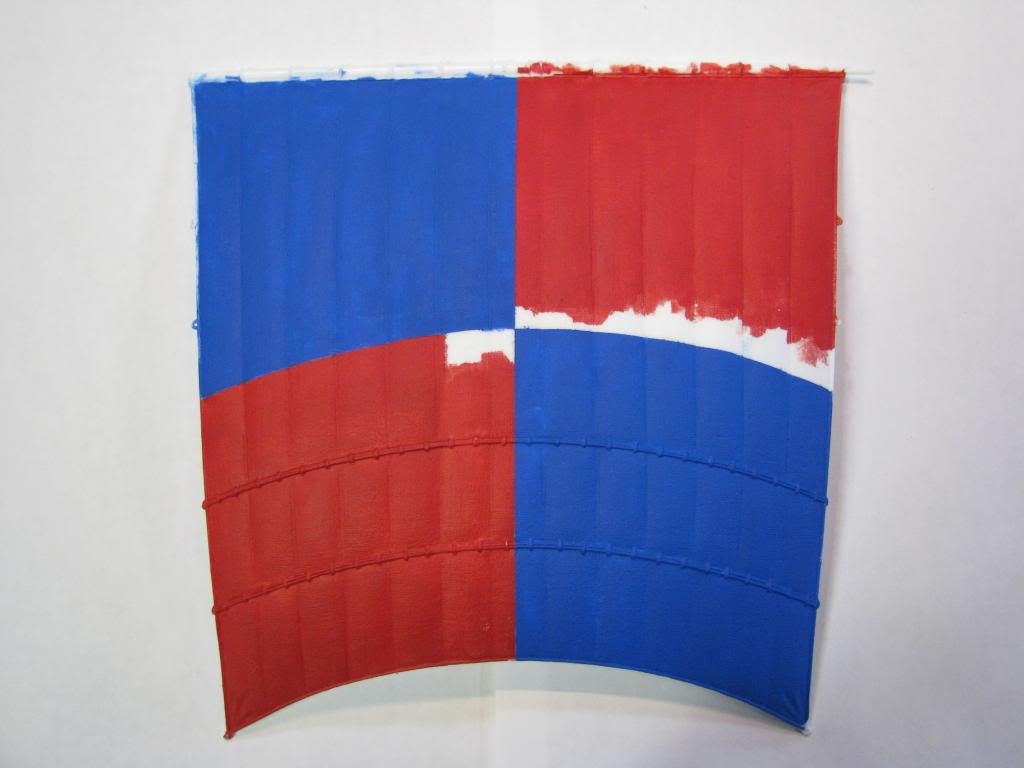
You can see the decals that go on the sail which is one of the reasons I used it. Also, I am building this pretty much OOB. I am actually using the sails as well as the deadeyes and blocks from the kit. I am using my own rigging line since the kit’s line was garbage.
I use high grade artist oils over acrylics. You can use student grade oils but they do not have the longevity of the pro grade. The initial outlay is on the high side but you really don’t use that much on each model so they last a long time.
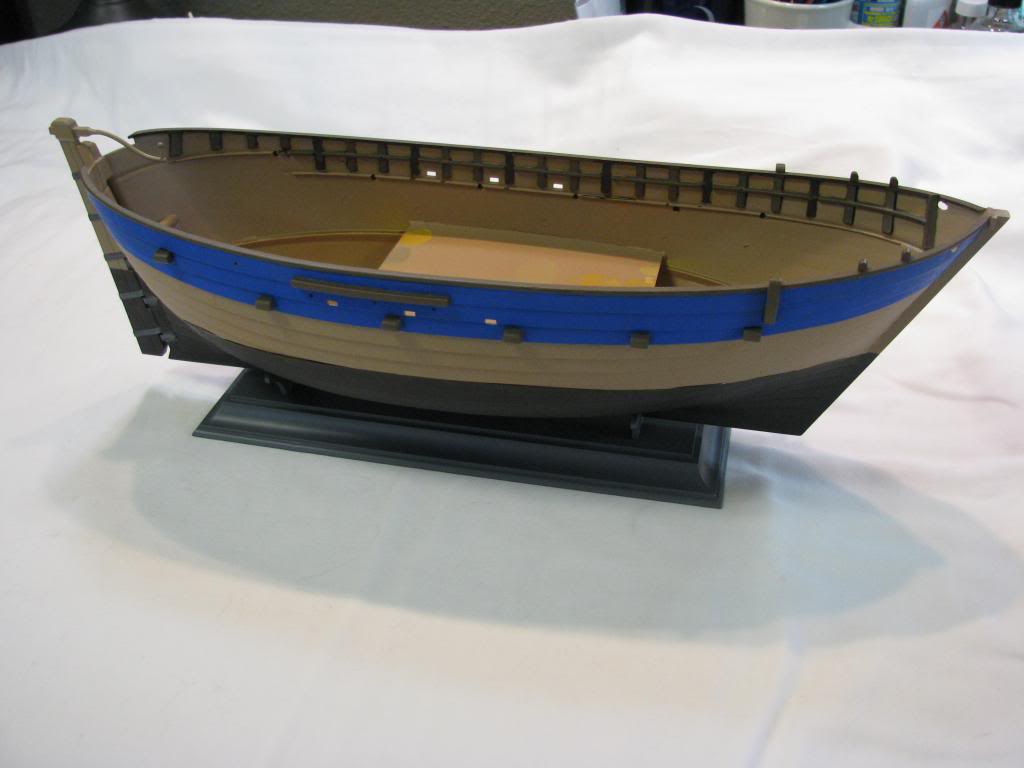
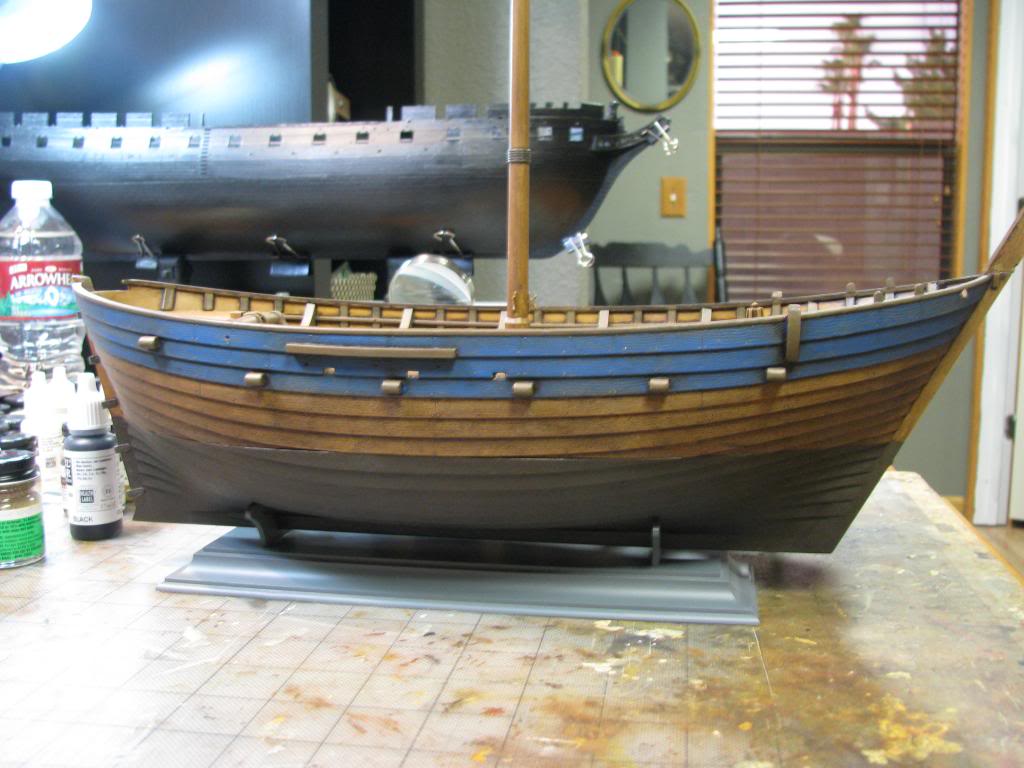
It’s an interesting build and makes into an interesting boat. I firmly believe in what Prof Tilley says about getting back into ship modeling; build a.small ship in a large scale. This also has a nice bit of rigging, not too much but enough to teach someone the basics. Nice grain for weathering and painting.
If you decide to build one, please share pictures I would love to see how you built it. In fact DavidK built the same model at the same time. He did a beautiful job but different approach as well as building it much faster than I take. He usually does at least two to three models to my one. Hopefully he’ll post some pictures of the build soon. If you have any questions, please ask.
I love the finish you got on the hull, it looks like real wood. How did you achieve this? I admit to prefering wood for sailing ships but this kit looks very interesting.
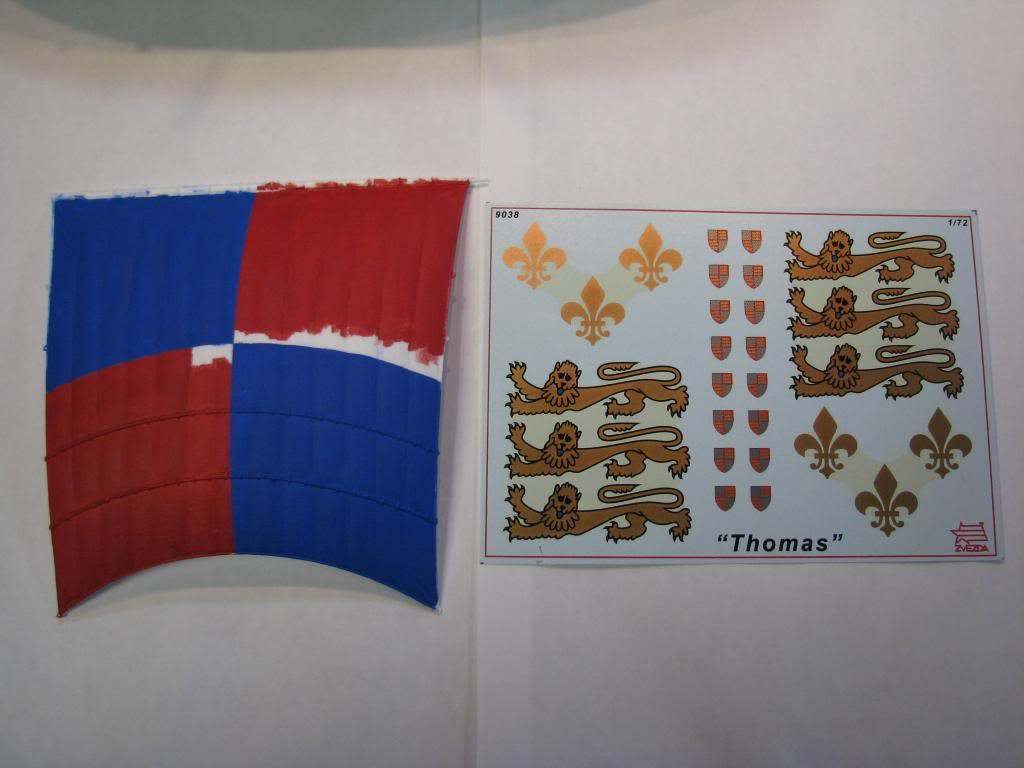
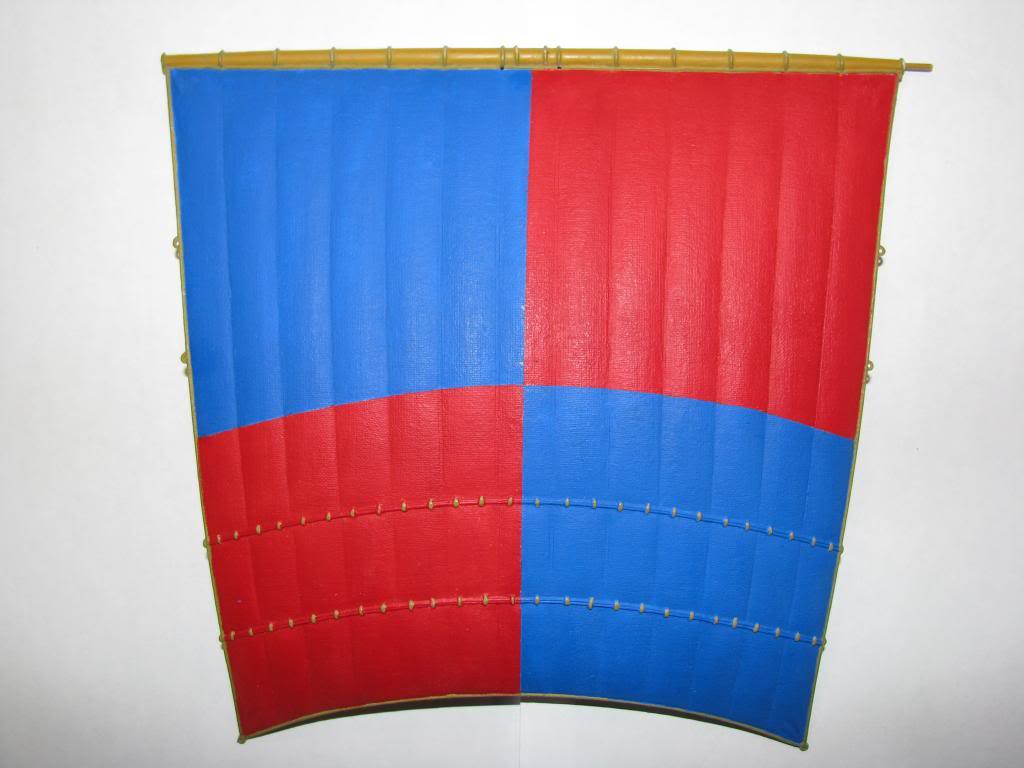
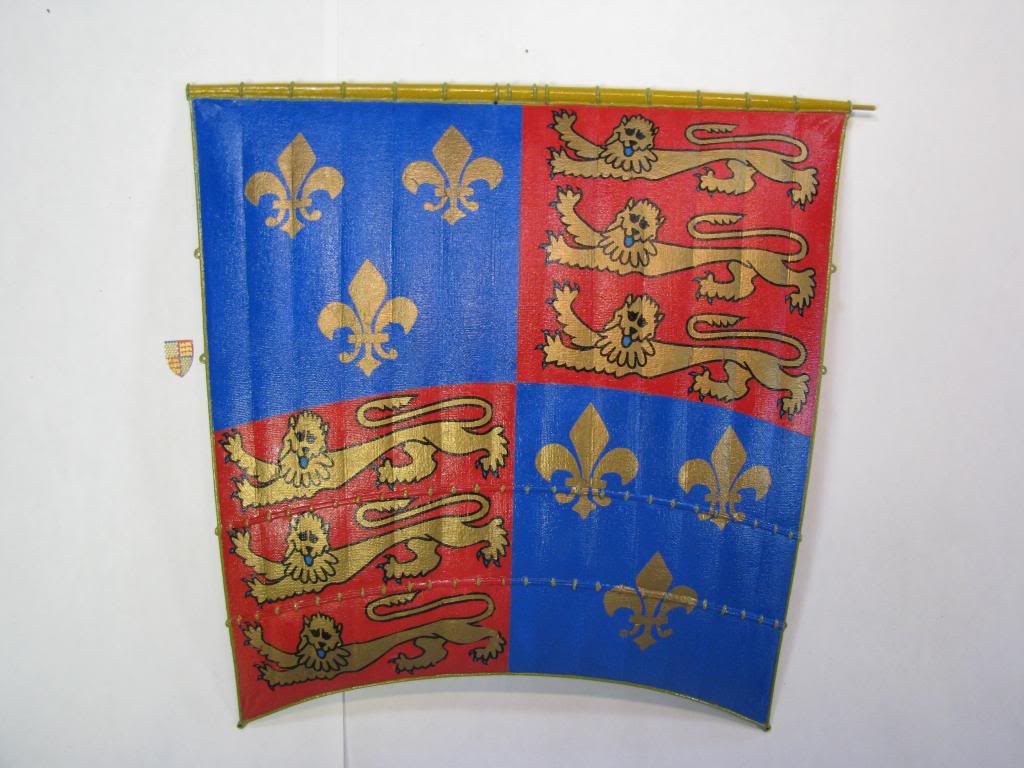
Here is the sail with decals on finally. It was a bear getting these babies on! I thought the Lions were going to be the hardest, they only broke apart in about 4 or 5 places; however, the fleur- de- lis added at least a parcel of gray hair to appear. They broke apart in so many places I lost count. Add that to eye balling them to conform to the sail, let’s just say I’m glad that part is done.
Now on to weathering them. I was wondering if I should seal them with Future and then a dull coat before I weather or just a Future coat and then a dull coat after I weather them?
Thanks Arnie, like I said, I am REALLY glad that part is over. You rarely encounter decals building sailing ships but it is always good to stretch your limits.
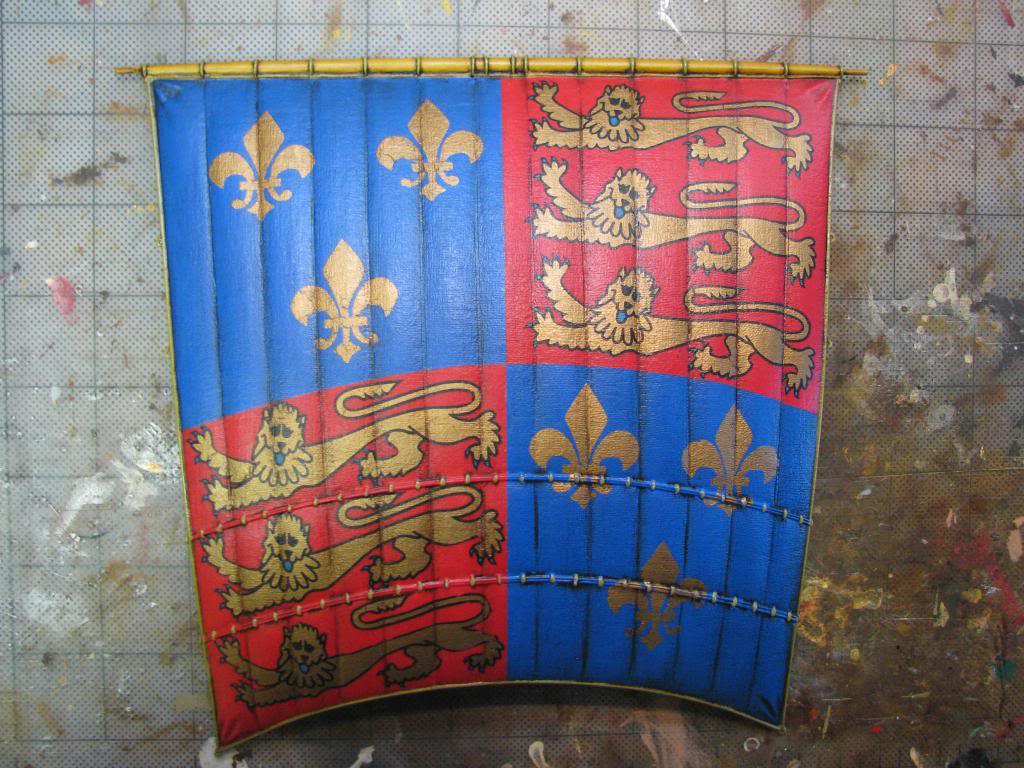
I finally got to weathering the sail. It is a bit shiny due to the fact I just painted the oils on it. I’m still toying with the idea of using a bit of yellow ochre but I’ll sleep on it for now.
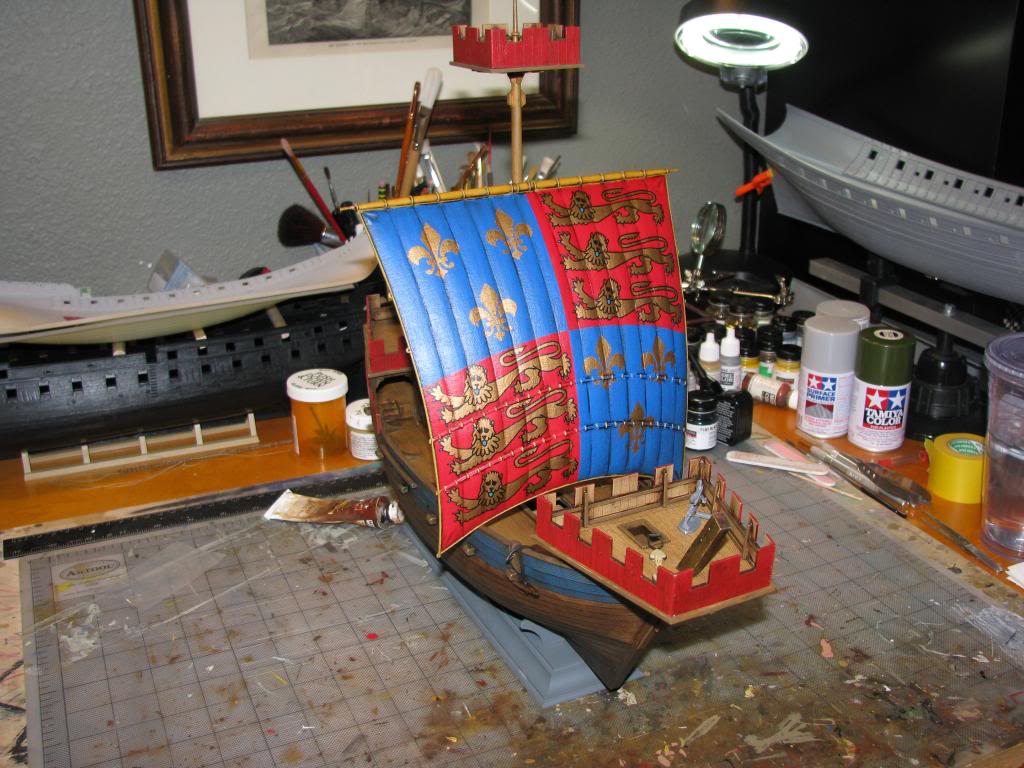
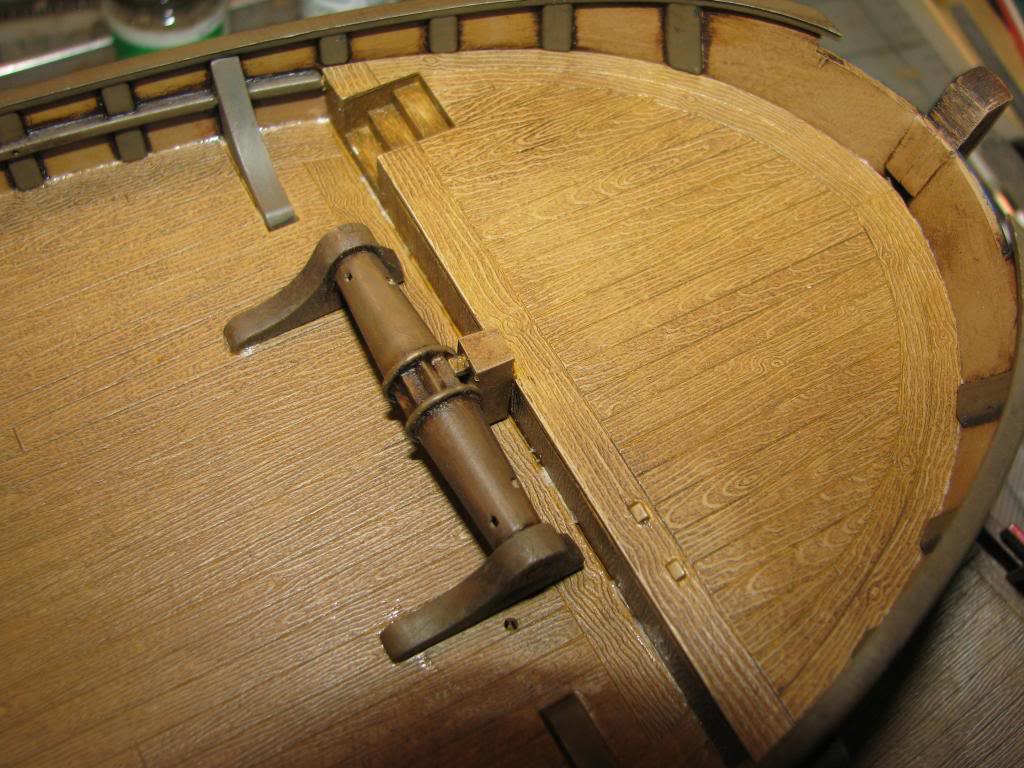
These pictures show the evolution of the painting technique and shows the start of rigging. I put the kit block in to show the difference between the handmade rigging vs. the kit version. Since I am using the sail, the sequence of the build is getting weird. I need to do the anchor ropes before securing the fo’c’s’le so that I can secure the rope around the bits, the capstan and then down below.
The sail/yard needs to be rigged next so that I can run the halyards around the wench ( oops, I meant windlass! ), as well as the lift, brace, tack and sheet blocks. I’ll probably rig the back stays next since it will be immensely easier without the sail than with it.
Hmmm…run the halyards around the wench…Souns like something really interesting is going on aboard that ship. Beautiful model. Have you considered adding some people? Zvezda makes some nice 1/72 medieval figures for war gaming, and your superb oil painting technique could make them look spectacular.
Thanks for catching that Professor T! Although, it being the King’s ship and all … You just never know.
I actually placed the 1/72 figure for size comparison and the thought has crossed my mind during this build. I have seen some rather nice figures by Zvezda and Ceasar. What I haven’t found are bombards, although again, I am not sure if the English carried them on board during the battle of Sluy. If I do go with the figures I am definitely going to put Longbowmen in the fighting top.
Although I was going to do this built out of the box, when it came time to start rigging I couldn’t bring myself to rig her that way. I put the kit block in the picture so that a modeler you is thinking of building the Thomas or another Kogge can see the difference between the two methods.
Finally, thank you for the compliment, I always appreciate your input.
Looks great, Steve! When I did my Thomas, I replaced the kit blocks with walnut hearts (from Cornwall Model Boats, in the UK…SUPERB fittings, BTW!)…though Zvezda does a great job with their blocks, I felt that rigging my own was a good idea, and they look way better…as do yours! I don’t remember if I posted any progress pics of the Thomas on here…been awhile since I contributed at Finescale…
Makes me consider starting a thread for the Chebec build…