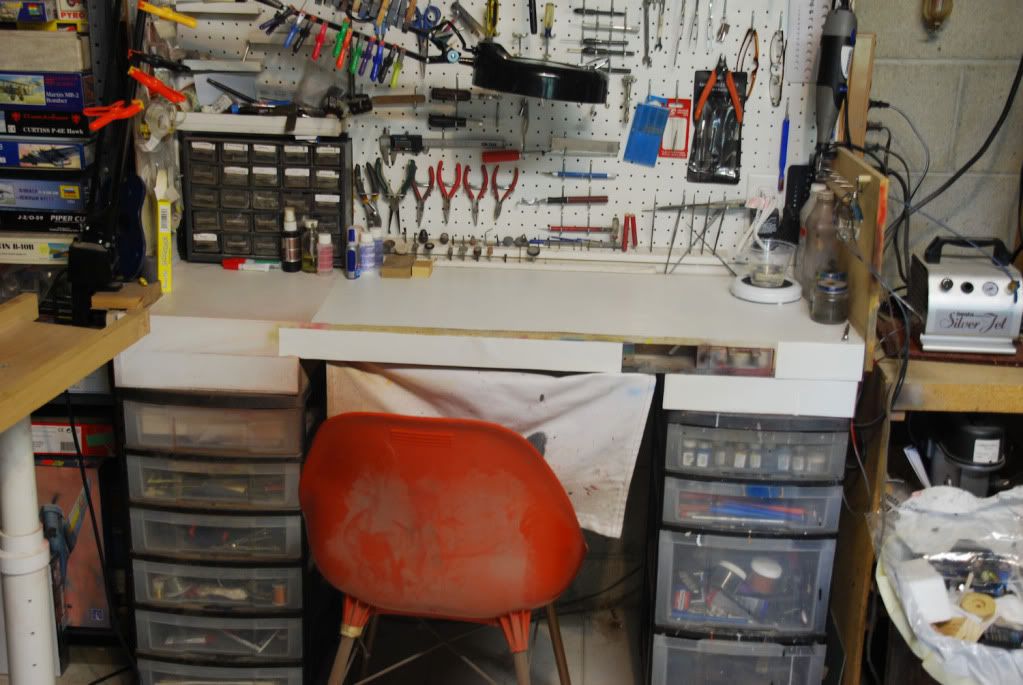
This is my workbench. I built it about a year ago after settling into a new house. As you can see, the large Pace paint booth takes up the majority of the bench. It’s strategically located under the basement window, which supplies a place to vent the booth with a little ducting.
I usually build in the booth, but I’ve decided that I need a dedicated assembly area. So I built this:
It will be placed so the two benches together form an “L” in the corner of the basement. I’m thinking about the design of a backboard or backwall for the new bench. I’d like to build in some lighting, storage for paints, and tools. I may include a spot for a computer.
What are your thoughts? What workbench features, accessories, and storage set-ups do you like? I’m thinking your input can point me to the features that have worked well for you, and steer me away from features that do not work as well. Any input is appreciated.
I make my own benches now to a simple plan I developed. For the pedestal/drawer units I buy two of those plastic drawer cabinets from office supply stores. They are frequently on sale (and Walmart now carries them). They have casters on bottom- that allows me to roll out the bench if I drop something and it goes under one of the cabinets. I have a six drawer unit on one side, a four (bigger) drawer unit under the other. Those casters sure were nice during my recent flood. Bottom drawer stayed below water level so nothing in bench got wet.
For a top, I buy two pieces of 1/2 inch particle board 2 foot by 4 foot. I trim them to 20 inches, since I find I cannot reach comfortably to the back of a 24 inch desk while sitting. I also buy some 1 x 2 pine, and lay up a rectangle around the edge of the bottom piece, with a couple of beams in center, then add a couple of beams in middle to stiffen this bench top. Now, just fastening that top to those cabinet units results in the benchtop being too low, so I make two squares from 1 x 4 stock, and fasten one to each cabinet unit, then put benchtop on top of those. The extra four inches (actually three and a half) brings top to comfortable height.
I fasten a piece of pegboard to back of benchtop to make a tool rack. I cover the top surface with white contact paper. Easy to replace after too many paint and glue spills.
I don’t know what they were originally for, but I found 2 of these at the Re-Store (I’ve since attached the second one on top of the first). You look handy with wood, and may be able to make something similar.
Yes, there are some great layouts here. I like those styles of paint racks, and I like the peg boards. Maybe the best approach would be to figure out how much paint rack I need, and add some room to grow. Then, I can use the unused room for peg-board.
I’m not a big fan of drawers. I put something in a draw, then forget I have it, then I buy a new one. It’s a nasty cycle.
I sort of assign my drawers. One drawer has measuring tools, one has spare glue and other adhesives, another has wire and threads, etc. Organizing them means I know what drawer to go to.
I did include a photo with my description. It shows up when I view the message today, so it should be visible.
My workbench is a drafting desk from Ikea. I also have an IKEA small metal drawer cabinet under the desk. The cabinet has all my paints and supplies. Next to my desk I have several plastic drawers cabinets stacked up holding more supplies.
You guys are a lot more ambitious than I am. My wife and I bought a 16x16-foot two-story outbuilding from Home Depot and I finished the bottom part with insulation and sheetrock, then bought a few of those foldable plastic tables from Wal-Mart and put them up against the walls. I had an electrician run power strips all the way around the room, so there’s plenty of electricity available. My wife has half the room for her stained glass equipment, but complains that my stuff keeps spilling over onto her side (hey, models have to dry somewhere while I’m working on another), so she wants to take over the upstairs, which we’re using for storage at the moment. I’d use the basement if we had one, but we’re in a manufactured home.
There is a rectangular frame just under the surface board. The frame is slightly smaller than the surface board, and the legs are are screwed to the frame. Also, the frame is connected to the surface board with brackets on the underside of the board and inside the frame.
You gentlemen have offered some great inspiration.
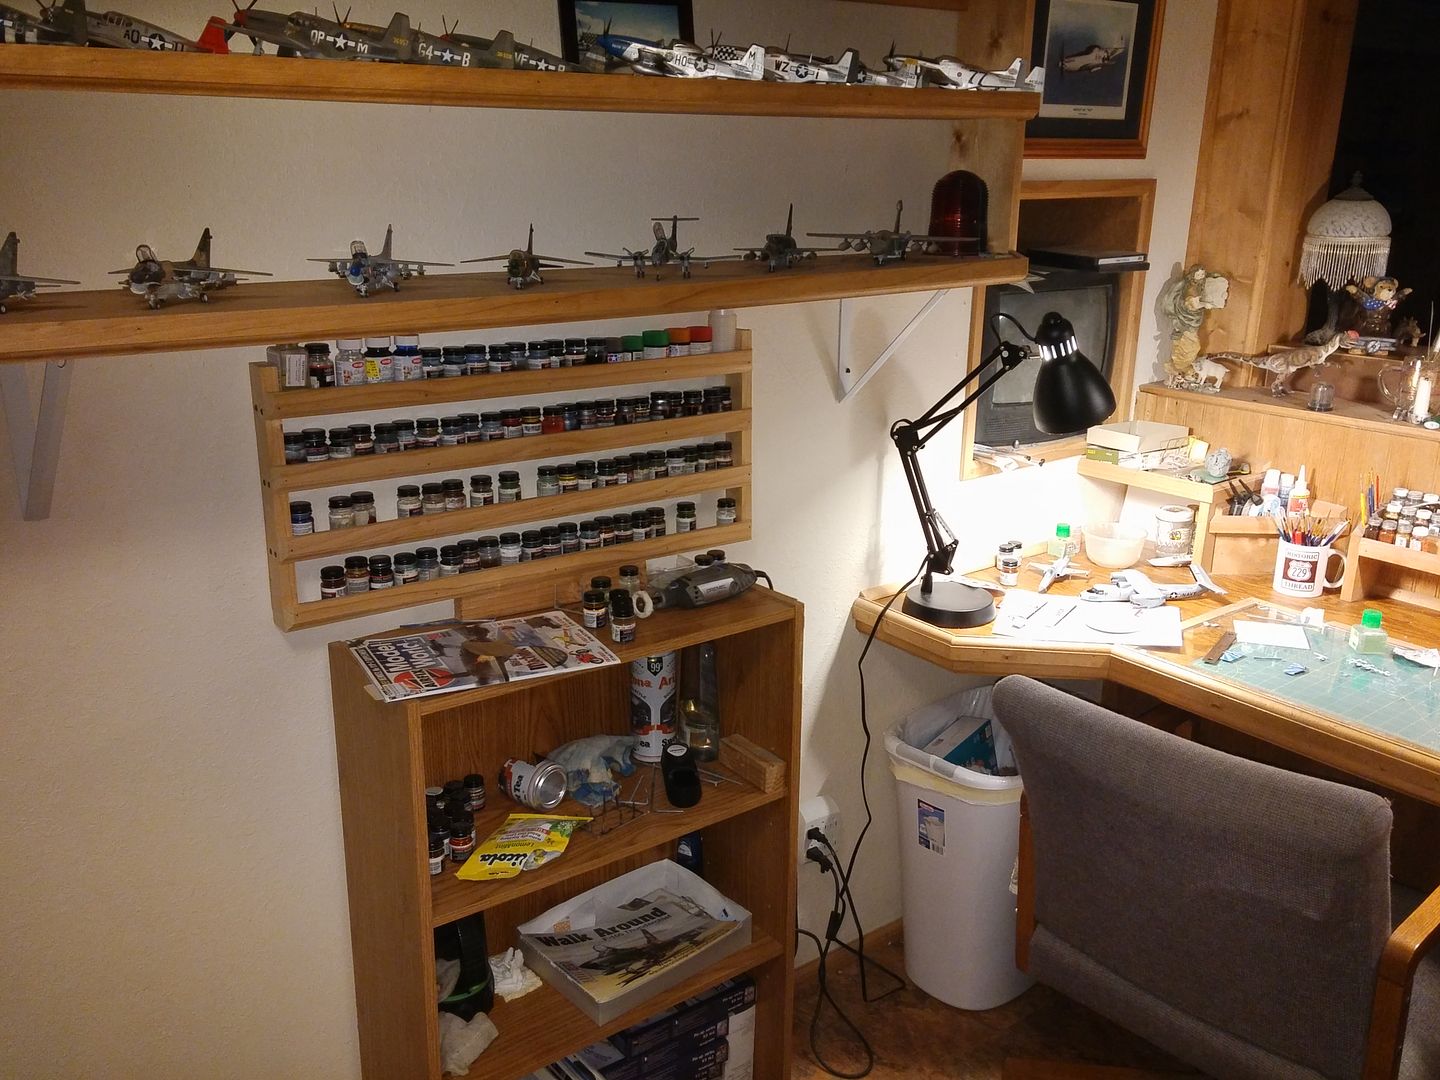
Don Stauffer, I mimiced your bench layout with the pegboard infront of the work area.
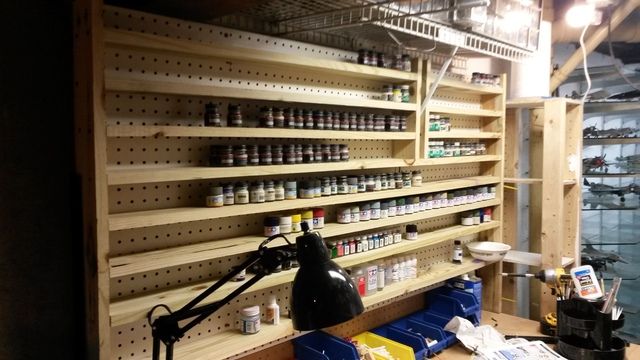
Cdn Colin and Tempest Johnny, I took inspiration from your paint racks to make one of my own. It’s not exactly the same size, but the spacing between shelves is definately important. I know it has been stated to leave room to grow into, and that is a great way to look at it. However, I thought it best to make a rack that I can remake and design modify when needed. This rack fits all of my Tamiya, Polyscale, and mixed paints. I have a some Vallejo bottles and spray cans that may need something with more space between shelves.
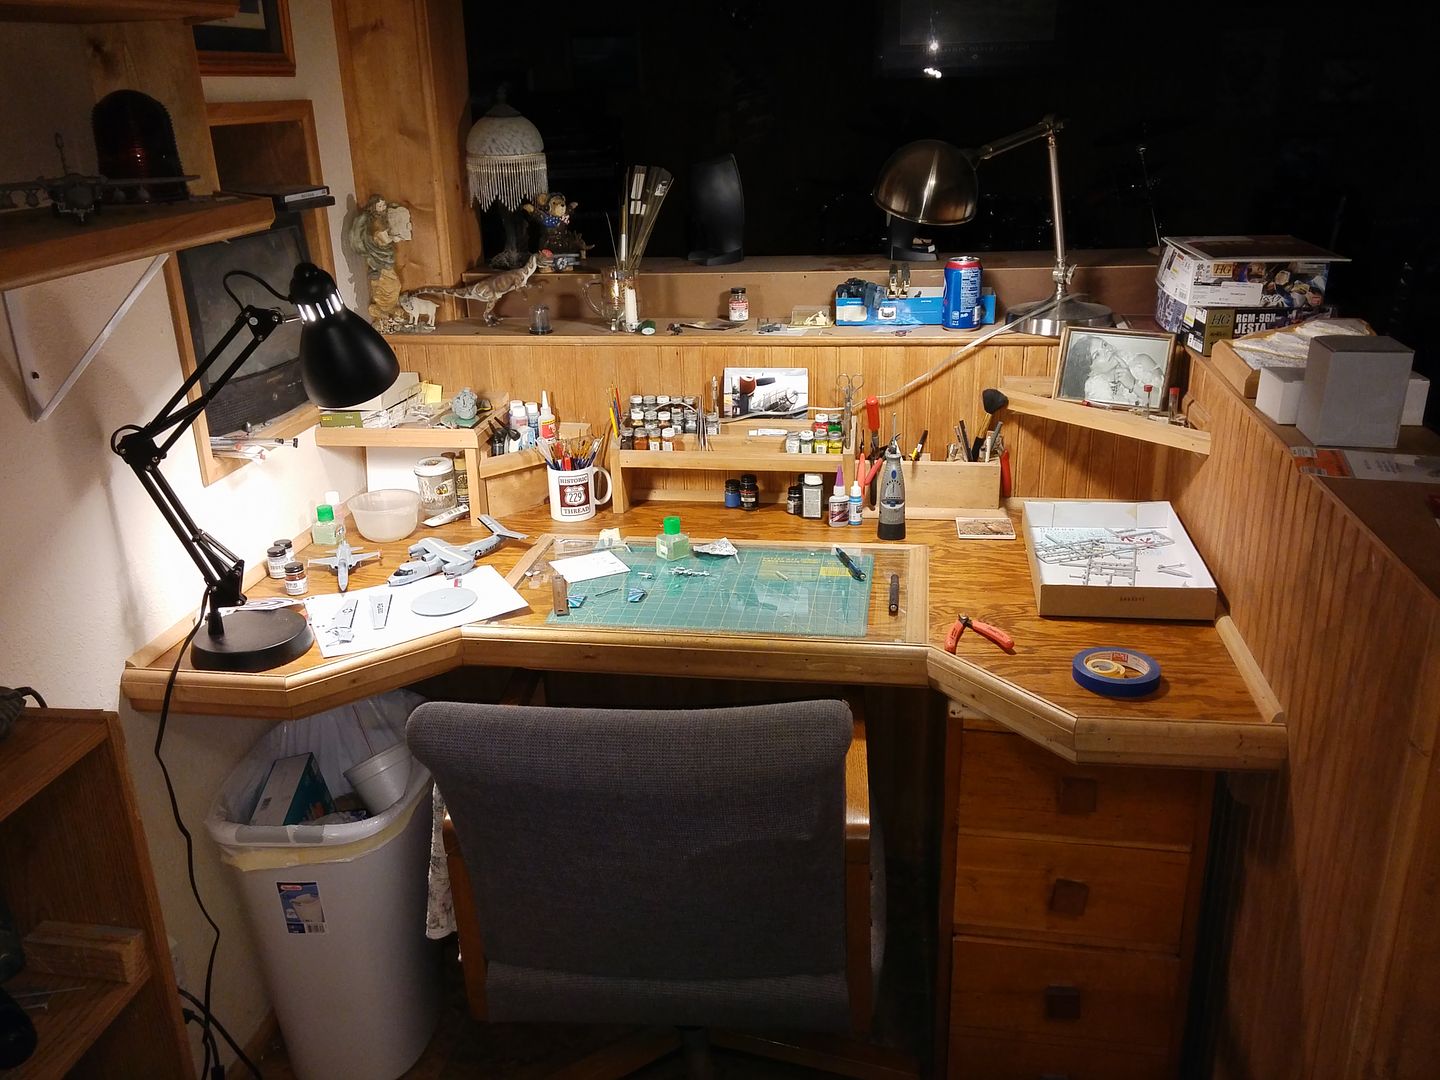
This is how the new additions fit on the new bench.
And, this is the whole modeling area. It’s my corner of the house. Truth be told, all the rarely used modelling stuff is stashed in plastic bins on the shelves under the paint booth. There are also some weird odds and ends in that little toolbox next to the paint booth.
Next, I will think about lighting. Should I get a flexible light on an arm that I can reposition? Should I get a fixed light directly above the build space, maybe mounted to the top shelf on the new backboard? Any thoughts on lighting?
I may do the swing arm first. Maybe I can use such a light to add light to both my paint booth area, when needed, as well as the new assembly area, when needed. Shadows have been an issue with models in the booth. That may help me get a sense of where I need to apply additional stationary lights later.
Thank you for sharing your experience with the subject,
I built mine when I finished off my basement. Knowing what I know now, I’d have done things a little bit differently. Making any changes would involve a fair amount of work, as it is all “build in”…I’m certainly capable, but just too dang lazy…and, it still works for me, so I don’t really NEED to make changes.
As it sits, right now…
The drawers on the right were taken from my old desk/bench that I had up in the loft. (the desk top…1.5" slab got repurposed as a butcher block, out in the garage…I “process” my own deer). I use a piece of 1/4" glass as my working surface. You can mix small amounts of paint right on it…stick tape to it, to cut strips, lots of “pro’s” to having it. Clean up with a few swipes of a razor blade. I love it!
I used to keep all my paints, other than basic colors(Testors, that you see on the bench rack), by my paint booth, in the utility side of the basement. Nowadays, since I’m using more and more of the MM enamels, I built a rack to have them handy by the bench.
The glass is nice! Mine cost zero dollars, as it was left here from the previous owners.
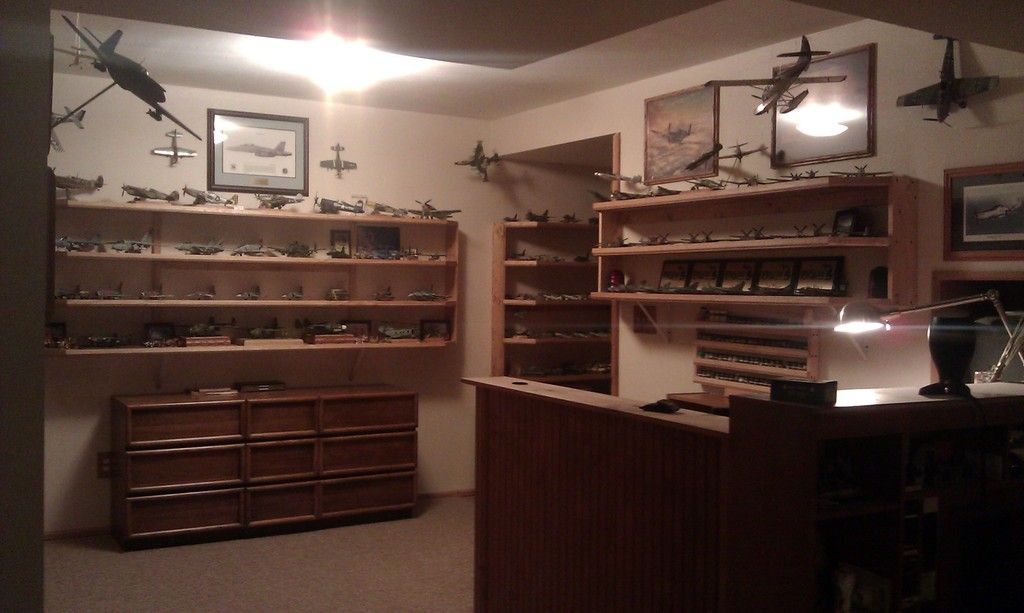
My display shelves were a new addition, this Spring.
Right, left and the one in the doorway…
The one in the doorway…at the bottom of the steps, goes down to the floor. I don’t like having models below waist level, so I filled those shelves with books and mags.
Then there’s the main display…built in, when I built the room (stash cabinet underneath)