Wood Surfaces: A Test For Wooden Aircraft Carrier Decking

I was literally sitting around the other night, watching a show when I had this thought:

Can I make a surface that looks like wood with just cardboard paper?

Now, of course, there are many ways to ‘make wood’ simulated from all manner of things, even actual wood, when it comes to making diorama scenery or terrain. I’ve watched a lot of different You Tube Videoes in my ‘recalibration’ to entering back into models and dioramas after just over 30 years of complete absence.

Anywho, who, whoo, I was sitting there, as I said, and I also had on hand, a bit of cardboard paper from a box that held cat food treats, which I had, days earlier, decided to see how easy it would be to use to make a house and cover it with different materials to simulate various building surface finishes. You know, stone, logs, brick, stucco, etc..

However, I’ve just joined here at FSM and got excited about joining the “Battle of Midway Build Group,” action. So there I was, thinking about that while watching the show and the cardboard was right there and I thought – “Can I use that to make a wooden deck surface?”

So I grabbed an old cutting board (my ‘work’ surface), an old X-Acto knife with a relatively sharpish blade (good old #1 knife) and snagged up a section of that cardboard and just starting sort of scratching away. I would have used a steel brush (the preferred method from YT personalities), but I couldn’t find one handily.

There I was, with an idea and the desire, so the X-Acto knife was it, because it was right there, too.

As a rough test, I literally grabbed a small section of cardboard and went at it and here was my initial result:

Test One on paper cardboard with no scale measurement:
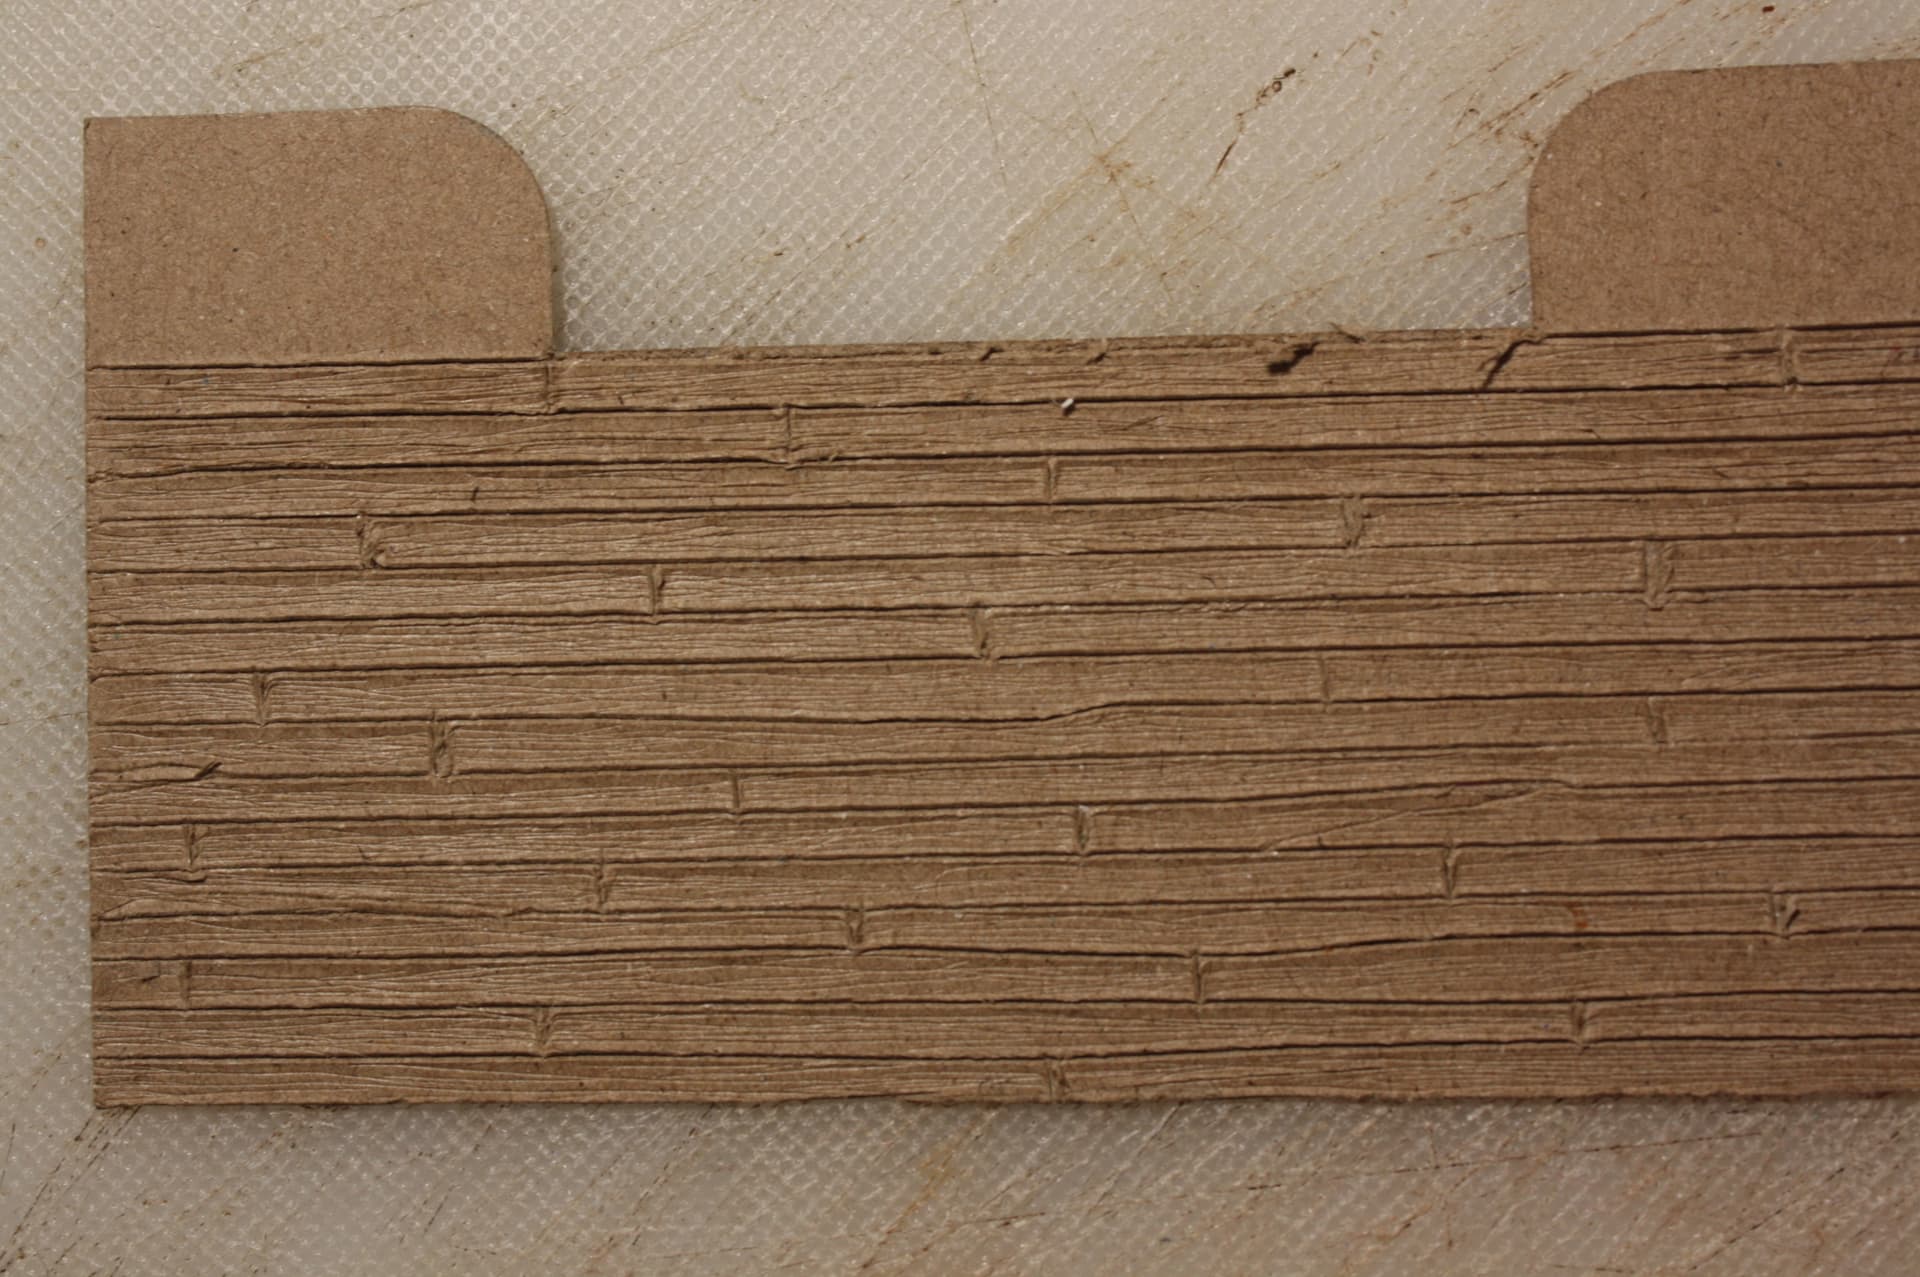
As you can see, it’s not bad. In fact, I decided it looked good enough as an initial ‘just farting around’ test that I made another section in scale 1:48 to mimic the decking of a USS CV from WWII.

Test Two: Measured 1:48 scale markings and ‘official’ description width/length planking and grain:
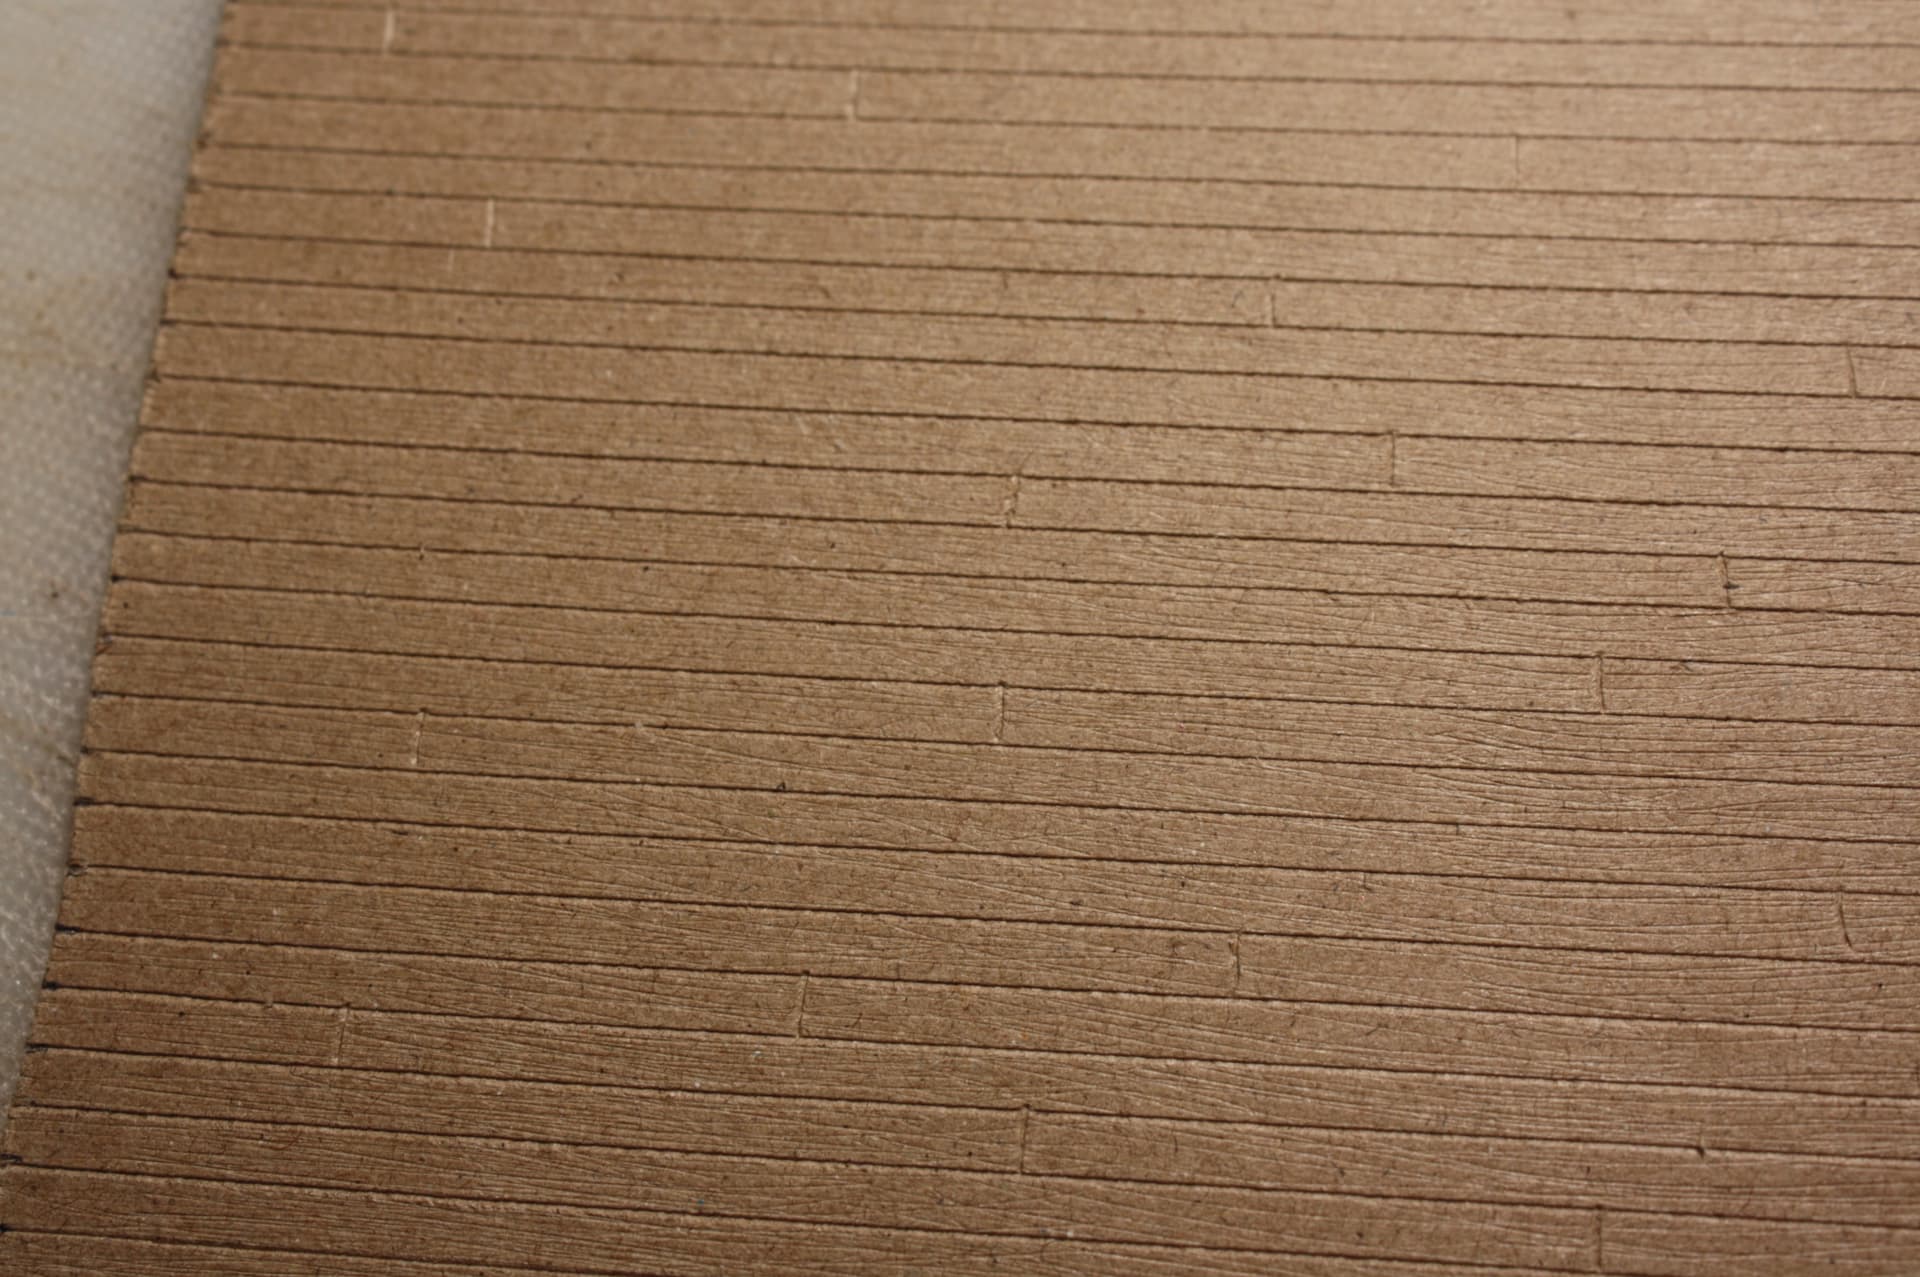
In the above image, I used a section of the cardboard of about 5 1/2" by 4 3/8".

The decking material was wooden beams of 6" x 3" x 10-20’. The varying lengths I attribute to making the decks more able to withstand the abuse they would recieve by landings, takeoffs and the average weight of aircraft on it, while also allowing for torsion flex of a very large ship on the ocean.

In this case, I realized a ‘mistake’ of my first attempt. Well, two, really:

  1. Make all the ‘wood grain’ lines as long as you can and make them FIRST.
    In my first attempt, I scribed out the plank lines first and that method created scratches and flaws in the plank lines that I felt, small as they were, created some destruction of the detail overall.

  2. Use the ‘back’ of the blade to scribe plank lines.
    Again, my first attempt I used the ‘sharp’ knife edge for all the effort and, while it looked okay, there were places where the knife ‘travelled’ during my plank lines, even with a straight edge against the blade.

To provide a better view, I snapped a couple of closeups. I would like to caveat that I took these photos with a hand held camera, sitting on the couch, with a large cutting board in my lap and only using a 60W Equivalent LED bulb on a flex lamp. I also placed them on low resolution (I normally snap in RAW and edit now, but these were taken as JPG on low resolution) so I could be sure they’d load okay…

Image Three, Test Two Closeup:
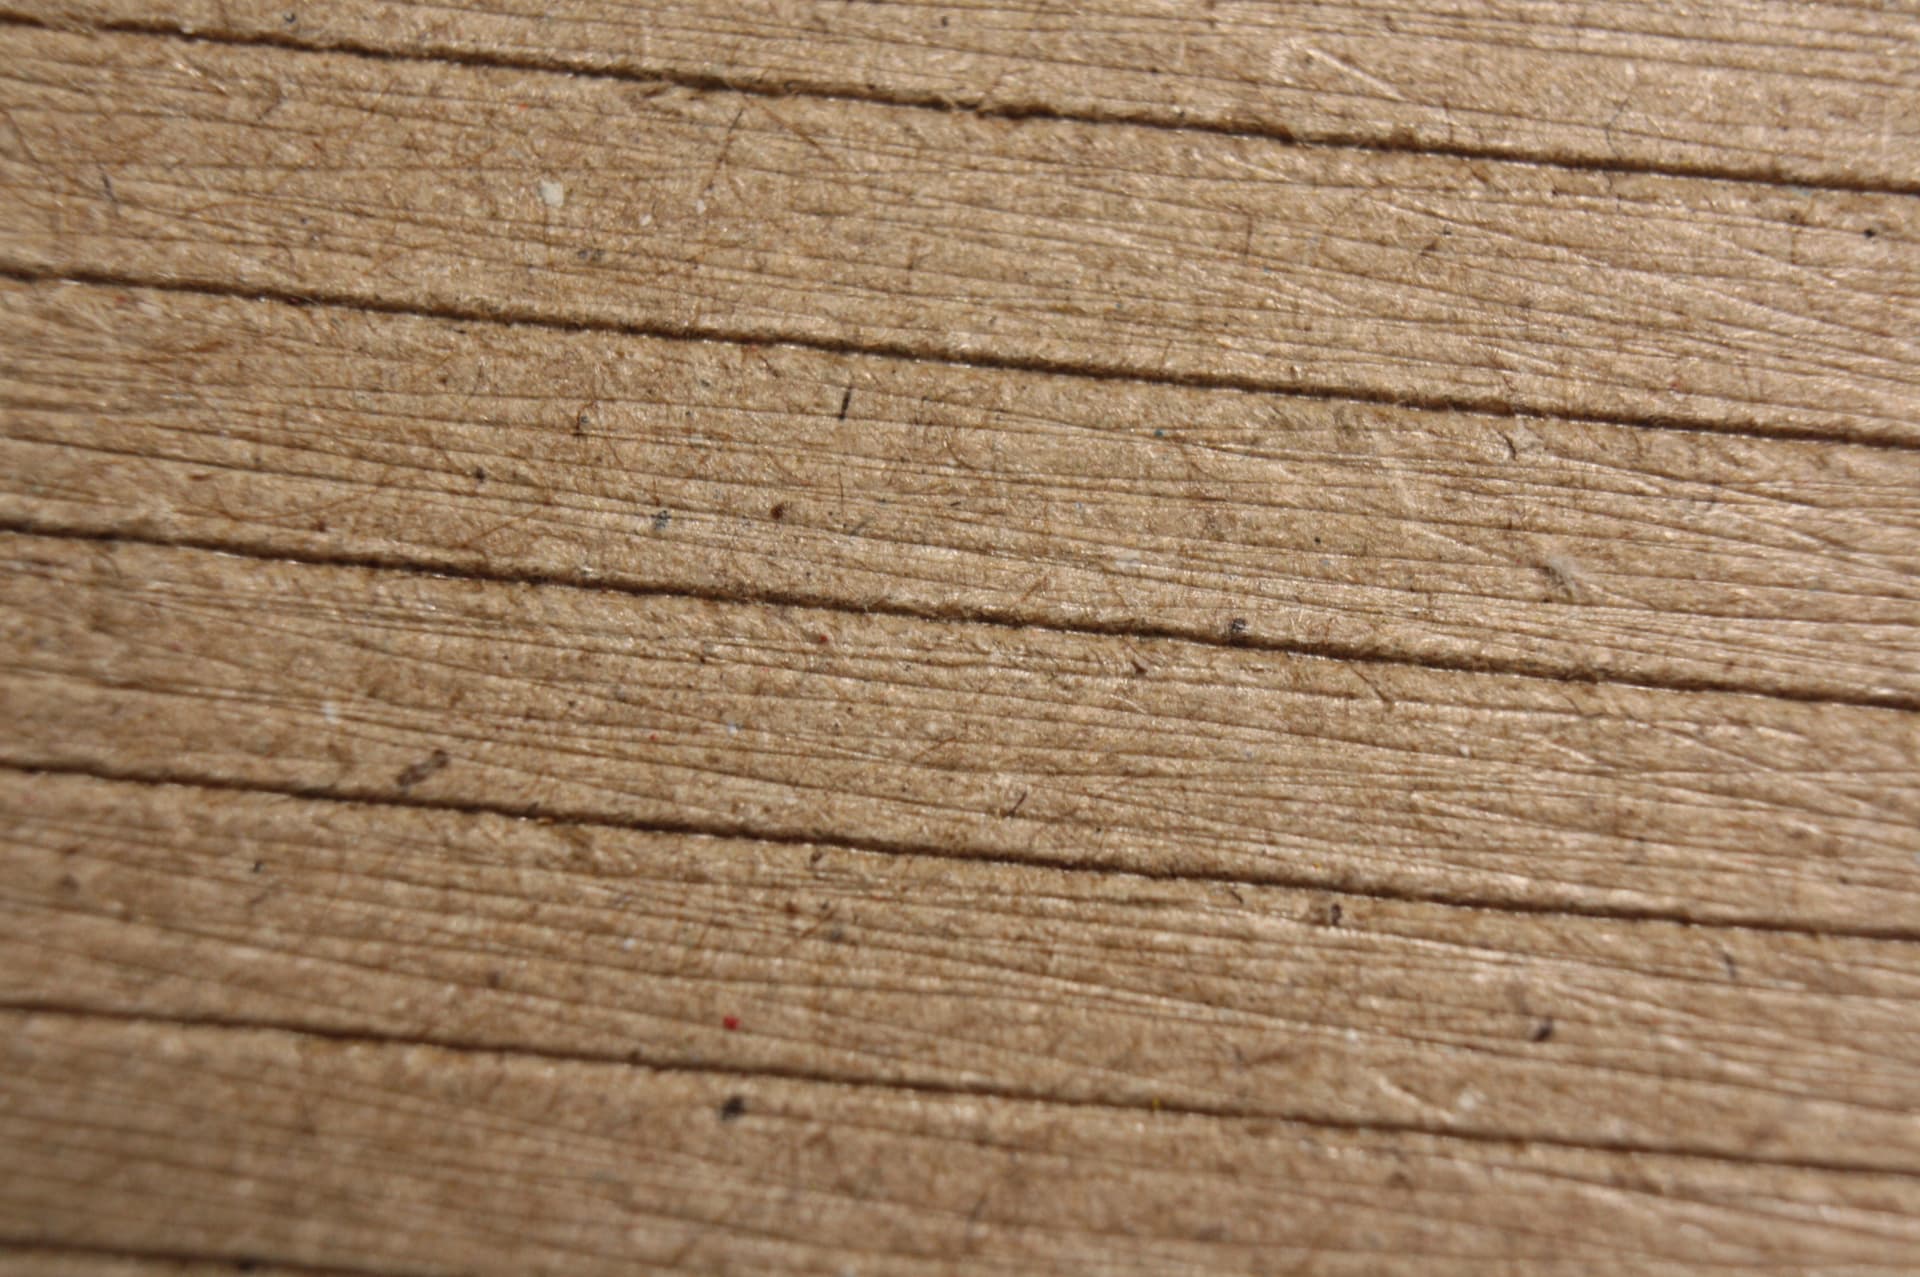
This is NOT painted. Just raw cardboard paper. All I did was scratch in the grain lines (I need to improve on my method – and maybe try it with a wire brush to see how that does at this scale), then used the backside of the blade along a straight edge to scribe the plank lines, post grain lines.

I haven’t gotten started with building, however I did want to contribute a little something that is relatively simple, easy to do (it does take a bit of time, but a wire brush might speed that up by a couple of factors) and pretty much available to the vast majority of all model/diorama builders out there (all it took was a surface, a bladed knife and thin ‘cereal box’ cardboard) all of these things should be well to hand for anyone from complete novice to master builder.

I will post another test later in this same thread and I may also do some painting (I need the practice) to try to make it more like a Carrier Deck section instead of this.

3 Likes

This is a great concept, and your third run looks very convincing! I always worry about trying to make bases with compressible media like cardboard though, unless they can soak up some sort of glue or solvent to make their shape more durable and unlikely to warp or lift from their baseboard. Still, that’s not the focus of today’s experiment, which on its own was a worthwhile one!

I totally agree. With Cereal Box cardboard, however, it is thin and more like card stock, which is hard to compress, though relatively easy to BEND.

I am still concerned that painting may cause all manner of warpage and adding a thin coat of Mod-Podge or PVA glue may do the same. So this is going to be part two of my testing to see if this is workable.

I’ve watched a lot of terrain making videos for making gaming terrain for Warhammer, D&D and other forms of Table Top Gaming (TTG), but I’ve never seen anyone use this kind of material for making the ground or floors, so I’m sort of in unexplored territory.

That said, I’ve always been a, “Let’s see what happens,” sort of builder, because if you don’t experiment and explore, what’s the point? How do you learn if you just do everything everyone else tells you to do, right?

Even so, I’d very much like to have something worthwhile in the end of all this to provide a basic sort of display quality wooden decking for a Carrier based aircraft that isn’t going to take me weeks to construct with real wooden parts – not that I wouldn’t DO that, mind you, I’m just hoping to be able to get a relatively ‘nice’ look with minimum time and cost.

As a low to no budget builder, I’m always looking for the cost effective ‘solution’ that gives me the most bang for my buck – or lack of one.

My next update will be: does it take paint well?

1 Like

I have a sneaking suspicion that a lot of folks prefer to use vinyl sheet in this application. It won’t invalidate your technique, in fact it’ll hold up beautifully, but I acknowledge the average household consumes more cereal than floor covering and the point of the test is the accessibility of the material. Definitely keen to see where you take this one!

Yeah, too true.

I agree also that many folks might prefer the ‘higher grade’ stuff. As I said, I started off as a low to no budget builder. My first cutting tool as a kid was one of my dad’s ‘safety razor’ blades wrapped in toilet paper and covered in cellophane tape so that only one side was exposed. I used some of my mom’s needles from her sewing kit, heated up on the end using a Zippo lighter to make bullet holes in things and to create pin holes to make attachments.

So that’s where I started. By the time I was fourteen, I hadn’t changed much in the way of tools. I added a pair of needle nose pliers, rubber bands (for holding parts together while the glue set), an actual model paint brush by then (one that I could mostly even paint eyes on a 1/72nd scale soldier) and my still cherished white military single bed top sheet.

Now? I have my X-Acto knife set (got at 17) and a Dremel Tool kit (got that at 21), a set of model files (also at 17), a ‘hot knife’ (got it at 24) and numerous paint brushes (which I just inventoried last night to see if I had anything useful for this test project – I do).

For my dioramas, I have used pretty much whatever my imagination allows me to divert from their original intended use all the time. I’d go to my local hobby shop and STARE at all the cool stuff on the walls: trees, grass, bushes, telephone poles, etc. and then go home and figure out how I’m going to make that with whatever I can find.

I made a crossing bridge once with nothing but flat toothpicks for one diorama and while it wasn’t lifelike, it was an engineering marvel from a 12 year old kid.

For a very short while I actually had a decent income stream – and wouldn’t you know it, that was the point in my life where I had the least amount of time available to spend on building.

I’m not complaining. I want to stress that. I love this hobby and I devote a lot of time to it mentally when I’m not actually building. When I build, it’s all about how I’m doing what I do to achieve my objective.

I also realize that I can’t possibly be the only cheap as possible due to circumstances hobby builder. So, if there’s anything I can do to impart techniques, tricks and tips to others in my kind of financial situation of not having pretty much ANY ‘disposable’ income, where looking at a model makes you reflexively pat your pocket to remind you that you only have X amount of dollars in it and most of it is already earmarked for basic needs, then I’m happy to provide.

These days, it’s not as bad as it once was, however, old habits breed good practices and there’s no reason to spend money on things that can be done with stuff you’d otherwise toss into the trash. It’s sort of an ecological and recycling effort bent towards making stuff that is cool to look at.

Now that the ‘public service’ portion of my post is done. On with the show!

1 Like

Carrier Deck Tie-down Strips

steel strips installed cross deck at (I forget) intervals. These are c-slots which face each other, not modern stars. White Ensign made some PE ones. May still be available as Toms Modelworks sells WEM products in the States after WEM’s bankruptcy. Check WEM Website

1 Like

Thanks, Ed. I haven’t even TOUCHED on the additional things necessary to make it look like a proper flight deck. I just wanted to be sure the cardboard stock would work at all for a wooden look as planking. There are not steel slots (the spaces between where the wood sits in the deck) and there are no pins and mounting holes (where planes are tied down). I figured that I would have to get the ‘wood’ look down first and then go on from there. At 1:48 scale ALL of that is presentable and viewable without a magnifying glass (though I admit the wood ‘grain’ lines are a bit hard to see without one).

Again, PE is a pretty amazing add-on – which I can’t see me forking out cash for, so it might end up being something like fine foil slotted alongside the wood into the cardboard stock (like the peel off foil on those ‘saver’ covers for food items like Peanut Butter or Chocolate Powder [the only two I know of that would be large enough to get proper length strips for that] ).

Each thing in their turn, I suppose. I wish to be clear, I am NOT dismissing anything someone can buy to make a great look. I just don’t have the cash for that and I’m sure I can’t be the only person in the hobby thinking, “How can I do that without spending all that cash?”

If folks can afford those things I am genuinely happy for them (not to mention envious), but I’m not one of those guys.

Tom’s Modelworks actually does have some tie-downs in photo-etch.I had thought that no one made them anymore.

This set is 1/48:

https://www.tomsmodelworks.com/catalog/product_info.php?products_id=51&osCsid=17402e4376a14b4a8a4a0c5b2b0e19e5

Tom’s has more than that one; if you visit the webstore and search on “tie downs”, you should get the whole selection returned.

Best regards,
Brad

1 Like

Your cardboard planking looks really good to my eye. I think the the big test will be how does it look under a sealant of some kind? Some wood products tend to get “fuzzy” with raised fibers when water (or acrylic paints) are introduced. If it can handle a coat of mod-podge or even a flat lacquer, and subsequently receive paint and weathering, I think you’ve got a winner.

1 Like

Yes, the real test comes when I paint/seal the surface. I’v been spending the most of my day looking for really decent images and specs for the wooden surface of the Deck. It’s amazing how much just is HARD to find today. You’d think that the “AI” stuff being pushed so hard could answer questions like this and find you the links – instead they just parse the pages they do find and spit out some half hallucinated BS.

That said, I found a few decent images of the flight deck. It appears to be a series of 7 or 8 teak planks lapped together with the slots between them being about the size of 2 to 3 of the planks with drain channels and tie down points.

These go across the deck the hull instead of along it (along it would be from end to end and across would be side to side – not the technical terms, longitudinally and athwartships are those). The original decking was teak wood stained or left natural and preserved with some sort of clear varnish. In later years, these methods were dropped and the decking was painted according to the then current specifications for warship camouflage painting specs.

So, before I start painting/sealing, I am going to attempt to make a set of deck sheet that looks like the proper decking, 7 lapped planks, a slotted channel with drain/tie down holes, rinse repeat, repeat, repeat for however long a section I intend to use as a test plate.

Thanks for watching and commenting. This is the power of a forum – multiple true intelligence applied to a specific task with a desire for clarity, accuracy and no hallucinations.

Short update (for me).

I spent a good two days now looking for really useful images of the flight deck surfaces. I also made an attempt to create a new flight deck prop to include the tie down plates. I had the sizes wrong (am doing this to 1:48 scale initially) and didn’t realize it until I had most of the wood planks done. Whoops!

So that unit will be a test of how well the surface paints/seals/primes without losing detail.

Also, I discovered that using my X-Acto knife was just a bit too ‘harsh’ on making the wood grain lines, used normally. Still no wire brush. So I angled the blade at a lower degree, making it sort of ‘sideswipe’ across the cardboard. Additionally, instead of just sratching away at the surface in short lines, I decided to try freehanding the shallow angle and pulled in long, gentle strokes the entire length of the planking.

This worked MUCH better to provide a good looking ‘wood grain’ surface for the planks (photos to follow in next update). This is where I had realized my mistake with the tie down/drain channel plates. What I took to be a torsion slot was actually a section for arresting cables. Additionally the drain channel/tie down plate was not nearly as large as I surmised. They are apprioximately the same size as one plank (6" wide). I also discovered that I need to spend a bit more time figuring out how to make a competent series of “C” slots for the tie down plate. Freehand was a nightmare of varying size, even with my magnifiers in place.

Last note, there is no serious view of the deck across the fore, amidships and aft portions of the deck. Each major section of the deck has different spacing between the planks and tie down plates, plus the arresting cables are at relatively ‘uneven’ spacing across the deck, depending on where they are located – again, aft, amidships and fore – and I haven’t found a good resource yet to provide me visuals that are worthwhile.

Okay, I lied, not that short.