WIP: IDF Megach 3 (M48A3) circa 1973

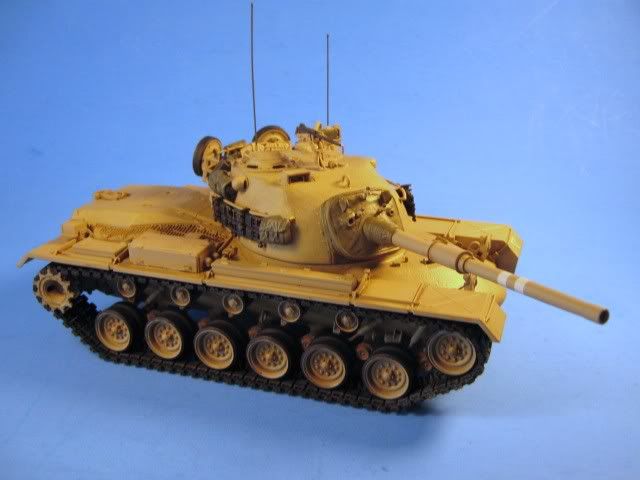
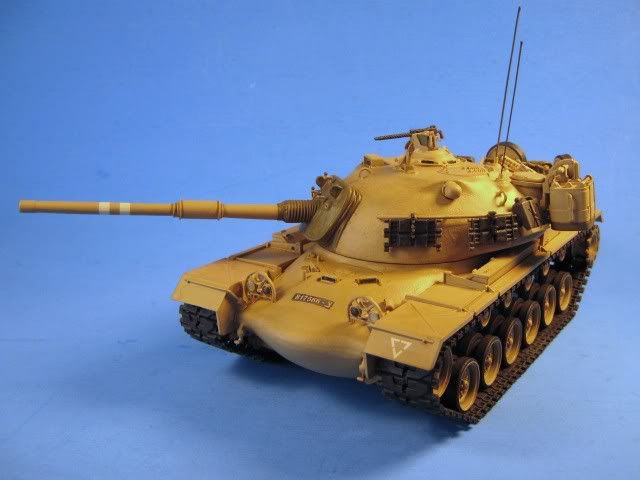
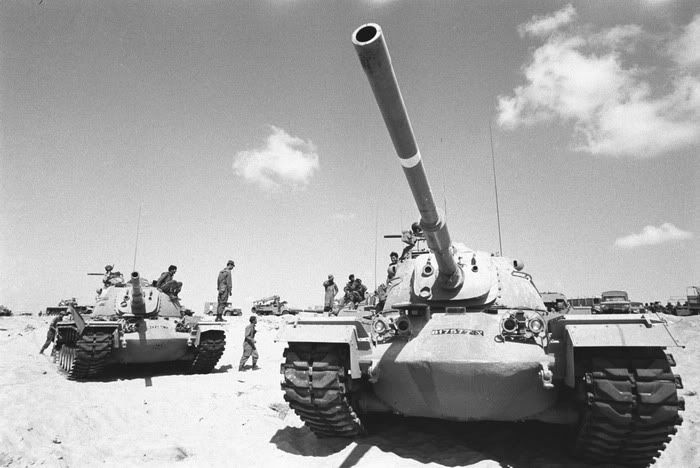
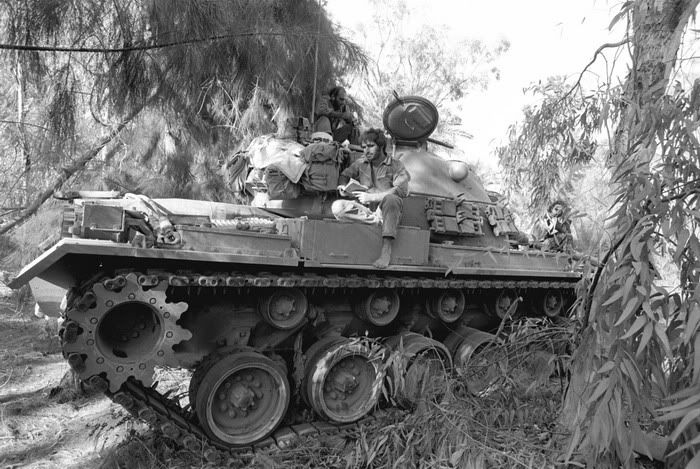
This is my latest project for a customer. It is an IDF Megach 3 circa 1973. It is basically an M48A3 with a 105mm L7A2 (US M68) barrel. Here is the actual tank.


I started with the Tamiya M48A3 by taping off the motorization holes from the outside and filling the inside with a thin layer of casting resin. Once cured, remove the tape and sand smooth. It is a quick and easy way to deal with motorization holes.

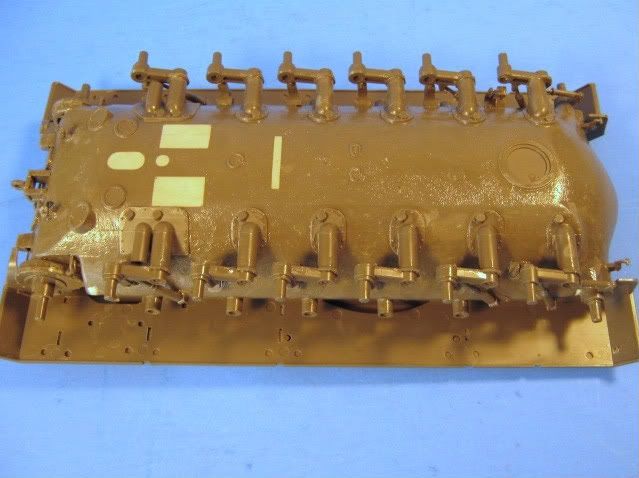
Next, I lowered the roadweels by about 3mm since Tamiya’s kit was based on a vehicle without and engine and it sits too high. I simply cut off the small pin portion of the bumper attached to each roadwheel arm. This allows the arm to move up about 3mm and the tank to sit properly.

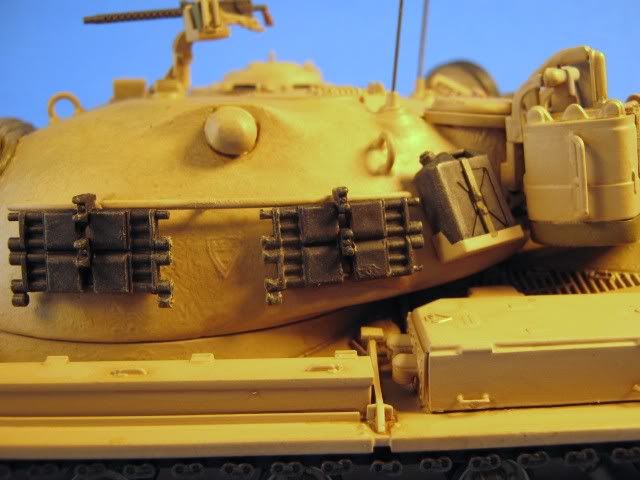
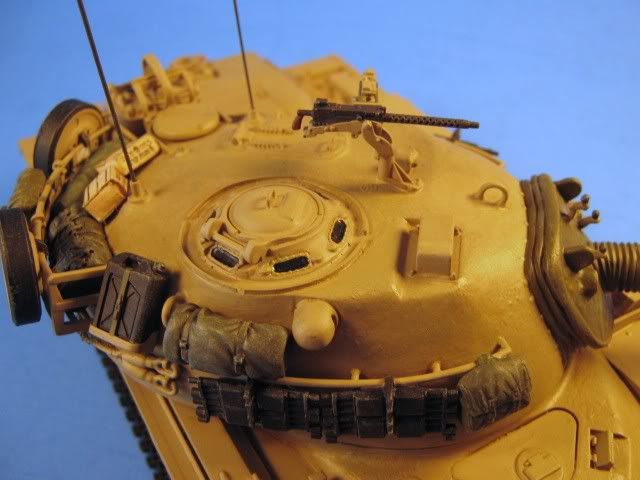
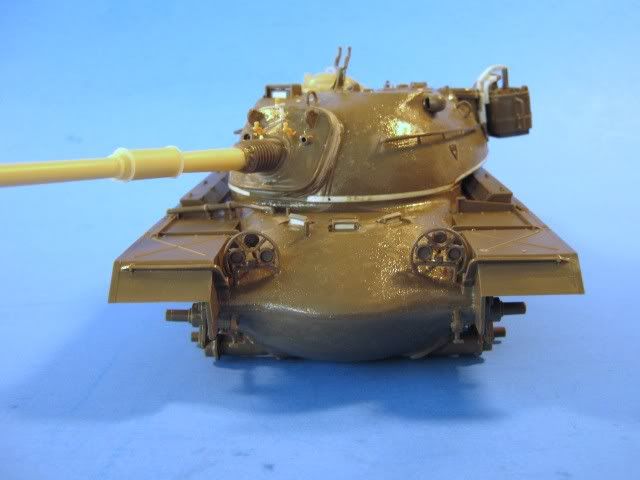
Next, I cut off the kit barrel just past the slinky section on the dust cover and mated a Verlinden Israeli L7A2 barrel from their M48/M60 update set. I also removed the commander’s cupola ring from the turret roof at this point in preparation for installing a Sherman early commander’s cupola. I made the fabric cover around the mantlet out of A&B putty as well.

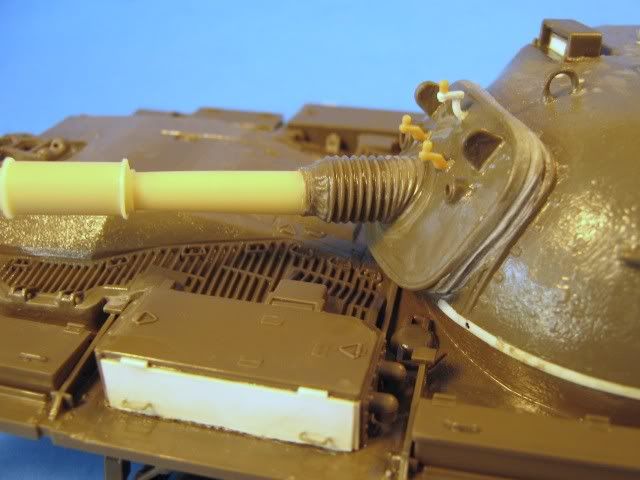
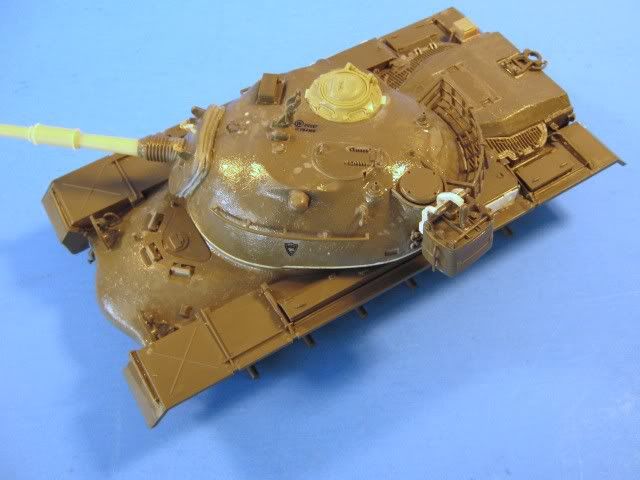
I added strips of 0.040 styrene stock to the lower turret half to raise the turret up about 2mm as well since it is a bit squashed in the kit. Once the basic construction of the turret and hull was complete, I gave them both a bit of cast texture. To do this, I wet sections of the plastic with liquid glue, then stippled the surface with an old paint brush. Another pass of the liquid glue toned it down and blends the texture look like cast steel.

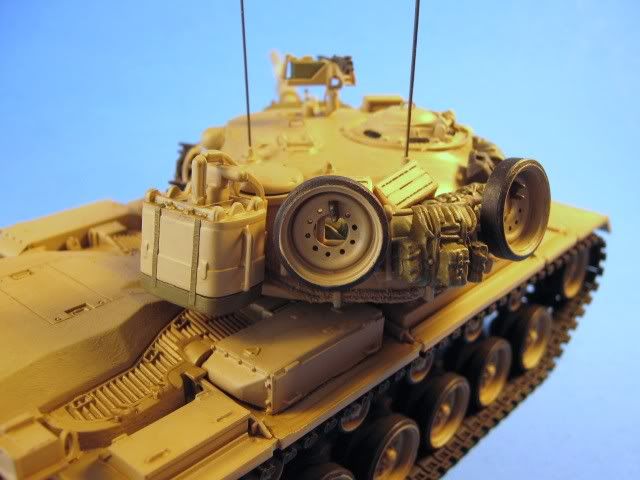
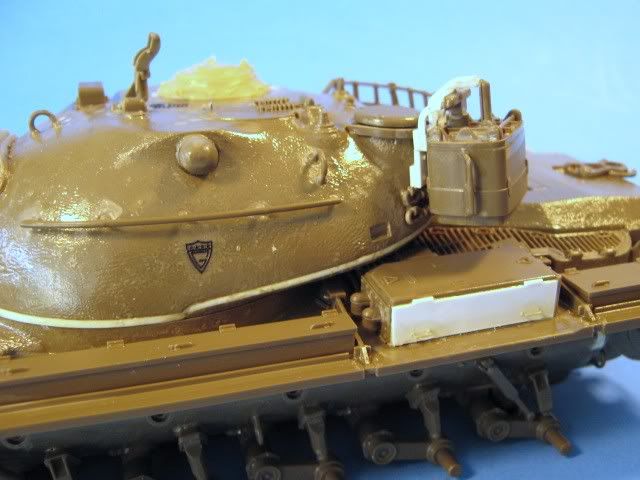
After the cast texture, I installed the Sherman cupola and a .30 cal MG mount on the turret roof.

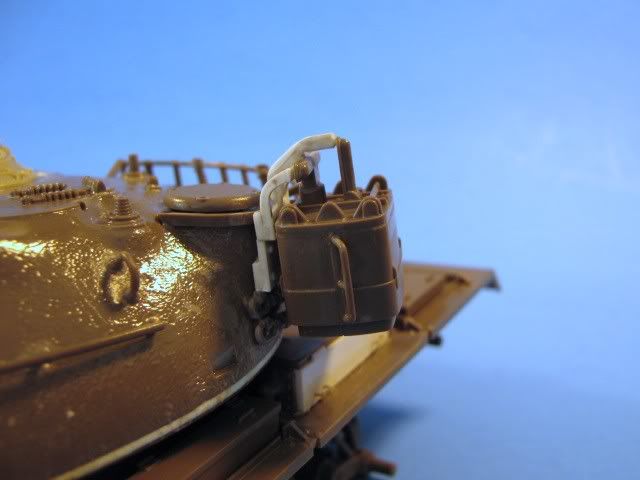
I also added Archer Surface Details casting numbers and symbols to the turret and hull. I also constructed a storage mount for the search light and modified the air cleaners to the larger opening Israeli type.

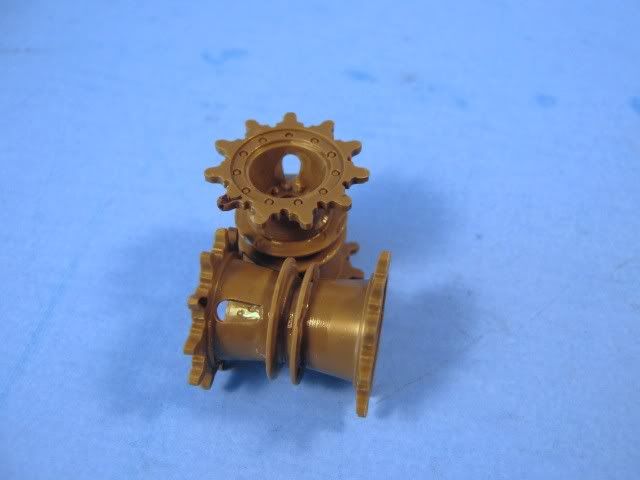
Lastly, I cut the mud release holes in the sprockets.

I also added bolts and smaller details here and there, along with a Tank/Infantry phone to the right rear fender.
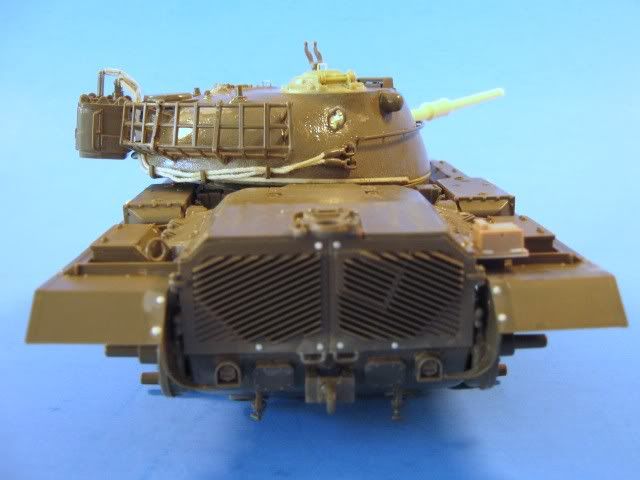
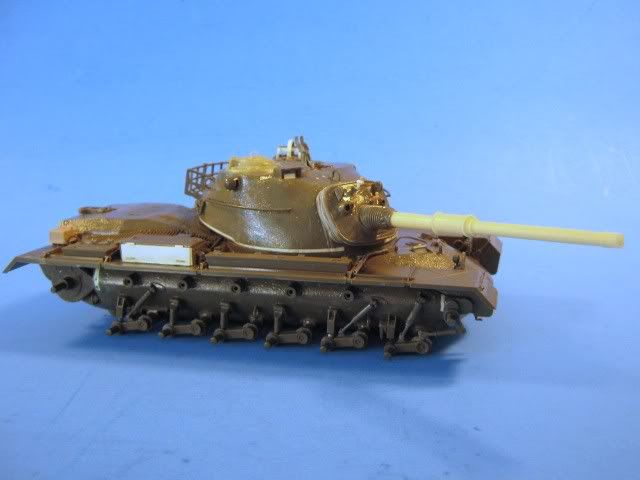
Some overall pics.

Now its off to the paint booth and markings. It will also get a set of AFV Club’s excellent T97E2 tracks on it.

As always, all comments welcome, so let me know what you think.

Gino - Nice work…great fixing of the kit’s short comings. I love the Archer surface details…good stuff.

Can’t wait to see some paint!!

Rounds Complete!!

Well, Sir…now with all those amazing fixes and heavy research, you are being compensated with at least $1500…right???[whstl][whstl]

in the photo of the rear of the turret there is a large box of somekind with something white going over the top. What might it be? By the way the .04 shim for the turret answered a question that’s been going thru my head lately

gary

Thanks for the comments guys. She’s moving along. I hope to get some paint on her today.

Yeah, I wish. Nowhere near that much. It really didn’t take that long to do the fixes and changes though.

I think you mean the Xenon serch light storage mount. It holds the search light when not mounted on top of the barrel.

I’ll be following this one like a flock of gulls and a shrimp boat…

Like peas n carrots… ! Looks good…!

thanks! I’ve never seen anything like that before. Didn’t say it in my previous post, but I really like the way you created the casting texture on the surface. Not too over done; yet it shows up very nice. You do nice work Gino, and it’s always my pleasure to look it

gary

Looks good Gino. When you get it painted, get a shot of the turret with a good shadow to show that texture.

Nice work dressing up the older kit Gino, definitely going to shine once you get some paint on it. [Y]

Thanks for the comments guys. I hope to get some paint on it soon and will keep you posted.

The Magach 3 is done. I sprayed it with Krylon Khaki from a rattle can, then proceeded to weather it with a couple sandy acrylic colors, then drybrushed with some Model Master Armor Sand. I also drybrushed some steel on the tracks and drive sprockets. The stowage is various packs from the spares box and a couple Verlinden IDF ration boxes. I also secured the spare road wheels with center guide teeth. The markings are a combo of Verlinden dry-transfers (inverted triangle), spare wet-transfers (barrel bands), and home made wet-transfers (IDF registration #s).

Here she is.


Some close ups. The cast texture on the turret and hull came up nicely, as well as the casting marks.


More pics here.

I think it came out nicely and it was a fun conversion. Let me know what you think. As always, all comments welcomed.

Hello Gino,

I like your build a lot, the conversion is really nicely executed. Personally I have a problem with the painting of the tank - too little color variation for me. If I was painting the machine, I’d add some shading, but I wasn’t. Like I said, it’s just me. Looking forward to see your next models - keep 'em coming and have a nice day

Pawel

Thanks Pawel. There is more variation in the color (quite a bit actually). I think the lights and/or camera washes it out some.

She came out really nice Gino! Your customer should be roud to display it!

Brian

Rattle Can!!! Hole Excrement!!!..That almost seems like firing damp powder for you!!! Then again…it looks like a complete burn and on target!

Nice…looks great…a bit clean but very nice. Love the casting and casting marks…they turned out great.

I am sure another very satisfied customer [;)]

Rounds Complete!!

Thanks Brian and Mike.

Yup, I find rattle cans work just fine for overall one color finishes. I am using them more and more. I guess I need to work on my camera skills. The model is weathered pretty well and has quite a bit of tonal variation. I guess it is washed out by the lights.

Looks great, Gino.

Did you scratch the mount for the turret .30-cal?

Thanks Russ. The .30 cal mount, gun, ammo cradle and box, pedestal etc. were all left over from another kit (I believe it was the AFV Club Centurion Sh’ot Kal '73).

Now that is nice.

The color is spot on IMHO.

One question, did the Israeli’s retro fit the old style cupola, or did we ship them that way?

G