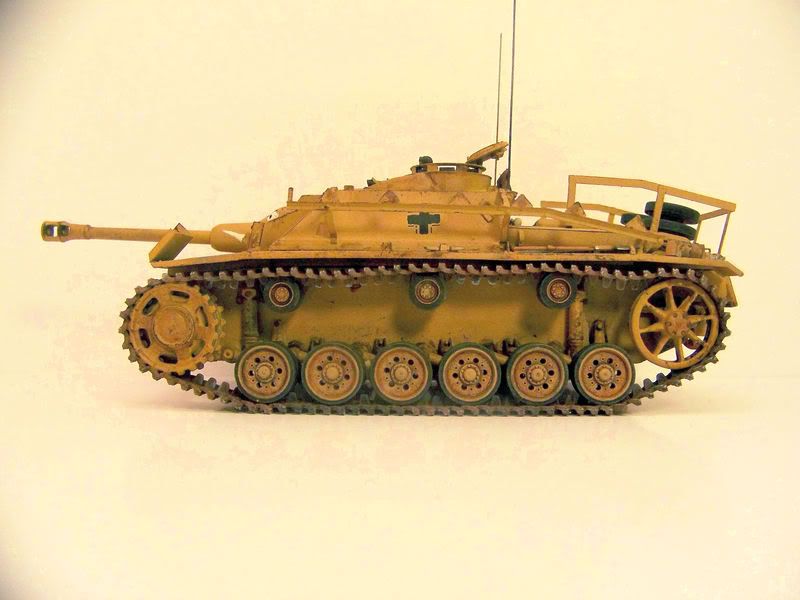
What is the best way to take tank photos?...

This may not be the right place to post this, but since I’ve seen nice photos from you guys I thought I’d go right to the source.

Problem: When I look at the photos I take of my tanks, they don’t do the real thing justice. The colors aren’t vibrant and some of the detail is lost; or detail that doesn’t pop so much on the actual model is accentuated. A good example of this is the “whitewash” on my SU122 in my Winter Camo’ tutorial, it is too dominant…the green next to it is muted. Same thing with the rust, it’s blah brown…The contrast of colors just isn’t there[|(]…the photos look “flat” for lack of a better word. I tried a different computer monitor and that helped, but it’s still not what I was hoping for…

I used the set-up shown in a past issue of FSM…the two light thing…I don’t have any light diffusers though. I’m using an HP 5.1Mp camera (no tripod) , lens setting at macro, auto-focus, no flash. I’ve moved the lights back and forth, I’ve tried using the flash too…several different set-ups, but I’m still not satisfied[banghead]. Maybe I’m expecting too much, but as I go through the my tutorial I need the photos to compliment the explanation.

any ADVICE???

Yes, please advise. I’m having the same problems and really would like to know any tips.

Dale

[8D][tup]This should get you started my friends…

http://www.missing-lynx.com/articles/other/bgphoto/bgphoto.htm

Steve

I will second that!

As a photographer, allow me to shed some…err…light here:

Step one, if you are going to use external light sources, make certain they are more ppower-compact and less incandescent, as for a typical point and shoot camera (regardless of the megapixel rating) it’ll turn out heavily skewed to the yellow side.

Second, a tripod is a must, and you don’t have to spend a ton of cash on one…there are tiny tripods at best buy (and other places like that) for 15$ that reach the height of a tank, great for getting that proper level.

A Tripod will also allow you to get better (sharper) pics if the light isn’t the best (indoors for exaple)

I would like to point out at this point that an SLR (or dSLR) is a must, but it’s not, it’s just a very good idea as a true SLR (as opposed to the over the counter point-and-shoot) will give you more options to work with, but assuming you have a PaS, look in your manual to see if it has options for dealing with light. My dSLR has about 20 options for dealing with indoor/outoor light spectrums, and belive me, it makes a difference. Try them out, and see what most accurately reproduces the effect you are looking for (truer whites, better greys, not so much yellow, etc.)

Watch the clutter behind/around the model, it will take away from the finer details. Built a simple box, spraypaint it white or light grey, and use that, with nothing to destract from the model, the pics will turn out better.

If you can shoot outdoors, do so, the lighting will be better, but again, watch out for distractions, use your lightbox you just built.

I have a few suggestions here too…I’m not a pro but I am an experienced amateur…so I do know a bit about it.

If you can afford an SLR you should get one. I use my Canon Digital Rebel XTi most, the Nikon D40 is another good camera in the $500 range.

Most of you probably won’t want to drop $500 or more on a camera and decent lenses, so I’ll offer some tips that I learned before I had an SLR.

-Tripod. Get one. Plain and simple. Get a real one and not one of those flex-leg pocket ones - it needs a rotating ball head assembly, should sit on the floor, and should be tall enough to take pictures from 12" above your photography surface. I got my first one on eBay for about $20 and it served very well for model photography.

  • Lighting is always hard with incandescent bulbs - what may work better with a point and shoot is time exposure. It’s what I did most when I used a PaS for model photography. You simply use a longer shutter speed (in the 5-10 sec range) and let ambient light do the job. I found that to produce truer colors and correct depth. You should set your ISO (light sensitivity) as low as it goes if you are using a PaS because on cheap cameras all high ISO is good for is creating noise (a multi-colored grain effect that does not look pretty).

-Never use flash. The only flash that works for model photography is a macro ring flash and those only fit on SLR’s.

If your camera has no manual controls, especially shutter speed, you will probably need something else.

To add to what the others have mentioned, a light tent is one of the best investments you can make in getting good photos. Diffuses the light and allows for even all-around lighting. Here’s my setup…I use 4 light sources, 2 that are the goose-neck clamp-style incandescent student lamps and 2 that are positionable desk halogen lamps. I use a Canon Rebel XTi Digital SLR and a remote trigger switch to avoid any camera shake.

If you don’t have ‘light defusers’ you can just use wax paper (baking paper) over the lights, with a piece of tape over the area that covers the bulb. And obviously using a solid coloured backdrop, probably in a light gray hue. Also make certain that the lamps you are using are of the same make and with the same type of bulb. With the camera you have, when you take pictures, you want to set the camera down on something stable, since you are not using a tripod.

You have to play around with distance and light and see what you can come up with. Other than that, the biggest difference you will see is in upgrading your camera. The absolute best results are with an SLR. The two basic beginner models were mentioned, the Canon Rebel XTi or the Nikon D40 (D40x is a little bit better), but these are much more expensive than simple point and shoot cameras. However, the image sensors and lenses are far better than in point and shoot cameras.

also if you can control the speed and apature use the largest number {smallest hole} you can this gives more depth of field example shooting at a 500th of a second and f1.4 is a very short depth of field shooting at 125th and f16 is much larger depth of field. wide angle lenses will also be easier to get that depth of field, I have some lenses I can set at f22 and from the shortest focus to infinity is in focus.

having said that i use my cheap digital camera with flash and I have a couple of the new energy saving bulbs that I aim at the model too…

Cheap Light Box

Somebody posted that a while back. I’ve tried it and it worked out rather well, especially if you want a really compact setup.

One of my first tries on it a while back with three table lamps and daylight bulbs and custom white balance,

The light was soft enough but I need a shorter lens next time to get a bigger DOP. The noise level was also higher than expected at iso400.

Wow, armed with this little bit of info, my pics are already looking much better!Thanks for the info!

Here is a before and after shot of my boars head StuG G…

Before

After

Same background, much less lighting. only a single 60 watt Reveal bulb. I think the colors and focus are much better on the second and it was taken in full manual mode where I have control over all settings.

WOW GUYS, fantastic information!!!, I didn’t expect such a great response…never underestimate the power of GROUP knowledge. Funds are a little tight now, so I’ll probably start with an inexpensive tripod, some more lighting, and a “make-shift” light box. I think my camera has F-stop setting control so I’m set there…I’ll have to give it a try.

Thanks a lot!!![#toast]

Slightly more information here.

DoF (Depth of Field) and aperture are related. This is more useful for those with a SLR or dSLR than for those with a Point and Shoot. And of course anyone with a dSLR these days hopefully knows this info, but here you are:

The larger the f/stop on the lens the less light that is allowed into the camera (thus the need for longer exposure times and a tripod) but the greater the Depth of Field (which is the area in front of, and behind, the point at which you are focusing on.)

An easy test for this, set your tank at a 3/4 view, open your lens all the way up (2.8, or 2) and focus on the insignia on the turret. Take a picture.

Now do this with the lens cranked all the way down (16, or 22) and you will see how much more of the tank you’ll have in focus.

You can get creative with the use of DoF as well, for battle scenes, losing the backgrounds (blurring them to artistic shapes), etc.

ISO on any digital camera is simply the amount of noise inserted into the pic. The lower the ISO, the sharper the pic will be, but the longer the exposure time needed to take the pic (thus requiring the proper tripod) assuming all other settings (f/stop) are the same.

See what fun cameras can be?[%-)]

I have limited experience with PaS cameras, but f/stop is generally fixed, as is the lens length, so that doesn’t leave much room to play with, but as Jester has seen, even basic amounts of info can improve pictures dramatically.

Cheers!

Try to take the picture outside, you l’ll get better light.