I’ve got this one all but fully built. I haven’t assembled the front and rear track guards yet, ‘cos I need room to assemble the track around the runnin’ gear.
Bison decals in their line drawings of this tank show and mention the armament to be DP-28’s. They are actually MG-13’s fitted with a flash suppressor which is similar to the ones found on the DP-28 or 27. So I raided my russian Assault Infantry set by Tamiya and dug out the DP-27’s and cut off the suppressors (there are two in the kit), and cemented them to the MG-13’s. One of these guns in the set, I had actually painted already, but that didn’t stop me!
The turret hatch will be left open to accommodate a figure, Japanese or Chinese - I don’t know yet!
These tanks were actually abandoned at a river crossin’ by the Chinese, a few tried to ford it! They tried an’ died! [:D]
it’s a simple kit to throw together, there isn’t anything interior wise, and it’s very mundane I feel… I put mine back in the box and said, “meh” kinda boring really…
[:P] That just means that DML did the job right in classing this as a “Smart Kit”…and priced at under $20, it’s aimed at a broader demographic as opposed to the 3-in-1s or the “Super” kits. From this and other builds, it looks like it can build up nice and quick and still have a good detail level. There are times when that’s just the ticket between major projects to avoid burnout.
For those inclined to the more complex offerings, Tristar has their I-A with full interior coming out in the near future. That means that a good kit is available for the whole spectrum of builders, a good thing IMHO and rare to boot.
Dragon have put out this kit that has components for a 2 series and a 3 series rolled into one, and in my opinion that is not ‘smart’! Nevertheless it is a nice kit to build, but you jus’ need your references to hand in order to make sure your buildin’ the right version you want!
James, I think your missin’ out on buildin’ this. If you wanted to super-detail it, you’ll have your work cut out, and thats jus’ for the exterior detailin’! [swg]
For instance, I’ve checked some references and found that this version did not have the right rear vision block on the hull. So with care, I removed the vision block with a scalpel, then filled the aperture with some 1mm styrene sheet and liquid putty. I did not have much room for maneuver when sandin’ ‘cos of the delicate weld lines, but the liquid putty made things a whole lot easier. ‘No weld seams were harmed durin’ this process’! [:D]
This liquid putty (Mr Dissolved Putty) is absolutely awesome stuff to work with, its not porous and doesn’t shrink once its applied. Also, by wet-sandin it, its so easy to cut back! [:D]
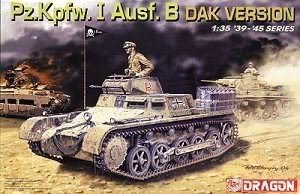
Eddie I hear ya. My version is the Ausf B. has some nice PE and the like, but I don’t know maybe it’s all the crap clear parts and what not that are a turn off… I’ll eventually finish it. It’s a DAK version and came with the set of DAK figs that you just finished. All the ports should be opened only because of the immense heat in the desert. It’s not a smart kit, I think it’s a relatively new release, maybe about a year or two… here’s the box art,
maybe it’s just a lack of interest in the subject at the moment, what with all of my modern stuff going on it’s hard to get into the early stuff! One day!
All depends of you. I don’t have that version in my hands yet, but knowing the subject, it should not be that difficult to make it for the European Theater. Don’t glue on those filters yet… that would be a start… By the way, there is a lot of differences between the Ausf.A and B, starting with 60 cm longer on the Ausf. B hull. The exhaust is a lot different too. So is the suspension.
One of the biggest advantages that the I-A Smart Kit has over the I-B DAK that you’ve got is the Magick tracks. The DAK kit doesn’t have them but instead has the standard on-sprue indys…each one with 5 sprue points and enough tension to zipper and intire row in half if you don’t release the tension properly. Ask me how I know that one… [(-D]
I’m right there with you on the clear visors…I remember when they first came out with those the first thought was “why when only 1 part needs to be clear?”[%-)]
Bill, i’ve already trashed these Magic Track links that come with this kit!! Probably it’s me, but this was my first time in usin’ these things, and in terms of fittin’ 'em, I think they’re the most ridiculous pieces of *hit ever! A step back in my opinion!
[soapbox]
I’ve already ordered a set of MK’s, which I regard as the best tracklinks money can buy! Give me MK’s everytime! [swg]
Magic Tracks are not ‘magic’! If they were they’d assemble and fit themselves! In other words they’re a pain in the *ss! [:(!]
GunTech: I fully intend to do it as a DAK when I do finish it… so that’s not an issue! I’m seeing from Eddies build here that there are some major differences between the A and B.
Bill: the clear visors are definately a waste of material IMHO, and the Tracks, I built the Dragon Panzer IV J and the tracks were on the sprues too and they didn’t cause a problem, then again there is a huge difference between the Panzer I track and IV LOL
Eddie: I think you’ve got the right idea with the MK tracks, a buddy of mine swears by them and I have yet to try them. I’m a Fruil guy mostly, and with the Abrams builds I have done recently I have really come to miss the ease of adding them to the tank… these magic tracks are indeed garbage!!!
I think I’m going to finish my M36 Jackson first! I’m converting the AFV club kit to a Korean war M36B2… got the Pershing 90mm barrel in the mail! I keep looking at my Panzer I over and over, and with the little amount of parts, maybe soon I’ll finish it, just to get it over with LOL
The Tristar kits include MK tracks. [:D] I agree with you on MKs, I like them as well but don’t use them on every build. The only thing “magical” about Magic tracks is they are off the sprues and, depending, are bagged as handed links per side, but still have to be assembled as you would ordinary static indys. I’ve only used Magic tracks with the IV-E build but they worked out as normal on that one. They aren’t “clickable” tracks in any sense of the word.
James,
I can’t recall the exact pattern as it’s been a while but there’s a real trick to releasing the tension on the sprues before you remove the links. Basically you want to remove the outer frame of the sprue before you begin removing links and then have to work your way even then back and forth with the different points for each link as the space for cutting is very tight. Unlike normal Dragon practice, the I-B kits only give you about 10-15 spare links in total, so there’s not a lot of margin for error. I’ve done 3 sets of those links (the I-B, the I-B DAK, and a kitbash of the I-B with the Italeri Pzjgr I) and you have to be a little creative and stick with the same pattern or an entire row of 7-8 links will literally split right down the middle with one snip of the cutters. [BH]
Bill, have you seen how the MK Pz IA and B track links go together? They are a breeze, they already have a locatin’ pin moulded into the link on one side, leavin’ you to apply jus’ one pin per link, probably makin’ these easier than any other larger link track set! Also, they’re attached to the sprue in such a way (at one sprue point), that allows for easy removal. [:)]
Great work as usual. I’m going to look for that putty you used. I have a question though. This is the second time I’ve seen a reference to a jig for the links. What is the jig you mentioned? I don’t think I’ve seen any links with one included.
Matthew, usually in MK track sets they include a molded jig that will hold several links for easier assembly with the pins since you have to put two in per link and the tolerances are usually pretty tight to keep them workable.
Fingers,
No jig! Man, that’s going to be some slow work…unless of course you make your own. [;)]