VK-4502 Vorne: "The Berlin Hedgehog" FINISHED PICS!

Hi Guys,

HI–ANYONE WHO’S TRYING TO VIEW THIS POST, PLEASE BE PATIENT; ['VE APPARENTLY “EXCEEDED BANDWIDTH” FROM PHOTOBUCKET WHICH MUST RESET NOW LATER IN THE MONTH. DOESN’T REALLY MATTER, AS I WON’T BE UPDATING TIL I ET BACK NEXT WEEKEND. THANKS FOR AL THE VIEWS, COMMENTS AND YOUR INTEREST!!! BE BACK SOON!!

Well, I’m back in the saddle again with a build I’ve been working on for a while here—slow going, as I’ve been having a number of setbacks with it. Repainting, experimenting, and having to rebuild lost parts. I’ve finally got it to where I can show some progress.

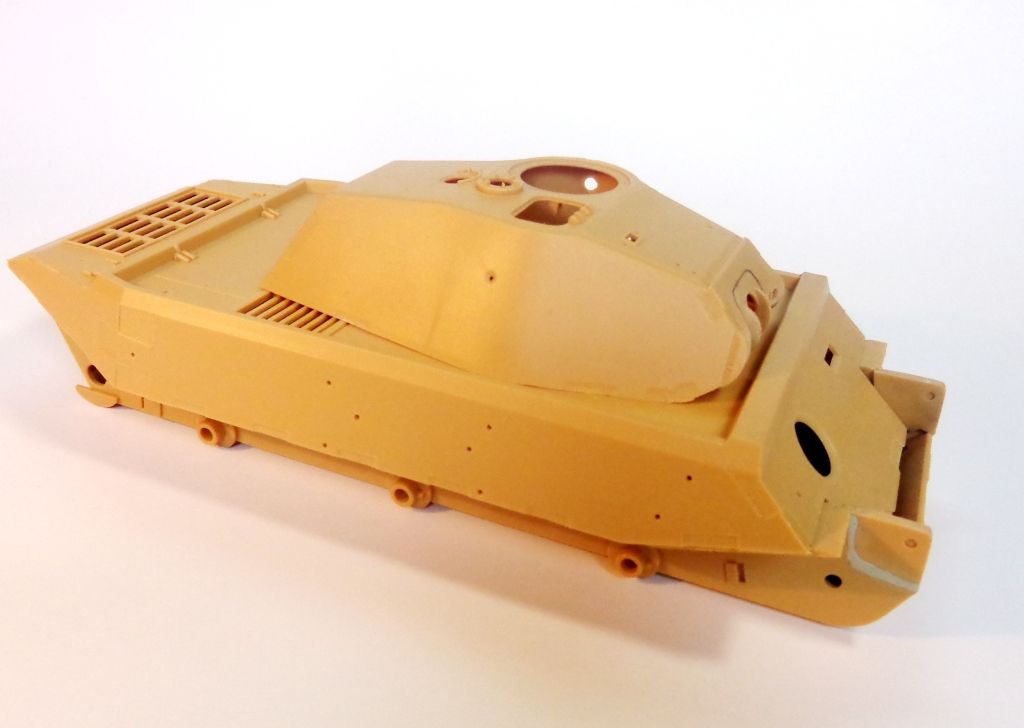
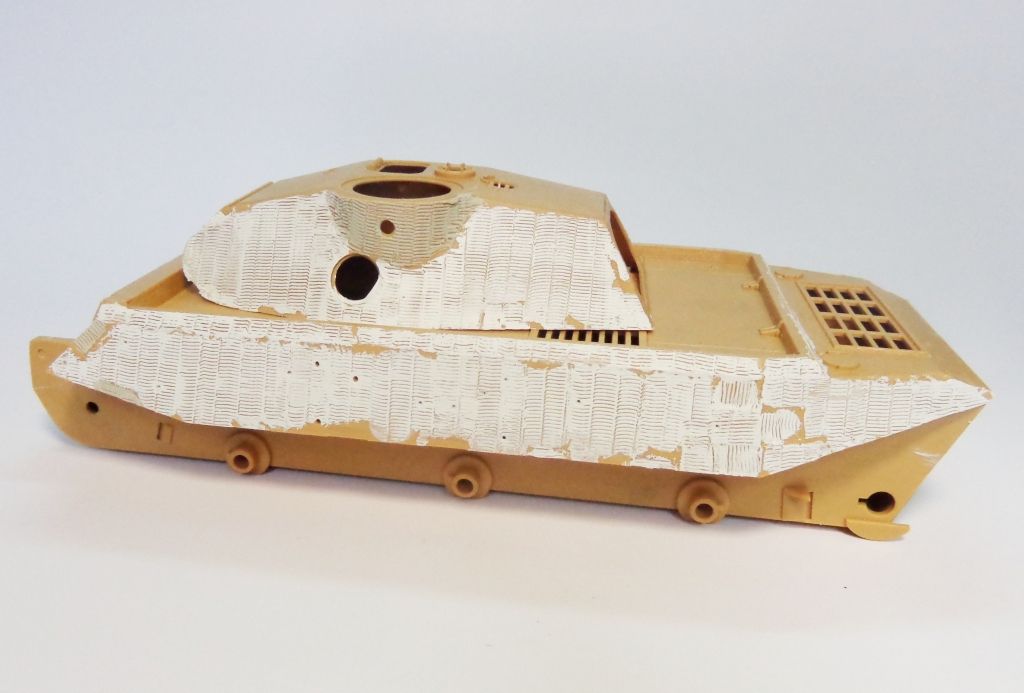
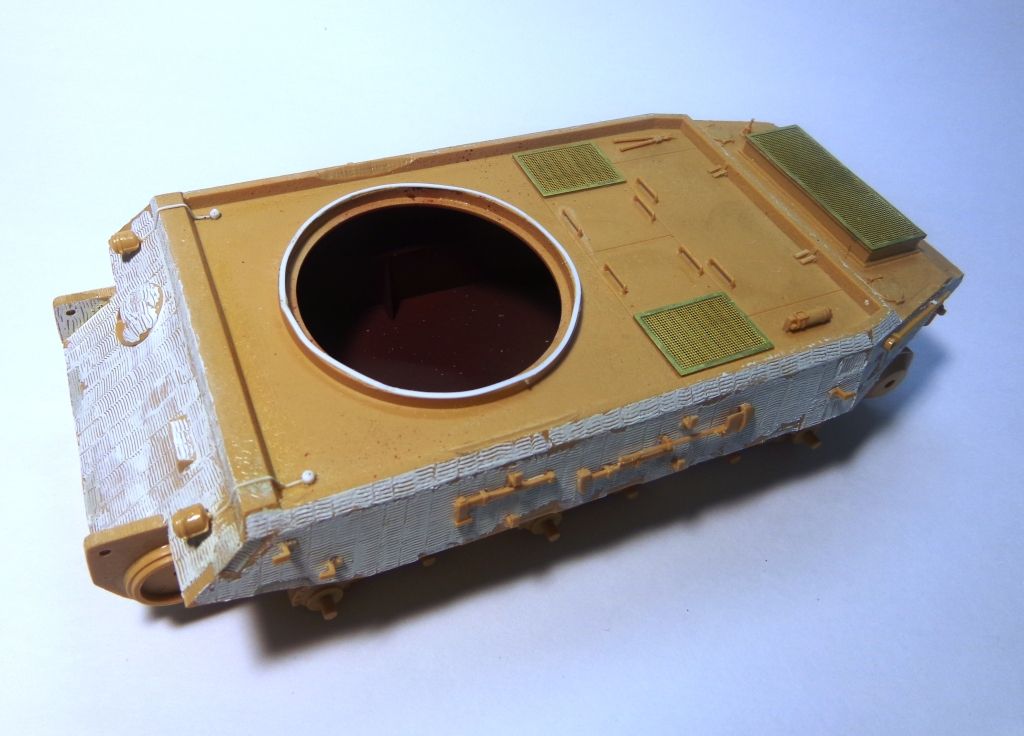
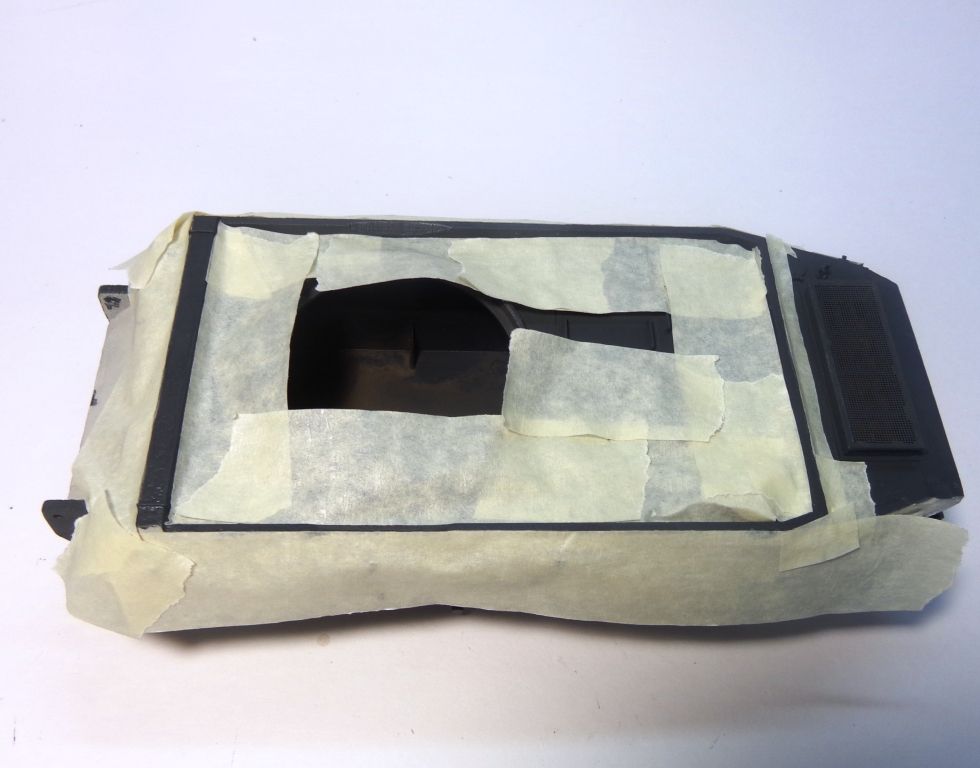
First of all, the surface of the model is too smooth for a big steel beast…I had to fill in the joint between the first hull addition that you put on.

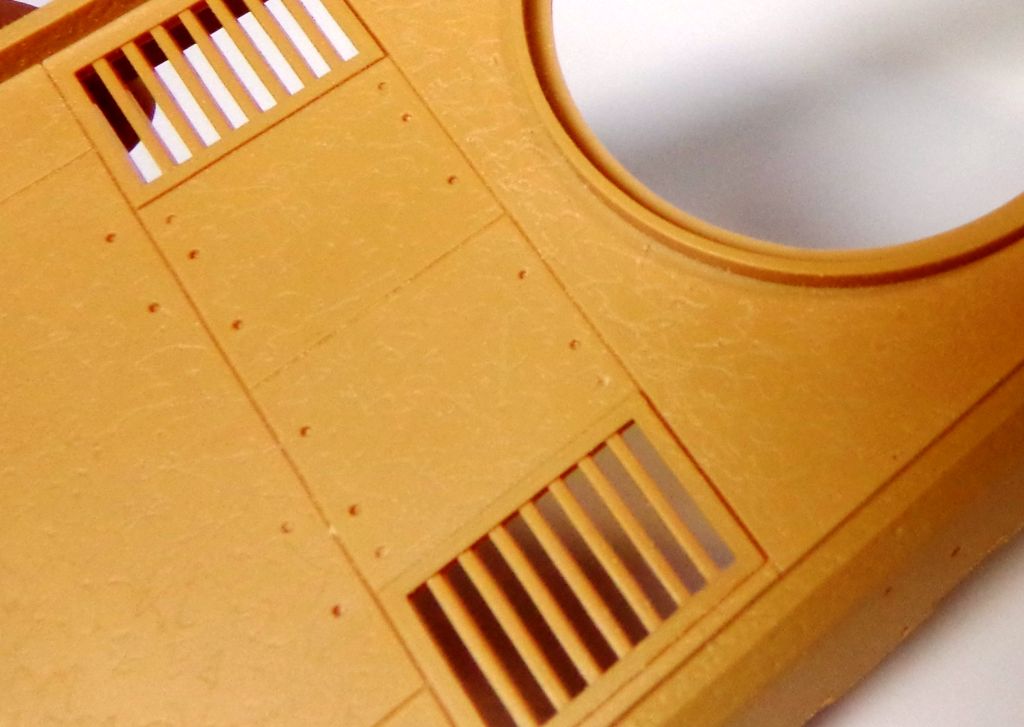
I used my Dremel to bump and grind in some texture to the hull.

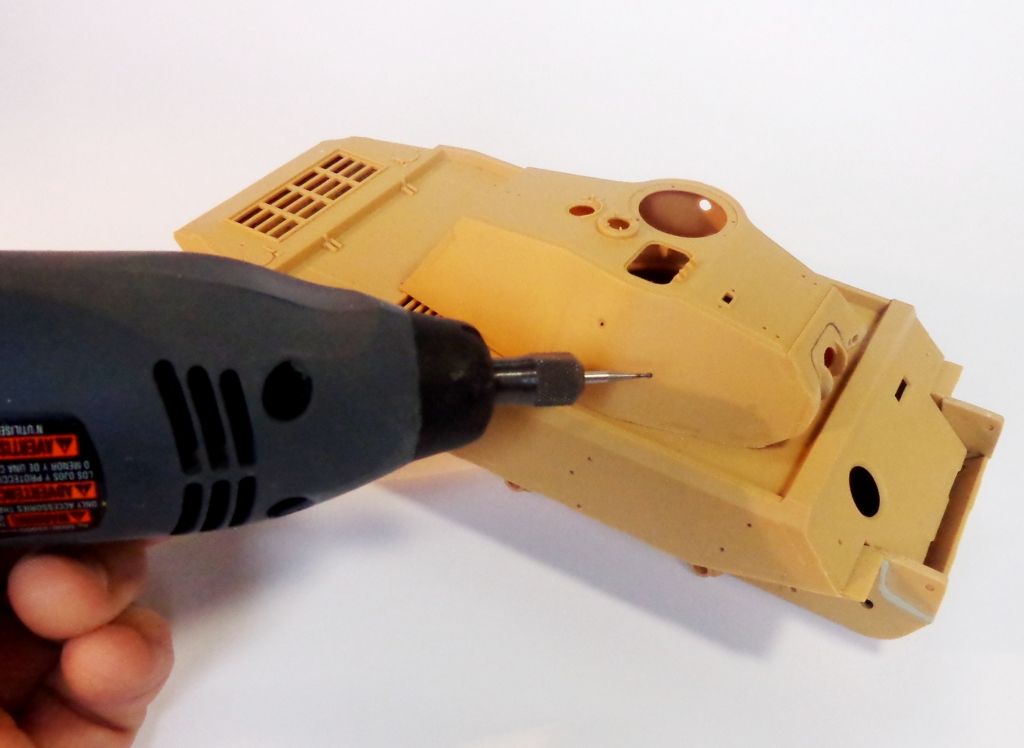
Not sure if you can make it out here…

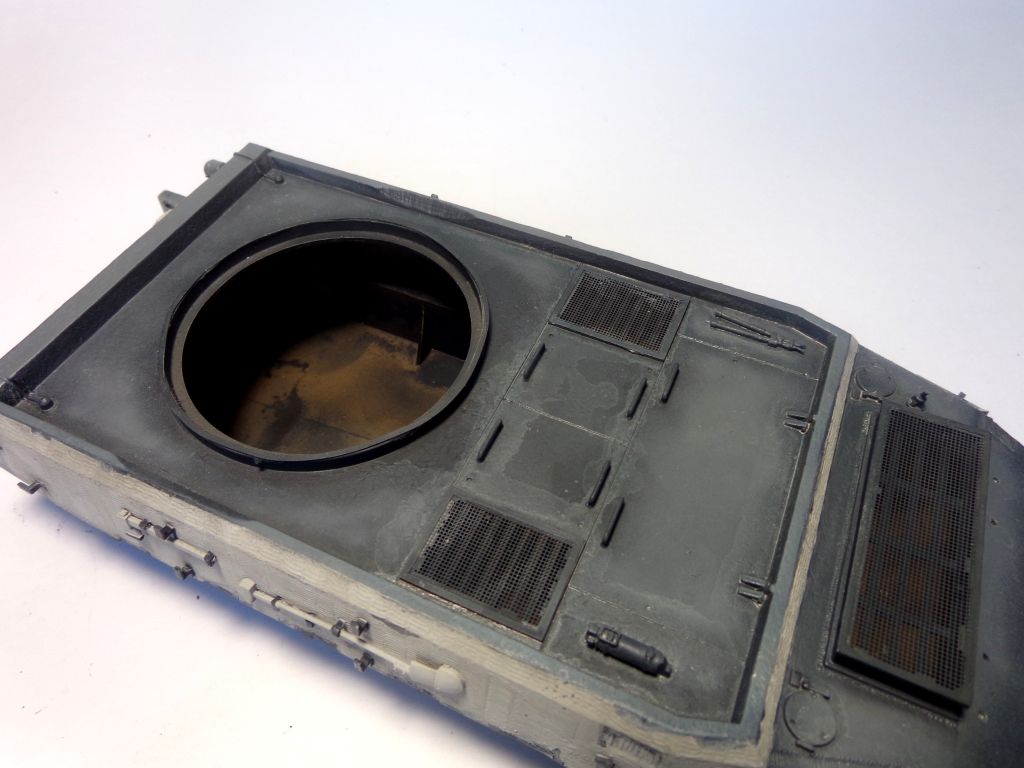
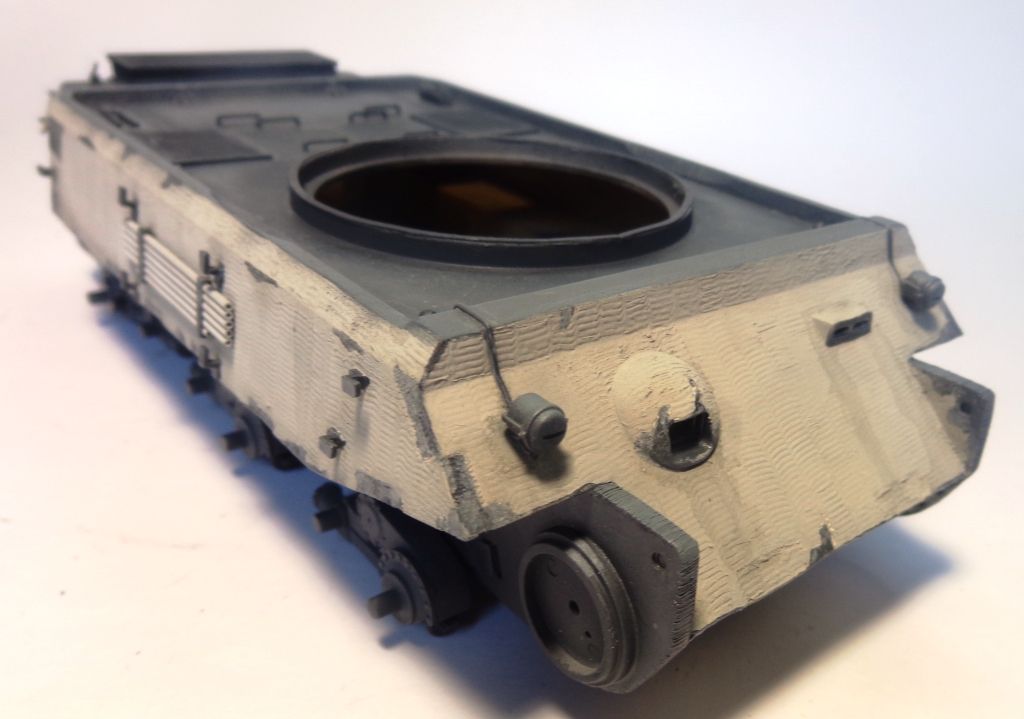
Next—I"m adding zimmerit from Tamiya putty. Just trying something different; usually I use Squadron’s White Putty. There’s really no difference at all, in my opinion, after using it. These are Tamiya’s Zimm rakes,

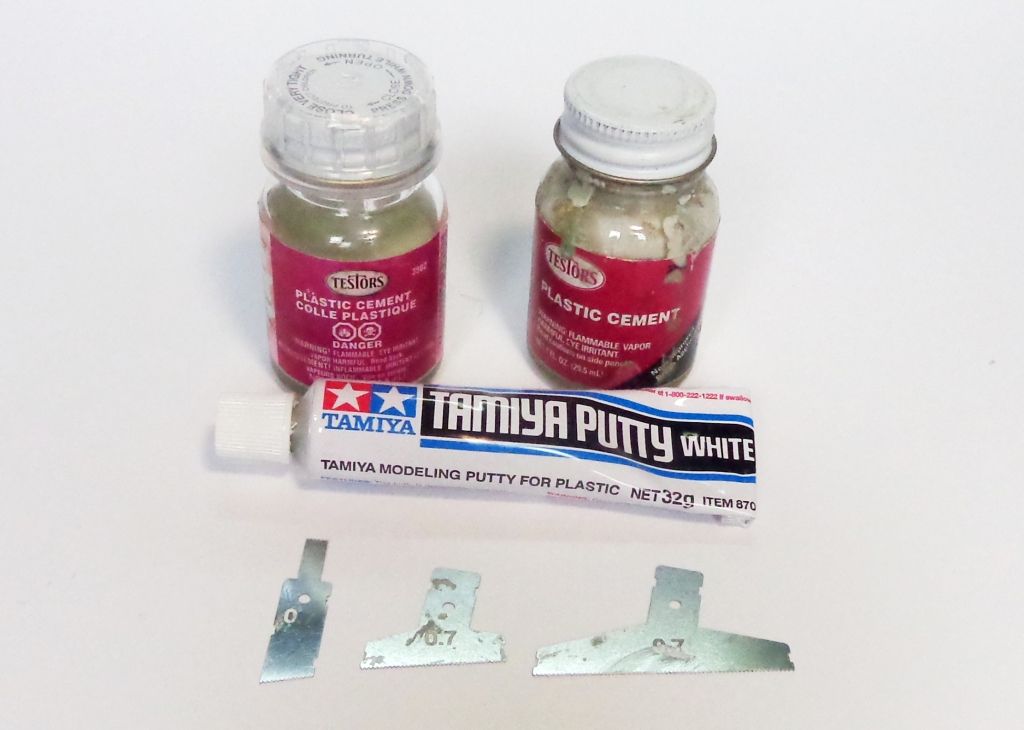
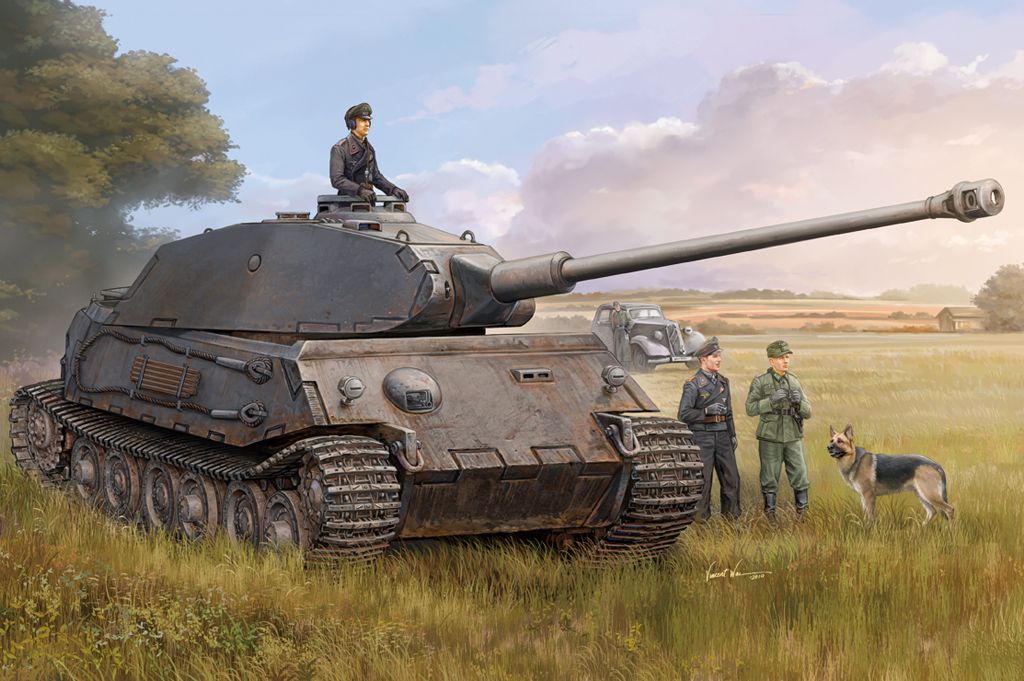
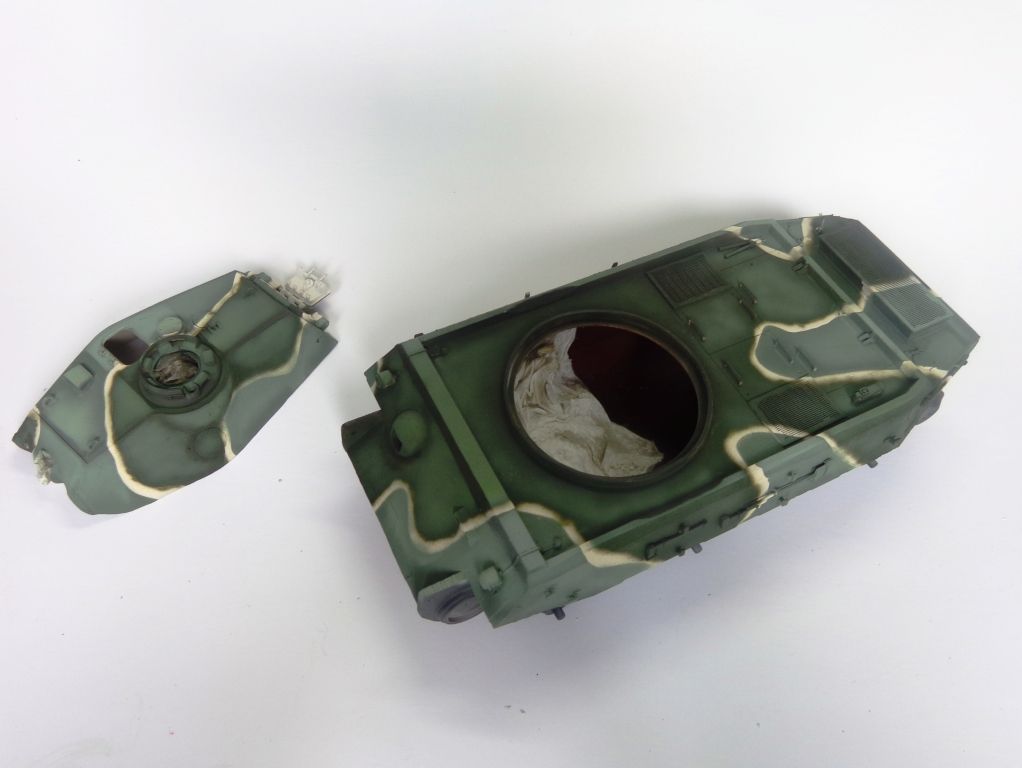
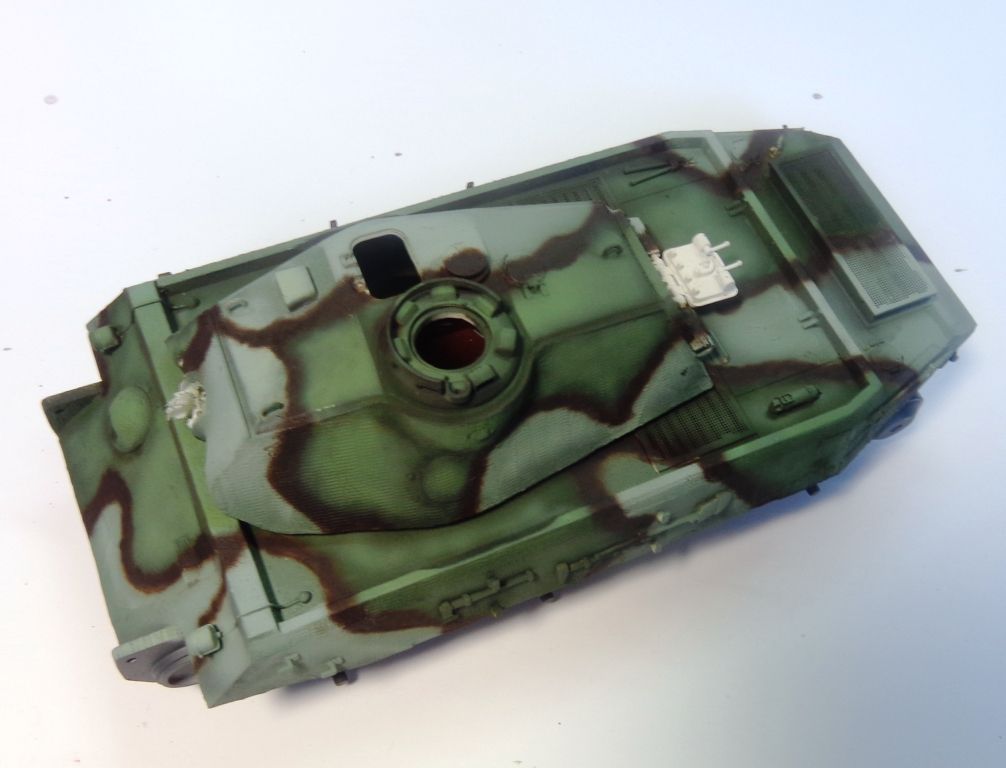
Got some “Field-applied” mojo going here. The three protoypes built were allegedly used in combat at the end of the war; I want to portray mine as being dressed for war, with some late-additions of zimm and a cool paint scheme.

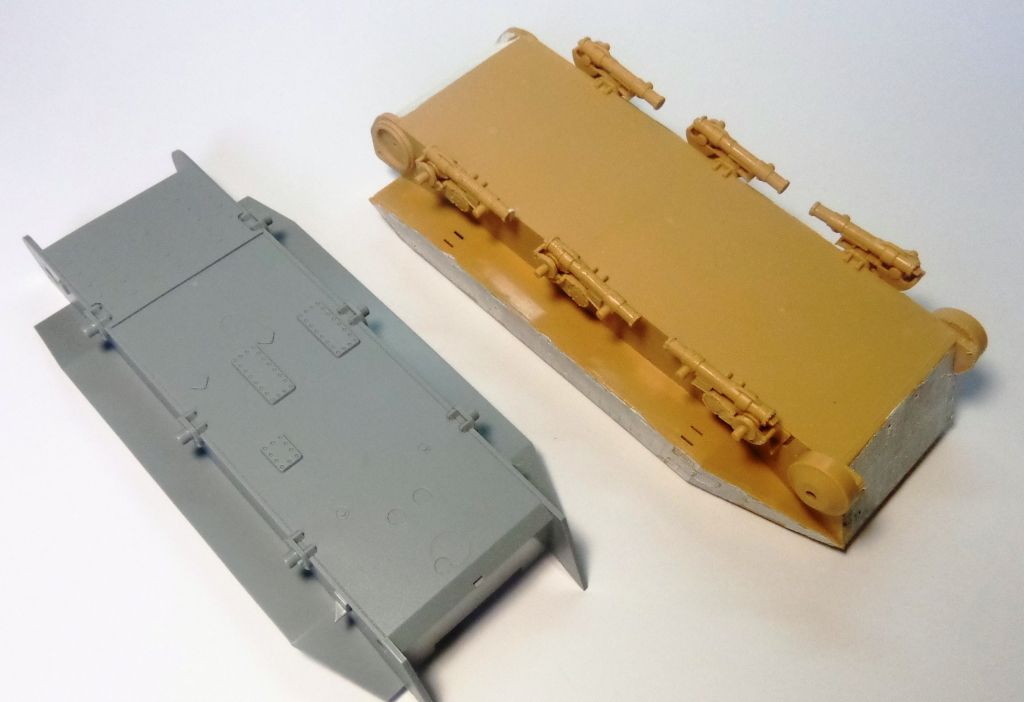
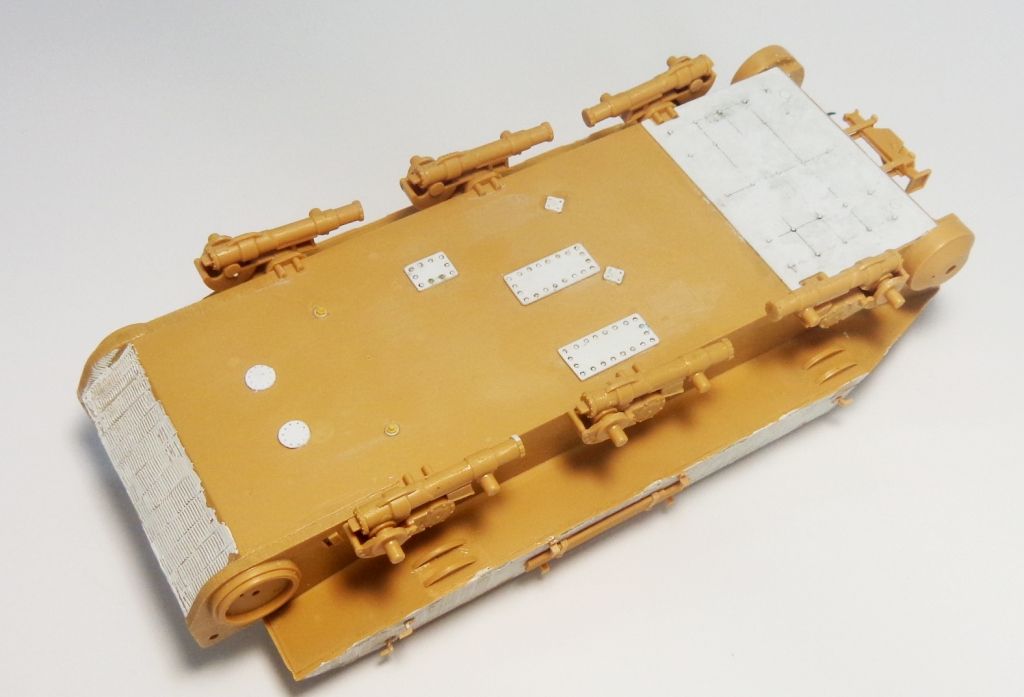
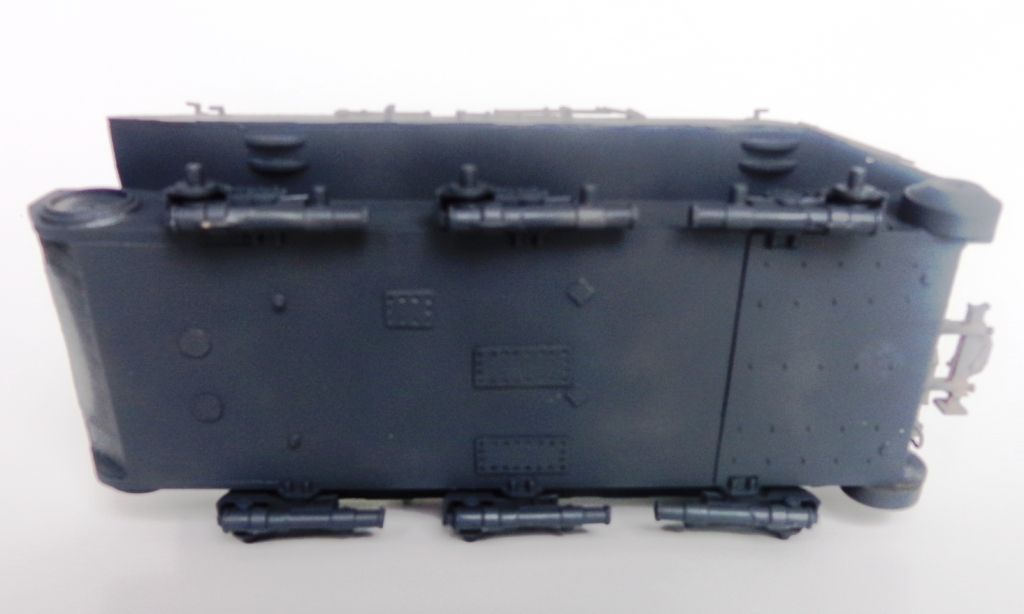
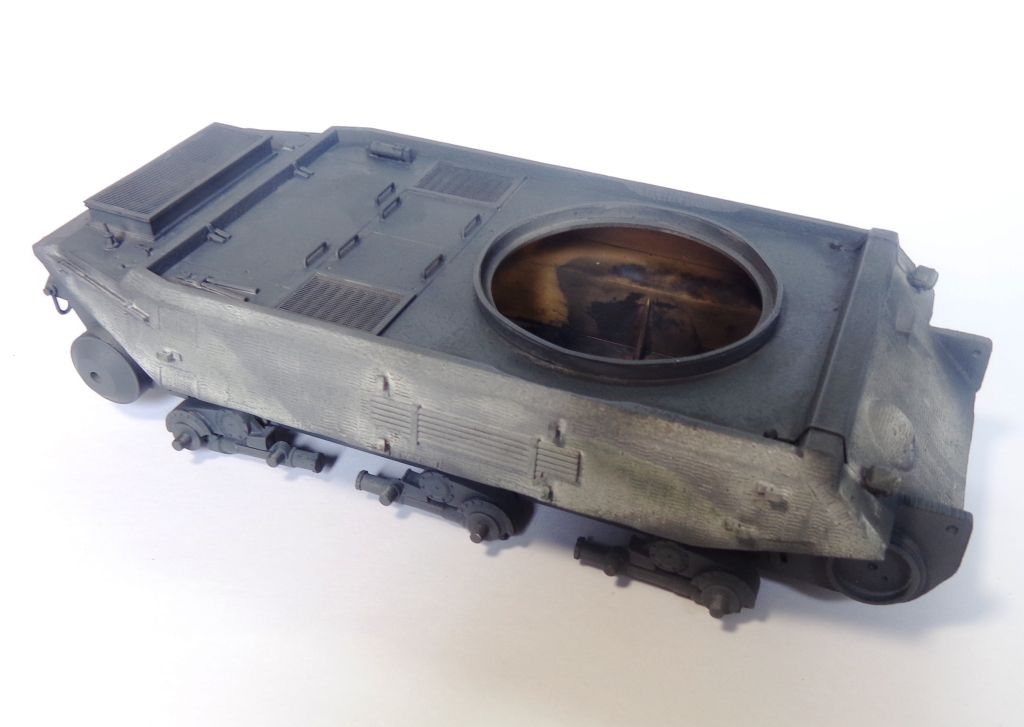
Next, the bottom of the Trumpeter model has no detail. I used the bottom of the HobbyBoss “Hintern” model as a template for the mods,

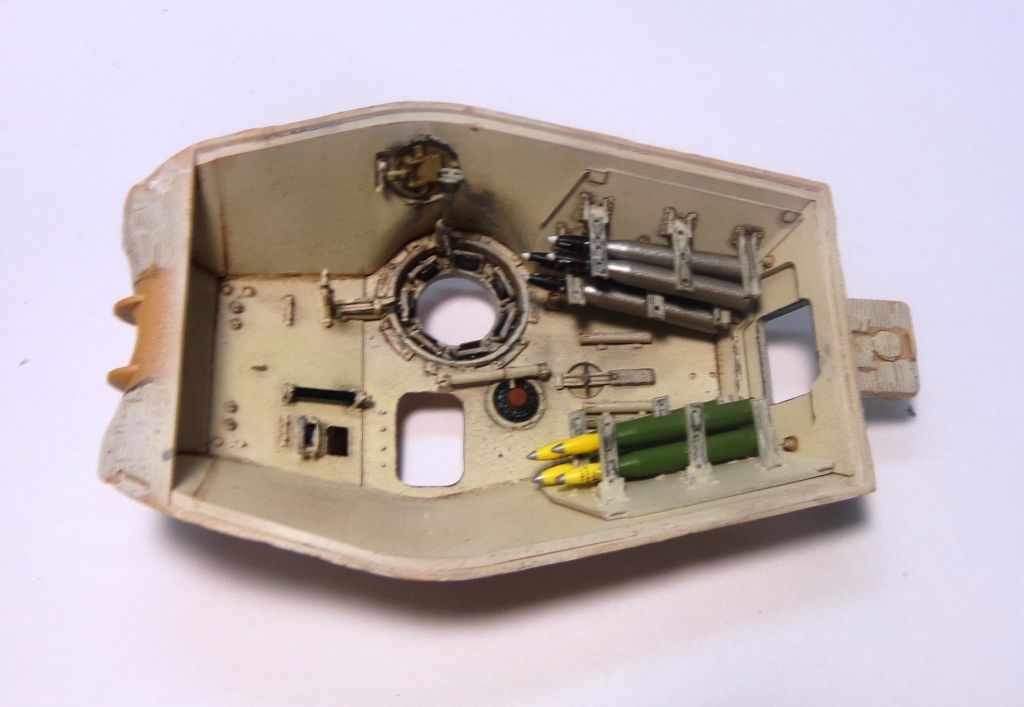
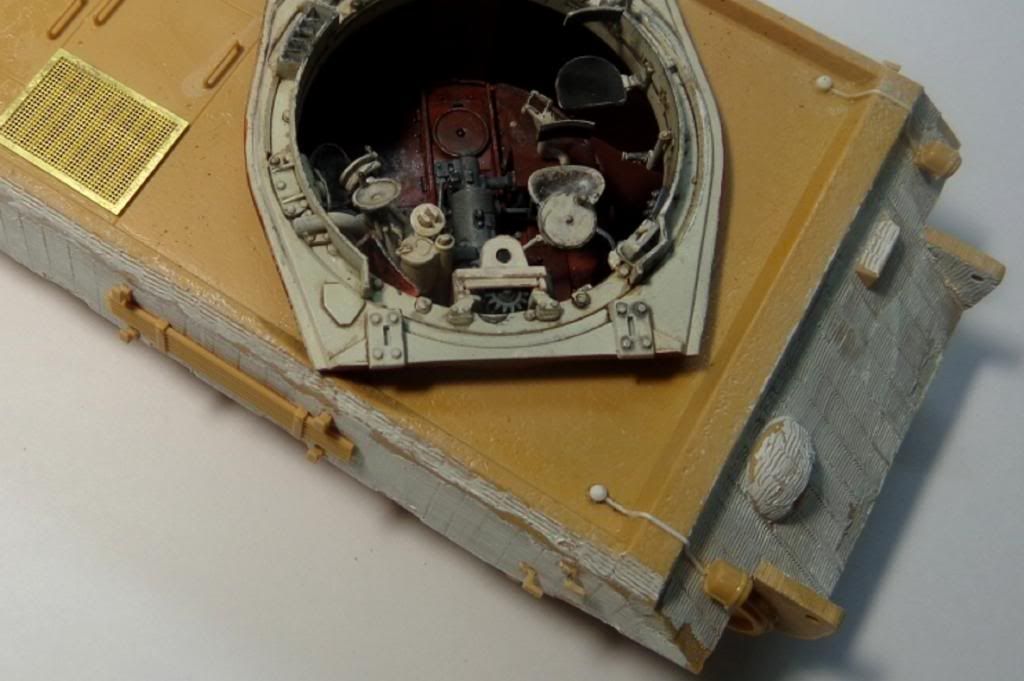
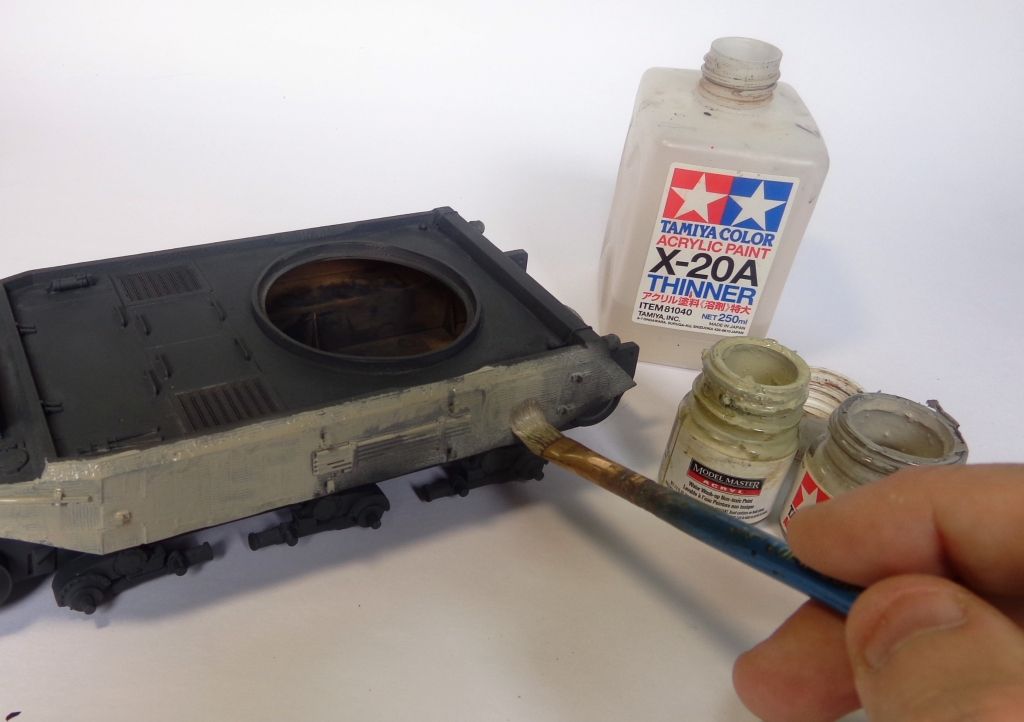
This kit has, oddly, a turret interior—but no hull interior. I decided to build it anyway, as an exercise. This was where I did some experimenting–I used the hairspray method to do some weathering on the floor. I mixed my own primer color from Tamiya, and had a few go-arounds of stripping it all to get a “right” color and weathering mix. All the parts were reduced to sub-assemblies to facilitate the painting and assembly.

My experiments with the hairspray chipping. I reduced this somewhat since the photo.

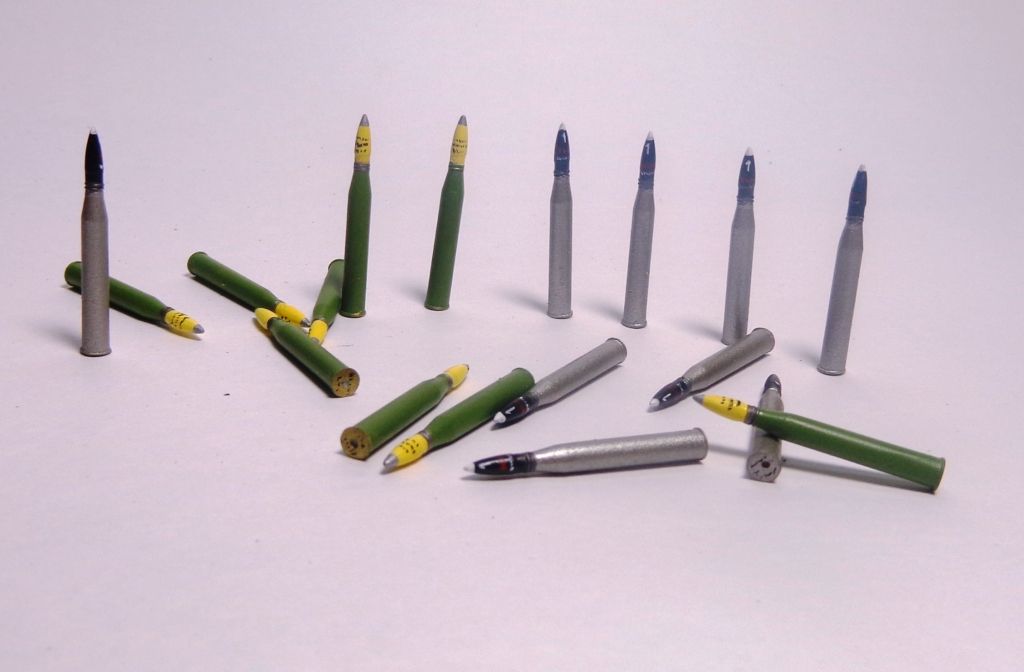
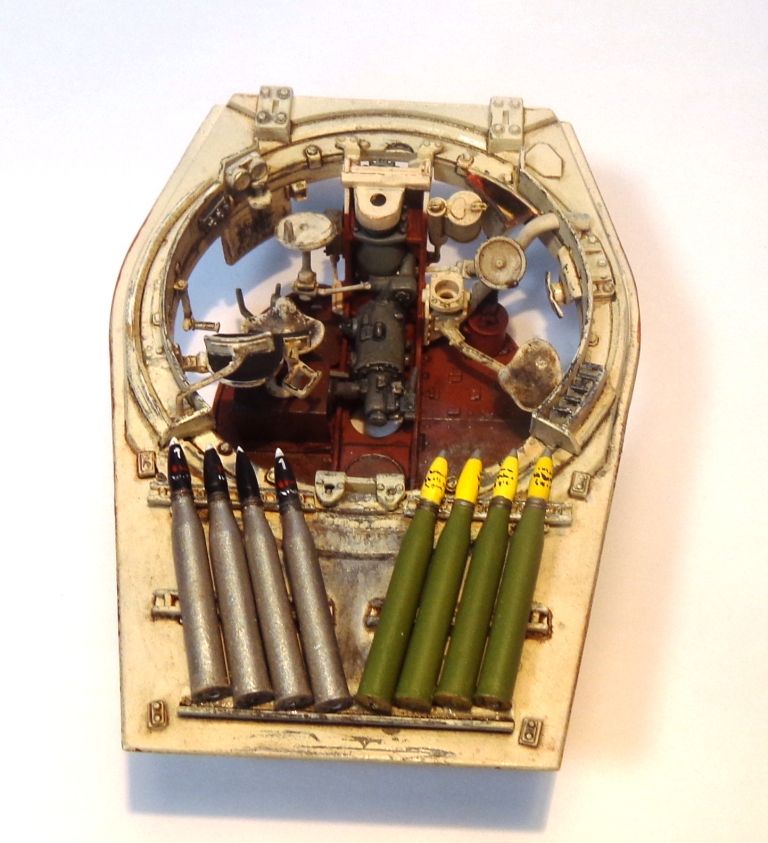
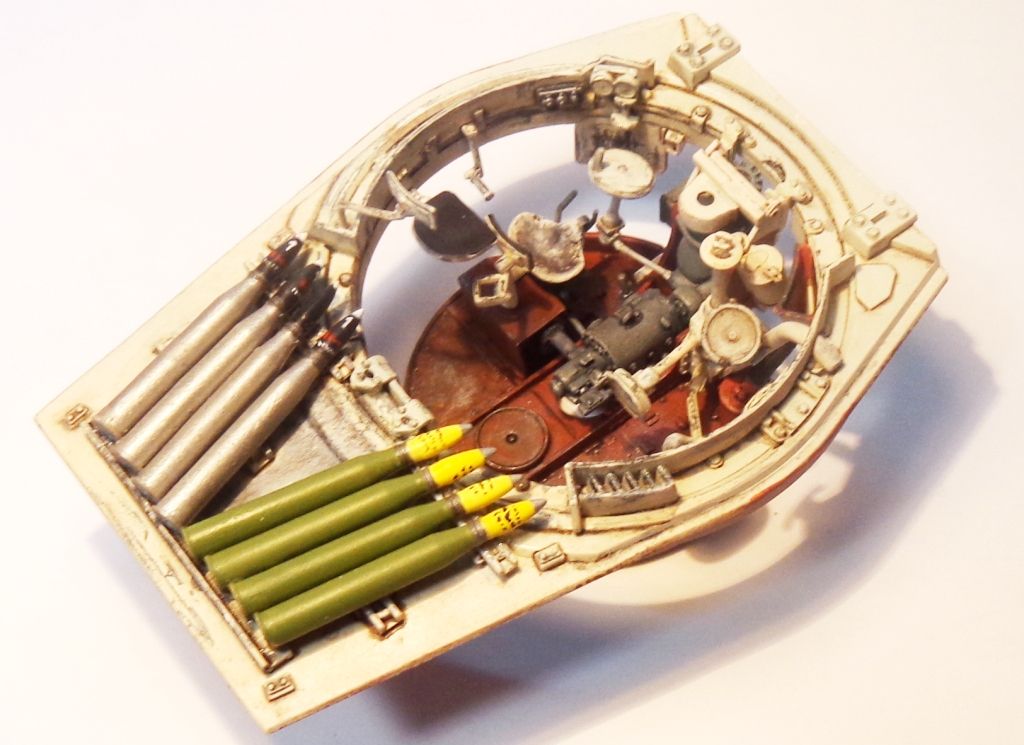
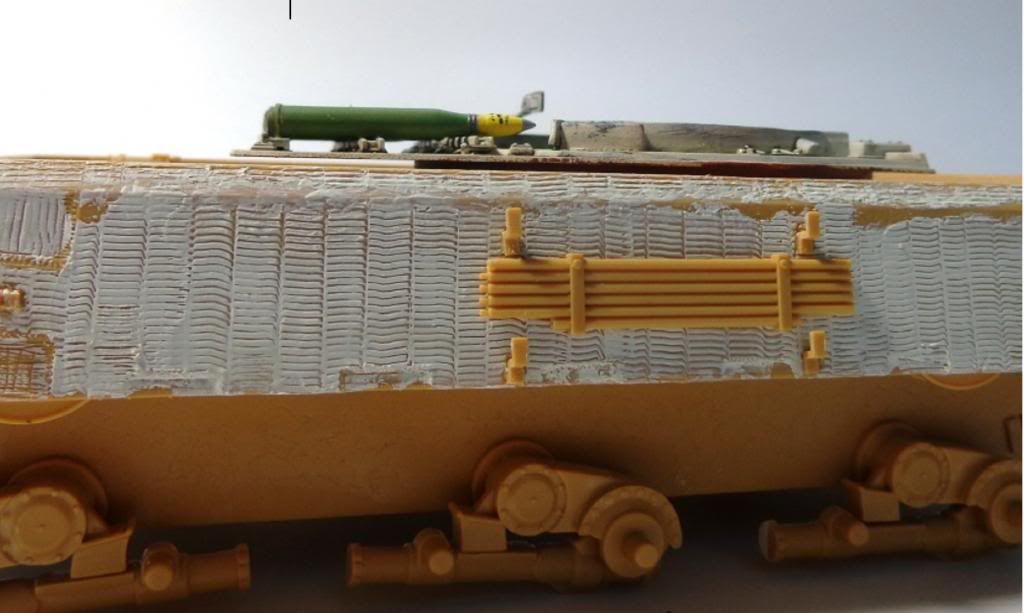
I had to paint the shells before I could put them in the racks. I like the green shells as portrayed in front of the Panzermuseum in Germany. he others, I painted steel, as metal shortages saw these shells made of steel later in the war.

The turret top,.

Top & bottom

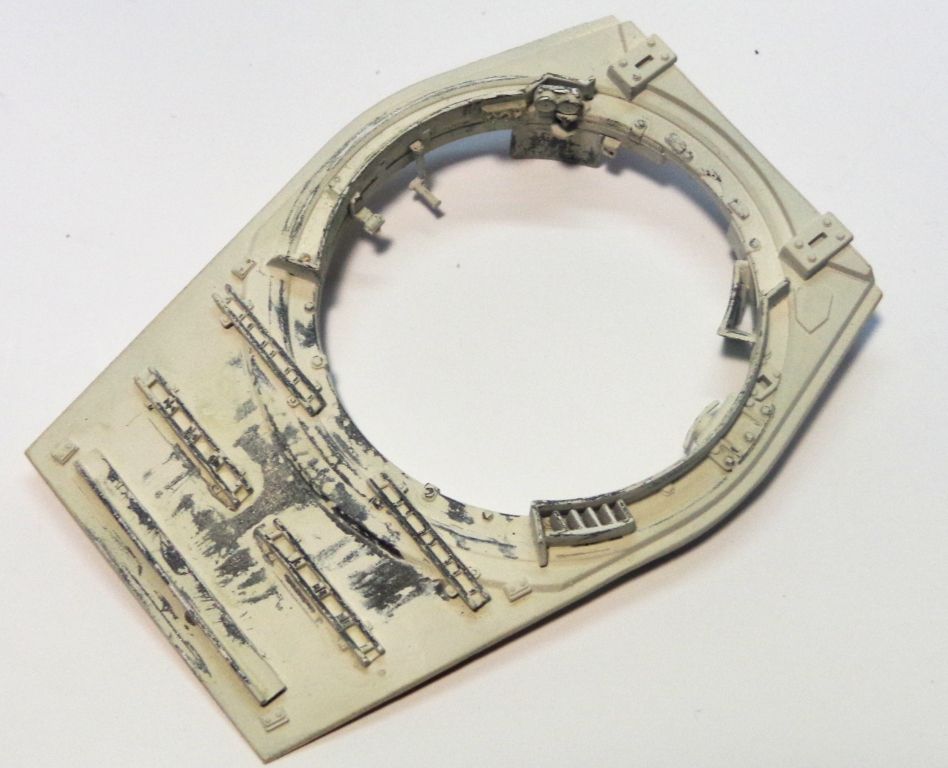
The lower turret basket, finally painted, weathered and put together. I plan to add some minor dirt to this as well, from the crew’s boots.

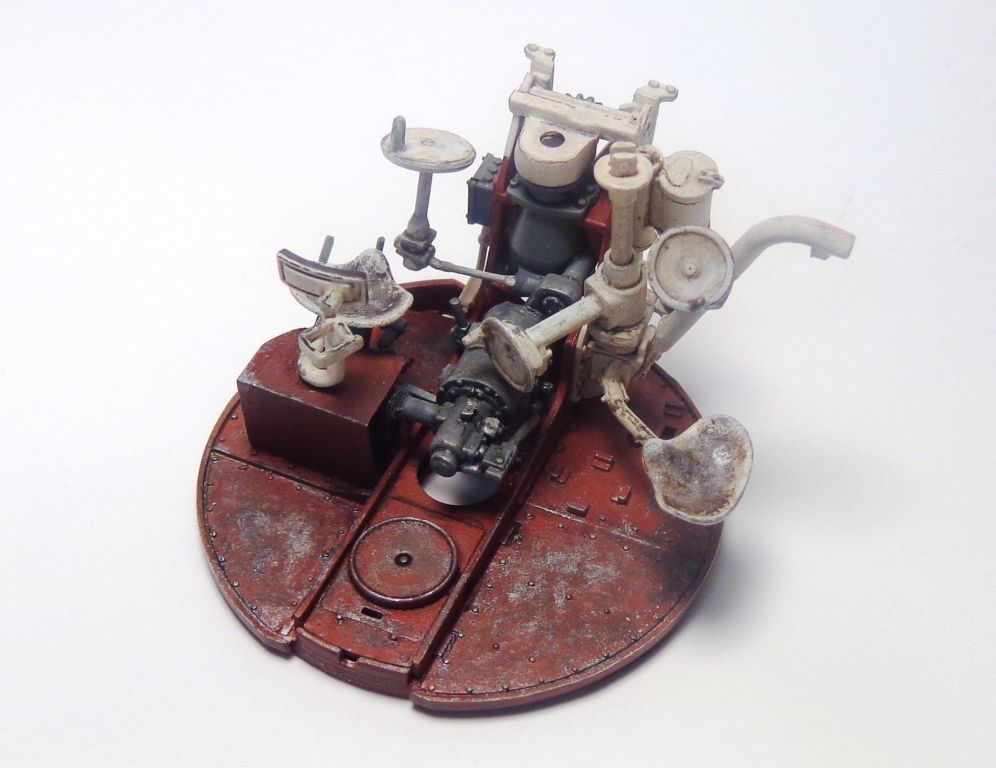
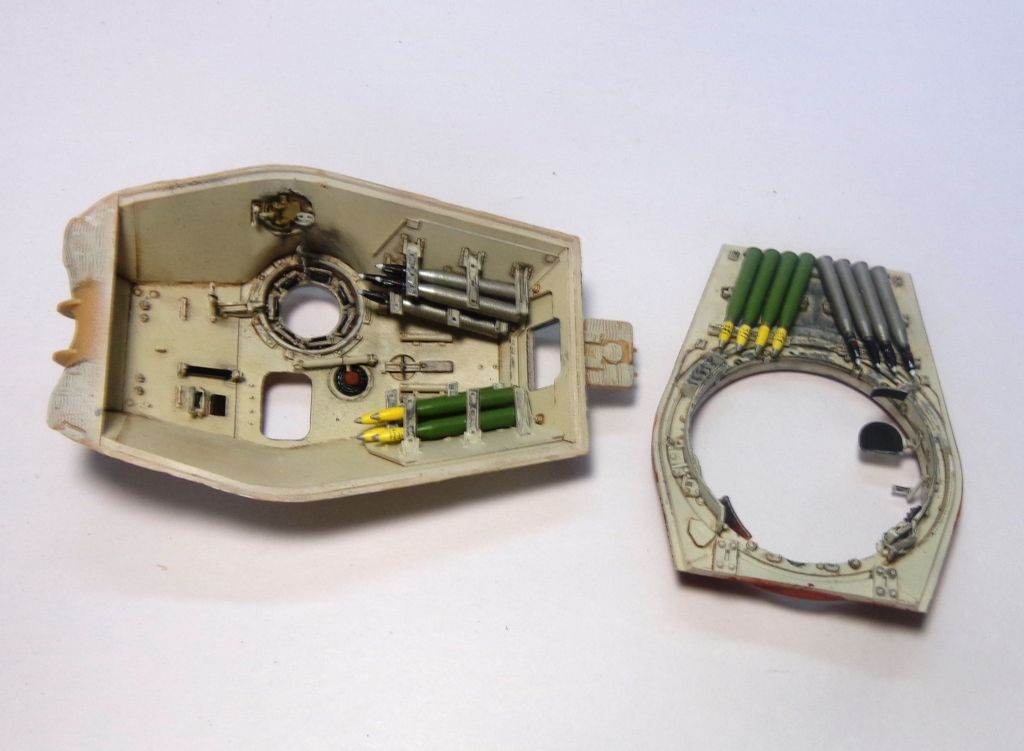
The turret basket installed. The fit is tricky here; it was a chore to get this all lined up and every part connected and painted properly. I broke off all of the seat mounts at one point or another, and had to rebuild them all. Ugh!

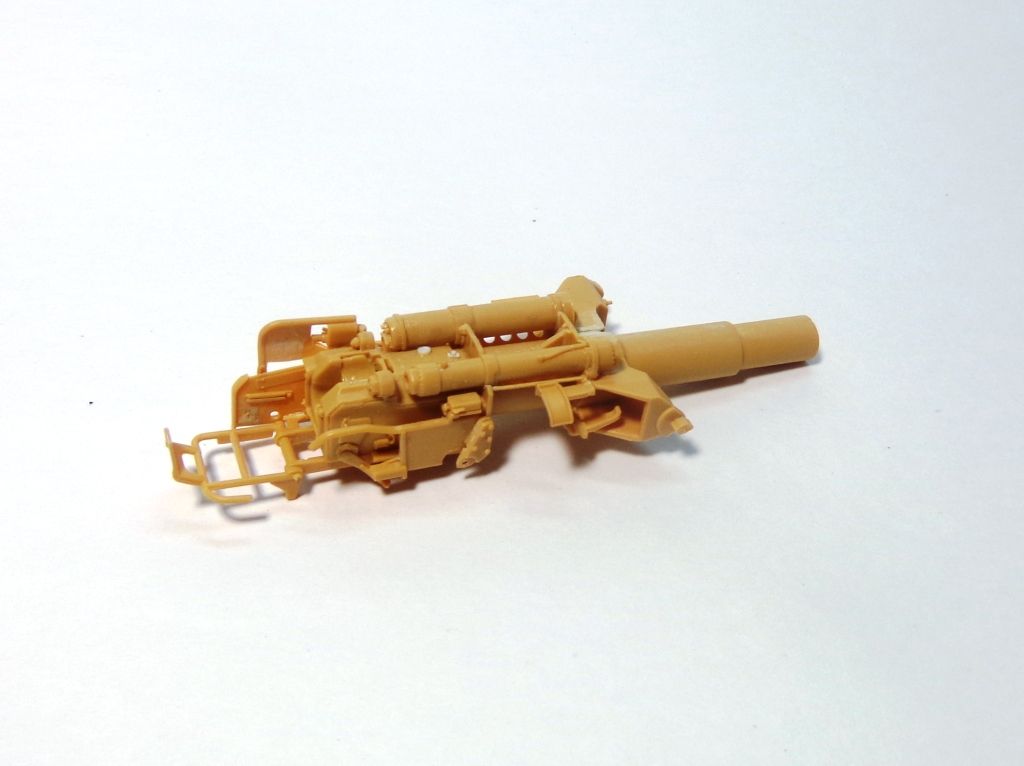
Well, that’s it or now—I have to work on the gun assembly next. I expect that to take a week or so with my schedule lately. [:|]

Thanks for looking in, guys! Any comments and critiques are always welcomed and appreciated! [:)]

AH Yes, At Last!

!http://www.sclero.org/forums/public/style_emoticons/default/emoticons-yes.gif

The turret was specifically designed by Krupp for this vehicle so don’t forget to delete the shell ejection port (behind the ventilator) on top of the turret.

I’m still a staggerin’ around the kitchen countertop with mine…

Very cool project! So this was the prototype that lost out to the Henschel King Tiger? And it actually saw battle in the end days of the war? Sweet!

BTW, beautiful work so far…

That is great that the manufacturer provides a complete turret interior. I wish Academy would have done the turret detail in my 1/25 Panther that I’m working on. I specially like how your ammo came out. [B]

Thanks for looking in, guys! And for the chuckle, Steve!

Lee, yup, that’s the one that lost out to the Henschel. Reports say that it was used somewhere south of Zossen as part of a Kampfgrup Kaether in the last days of the war. Unfortunately no pics of it have surfaced, but where it was destroyed was right next to where the Maus was discovered, so it’s possible that it was simply overlooked in the Maus fervor?

Thanks, too, plasticjunkie. I like those green shells too. Something different! The interior is cool too, but I don’t know how much good it’s going to do without a hull interior. I want to show it off, but don’t know if that’s doable without a hull interior.

Karl, it looks like not much of the hull interior would be visible anyways. At least not the drivers compartment. I did not notice any upper hull hatches on the pieces you posted the photos of. Looking down thru the turret hatches, the turret basket will obscure 90% of the view into the hull, and Ibet once the main gun breech is in place it will take up most of the rest of the 10%.

I suppose you could add a firewall for the engine compartment into the hull aft of the turret area and add some gizmology there… perhaps some ammo stowage racks on the hull lower side walls as well

Carlos, yeah, I thought about that, but I"m already into this build for way more time than I like, and besides, I don’t have a plan to exhibit the interior any more than it will be visible. This vehicle strangely has no hull hatches for the driver, so you can’t even see in the hull. I"ll just go with it as is, and leave the turret hatches open.

I need to try this hairbrus spray technique, the wearing of the interior looks perfect!. Too bad you will not be able to display it…

Very nice build and interior work there Karl! [Y] I hear you about tackling detailed stuff only to have it break or need rebuilding as you move along but would never know about the issues based on the finished and painted interior. [B]

[Y] Excellent detail and zimmerit.

Regards!
Rodolfo

Along for the ride! Excellent work so far doog! I really like the turret interior!

Nice interior work. Do you have any references that this vehicle had zimmerit applied?

Thanks for looking in, guys!

Garzonh, if you haven’t tried the hairspray method yet, there are a number of good links on this site that can show you how. It’s definitely a technique that today’s Armor modeler should have under his belt! Thanks for the [Y]!

Bill, thanks, buddy; nice of you to say that. It’s been a tedious process with the assembly and painting requirements, but it’s a relief to have it finally done!

Thanks too, Rodolfo, for the nice words!

Hi again, Eric–nice to have you along! Thanks for looking in!

Bronto, no, information on this vehicle is quite sparse. But as it’s a prototype, I"m venturing my own story and interpretation of it. It will be a vehicle–one of three, apparently,–that was brought out of the shed to fight for the defense of the Reich. They threw a coat of zimmerit on it (as that was the norm when it was produced) and repainted it and sent it out to the front. Since there’s no hard documentation of it, I’m taking an imaginative interpretation of it—that’s what’s so fun about these paper/prototype panzers!

!http://www.thedigichick.com/forums/images/smilies/impatient.gif

!http://www.sherv.net/cm/emoticons/basketball/dribbling-smiley-emoticon.gif

!http://www.sherv.net/cm/emoticons/nervous/waiting.gif

!http://pidgin-themes.org/themes/smileys/Hyves%20Kwekker/Hyves%20Kwekker/smiley_poker.gif

!http://www.rocketryforum.com/images/smilies/xmas/8975.gif

!http://www.sherv.net/cm/emo/laughing/animated-laughing-smiley-emoticon.gif

Karl - Nice to see you back again. Looks like you got a ton of work done. love the interior work. Ammunition looks great. All of the hull work with the Zimm is fabulous. Looks like another Doog special off to a great start.

Rounds Complete!!

Thanks, Steve and Mike! Good to hear from a pair of old-timers from the Good Ol’ Days! [:D]

I’m surprised that the zimmerit is going over s well. This ain’t the easiest vehicle to zimm, and I wasn’t sure of it at first. But, hey…I won’t argue with ya’s! [Y]

Geez, doog, it’d be a shame to not be able to see the interior of the turret, after you’ve done such a nice job of it. Maybe some black plastic bulkheads to blank off the hull interior? It would be nice to be able to leave the rear turret hatch open, too.

Zim looks real good, too.

Hey thanks, Russ. I’ve given it a fair bit of thought, and I"m pretty sure that I"m just going to leave the hatches open and that’ll be the extent of it.The rear turret hatch, too! [;)] New update coming right up…!

Well, as you will soon see, 'm off onto a sort-of “maverick-y” adventure here; the Quest for Something Different.!

I’ve been wanting to give this build something different, and I’ll be honest–with so many prototypes and paper panzers out there–and all the subsequent wild paint schemes—it’s been hard to think of something original-yet-plausible. I’ve been working away here, made a few missteps, and am finally correcting course and think that I’m on to something “different”.

First, some construction updates:

Here’s the nice gun breech to be painted and added to the turret interior:

Next, I’ve added a ring of .015 strip to the turret ring because the turret really scraped the hull–I mean, it REALLY was low! I also added two tools to the rear hull panel on either side, and light wiring with terminal “buttons”.

The turret sits at a more realistic height now.

I also used a Dremel to chamfer the hull sides, as the turret just barely cleared the sides.

You can see how close the turret comes to the side.

The underside looks good now with the added detailing and the new Dark Grey paint as a base coat.

I cannot tell a lie—in my quest for originality, I had a few missteps. Here’s my concept for this tank:

Historically, the prototypes were not accepted as production Tigers, and the remaining turrets were placed onto Henschel hulls and they became the “Porsche turret” Tigers. The hulls were left in storage at Kummersdorf Testing Grounds until the very last months of the war. At some point, Kummersdorf was “raided” for spare vehicles and armaments–anything that could be thrown at the advancing Russians. There are reports of a “Tiger” being used from Kummersdorf in the final battles—could it have been a prototype with a refurbished turret added?

In any case, the protoype would have presumably been painted in Panzer Grey, as the first tanks were completed in October 1942, and Dark Yellow was not standardized until Feb 1943. My model postulates that the hull was painted thus; later, zimmerit was applied-whether as a testbed for eventual widespread use, or in maybe as a practice hull for workers? Maybe it was even added before being sent out to face the Russians in 1945, as the superstition regarding the magnetic mines remained entrenched. The model will be painted with this narrative in mind.

My first experimental scheme was a two-tone green with “Czech cream” hard edge lines painted via the Silly Putty method:

After shading, it looked like this:

Hmmmm…it looked like Salvador Dali got into the paint shed…

…so I tried to tone it down with Schoklolade Braun…

Cool, but not plausible in my eyes. It was into the Mean Green bath, and stripped…sigh…[:'(]

Back to the drawing board, I envisioned now painting the zimmerit “zimmerit color”, under which would be the original base color of Pz Grey. What I intend to do is to show a thin Dark Yellow/Pz Green hard edge pattern over the added zimmerit hull sides, and leaving the hull top and suspension in grey. Kinda like the workers got whatever small stock of paint they could procure and painted what they could before rolling it out to the front ASAP. The turret will sport a normal 3-tone, as if it were added from a reconditioned wreck that had acted as a donor tank.

So, are you following me? Good! [:D] I started back with the base coat:

Next, I painted the zimmerit a grey-tan. Use Tamiya thinner to keep the fast-drying Tamita paint “wet” while you brush paint.

I added chips for variety and interesting visuals…

Here, I’m masking off top surfaces to paint highlights. This is how you “color modulate” using an airbrush…

Masks come in all shapes and sizes…

I’ve shaded the top, and actually even added some weathering filters from Adam Wilder’s new line. This is because I want to simulate a coat of camouflage paint that will have gone over an already-existing hull. So the finish has to be somewhat advanced to get the proper effect. The chipped zimmerit parts have been given a light acrylic drybrushing to simulate leftover zimmerit dust or whatever putty-like material it was made of?

Here’s where I"m at now. Getting ready to add the camo colors!

Let me know what you think of the concept, guys. I’m trying to “think outside the box” on this one and pull ff something original! Comments and critiques warmly welcomed! [:)][B]

I’m a draggin’ with the Dragon kit and haven’t run into a problem with that or the commander’s hatch…

It didn’t have the track bumpers on the bottom of the sponsons http://www.smileyvault.com/albums/userpics/12962/bump~0.gif
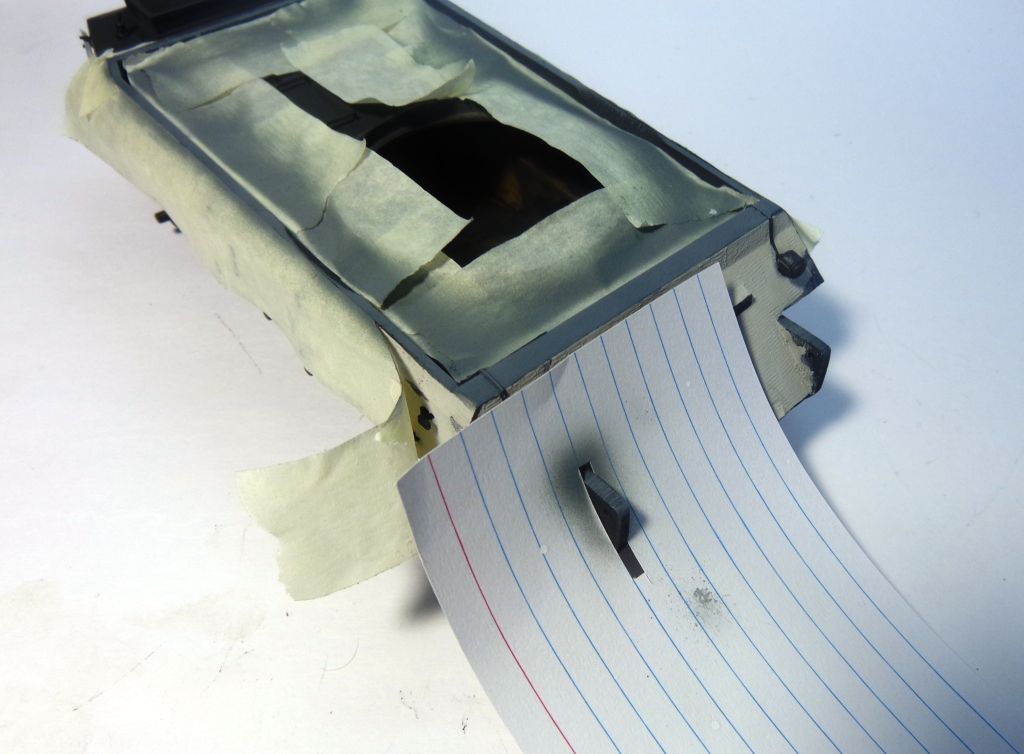
so I just made my own.

And so we have the Kummersdorf division… a motley !http://ollr.createaforum.com/Smileys/users/ollr/smiley-rocker.gifcrew of various tanks including a sherman and a t-34.

Well here’s a partial from the list of resources I have available …here goes,

!http://i717.photobucket.com/albums/ww173/prestonjjrtr/Funny/SmileyHappyDance.gif

The Special Henschel turret was especially designed for the VK4502 by professor Porsche and would mount the 8.8cm Kw.K. L/71.

68 rounds for this gun were carried in the tank. 42 in horizontal panniers along the superstructure sides, 10 horizontally on the floor and 16 rounds stored horizontally in the turret.

As for the hull, work continued into the middle of 1944. By that time the vehicle had hydraulic drive, new suspension, a 900 metric horsepower air-cooled diesel, and heavier armament …

and so and so…
!http://www.augiedoggy.com/Smilies3/SewingMachine22222222.gifand so…

The gray will look good I’m sure…!http://forums.easypooltutor.com/images/smilies/smiley_wink.gif

Hey, I heard a while back that someone put a copyright to that phrase… “think outside the box”, imagine that!

Looking forward to the finale!

!http://forums.collectors.com/i/expressions/clown.gif