You may have noticed that I haven’t posted anything of my current project, but I am already preparing the next one titled “Boldness in adversity (D-Day, June 6th, 1944)”.
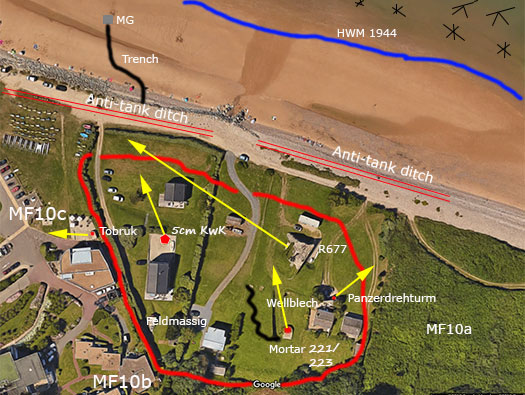
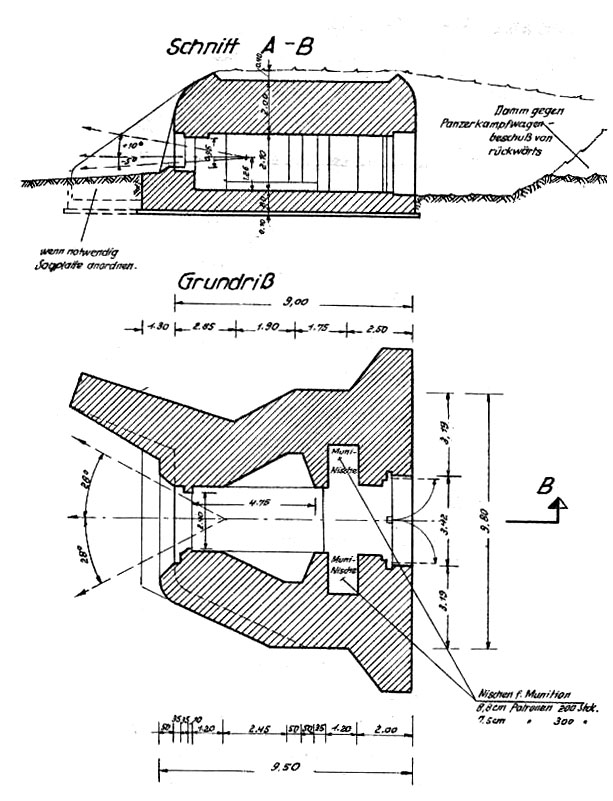
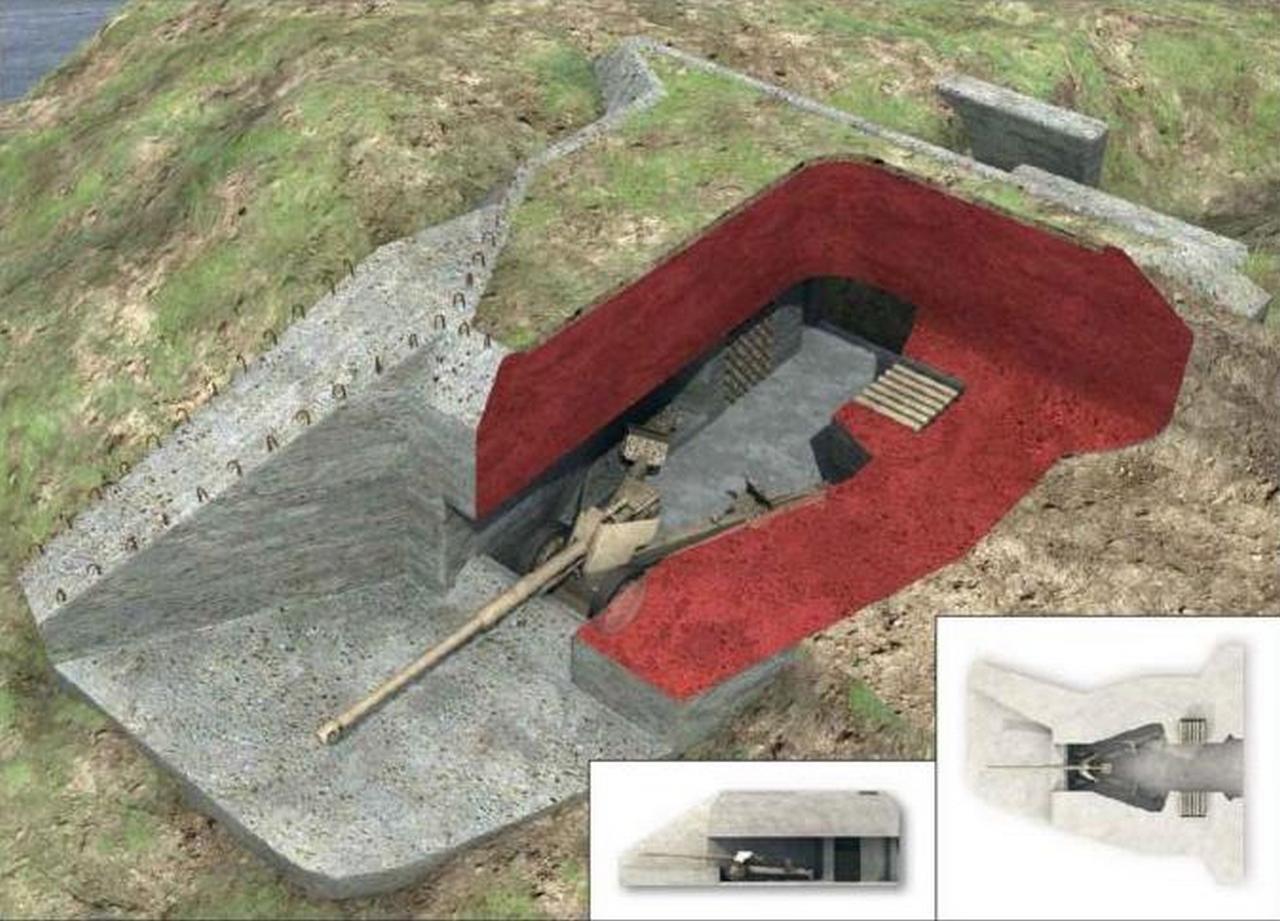
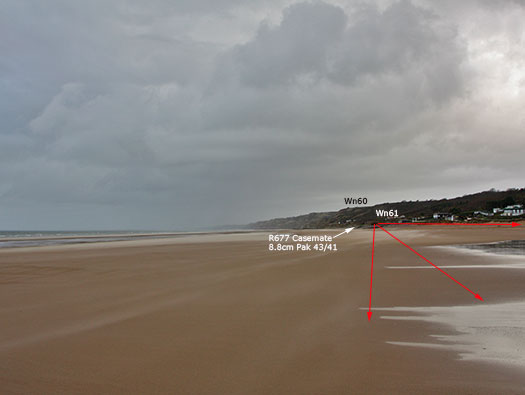
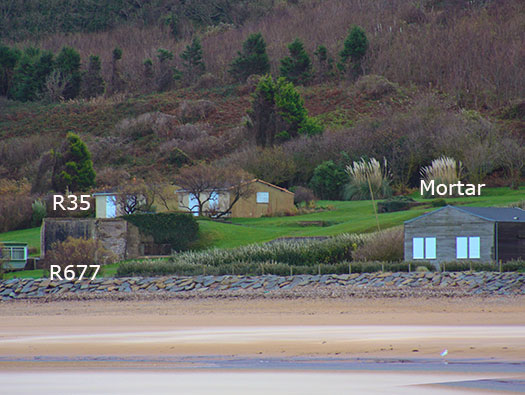
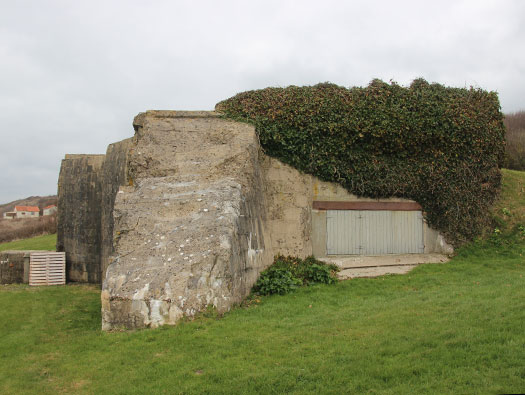
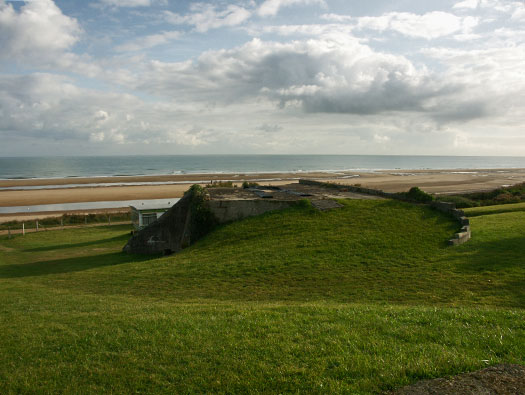
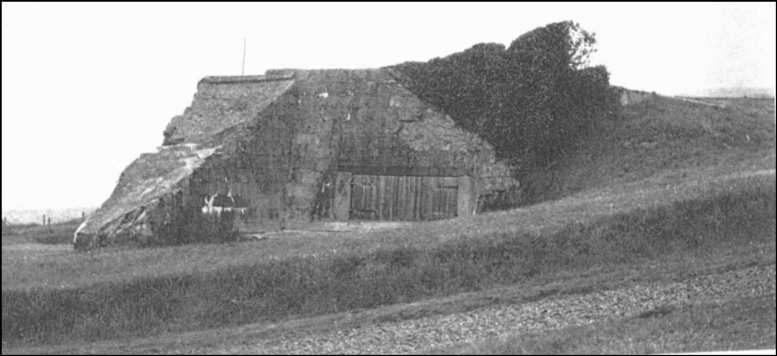
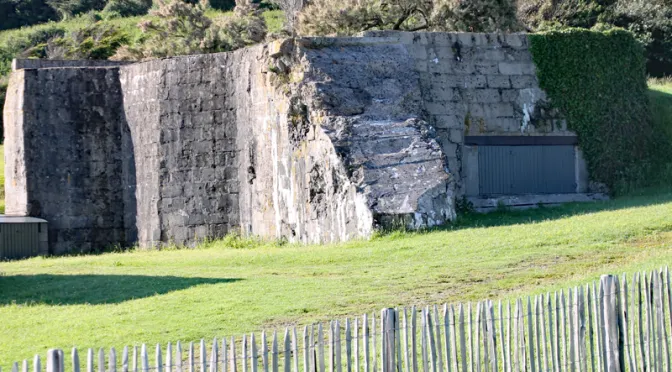
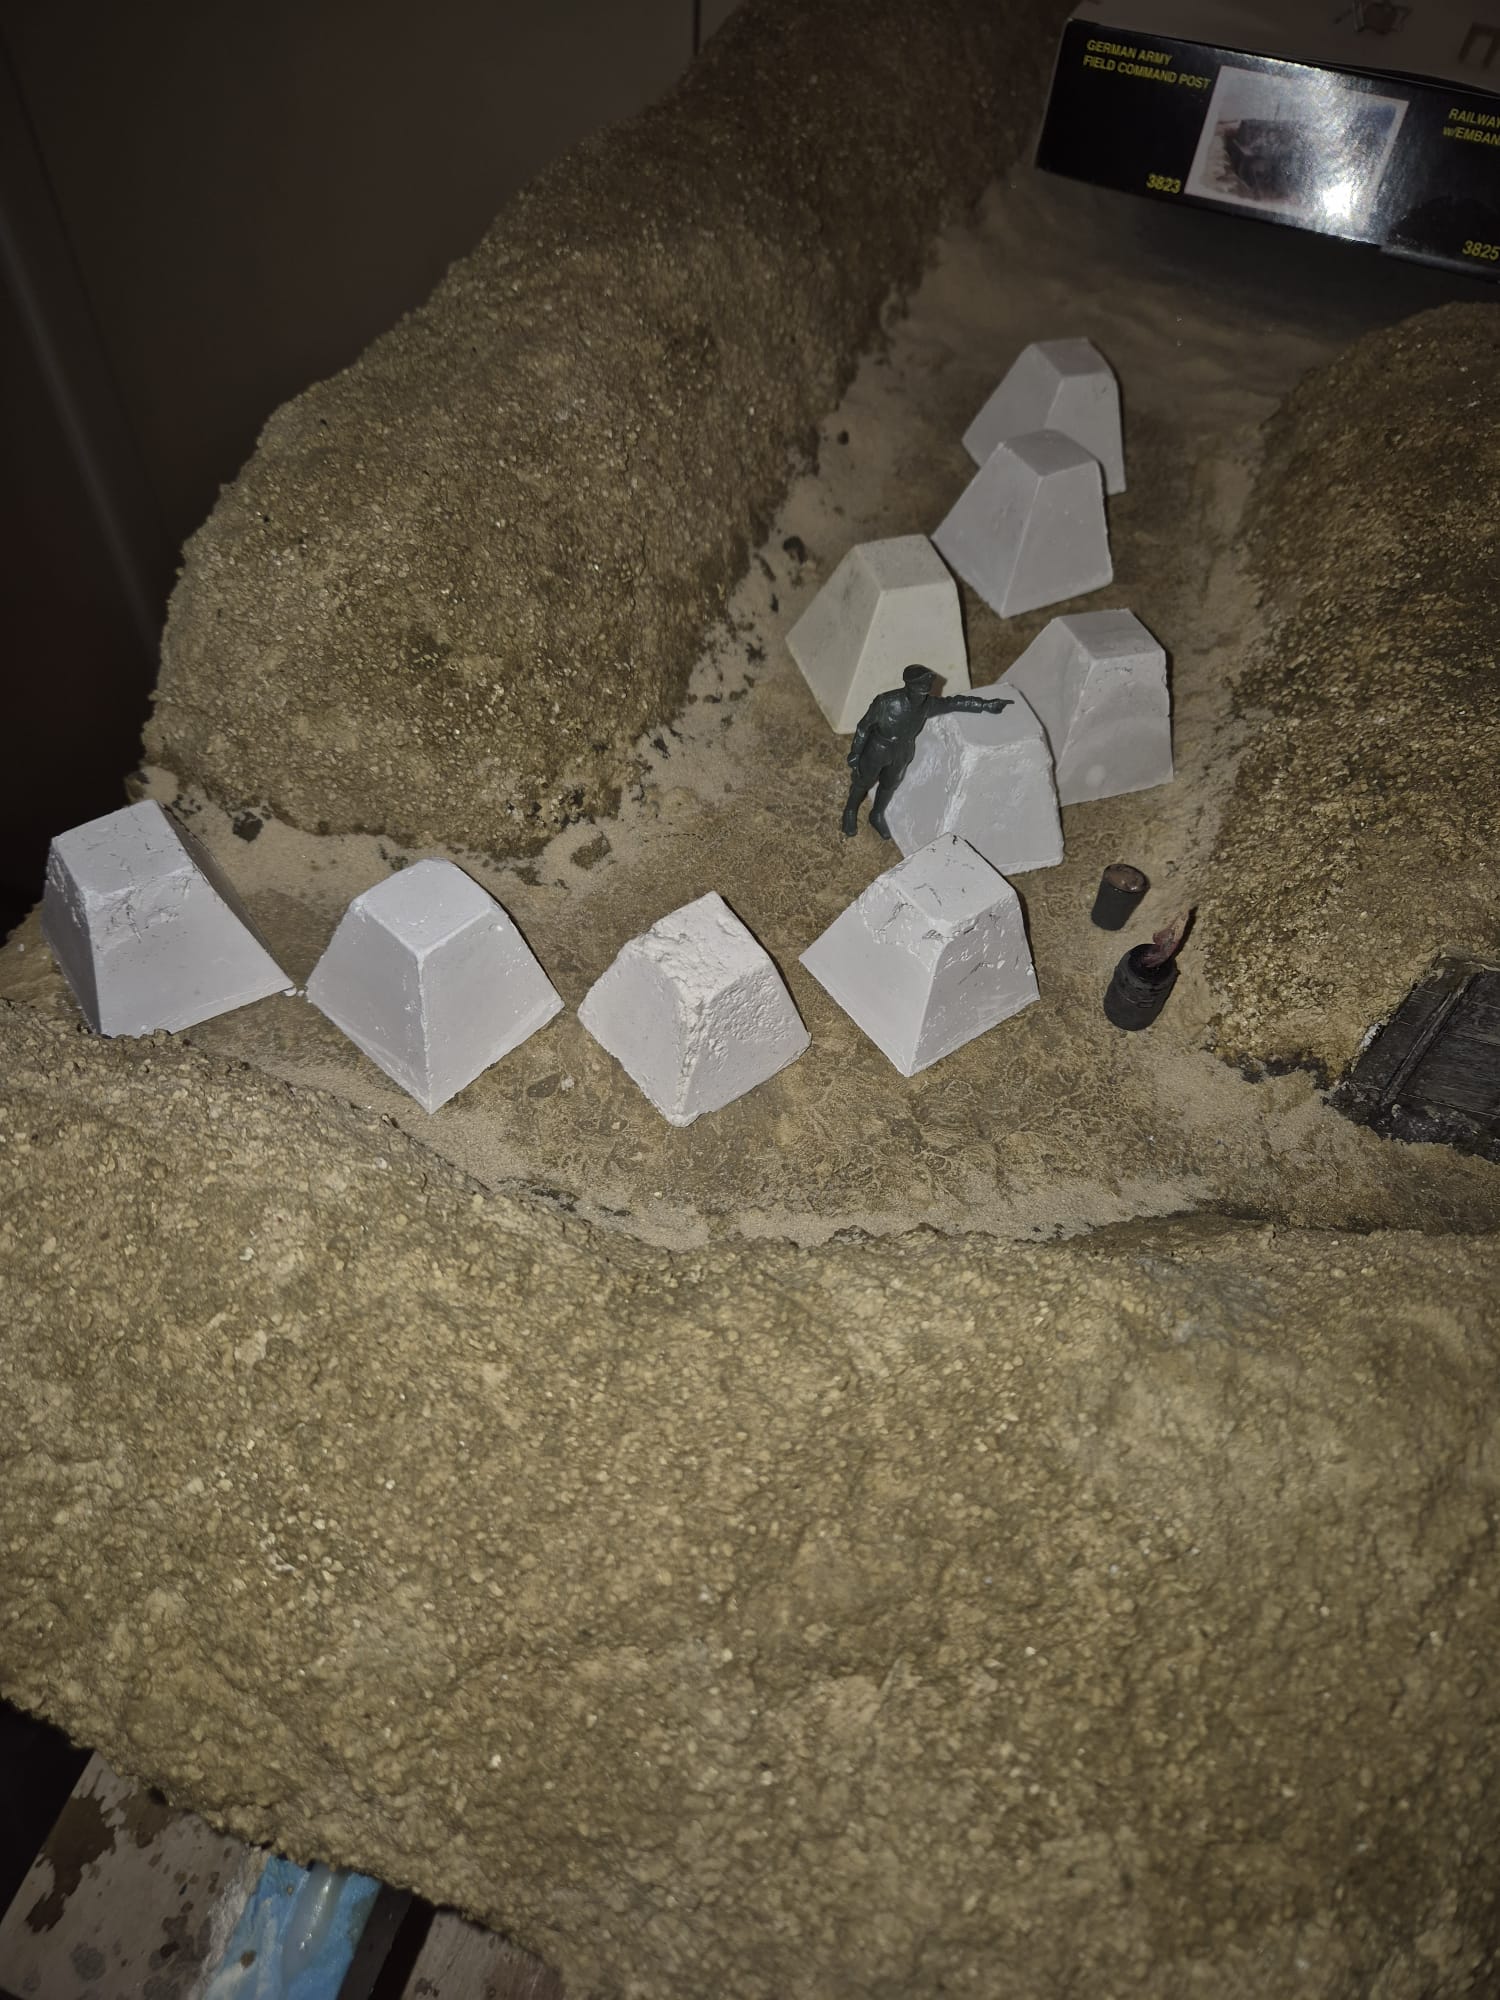
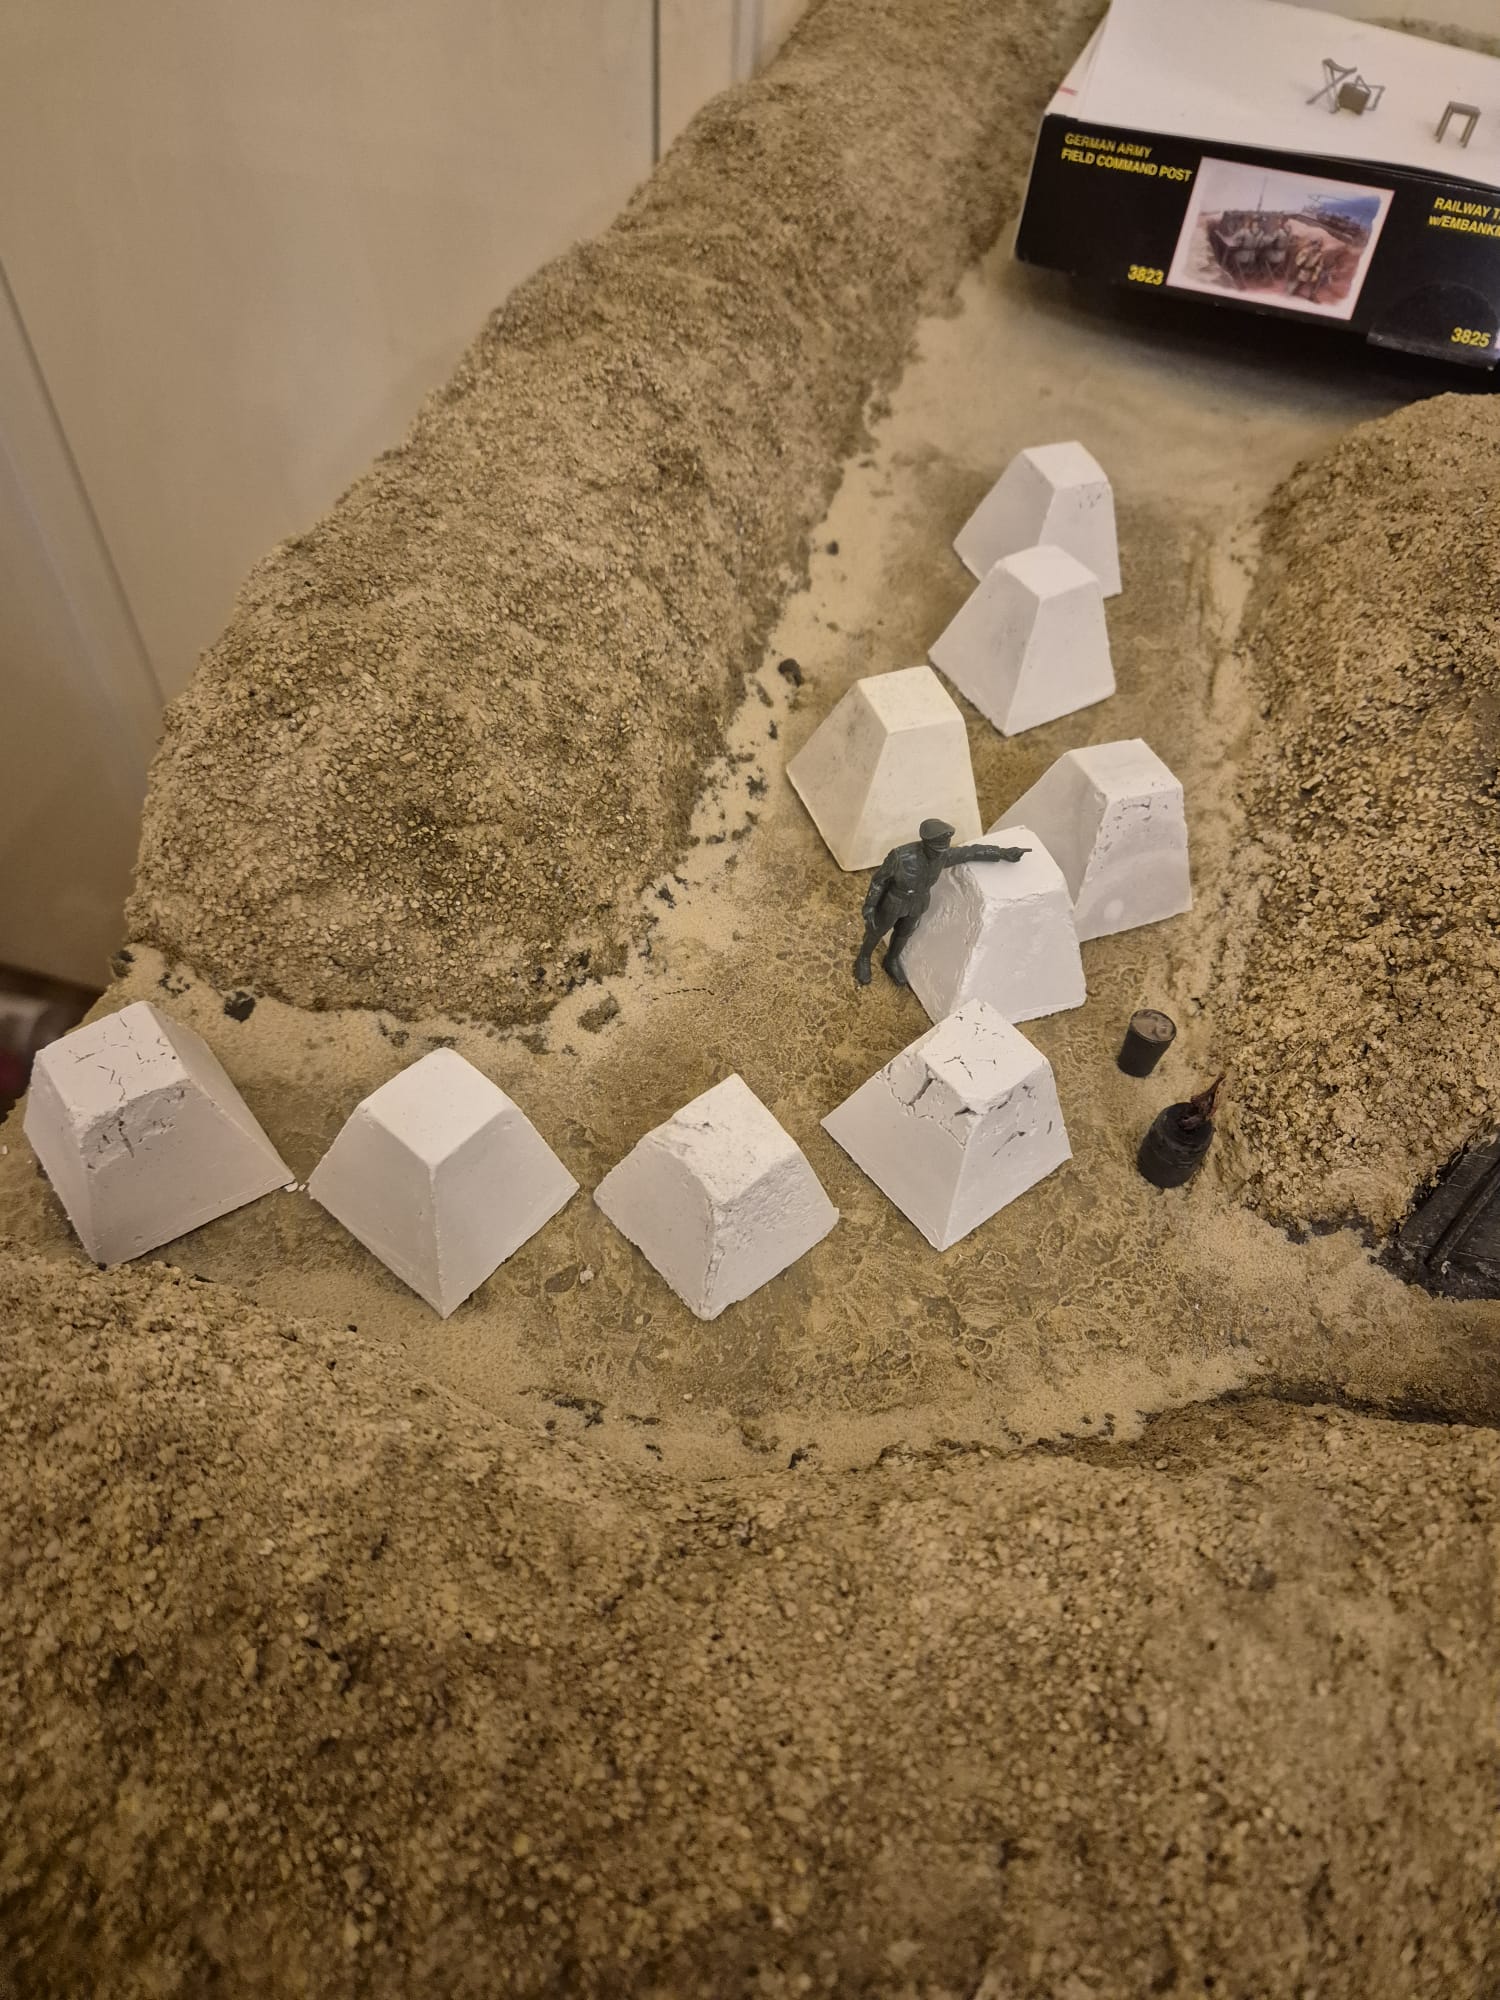
In fact, besides still working on “dragon teeth” reserved for The Battle of the Bulge - I am producing a dozen of the big ones - I am also preparing and refining the R677 Bunker of the 88mm PAK 43/41, which came in a very strange conformation which did not completely correspond to the one on WN61 or Fox Green for the landing soldiers.
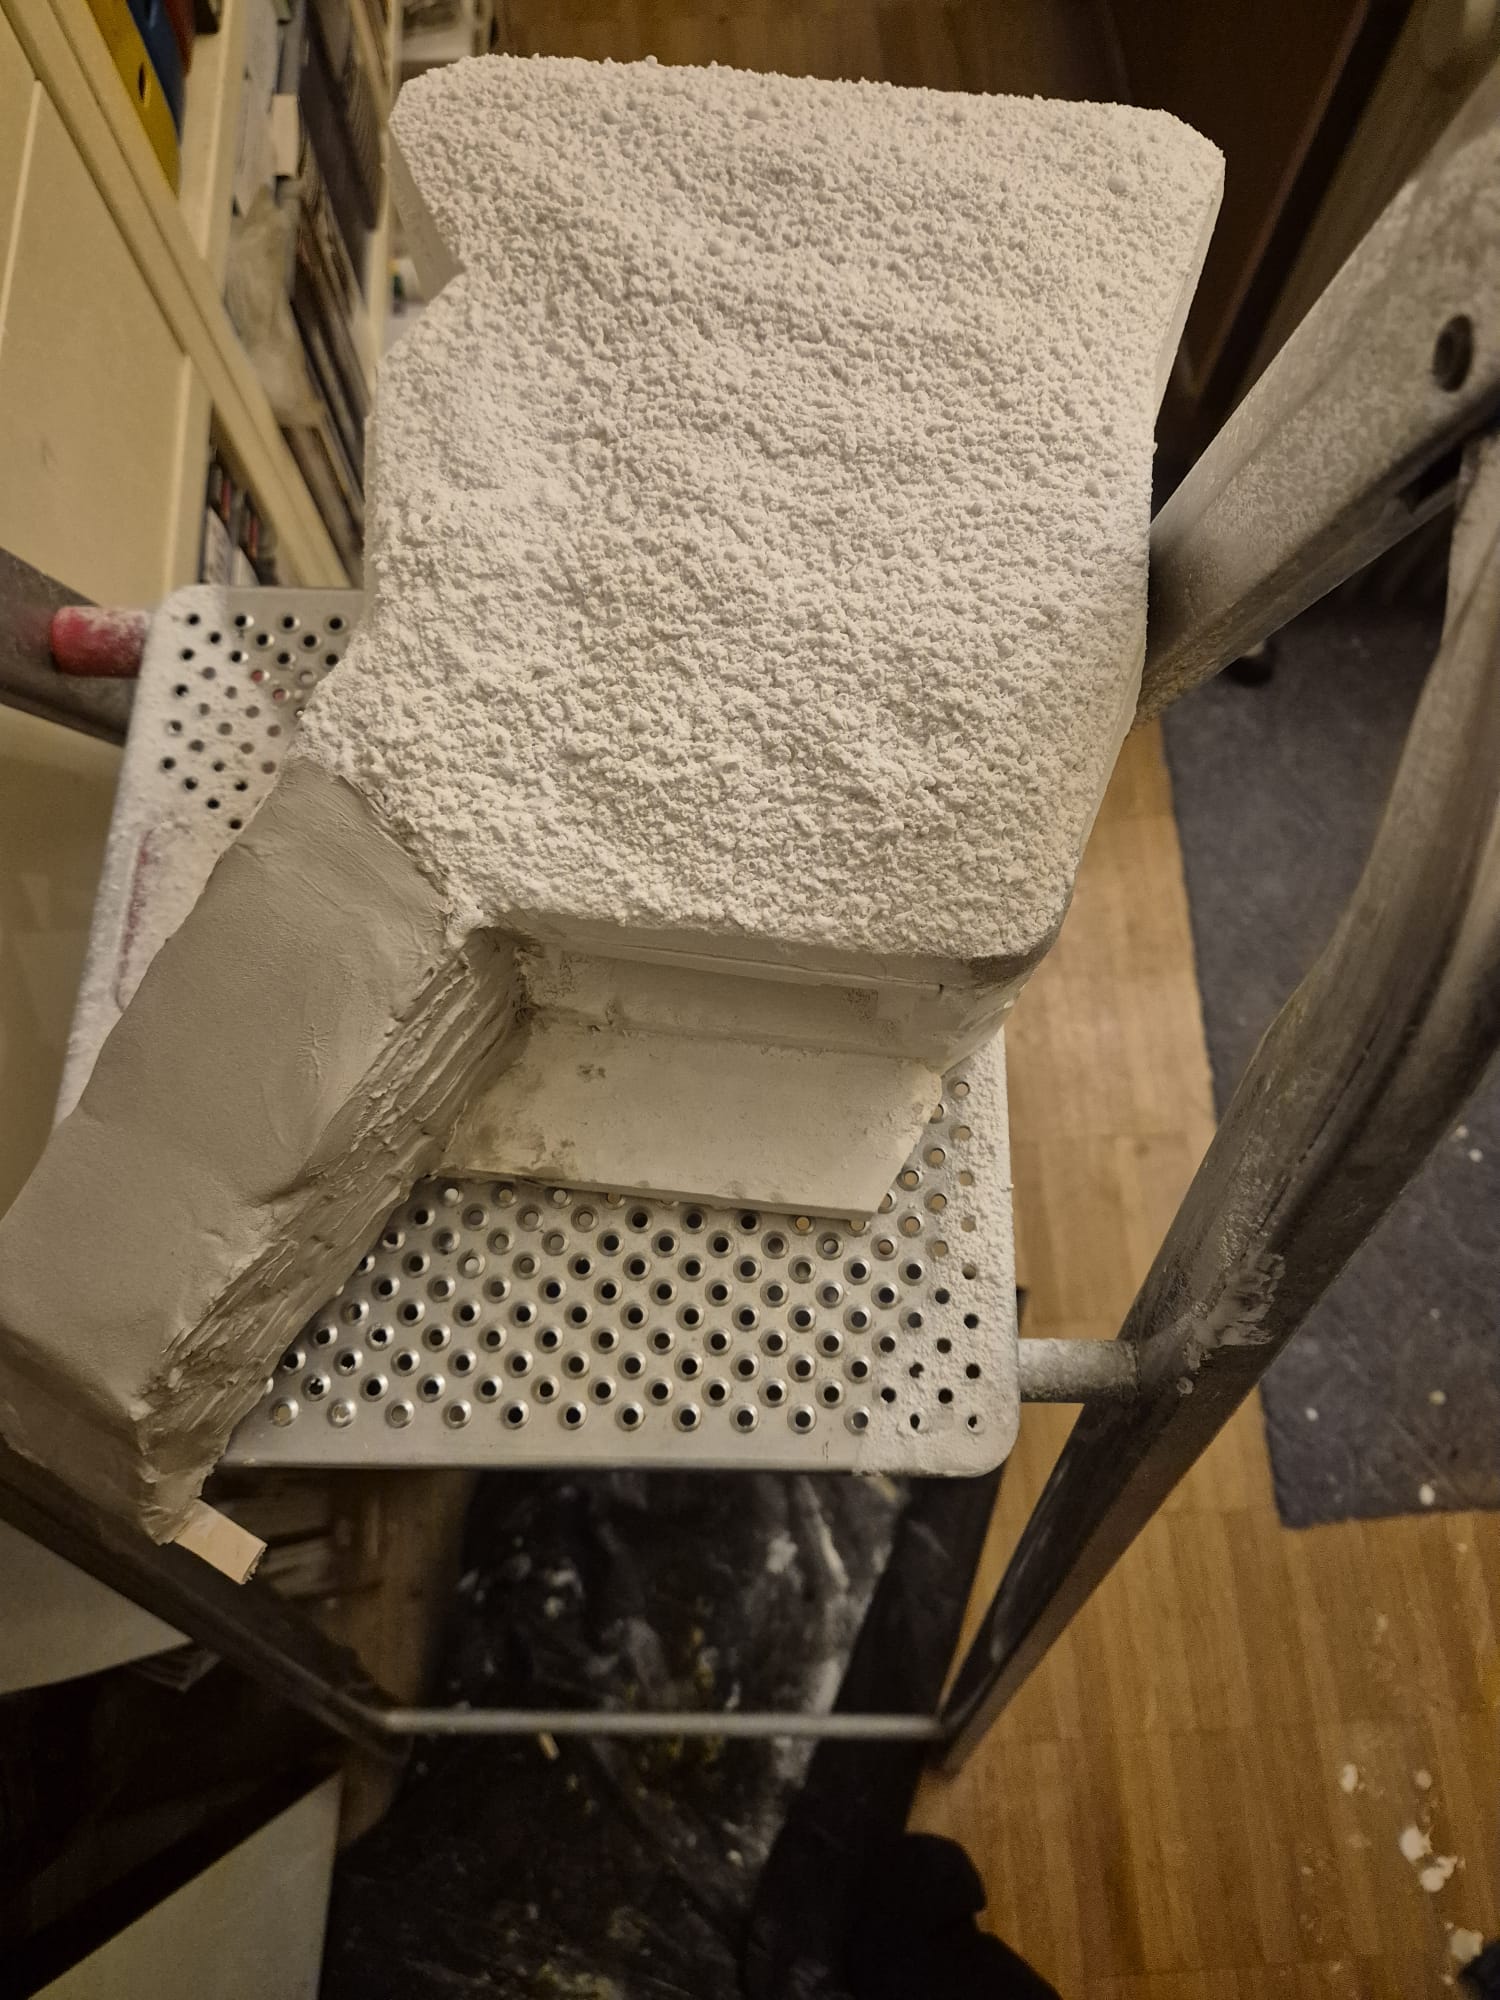
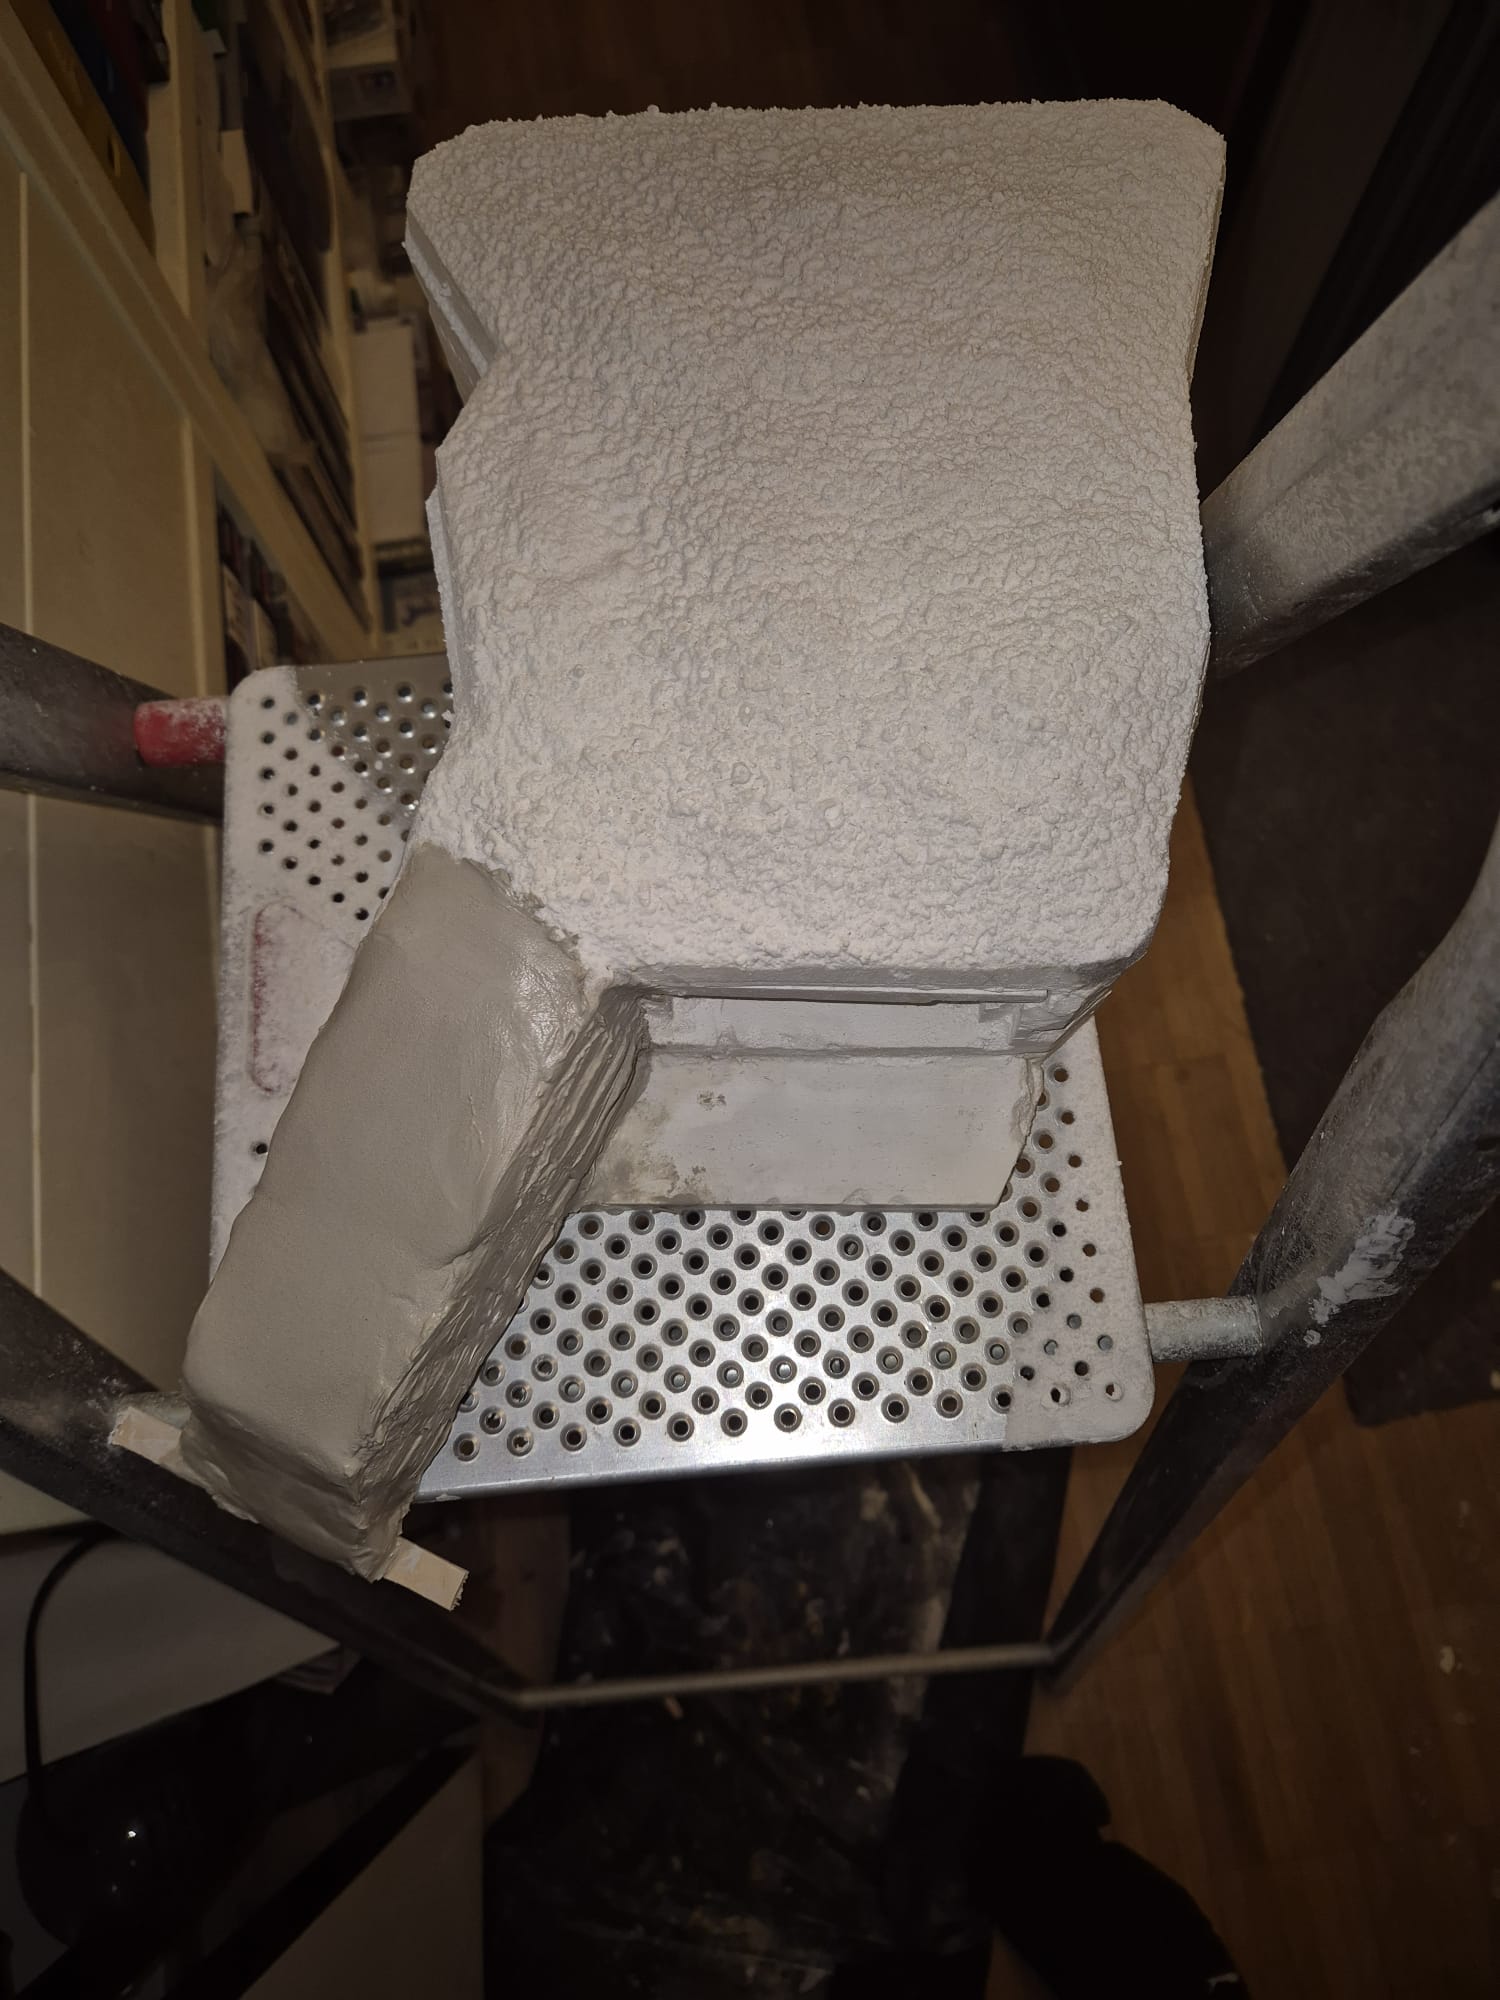
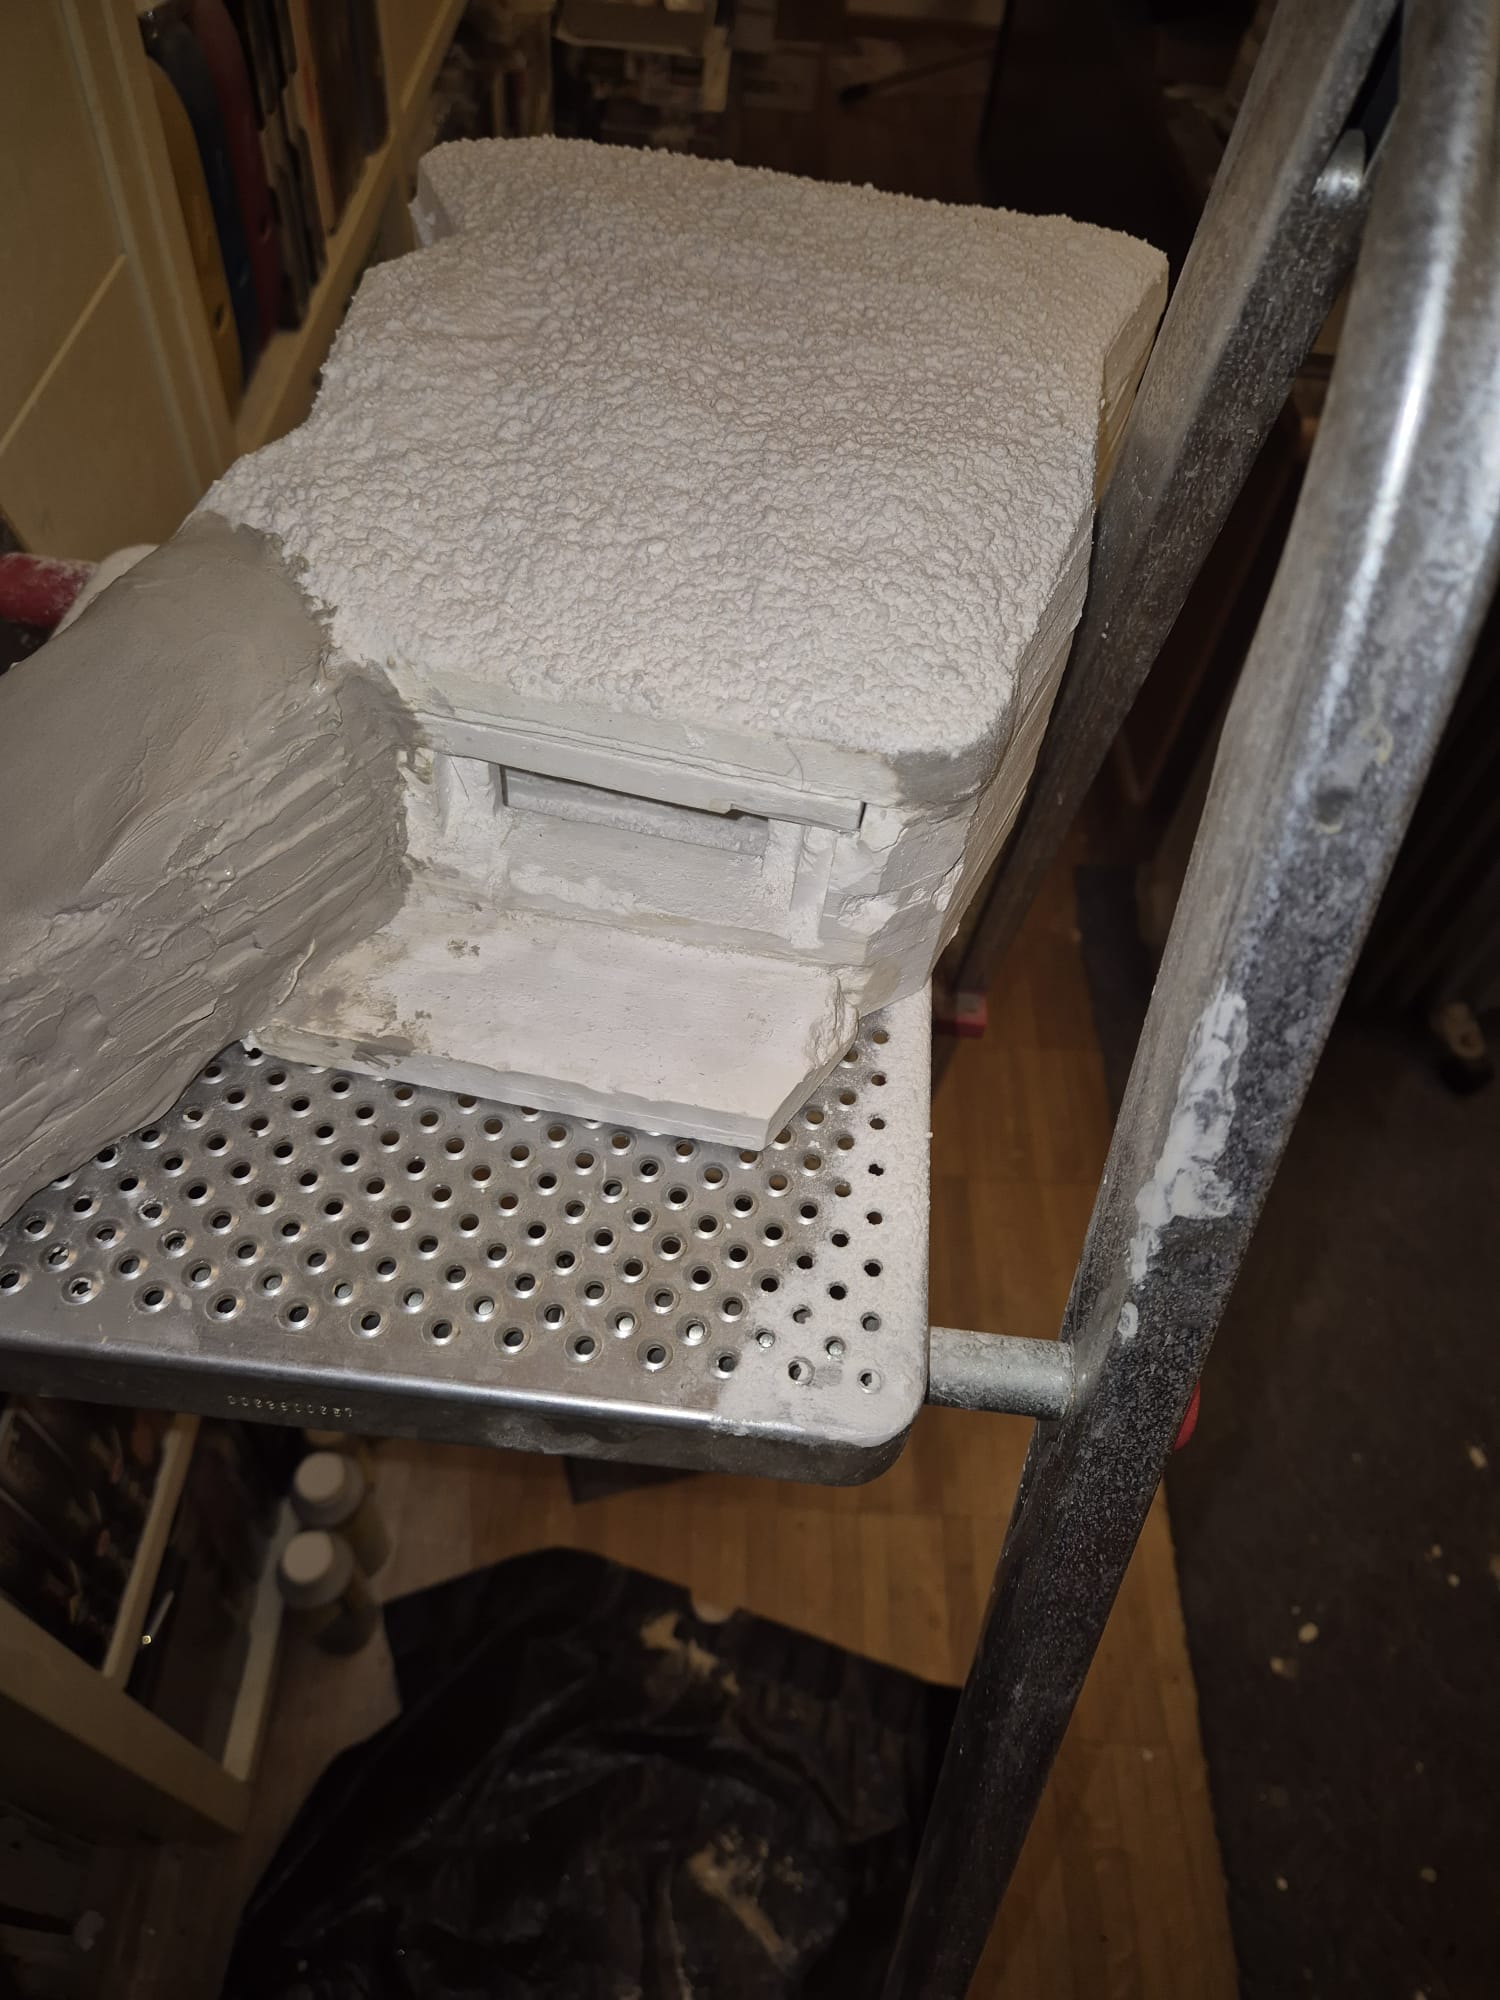
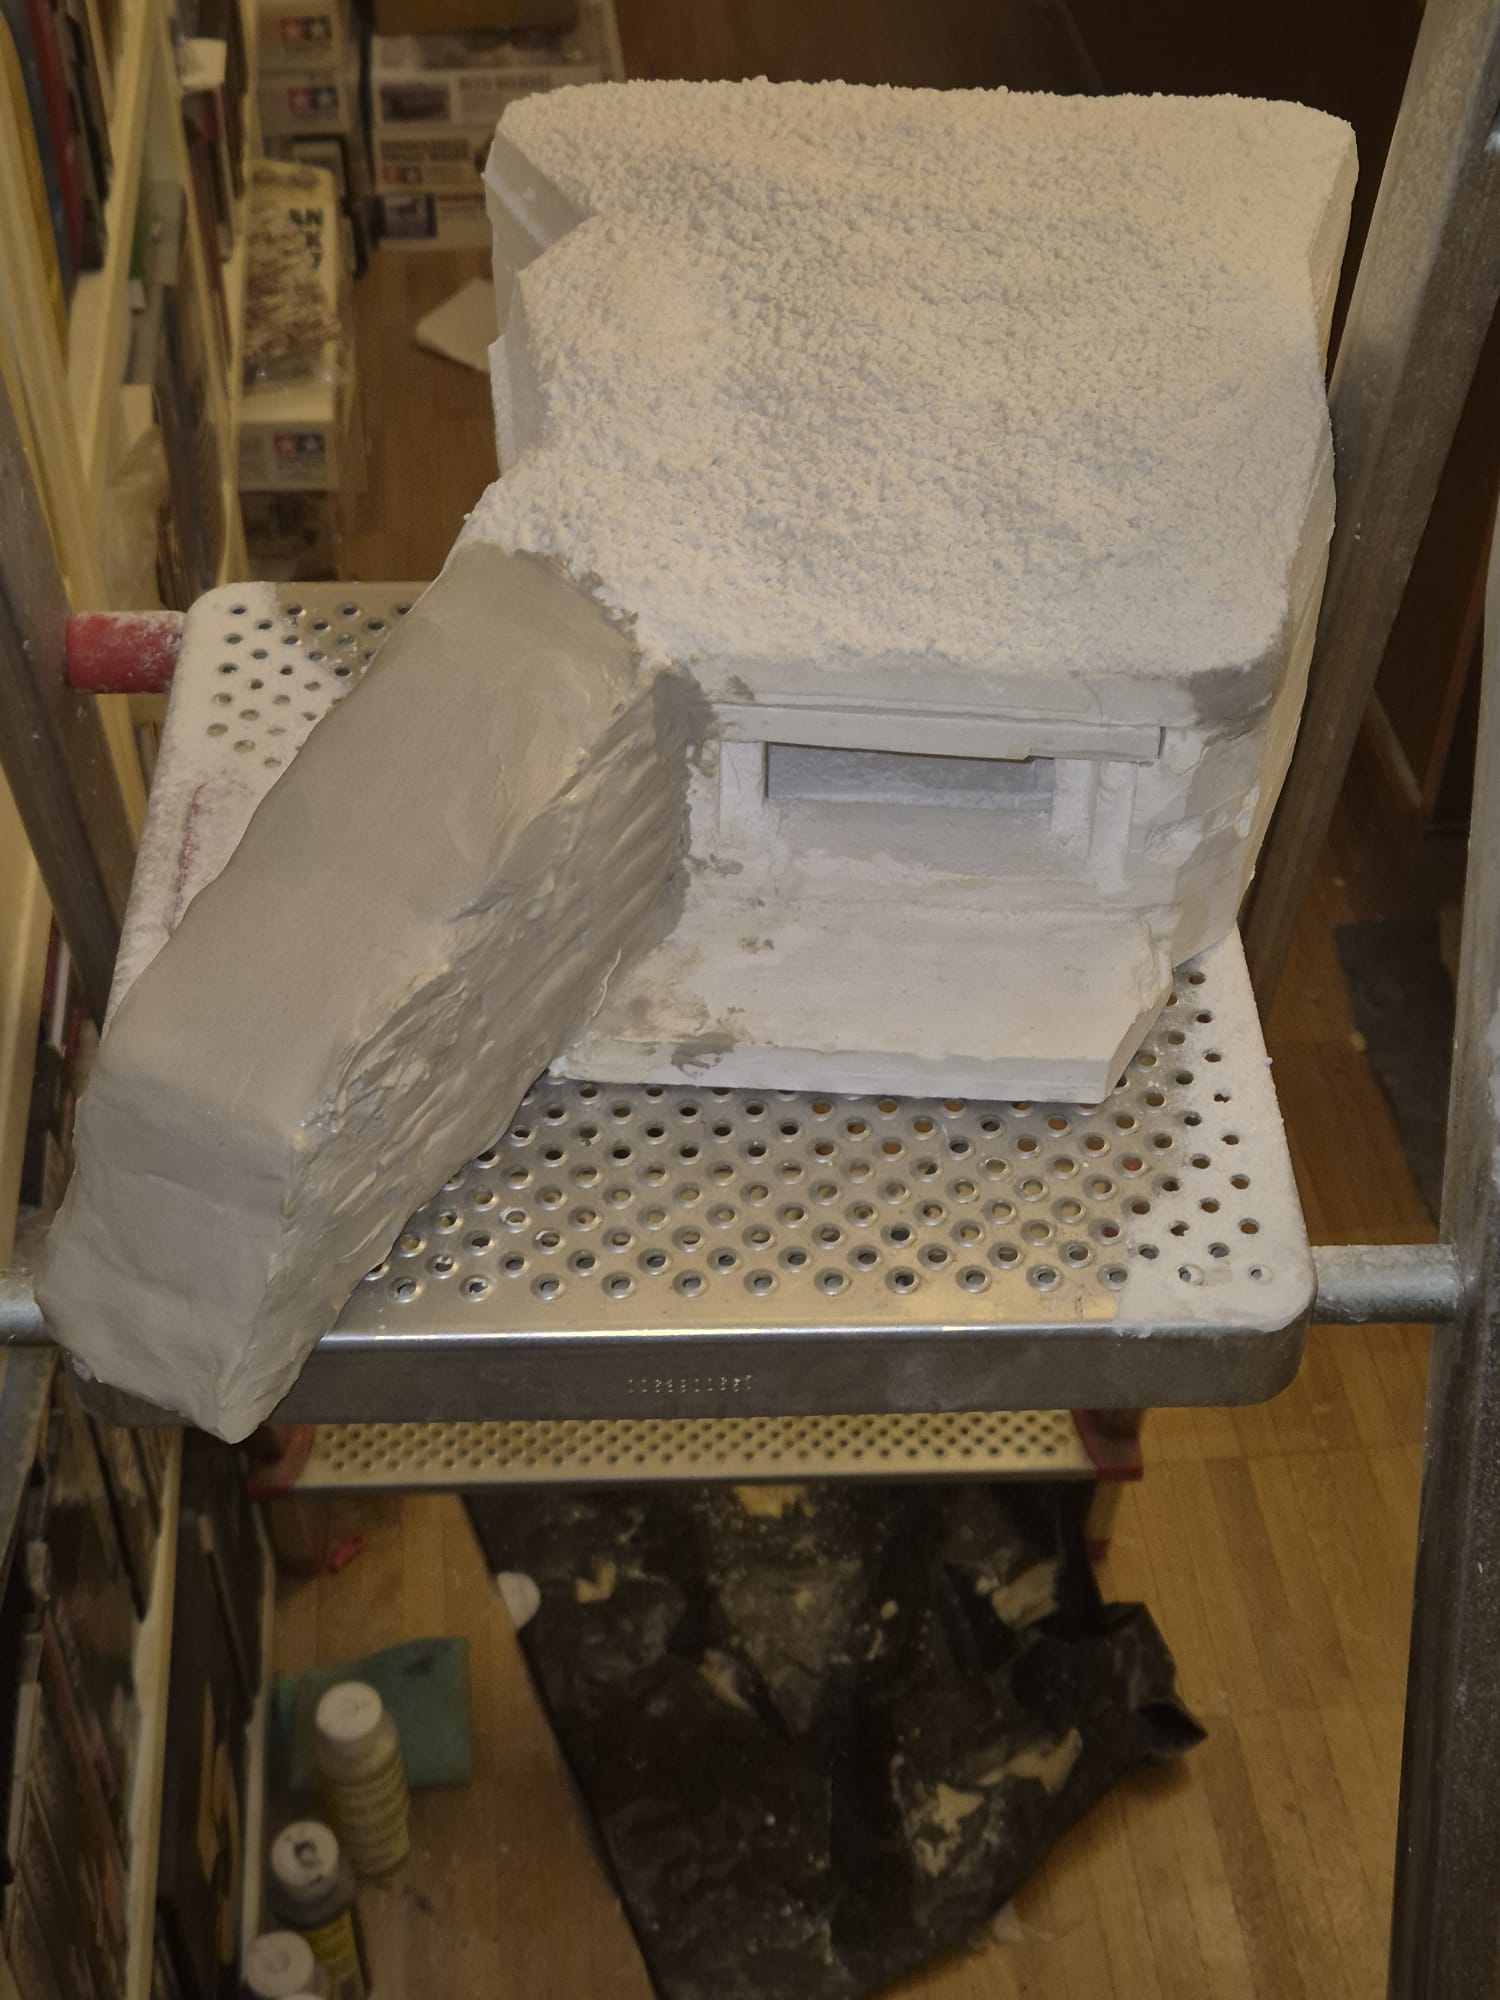
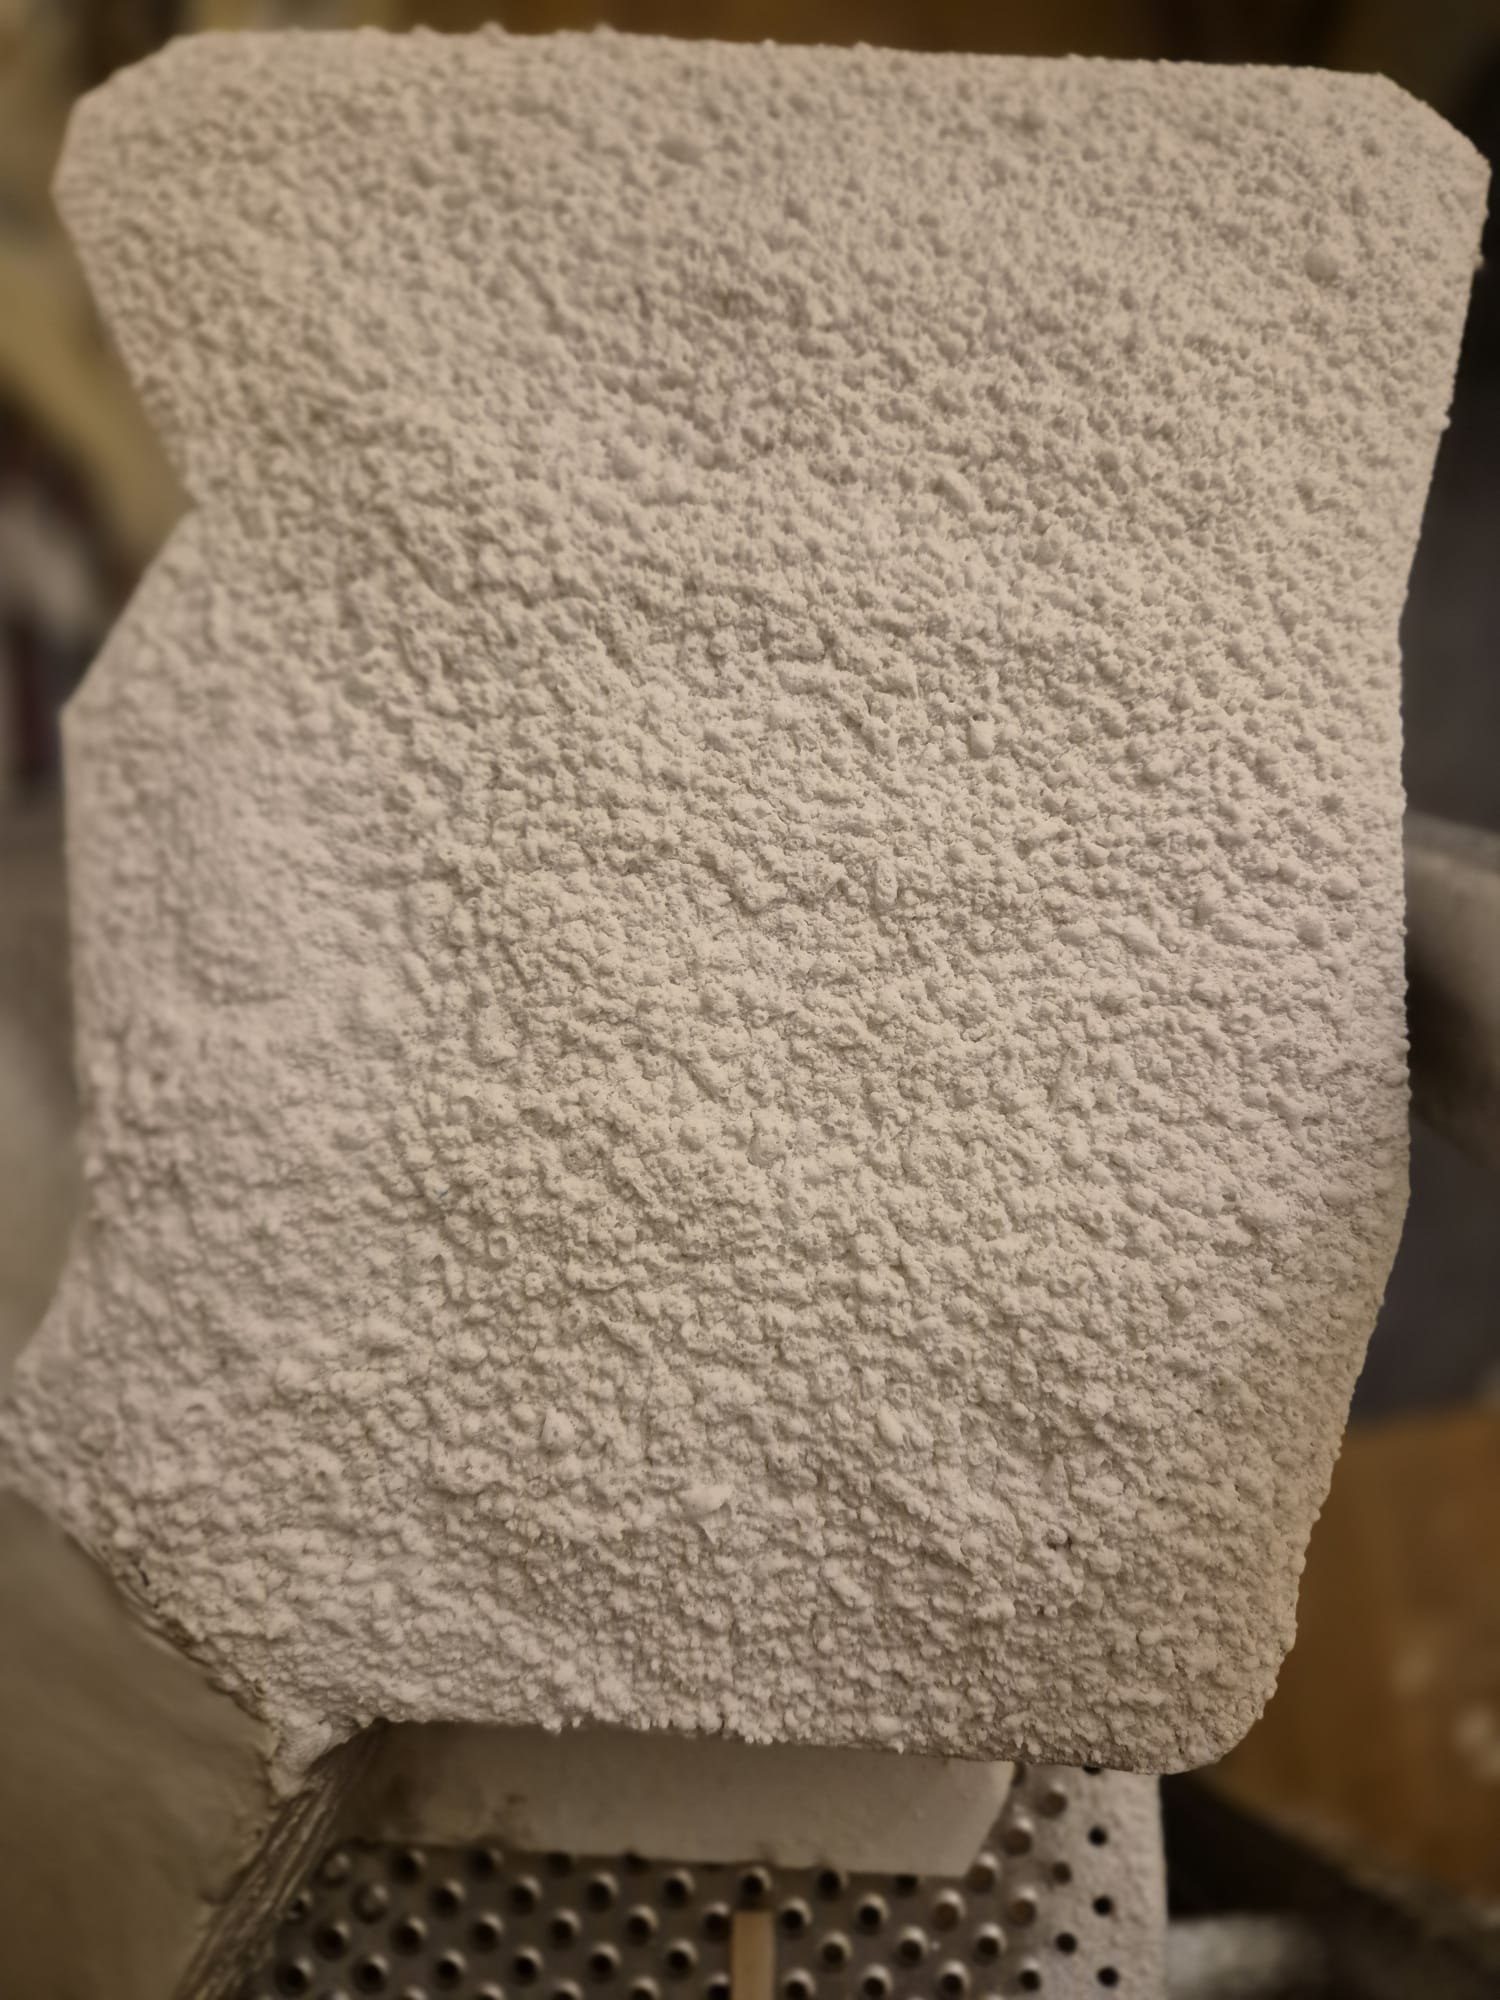
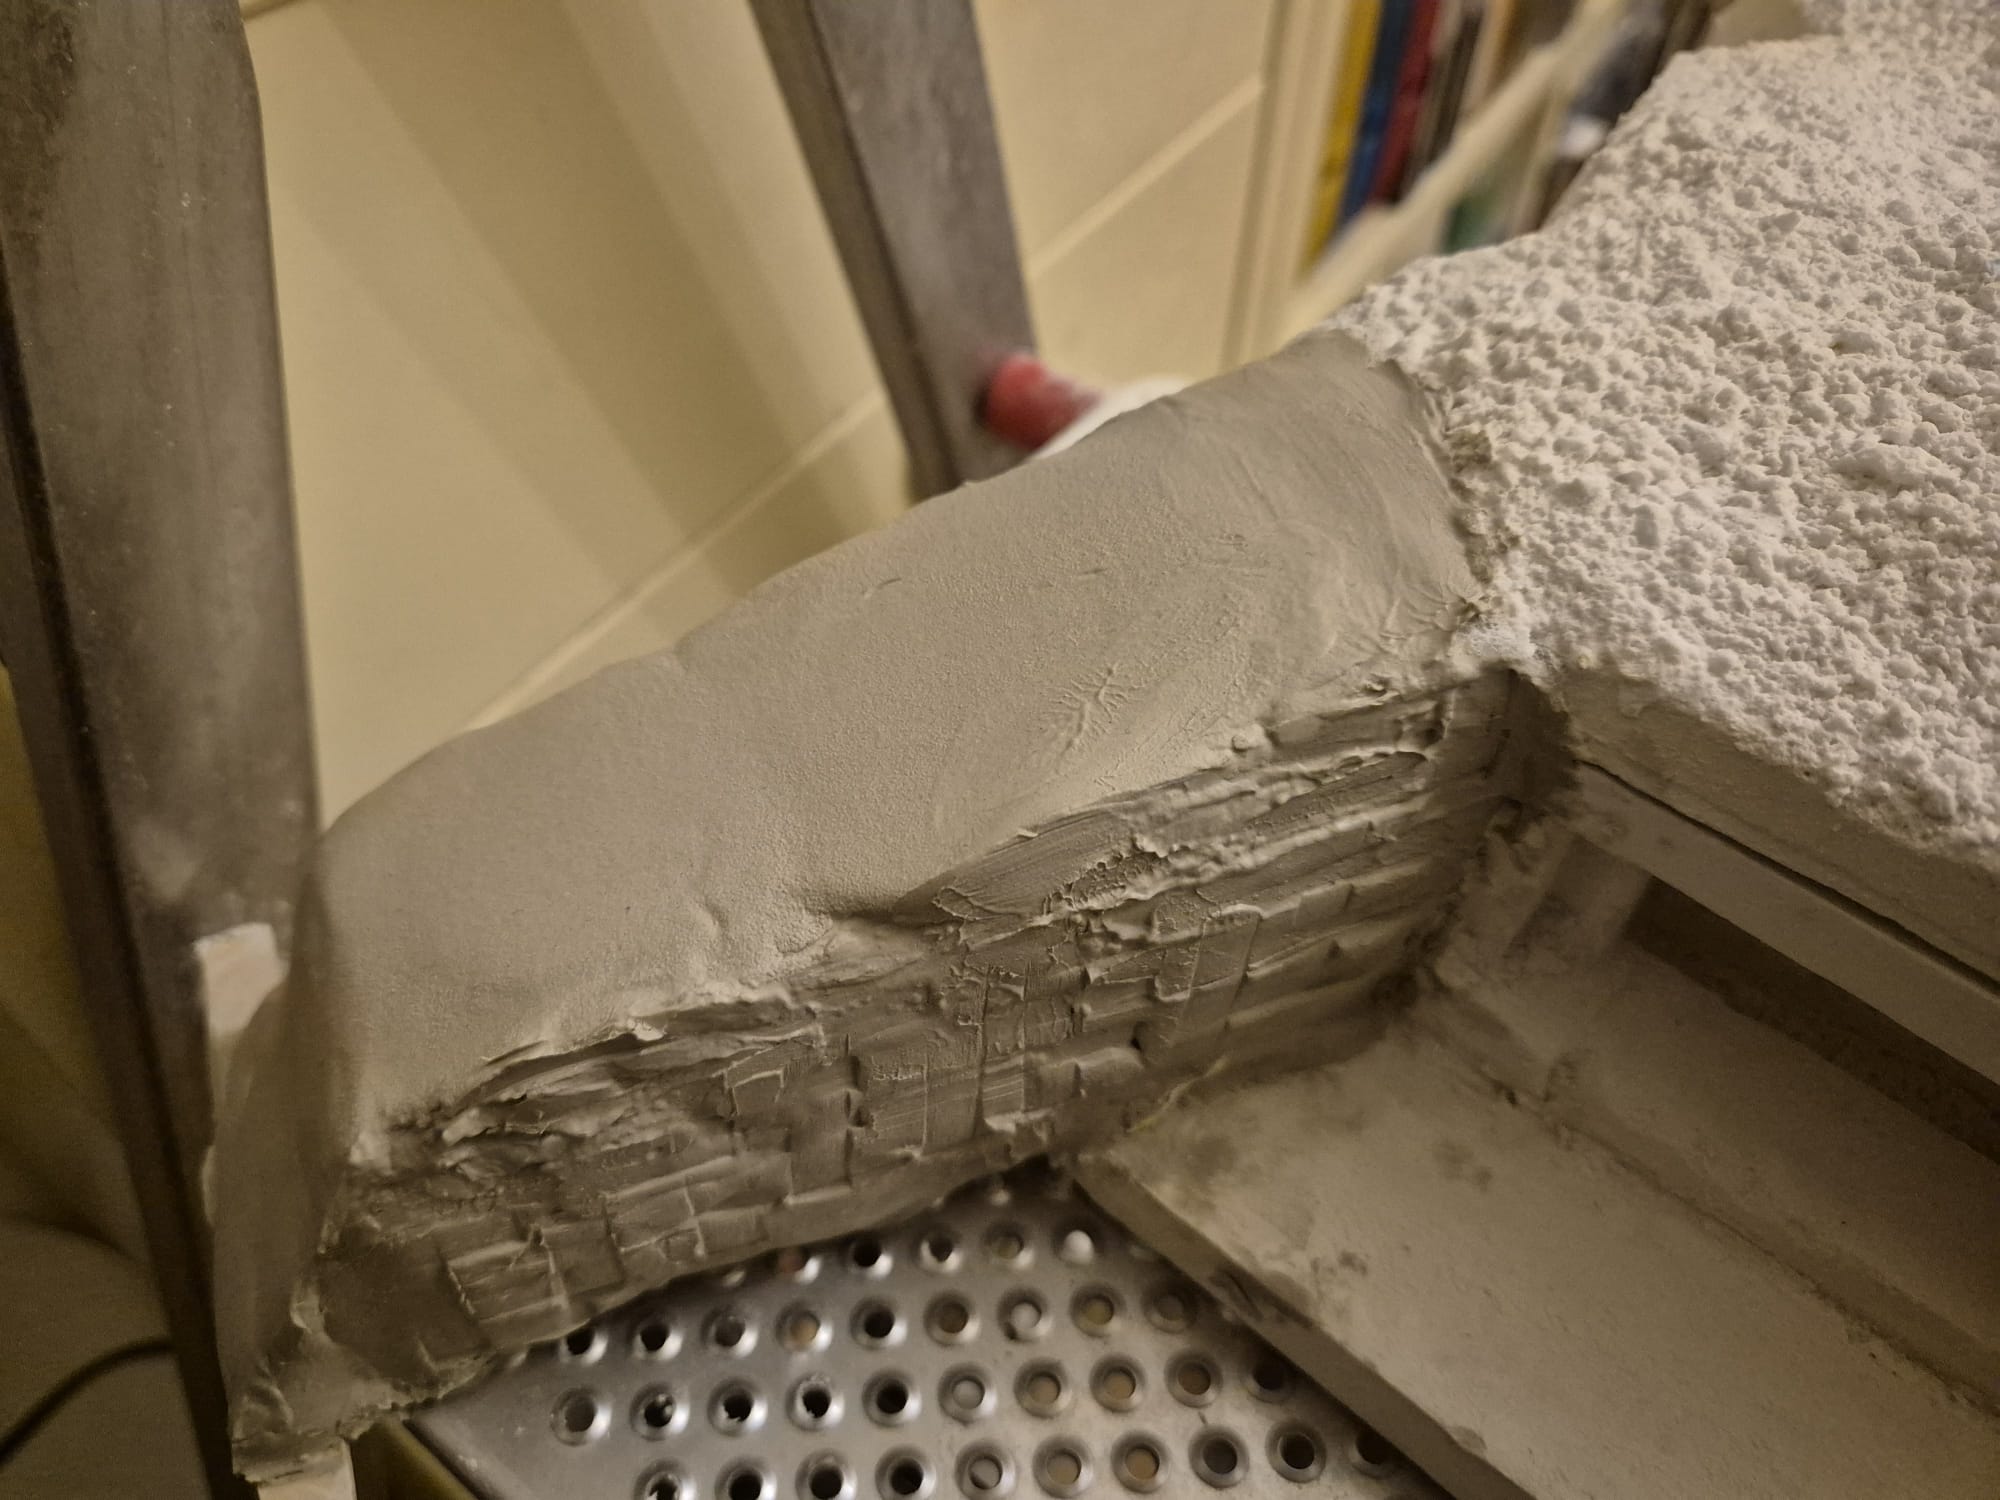
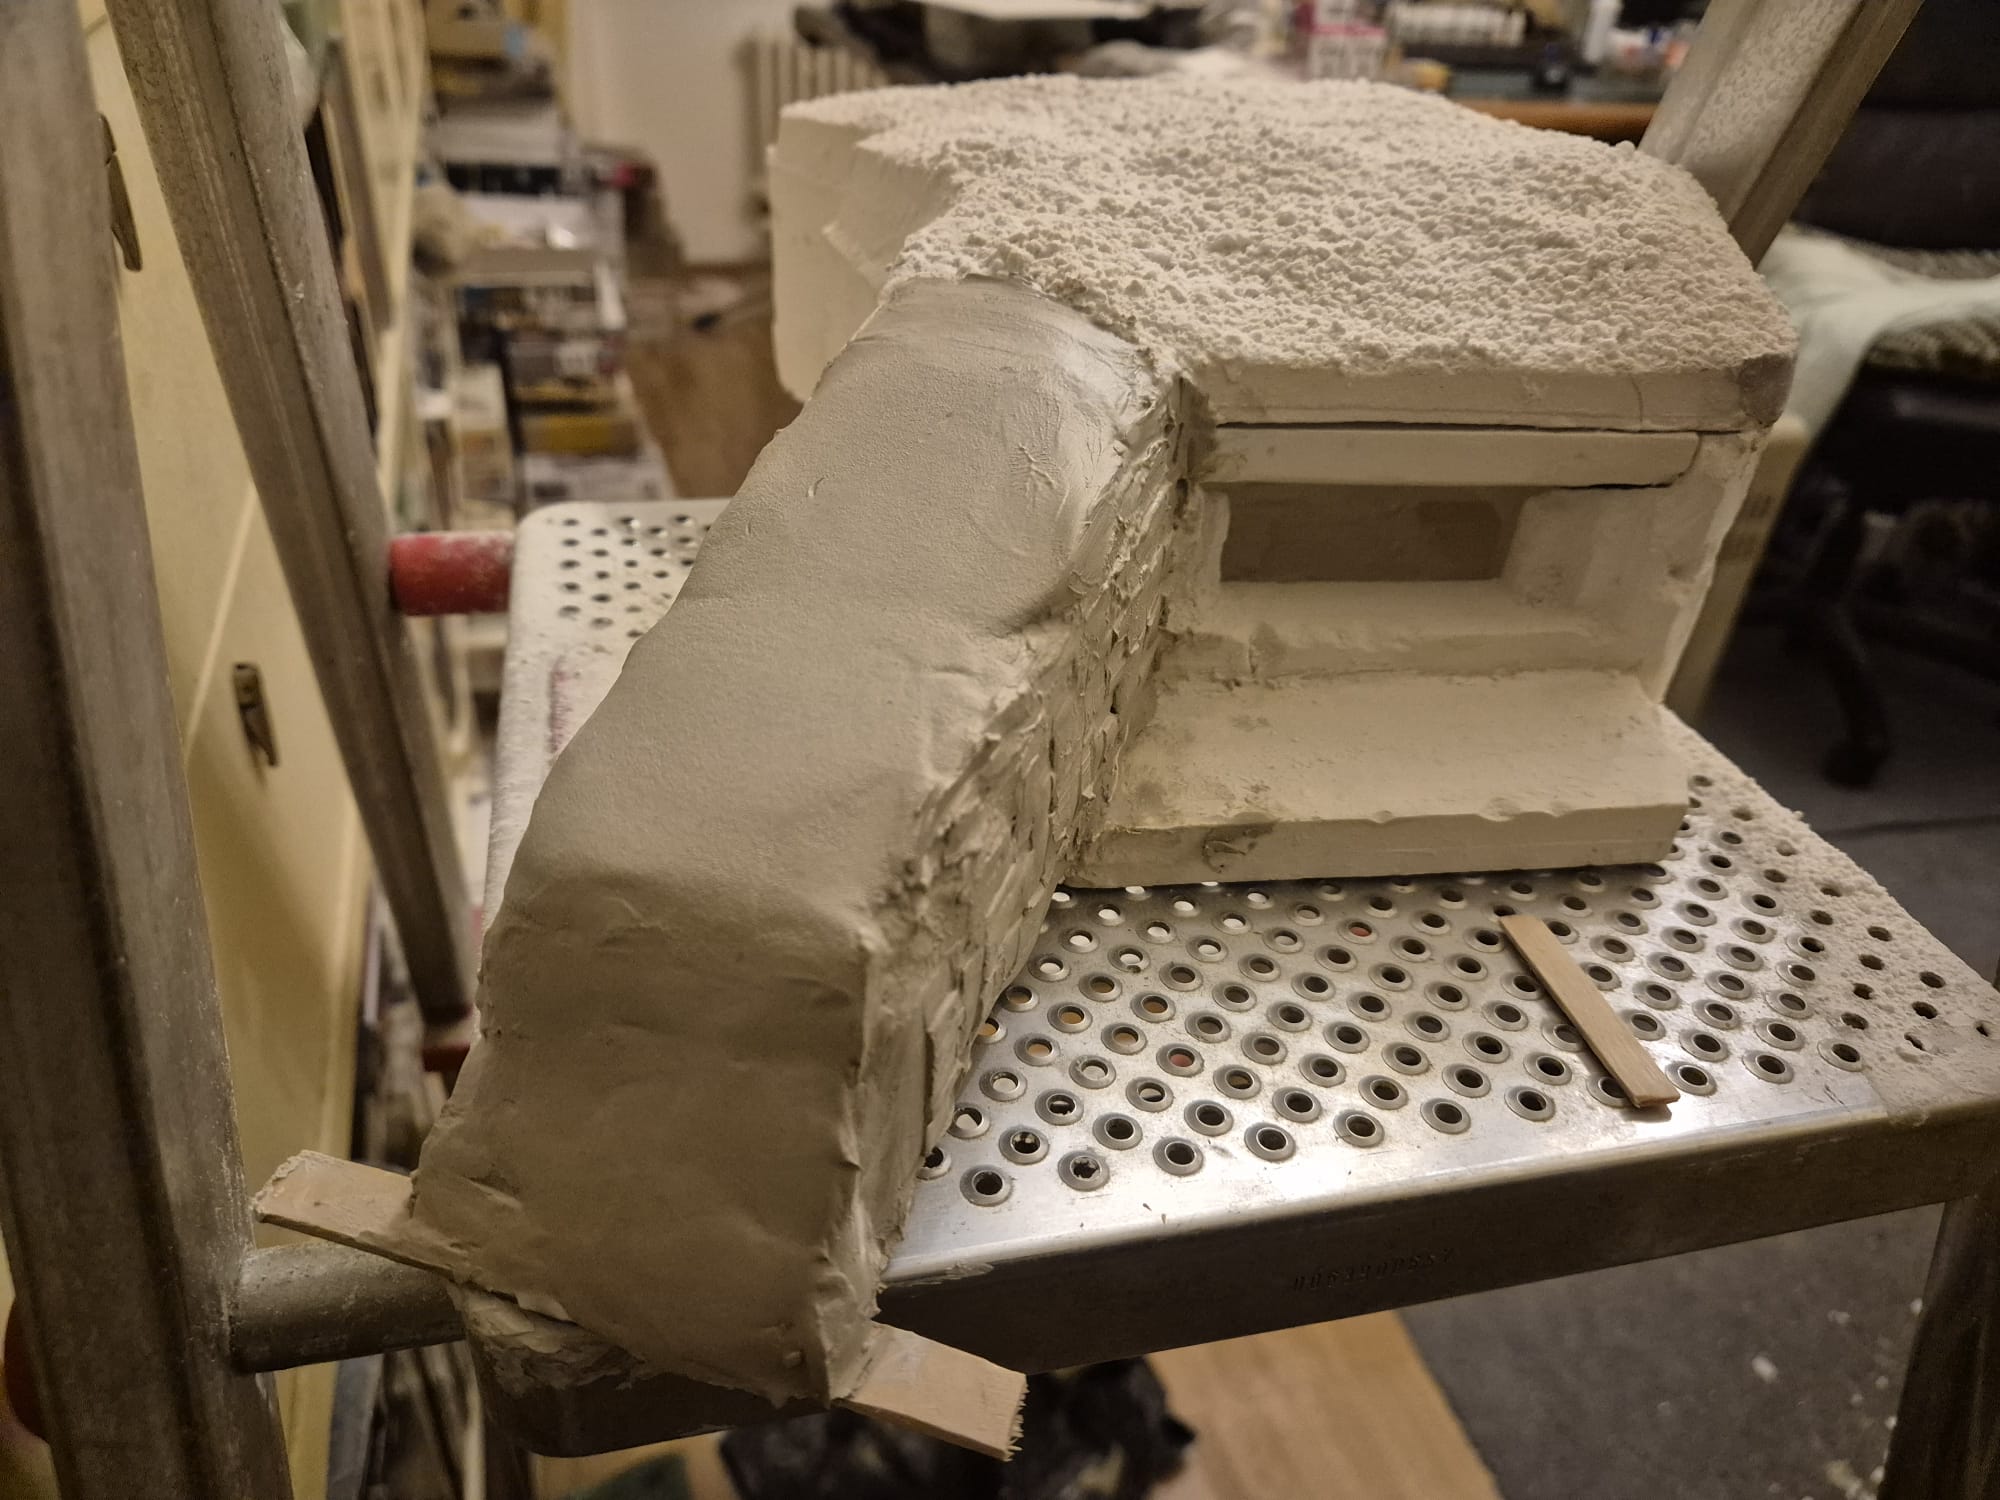
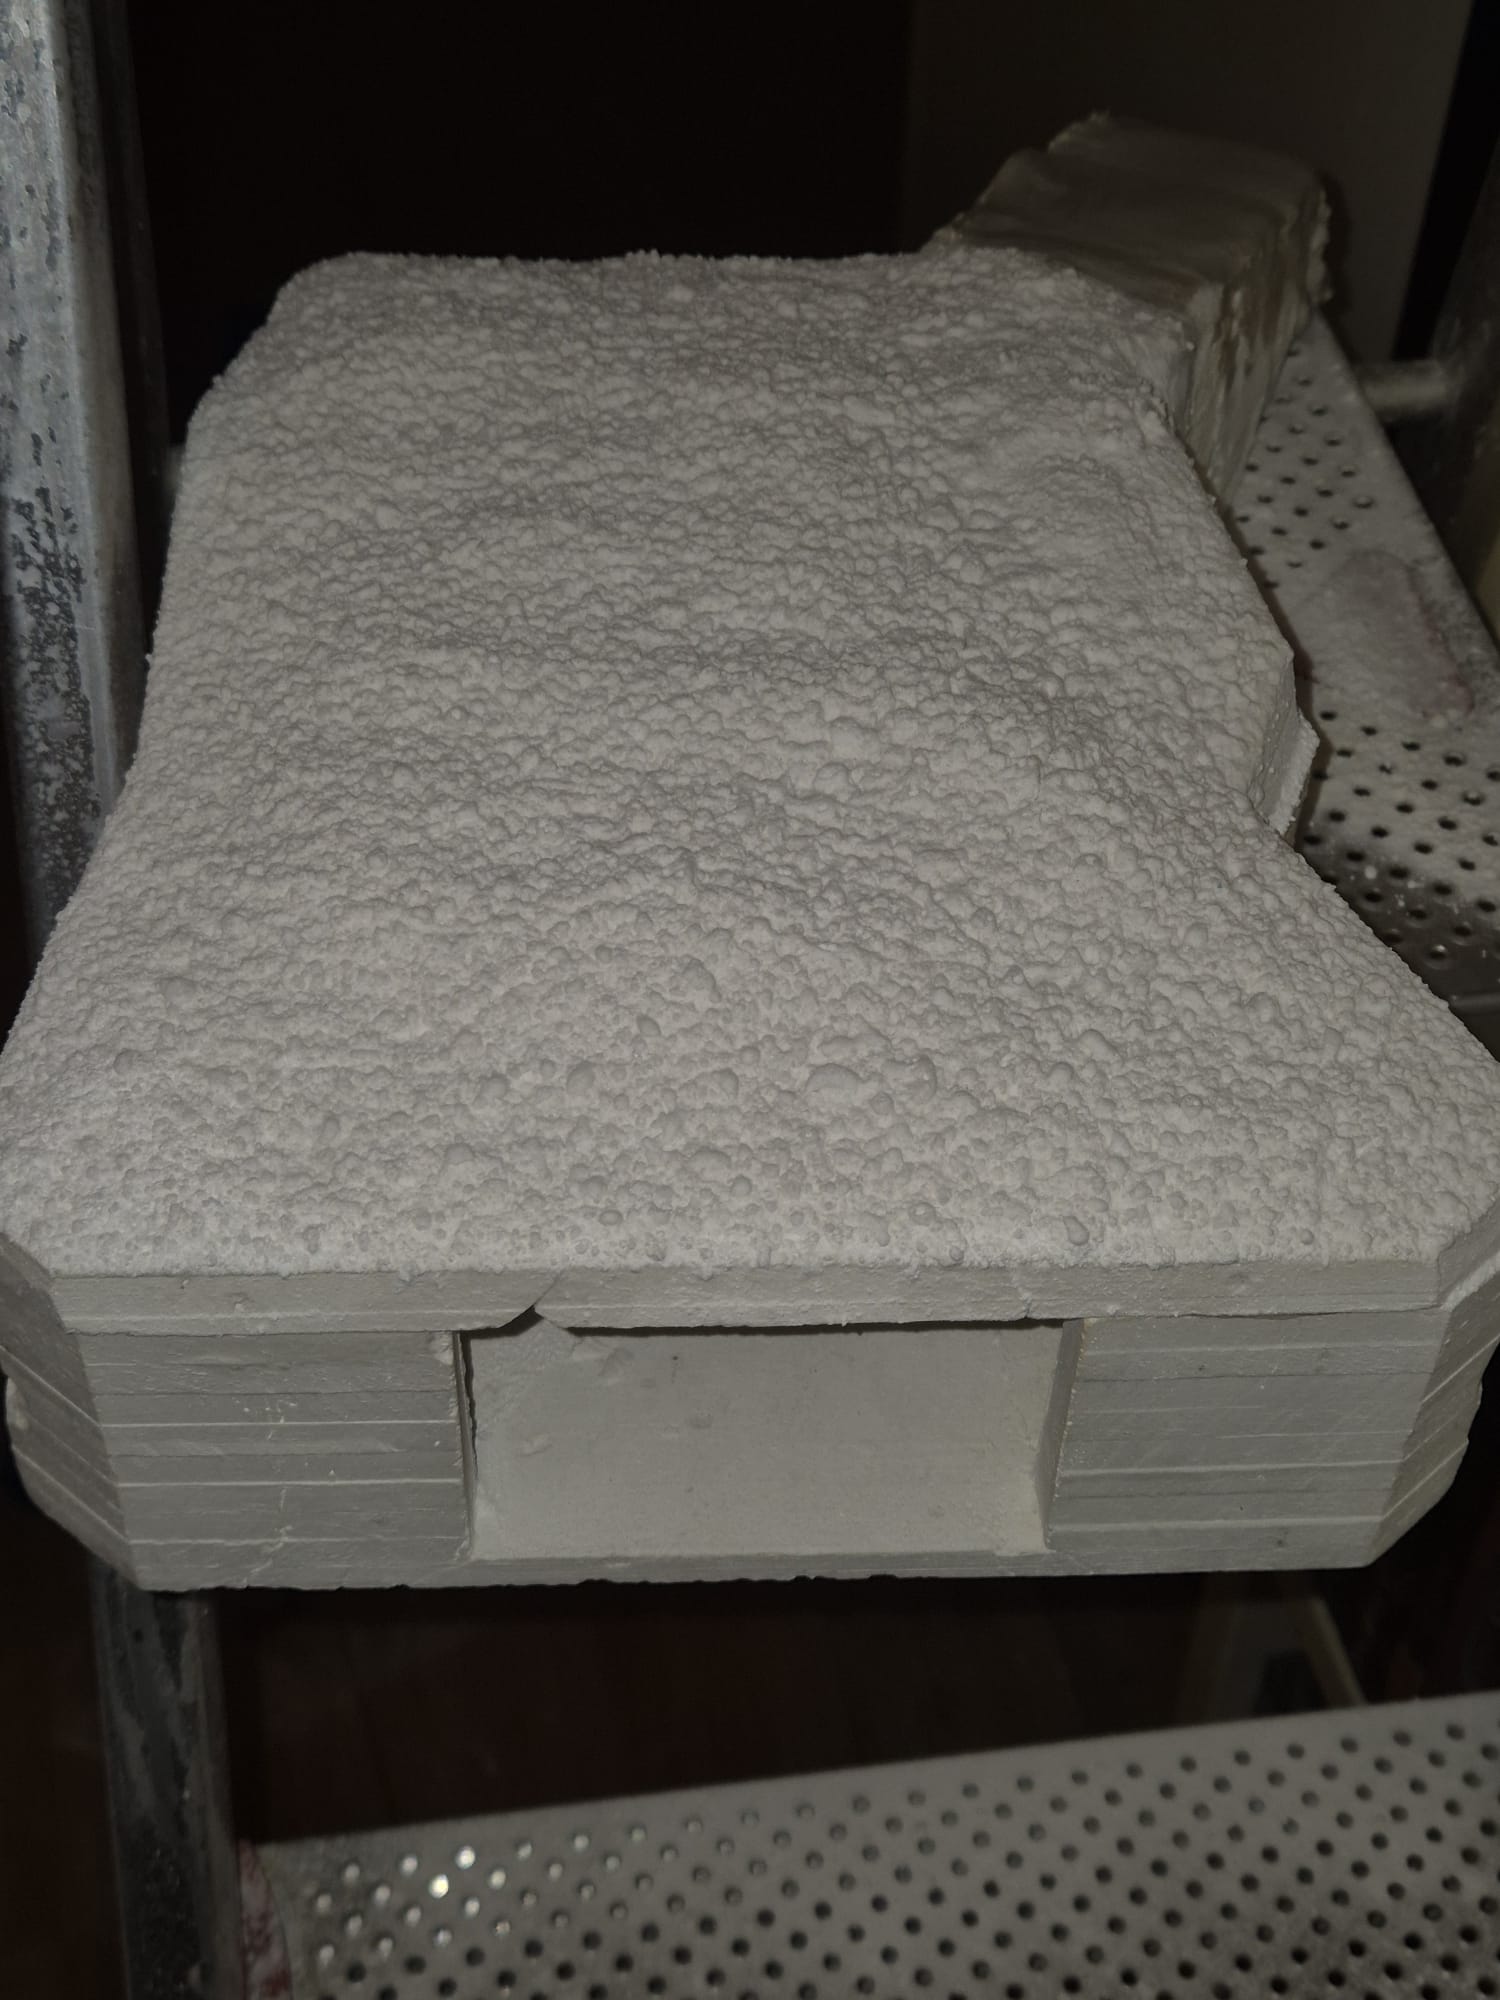
Here are a few preliminary pictures of what I am doing. Since the rooftop of the R677 had a funny shape, by no means realistic enough I covered it all with Light Weight Plaster by Woodland Scenics by pouring it summarily over on its top simulating the terrain which actually covered the roof. I fixed it by spraying it with a mix of Craft glue mixed to Aliphatic glue and water. I sprayed the mixture from above with a sprayer. Due to its nature, once wetted the material starts to show tiny bumps like on a natural terrain surface. This will later be further refined with actual terrain surfacers and vegetation.
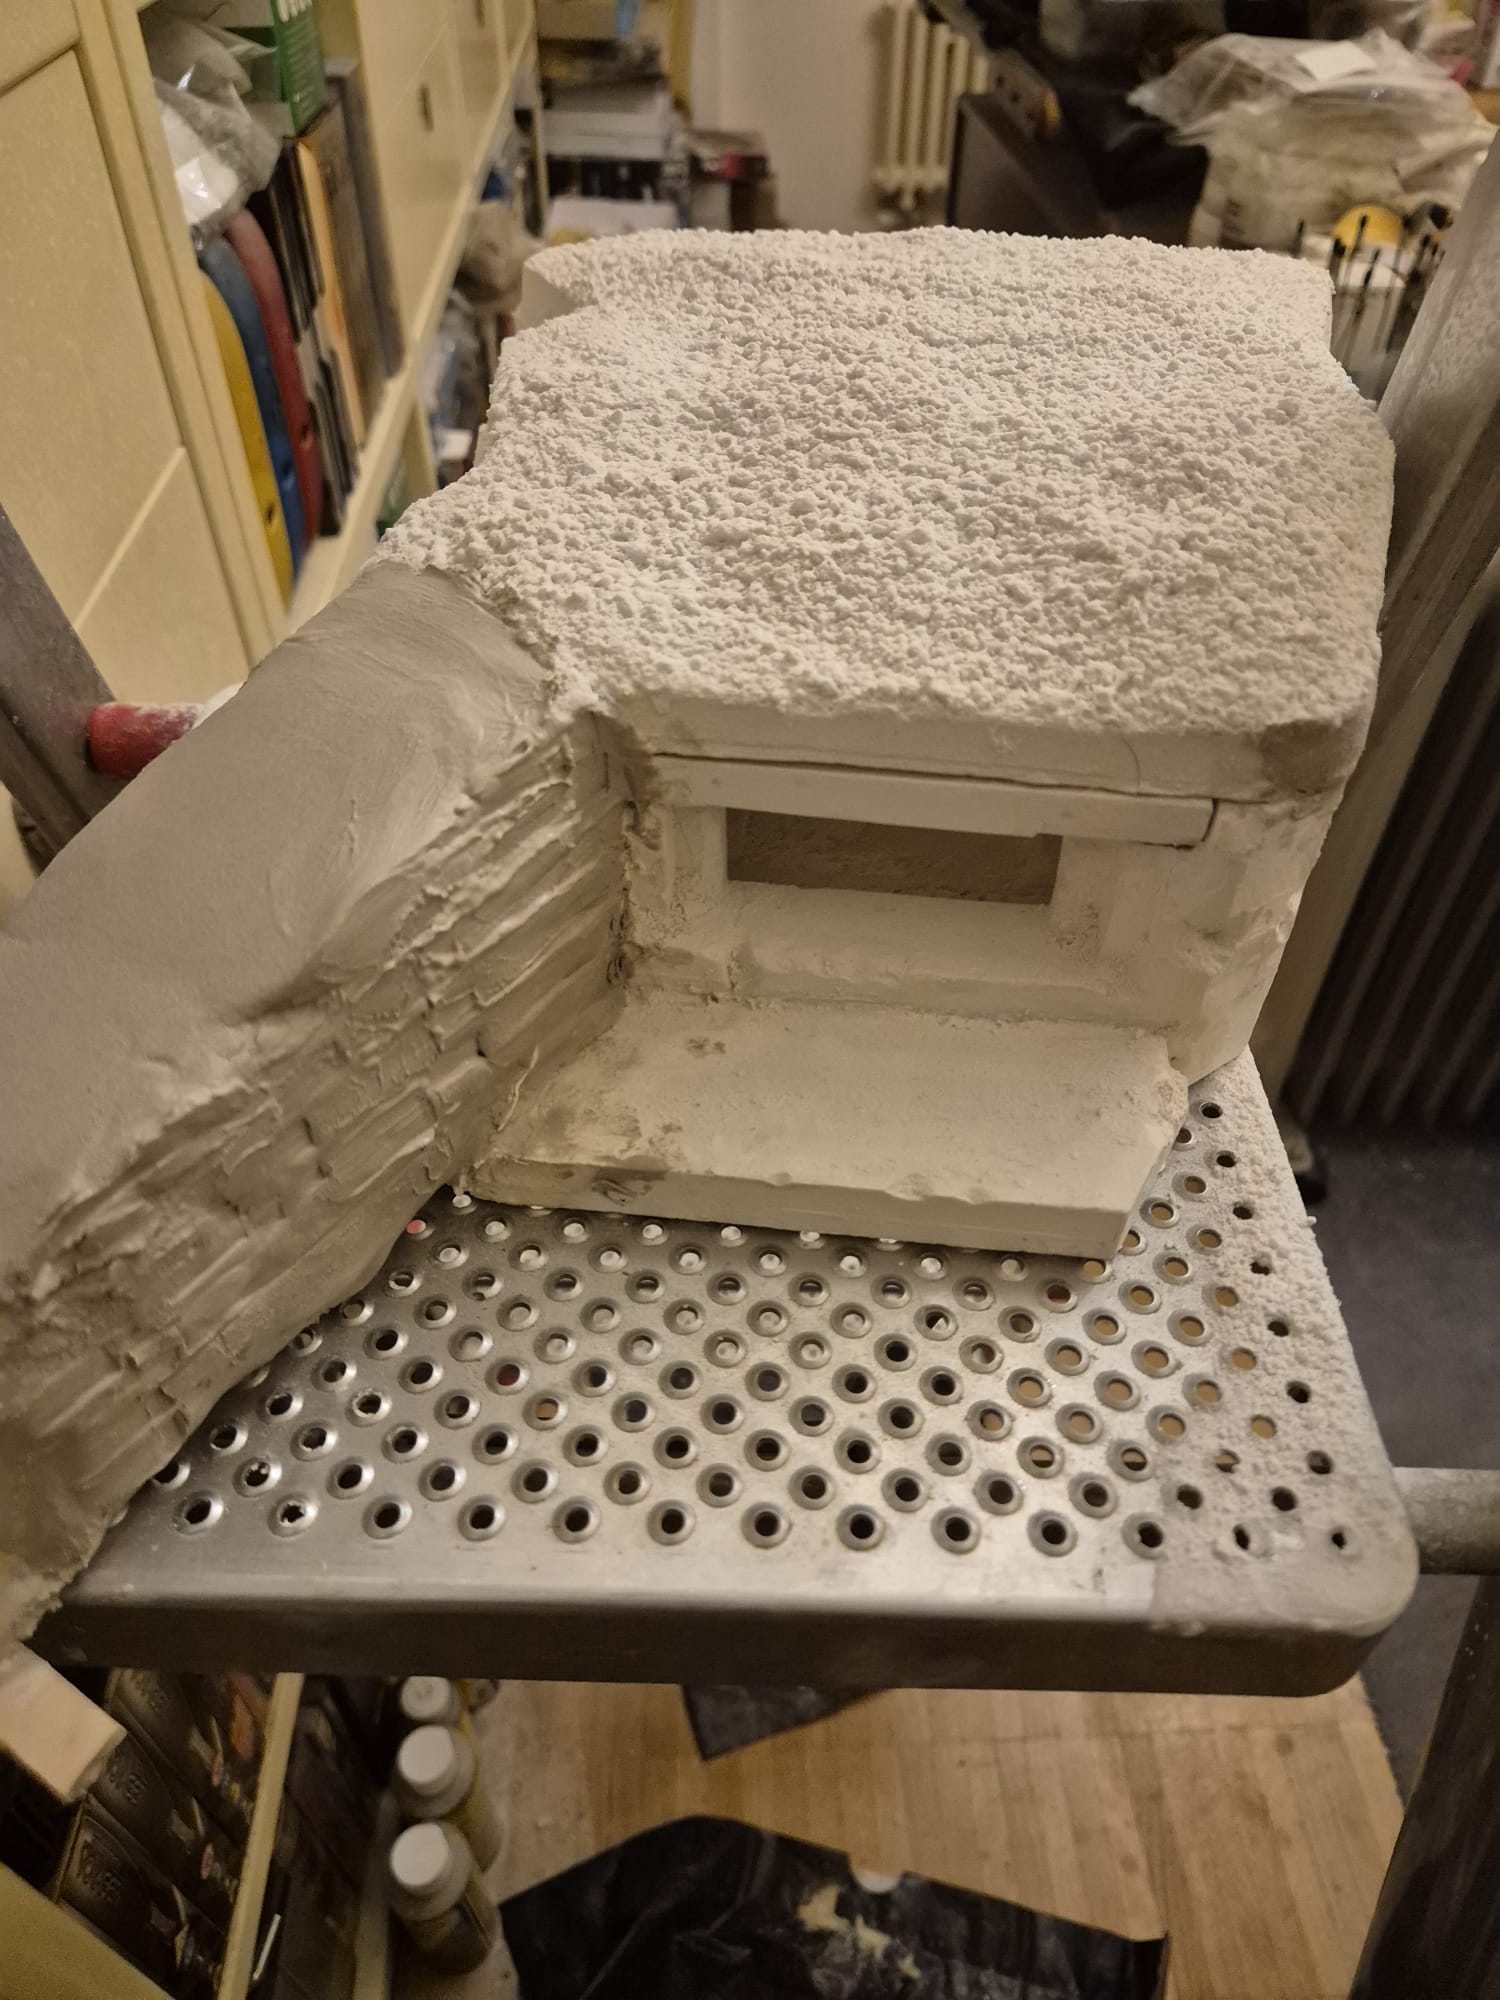
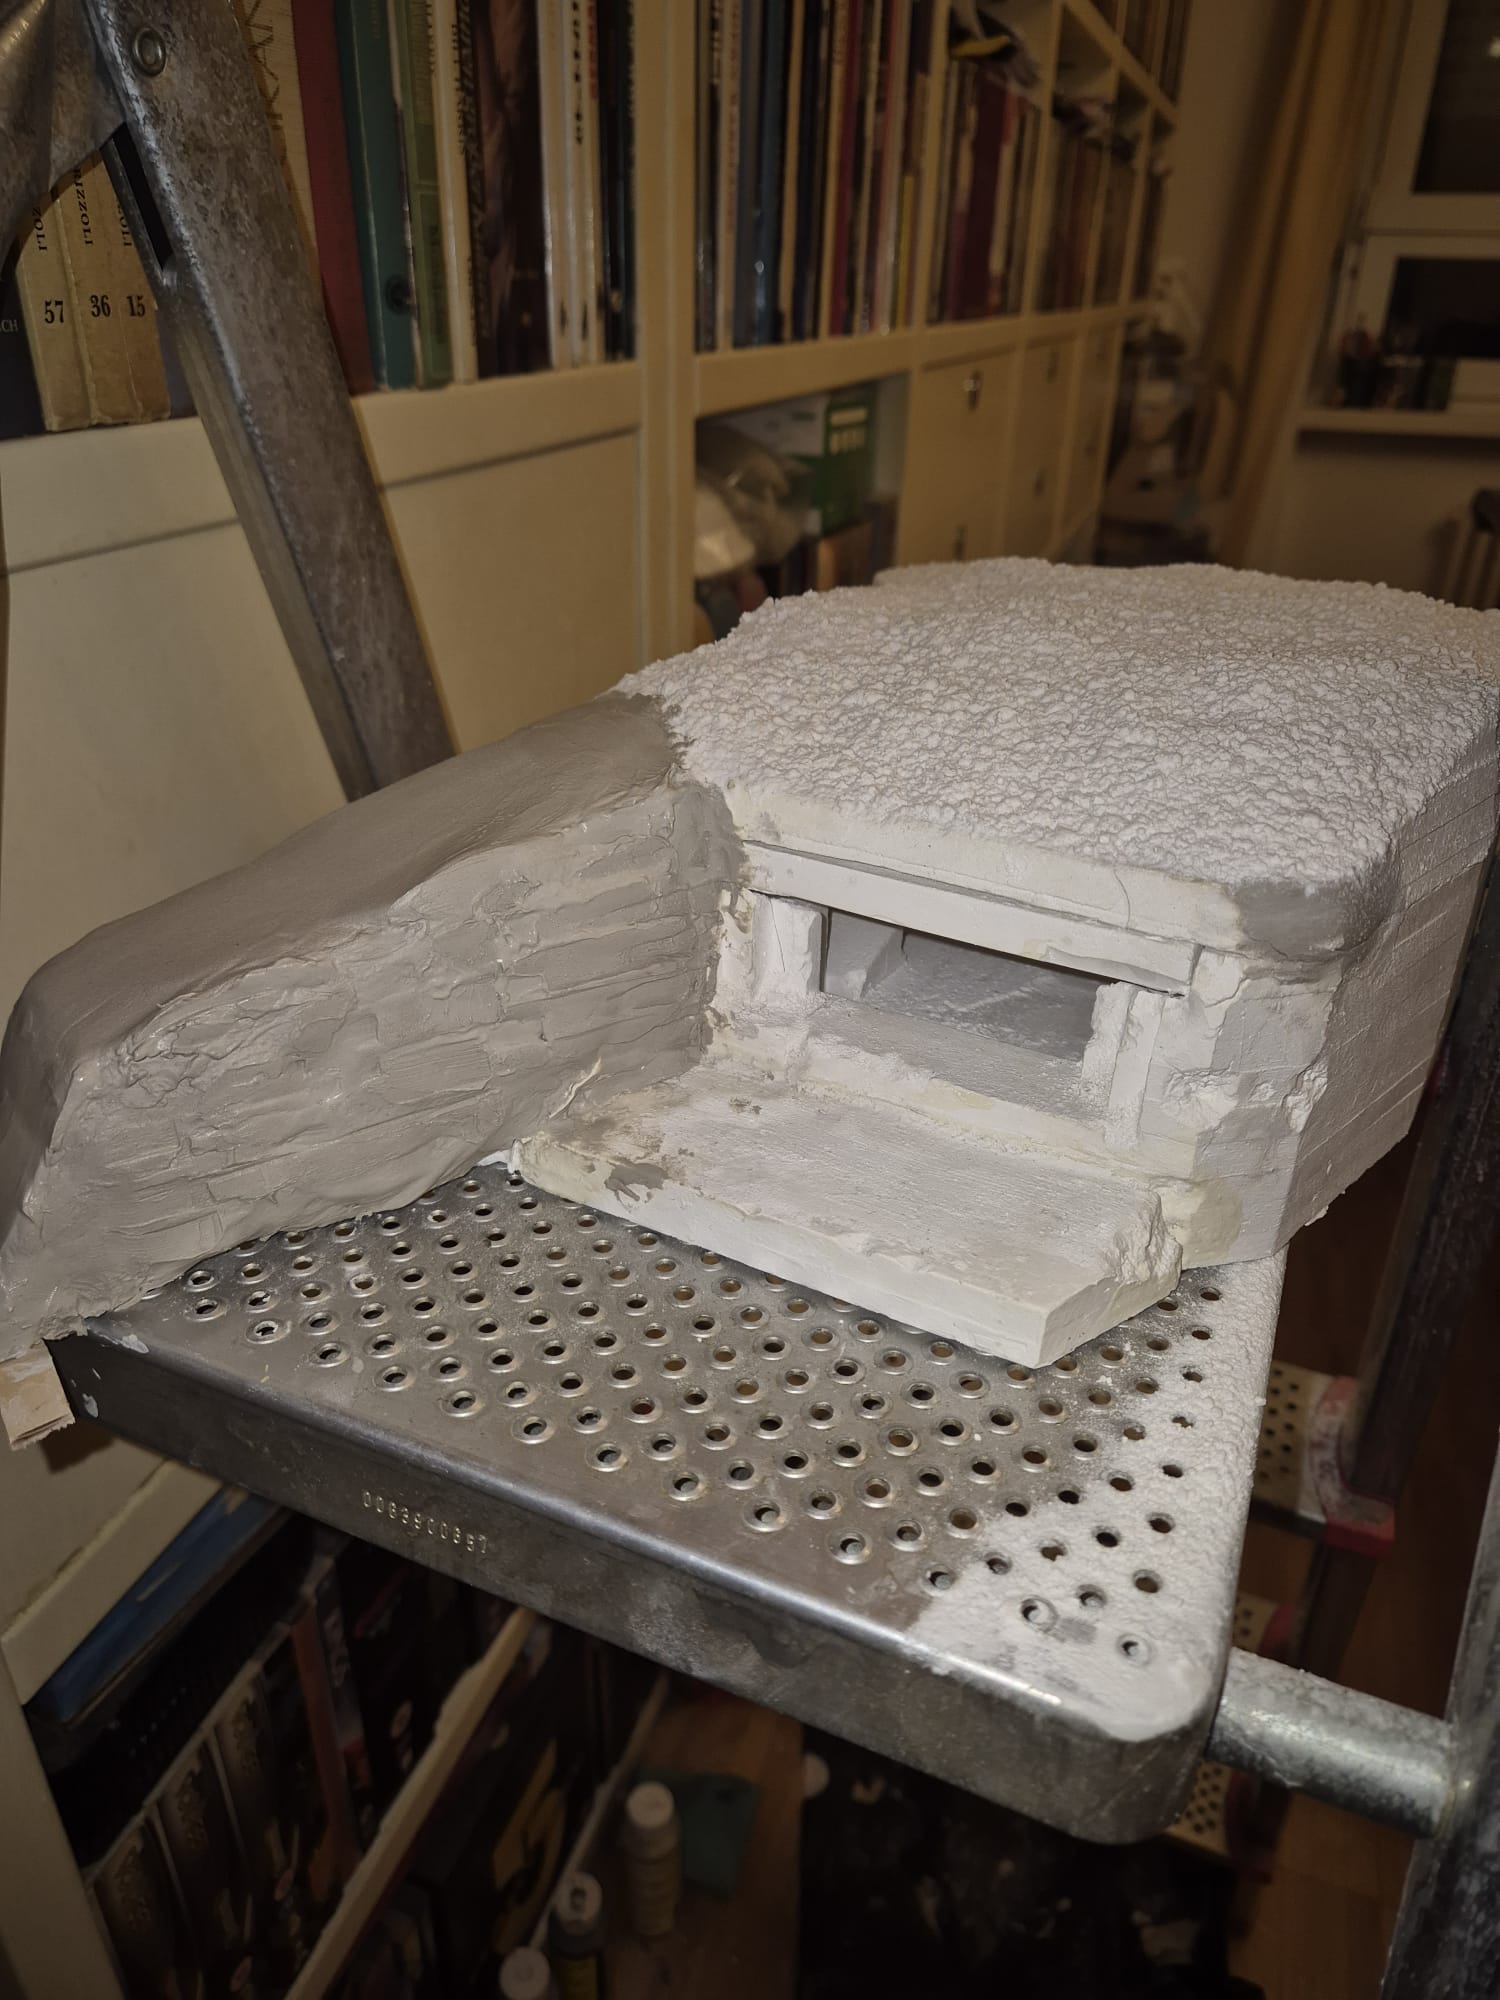
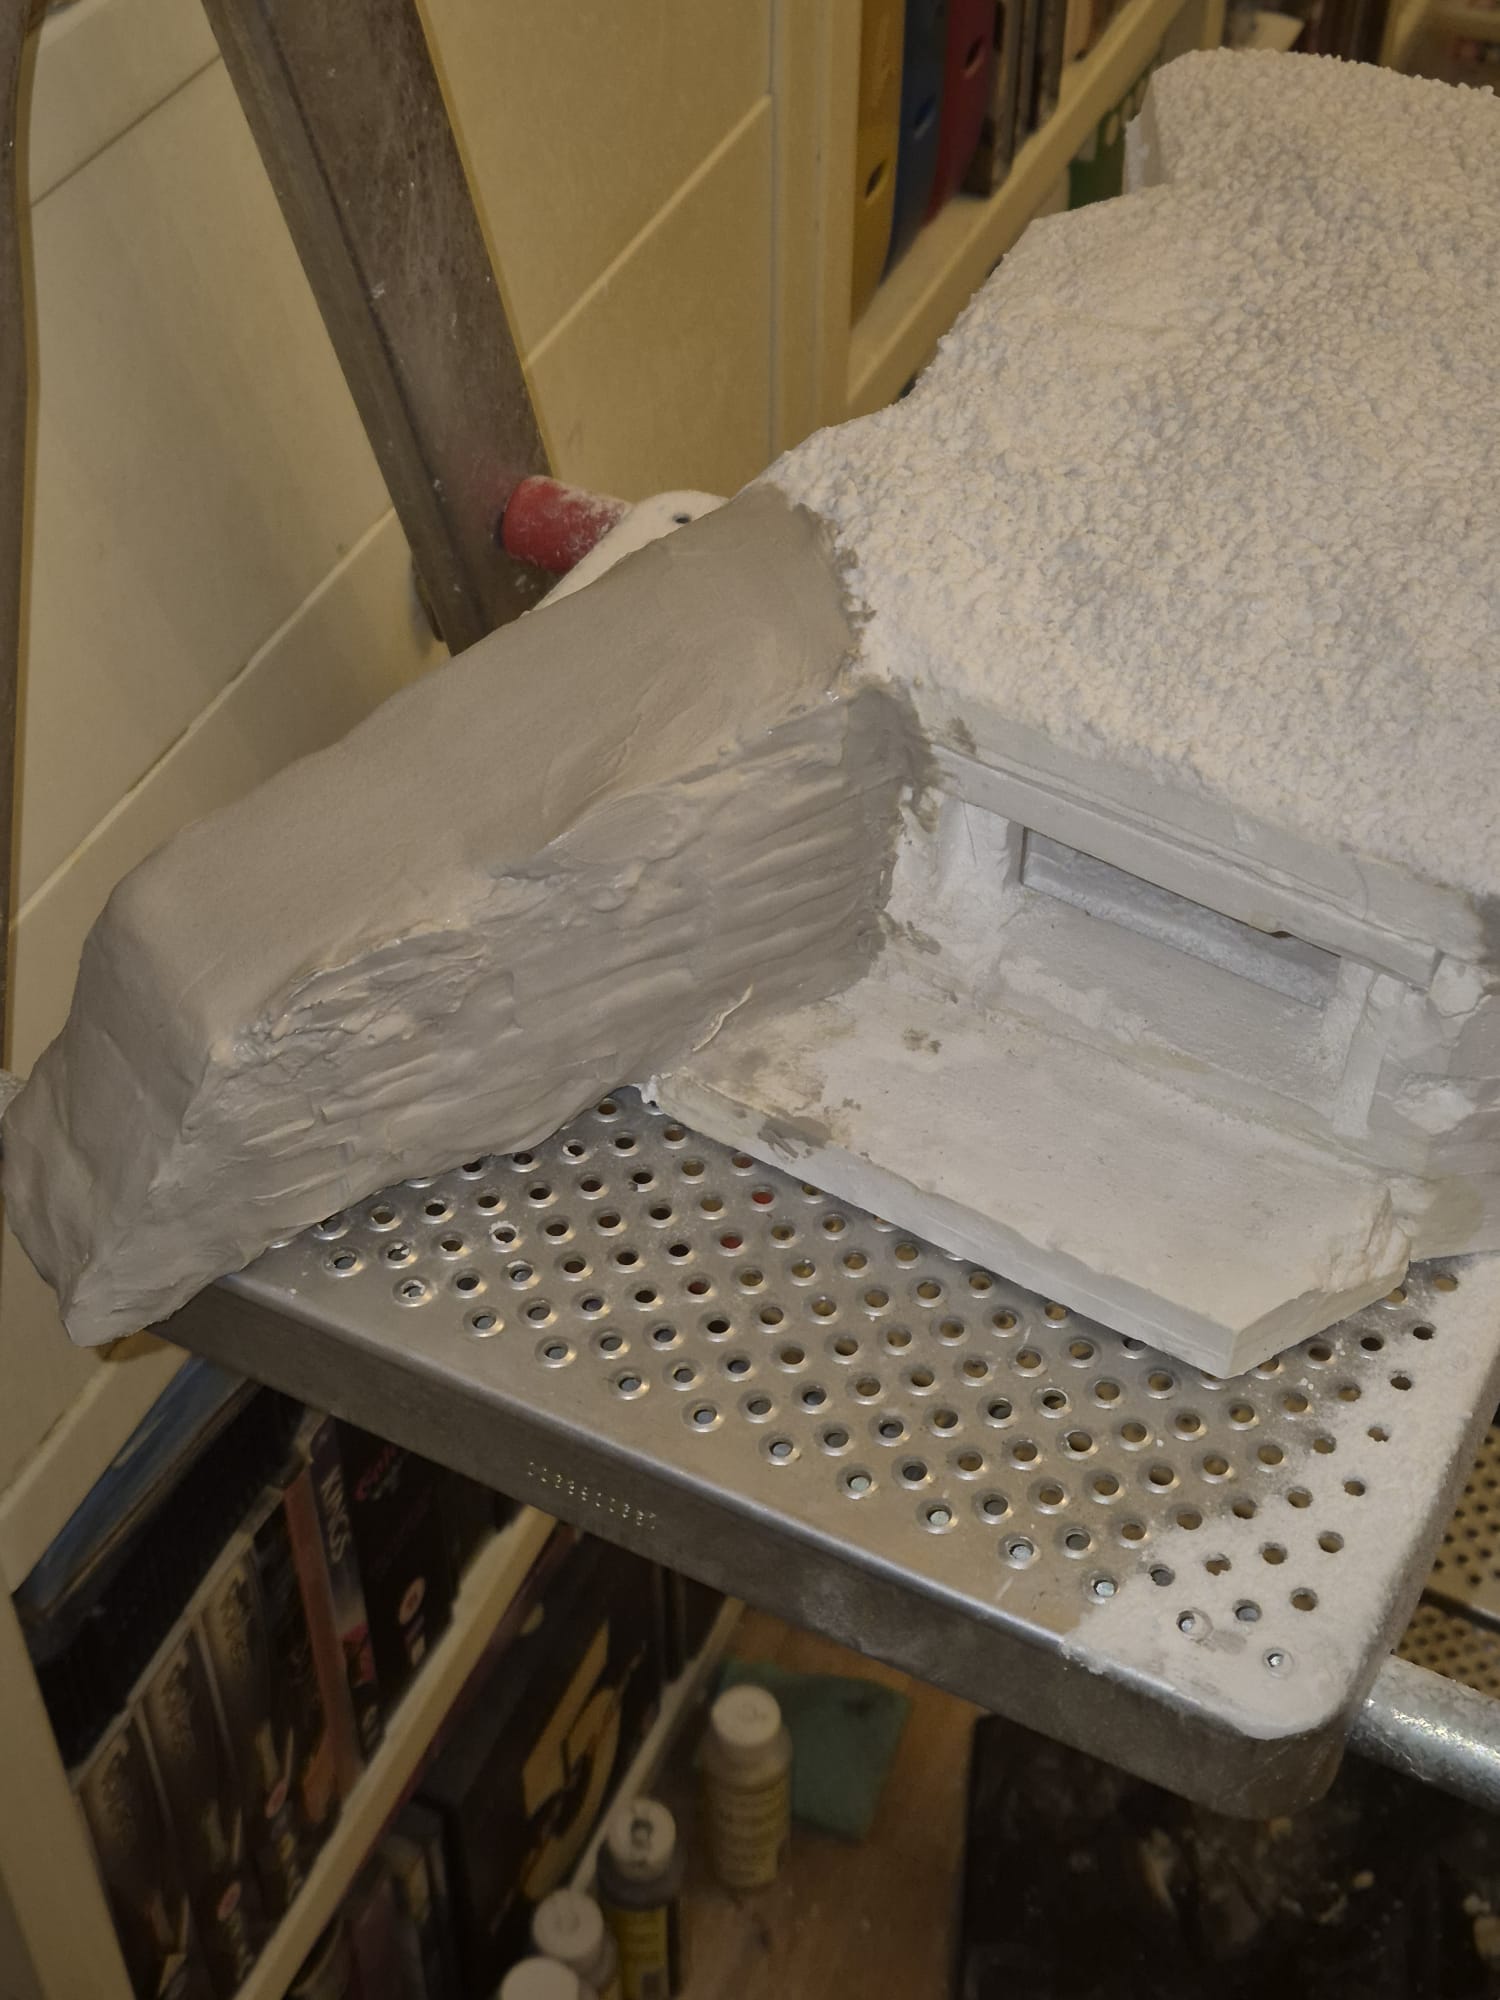
The protection wall, although already built in hard plaster, lacked the necessary details which I could not add on that material. So, in order to finish it and define it a bit better, I added a very thin layer of air drying clay mixed with water and despite being thin, it tended to stick to everything requiring additional lukewarm water and a spatula to be evenly spread along the side and upper surfaces of the wall. I also used a water filled paint roller sponge to make it smoother. Once this was finally achieved I pressed a medium sized wooden stick into the clay to simulate the horizontal shapes of the concrete stones, then, with a smaller stick to which I cut its rounded ends, proceeded to do the same for the vertical imprints. Tomorrow i will proceed with the outer facade of the wall and do the same. The upper one seemed to be smooth, so I just passed over it with a large spatula applying rotating movements and then a full downward pass to completely flatten it.
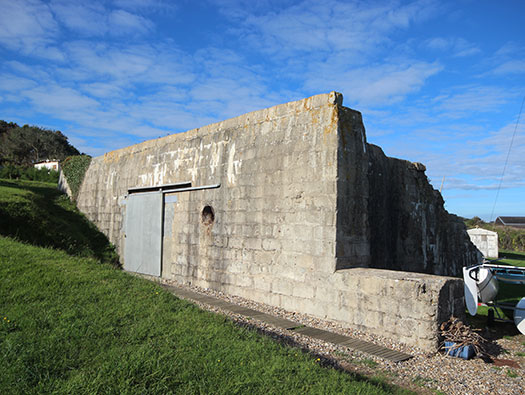
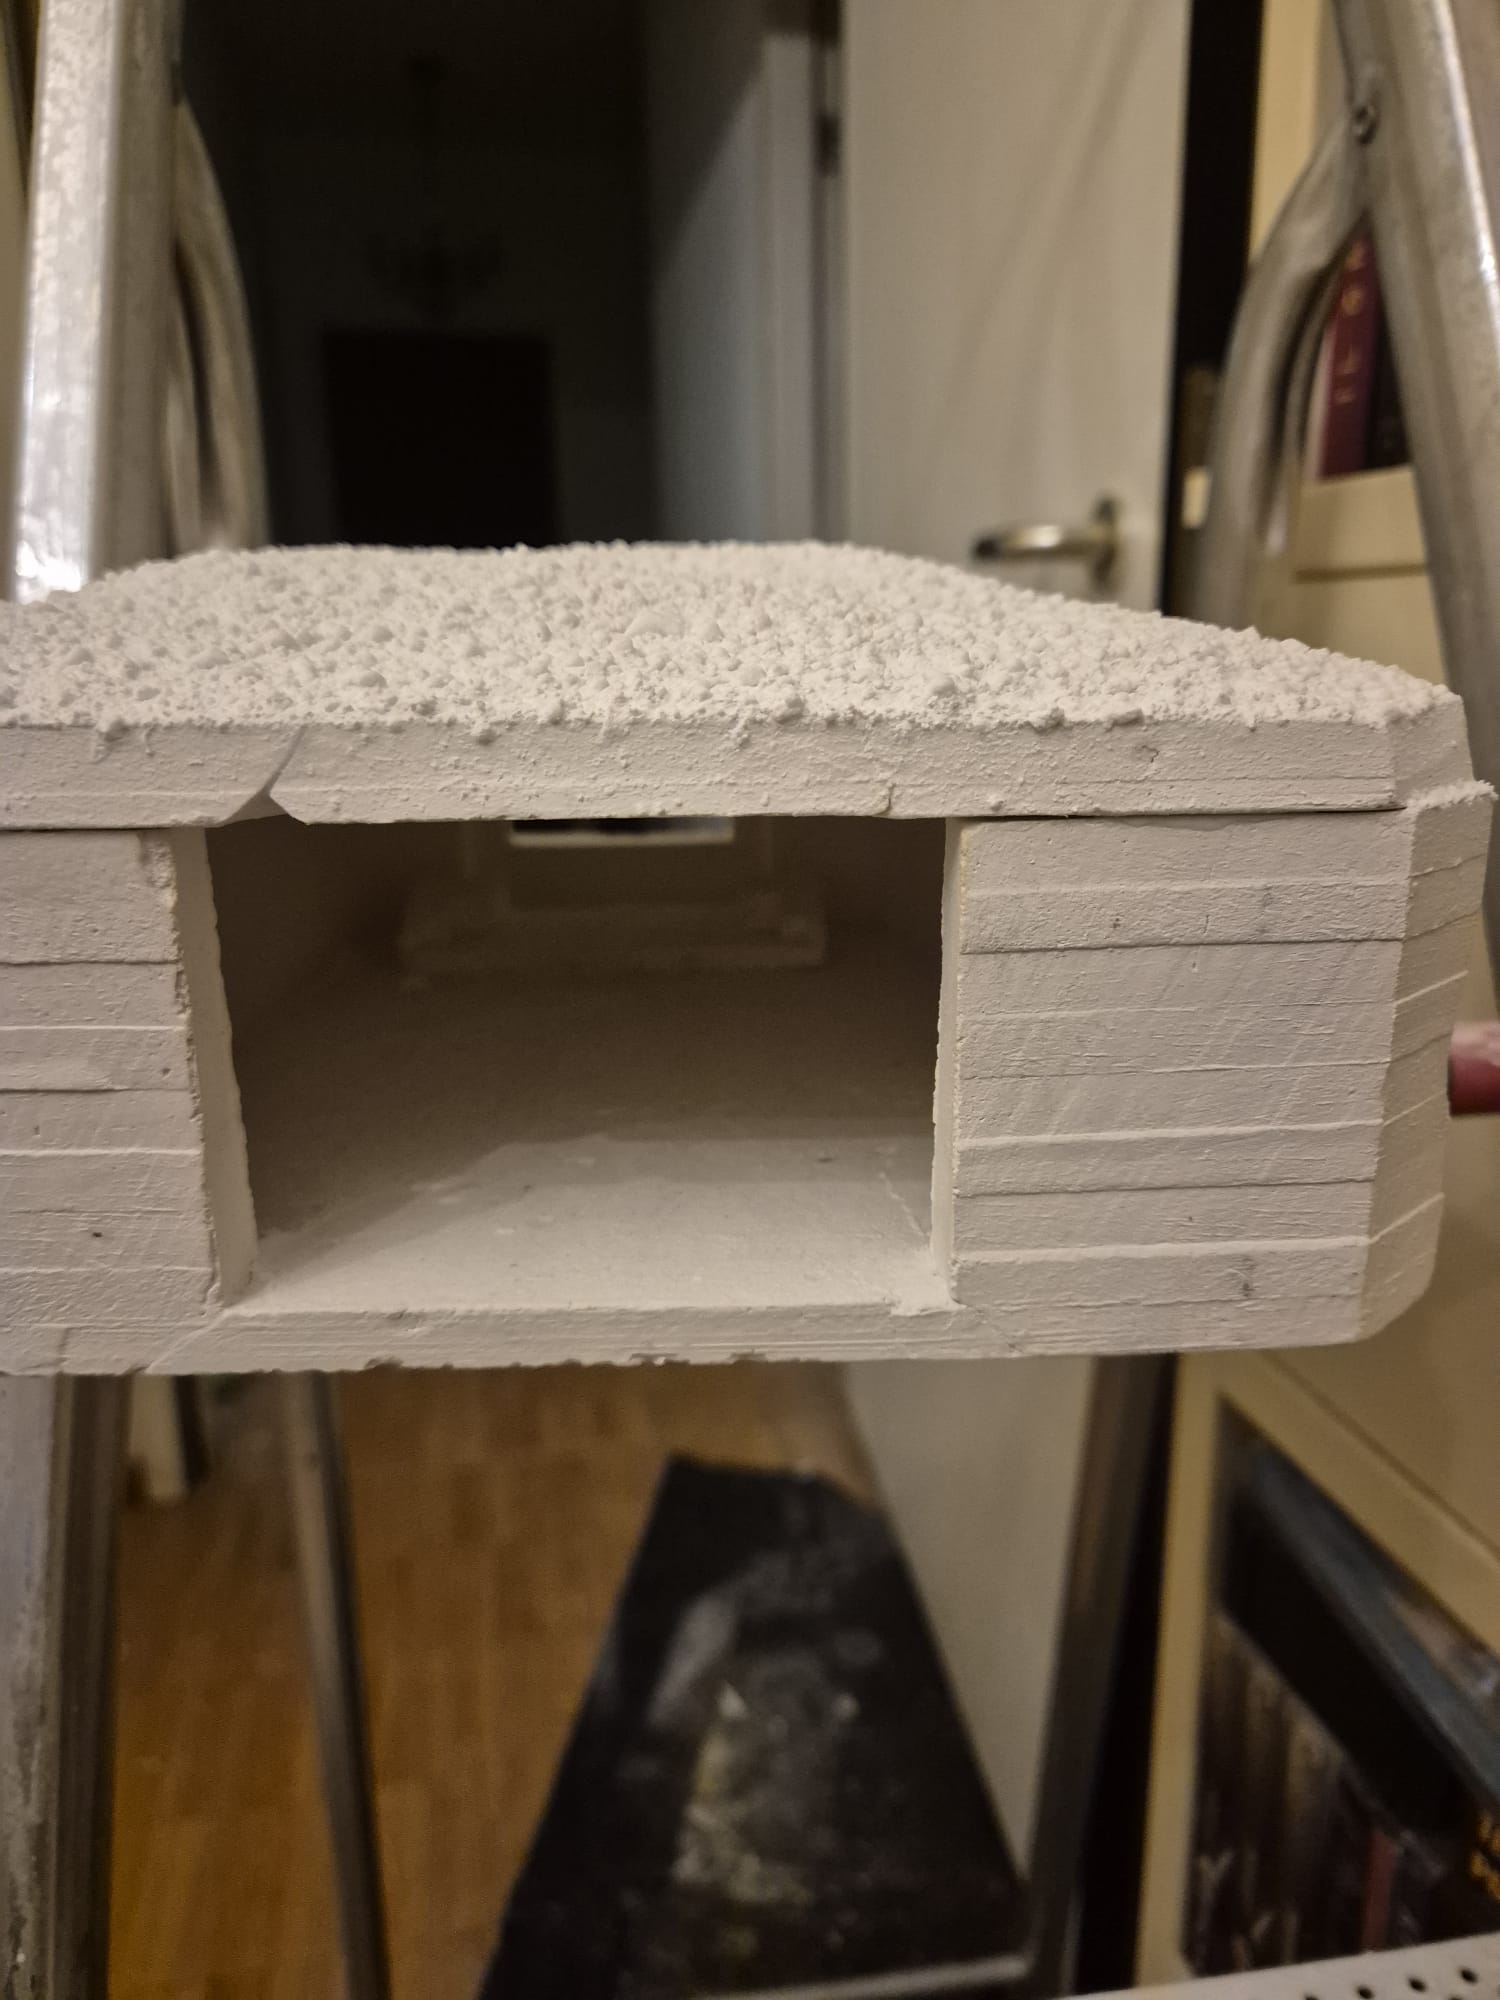
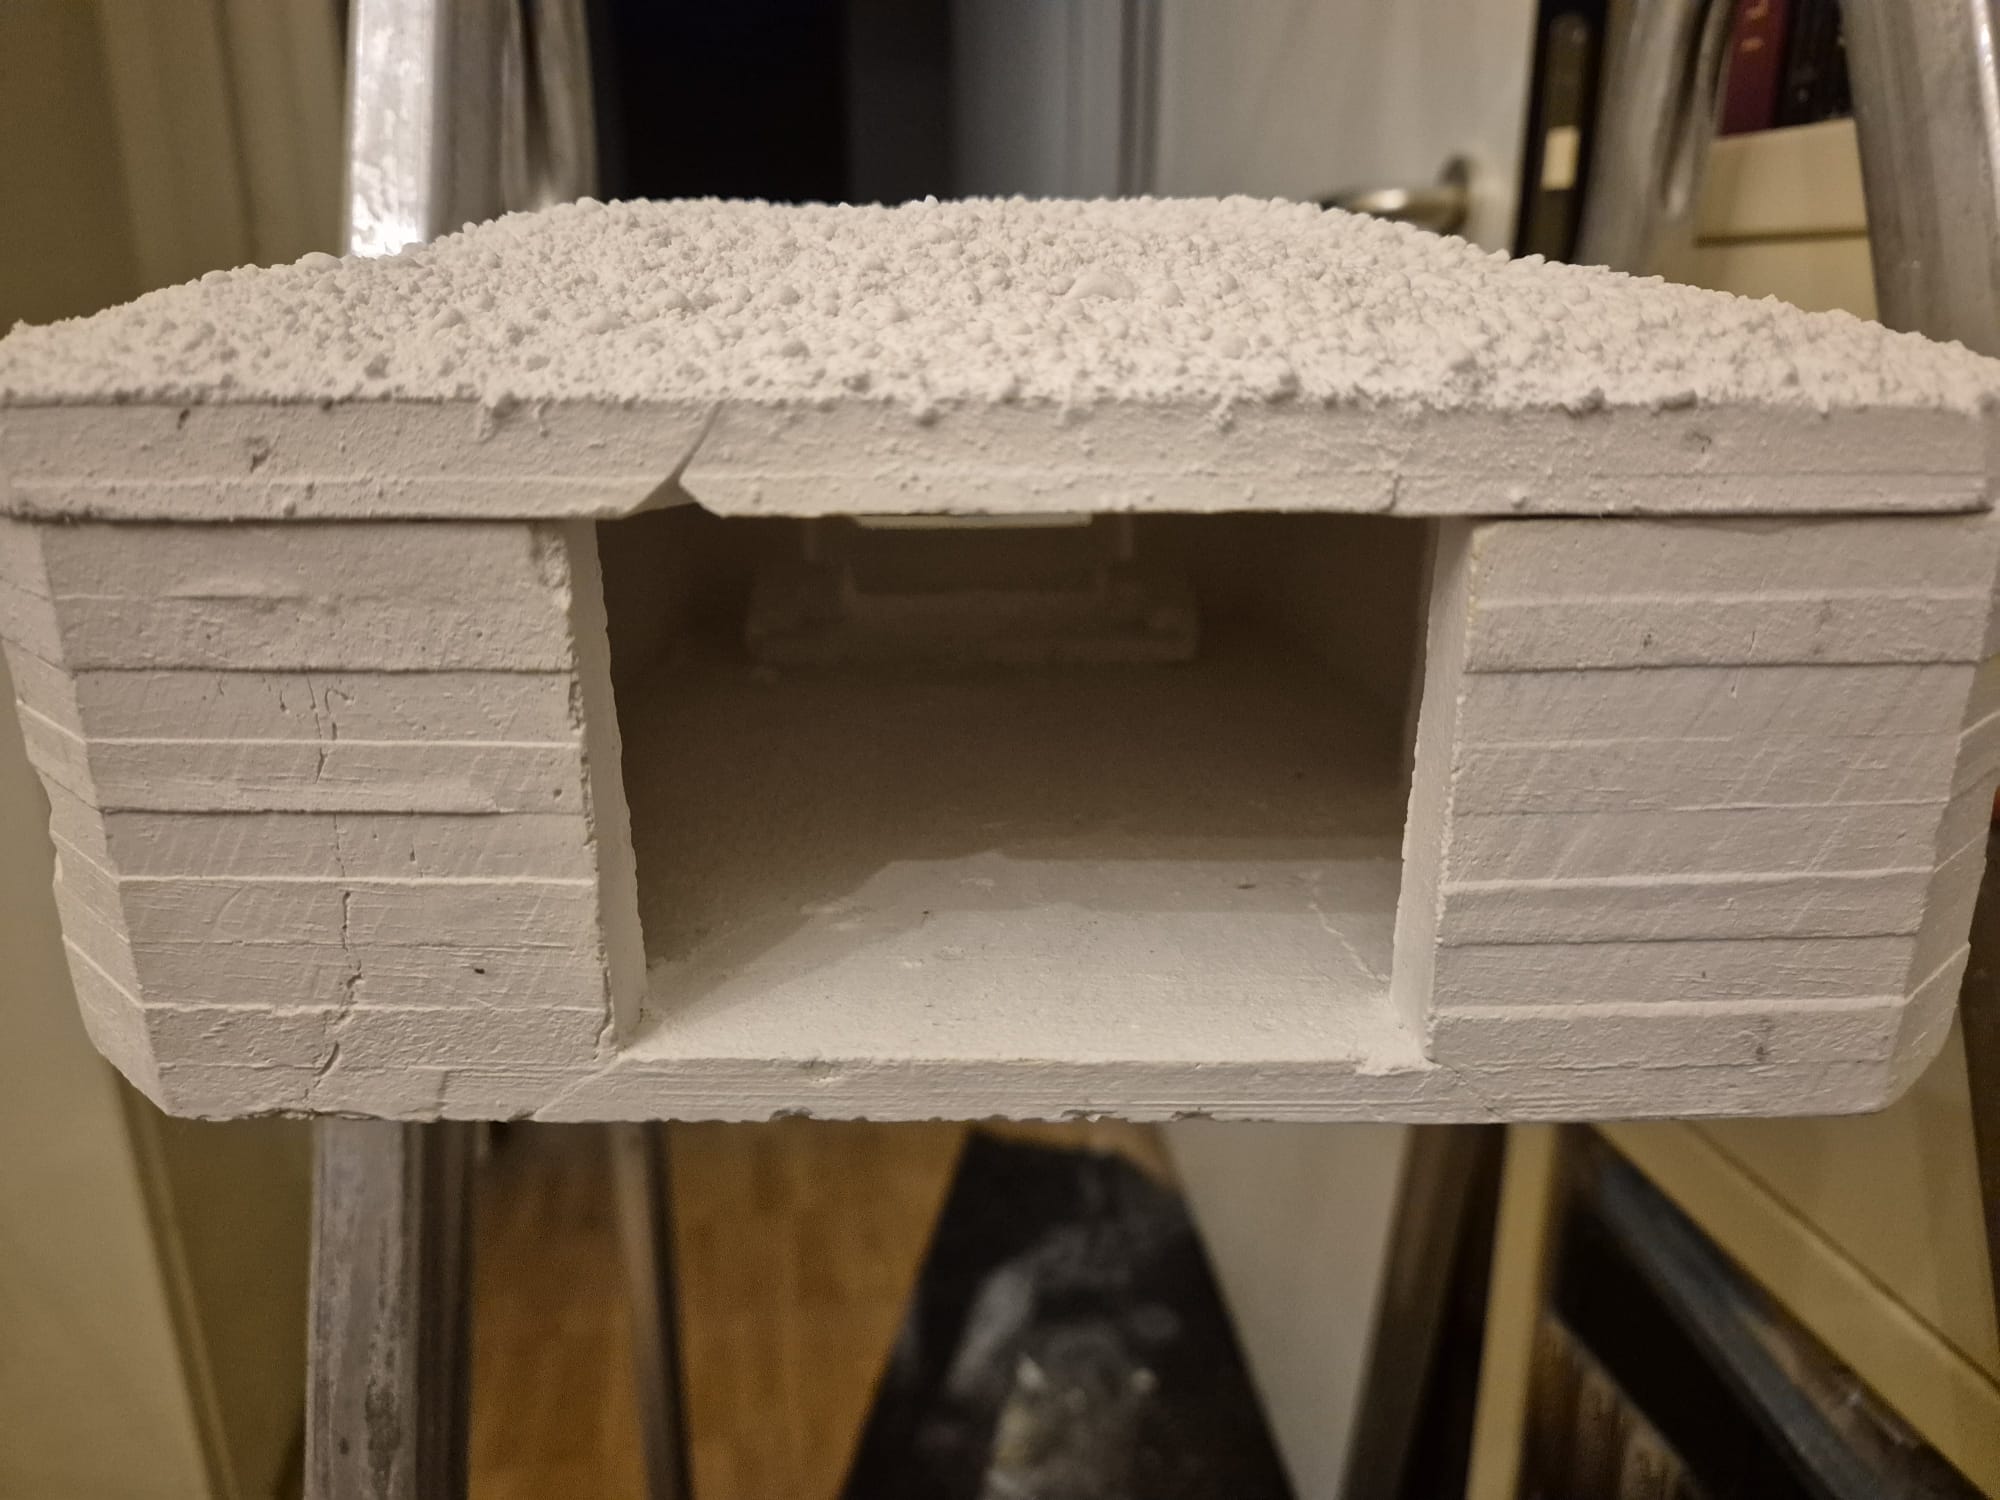
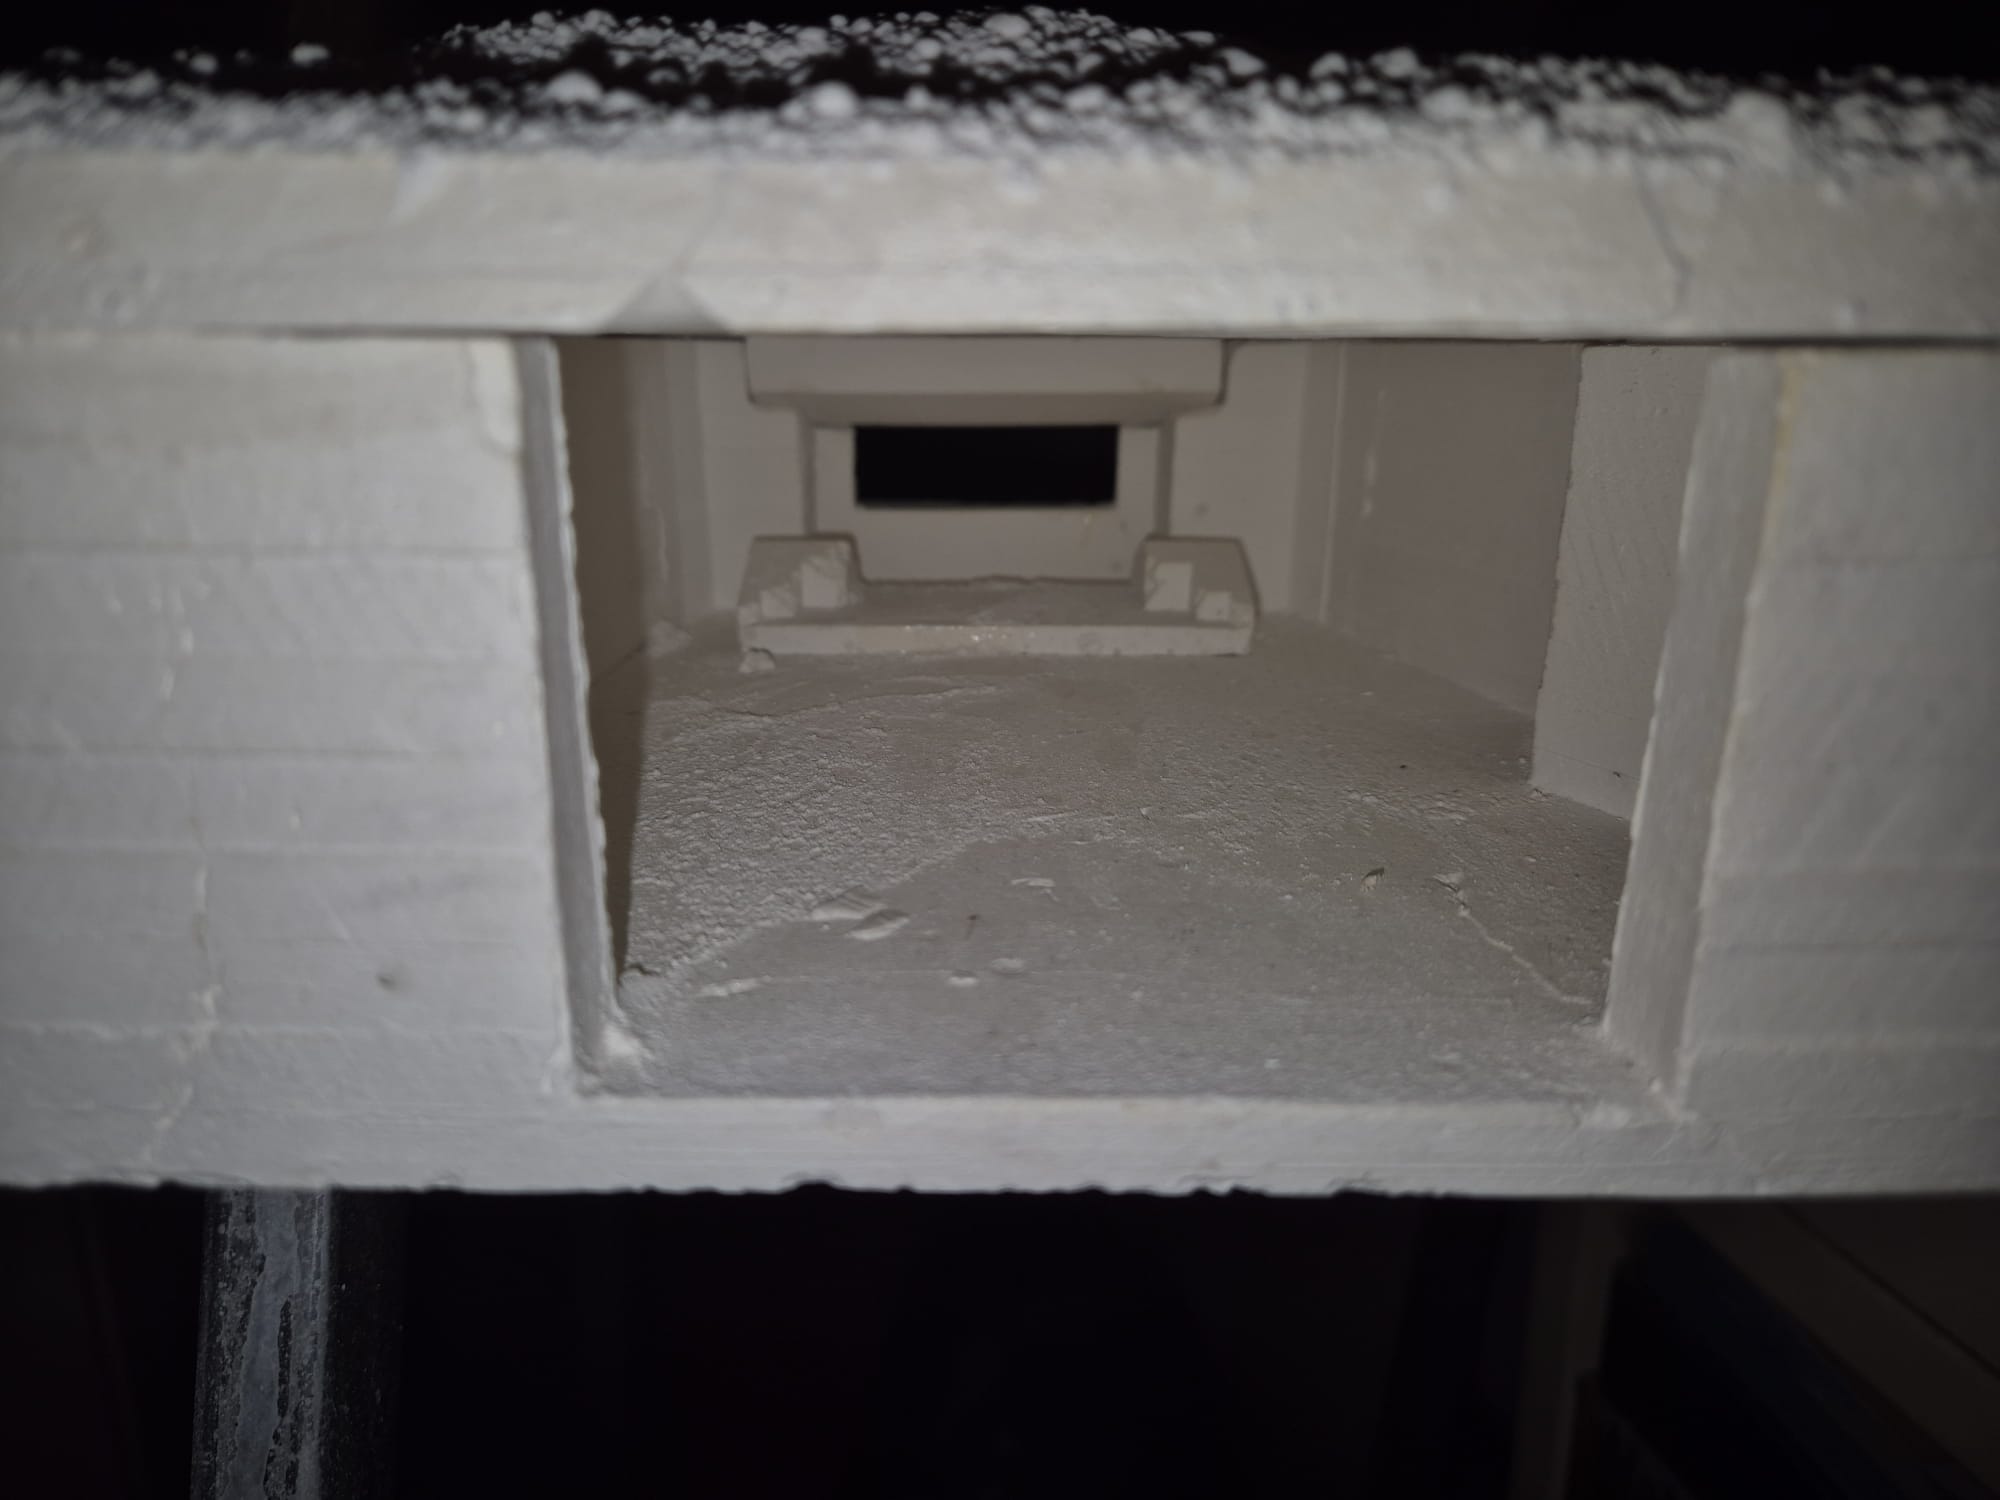
You will notice that the rear is completely open and lacks the interior retaining walls and the iron doors that protected the entrance. The fact is that the seller of this model included a base, while all my other Bunkers lack that, which makes it possible to place the artillery piece into it more easily.
No big deal, but due to the floor attached to the upper walls I need enough space to “push” and “pull” the large PAK 43/41 into his frontal cradle as well as the crew manning it and until they are finally fixed I cannot add these details beforehand.
Once these will finally placed in the iron doors will be show in the open position, but to their rear there will be two massive protection walls placed into an overlapping position.

I hope you won’t be too disappointed with this change of pace in my current work, but soon enough you will see my initial steps in building all the vehicles contained in “The Last Warning” as well as their painting and decaling, followed by the assembly of all the soldier figures with their painting and decaling, so please stay tuned since there will be lots of stuff coming up.
Until then, please enjoy these first glimpses to future builds.