I love your build, your attention to detail, and your technique for building up the decks from wood is astounding!
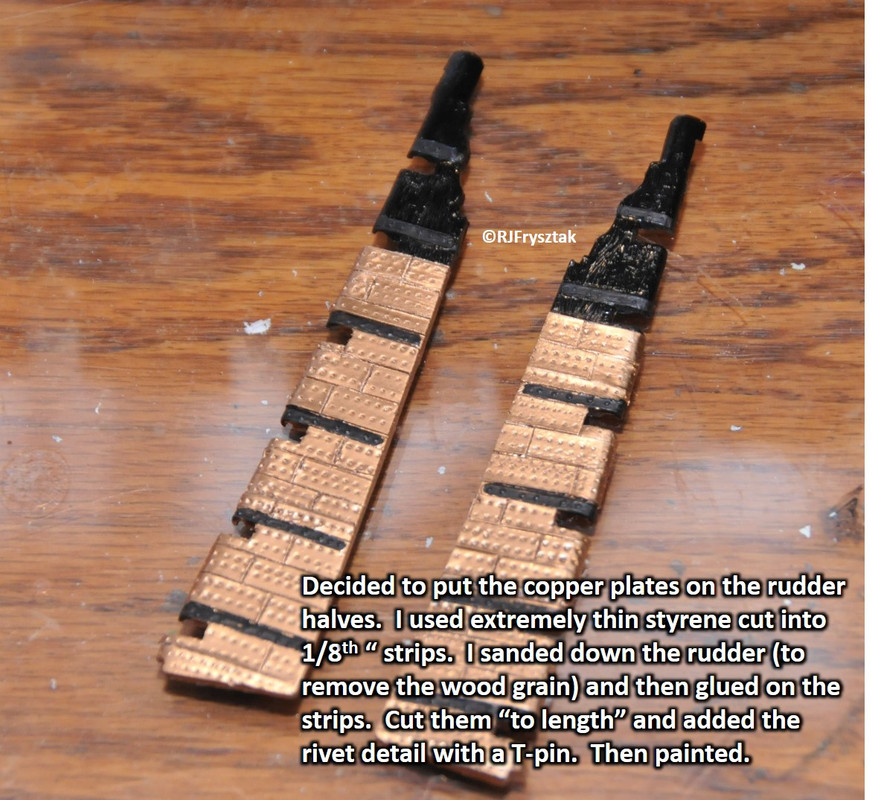
There are valid arguments on both sides for why the rudder should or should not be coppered and they have been made in various threads throughout this forum. My argument for coppering the rudder comes from the appearance on the Isaac Hull model housed at the Peabody Essex Museum. Here is a previous thread with pictures:
Note that the rudder is painted green, just as the coppered portion of the hull. I was also hoping to find some evidence in the Michel Felice Corne paintings of the Constitution vs Guerriere paintings, but even zooming in on the pics in Force9’s thread did not yield any solid evidence.
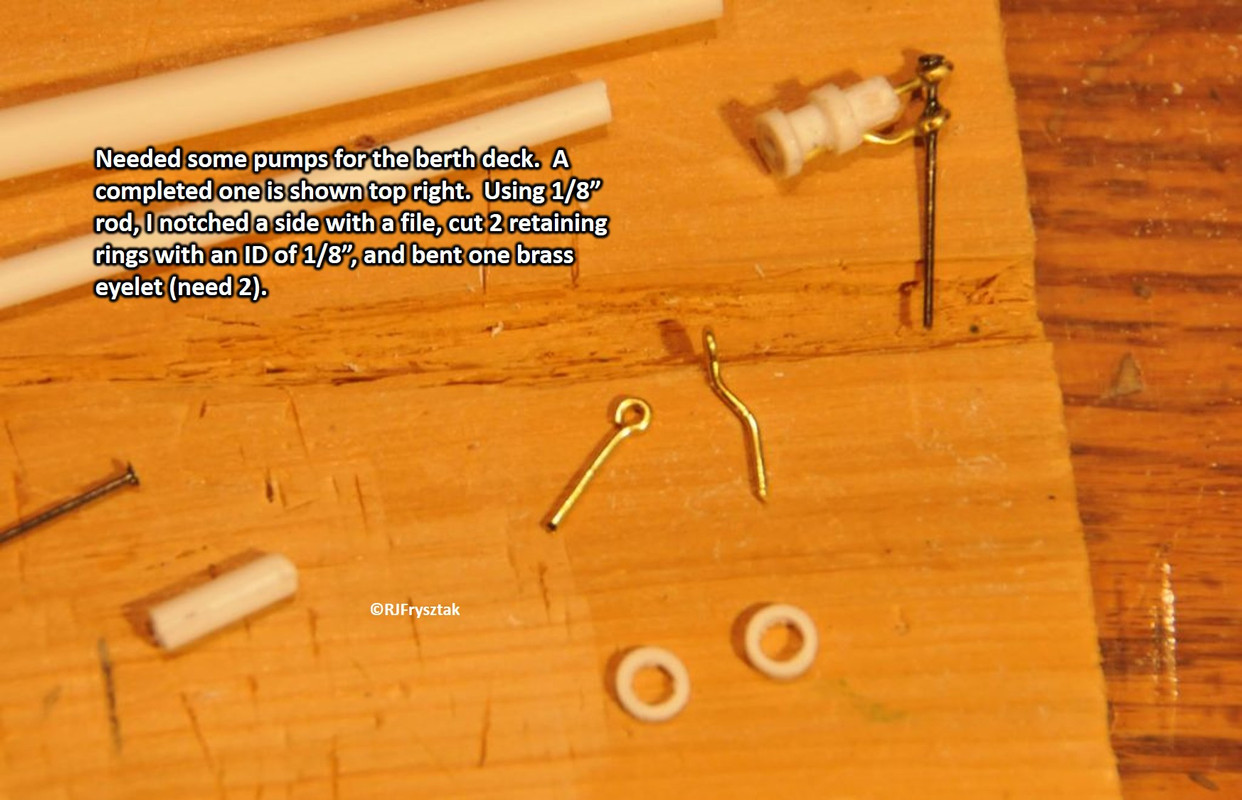
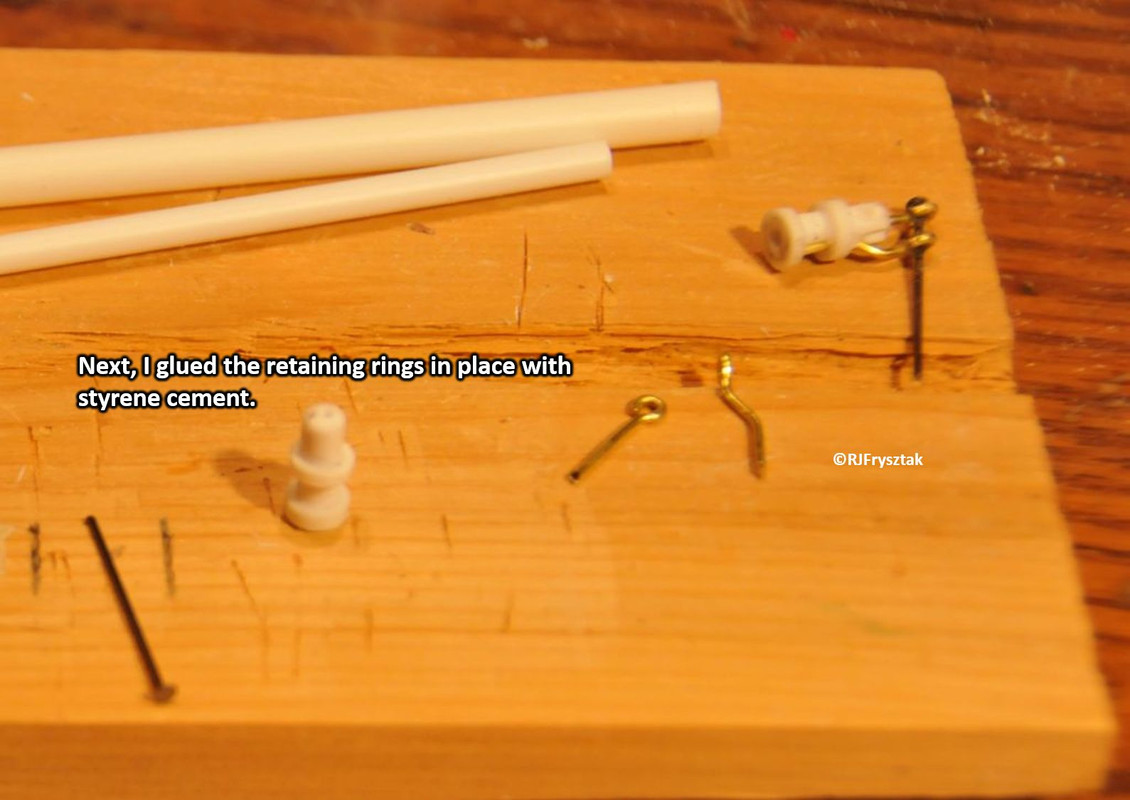
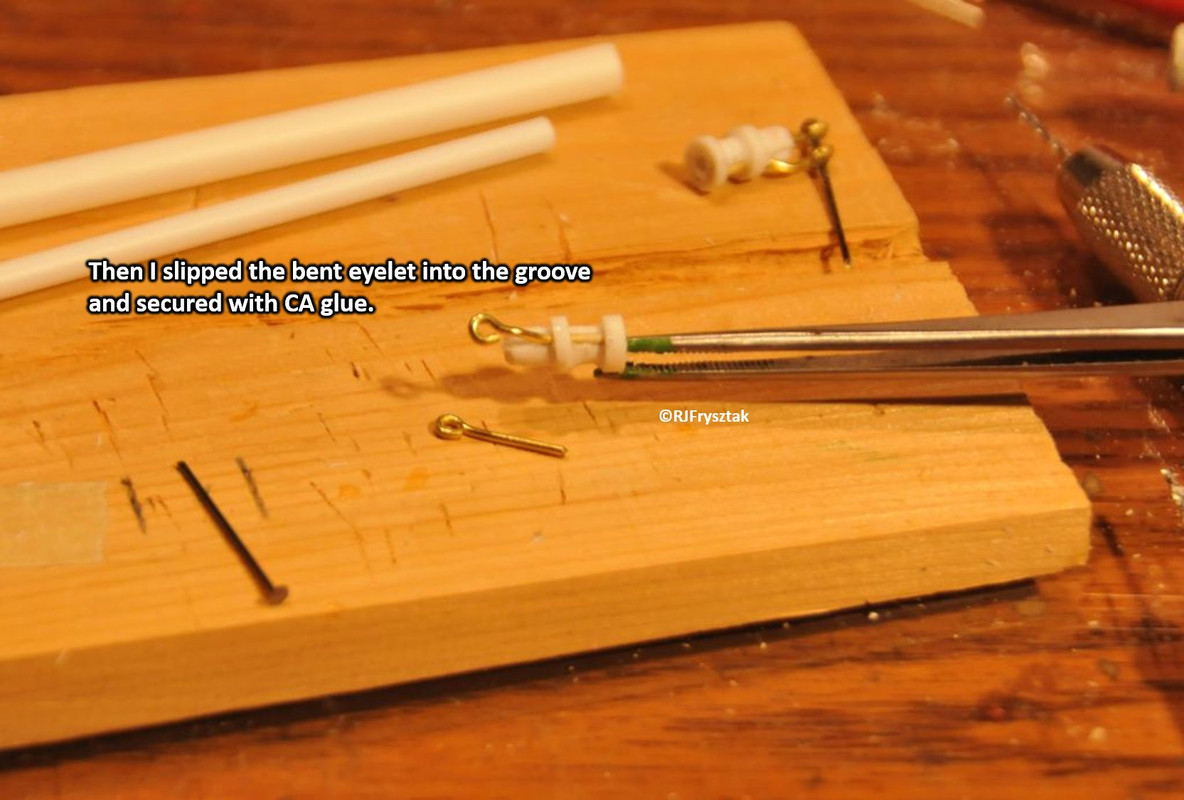
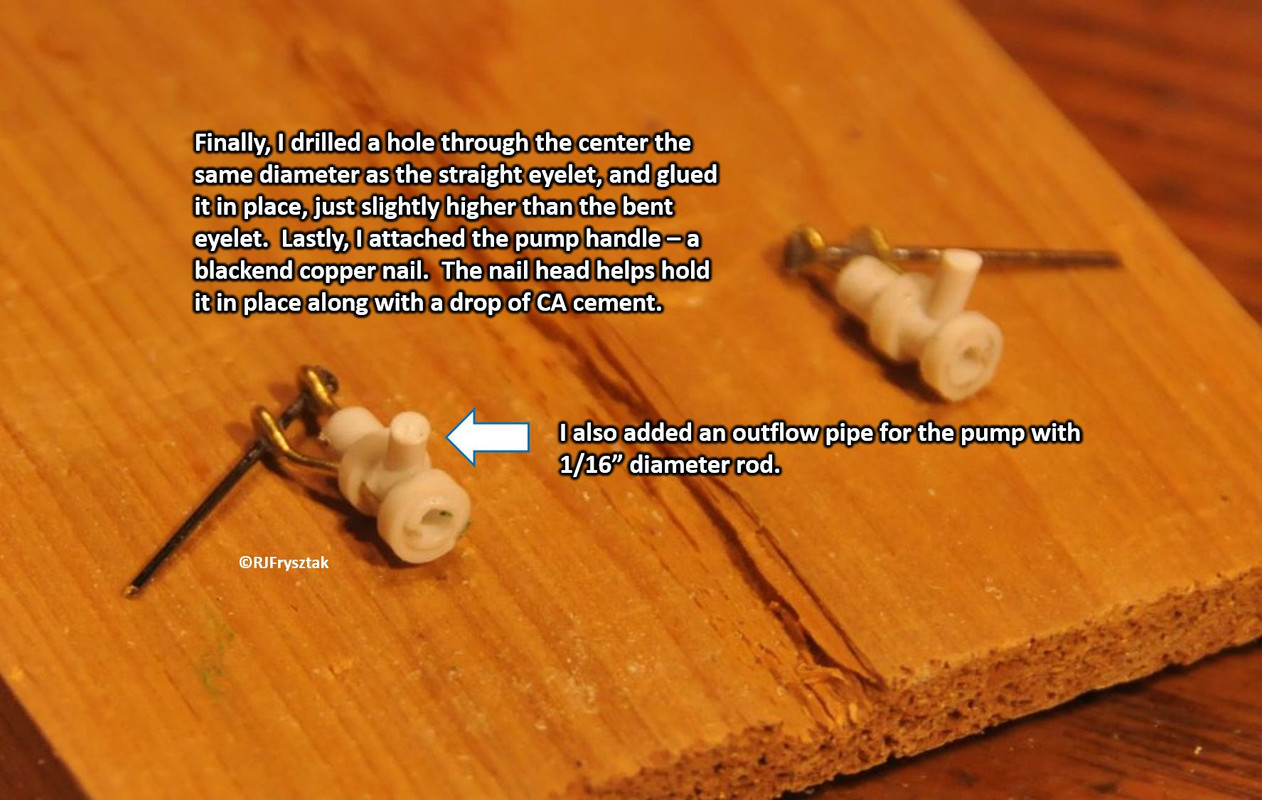
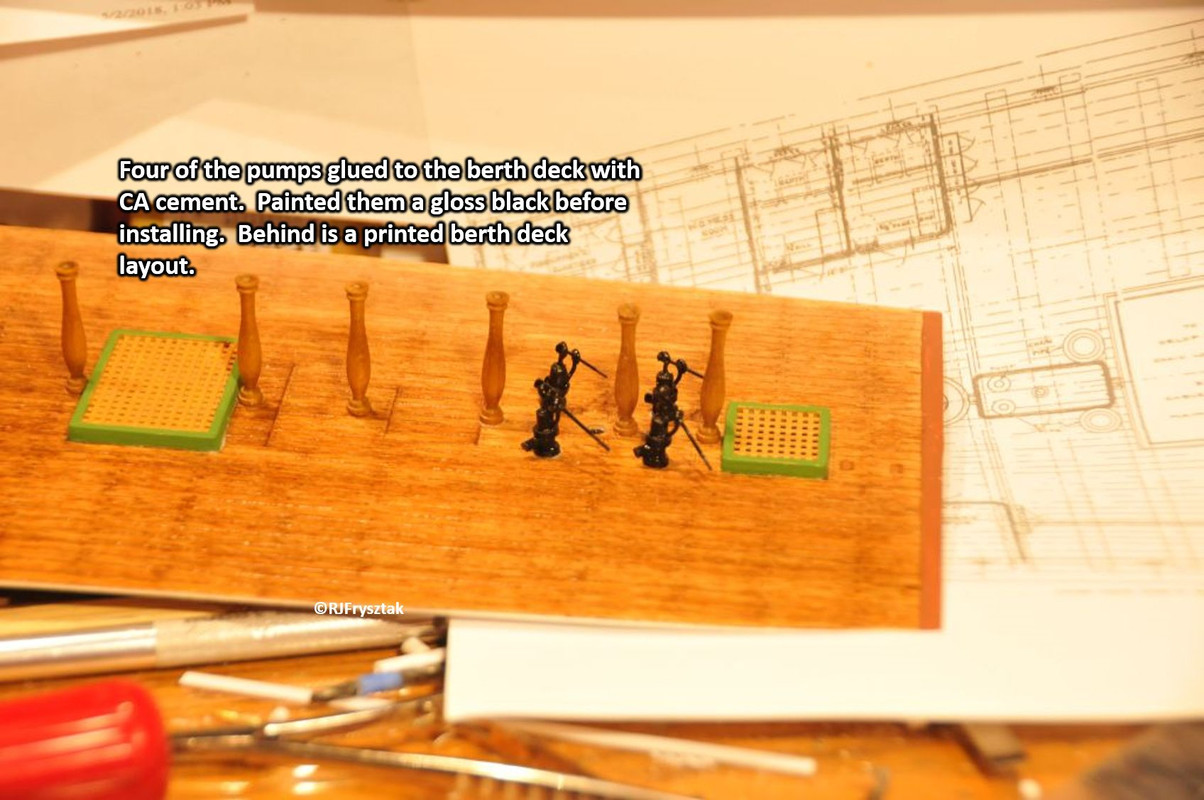
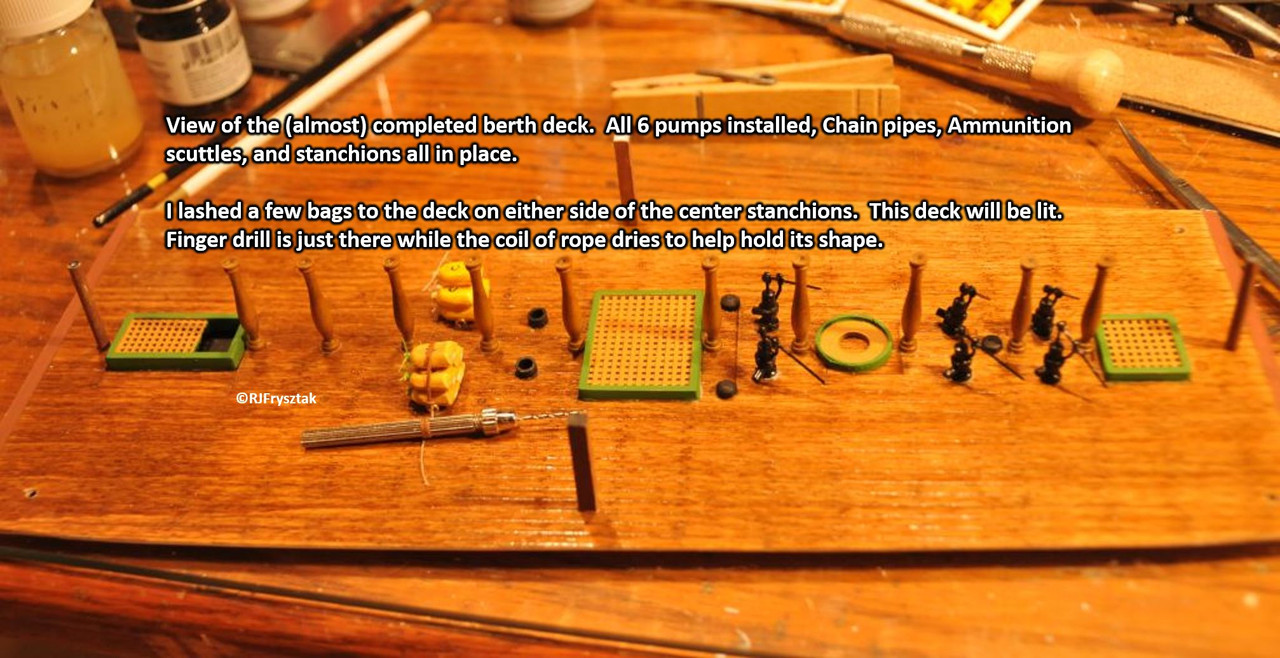
Working on putting together the spar deck now. Finished (for the most part) the gun deck add-ons and the inside of the hull, including beefing up the bow near the anchor gussets. Any other things I might need will be installed once I get the hull together and the gun deck mounted. I will be hanging the berth deck below the gun deck beneath the open areas of gun deck and installing the 34 portholes listed on the plan. So the question now is, will any of the hammocks be visible, and if so, should I put a light or two on the berth deck?
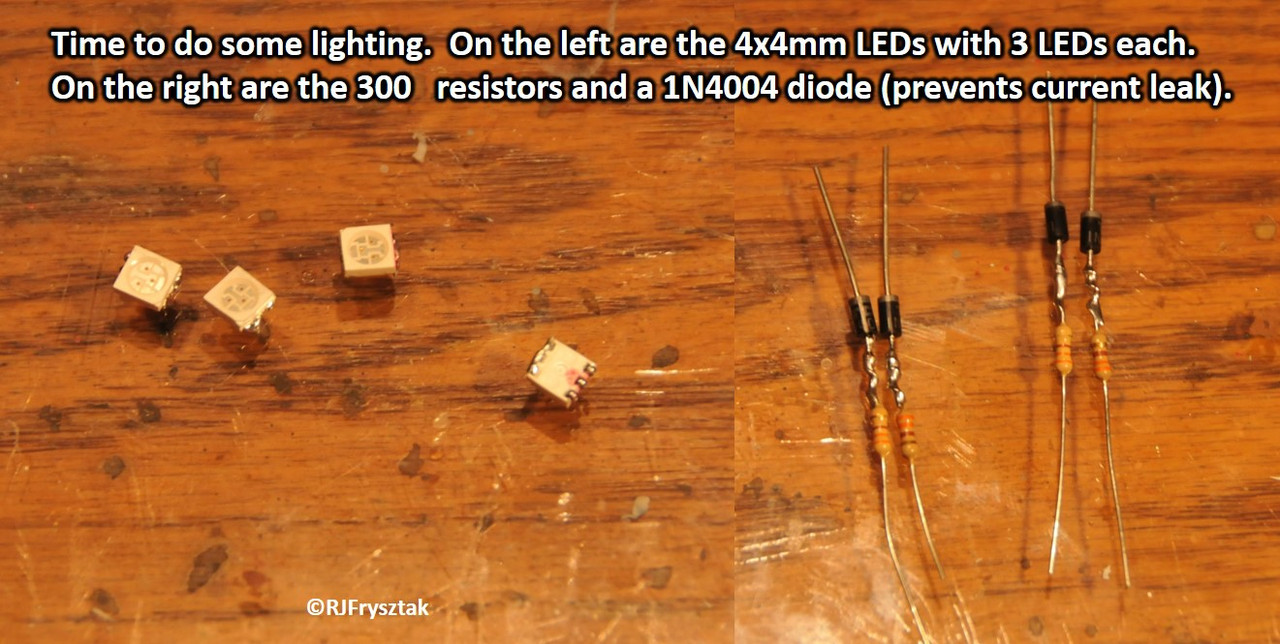
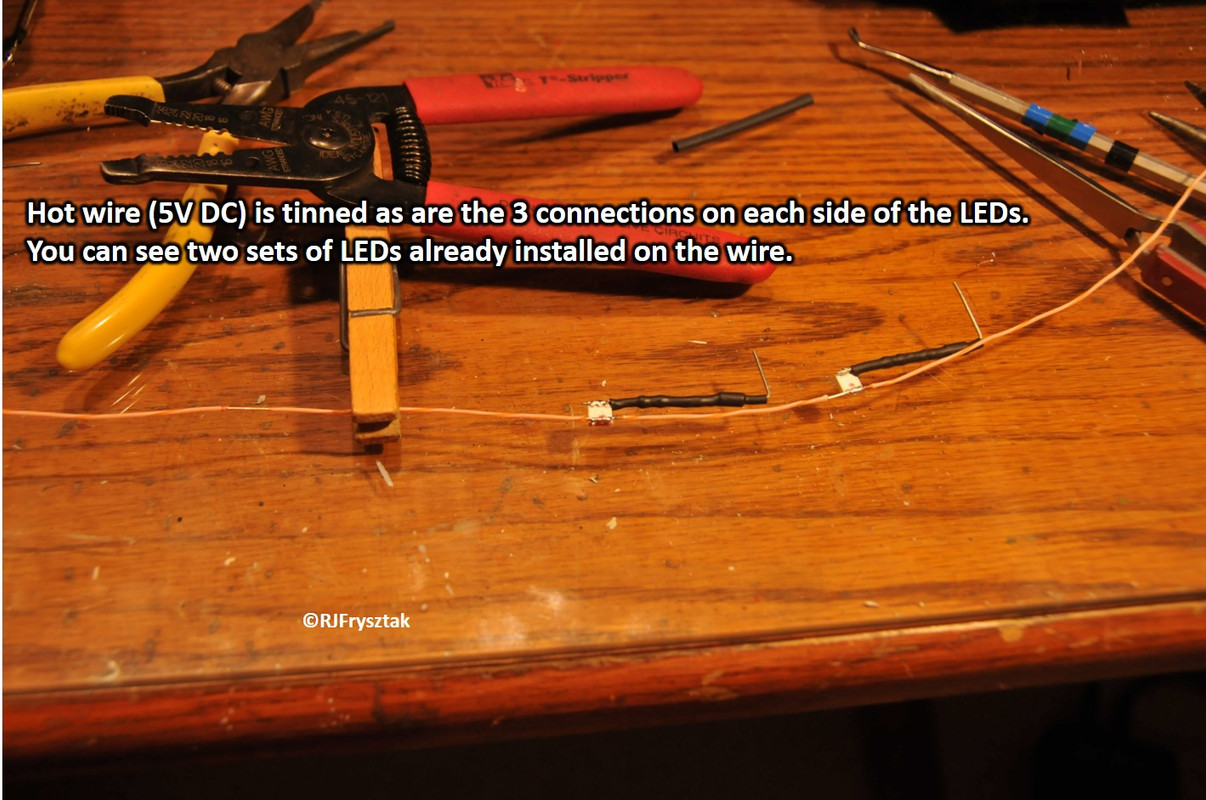
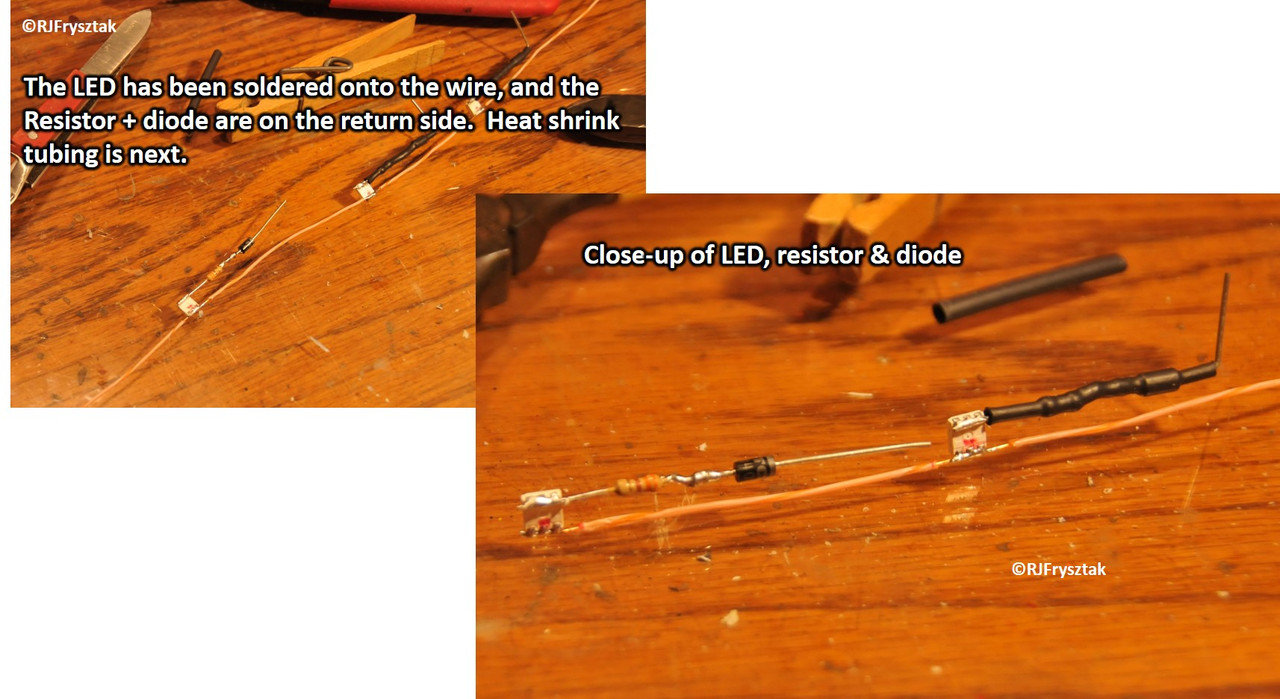
Since the berth and gun decks are fairly complete, I decided to start with a bit of the lighting. Since I have to work my way up, I started with the berth deck. This will be lit by 8 4x4mm yellow LEDs. Each LED is only 1.5mm thick so they will not get in the way of anything on the berth deck. They are (will be) mounted to the underside of the gun deck using a hot glue gun and 2 hour cure clear gorilla glue. The photos tell the story:
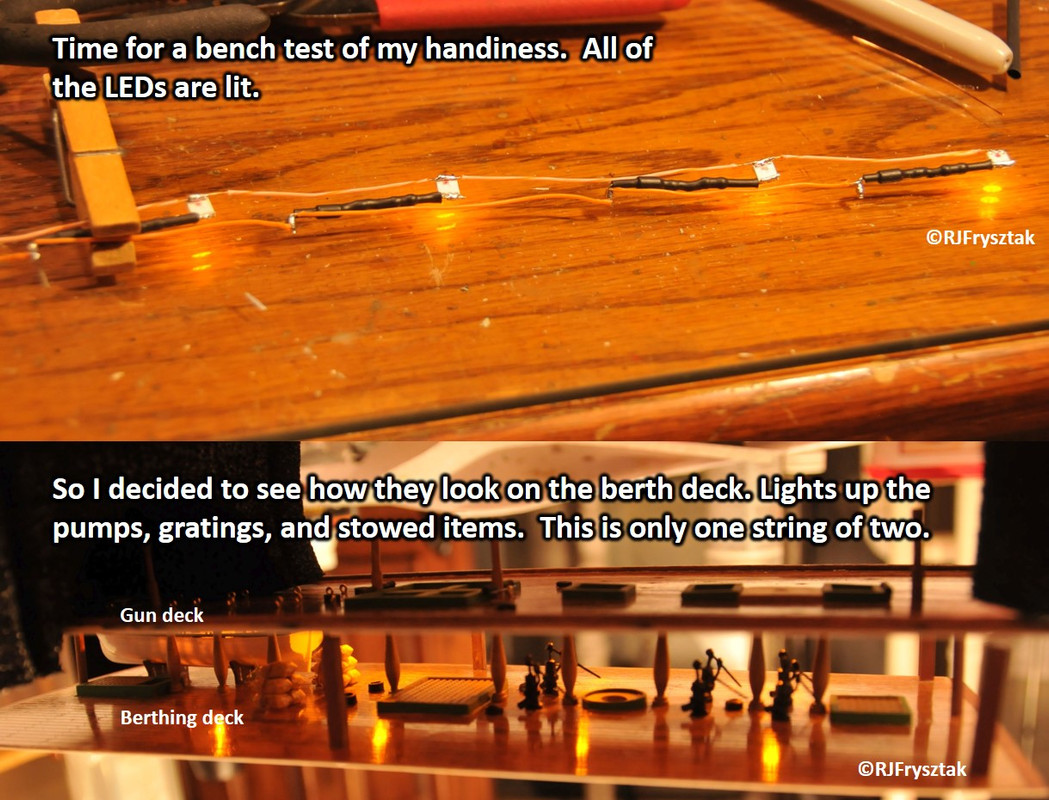
After completing the soldering, I insulated any exposed wiring with liquid tape (rubbery stuff that acts like electrical tape). Testing of the wiring:
there are only 4 lights attached to the bottom of gun deck at this point, but you get the idea!
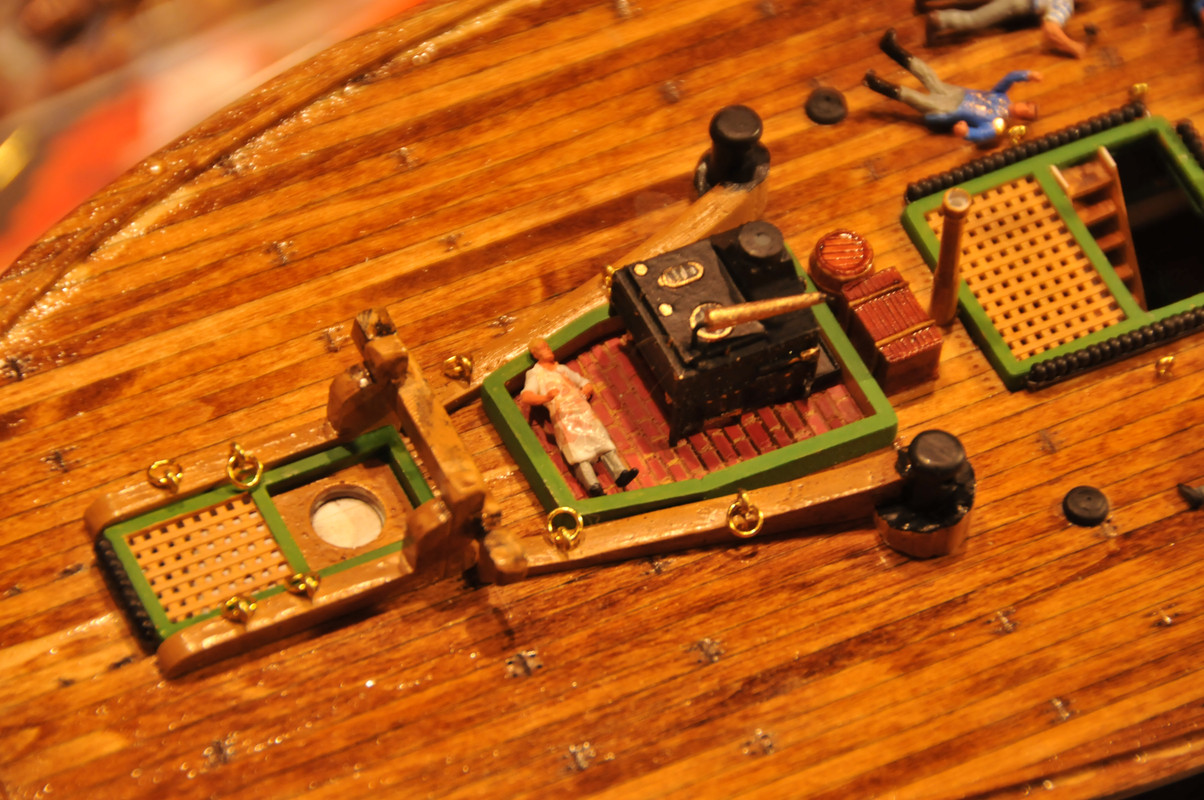
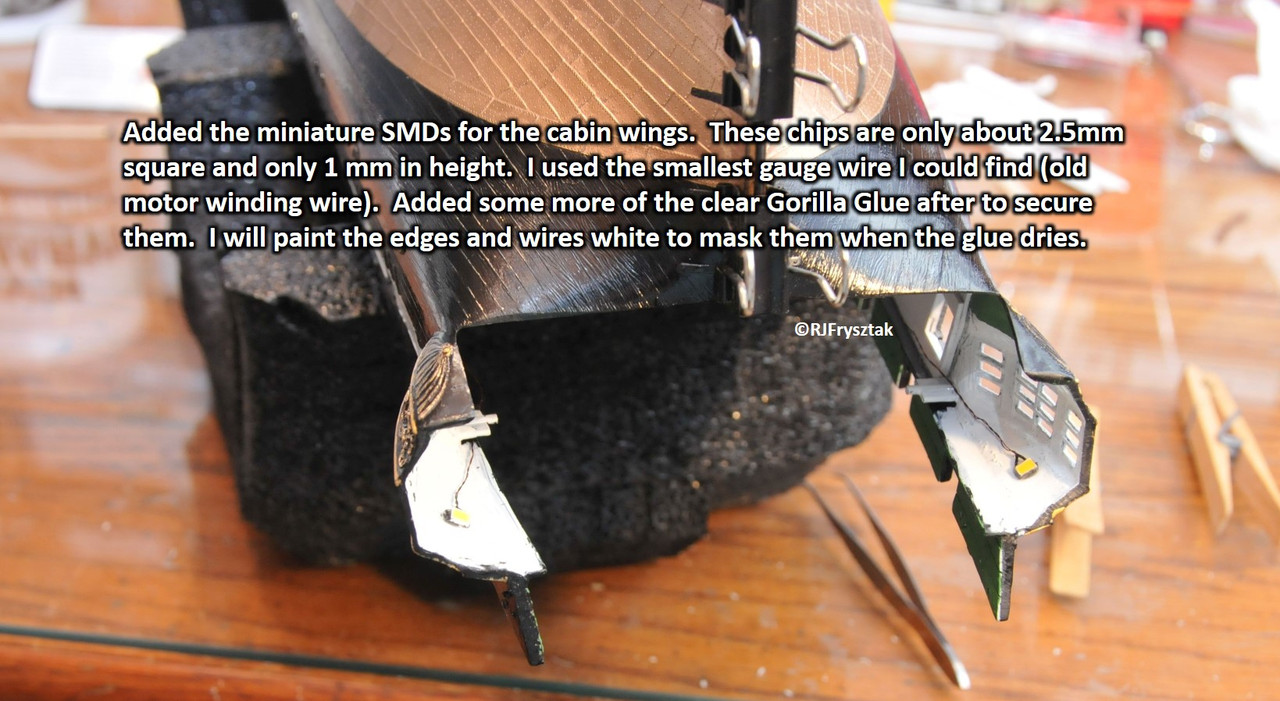
Once the gun deck is in place, I will install the captain’s cabin and wire up those lights, including the orage glow for the camboose.
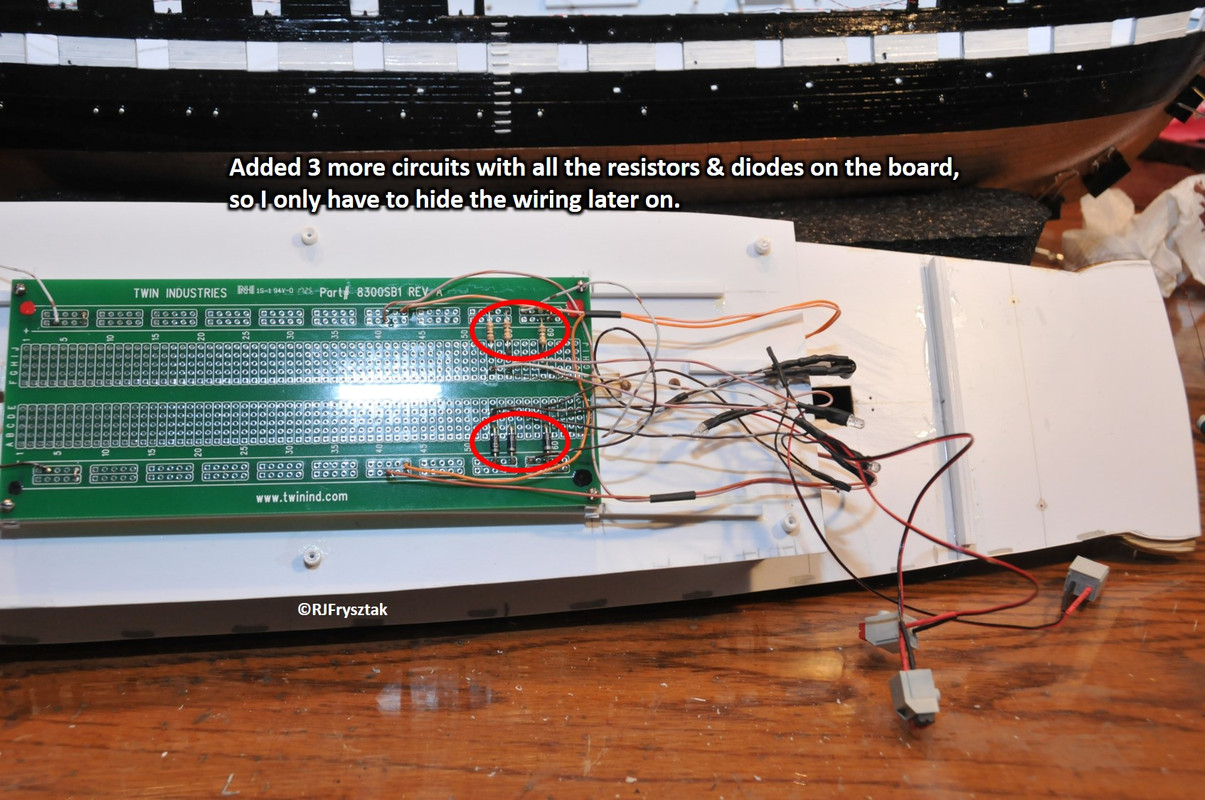
Working on the cannons and carriages right now. Also working on laying out the circuit board to power the lighting. Found a decent one that will fit in the hull, but now I have to lay out the various circuits that need power. I will take pictures when I have it all worked out. All those years repairing circuit boards at the bowling alley will finally pay off. I hope.
I have a little helper just about like that, except she’s a standard poodle. She’s taken out one complete model (a Revel Apache that I spent WAY too much time just sanding the bad seams), and almost did in the FT-17 I was working on. Luckily, that one survived. I keep everything locked up when not working on them now.
My workarea is down in the basement and keep the door closed unless I am in there. She doesn’t really bother my stuff - more interested in her bone or tennis ball. Or napping on my foot, which is a bit of a problem when I try to use my dremel foot control! I really don’t mind having her down there otherwise. She’s a good pup.
I used a similar solution on the one I built back oh, 50, or so years ago =8-0
The middle upper deck section on my kit was badly warped. Knowing that styrene softens with heat, I set that deck section in the oven turned on low. Came back a few minutes to find the Shrinky-Dink secton of deck on the rack! Lesson learned, styrene softens AND shrinks with heat.
So, now I had a big, expensive ship kit that was missing the middle of the deck! I traced a pattern off the instructions and recreated a replacement with balsa sheet. This elementary-school-age kid thought the finished product didn’t look too bad after painting. Not sure I would have had the patience to do it in 1/8" strips of wood.
Nice work! I do have another one of those in my stash. Maybe one day, I’ll recreate it, only without (I hope) the balsa wood replacement parts.
Thanks Gene. One of the main reasons I did wooden decks is because of the warped and bad seams on mine. I reinforced from below, but that didn’t seem to make a difference. Since I am lighting mine, I couldn’t give up too much headroom, and decided to build my own.
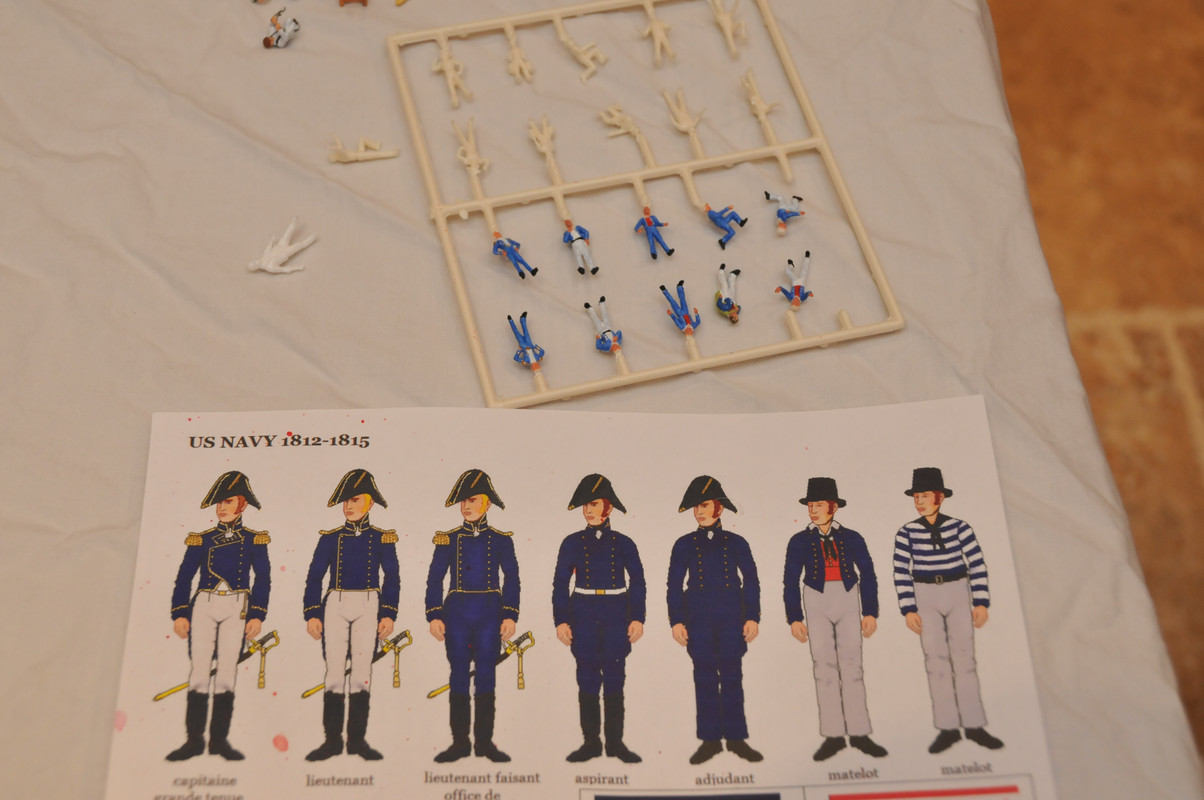
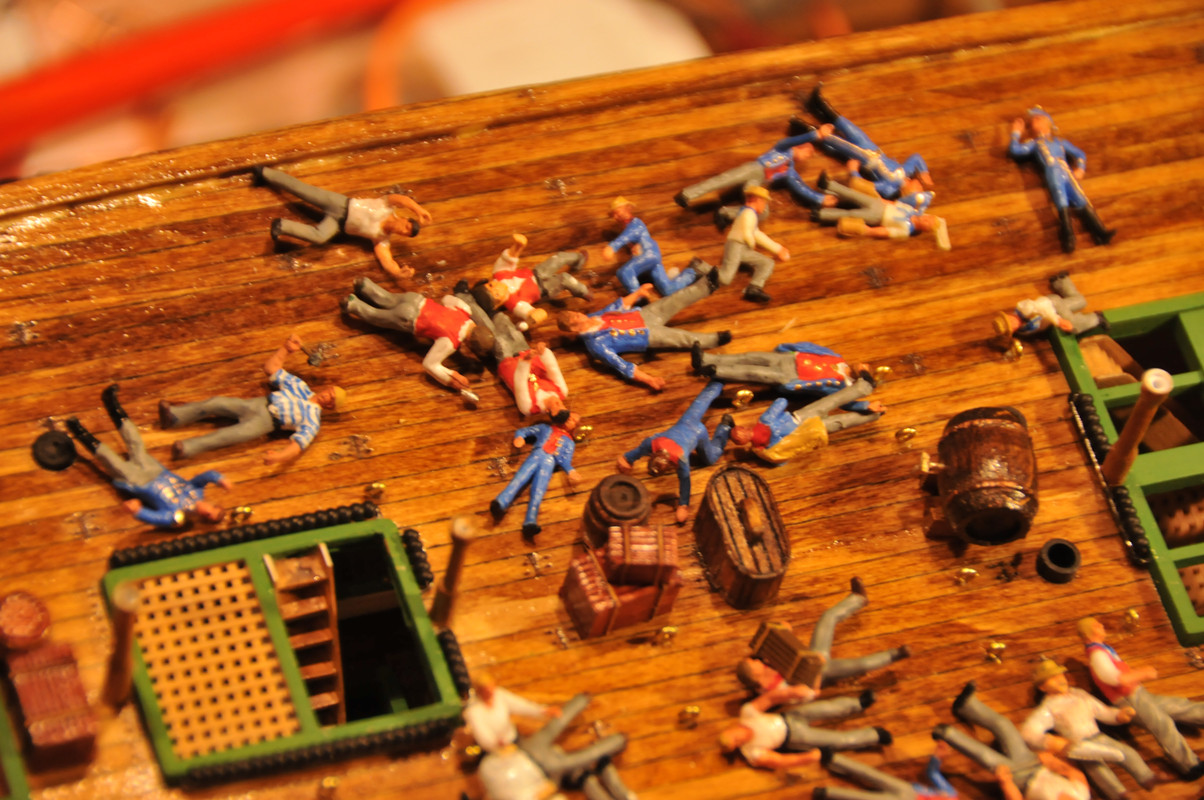
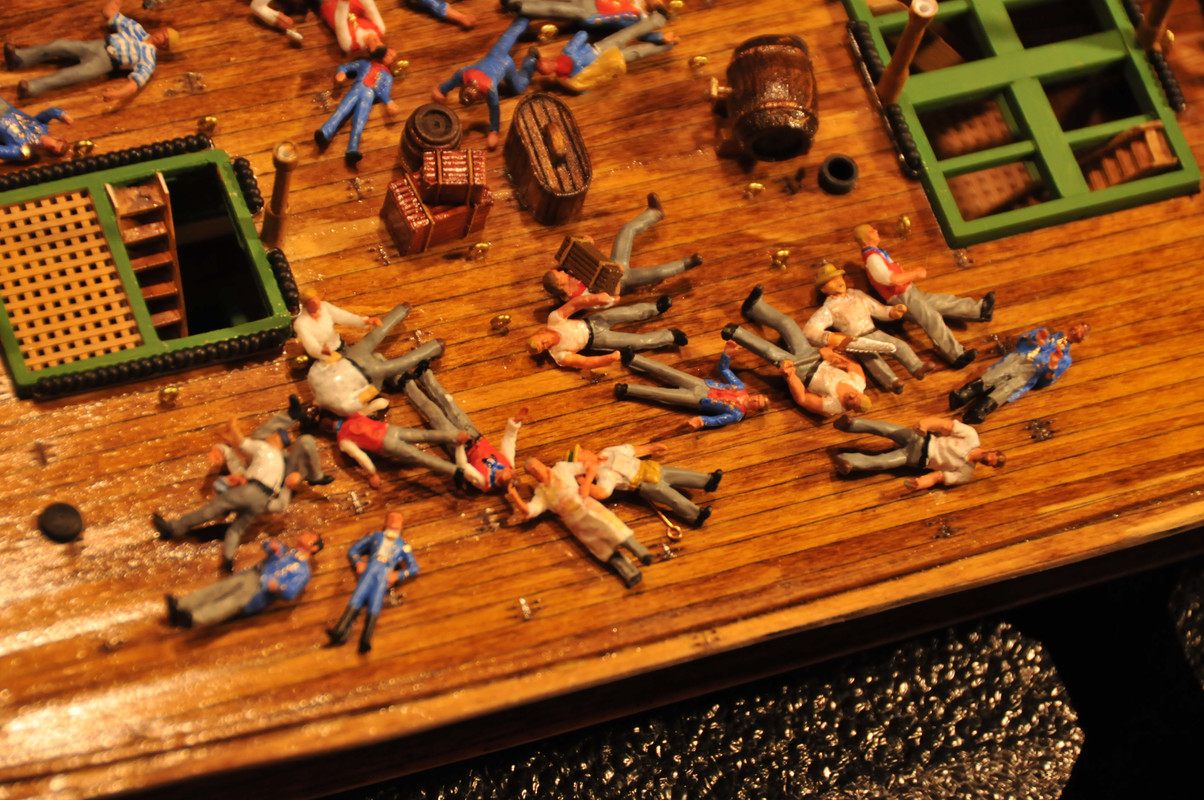
So I was all set to put the hull together, when I realized I needed to put my below-deck crew in place, or I would never be able to later. So painting the crew has commenced. I have about 60 guys total in various poses, including the 20 or so the ship came with. Most of the other guys are either Preiser or Woodland Scenics HO gauge figures, which all have to be repainted and/or modified. Construction guys and railroad track workers seem to be the best choices, but I found many others that will also work with a little bit of work from a sharp exacto blade or my dremel. Here is what I am basing my painting on:
Here are some of the Preiser figures I am modifying:
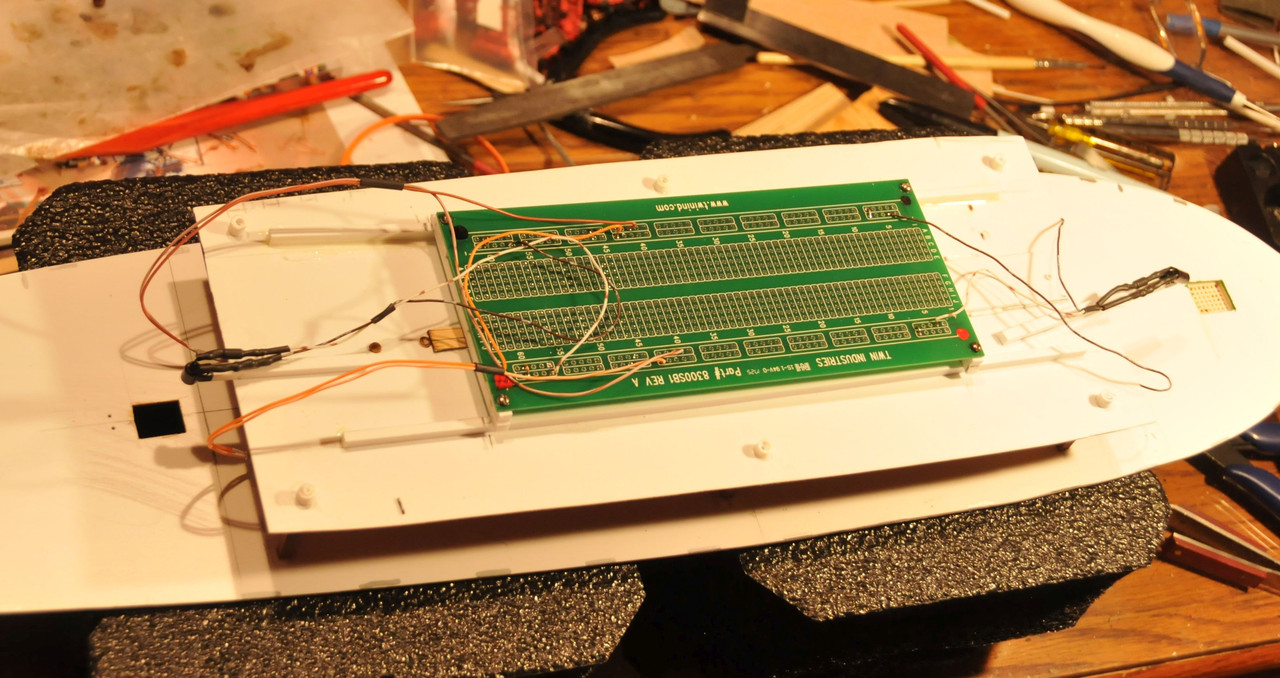
First image is of the circuit board I attached to the bottom of the berth deck. Built a couple of stand-offs so nothing will come in contact with the deck when soldering. Enough room for over 40 circuits, but I only expect to use about half of that. Below deck circuits (stove, berth deck lights, flicker lights) have been soldered.
A few more shots of the crew painted. I even found a couple of “short order” cooks to go by the stove.
I have a water barrel and grog tub (scratch built) inthe photo as well.
I shot a 10 second video of the stove lit up with the fire going, but not sure where I could post that - postimage doesn’t seem to want to host videos. C’est la vie.
I just hate “messy” wiring jobs. This lets me keep track of exactly where everything is, and even if one circuit goes out down the line, all the others will continue to work. I just have to add up all my milliamps when I am done to make sure I have a big enough power supply. I have several to choose from, so shouldn’t be an issue.
Been busy on and off. Tough going in the summer when the weather is nice.
Built rails and bits for the mizzen mast.
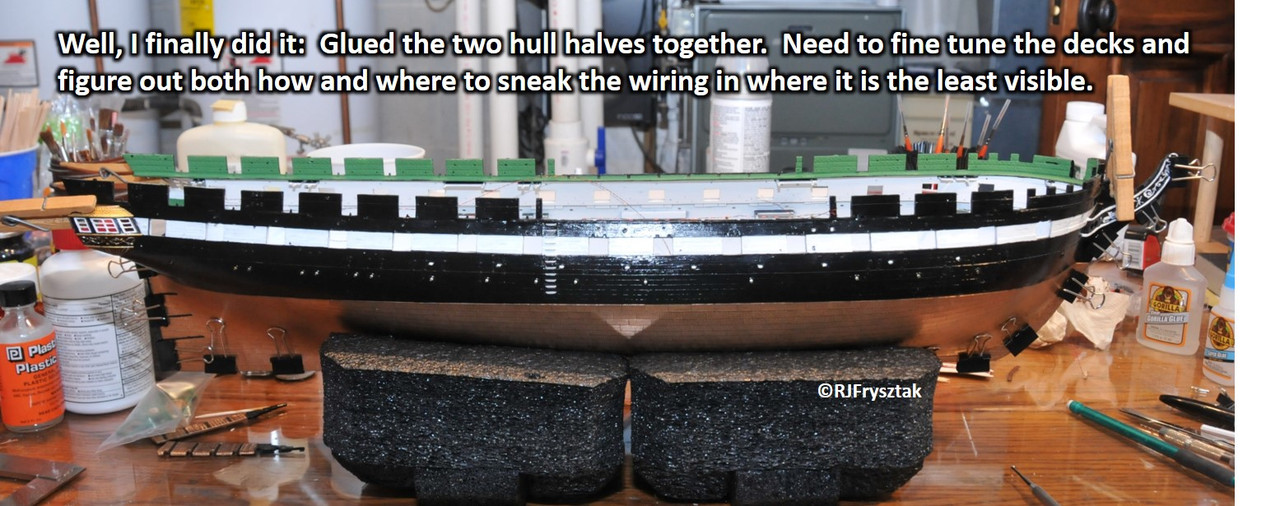
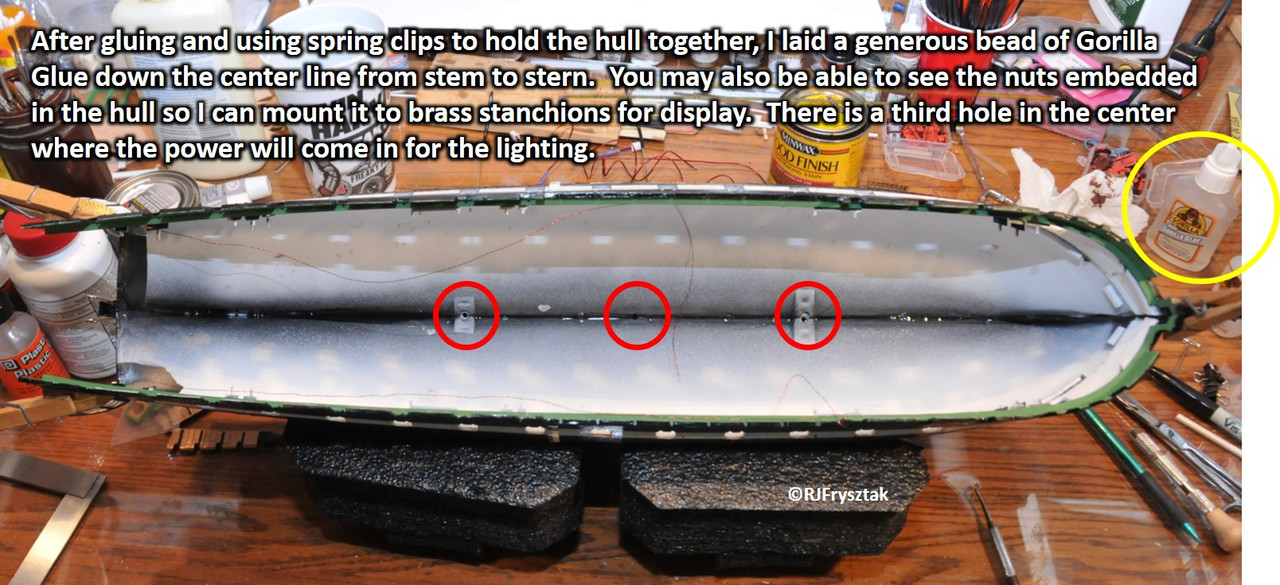
Finished painting on the hull. So time to glue it together:
Also finished cutting all the boards for the spar deck and adding all the nail holes. Also stained. Took your advice Nino and stained the center area slightly darker than the area under the guns. Will post pics when I get a coat or two of urethane on it.
Bob, your work is really super impressive in both your artistry & electrical " engineering". I would be lost doing work like that. Your figures are beautiful, are they 1/96 ? They sure fit.