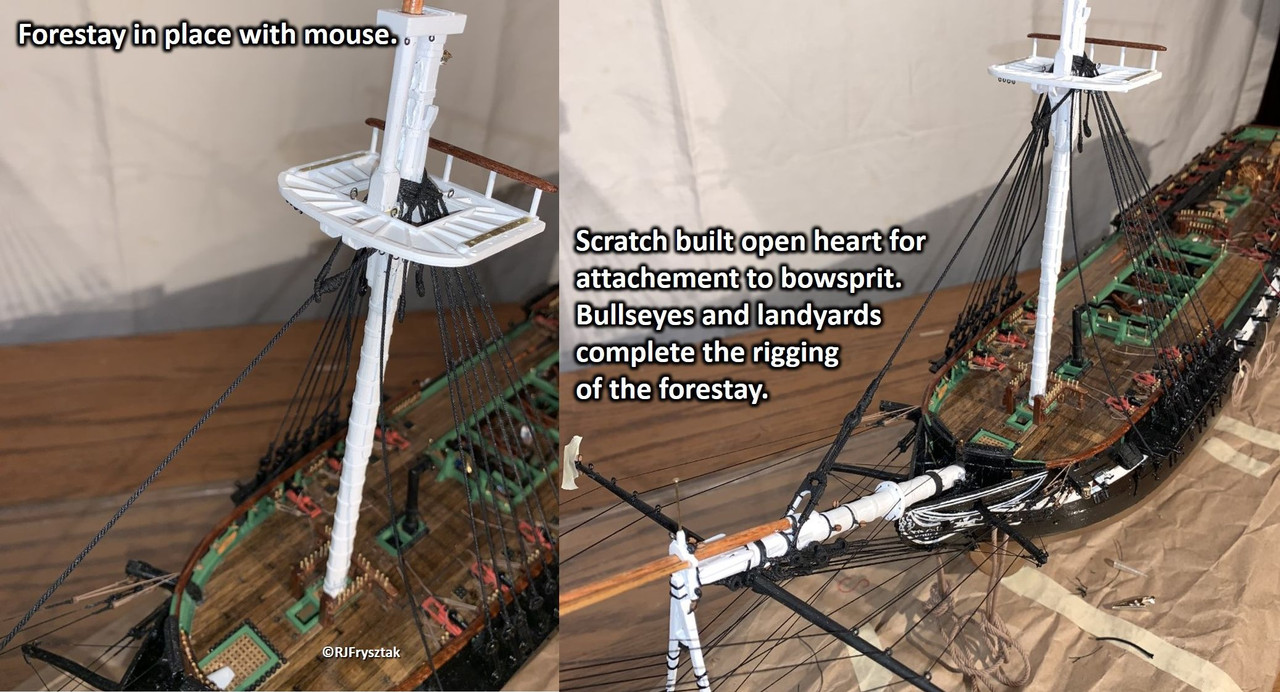
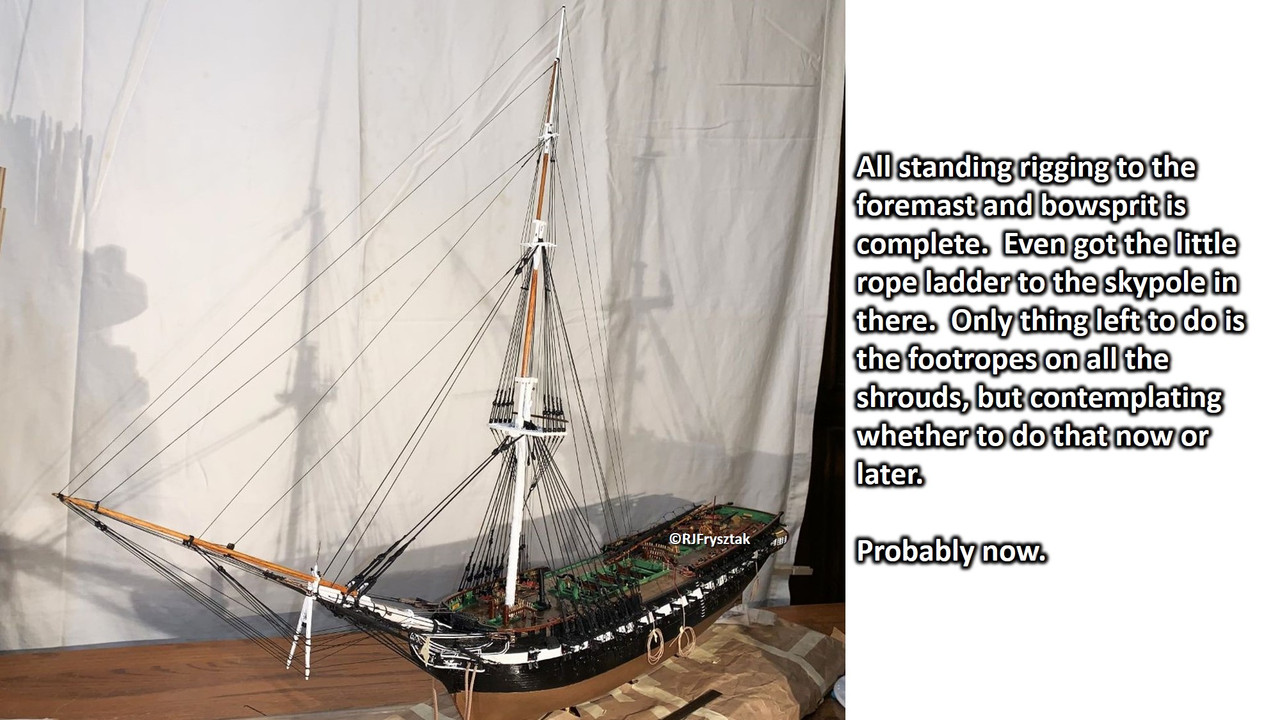
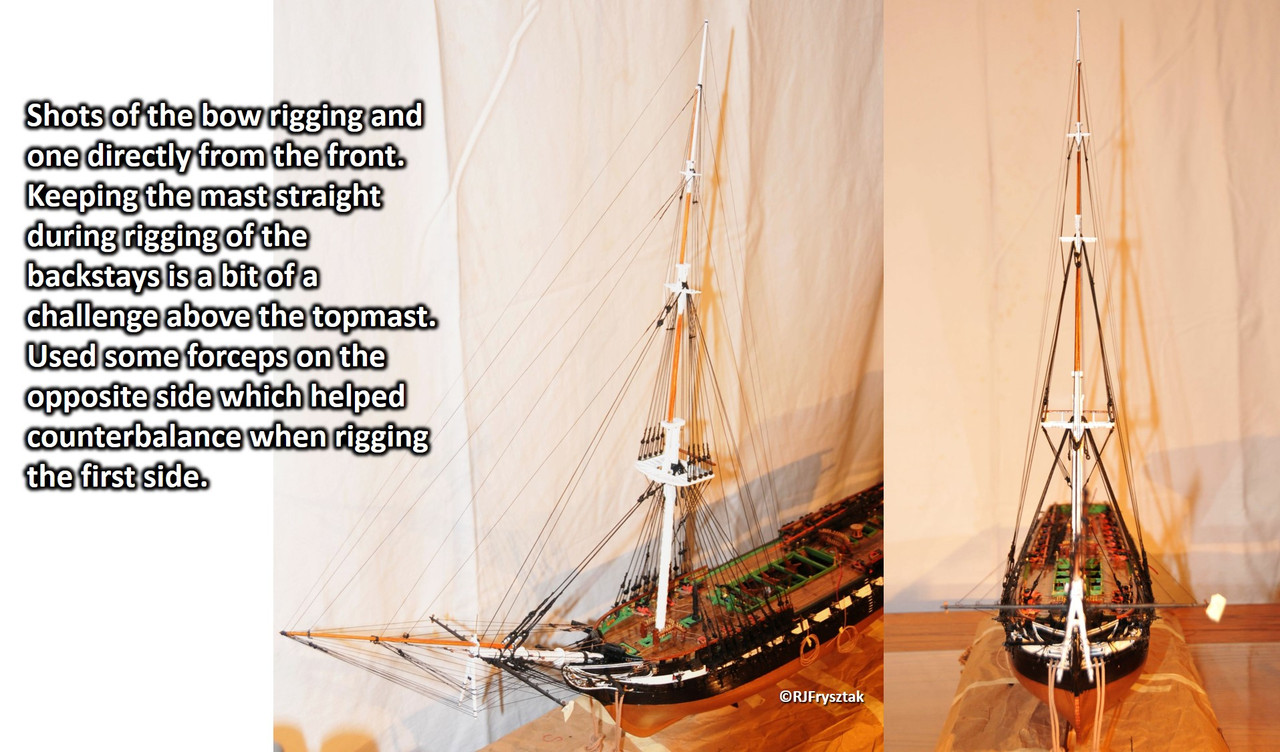
You were correct and I was in error. The foremast stay and preventer stay are rigged to the center of the bowsprit via huge open hearts. Topmast stay & preventer go through the bees. All four of these will try to pull up on the bowsprit. But with the gammoning and bobstays all rigged very tight, I am not worried about the bowsprit bending, since it is a solid piece of wood.
More worried about the topgallant and royal stays pulling on the jibboom and flying jib. That is where most folks run into trouble, especially with the very flimsy plastic, which really has a tendency to bend either the skypole or the flying jib. I remember playing that game some 35 years ago when I first built her. Had to go back and tighten up the martingales so I could get everything to look OK. But even then, they had a tendency to sag in the summer.
Bob
Rigging. An excuse to drink scotch. (I am paraphrasing off of your tag)
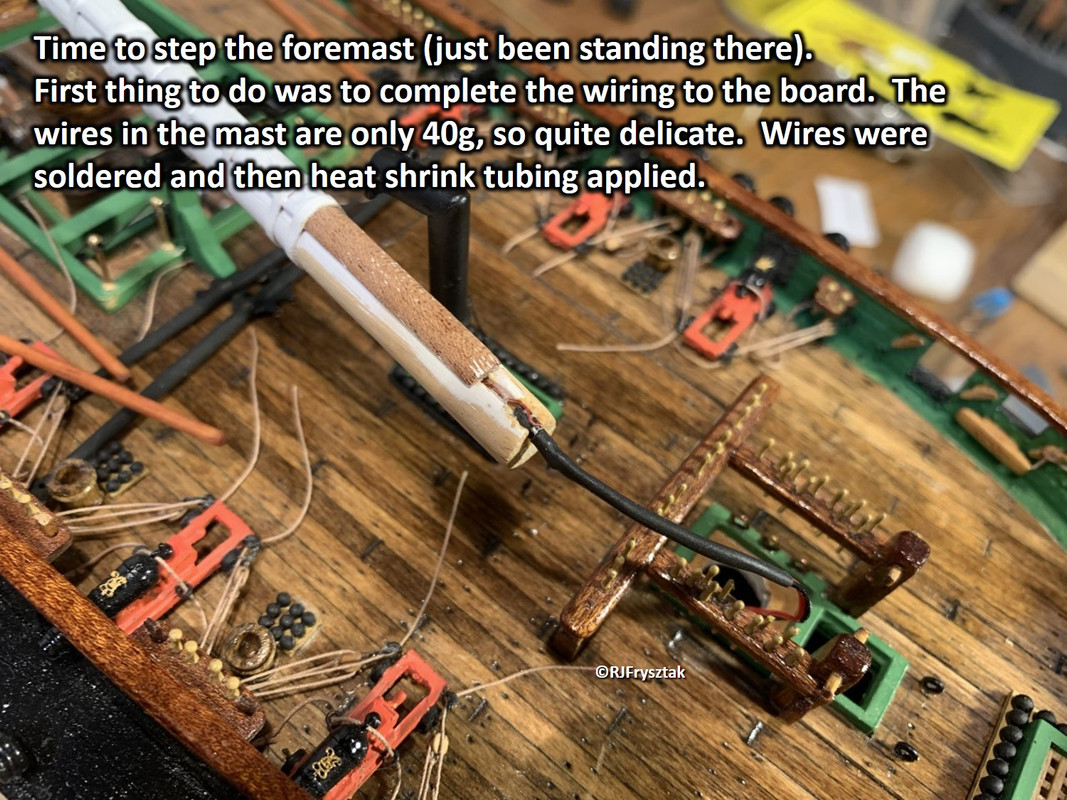
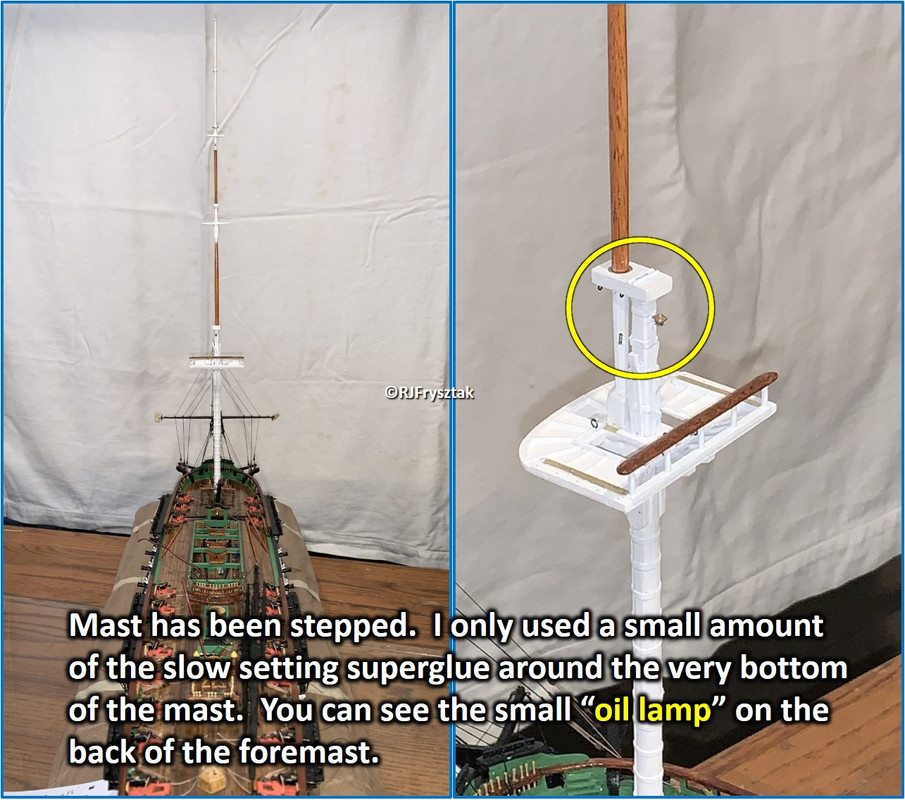
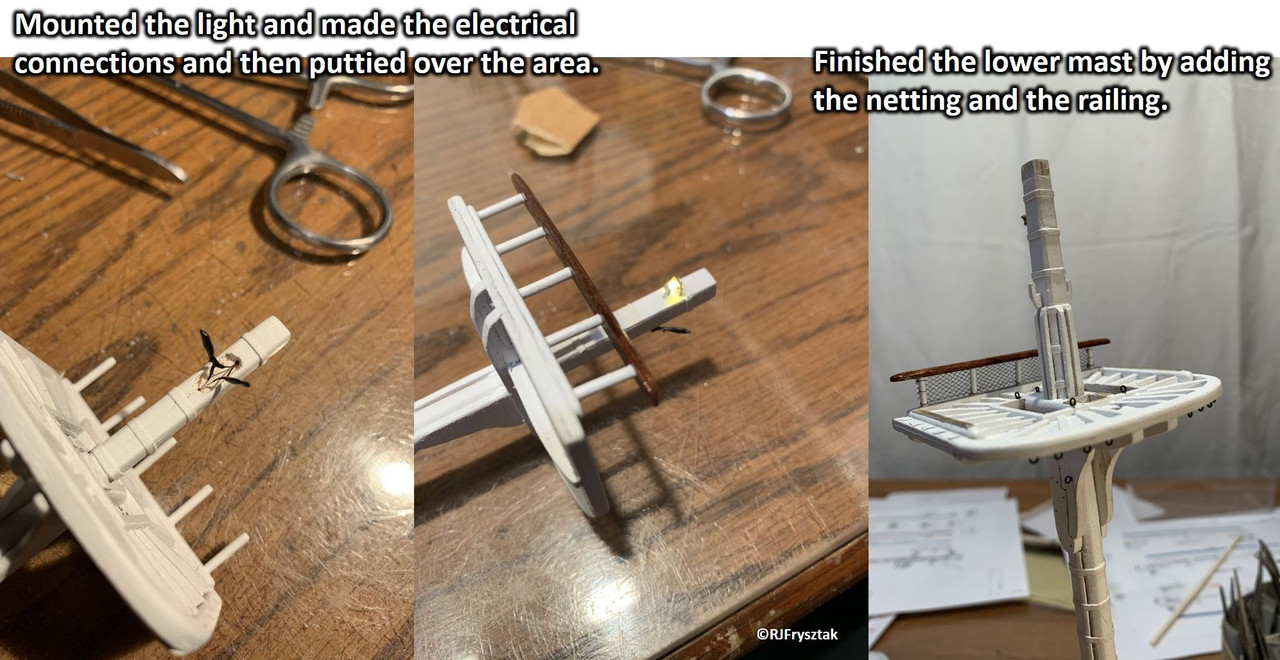
Moved from the bowsprit to the foremast. Accidentally broke one of the 40g wires to the foremast lamp. It was a chore, but I was able to pull out the broken wire and splice a new one on. Can’t really strip the insulation on that stuff - just have to gently scrape or sand it off. All fixed, light is working, and stepped the mast using just a bit of the slow-set superglue on the bottom. Mast is pretty tight, but shrouds will hold it in place.
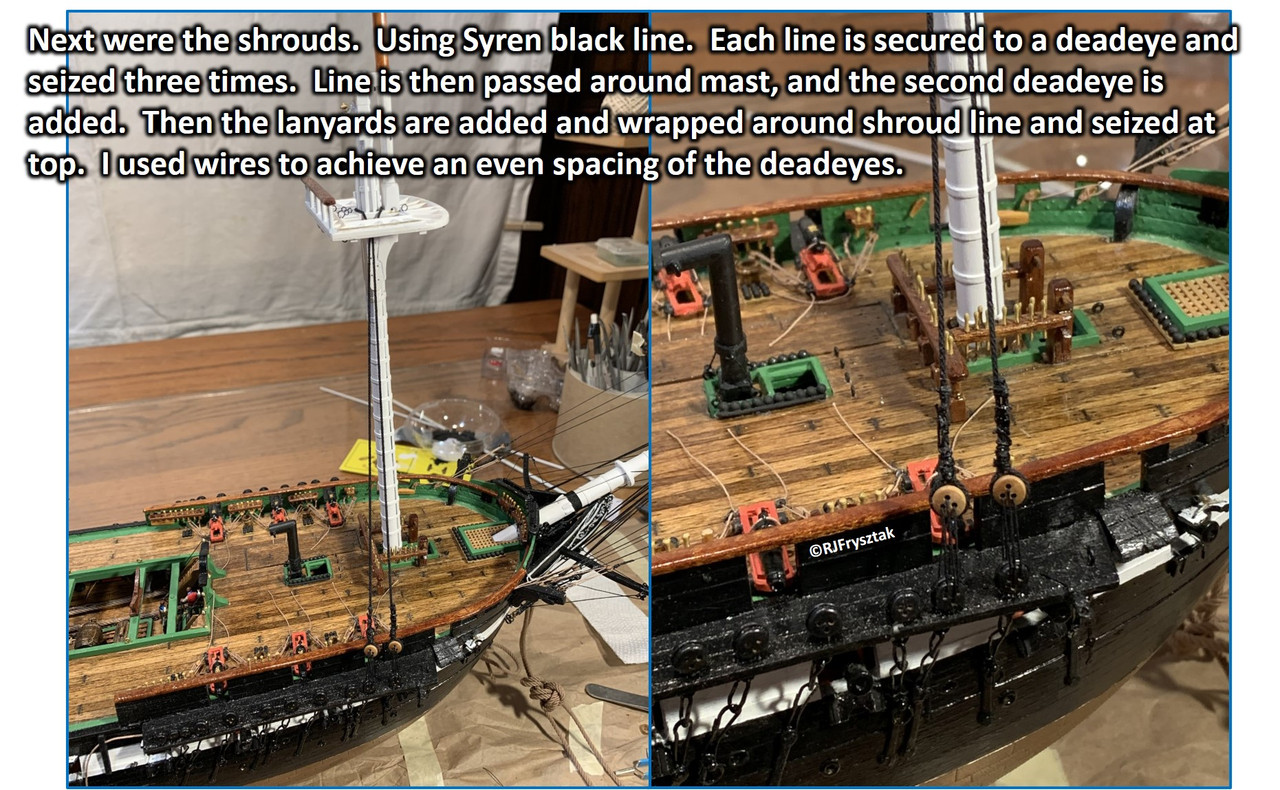
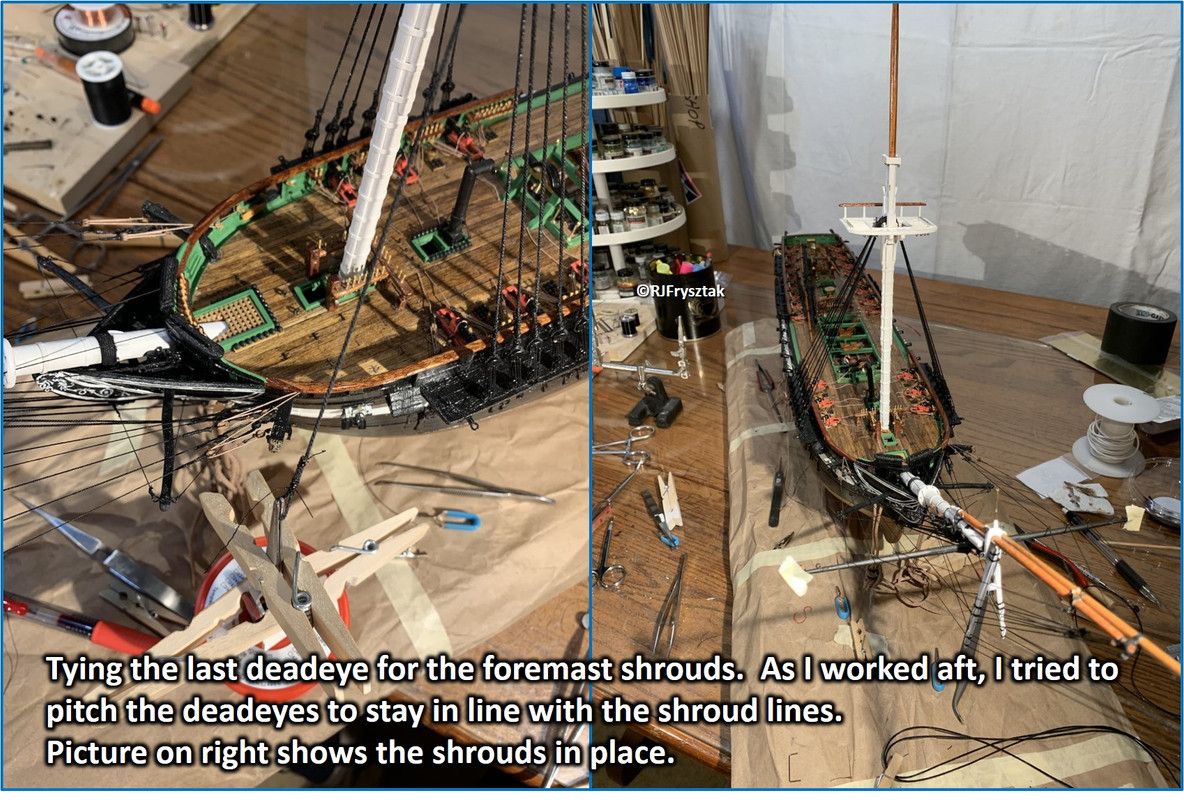
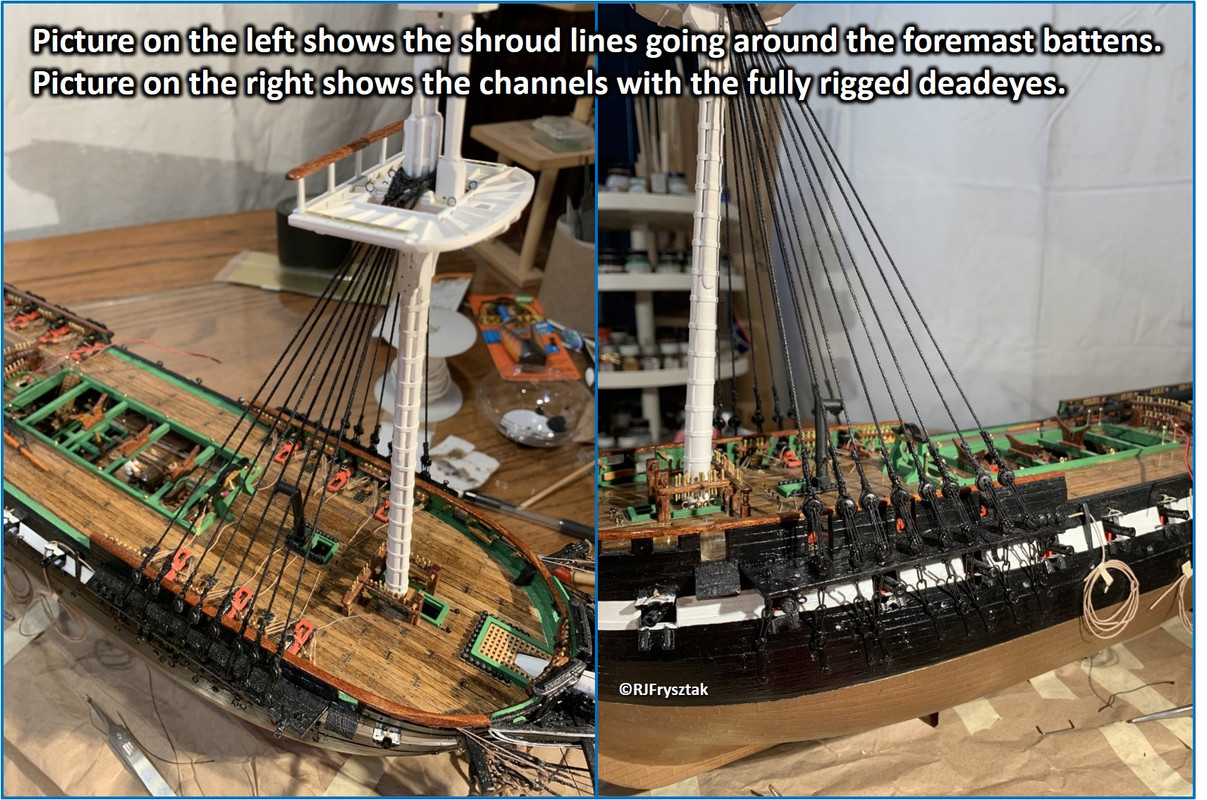
All shrouds were individually tied, seized, and wrapped around the mast in pairs, working back and forth. Mast is dead straight and has the necessary 1/2" of rake. I tried to make sure to keep the deadeyes holes in line with the shroud.
Have a Merry Christmas everyone!
Hope all your stockings are stuffed with modeling things.
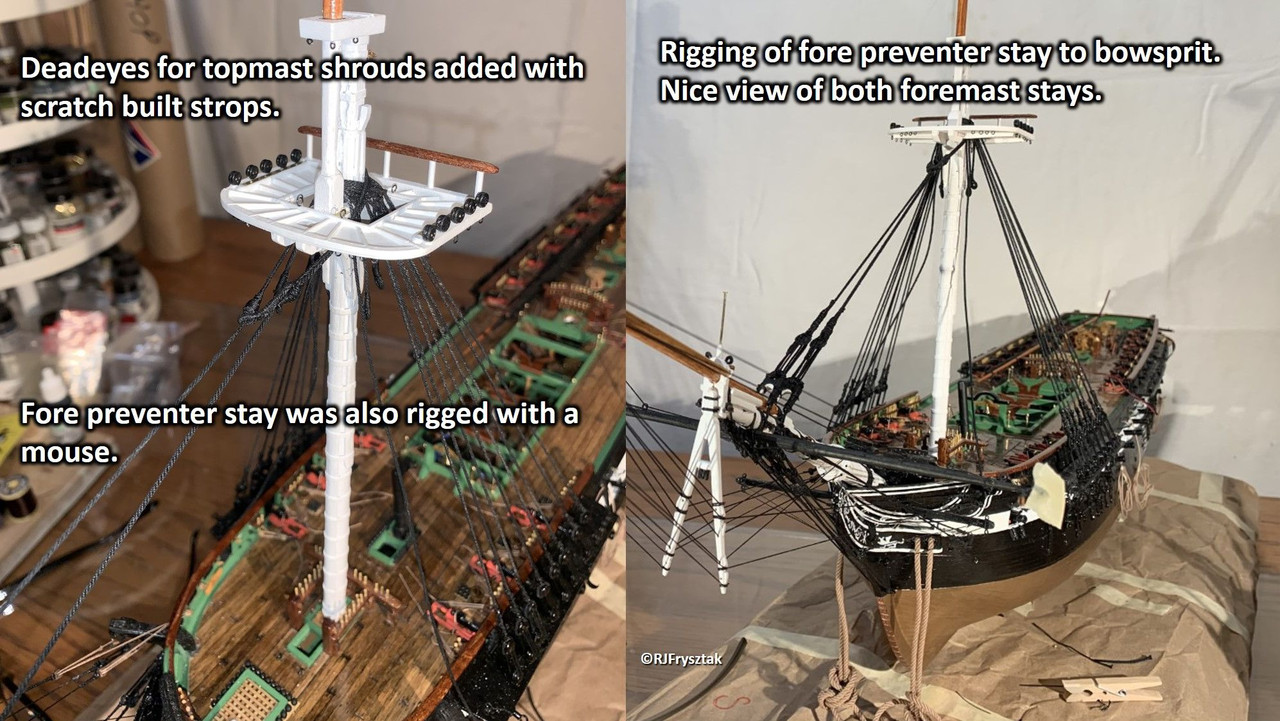
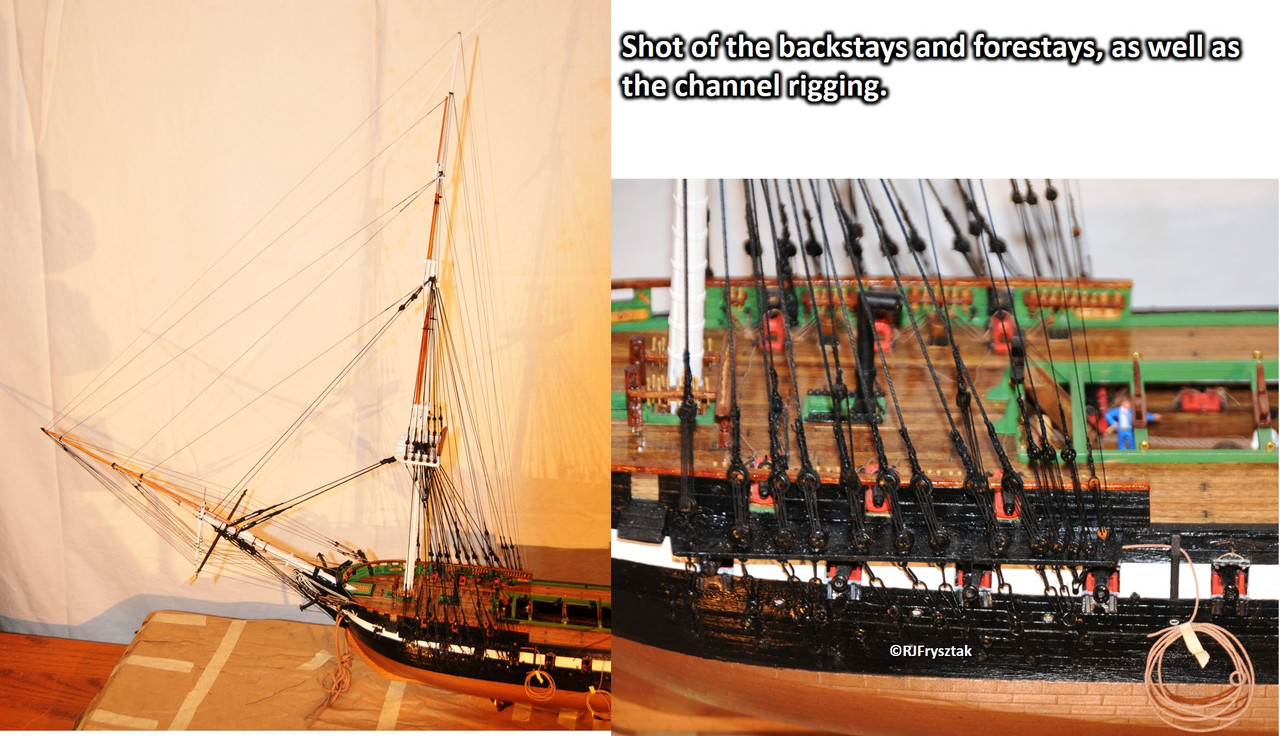
After getting all the shrouds and Burton pendants onto the foremast, I added the fore stay and the fore preventer stay. Each had to have a collar and mouse added, and then served. They both attach to unique “open” hearts on the bowsprit which had to be scratch built and painted. Each was tensioned with a lanyard.
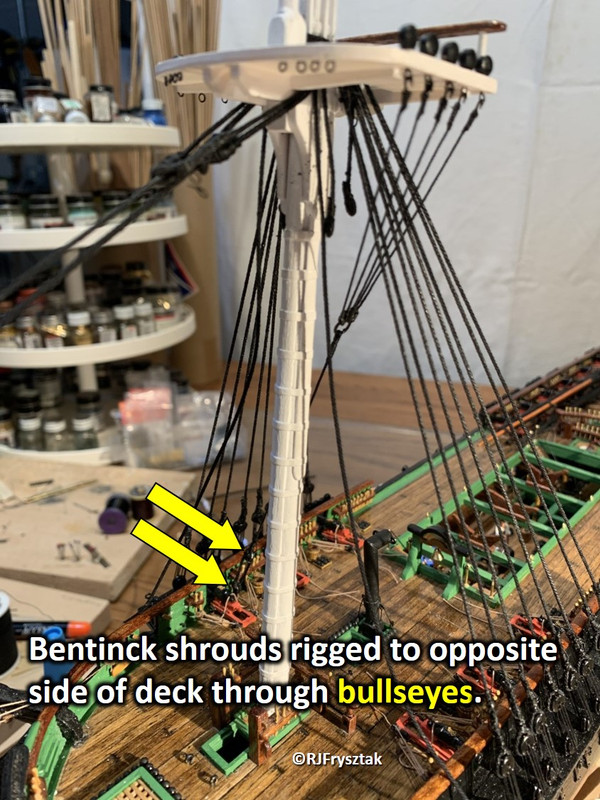
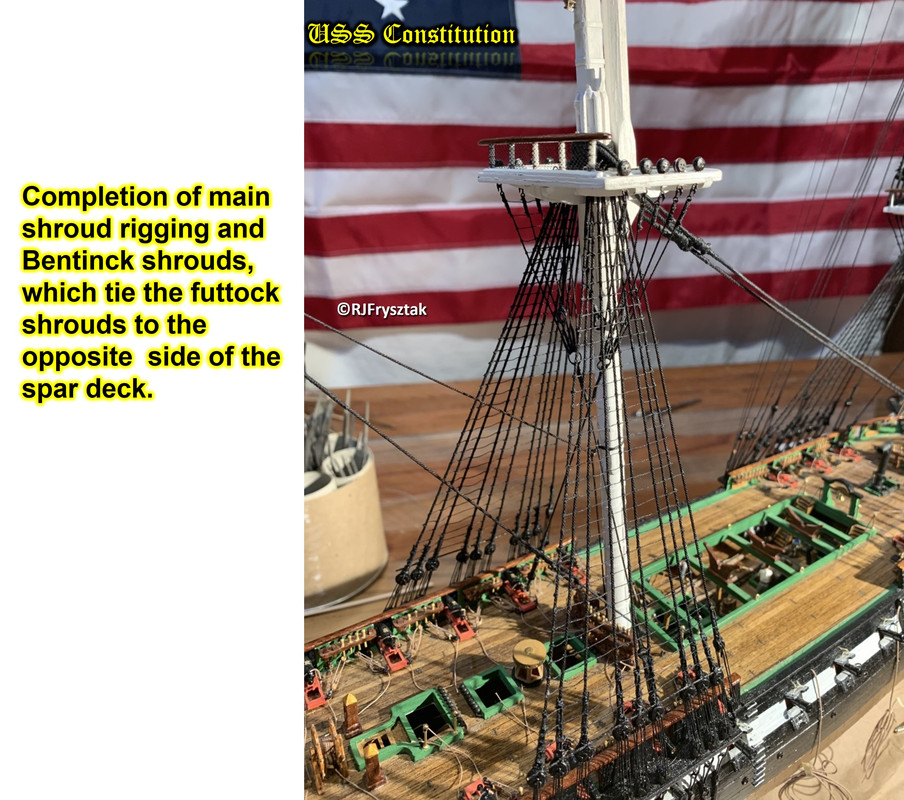
While waiting for the correct size 3 sheave blocks to arrive to the foremast shrouds, I decided to strop the deadeyes and attach them to the fighting top. To hold them in place, futtock shrouds are used, which attach to the deadeye strop with a hook and to a ring below the fighting top. A Bentinck shroud then courses behind the mast to a pair of bullseyes on the opposite side of the deck and are tensioned with a lanyard.
Bob, I’m still out here, reading along and following your definitive Constitution build to the best of my ability.
You stretched my comprehension ability with your last “…While waiting for the correct size 3 sheave blocks to arrive to the foremast shrouds, I decided to strop the deadeyes and attach them to the fighting top. To hold them in place, futtock shrouds are used, which attach to the deadeye strop with a hook and to a ring below the fighting top. A Bentinck shroud then courses behind the mast to a pair of bullseyes on the opposite side of the deck and are tensioned with a lanyard.”
Thank you for adding Photos with arrows…(lol).
Yo, Great work. Yours is another great Thread that I love to re-read and take notes.
I didn’t mean to lose you Jim! Glad the photos helped. [:D] Just trying to follow the BlueJacket plans and my 3 other resources to get this looking as close to 1812 as I can. Since this is my first foray back into ship building in many years, even I have trouble sometimes with the terminology being used. I constantly have to look things up or type them into the Google search bar. I try to research each section I am about to do if I have ANY questions, since I HATE doing things twice. [bnghead]
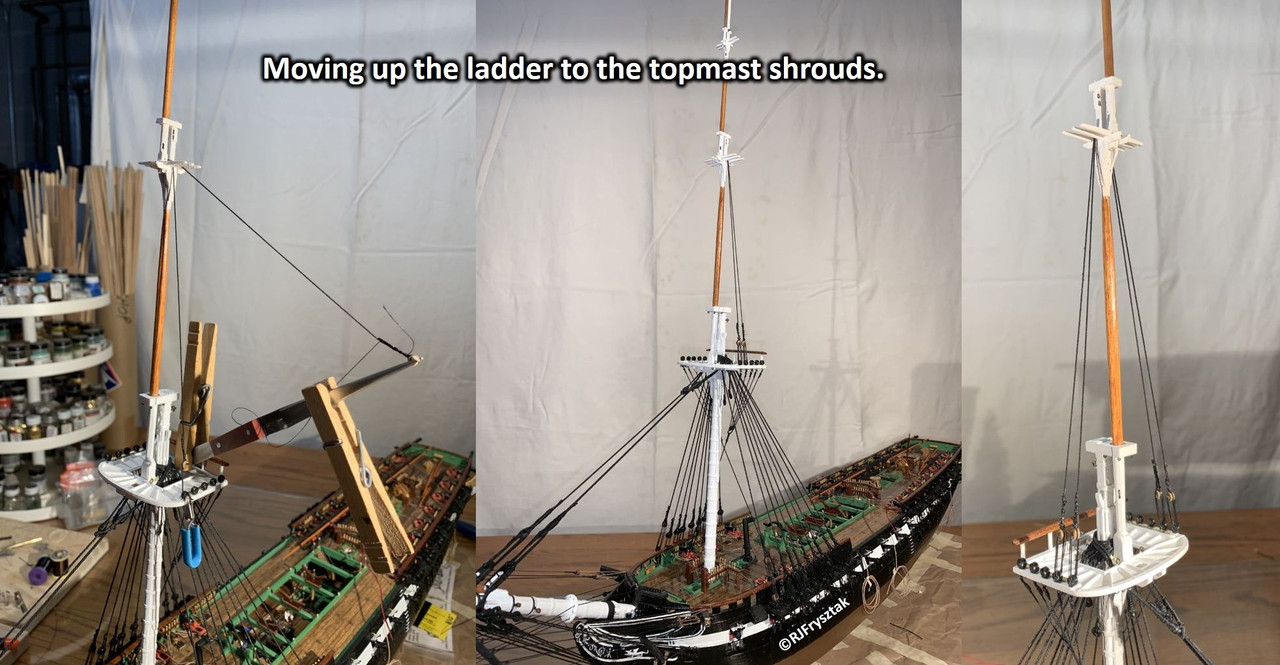
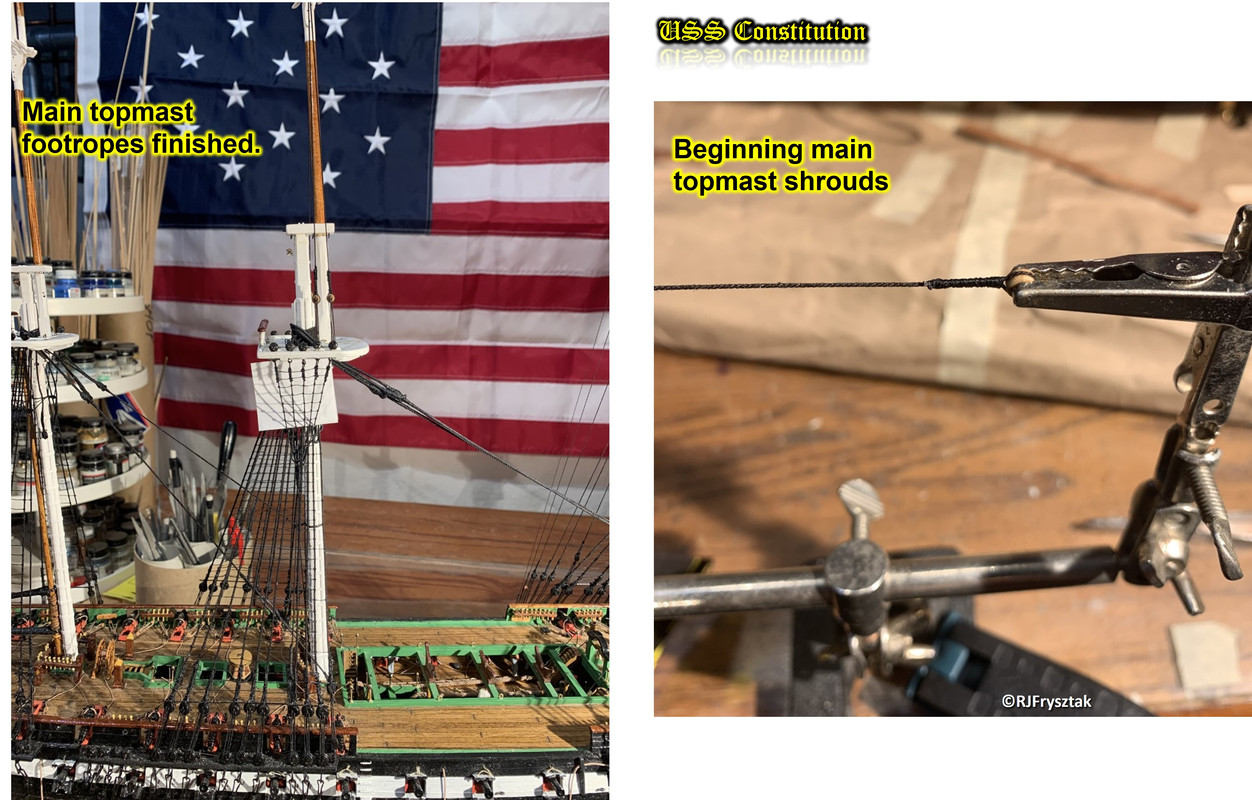
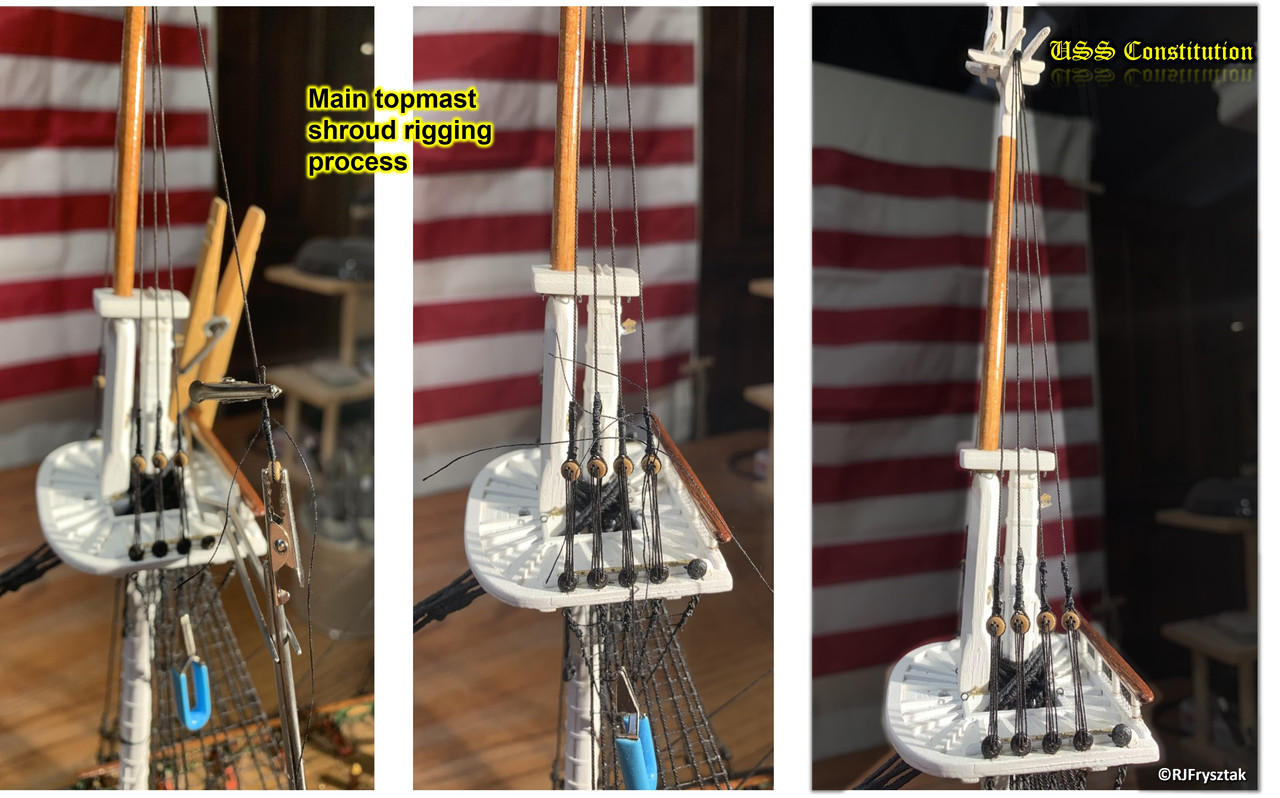
All lower shrouds done so moving up the mast to the topmast shrouds. Still working in pairs except for the 5th (aft-most) shroud. Same procedure as before, except it is a bit trickier to rig the second deadeye on the shroud. Had to get clever so I could seize it correctly.
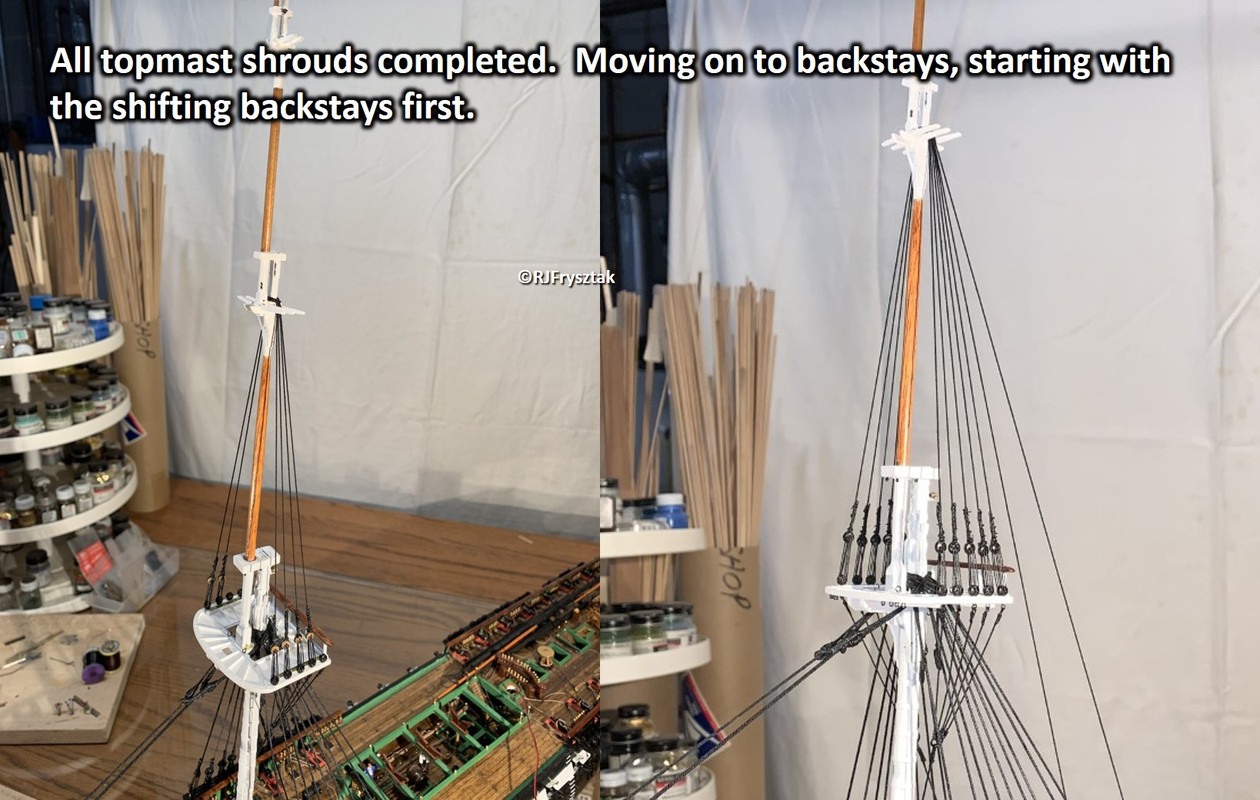
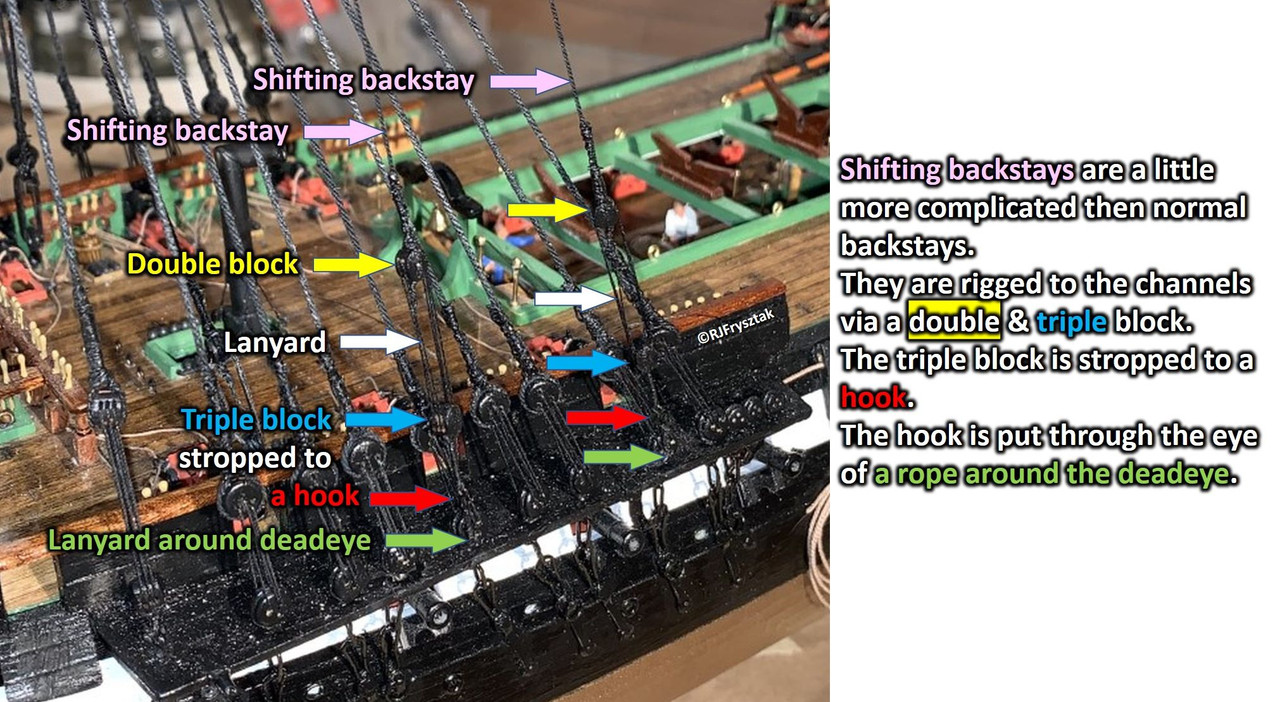
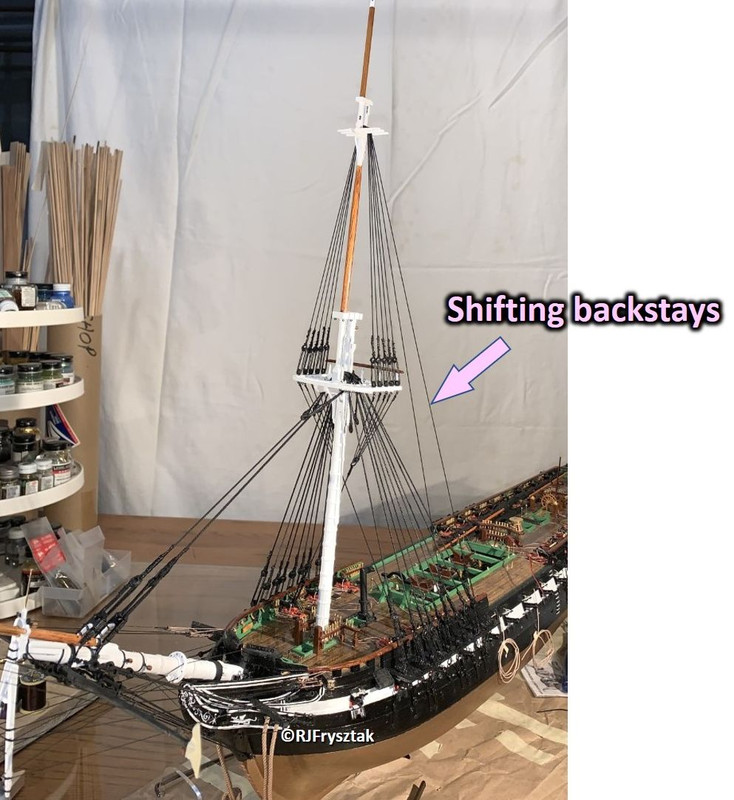
After the shrouds were done, started on the backstays, since the topmast forestay is supposed to go around both shrouds and backstays. Started with the shifting backstays which have a very unique set of blocks, a hook and a loop around the lower deadeye, as shown below. Once these are finished, I will do the normal topmast backstays to the deadeyes on the channels.
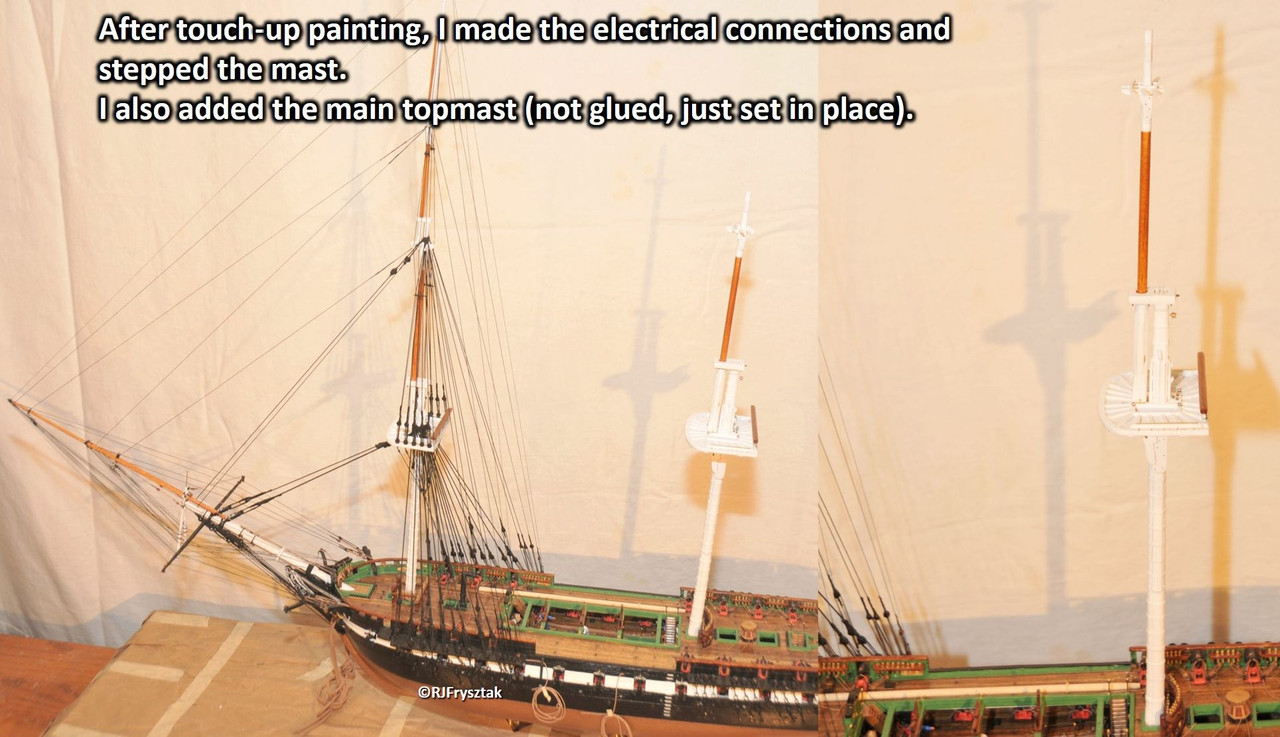
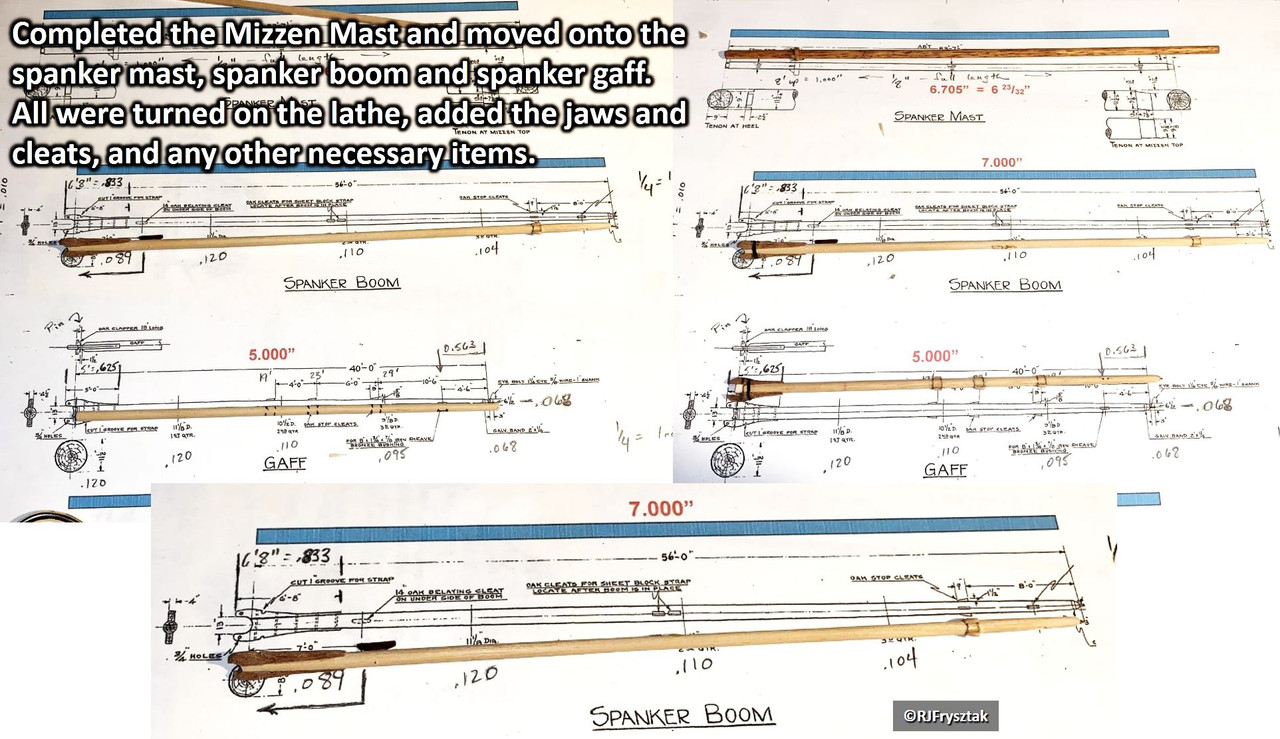
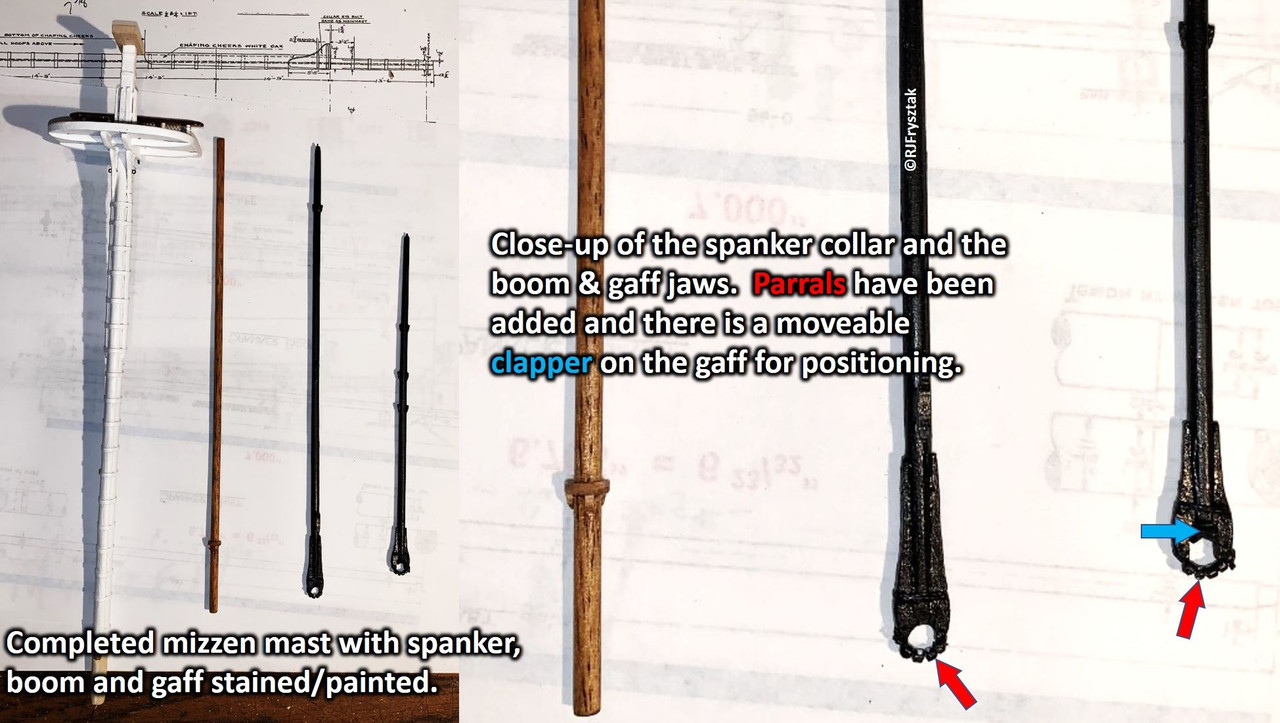
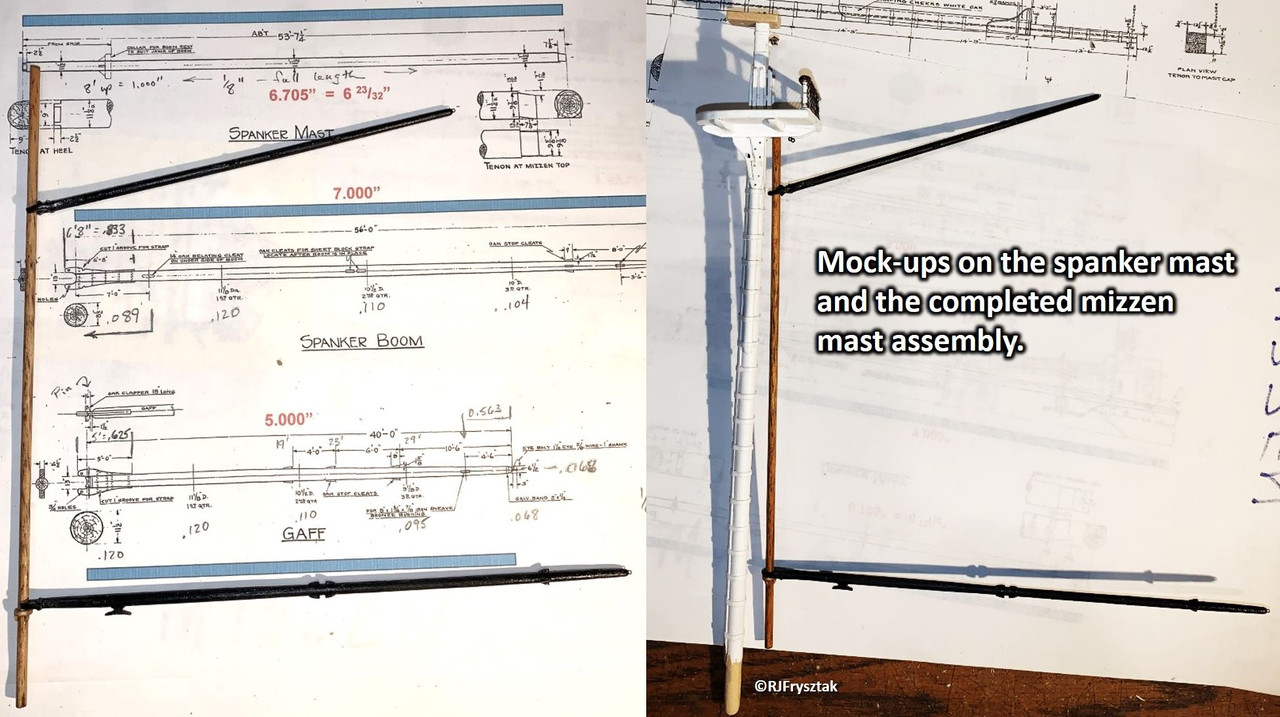
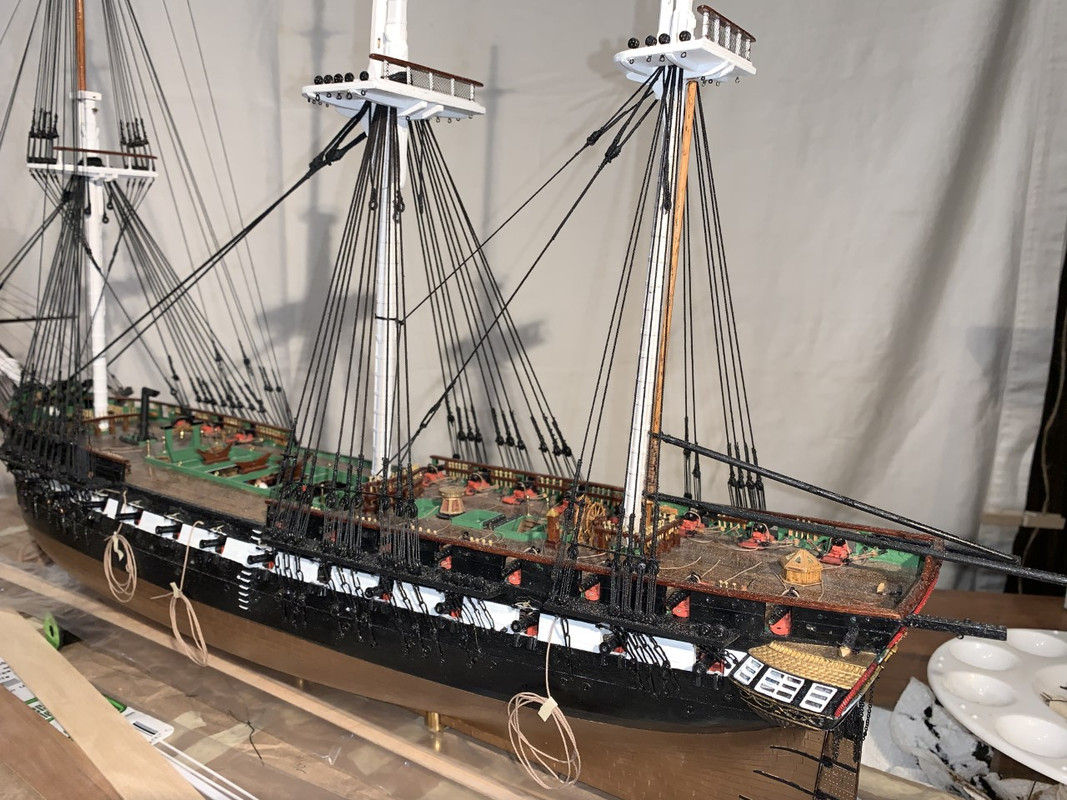
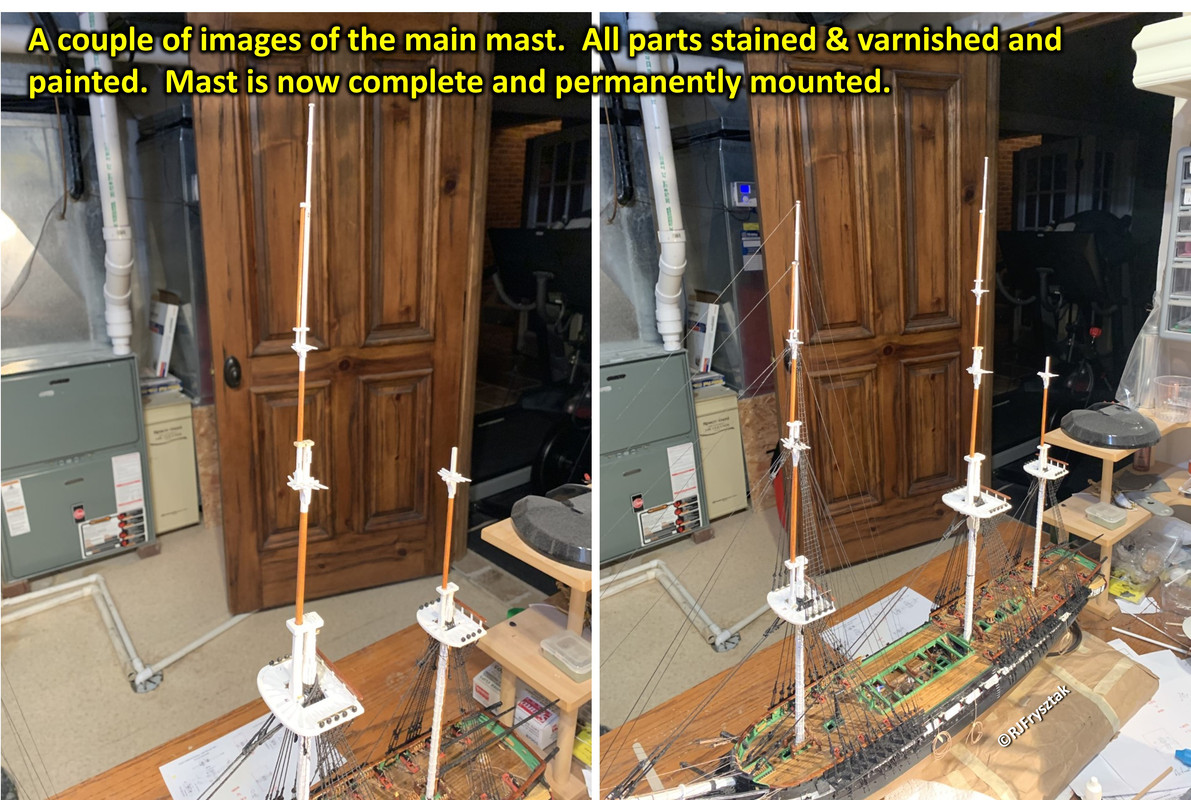
So I finished the main and mizzen lower masts, and the main topmast. Stepped the main mast after doing the electrical work for mast lamp. Moved onto the mizzen spanker, boom and gaff, since they need to be added when mizzen mast is stepped. Gaff and boom jaws needed parrals, but didn’t have small enough beads, so I made them out of 1/16" tubing rounded on ends. Also need the clapper for the gaff. Cut the shape from wood, drilled a hole through center of clapper and jaws, and mounted with a 28 gauge wire. Actually pivots, so gaff could be adjusted.
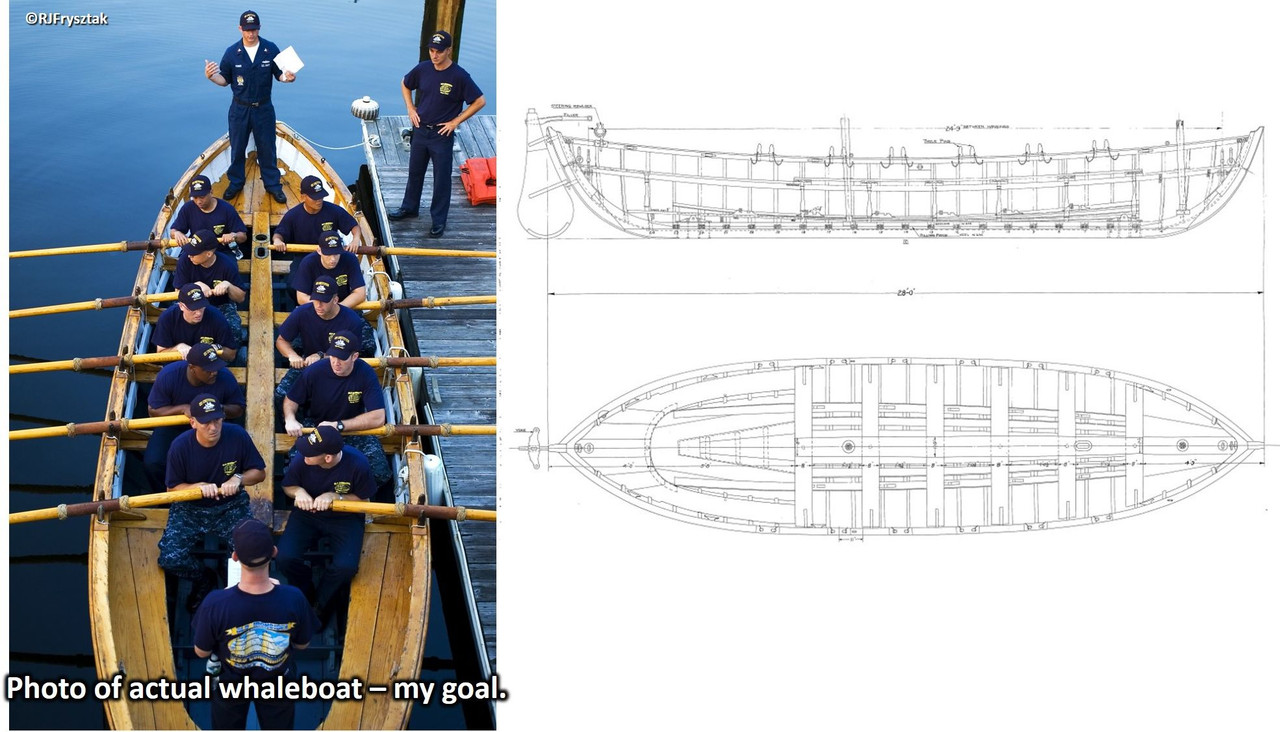
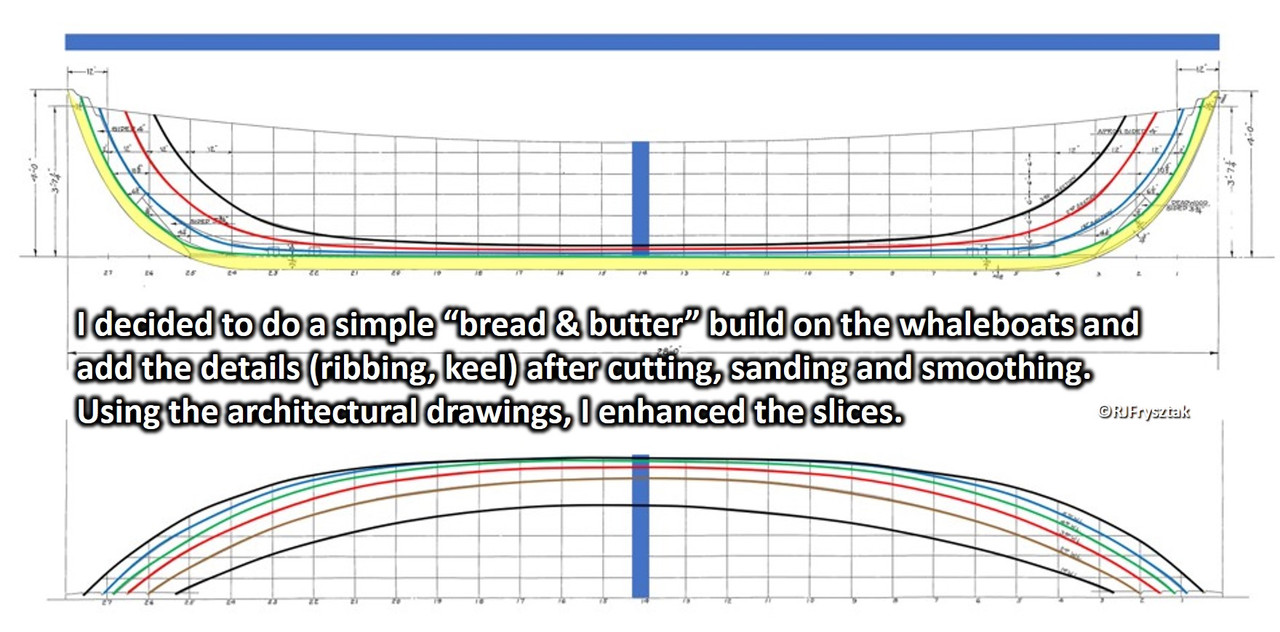
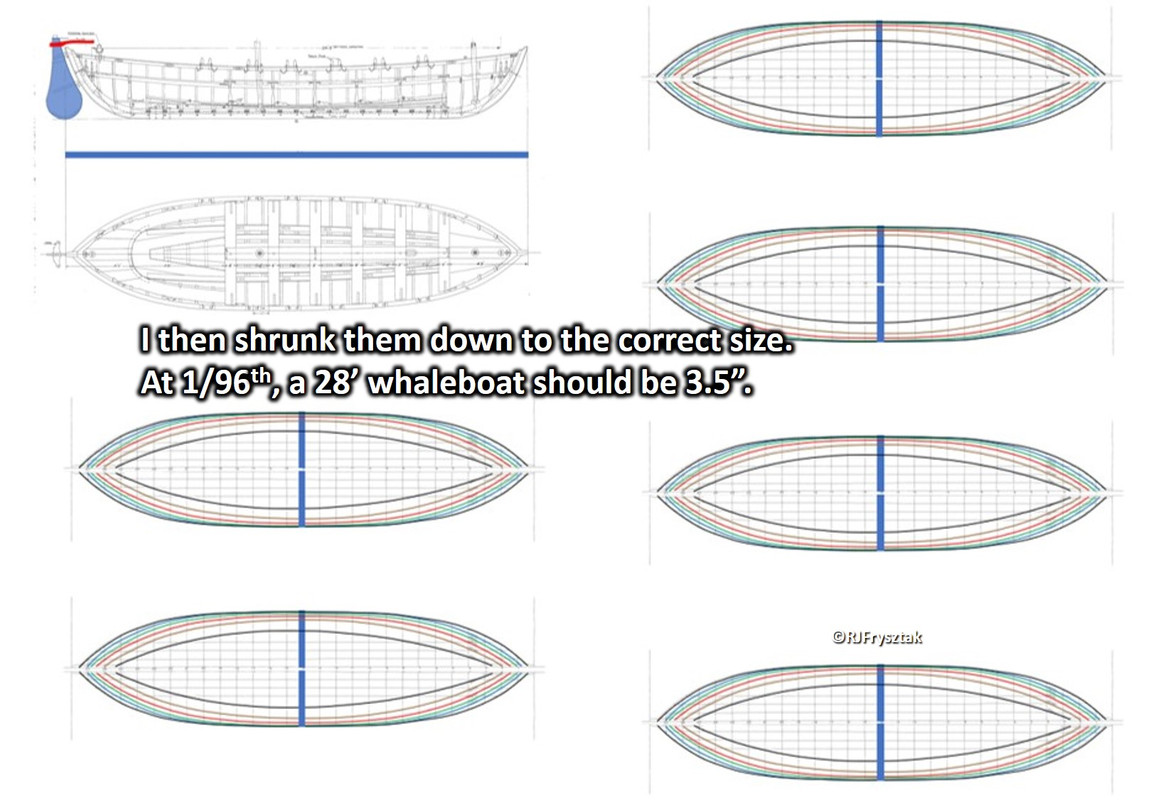
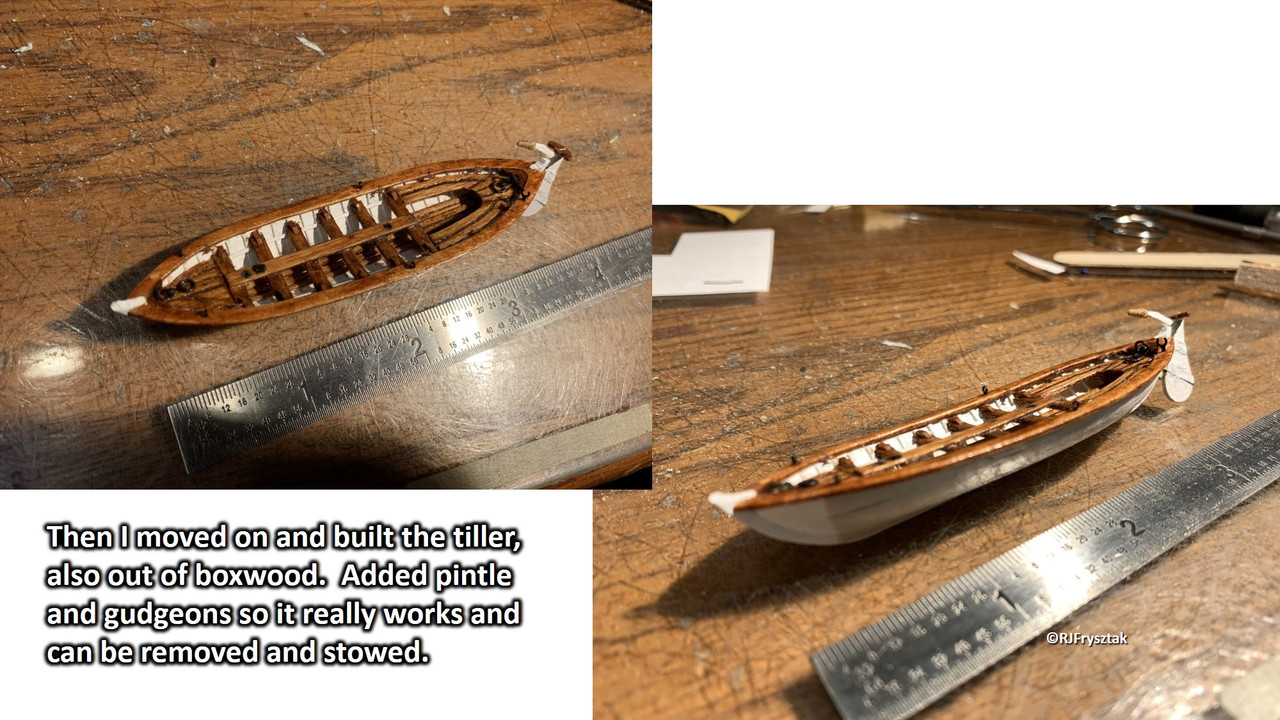
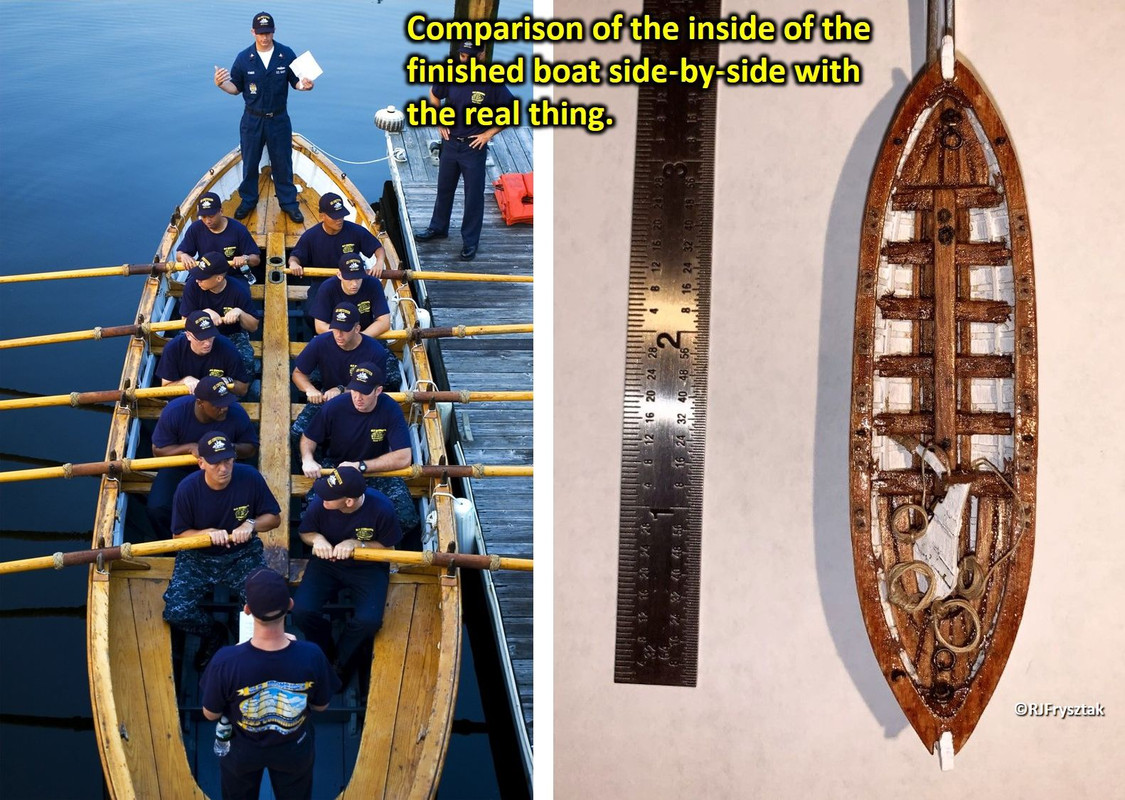
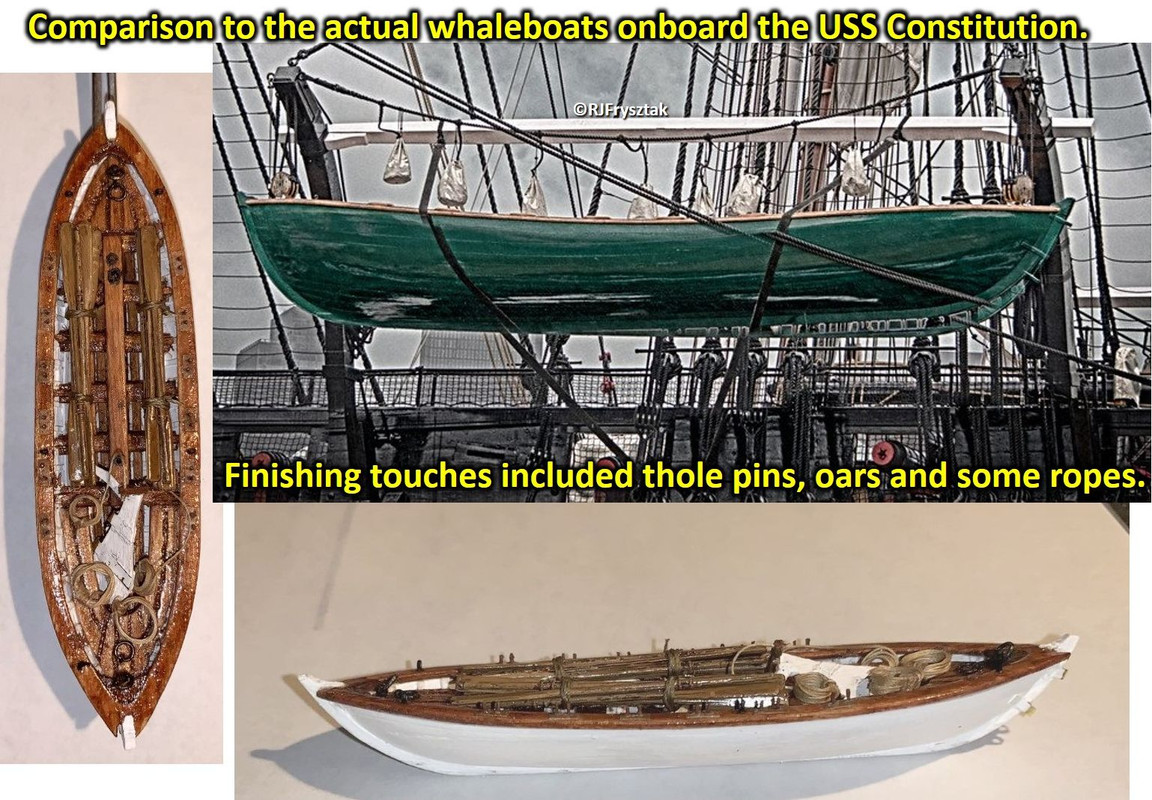
I completed the rigging of the mizzen shrouds and backstays, but before moving on to tying 1000 ratlines, I decided to try building one of the whaleboats. Using the plans from the museum, I decided to build it using the “bread & butter” approach.
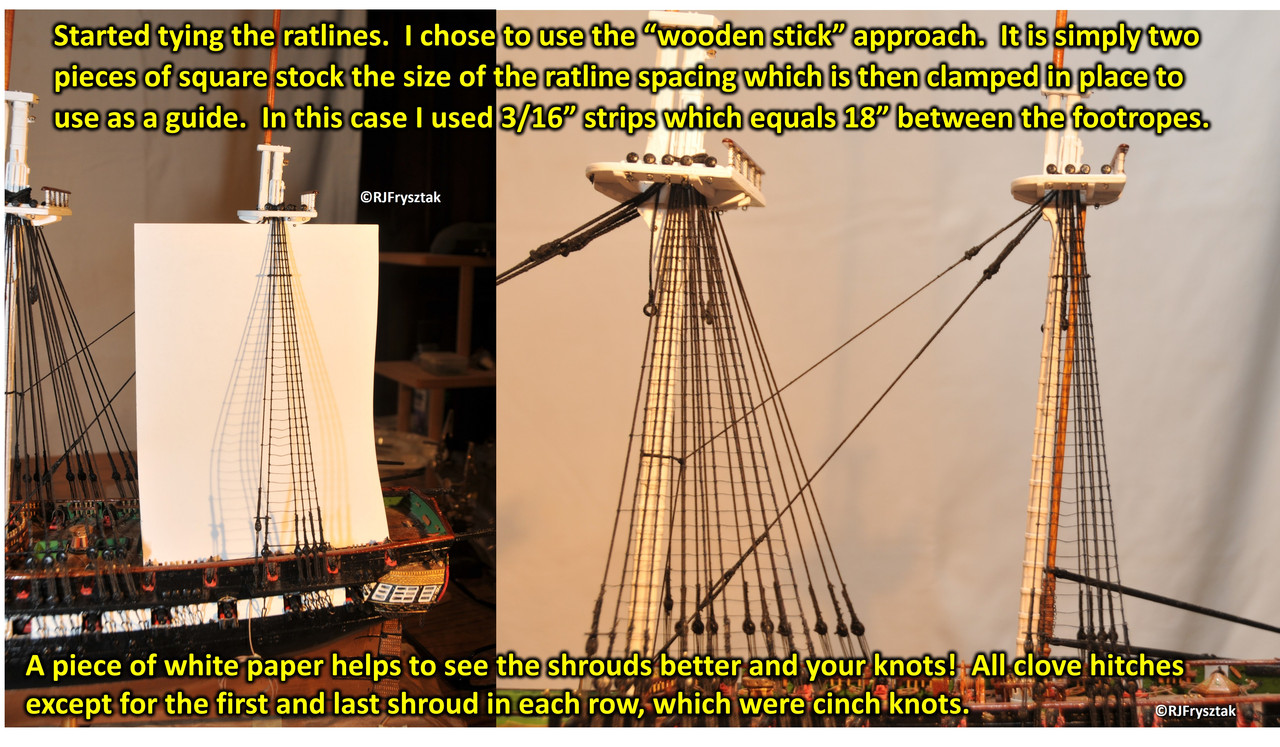
Completed the port side ratlines on the lower shrouds. I used the “sandwich method” since it helps hold the shrouds in place, and allowed me to vary the “tightness” of the ratlines between shrouds, so there is a bit of sagging here and there. I think that helps with the realism a bit, as most ships have a bit of sag in the ratlines.
Started with the mizzen mast since it had the fewest knots to tie, with only 6 shrouds. Got the hang of tying all those clove hitches, and things went pretty smoothly. I only went back and cut out the first two rows and redid them, since they were a bit messy.
Main mast has 10 shrouds, so a bit more work, but no problems at all.
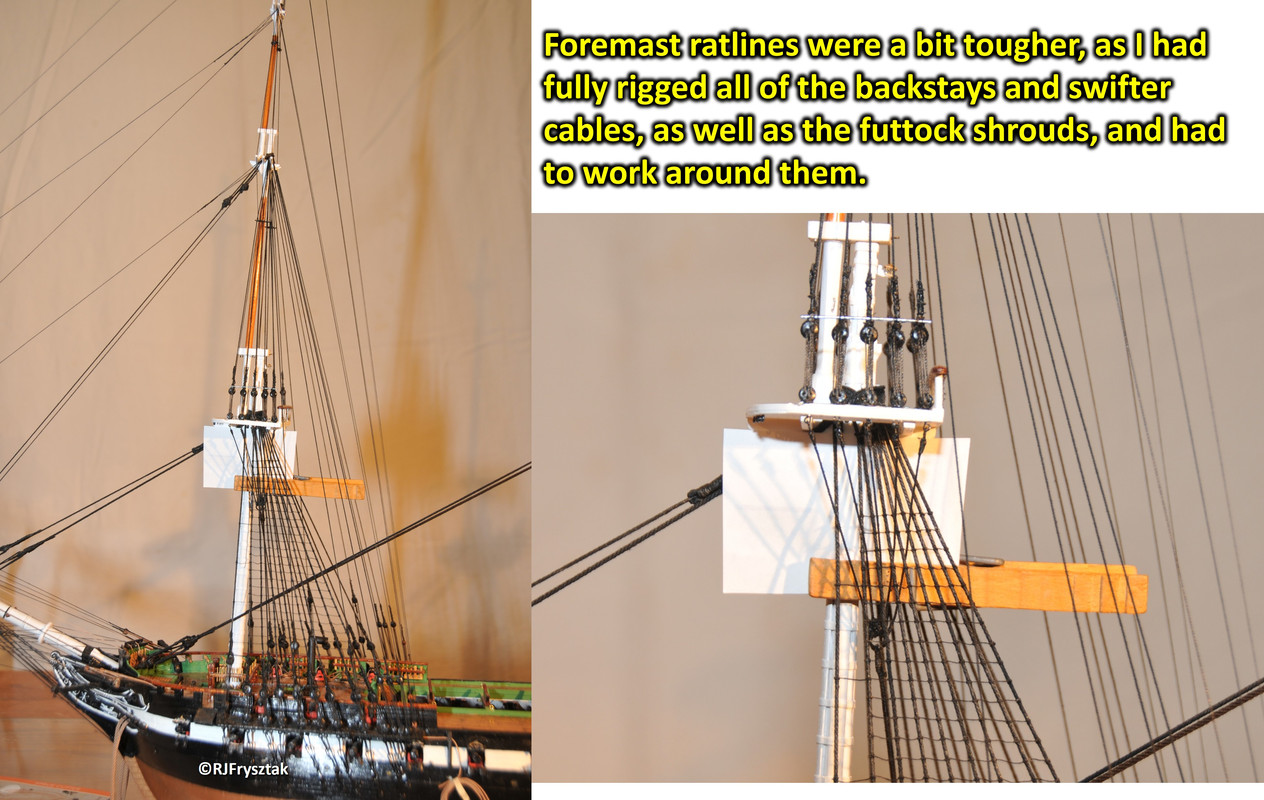
Ran into a bit of trouble on the foremast, since I had fully rigged all of the backstays, swifter cables and futtock shrouds. Made it much harder to keep track of the knots, as I got tangled up in the other rigging a few times. But I persevered and learned a valuable lesson - tie the ratlines before adding all the additional lines! Added footropes to the foremast futtock shrouds, and then started up the fore topmast shrouds.
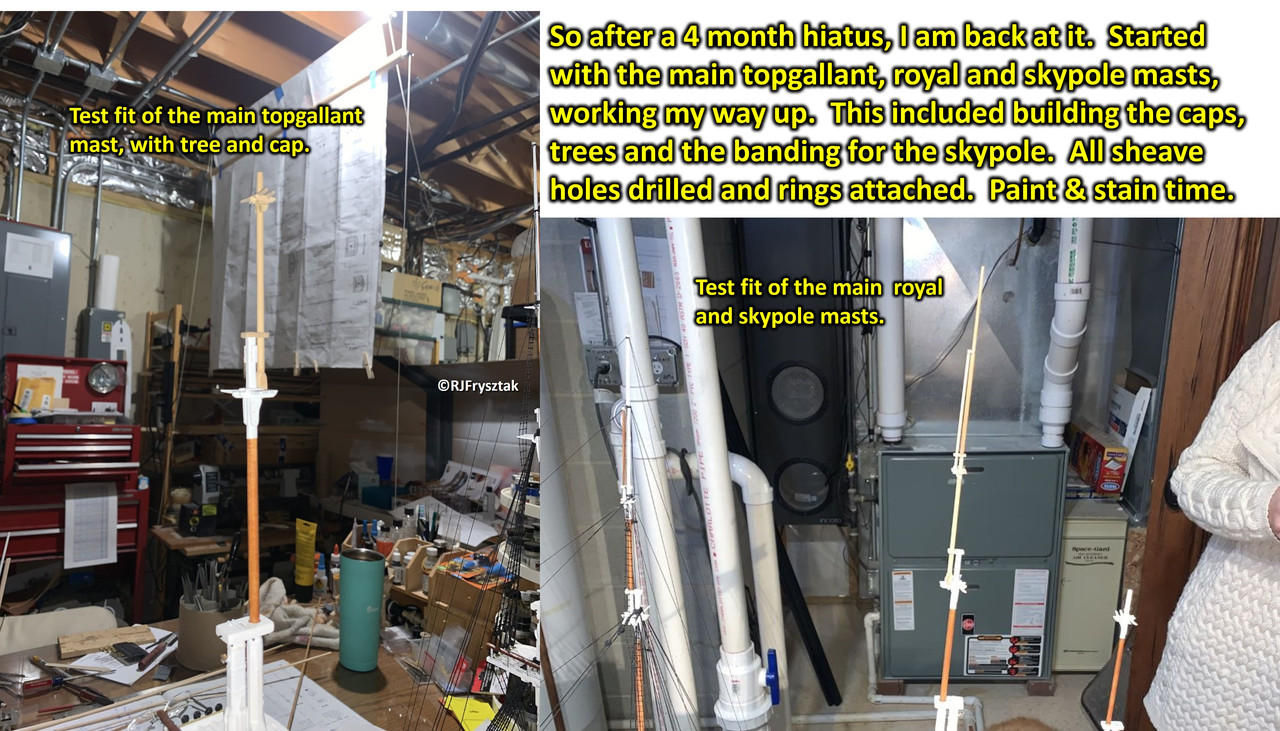
After a very long semester of teaching pretty much every day, I finally have some free time again. The Constitution has been moved from her spot of tranquility (next to the TV) and is back in the shop. Yeah! I have really missed building and working on her.
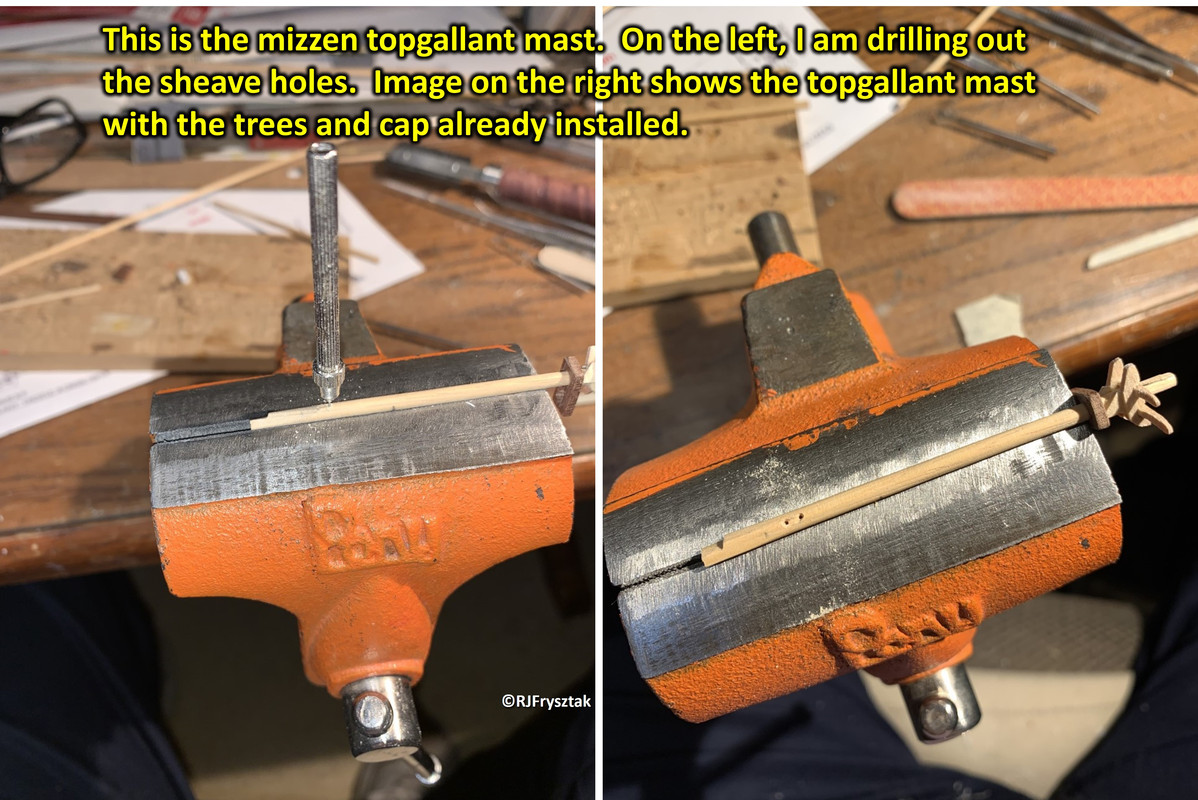
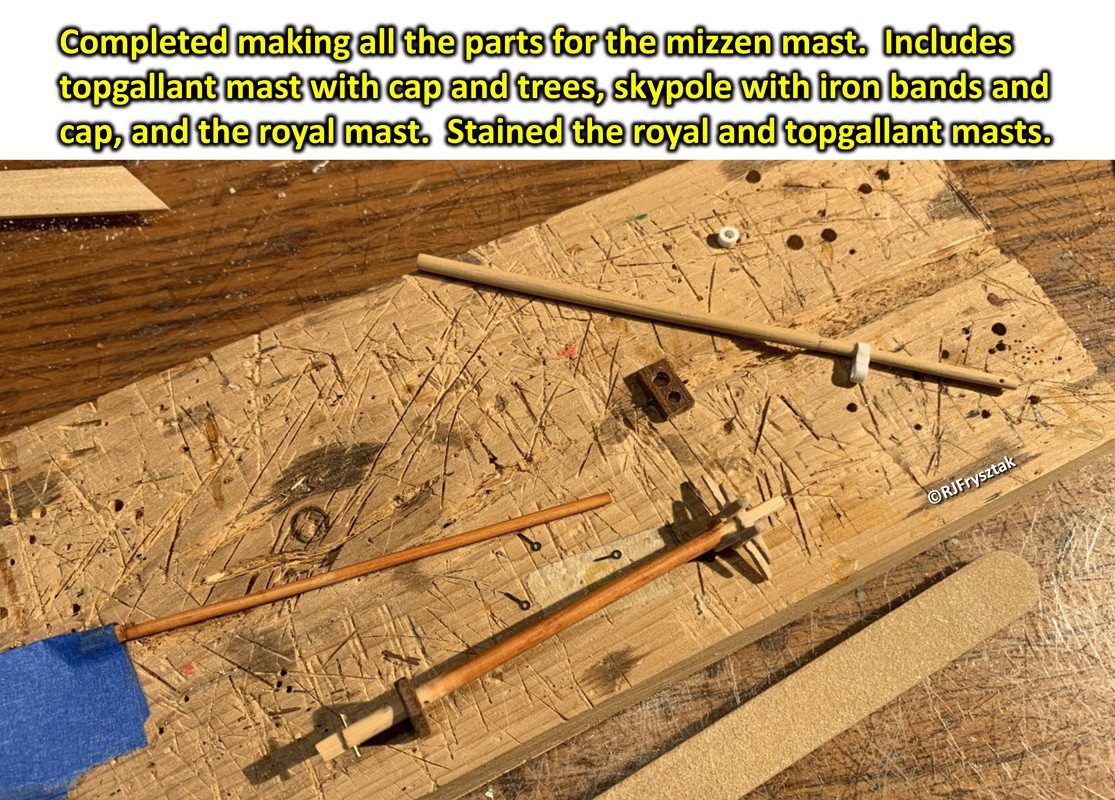
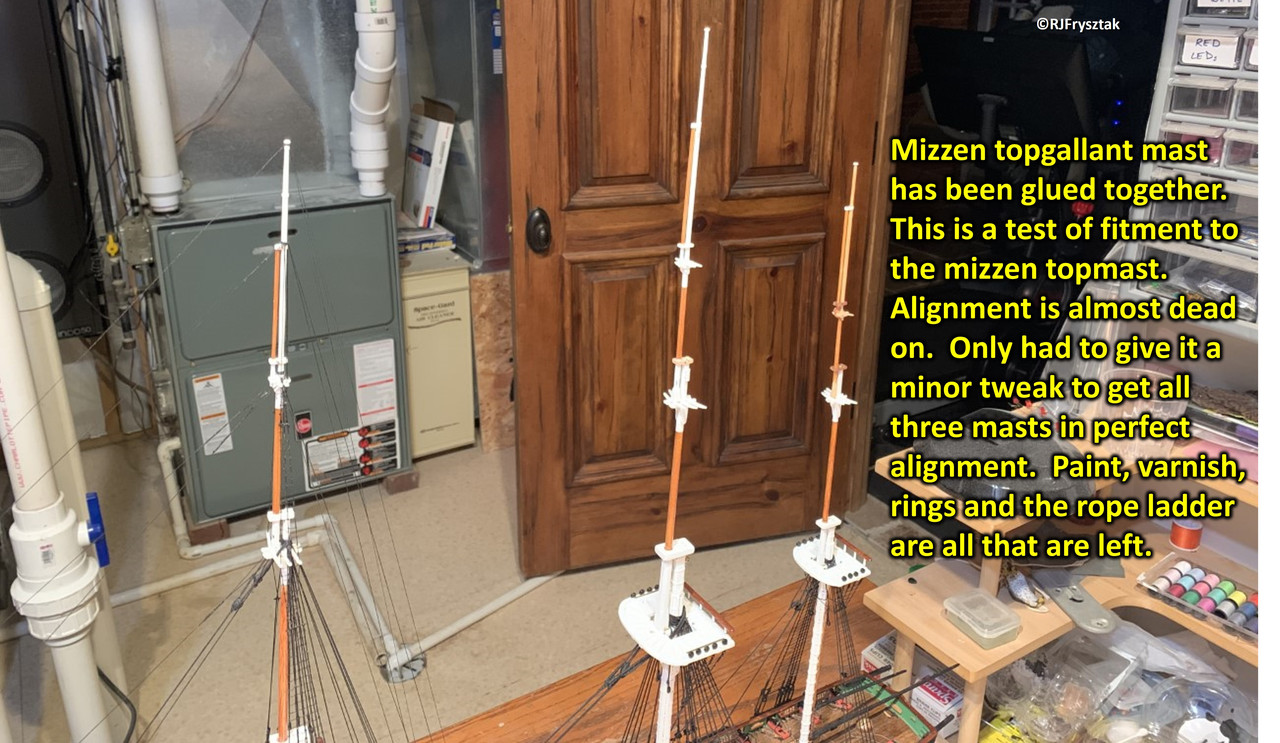
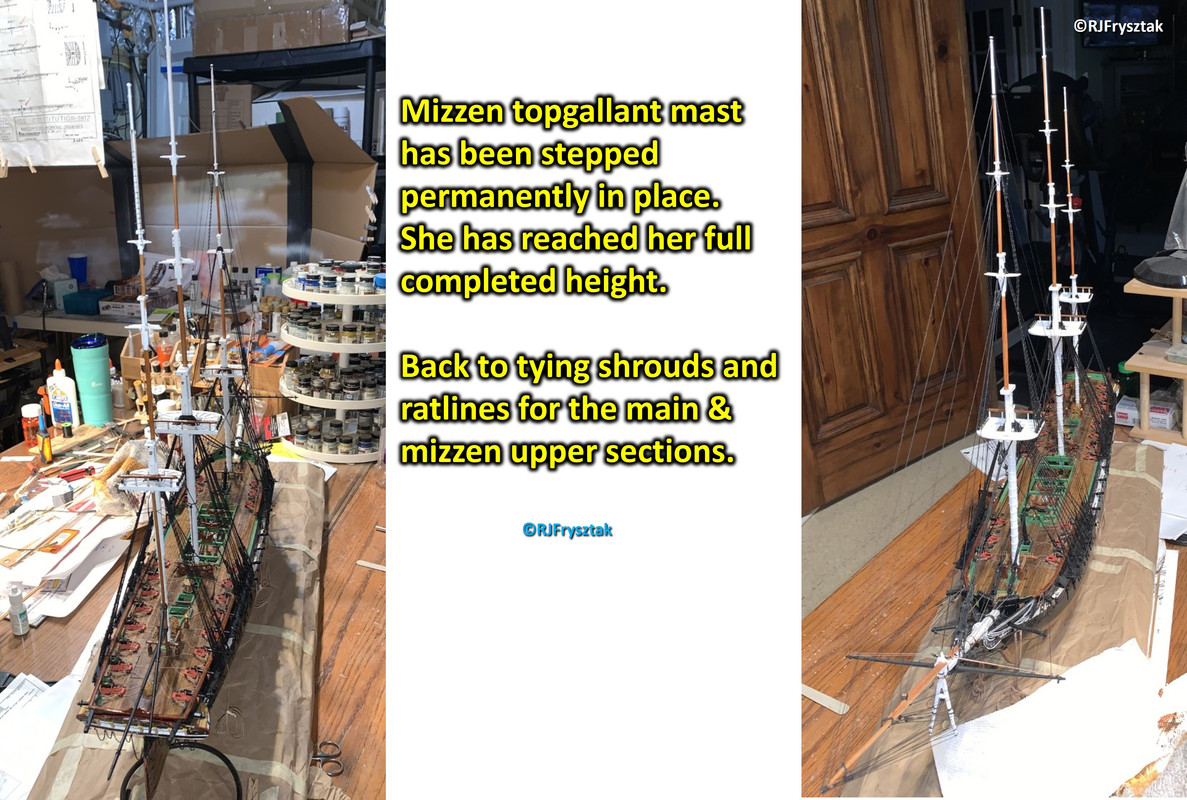
More to come in a few days as I get back into building. Working on getting the main topgallant, royal and skysail masts completed, then on to completing the mizzen mast.
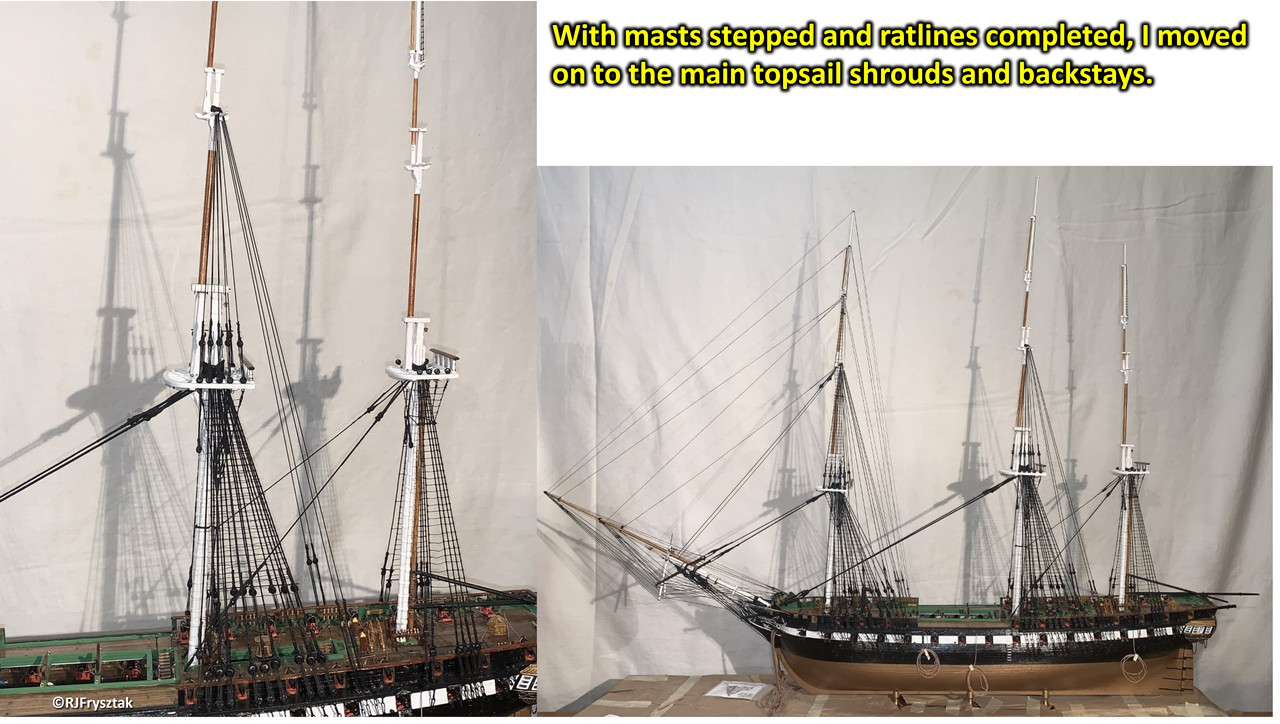
After finishing the ratlines on all the lower shrouds, I moved on to the main topsail shrouds. Had to complete the futtock and Bentinck shrouds first. Futtock shrouds collect onto an iron ring, which is then attached to the opposite side spar deck via the Bentinck shrouds fitted with bullseyes and lanyards (exactly the same as on the foremast). Then up to the topmast shrouds (5 pairs), and finally the backstays (2 pairs).
Next up are the shifting backstays and finally the topmast stay and preventer stay.