USMC Hue Vietnam 1968 radio operator

Just finished my bust model resin figure from young minitures. I used a mix of tamiya and humbrol acrylic paints and added a little vietnam earth red pigment powder. I started with black green and finshed with lighter shades of green, and khaki for the faded vest. The radio headset cord was scratch built with a piece of thin wire, then painted black.

Okay, no one’s commented. I hate when that happens to my posts.

First, welcome to the world of figures. There is no end to the journey on which you’ve embarked.

Many of us have been on the road for many years and have tried different types of paints. Ditch the Tamiya paints for your figures. They aren’t designed for brush painting and haven’t been since at least the early 90’s. If you’re going to become serious about figures and a Young bust suggests you are. you might want to consider an investment in Vallejo and Andrea acrylics. They are designed to be thinned with water (distilled is better) and brushed on. No streaks, no lifting, super fine pigments, a huge pallette of colors,

Your figure looks to be glossy. The helmet has a cloth camo cover, the pattern is somewhat challenging. You should be able to find examples on line, even Ebay will help if you search for Vietnam helmet covers.

Not to be picky, but pictures I’ve seen of the Marine vest show it more green with a nylon shell, so you could get away with a more semi gloss finish. I don’t think those would havve faded like the fatigues. The face is sculpted as a youyng man, so I’d go with a lighter skin tone and less in 5 o’clock shadows. These guys were often under 20 when they were over there.

Someone makes (made?) decals for the grenades on the back of the radio.

In general, try to use a base color then lighten it with appropriate colors (not white) and darken it with complementary colors (not black) and appliy these carefully to the areas that catch light. In this scale, dry brushing won’t work. You want to deepen the shadows and make the highlights pop.

Thanks Aj.

Great advice. I won the bid on this bust on Ebay very cheap, and didnt realise how expensive these young figures are. The art work is amazing. I know i didnt do justice to the craftsman that created this figure, i guess i rushed it.

I understand what you mean now about light and shadow v’s dry brush. also i wasnt happy with the way his face turned out either. Looks like his been in action for the last week straight.

The decals for the smokes would be good, i will look into them.

I will repaint the vest with a faded green look, as Khaki wasnt the right shade i was looking for. I just wanted the vest to stand out over the greens as everything is green and these did fade alot with a heavy fade on the shoulders. It was hard for me to seperate the right shades of colour.

The helmet cover is alot darker then i wanted it to be, I was thinking a faded cover with the maple leaf camo almost faded out as they did. Again, i think i just rushed into finishing it.

I guess its not too late to repaint over him again, As you say painting in this scale and bust type of model is more for the experts. Im still learning my painting skills, mostly i have been modeling in 1/35 lately.

I know why nobody else commented, because its a poor effort from me, and not worth any comments.

I really do appreciete your constructive feedback, and others, without it i would not improve.

Overall, I really like it. I will add just a couple small critiques. There is a hood coming out over the back of his Flak vest, it should be in the same olive green as the sleeves. It looks like he has on a wet weather top under his body armor judging by the front view. The hand mikes for the radio were made from black plastic with a black rubber boot covering the keying switch, there should not be any bare metal showing anywhere. Nice work on the radio body though. Those did get beat to snot, and still do. Yes that reversable leaf pattern is something of a bear to replicate in scale. I would not worry too much about 5 o’clock shadow on a youngster. There was always a guy or two in any squad who had the genes of needing a shave by midday, even at age 19. His face has the nice dirty been in the field a while look.

Thanks Stik, i was wondering what the hood was from, i had never seen one on a M69 vest before. Think i might cover the headset i a plastic bag as they did too.

If you wander eBay, look for “US Navy rain poncho” (or anorak or pull-over instead of poncho). Still pretty plentiful on the surplus market.

They were made in great huge batches for 30-40 years and widely available to the Sea Services. They have a virtue of rolling up smaller than the full poncho. An easy item to tuck under a pack flap or under the straps on a packboard. Note, Marines had access to the 1944 packboard, which was a better carrier for either PRC-10 or PRC-25, and allowed carriage of one’s 'real" pack, too.

Color runs from a not-quite forest green, to a darker-than sage. Construction is a rubber/vinyl coated fabric. Note that tears will be more neat that frayed from that construction; but that fold edges might show breaks, too. Sometimes the inside of the rain-top was a different shade than the outside, this more from sun fading rather than a manufacturing artifact.

My passed-down-from-family KW-era copy is about 2 sage green + 1 medium green in color on the outside, and about an OG-107 on the inside. The VN-era copy I have in the back of my ride is a color much like faded OD Poplin plus a bit of dark blue, like feldblau, and inside and out. The one I have from my university NROTC days is almost unissued OG-107 on the outside and sage on the inside (this despite a number of boat and field exercises with no care nor concern for preservation).

That helmet cover could be a straight OD or the standard Mitchel camo. Ought to be a few more puckers and places where it does not fit quite so perfectly. Also, the slots ought to show loose threads RTO might have a brass-bristle brush next to the spoon stuck through the eyelet over the left ear. but, those are more related to the sculpting, not the quality of the painting shown here.

Sorry, since not too much gets posted here I tend just to check the armour, aircraft and group build forums every day and skip ones like this so I didn’t even see this till now.

The guys have some excellent advice here and if I might add you can find lots of great painting videos on YouTube as well.

Nice work, you did tackle the eyes- something that I avoided for years!

Actually the helmet cover will be the Mitchell pattern as few others were issued if at all. They faded to a light sage/pea green and the camo was almost gone. Marines did starch their helmet covers to the steel pot thereby eliminating floppy and wrinkles. The covers then rotted away and faded even faster.

The flak jacket was a dark green with a hint of gray MM Marine Green is close. They were nylon and while fading was at a minimum, they were dirt magnets, sweat and such turned the collar area and arm pits area nearly black. I recall mostly brass zippers, but there nmay have been some aluminum ones out there.

Overall all I can say is don’t use Tamiya to brush paint, and dull coat when finished. Good first attempt.

G

Over all a very nice piece, cant add to what has already been said, about the painting. I will say I really like the way you did the AN/PRC-125 aka the “Prick”. The weathering and chipping are perfect. I carried the next generation AN/PRC-77 for three years in the Corps. Got to love the tiered gaze of the eyes.

Gotta space that word, Capt… Pri ck-77s and Pri ck-125s, and so on, lol… As the Master said about the Seven Words You Can’t Say on TV, “It’s OK if it happens to your finger… Yes, you can pri ck your finger, but don’t finger your pri ck, no-no!”…

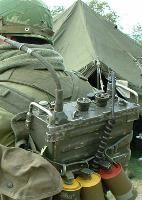
Gotta say that I like what ya did, Ice… The handset, gotta echo Stik… No metal… However, we used to put cellophane from ammo-cans or sandwich bags (sometimes bread-bags if the “Spoons” were bivouaced with us) over them to keep 'em dry, with the open-end rubber-banded or taped around the cord… If the diaphrams in those things got wet, they disintegrated pretty fast… Might be doable in that scale as an added touch.

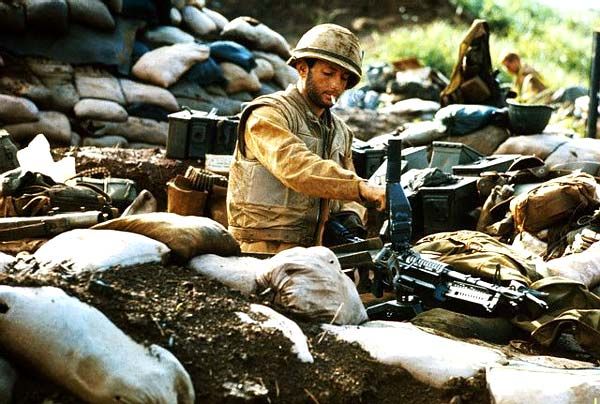
(Above is “staged” photo…Note C-rat Marlboro 4-pack, bug dope, Zippo (good way to lose that lighter), matches, and toilet paper…)

Here’s some USMC pics ca. 1967-69…

Colored Smoke Grenades

Smoke Grenades

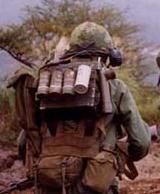
Grenade on far right is HC Smoke

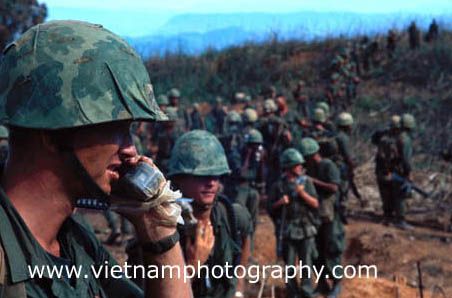
Note how the ground-color gets into and on everything… Even the M16s black hand-guards…

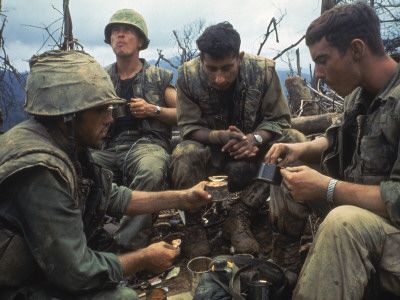
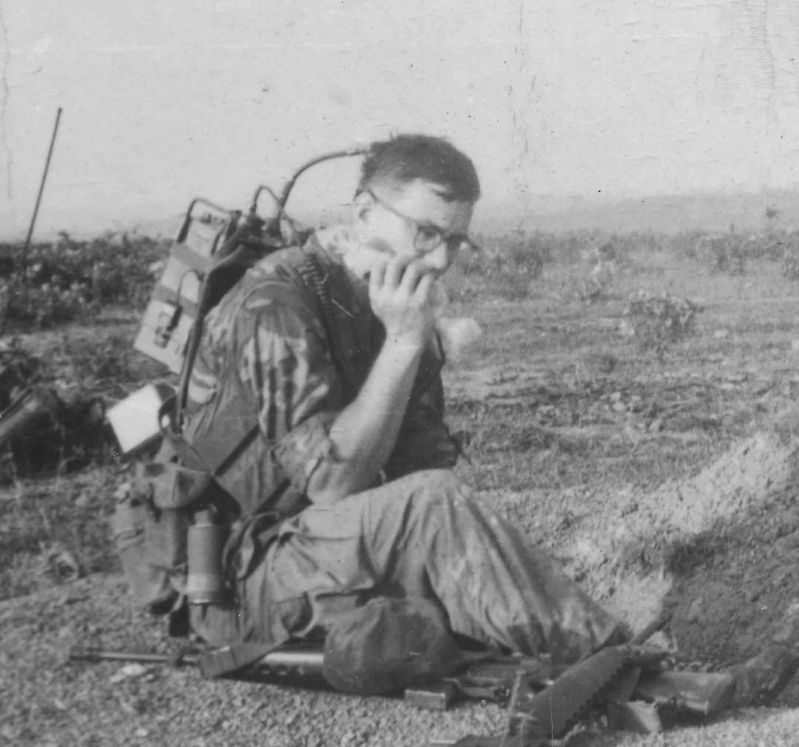
19-year old Marine’s beard… Note color of canvas M1956 web gear and various colors of jungle fatigues and helmet covers, color dependant on age and “dampness-factor”… Also, a lot of ground-color in the uniforms again… (The USMC didn’t issue camo-cover bands, either… Marines either went without or used inner tube sections, as seen below…)

Note zipper-color… (“Zipper” in Mil-Speak is “Slide Fastener, Metal”, BTW… Just some more trivia, lol…

The red clay of the Central Highlands really changed unioform-color… This is from Khe Sahn during Tet… Note the beard too… No water for shaving… Barely enough for drinking back then…

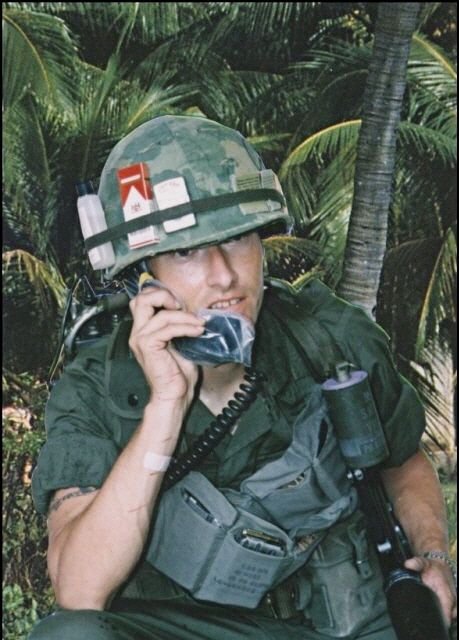
And a shot of a well-dressed Marine in ERDL-pattern camo fatigues and a frsh bottle of bug-dope…

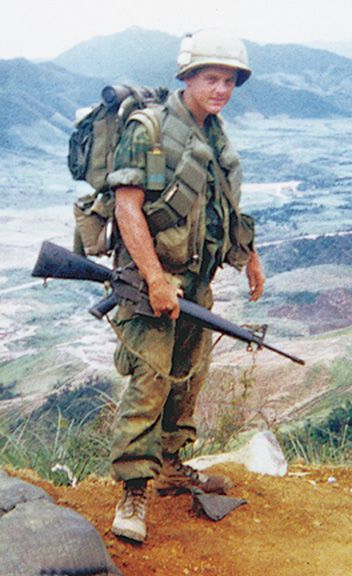
Note the cleanest things he’s got on are the bandoliers of rifle ammo… Everything else is “Vietnam Highlands Color”… Must be a “Garritrooper” though… (No mag in his weapon…)

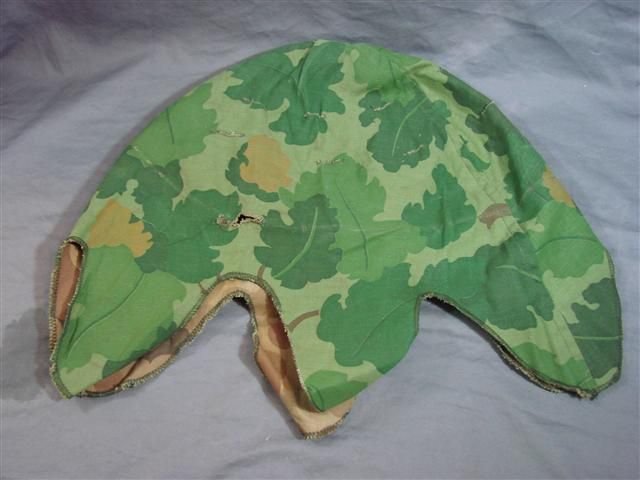
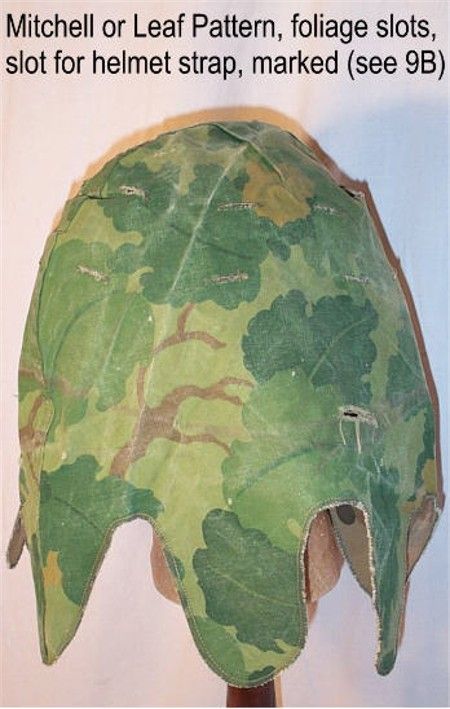
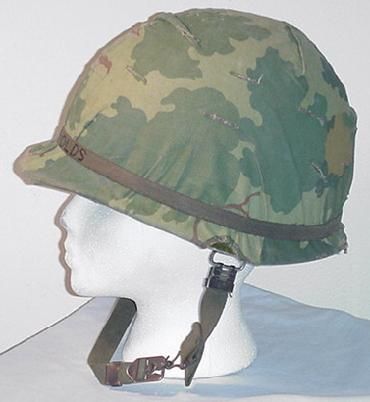
Here’s a few more cover-shots…

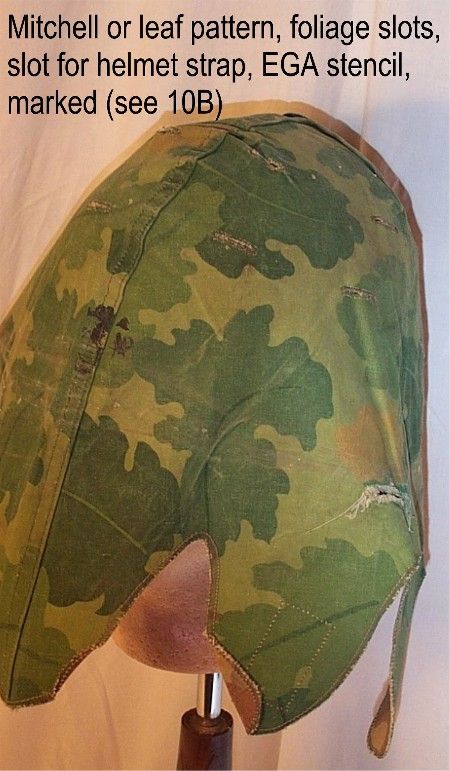
EGA = Eagle, Globe, & Anchor-stenciled Mitchell Pattern

Same pattern, excpet no EGA

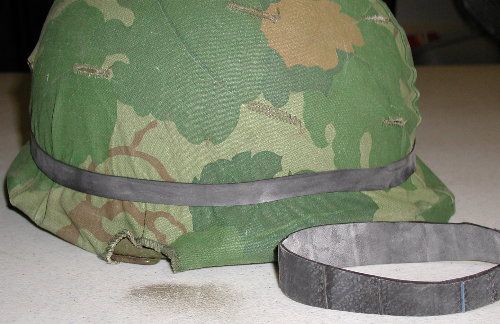
Mitchell Pattern cover, US Army with elestic camo-band

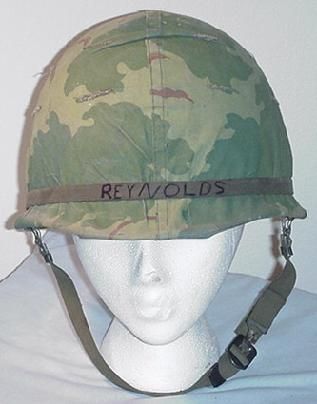
The above cover was in use from the mid-late 60s until the early 1980s, when it was replaced by the non-reversible Woodland Camoflage pattern, which was in turn replaced by the Kevlar helmet with Woodland cover…

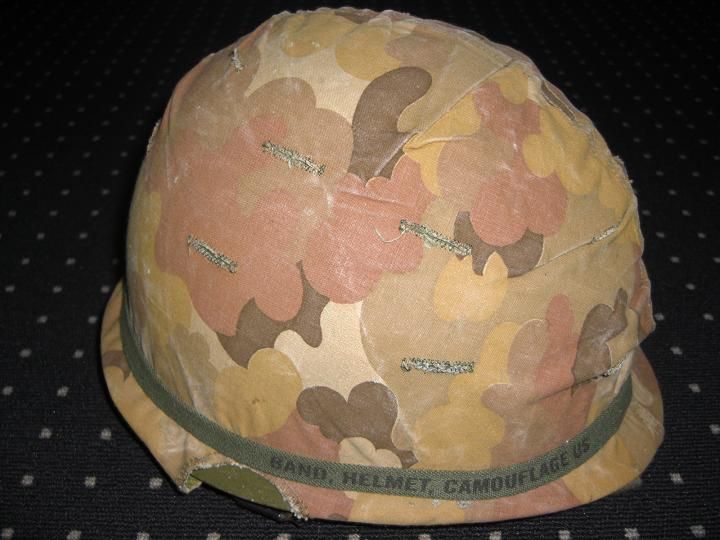
And just to muddy the waters a bit more, the reverse side of the cover…

And the ERDL-Camo cover…