So I read that some people use real, actual dirt (or in some cases the model train, dry powder stuff, that they use for real dirt) on their models. How does one go about making it stick? Do you use watered down white glue? Clear parts cement? Mix it into paint and dab on? Also, what is your prefered method of application, dabbing it on or say “sprinkling” it on…hell, maybe even standing half way across the room and throwing it at the model? [:D]
Basically, after my first experiment in weathering armor I used brown paint and corn starch for mud and don’t like how it came out. I realize what I am looking for is a “subtle” weathering look, and I think a combo of airbrushing, drybrushing and real dirt lightly applied would give me the results I am looking for. I just don’t know how best to go about applying the real dirt and making it stick.
Are you looking for a “dusty” or a “muddy” effect? If your just going for the dusty grimey look try out Tamiyas weathering powders. They work wonders.
I have never used real dirt before so I’m gonna keep an eye on this thread and see what others have to say. I think mixing it with white glue might get a nice mud effect. Why not try out some different methods on a scrap build or spare parts and let us know what worked for you!
What I am looking to go for is a dusty look (using airbrush methods I have read up on), but to use just a little bit of the dirt to also add a little texture. Not really thick clumping of mud (though I would be interested in methods folks who use real dirt like to use to apply thick mud for future projects), but more like a light layer.
I will use real “dirt” of various grade as a base for my mud, I then mix it w/ a little plaster or paris, some white and celu-clay(smaaaaaaal amount) then I add it to my model and then paint when dry. If you just want the appearance of mud w/ out the texture, stick to weathering powders, or a fine coat from a airbursh.
Check out my T34 a few threads down. Not the best like some folks here but I think it came out ok.
I used real dirt from my backyard, sifted it, and placed it in a mixing bowl. I took some dark brown acrylic craft paint, a dab of white glue and some acrylic matt medium. Mixed well amd slathered on with an old brush. I didn’t use a lot of water, just added it to make splatters and such.
NEVER use organic household products like corn starch, baking powder, baking soda, flour, etc, for modeling effects. You run a severe risk of ruining your model when they either start to degrade themselves, or break down the paint.
Never use dirt straight from your garden. There is too much live, organic material in there to be safe. We don’t want a begonia sprouting from the turret, now do we? [;)]
If you are going to use dirt, as I do for some of my diorama work, get it from an old construction site, where the dirt has been ground into a fine dust by heavy vehicles. Where there’s no way anything is left to sprout or mutate within the soil.
You can use White craft glue to glue it down; sprinkle it over a thin layer of glue. You can even dilute the glue with water for a thinner glaze–or use scenic spray glue (messy, but effective in some scenarios?)
In reality, ever since MIG pigments came to town, there’s just no substitute. They are blended in super-realistic colors, go on easily and consistently, and are easily fixed to the model with either simple mineral spirits or their Pigment Fixer. A little pricey, yes, but they last a long time to be honest, and one set of their bottles will last you dozens of models, averagng out to a few cents per model, honestly. Check into them; you won’t regret it!
I use real dirt all the tme… I get it from the local baseball diamonds, sift it a few times until I get it almost a powder… It’s a nice greyish-brown “Dirt road” color when dried…
I also use baking soda (sorry doog, [;)] ) colored with tempera paints or talcum powder with the tempera and a bit of water & white glue.
Whenever I use real dirt though, I rough up the underlying surface of the area with a knife to give the dirt/white glue mix something to stick to…
I tried some real dirt before, and it does offer more variations in pigment sizes, than pastel chalk. The clay content also seemed to help it stick to surfaces after drying, but it’s hard to get the right mixture and easy to come off the scale.
I also agree with above postes, it’s not very sanitized to play with dirt. That’s how children get worms.
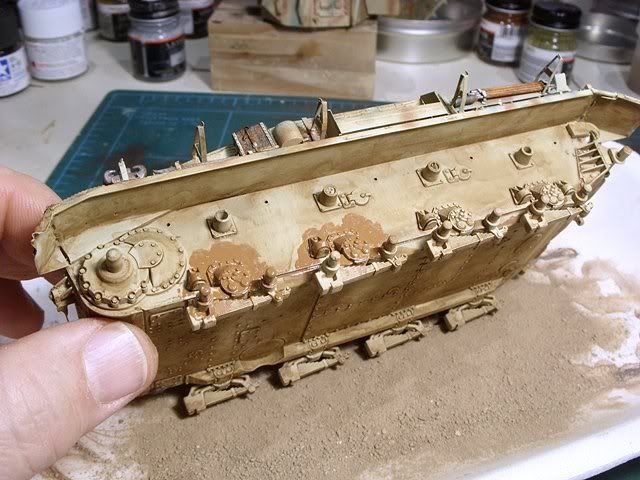
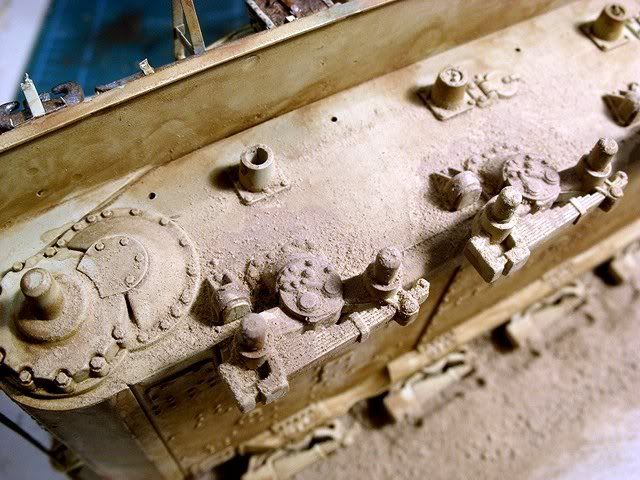
I also use real dirt. You need good dirt though, a nice loamy dirt. Gotta have the clay in there. This is the stuff that makes that real nice mud, I ma talking real life here, when it rains. Gooey and sticky like the stuff that you used to squish through your toes when you were a kid. You HAVE TO do what doog said about baking it. I did mine for an hour at 500. Maybe overkill, no pun intended. If you got the right dirt these clods will be hard. break them up as best you can and sift it through the finest strainer you have and just keep smashing it til it all gets through the strainer. You can see the consistency in the pics below.
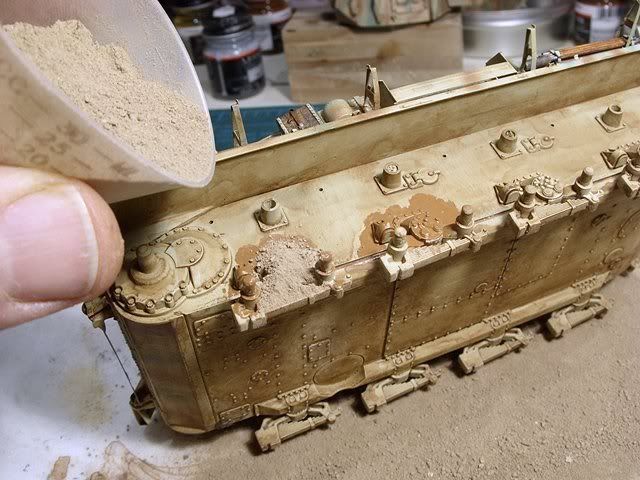
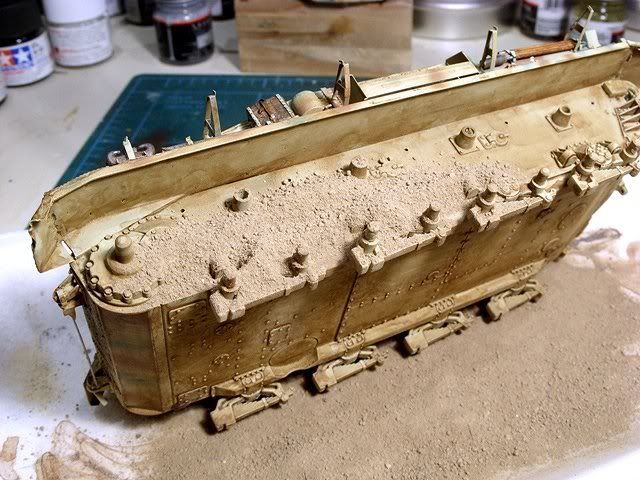
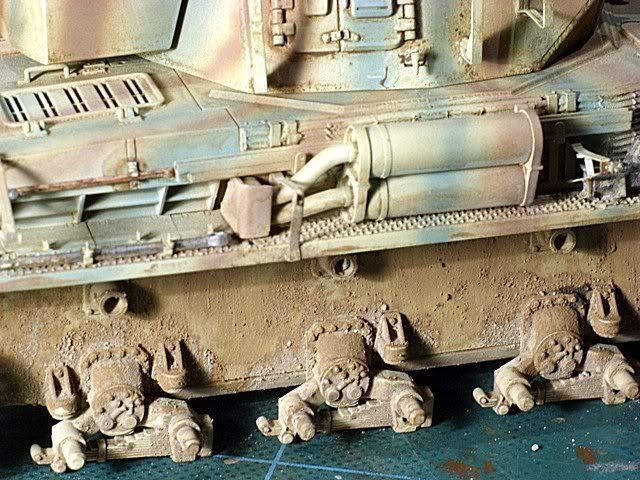
very 1st thing tot do is put on a dust mask… this is a dusty procedure. Dab some brown paint and sprinkle on some dirt and let it sit for a minute or so. If it too much take a stiff 1" flat brush and tap the dirt with the bristles, don’t wipe…yet. This will push the dirt in the he paint and removes excess at the same time. Repeat as needed in different areas. I then took a fan brush with mineral spirits and pulled some of the dirt down from top to bottom to streak it a little. A drop of black wash makes a nice oil stain.
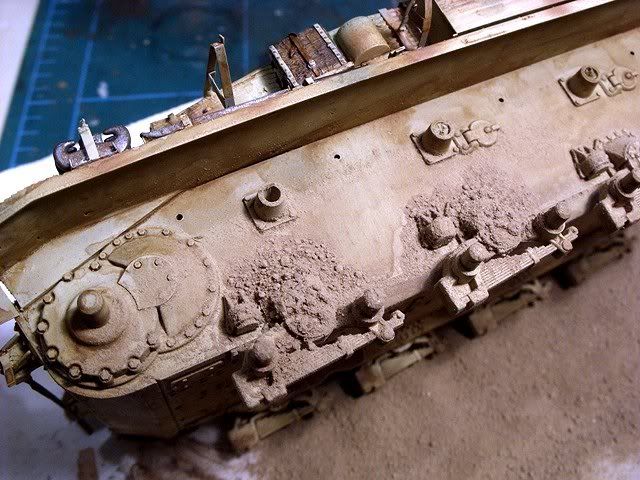
Disaster got it correct. Bake it in the oven for 30-45 minutes. That sterilizes it and drives off all moisture. Then grind it in a mortar and pestle, or even in a bowl with the rounded handle of a screw driver to get a very fine mixture. Mix it in with a little diluted white glue to get a paste and apply. Without adding paint, this will dry to a light tan, and looks similar to dried mud. Dry brush with a little earth brown or umber to vary the shades. This is an example:
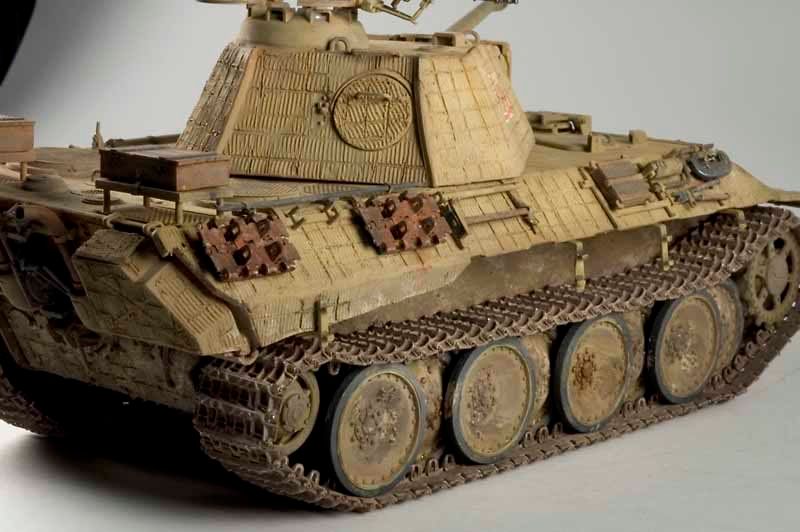
Add some burnt umber to darken the color. One could also add some Future to give it a wet mud look. That’s what was done here:
I use unscented kitty litter which is safe to use, is cheap (Publix 5 lb. bag under $2) and can be easily crushed to different sizes, even down to powder form. Some diluted white glue, and sprinkle on. Great for building rubble too. I use thinned craft paints to tint it. On tanks, I like to use Durham’s Water Putty mixed with a little white glue and tinted with craft acrylics. I then dab it on the tank’s undersides, track or whatever. When it dries, drybrush some more craft acrylics. You can build up as much or just have a hint of mud.
I had actually thought of using sandbox sand. The kind you can buy dirt cheap (pun intended [:D] ) at the big name hardware stores. But I may just pony up and try the Mig Productions stuff since I keep seeing people mention how easy it is to use. Plus as of right now all the dirt around here is under 3 feet of snow [;)] . But I think I will still try the above suggestions at some point as the end results look very good.
I just did my first dirty job on a KV-1 ( see pictures in a different post). I just used Bragdon Powder ( similiar to MIG) and mixed it with Windex ( lot cheaper then specialized stuff). And the good part is, that after it is dried you can still brush it off with a stiff tooth brush if you think it is to much. These are my 2 cent.
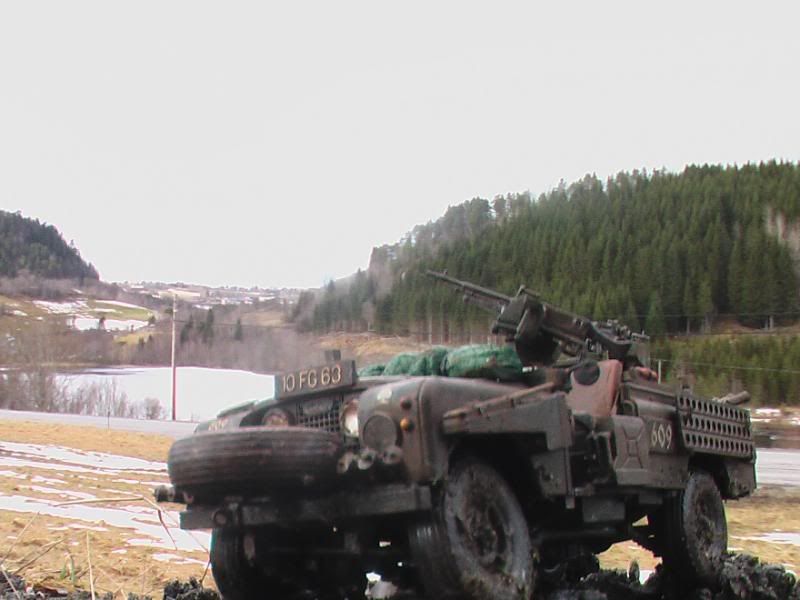
I picked up my technique from a friend, and only used it once… Haven’t had use for it on anything else, but it works wonders!! The technique written of a tutorial I did on the Tamiya Land Rover a long time ago:
"Want some clumps of earth to the wheels as well? Well, prepare an empty paintbottle, take some earth from you mums plants and put up in the empty paintbottle. Now pour in someof Tamiya’s Cement, about 1/3 (It’s a very good idea to apply the glue outside, as it’s a horrible stench and may cause a hard headache) and apply some paint.
Citadel’s Graveyard Earth does a good job. If wanted, a bit of static grass can be applied to the mixture as well. Now, use a toothpick, a match or an old brush and mix everything. Then you simply apply some clumps to the wheels and let it dry overnight. It’s important not to overdo it, and that’s quite easy to do."
And a picture of the result:
And no, the pictre is NOT edited, as many tends to believe [;)]