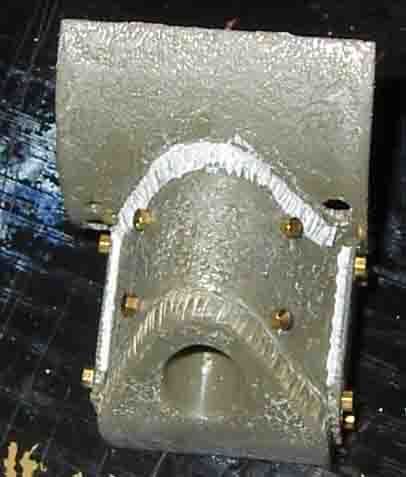
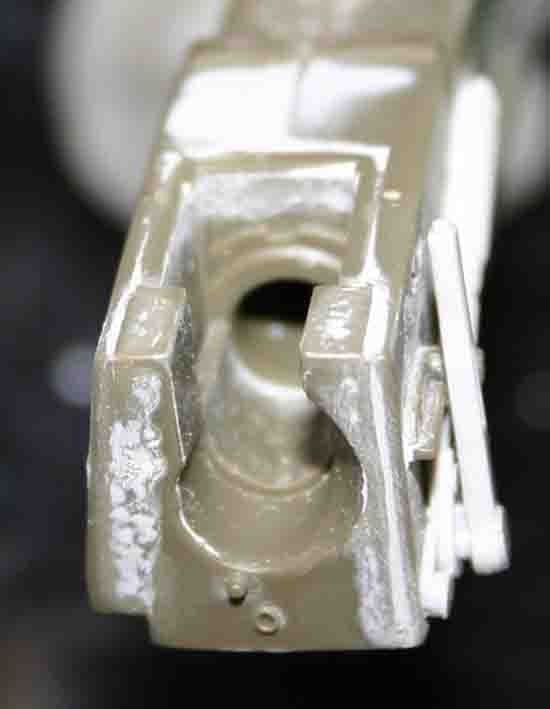
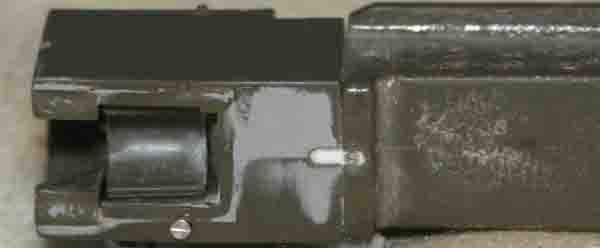
Well I’m still waiting on Air Connection to send my book “T34 Mythical Weapon” so while itching to get some work done I turned to an area where I had decent reference. The Gun and Mantlet, I had spent some dead time a while ago working on the gun with very clear shots from AFV Modeller Mag. The breach needed an awful lot of attention as can be seen. For the mantlet I decided that I needed to add some texturing as the real vehicles were very rough. I removed the bolt heads so I could get entire plates textured. Also the kit bolt heads were crap, so I bought some brass bolts the same size and after removing the kit ones simply drilled into their positions and placed the brass replacements in after I was satisified with the texturing and the welds.
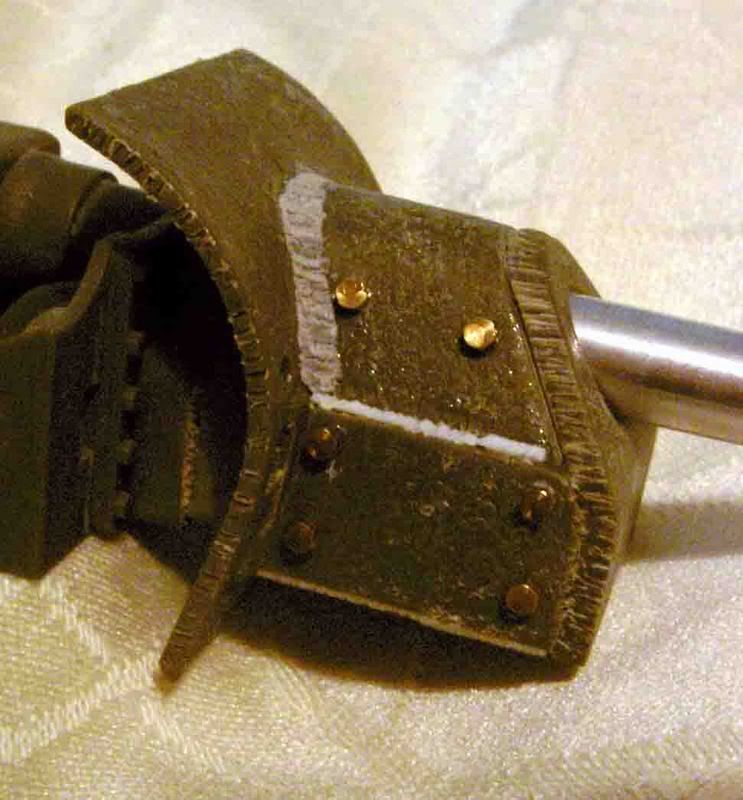
In this shot the brass bolts look much better than the kit ones. These worked out at about €1each probably $1.25 each expensive but worth it.
I think the rough torch marks are obvious here, on real vehicle shots the steel is even cruder but if you placed it on the kit people might not believe it was really representative of reality.
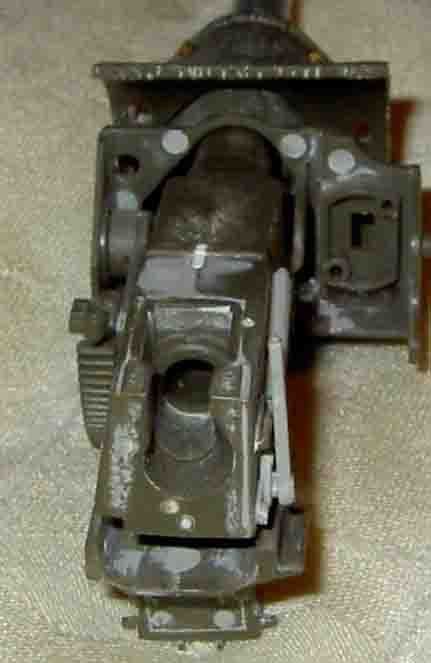
As you can see in this shot the breach needed a lot of filling and the addition of some screw heads and pins and an all important keyway on the top. A typical problem with this and other Trumpeter kits is ejector pin marks, although they are getting better.
hey terry my bro[:D]–the re-worked welds look FANTASTIC man !and I know what you mean about how rough the castings with torch cut marks were-- almost unbelieveable-- but hey-- it was no beauty contest!!!-- form follows function-- a certain beauty in its’ own right!- and you have captured the feeling 'spot-on ’ as you would say— the brass bolt heads look great-[tup][tup]-- has someone been shopping in the scale train section of thier hobby shop?-- or are these little bolts from the r/c section??-- they look super-!! – I will e-mail you soon bro — tread[:D]
Hows it going Tread, Thanks for the mighty kind words guys, I think the bolts are from an American company called hobby bits. I spent about 40notes on these late last week, I have enough to do the engine plate and will have to buy more for the back plate. Will retexture the upper hull when in place.
Thanks again for the kind words guys,
I feel that members of this forum are putting as much work into this build as I am.
Regards,
Terry.
P.s. Tread got that English Civil War movie from you yesterday, very funny.
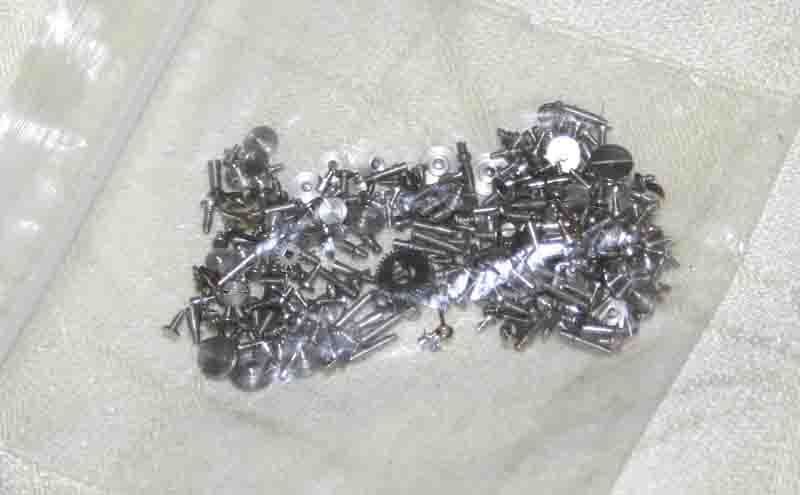
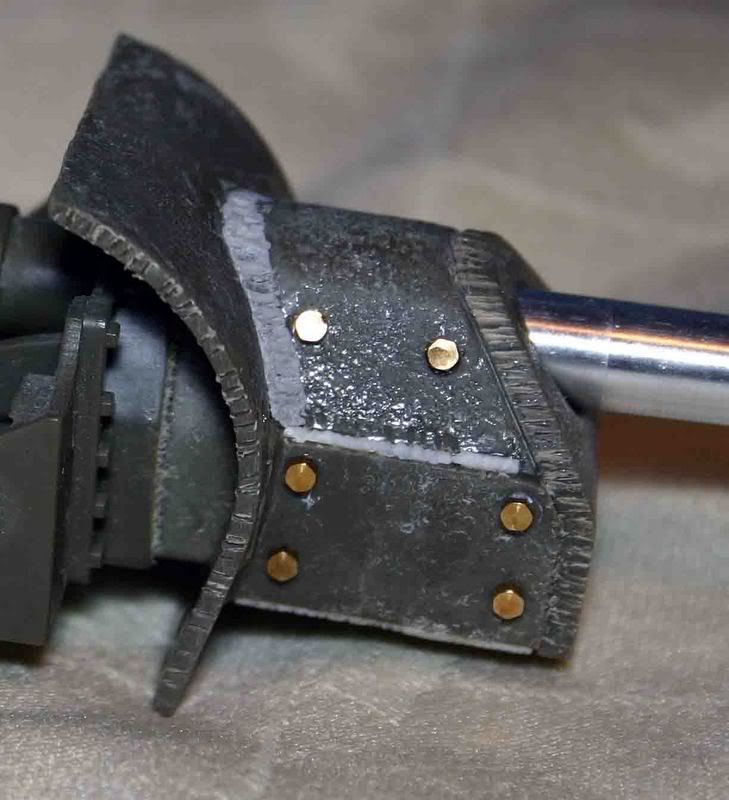
When I got in this evevning I decided that I would try and improve the breach. Some time ago I got some watch components from my friend Joe, Thanks Man. The tiny screws worked out really well in bringing some life to the otherwise desperately detailed breach.
The tiny bag of watch components.
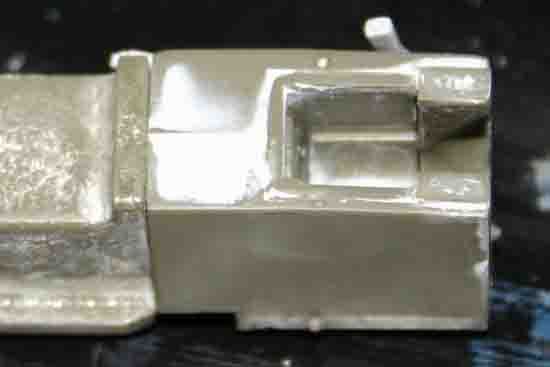
THese shots clearly show the amount of filling needed and the lack of proper detail ie. no firing mech inside the block. and the two pins at the back which don’t properly represent the real vehicles gun at all.
The rear of the breach with the firing pin mech included. I don’t know what the pin and screw at the back are but I clearly saw them in real vehicle shots.
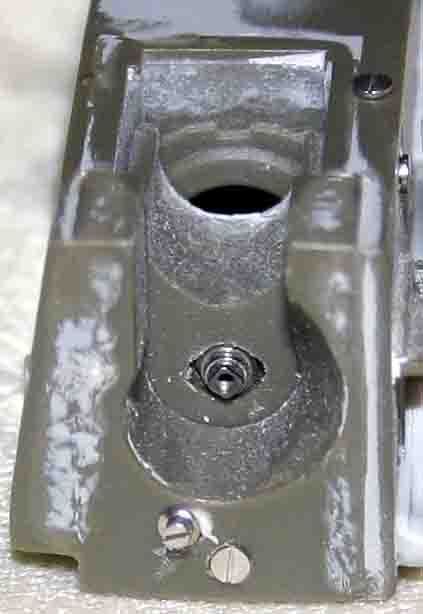
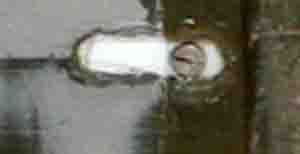
The top of the breach. The screw to the bottom of the image is flush as it should be, just drilled in. The key way was first cut into the breach and plastic inserted, then the screw drilled in. From images of the real thing it seems that these are two parts, and this is what aligns them.
Just a close up of the key way.
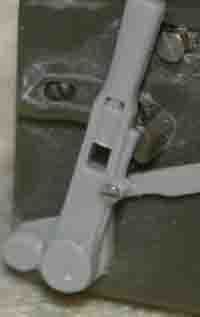
THe breach release lever with some screw detail.
The area behind the mantlet, textured in case some of it can be seen later.
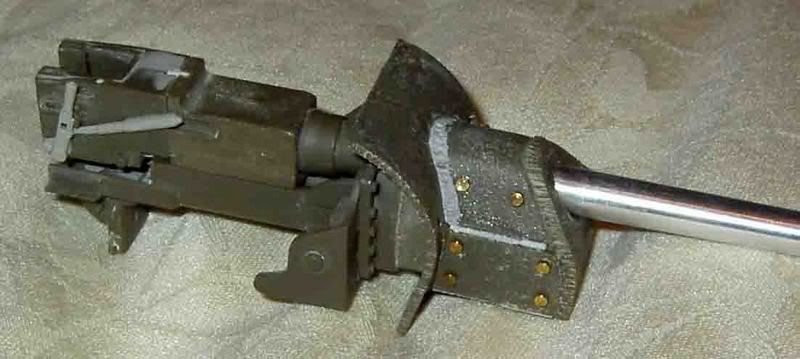
THe Aber Barrel (I Think it’s Aber, can’t remember who I got it from) with rifiling.
holy crap bro![(-D]-- 2 posts in 2 days?-- those tiny screws really add alot man!— on my’85, the gun breach was molded very well-- almost no putty-- so I got lucky there— i am gonna have to shake myass and get another post up soon!! – i am working on the rear plate and have some interesting info to share ( i will send a preview to you before i post )-- nice work terry-- [:D]— comrade treadwell[#toast][swg]
I still aint started on my T34/85…I want to clear a load of project’s first so I can concentrate on it.
As for the brass bolt’s hold off before you buy anymore as I’m sure my wife has those at work…she work’s in precision electronic’s and has load’s of small stuff like that…I’ll mail you and let you know if she find’s anything usful[;)]
very nice job on up detailing both areas terry these are really going to make a diffence those bolts look awesome and you also got tread all in a tizz to get some progress posted as well so a bonus for us viewers [:)]
Thanks forthe kind words guys, Zokissma, Ron, Glyn, and Tread the hippy. As of now progress is clearly up to the service of Air Connection and their delivery service.