I’m new here in the heli build section. I’m currently in a local group build for heli’s decided on the Italeri UH-34. So here’s the WIP till the current stage.
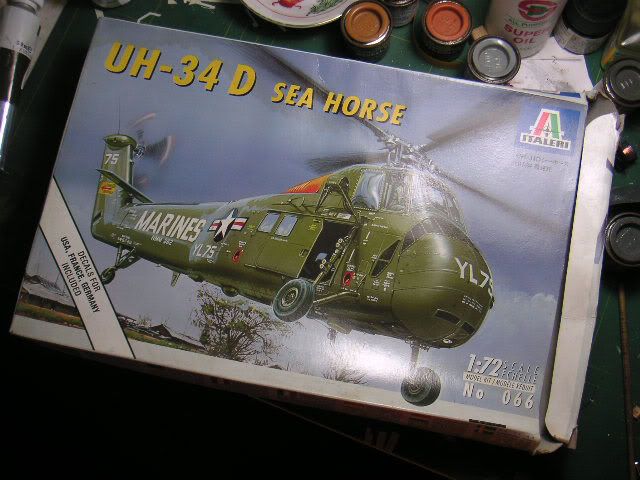
First up is the box top. This is what I’m building. I decided on this as the kit is quite detailed, even the rotor blades have been formed with the characteristic droop and further more it’s got the classic heli shape. A fellow modeler had done this particular kit during the Navy Group Build last year and I thought it looked pretty good having bagged a prize for it as well.
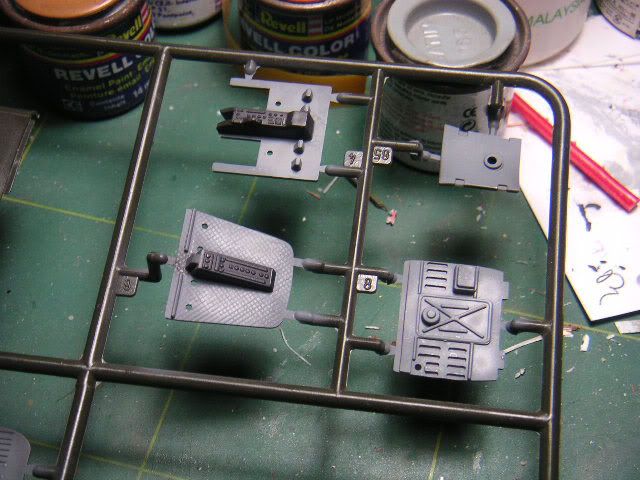
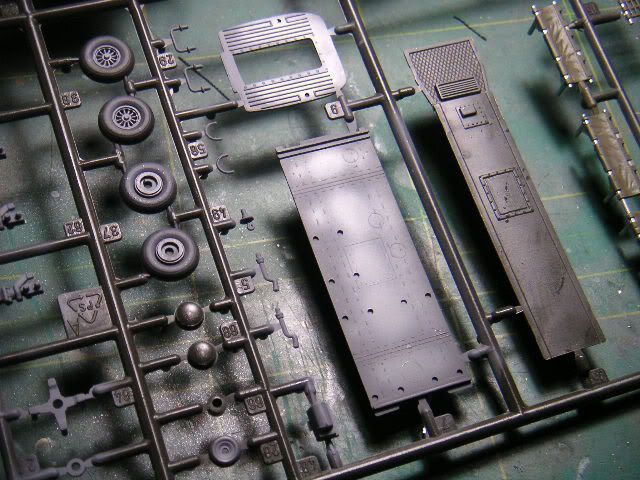
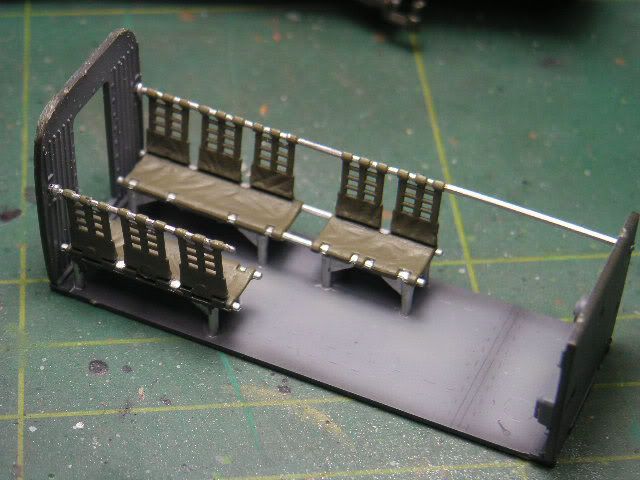
Airbrushed the interior with light and dark shades of grey.
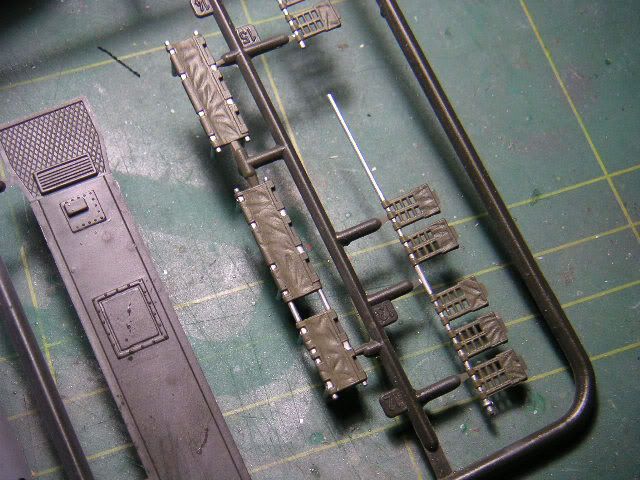
Then I picked out the seats with olive drab and silver for the support frames.
Glued the seats to the base and firewalls.
Test fitting the seats to the hull.
That’s all for now till later as I may want to pose the cockpit doors open which will need surgery. Time to bring out my ray gun. :lol:
Your Sea Horse is coming along nicely , the H-34 is a favourite of mine too , I have a few on the workbench as well . I really like how you have airbrushed the interior with light and dark shades of gray , I think I may try that on some of my next H-34 builds .
The kit goes together rather well , with no real fit issue’s , so it should be an enjoyable build … Good luck and keep the progress pic’s coming .
I saw your post and the fleet of cool Sea Horses. Real nice. I was also queried on the main landing struts by the group builders here and referred them to the knowledge of the two types of struts available on both the D & H versions from your post. Thanks for the great source of info on the kit from you.
I basically do Dioramas and this will be place in one as well. Sometimes I go overboard and add details which you can’t get with AM products that have not reached the shelves yet and kick myself when they finally come out.[:P] Hope this one turns out well.
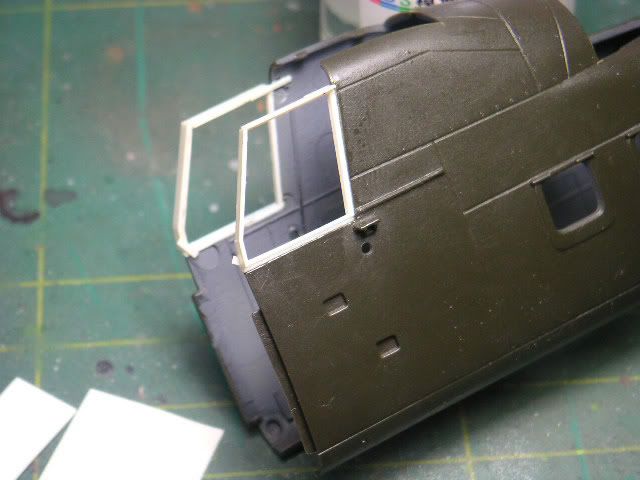
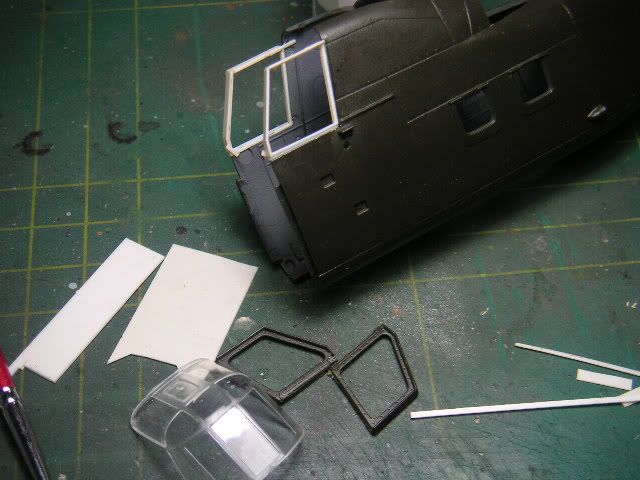
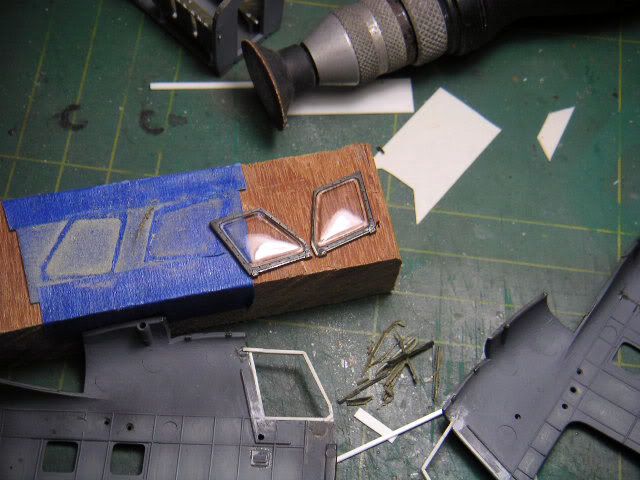
Now the following pix show the progress of the cockpit window surgery…
See the cut out window frame…I’ll need to sand it thin and remove the frame around it.
I managed to sand down the frames thin enough to hold the clear parts using my rotor tool.
I filled the release mold depressions with putty and sanded them down. Will spray on the interior colors over the frames later.
While slicing off the sanded burrs I accidentally cut off a bit of the front angle of the frame which you can see that I’ve added plastic card.
In my haste I also dropped glue onto the corner of one of the clear parts. I’ll wait for it to dry and harden before wet sanding with very fine sand paper and then polish it.
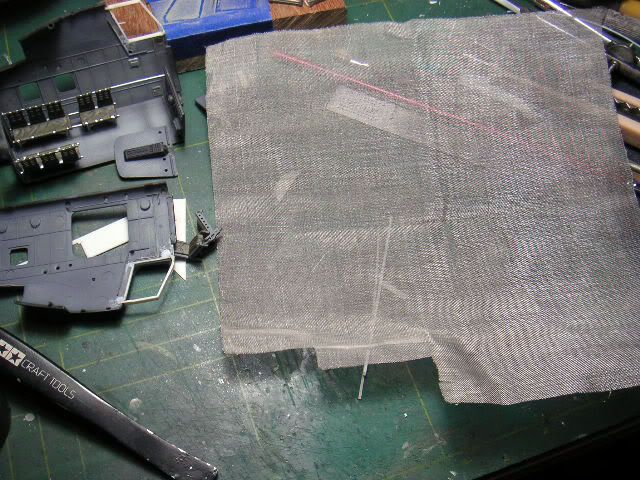
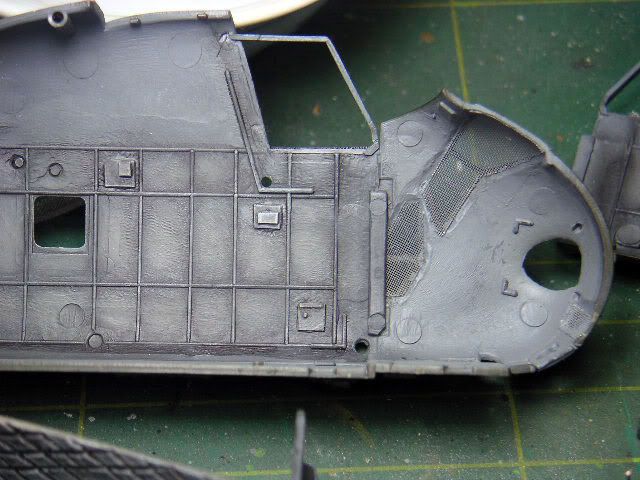
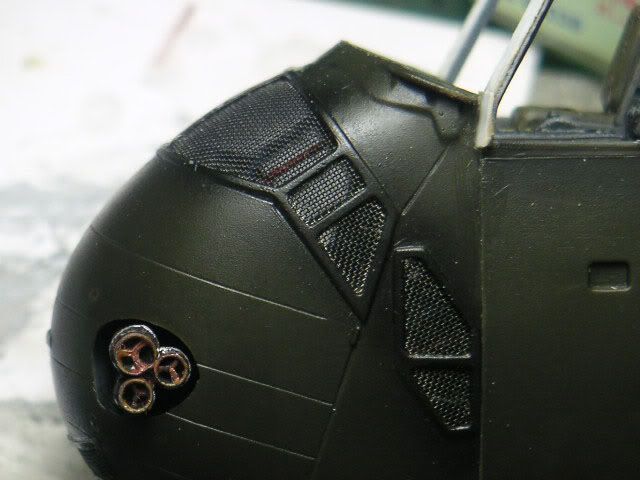
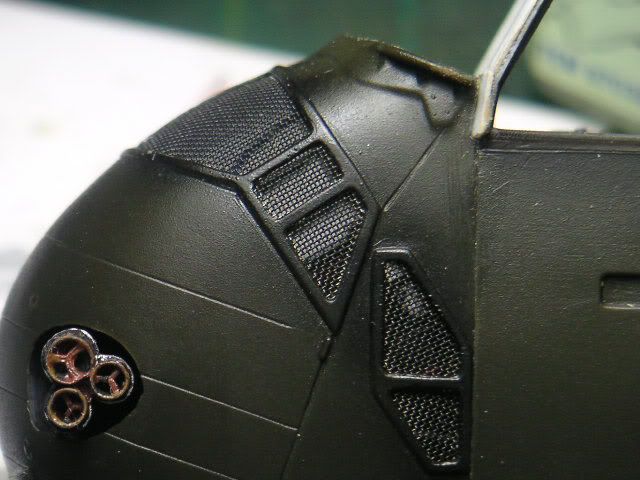
My itchy fingers had to cut up and scratch more details. The kit comes with well molded mesh for the engine vents but viewed from the profile it just didn’t have the transparent look so out came my power cutting tool.
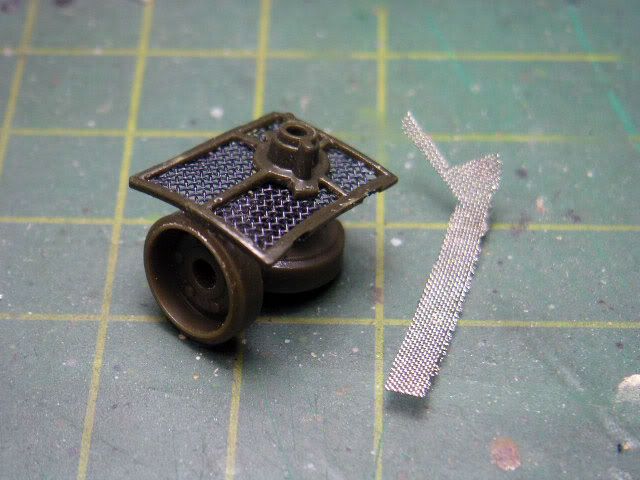
Here’s the progress, first I had to locate my mesh. Don’t ask me where I got it from…all I can remember is that I picked it up from the road.
Then I traced the area that was to be cut out by rubbing over the raised detail with pencil lead on thin receipt paper compliments of MH.
Look at how good the molding was and I have to cut it up using the grinding bit.
That was easy with the help of the grinding bit chocked into a power tool.
That makes two plus the tail section.
The hard part is to thin out from the inside with another grinding bit as thin as possible.
This will take a while. Meantime I’ll be cutting the wire mesh from the template and roughly scratch an engine.
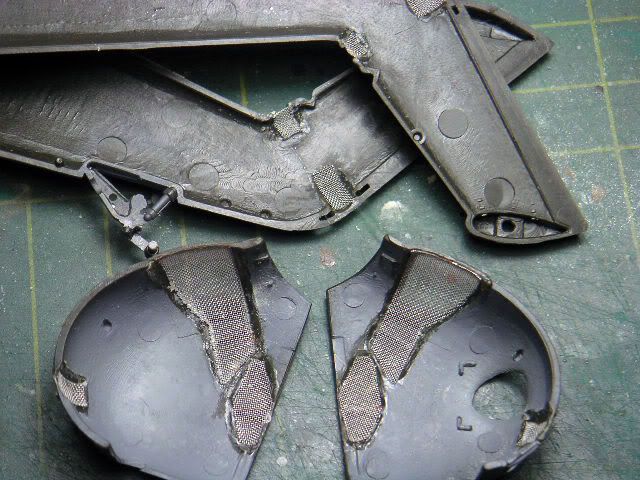
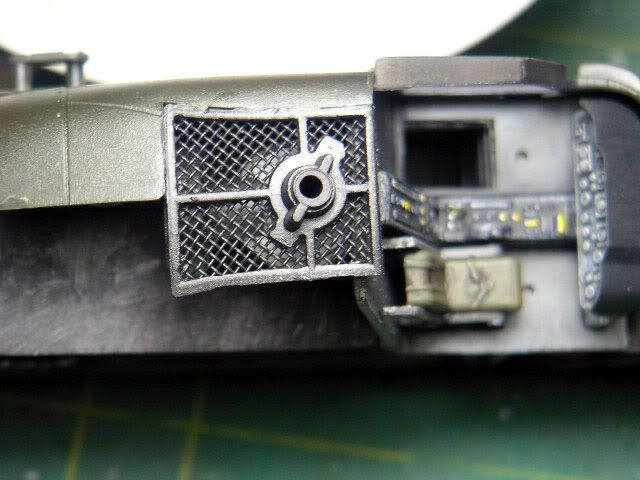
I really opened up a can of worms by replacing the mesh 'cos I had to scratch the interior. Lets start with the mesh at the forward section
All nice from the front but just look at the back, all super glued up.
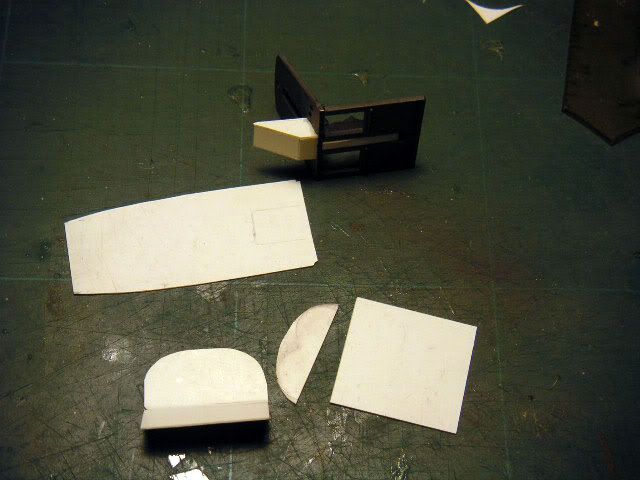
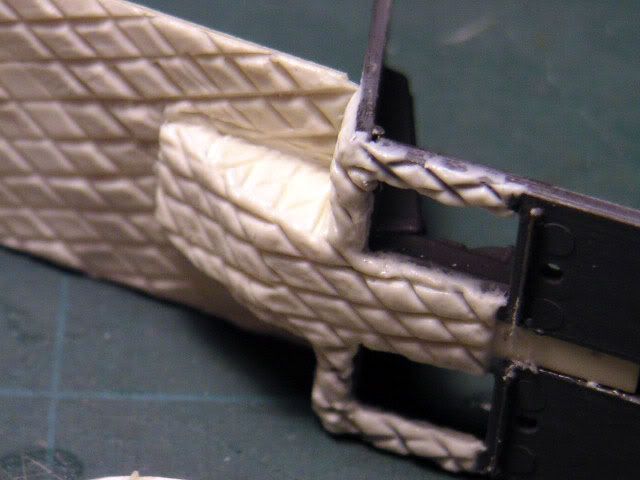
The interior top of the passenger compartment had no roof. So templates of the roof and firewalls were cut from plastic sheet. I also added a section for the shaft on the back of the seat board.
I cut a section from the flight deck floor board to fit the firwall.
The following show Bondite (two part epoxy putty) used for forming the sound proofing texture…
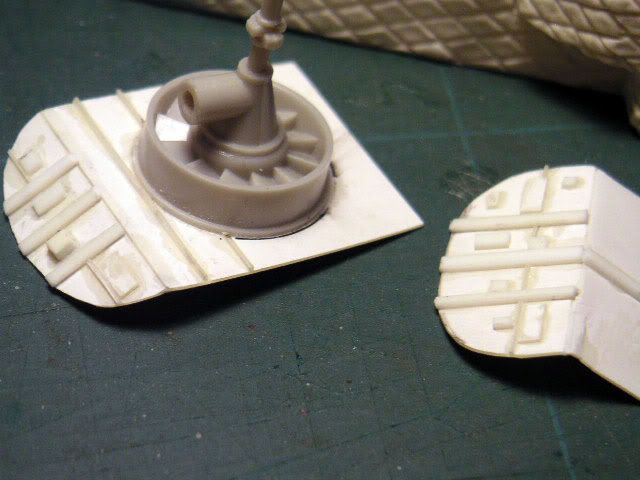
Some gyzmology for the engine and firewall…
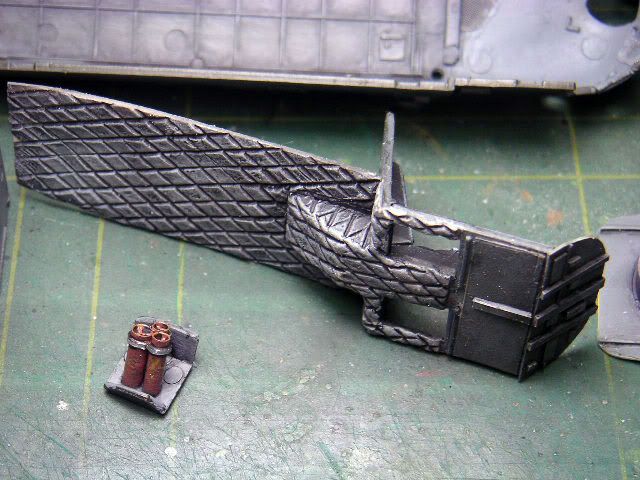
All three frabrications.
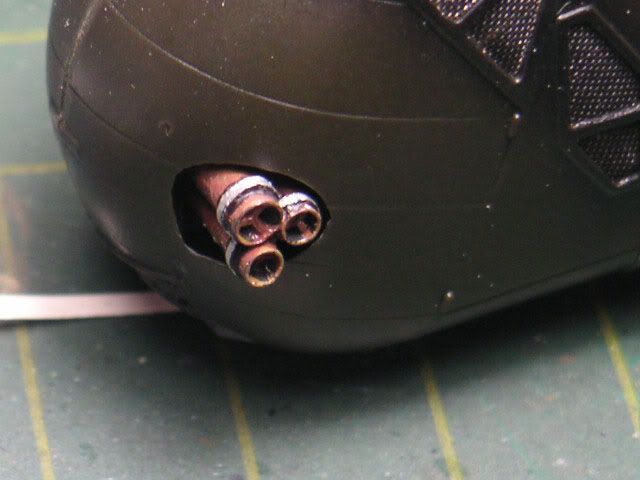
Then I added detail to the exhaust. Re-inforcement clasp and three spoked seperators in the muffler. Painted it rust and silver with a wash of sepia.
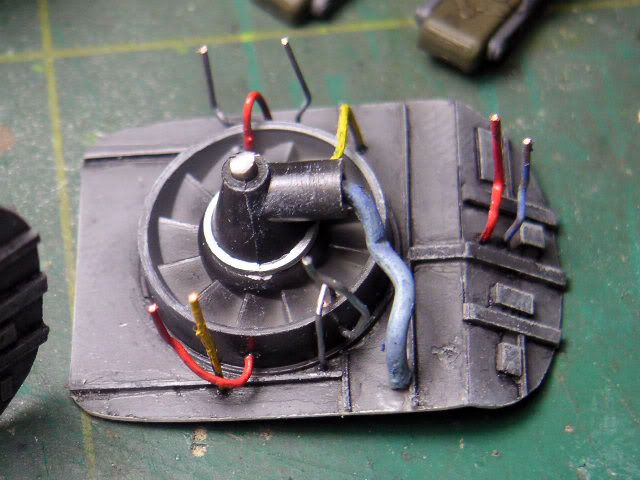
The engine got a bit of wiring with copper wire and the whole was painted and washed down. I randomly colored the wires. Through the mesh it looks quite convincing.
The interior paneling was also given a wash to bring out the already darker and lighter tonesdone earlier… I use water color for the wash.
Then like stuffing turkey I stuffed all the elements in to the bird. The wire ends can’t be seen after the halves are put together.
The seats and dash board are being dealt with now and will be added later.
I had no idea how much effort you were going to put into this build , your scratch-building workmanship is truely inspiring … ‘frankly it makes my H-34 builds look like amateur hour’ .
Just cutting open the cockpit windows is hard enough but the rest of your build so far is awesome . I really like the mesh screens , that motor tool looks handy to have around , I may have to look at buying one myself … Better than using a pin vice and needle files .
I also like the way you did the sound proofing on the cabin roof , I never thought of making a small wedge shape block to represent where the rotor shaft goes from the engine up to the rotors .
I like the engine , is something you can buy aftermarket ??
I popped a CD into the computer and copied all your great progress pic’s , your UH-34D build is just amazing .
John - Don’t say that as your objective was to build a flotila of variants. They’re really good. I would have done the same and kept the detailing to the minimum besides the UH-34 Italeri kit details are themselves good. I got overboard on mine as it was a one off build. The mesh detail is one of the best I’ve seen on a kit…it’s just a pity I had itchy fingers and wanted it see through.
If you getting a motor tool, get one that has variable speed and can be slowed down to working levels with plastic. Too fast and it will melt plastic.
Not sure about AM engines for the H-34…I guess any resin 1’72 scale radial engine can suffice with a bit of modifications. Mine, can you beat it is actually a cooloing fan part from a 1/35 scale M-113 Armoured Carrier.
Glad you like the progress pic’s.
Derek - My progress is quite slow at times as I have a few projects on my plate but I’ll try to keep this one consistant.
It’s appropriate that you used the cooling fan from an M-113, since your “engine” is actually the cooling fan for the Seahorse’s powerplant. The engine (and fan) sits forward of the firewall, and isn’t visible through the air screens. Actually, there’s not a whole lot of gear in that void between the back of the firewall and the front cabin bulkhead – basically the fan gearbox and shaft, assorted wires and cables, and lots of room for the air to get in.
There aren’t any AM engines that I’ve heard of. The closest appears to be the engine from the 1/72nd scale Esci M-4 Sherman tank, and its various reboxings by other manufacturers. It’s not an R1820-84, but it’s adaptable.
Thanks Len, appreciate your comments. Looks like I got lucky using the cooling fan from the M-113. I’ve actually got the 1/72 ESCI M-4 Sherman. Don’t know where I chucked the engine.
More updates…
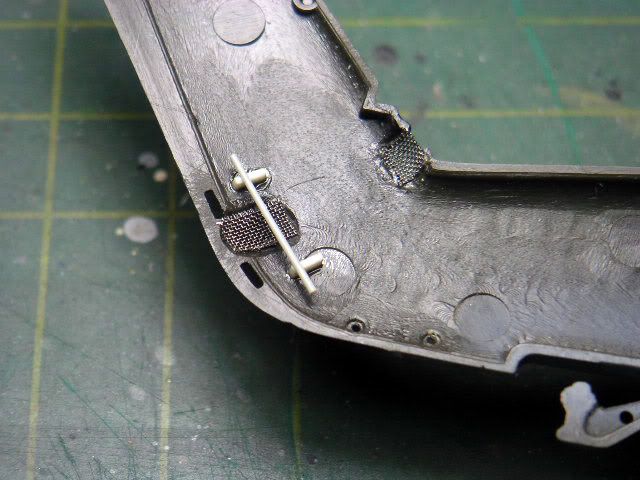
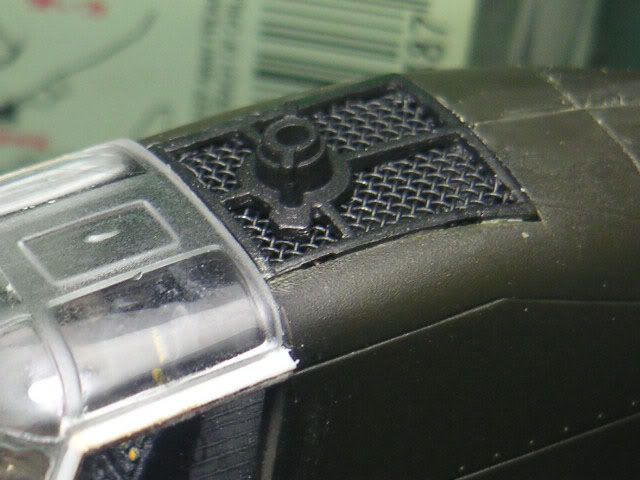
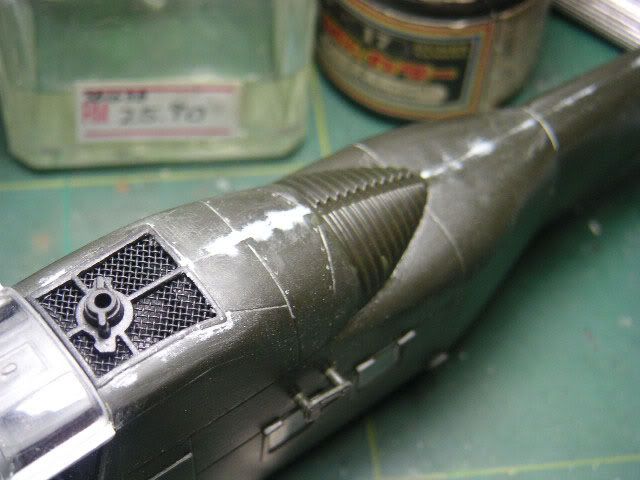
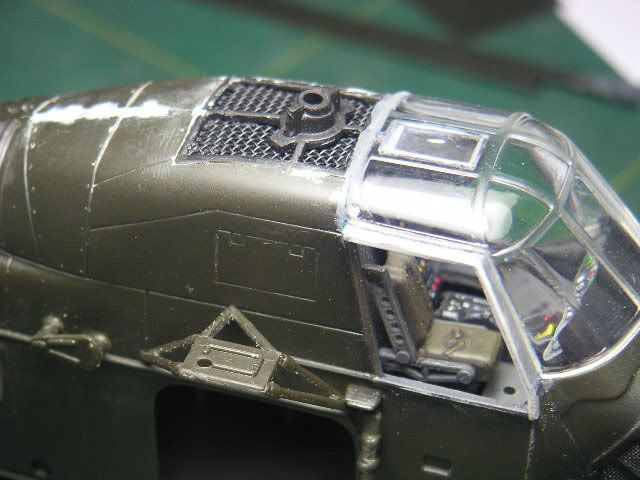
The vents just behind the cockpit also have mesh that I had to replace. They’re slightly more coarse as compared with the sample fine mesh here.
I used return rollers from a Tamiya M-48 Patton to simulate the gears.
She’s really coming together now Richard . The engine screens look amazing and so does the dry-brushing/highliting of the cockpit consols . I like the way you fitted the cockpit consol in , it’s sometimes difficult to get the consol to sit in place properly with italeri’s instructions , I like the way you did it .
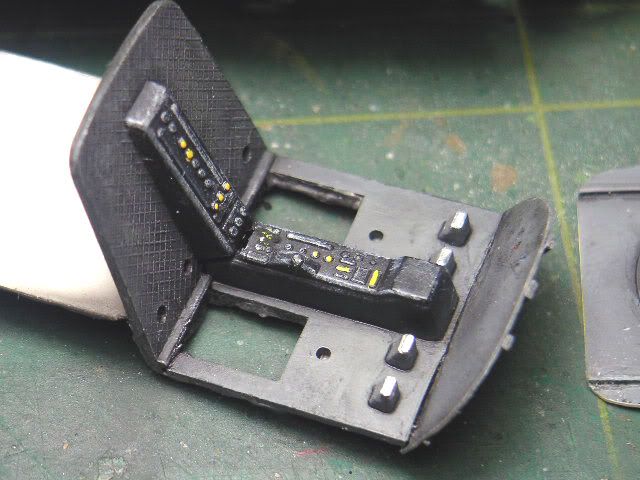
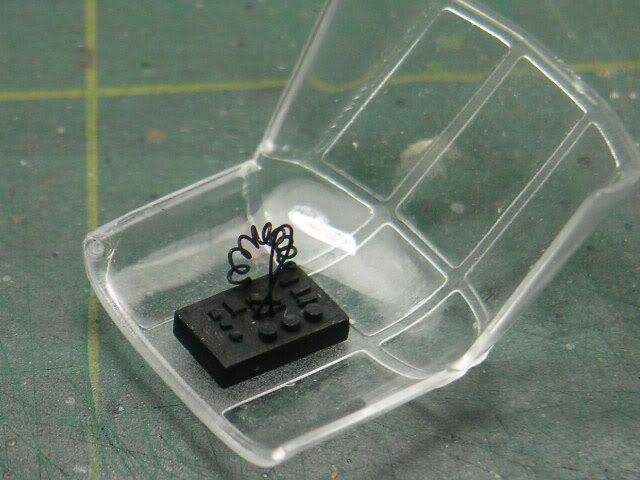
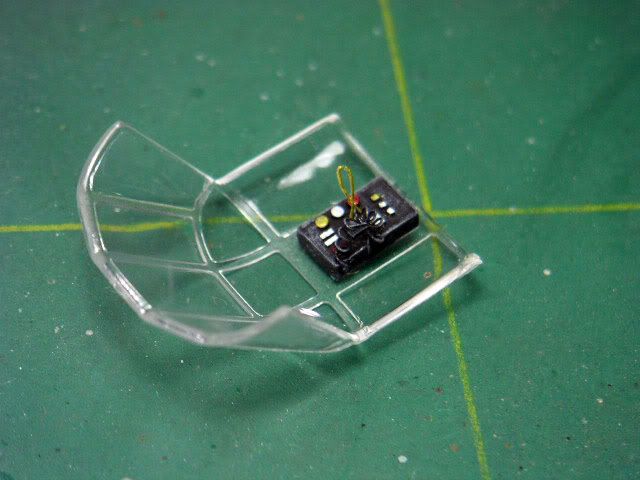
With all the scratch building done, the area I’m most dreading to do is the mating of the canopy to the cockpit which is second to masking of the canopy frame. To get my mind off it I’ll probably add switches and wire to the canopy console.
I saw your growing fleet of H-34’s and they’re looking great.
She looks about ready for the spray booth Richard ;
The amazing workmanship you have put into your H-34 build has certainly inspired me ; I had a go at cutting open the cockpit side windows on three of my current H-34’s . I’m adding pilots as well and I like your idea for the communication wire ; Italeri’s UH-34J canopy has a slightly thinner console panel molded to the underside with some knobs molded on as opposed to the UH-34D canopy .
Again great progress pic’s , thank’s for sharing .
Thanks, glad that you’re sliding the canopy window open and adding pilots. I’m having a hard time finding pilot figures in 1/72 scale to fit this UH-34.
Yes, there is a slight console panel mold on the canopy underside, that’s why I had to build a box to cover it instead of a solid one from plastic sheet. I did the same hanging communication wires for my Revell Huey. I hope to post it someday. Will the Vietnam Huey guys object if I post some pictures in their post? Would like to get feedback from some of the Vets there.
Progress is slow but steady. I’m stuck with deciding on a static bird or one that is just lifting off for my dio. With the lift off I would have to reverse the bend of the prop blades upwards. I’ve figured how to do that but how much of a bend should it be. John , perhaps you could help me on this?
I’m not really sure as to how much of an upward bend you would need on the rotors ? ;
I don’t think it would be too much …
I borrowed some pilots from two Hasegawa SH-60B Seahawk kits , there are three pilot figures in each kit so I will use two each in three USMC H-34’s , It will be a tight squeeze so I may have to do some filing and adjusting to the main console panel and possibly their legs as well .
Thanks Swanny, I took a look at your link and it’s cool.
John, thanks for the info on the props and figures. I saw that you also did some scratch building to your V undercarriage. Really good, it’s like you’ve been experienced in scratch building all your life. Have to warn you though, over detailing can sometimes stall building progress and I’ve been there.[:)]
Here’s more WIP on the UH-34…
The overhead console got painted and the canopy was soaked in Future to get the shine. I let it dry on a paper towel as I tackled the rear rotor blade.
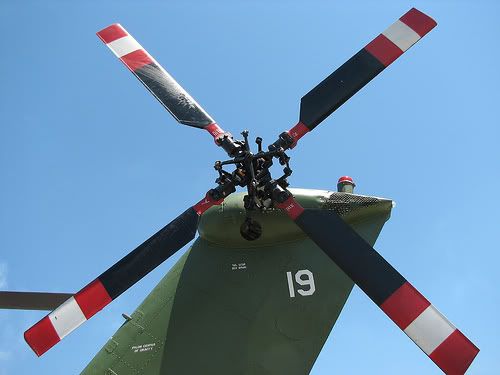
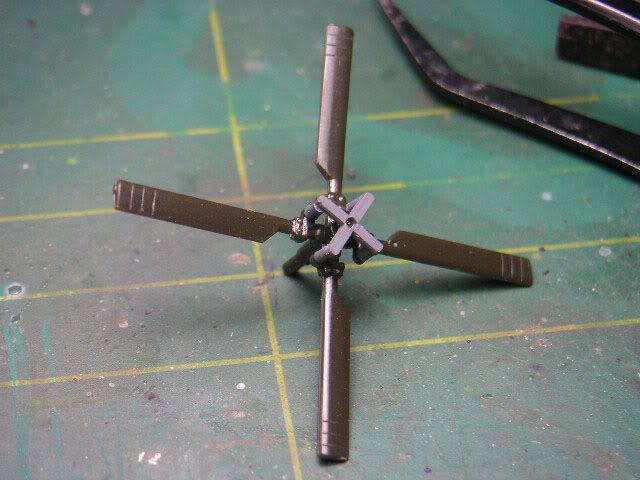
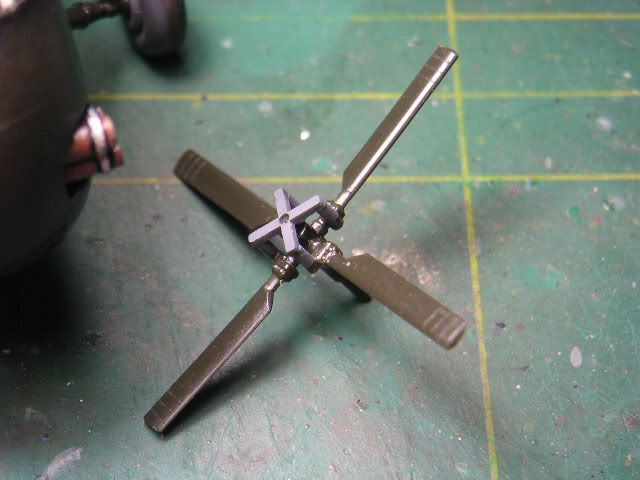
There was a mention that the manufacturer had produced the rear rotor blades backwards. I checked with reference and it’s true (picture attached)
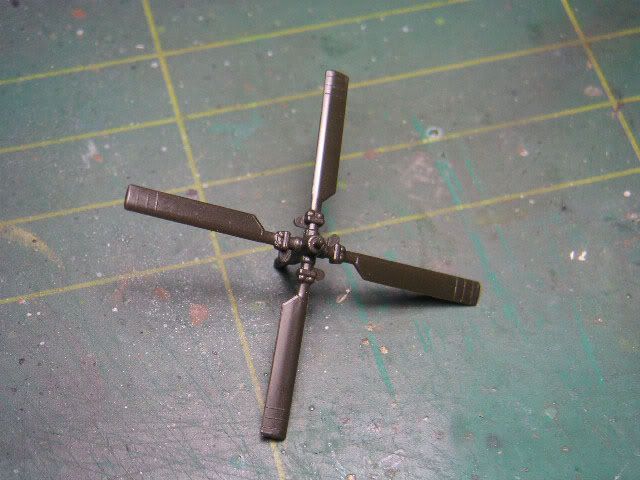
So I had to flip the rotor from this …
…to this…
…and it was easy, I just had to slice off both ends at the correct distance and switch them over…
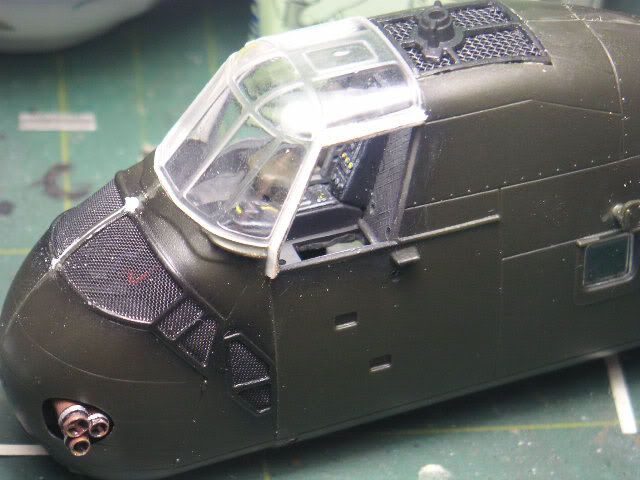
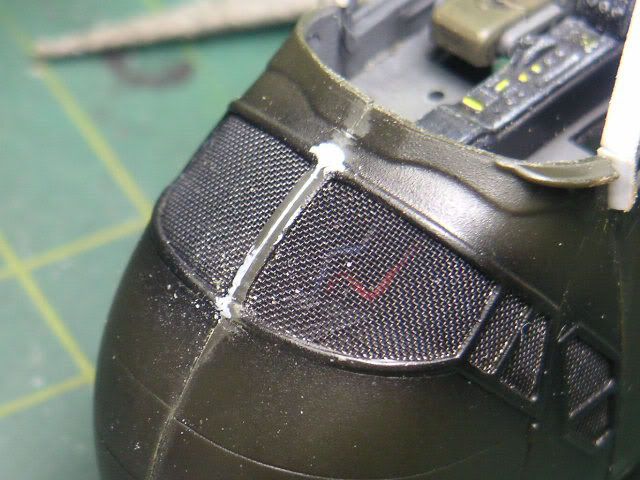
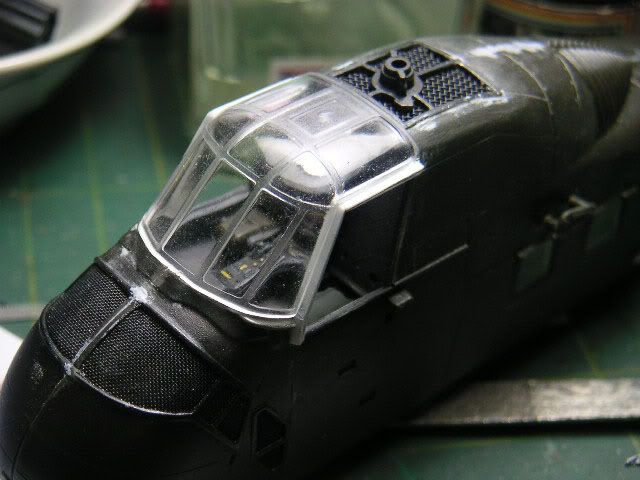
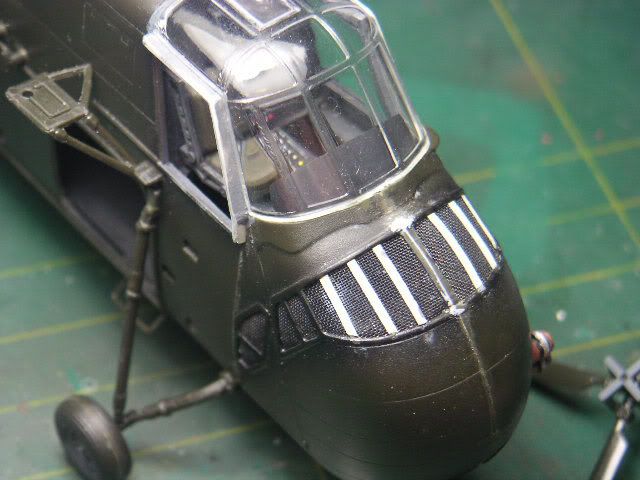
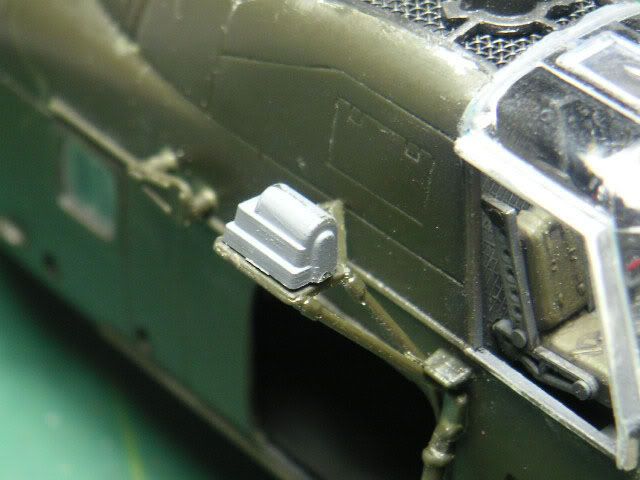
With that aside I added strip bracings for the front mesh and secured the canopy with the added backing strip and liquid cement.
Now the hoisting hook assembly looked a bit empty so I’m going to add some electric wire cables to spruce it up next.

















![http://i59.photobucket.com/albums/g316/rtfoe/rtfoe%20Heli%20Builds/PICT0004-63.jpg[/IMG]](http://i59.photobucket.com/albums/g316/rtfoe/rtfoe%20Heli%20Builds/PICT0004-63.jpg%5B/IMG%5D)
![http://i59.photobucket.com/albums/g316/rtfoe/rtfoe%20Heli%20Builds/PICT0005-55.jpg[/IMG]](http://i59.photobucket.com/albums/g316/rtfoe/rtfoe%20Heli%20Builds/PICT0005-55.jpg%5B/IMG%5D)