Thanks Ben, I wish I had your confidence!
I am so terrible at gloss finishes, and work on the P34 bears this out. While the Tamiya pure white went on nice and smooth, the blue was another story!
ttps://flic.kr/p/vEaS5x] [/url]P34-042 by N.T. Izumi, on Flickr
https://flic.kr/p/vDeF6N]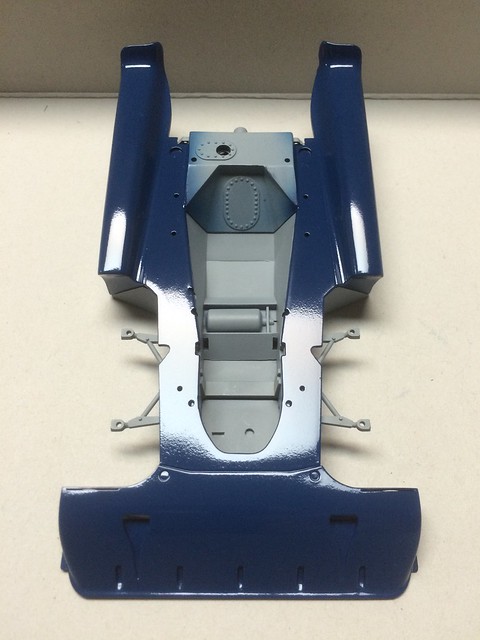 [/url]P34-043 by N.T. Izumi, on Flickr
So I attacked the blue parts with fine sanding sponges. The orange peel was gone, but the paint still looked bad. I had some burn thru at the corners, so more gloss and more polishing is in order.
https://flic.kr/p/vGypVL] [/url]P34-048 by N.T. Izumi, on Flickr
https://flic.kr/p/vMKwJu] [/url]P34-051 by N.T. Izumi, on Flickr
Ya that white is really nice! Looks like you got the blue tackled. I find the burning through so frustrating when it comes to polishing cars. I’d love any tips there for sure. This one is going to be a beauty when she’s done!
I recommend the Tamiya polishing compounds for getting rid of the orange peel without risking burn through of edges. I got them from Hong Kong on Ebay. I now swear by these.
I’ve been doing many more cars recently than military subjects and the gloss paint is a steep learning curve. I’ve also gone from using enamels to using the Tamiya TS spray cans which dry very quickly, helping to eliminate dust. These paints are very thin and take multiple coats
Learning to master the wet coats takes a lot of practice. I have the big 1/12th version of this kit w the photo etch parts, which I am looking forward to building.
Gloss paint is always a great deal more work. But each model gets better.
Yeah gloss finishes have eluded me, so I’d like to conquer that mountain!
And I realized I just committed my first double post SNAFU - the last bunch of pictures were already posted earlier. Sorry guys, I have been having a bad week. It sucks getting old.
So anyway, here are some different pics:
https://flic.kr/p/w5F3fL] [/url]P34-057 by N.T. Izumi, on Flickr
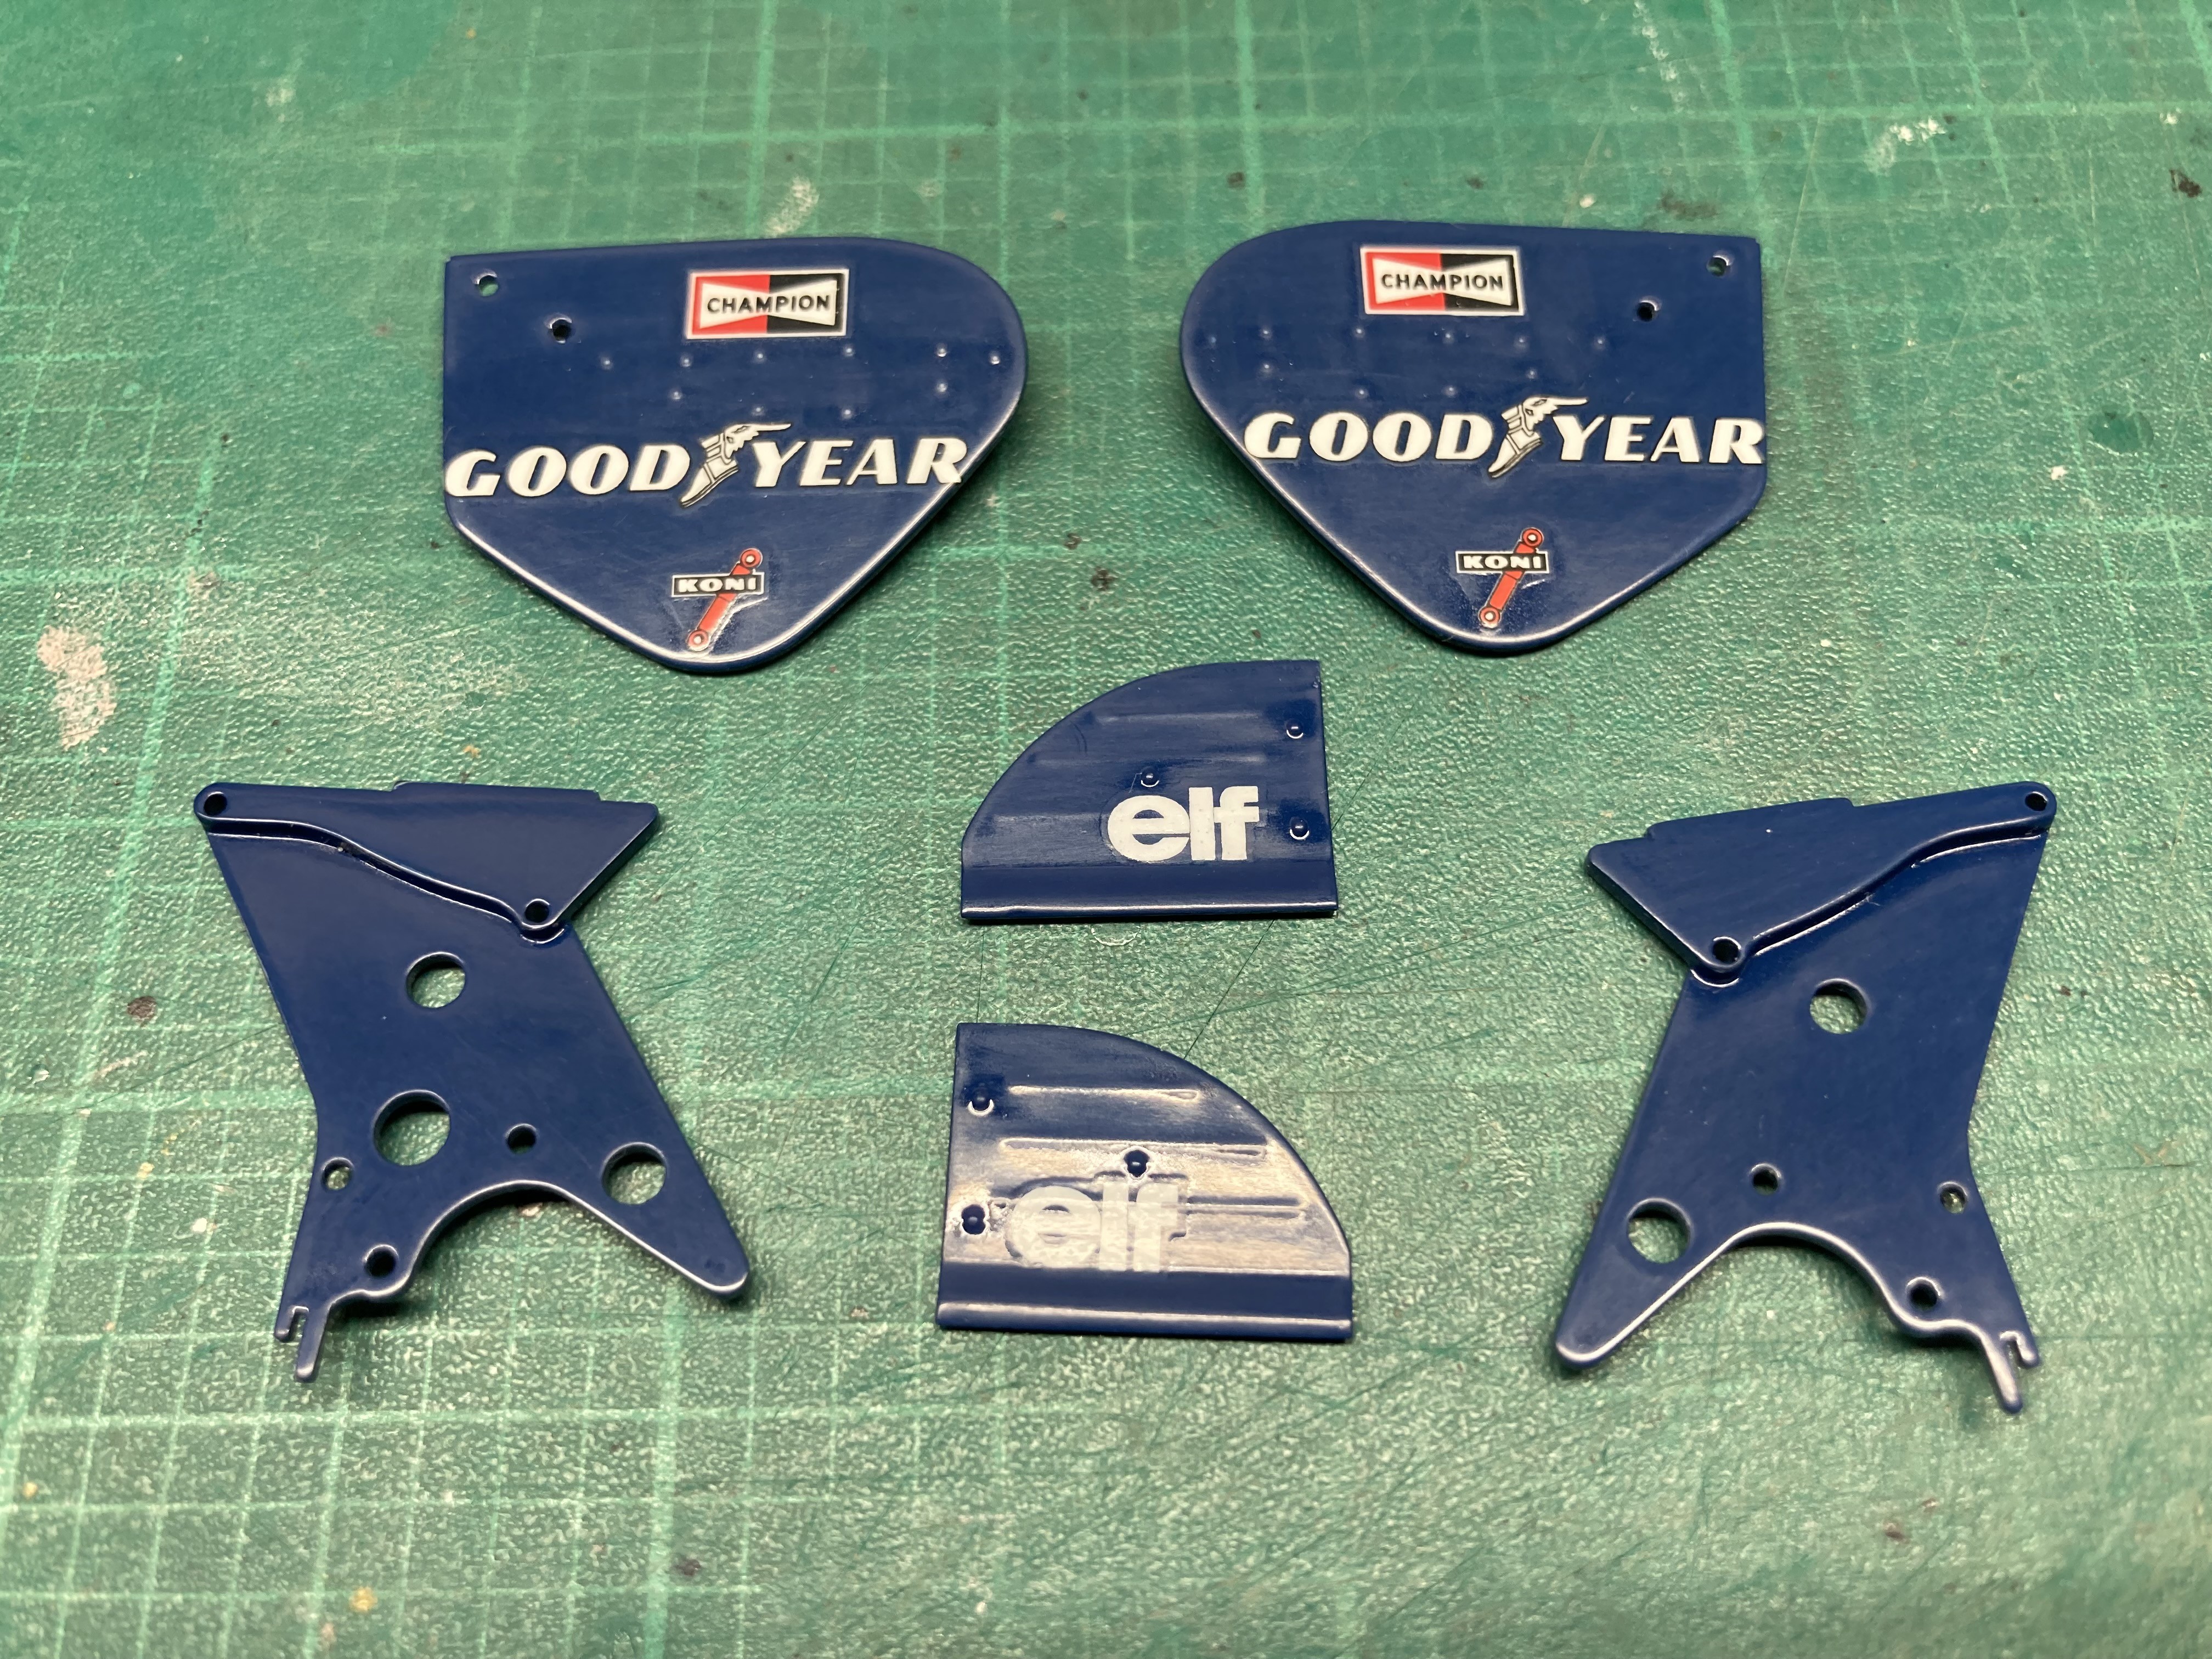
The upper cowling had a diagonal separation line, which of course the sponsor logos went through. So I made a photocopy of the decal sheet and cut the logos out to use as templates to establish where to make the cut in the decals. It worked well, but I did experience some chipping at the cut edges, which were touched up with paint.
https://flic.kr/p/zw64o3]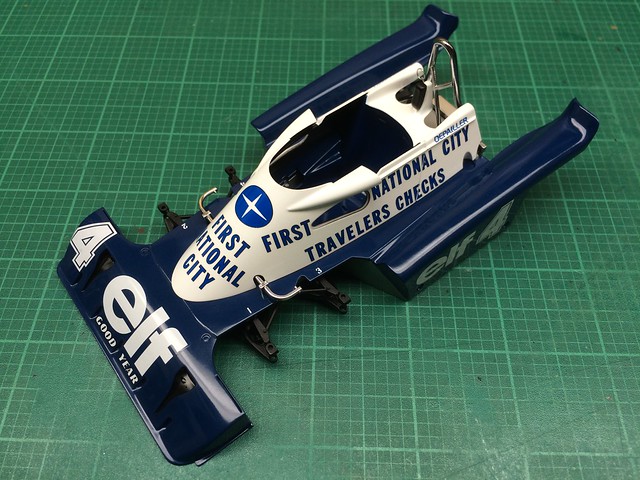 [/url]P34-071 by N.T. Izumi, on Flickr
https://flic.kr/p/Au7twH]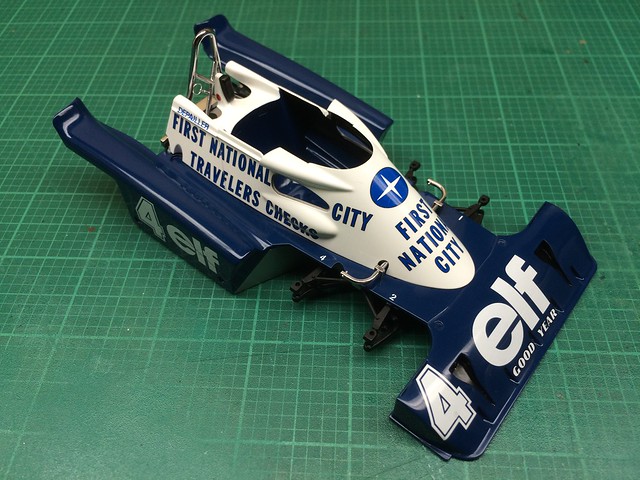 [/url]P34-070 by N.T. Izumi, on Flickr
I had an unusual problem with the clear coat and decals - the clear coat dried with a matte, textured finish only on the decals! I walked away from the model for a bit, then went back and tried gently polishing the texture down, which worked. Anyone have that problem? I have never encountered this phenomenon ever, on any kit.
What brand and type of blue paint did you use?
What was the clear coat that you used?
How long had the decals dried before you sprayed the cleat coat?
They were the Tamiya decals, correct?
P.S.: I told you that you could pull it out, looks nice!
Ben
Ben,
I used Tamiya TS spray paint and clear, on the kit decals. I may have waited 24 hrs prior to applying the clear coat. Moisture molecules on just the decals?
RealG,
This is a most excellent build you have going. I look forward to seeing it finished.
Thanks Lewbud!
RealG, I am not sure, but I had a fairly similar situation using Tamiya clear laquer on an older set of Tamiya decals. The clear laid over the painted areas just perfect, but the decals ever slightly ghosted to a dull finish. When it happened to me I was lightly misting on the clear coat and letting it dry between each application. After the third light mist and then polish it went away too.
My guess is it might have something to do with the age of the blue paint; the polishing of the blue paint; the type of polish used; the age of the decals.
Basically, it seemded like the decals stuck to the model, but not the best “stick”. Then the clear coat cure tried to slightly lift them. making them appear dull. By polishing the clear coat you burnished the decal both to the blue and in the clear coat.
Just my guess… Like I said, you pulled it out like I knew you would…
Ben
Ben,
Actually, the surface of the decals felt noticeably rough! That was so weird as I canot offer any explanation or even theory as to why it happened. But it was consistent for all the decals. The bond to the painted surface was not the issue, as they all glued down tight with no silvering. But at least when the decals were polished, the texture went away and they took on a glossy smooth finish.
As an aside, the “Koni” shock absorber logos disintegrated when placed on the model; they were on a smaller separate sheet. Although the artwork crumbled, they left the white printed backgrounds intact, which for some reason immediately bonded to the kit parts! I had to literally scrape the remaining decals off, damaging the paint. I was lucky and had an aftermarket sheet with the correct size logos to relace the kit ones.
Shiny cars are really outside of my comfort zone, but I’m slowly getting there. The next one will be better.
So here is what the project looks like as of four years ago as well as today!
https://flic.kr/p/wixrhp] [/url]P34-066 by N.T. Izumi, on Flickr
My goodness, where does the time go…
Hello!
That’s a nice publicity shot!
And yeah, doesn’t time just fly when you’re havin’ fun?
Thanks for sharing and have a nice day
Paweł
Necro Thread! [:P]
But that is just the way I am, like a discarded gum wrapper blowing along the road, susceptible to the whims of the ever-changing wind that whispers through my modeling mind. But yeah, it’s time to hit the road and get this project to the finish line.
I finally got the springs replaced by wrapping a pair of 0.020" plastic rods in parallel around a drill bit, then dunking in boiling water. The pair of rods can be threaded apart when cool, forming two springs with nice, even pitch spacing. I have found using plastic for the springs makes it WAY easier to taper the ends compared to metal.


The front shocks needed punched discs for the lower end of their brackets to act as stoppers for the springs. I didn’t bother making telescoping struts because I got lazy. [:$]


I need to sort all these little miscellaneous parts out. It has been so long that I have forgotten what most of the small stuff is for. Some look kinda ugly, so they will be replaced. Some of the PE discs might be replaced with plastic, as I like working with plastic versus metal. Now where are my notes…

The rear spoiler parts have been sanded wherever the clear coat/paint was not smooth. I got burn thru on the supports, so will need to repaint them before applying the gloss finish coat.

I had so much fun with the springs that I looked at my other car kits to see if they would also benefit. These are the shocks from Hasegawa’s 1/24 Lancia Stratos:

I did not notice the ejector pins until after the photo was taken. Yikes. They could be trimmed/sanded off, but separate springs and (telescoping) struts would look so much better, especially if the springs are a different color.
Yeah, the Stratos is another kit I really should get to…
I absolutely STINK at painting, and it really shows! I sanded down the rear spoiler supports for a third try at rattle can spray painitng. And it went just as badly as the first two times. So I sanded them relatively smooth (or so I thought), and ended up with this.

I’m going to try clear coating this mess to see if things start to look better.
Still plugging away on this old horse.
I was thinking about how to make small 90 degree connectors, and had a eureka moment to use pin heads.
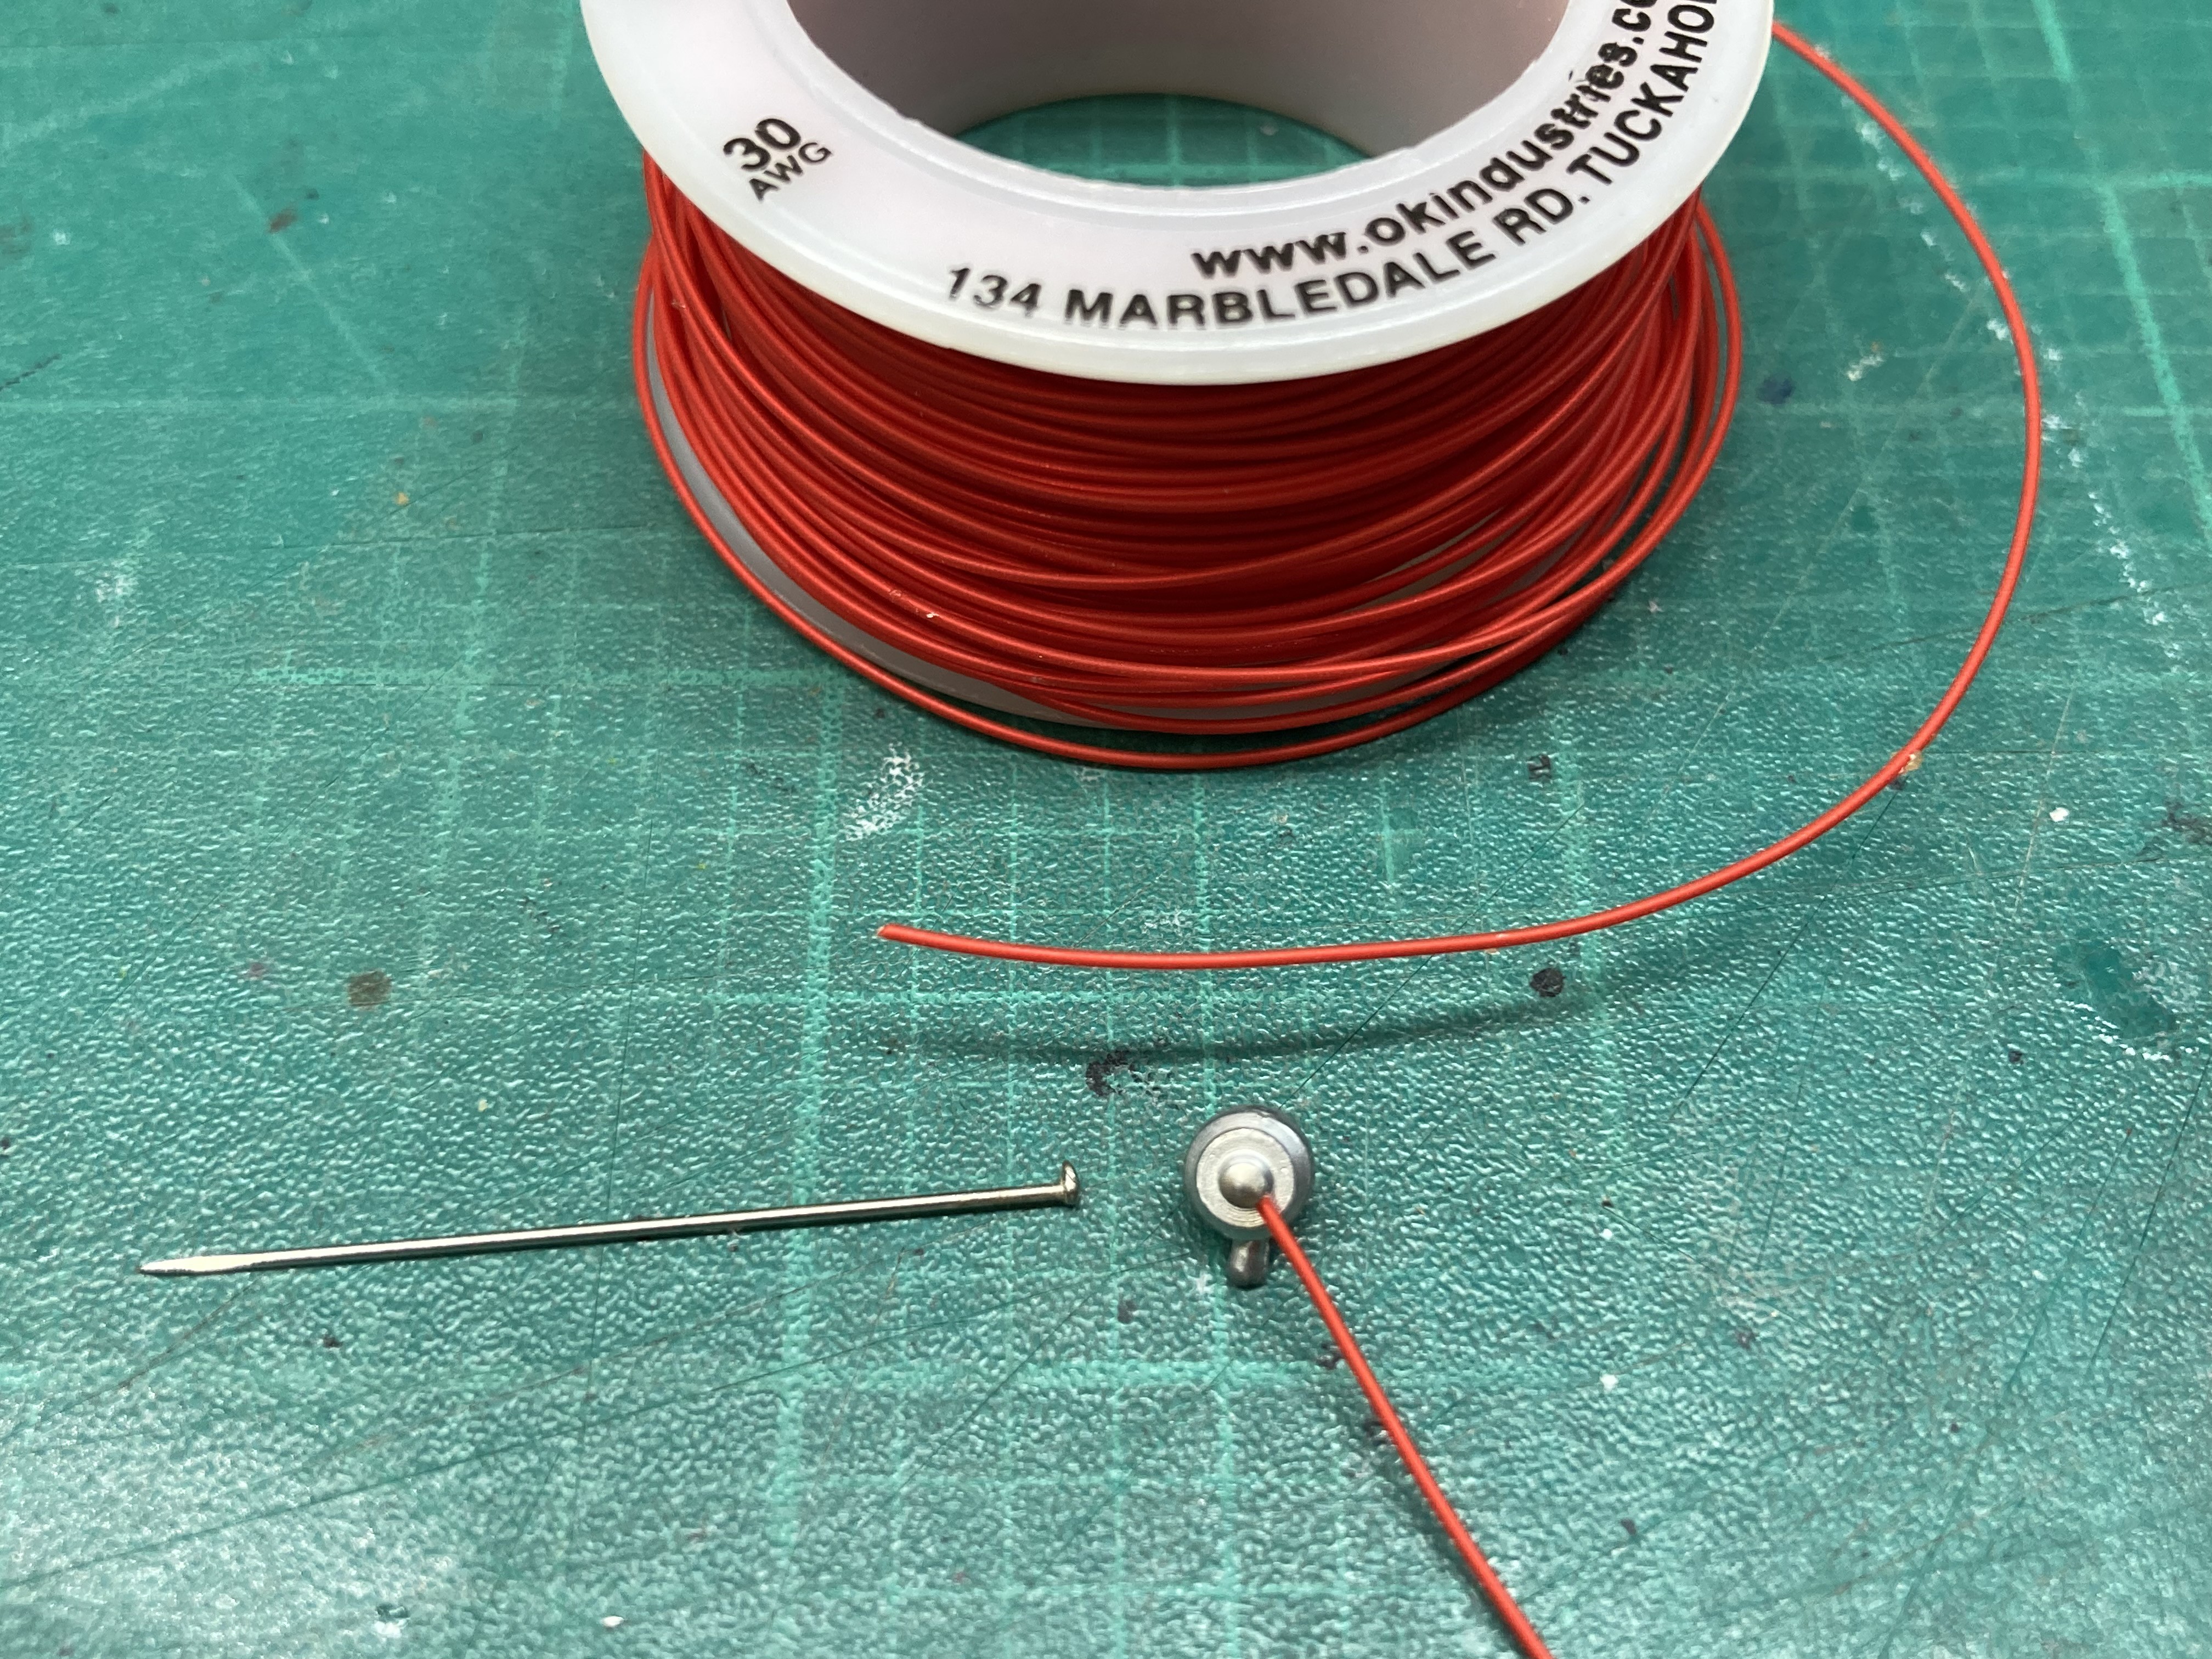
The Kynar wire insulation is stripped at the connection point and wrapped around the pin for a fairly secure join.
Other wiry bits continue to be added.

And the dreaded slog of polishing bits and pieces continues.
I REALLY stink at this!
I seriously need to get out the airbrush and finish painting the little detail parts so that the engine and suspension can come together.
This is a great WIP, G.
The bodywork looks great, despite your hiccups.
Sort of a side note, the next thing I need to do on my Lotus is paint the rear set of springs, which unlike the front springs, will be visible. Every time I go down there to get started, I think about your scratchbuilt styrene rod springs and get frustrated and find something else to do!!! They are so cool. (but hey, it got me out for a walk today, so that’s good)
Oh, and I have those awful ejector pin nubs on the Tamiya Lotus springs, too. They are facing in, won’t be seen, and I’m not going to try to whittle them into shape. [proplr]
Really like wat you have done here. Your changes are a major plus to the look.
Keep up the slog Real G, I may dig my 12th scale out and smash some things together. I’ve seen your magic, it will be great.