TUTORIAL DO IT YOURSELF RAILROAD TRACK w/CH1 COUPLER ANSWER

I have done a railroad build or two and I find the plastic rails that come with the kits really not worth the effort to make them look good. For a little bit more time and a small additional expenditure, you can make a quality railroad track base. This tutorial will demonstrate how I do that.

Parts List

Wood for Base. Since railroad builds tend to be long but not wide pre-cut basswood works well.

Basswood strips 3/8:Wide x 3/16:Thick (not as important as the width)

Rails Aluminum CODE 205 N.S. (i get mine at Caboose Hobbies in Denver)

Pack of Medium Spikes

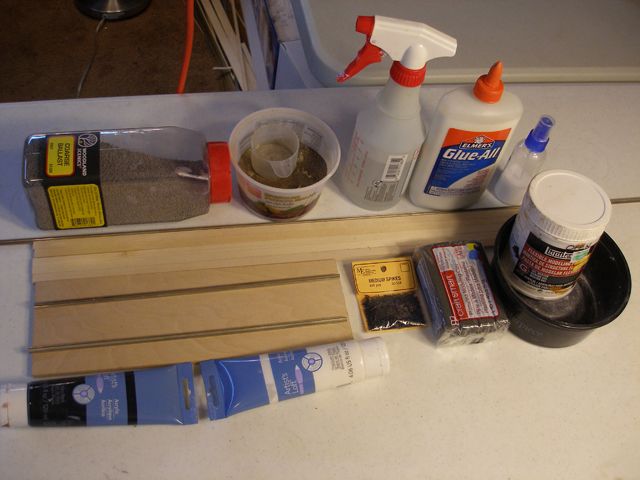
The following picture shows just about everything I used but obviously there are other options.
I stained the basswood strips for the ties and the base. Any medium stain like driftwood looks nice but i also use walnut. I buy the small reject cans at the local paint store as they tend to be discounted. It is fastest to stain the basswood strips before cutting into ties. I found it took about 2 days for them to dry. I tried washing one side with payne gray oils but it darkened the wood too much.

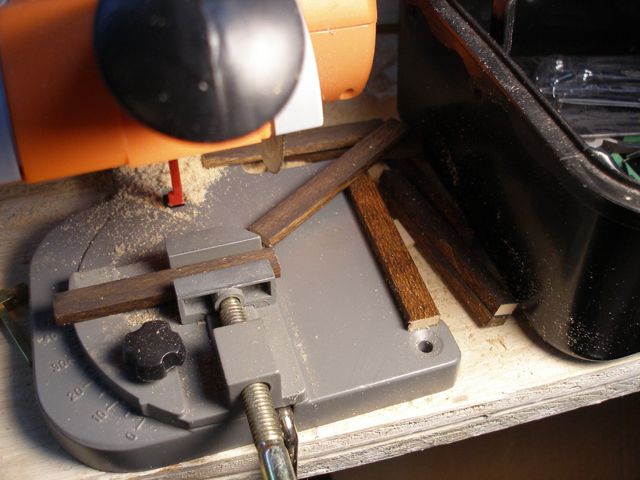
I cut the basswood strips into 3" lengths to create the ties. A miter saw works great for this.After the ties (or sleepers as they are called in the UK) were cut i dipped the ends in the stain, wiped them down, and set them aside. I do all of the basswood strips which means i will have leftovers for future projects. There will be 16 per foot but you may need an extra one or two ties for longer bases.
I used a hacksaw to cut the rails, primed them (I use ACE Hardware NOW gray primer) and airbrushed with Vallejo Air German red brown. I like this color better than the Vallejo rust which as a metallic element to it. The top of the rails are painted shiny silver if they are in use or can be left rusty if this section of track hasn’t been used for a while.
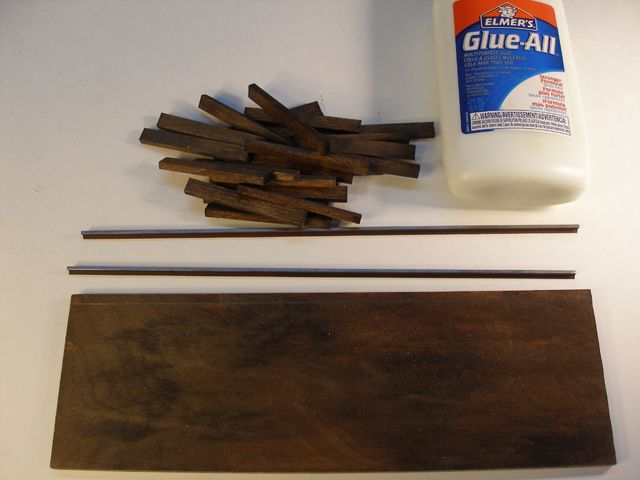
The next step is laying the ties. I drew a line to represent the left side of the ties so they would be even. I also offset the ties from the center to avoid too much symmetry. Using the Trumpeter rails as a guide I glued two spare ties together and turned them sideways. This will be used as the spacer between rails.
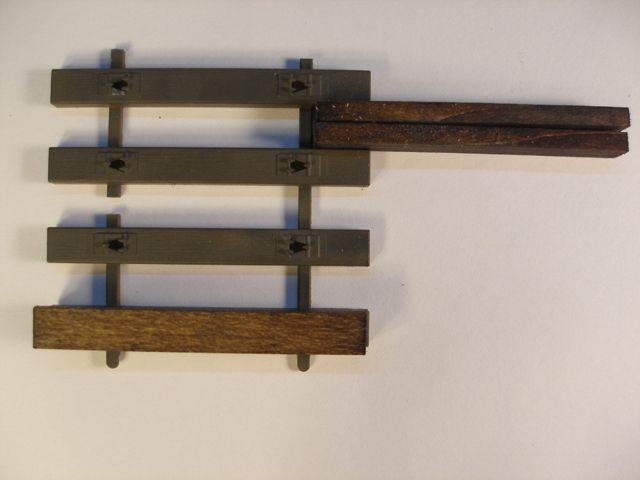
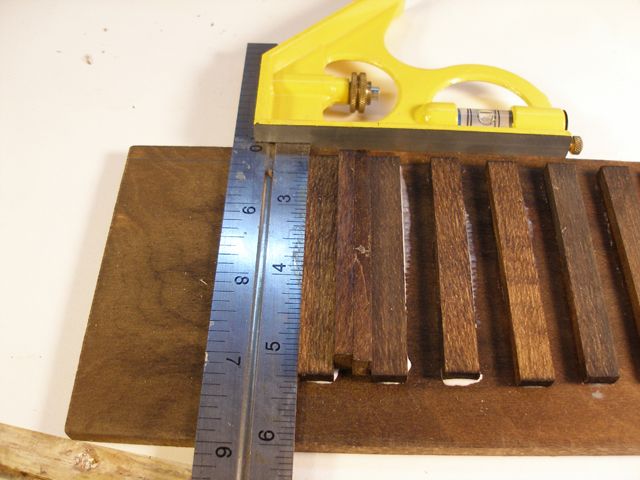
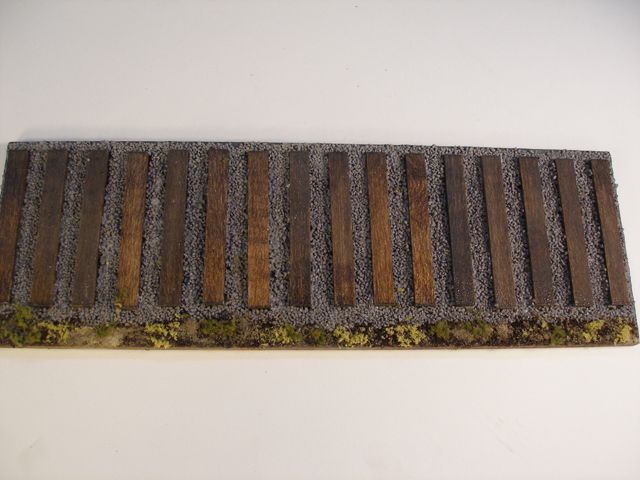
Using white glue or wood glue, I glued the first tie to the base one spacer in from the edge. A square ensures the ties are perpendicular to the edge of the base and parallel to each other. I continued to the end for a total of 16 ties. some of the ties are the darker ones i oil washed to add some contrast. Also the pencil line is a guide so if a tie or two is a millimeter off it is fine. The tracks are suppose to represent hastily laid tracks, not high speed rail lines.
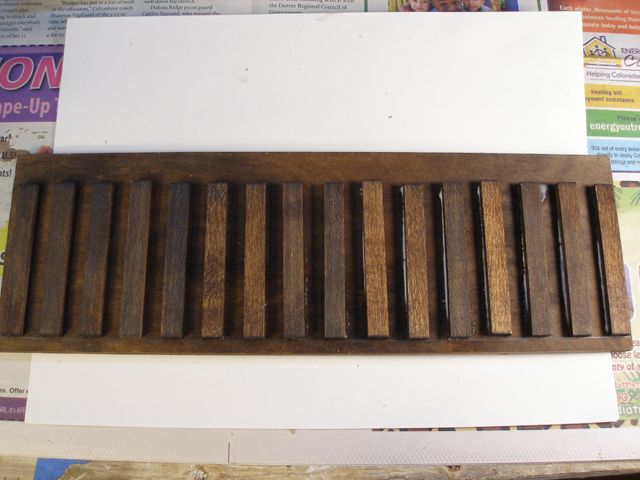
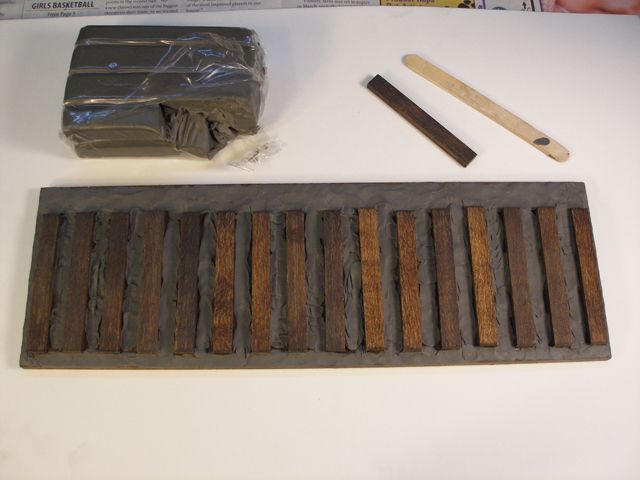
I used modeling clay to create the terrain. It isn’t as messy as Liquidtex A key factor here is to have the clay very close to the color of the turf on top. If that isn’t possible I will use cheap artist acrylic to paint the clay a suitable color.
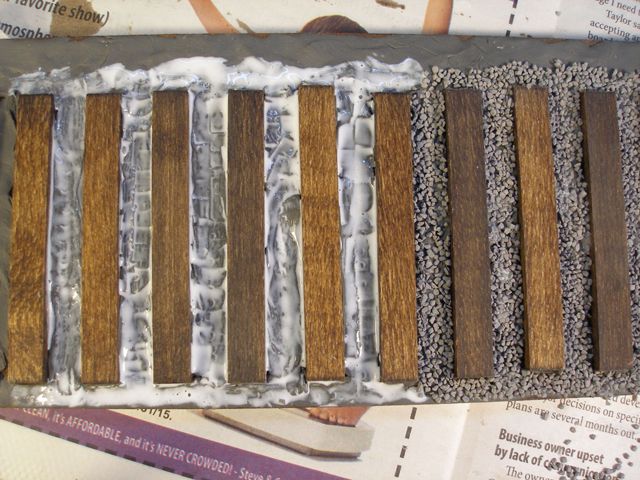
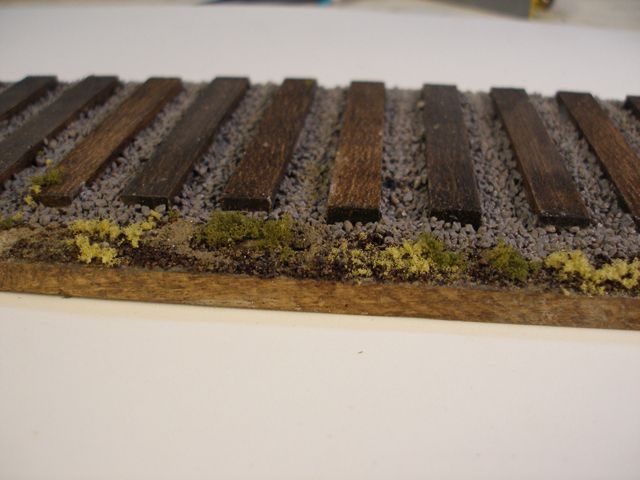
Putting the base in a clean box or a large sheet of clean paper, i spread white glue diluted with water between the the first 5-6 ties and start adding the turf. For 1/35 track I used medium gray ballast. After adding the ballast and pressing down i turn the base over and tap on the bottom letting the loose ballast fall on the paper so i can use it again. There will probably be some areas that need additional glue and ballast.
I did the same procedure along the edge with dirt and added some vegetation.
The next step is adding the rails. This is the tricky part though much easier than 1/72 using HO scale rails because the tolerances are tight. I measured in ½” from the end of the tie and used the square to draw lines on random ties from one end to the other. I laid one painted rail on the line and checked to ensure it was parallel to the ends of the ties. If so, using superglue I attached it to the ties.

These rails are wide enough to sit on the ties. I laid the other rail on the ties the approximate distance for the wheelbase and set my railcar on the rails, shifting the second rail so it was the correct distance. I amde some pencil marks on the outside of the second rail and measured the distance between the rails at their base. It turns out to be 39mm. I made a number of spacers using popsicle sticks, laid them along the ties, added superglue and attached the second rail.
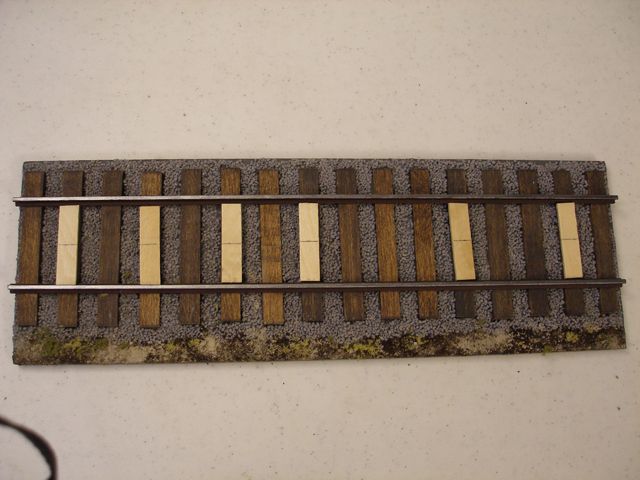
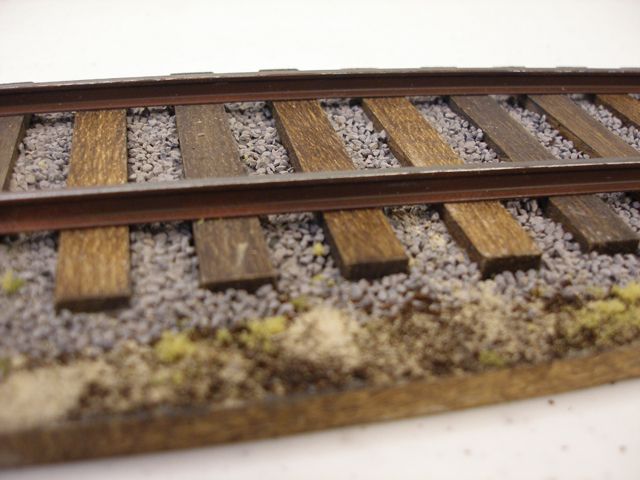
The rails.
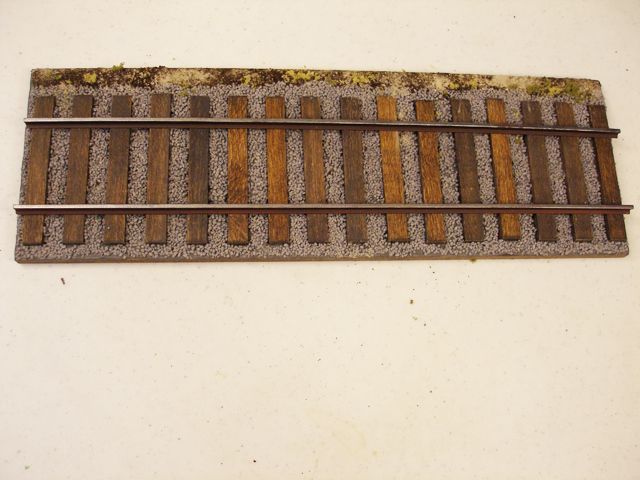
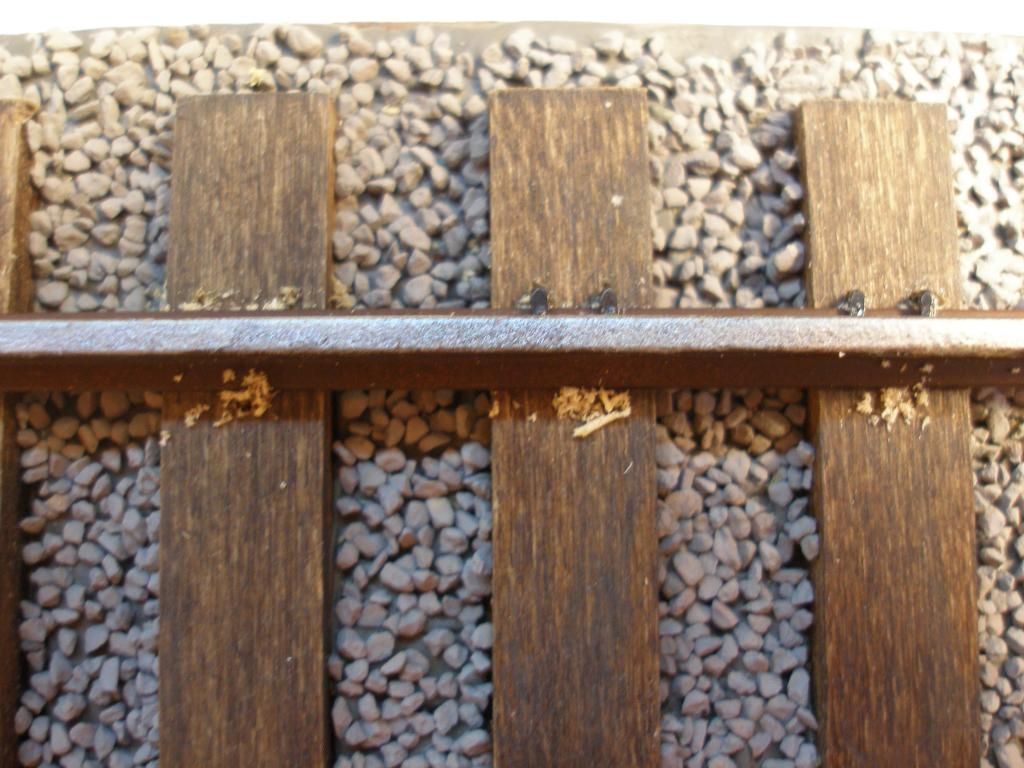
While a lack of spikes isn’t noticeable in 1/72, it is at 1/35. This turned out to be surprisingly easy. I decided on two spikes on the outside and one on the inside. I didn’t have rail attachment plates so I assumed hastily laid rails wouldn’t use them and spiked the rails directly to the ties. It was difficult to push the spikes into the ties but I remembered these spikes are not needed to hold the rails.
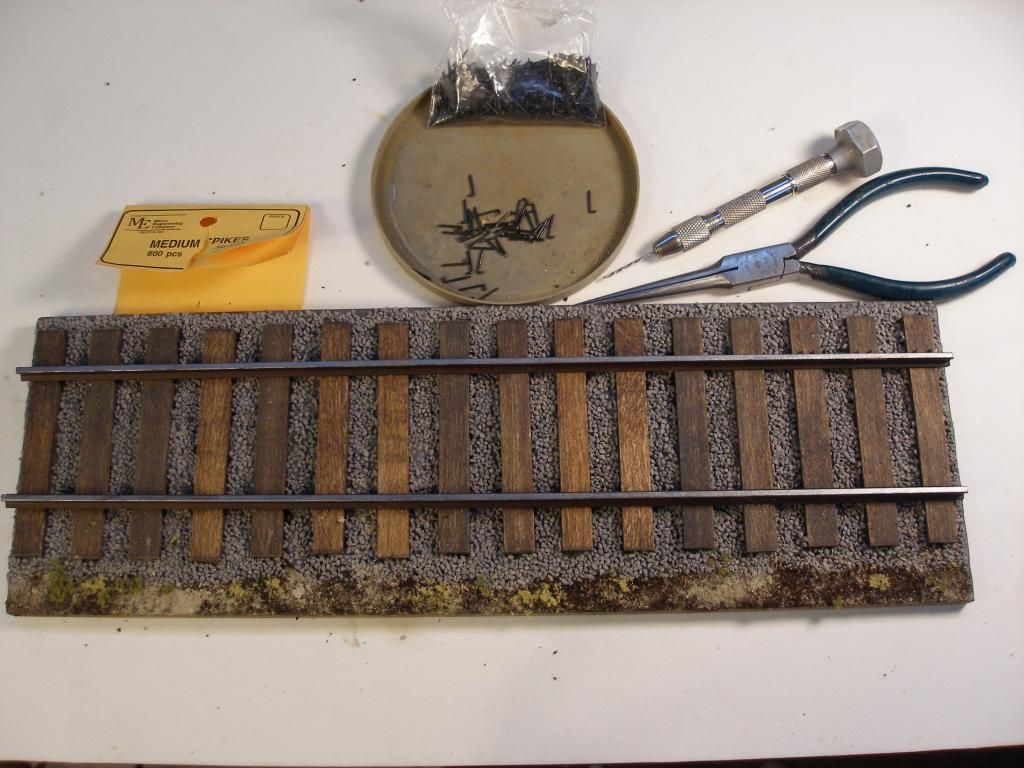
Using a pin vise I drilled holes where i wanted the spikes and used needle nose pliers to insert the spikes. When all the spikes where in i painted them rust and touched up any scrapped paint on the rails.
It took me an hour to spike and touch up one foot of track.
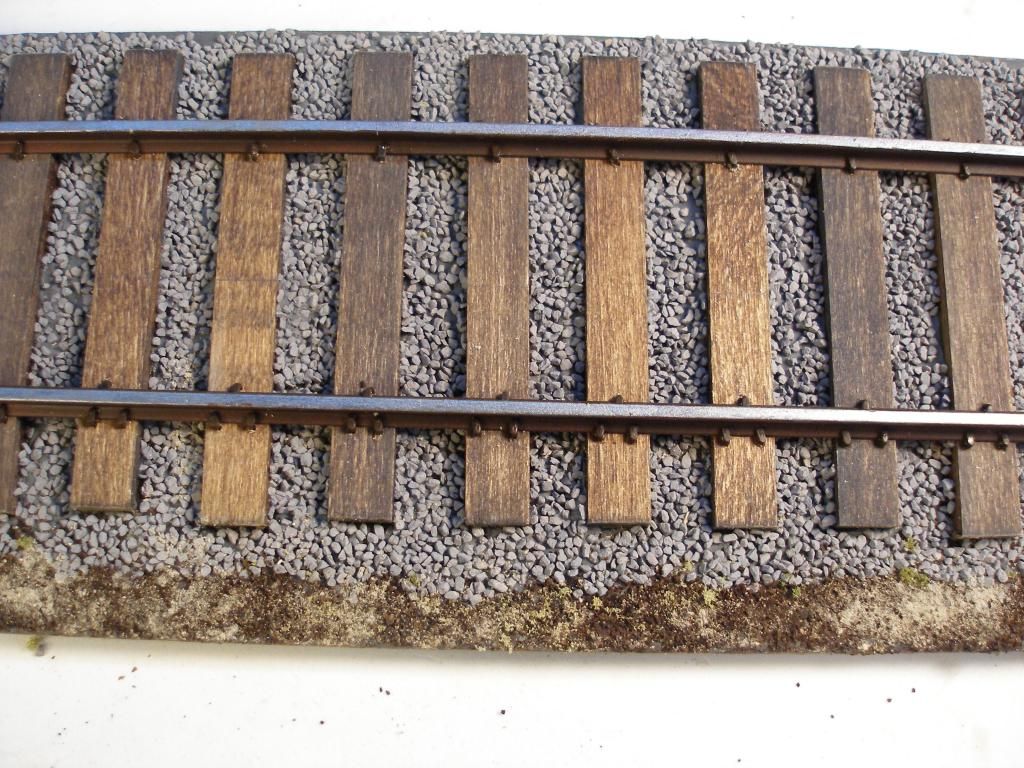
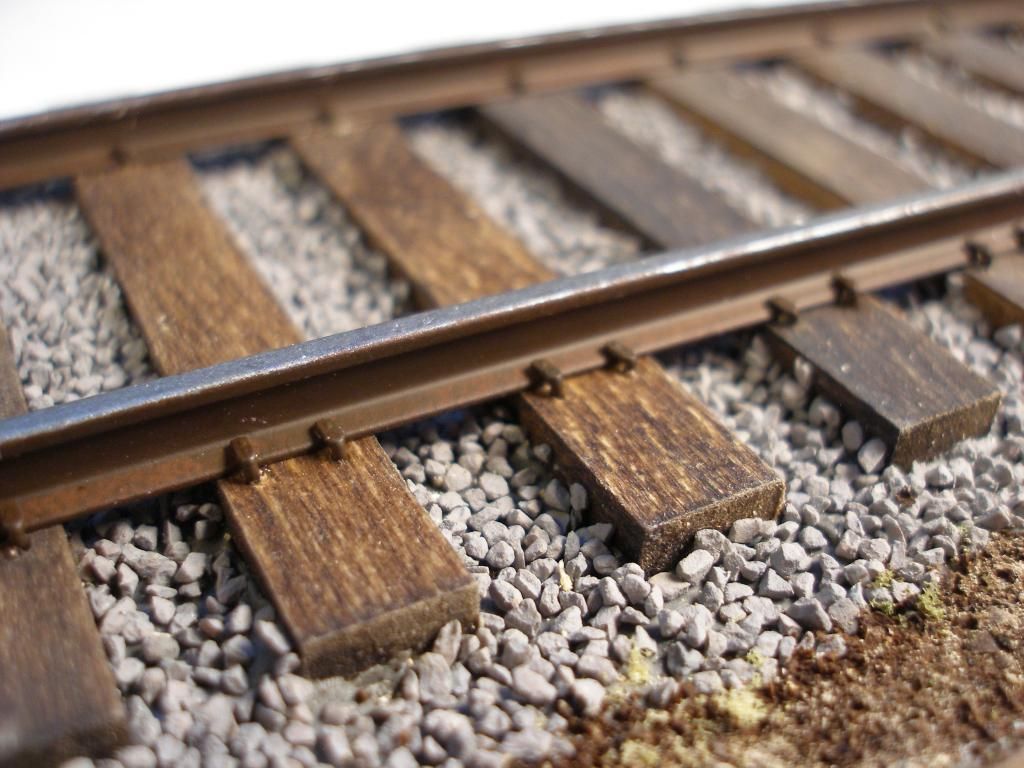
This technique will work with 1/72 track too. Thank you fdor looking at this tutorial. Any comments and suggestions are welcome.

CHANGE 1

It was suggested the ties would be splotchy with oils, grease and other stuff falling from locomotives and rolling stock.
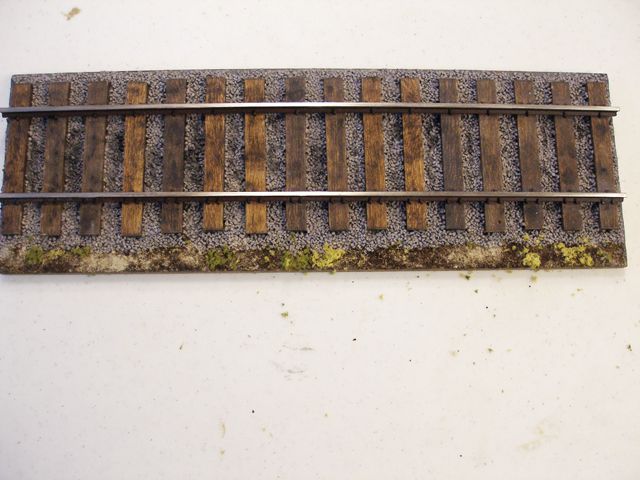
a second suggestion recognized, since the rails I used are aluminum, why not polish the tops with a scouring pad. Given i had 4 coats of paint and primer i used sandpaper instead.
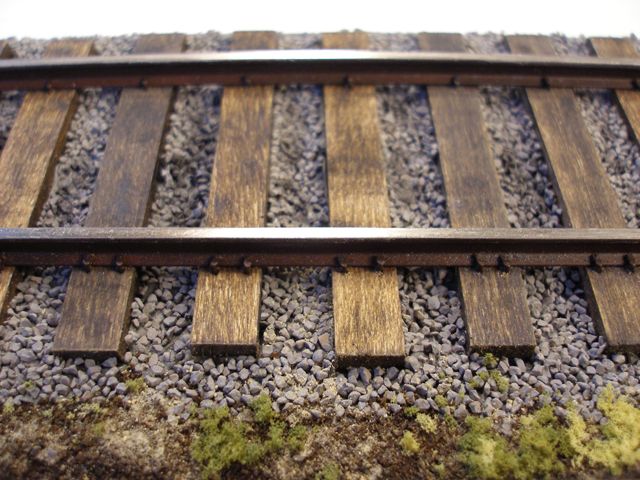
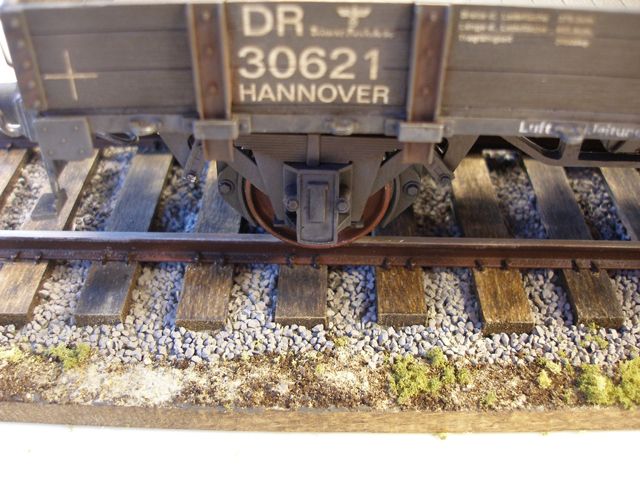
A third suggestion, at least for American rails, was to use styrene to make plates so the spikes go through the metal plate into the ties. I will do this on the next build.

WAYNEC

Very fine. I wondered if the rail guns ,engines kit tracks were usable. Your tutorial make that question moot. This simple, classic, trackage is just what the model needs to set on without being too noticeable and detracting from the model. Well done , clearly written and illustrated.

Aluminum rails an excellent choice.

Particularly in that a ScotchBrite pad can be rubbed, at a 45º angle along the inside of the rails to show the shiny edge from recent use.

Yard track is laid “flush”; all other track is on a raised subgrade (which is needful to carry the tons–or tonnes–of railstock across it. Eyeball rule-of-thumb is 2x tie(sleeper) depth (3/4" in Wayne’s example, since he is sensibly only showing the top half of the tie).

After being set, the rails and ties are ballasted (roadbed graveling) again. New ballast will be just above the surface of the ties, and falls off the edge of the subgrade at a 40" (from horizontal) slope. Old, settled ballast will show a 1/1 to 1/2 tie depth, and will ease to a flatter slope, around 25-30º

Since I’m droning on about railroad engineering, remember that rails are kept level as much as possible. The ground may vary, but the rails will “want” to be level. This can be used to add interest in the base, and the ground moves, but the rails stay level.

Perhaps I am just being picky because Waynec has certainly constructed a beautiful base. However I will make a couple of observations. The first is are we talking about mainline permanently laid track or hastily laid field track? The second is European or American? A permanently laid American track would have tie plates and the nice clean uniform crushed ballast. A temporary track would be ballasted with whatever material was available and probably would have the rails laid directly on the ties without plates. Now European practice is to use chairs and wedges to hold the rail and big lag screw type bolts to secure the chair to the tie. Find a copy of “The Train” with Burt Lancaster to see what your European track should look like in various settings -main line, yard, and hastily repaired. There are close up shots of the track being sabotaged by knocking out the wedges and unscrewing the bolts.

Steve - Thanks for you comments

CapnMac82 - I picked aluminum rails because they were the right size. I will try your scotchbrite technique

Amphib - You are not being picky at all. Constructive criticism is how we learn and improve.

Yes mine is more American looking than European. I do wonder if all European countries used the same technique and equipment or, if the Germans just spiked rails in Russia since they had gauge issues anyway.The Germans obviously laid temp track to get a K-5 into a temporary firing position or onto a turntable (now that would be fun in 1/35) and to bring in ammo resupply.The K-5s had a very good suspension system to give them the ability to move on temporary or damaged track.

i was looking at a siding yesterday in the US and there are 4 spikes and a small very thin plate but the ties are deep so the dirt is actually covering some of them. I also know that on longer runs like a 3 or 4 foot base i will have to add the side plates that bolt the rails to each other but i have a friend who can resin cast me a bunch using the kit ones as a model.

GAUGEMASTER in the UK has some rail plates but they don’y look like the plastic in the kit either. Peco SL-802 Running Rail Fixings approx 100 for 6 pounds plus shipping.I have a friend who may pick some up so that is still a possibility for future locomotive builds.

I am concerned my rails won’t fit plus having to order wedges as well as plates and is this going to be costly.

I shall now rationalize my decisions [:D]

  1. Unless I am building a diorama, the base is not supposed to be judged in a contest though, having been a judge, I I know that doesn’t happen.

  2. Most model builders won’t know the difference anyway and, given I am in the states, most folks think rails look like this.

  3. This way is the most cost effective, especially with a big model railroad store in town.

  4. As model builders we are creating illusions. Sometimes giving the observer or judge what they think they should see is as important as having it correct to the last bolt.

I’m with you, Wayne, on making a reasonable facsimile of a “rail”. Most people aren’t going to know or care about what constitutes the “fine details” of laying rails.

I think they look terrific, and it’s a great tutorial!

We used to walk railroads all the time up in coal country, NE Pennsylvania. One thing I always remembered was the bog splotches of oil and/or grease on some of the ties that would fall off the tenders. That’s one detail I would add. :slight_smile:

Hi Wayne, Nice SBS tutorial. It looks good for a model display base. [Y] [I]

Your opening post already describes what you already know that you’re are leaving out of 1/1 prototypical accuracy. And like you said, most eyes will be on the model anyway

Hey Karl. Thank you.

I forgot about the grease and oil. Some of that will fall back on main line vs temporary for the amount but it will add a degree of randomness. I did that on one of my 1/72, a streak of oily black down the middle. they have to dump the toilets on the passenger trains somewhere.another unique possibility is to add a third rail just outside to represent original Soviet track adjusted for German gauge.

Hey Waynec,

Good tutorial my friend but you forgot about the tie plates that go under the rails above the ties.

they can be made out of styrene.

PANZERJAGER

That was an aspect of European rail I hesitated to go into. Particularly in the East, having a holding tank was not necessarily a given–some trains merely has a hole (sometimes with a pipe) through the rail car.

Now, the steam engines themselves also dripped oil and grease. If the rails were slick, the engineer would sand them heavily, which makes a particular sort of rail gunk. Which is then cleaved away from the inside of the rial by every wheel flange passing through it.

Now, if we are going to rivet count (term not pejoratively used), then yes Euro practice is plates “kag bolted” to ties with another connection to the rail. The French used wedges; I think the Germans used either flush bolts or rivets.–you’d want an actual authority on such things, not a goober who spent too much time sharing a compartment with avid railfans.

But those plates could likely be made the once, then multiple copies cast. Which is probably the best way to make the rail-to-rail connection plates, if you cared to show those. The Germans were the first to weld the rails on the main lines–but probably did not in field or hasty rail lines.

But, frankly, the example you knocked out was more than enough for being a simple base, or even the beginnings of a dio. That’s my 2¢

You’re base looks great, and I say that as a railfan too.

For a bunch of details try here: www.google.com/search

If I were building an engine that would be the perfect base. Simple and not overstated to draw the eye too far away from the subject.

The subject of absolute accuracy “American vs. European rails” is moot. It would be akin to paying too much attention to the color or density of the sand in a dio of North Africa. Don’t care about the dirt, want to see the tank. lol. Unless you’re that much into your rails, then so be it. I mean NO offense at all if that’s what you’re in to. But Wayne is correct. Most of us have no clue what they really look like, nor do we care. If it looks like train tracks, then its train tracks lol.

Excellent Tutorial Wayne. Perfect for a guy like me. :smiley:

Mike, Gunner_Chris, SprueOne, Duster - thanks.

CapnMac82 - wow that’s a lot of detail. If i could find that much on a Voegele turntable, i would consider scratchbuilding a 1/35. I did sand the paint down to the metal.

Karl - i was able to add the stains

PJ - will add plates to next build

to everybody, i may be presuming but so be it. Amphib’s comments were good. i did not take it as rivet counting criticism. i didn’t take it as criticism at all. i took it as someone offering new information giving me the option of going more detailed or not.

Was just agreeing with you Wayne. More info is never a bad thing. Sorry if I seemed disagreeable or argumentative.

Hey Mike - No problem.[Y]

Let me throw this out to the group before the next track laying session. If i add the flatcar (ammo carrier) and the diesel locomotive I will need a 5 foot base. I need to break that into sections i can easily attach tightly for contest purposes. Someone suggested rare earth magnets to attach the sections.

we’re modelers; we solve problems every build. I have some thoughts but will await suggestions. Thanx.

Those magnets are a brilliant idea! Table top gamers use them for changing the weapon loadouts on their models. They come in a variety of sizes as well. I’d seriously look into that option Wayne. That’s a great idea.

Gondola took a 3rd in local “out of comfort zone” contest. CapnMac82 they really liked the shiny rails. they do look so much better than paint.

I will have my friend resin cast a bunch of rail connectors. that solves the rail cutting problem. Table saw cut through the base along the edge of a tie will hide some of that seam. nobody says the rails have to be cut at the same spot. just thinking out loud now i guess.

[Tips my hat] Gibe no credit for great genius, I was just sharing what I know the model railers do, which is paint (or chemically) brown the rails, then polish the contact surfaces back to bright (which is also for electrical conductivity as much as anything else in their case).

REM would be a slick way to click the sections together, but, I’d probably use some sort of alighnment pin(s) too.

Now, for five feet of railway, I’d probably lay that out and then plan the joints, with a specific “key” between each so they’d go back together the same way every time. I’d probably put a bit of pitch in the rails, so that they’d be a rail height higher at either hen than the middle (working brakes at 1/35 being a hair dicey to machine). This would also let you introduce a low spot to collect a thing or two–keg of spikes, some metal can litter, a broken tie, even a discarded rail.

Wottever you do don’t put the join in the middie because thats where everyone will look. Even a foot off dead center noone will focus on it.

I think magnets would not work. You need a good mechanical connexion, and I’d bias each joint at least 30 degrees too.

Go buy a four foot long piece of pre drilled shelf standard and mill a slot on the bottom of the road bed accordingly.

Put the thing together with little screws, flip it over and dump loose ballast around on it before the show.