Trumpeter's 1/48 C-47 Skytrain "D-Day Mini Whiskey 7" Completed.

I’ve decided since it’s January to dive into a project that is likely going to take me a little while. The museums ultimate goal some day is to restore Whiskey 7 to her D-Day appearance. So since I had a Trumpeter kit in the stash that I didn’t yet have a plan for. Picked it up a while back, and forgot I had purchased PE for it. What the heck is wrong with me?! I could skip using it, but where is the fun in that?! So this will be a D-Day version Whiskey 7. There are no photographs of her until after D-Day, sometime during Market Garden Era, and then another pic I recently found of her with the 79th TCS sometime after April 1945.

Market Garden Era with the 36th TCS.

She’s the furthest away in this pic.

The pic I recently discovered of her, that no one else had stumbled upon yet. I was in shock I even found it. I have documents that say she was transferred to the 79th TCS on April 20th, 1945.

One that was shared with me from one of the volunteers working on the restoration of “Night Fright”

The box, and all it’s content. Even picked myself up an extra set of decals it seems. So no excuse not to make yet another Mini Whiskey 7.

Tiny rudder pedals. Good Grief.

Not thrilled with all the injector pin marks. Nope won’t see them once the fuse is closed up, but this is a special project, so I have to get rid of them.

Start of the cockpit.

Couple rounds of putty, sand, prime, repeat, took care of the injector pin marks on the fues, and a few of the bulk heads.

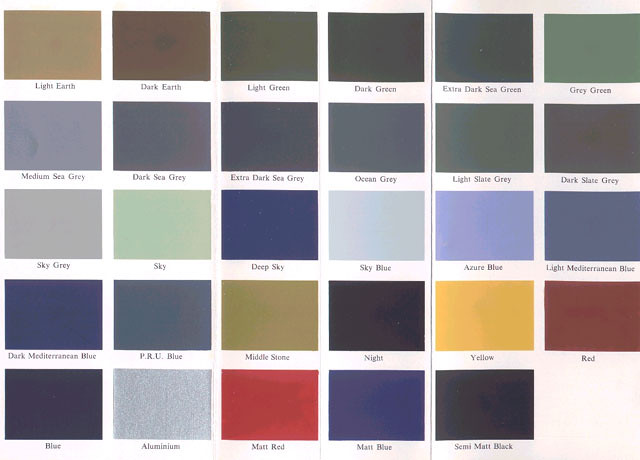
Got some color on the interior. The instructions call for “Sky”, but after trying to figure out what exactly that is I just went with interior green.

The literal microscopic latch for the seat belts. Why do I do this to myself?

One set of cockpit seat belts done.

So far my only complaint with the kit is the seats. They are no where near accurate. Even with the aftermarket PE stuff they do not look like they should. The seats in the Monogram kit are actually more accurate looking. I did what I could, and added a piece of round styrene to go along the back of the seat, and left it at that. If I tried to “fix” it further I would of just destroyed the seat.

Should be a big model in that scale. Tiny tiny PE is so frustrating - sometimes I just say nope!

I’ve always wanted to build that kit. Yes some P/E is absurd.

Some of the Aber stuff in general, I don’t know how a human could assemble it!

keavdog, It is a decent size when finished. Still a bit smaller than a 1/72 Herc though. So far the PE hasn’t been to bad. Which is shocking. I usually struggle with it.

Wilbur Wright, So far it’s a decent kit. I’m not really that far along though, lol. The seats bugged me a bit, I know I’m starting to sound like a rivet counter. If I wasn’t so close to Whiskey 7 I wouldn’t know any better to be honest. I was quite shocked to see the little seat belt latches in there. [:|]

Slowly picking away at the interior. Painted the black on the floor. Not entirely how the kit instructs. The painting instructions in the kit are just meh. Leave a lot to be desired there. But it does cause me to look online and try to find some reference pictures. I’m having to use a lot of artistic license on this though. I’ve seen the floors painted a few different ways.

A few more fiddly PE bits put in the cockpit and painted.

Putting in the little anchor points for the seat belts.

Rest of the cockpit PE ready to go in when I’m ready for it.

Pan seats painted. A lot easier than scratch building the seats Whiskey currently has.

Hopefully I can do some assembely and weathering tomorrow to the interior.

A bit more progress on the interior today. Slow and steady, lol.

Cockpit is pretty much done.

First small section behind the cockpit put together. I’m surprised there isn’t more on these shelves.

The rest of the interior bulk heads, pan seats, and insides of the fuselage weathered.

Hoping I can get the rest of the interior finished up, and get the fuse halves together in the next couple of days.

Its looking good keyda

Thank you!

Interior is all done. Should be able to close up the fuse tomorrow.

Front section. I’ve never been in an accurately restored C-47, so I have no idea if any of this is even close to accurate. But I have to roll with it.

All the pan seats, and seat belts installed.

Hard to tell, but I installed all the windows, and did a bit more detail painting.

Only a few more small things that will need to be installed before I close it up. Hopefully that goes well, and I don’t have any fit issues.

That is looking great! All of those details are what’s going to make this kit stand out.

TJS

Holy cow, great work on the interior, and great job on that PE!

Thank you! Sure hope so, lol. It’s just a shame you can’t see any of it once it’s closed up.

Thanks! For once the PE cooperated for the most part, lol.

Sky is an early RAF and more commonly FAA color for the undersides. Light green, and no idea why the interior would be that color.

Trumpeter color instr. are alway BS anyways. They are just lazy.

Bill

I was rather confused myself when I seen that in the instructions, lol. My first Trumpeter kit, so I wasn’t expecting it. I just did interior green. Seems most things in that era were either Zinc Chromate Green, Interior Green, or Chromate Yellow. Fairly easy to figure out.

So after a bit of a struggle yesterday I managed to get the fuselage halves matted. I had to file down the sides of the bulk heads to get everything to fit, and still had a very small gap. Oh well. I made sure to reinforce the seams with what I call the Mac Daddy super glue, so I shouldn’t have anything split on me.

Got the wings glued together as well.

Onto todays progress, which wasn’t a whole lot. I made sure to check ahead and see what it was going to take to get the center wing section together. I know there is going to be a seam to deal with on there. There is a bit of a seam on the airplane in that space where the wing fairing is, but I’m going to have to fill it, and sand it down so it’s not such a big seam. Anyway. I’m going to have to build up the landing gear bays, and up to the fire seal on the nacelle before I can join the center wing section halves.

So that stuff got painted. Still needs to be weathered.

Worked on the wings and horiztonals a little bit, and they got some primer to show they still need a bit more work.

Fortunately I realized this kit has a pesky 7th window on the port side which is incorrect. Whiskey did have a 7th for a long time, but didn’t get it until she entered civilian service after the war. The museum eventually removed it, and she only has 6 on the port side, and 7 on the starboard side. So that window is getting puttied over.

First of several rounds of putty, sand, prime, repeat done.

Moving right along. Looking good - good catch on the window.

Thanks! Might as well call me a river counter when it comes to Whiskey 7, lol. It’s odd, the Monogram kit has the correct 6 windows. I suppose it’s all in the subject they used as their reference. A lot of the C-47’s were converted to, or back to DC-3’s after the war. So I wonder if that is the difference. I’ve even seen a couple DC-3’s with 8 windows.

Yes good catch and no harm being a rivet counter, I’m proud to be one. The friction is when said person lays their trip on others.

There were DC-3s that had the last two windows on starboard side connected to form one long one. And there were the sleepers with little port windows over the bunks. Lots of variations.

Bill

Or in the case of the static C-47 at the museum(not owned by us) 8 windows.

Over the past few days)obviously not yesterday, I was in a freezing cold hangar most of the day) I worked on getting the pieces painted and together so I could assemble the center wing section.

I literally had to snicker when I put these together. I know just how much stuff is actually behind that silver fire seal. On the model its just open space.

I love the fact this kit has some detail in the gear bays. The tiny little oil tank, which in the real thing is a complete pain to get in and out.

Center wing section is now in one piece. Literally not locating or alignment tabs to speak of anywhere, so it was a bit fiddly to get lined up.

I’m close to be doing with the putty, sand, prime, repeat phase on the fuselage. Just a few more small spots I’d like to sand a bit more.

Then I can start the same process on the center wing section, join the two pieces, and work on any seams there.

It’s been slow going the last several days, as I landed up picking up a very nasty head cold from a friend at the museum. No, it’s not Covid. I’ve managed to avoid that so far (knock on wood).

At this point I’m not a huge fan of the way this kit is designed. There are some minor fit issues, but a lot of them. I have had to file away at several areas to get things to sit properly. I am being very picky with this one as well. It does have some pieces meet up where there are natural seam lines on the airplane, but the gaps are too large. So I’ve taken to the putty and sanding to close them up most of the way, or all the way, and I’ll rescribe where I need to.

Center wing section glued in place. Before I started any putty and sanding work. You can see a sizeable wing root seam. There is a seam line there on the plane itself where the wing fairing goes from the fuselage to the wing. I just need to make it much smaller.

In between rounds of putty, sand, prime, repeat I’ve been working on the engines. The kit piece with the push rod tubes was very brittle, and things broke as soon as you touched them. So I snipped them all off the ring, and replaced them with round styrene.

Painted the engines and exhaust peices while I was at it.

What a difference some black paint, and a wash makes.

Spark plug leads installed.

So engines are just about finished up. Just need to install the nose case and the prop govenror. Funny I actually know what these parts are called now. [:D] I knew nothing when I built the 1st Mini Whiskey 7.

I should be able to make some good progress this weekend. I’m not going to the museum. Don’t want to get anyone sick. I’m starting to feel better, but very slowly. So I’m not going to take any chances.

Thats looking good. Glad you are feeling better.