Hi, my first attempt at this, not sure if it will work but anyway. I cut the base to create a rough seas effect, sanded them down a bit and glued the two halves together. More updates to come.


Hi, my first attempt at this, not sure if it will work but anyway. I cut the base to create a rough seas effect, sanded them down a bit and glued the two halves together. More updates to come.
I have this kit in the stash…will definitely try and follow along.
I’ve made this test piece, very crude but looks promising. I used royal blue and blackish blue as undercoats. The dark blue looks good with the silicon tinted with tamiya clear blue and a few drops of black paint. It has quite a nice translucent watery look to it which is what I was after, rather than painting celluclay or whatever. I added some curved clear plastic to create the bow wave.
I’ve discovered that silicon melts foam, so I’ll do another test with the foam sealed under more undercoats.
My only piece of advice, and FWIW. Find a picture from above of a Gato underway. Wakes are not to be guessed at, so find a good image and copy it.
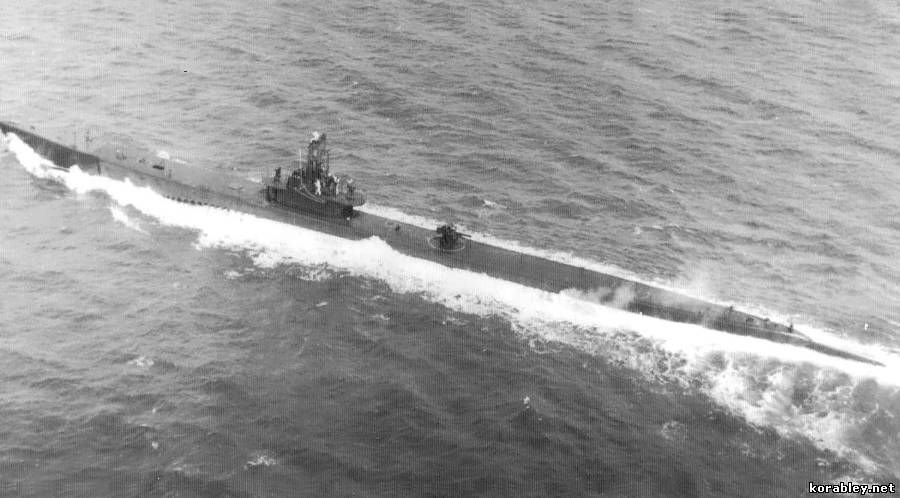
Thanks, I have lots of shots, but thats a good one. Going for rough seas, just to make it interesting.
I think your model is 1/144, correct?
Which boat are you planning to build?
I’ve always wanted to build a ship model with pitch and roll.
The painting has her bobbing like a cork.
It’s 1/350, probably too big for a first try at water effects. Having the ship listing and a froamy spray effect from the side could look cool.
Try a scene that was typical of most US subs during the war. Pulling a downed aviator out of his raft and onto the deck shouldn’t be too hard to make a 1/350 scale raft and using PE figures from a 1/350 scale set.
I like that idea, I’ve seen some scale rafts with PE oars, very detailed. I could have a bunch of them adrift. Once I sort out the water problems, cheers.
After some so-so results I dropped the silicon idea and decided to create the water by hand sculpting the surface. I had problems with thousands of airbubbles, but I can see it working if it’s just laid staight onto a blue painted surface. It’s tricky to work with anyway.
I’ll get around to that later, but the material I found is an oil based sealant putty, really fantastic stuff and I can see other uses for creating gound work. Takes ages to dry though. This is purchased in Australia, I’m not sure what the equivalent is elsewhere.
The model is primed…
Deck underpainted. No underpainting for the hull, I’m using black spray paint so there’s no point.
Engine grey for the deck.
Interesting project Lloyd!
Will be following to see how the water turns out.
The main thing is color and shine, depth is assumed if the first two factors are correct.
Stage 1 weathering. The panel shading looks a bit strong under the flash light, but will blended and worked over with washes etc.
I’ve added the water, getting something close to what I was looking for originally. I just couldn’t get this effect with silicon. This will take a month or two to dry[:P]
I modelled the water surface using the rounded ends of two sculpting tools, ‘pinching’ the water to get the rough surface effect. This shots shows the before and after on each side of the sub. The putty itself smell a bit like oil paint, very pleasant to work with in the end.
I’ve painted an undercoat of royal blue acrylic paint, and airbrushed the wake and churning ocean along the subs hull. I then poured a few layers of gloss varnish across the surface.
I added foam and cresting waves with mixtures of white acrylic, gloss gell and bicarb of soda for the 'white caps" which give a nice texture compared to the glossy water.


