I wasn’t sure about the color’s for the bunk’s, but in the end it will defenetly lighten up the interior.
I have been showing your progress to my wife… re-peatedly ! I think she’s getting “sick and tired” of me talking about it and is close to giving in and letting me buy one…
Snort laugh: A friend was over and I showed him this thread. (he is not a modeler but is a ship and war history fan and a font of knowledge ) His comment: “Wow is that great! However to make it perfect, once finished he will have to somehow make a spray that smells of diesel, unwashed bodies and sauerkraut and appy it to the interior!” I can just see the judges at a model contest going nuts…“The twisted maniac has even modeled U- Boat stench!” An entire new modeling level …can see it now an article in FSM on making realistic smells for your ship, car, aircraft, ect. WW1 trench dioramas would be vile.
Hmmmm
Lessee:
"I got a bit of leather from the craft shop. This was wrapped around the dog with a wool scarf. Then, we wnet to the pond and threw the ball for an afternoon. The leather & wool were remoed from the dog and put in a canvas tarpaulin and stowed away in the trunk of the car.
This was dried out with a diesel smudge pot. The mold & mildew were then scrubbed with alternating courses of diesel and raw ammonia, then left to dry.
The leather was then used to finsih the base, with the wool glued to the bottom."
It’s an interesting idea–not sure how to get the combo of burnt JP-4, Skydrol, hot tarmac and the like for an aircraft display. Or that mix of track grease, mud, hydralic fluid, and burn kerosene for a modern track.
Mind, my mind is still sorting out the mix of old harbor water, sun scalded pre-cat acrylic paint, old steam and burnt Bunker #2, oiled steal wire rope and damp manilla line, too.
All competing with xylene, toluene, mineral spirits, solvent glue, paints acrylic and enamel; old mugs of various things–the more ‘normal’ aromas of our modeling world.
I cannot remember what book it was in but, somewhere somebody said " once in service a U- boat quickly took on the scent of overflowing toilet’s and hot garbage."
Good News, I am finishing up the last two compartments and will post some updates. For those interested Sprue Brothers has this kit currently at 29% off through today. It is now $324.99. I know a couple of you all were on the fence.
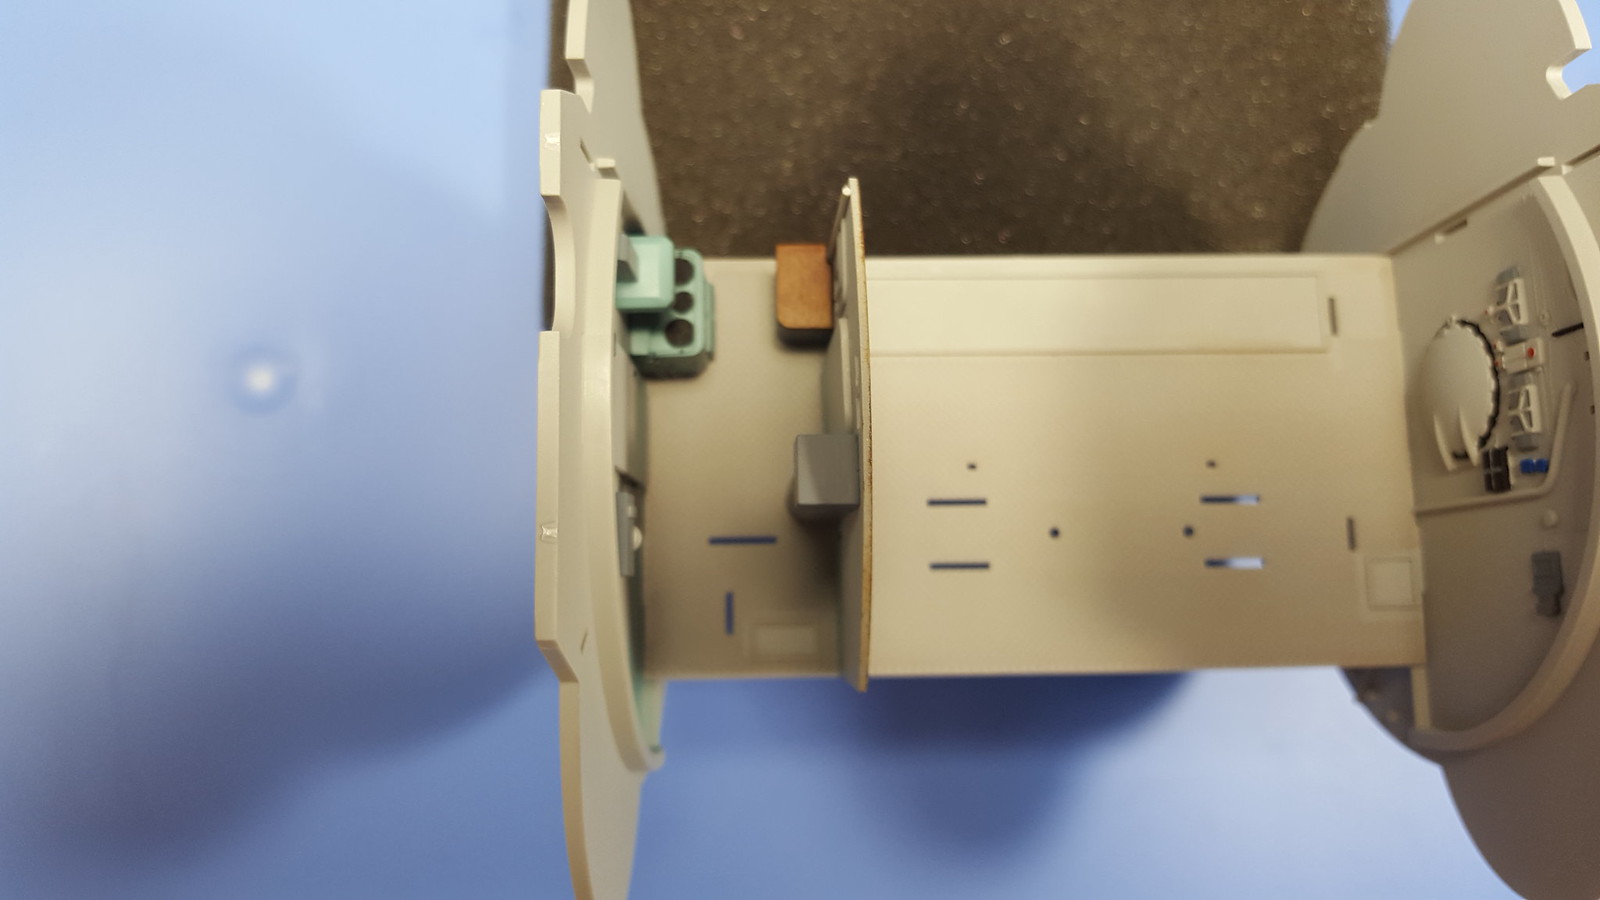
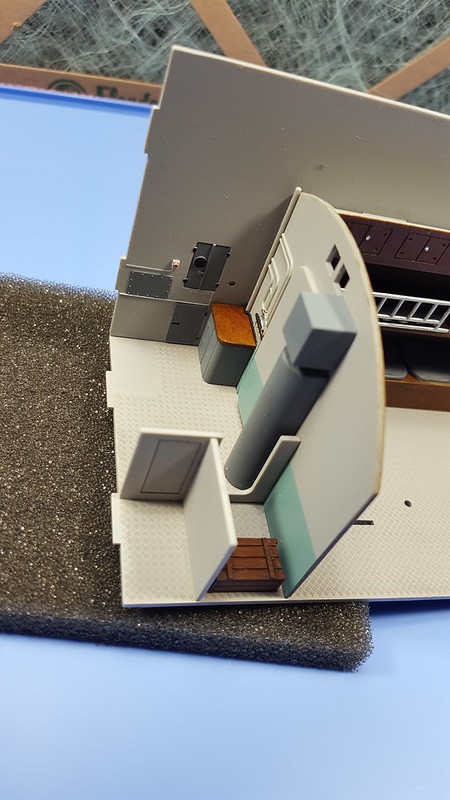
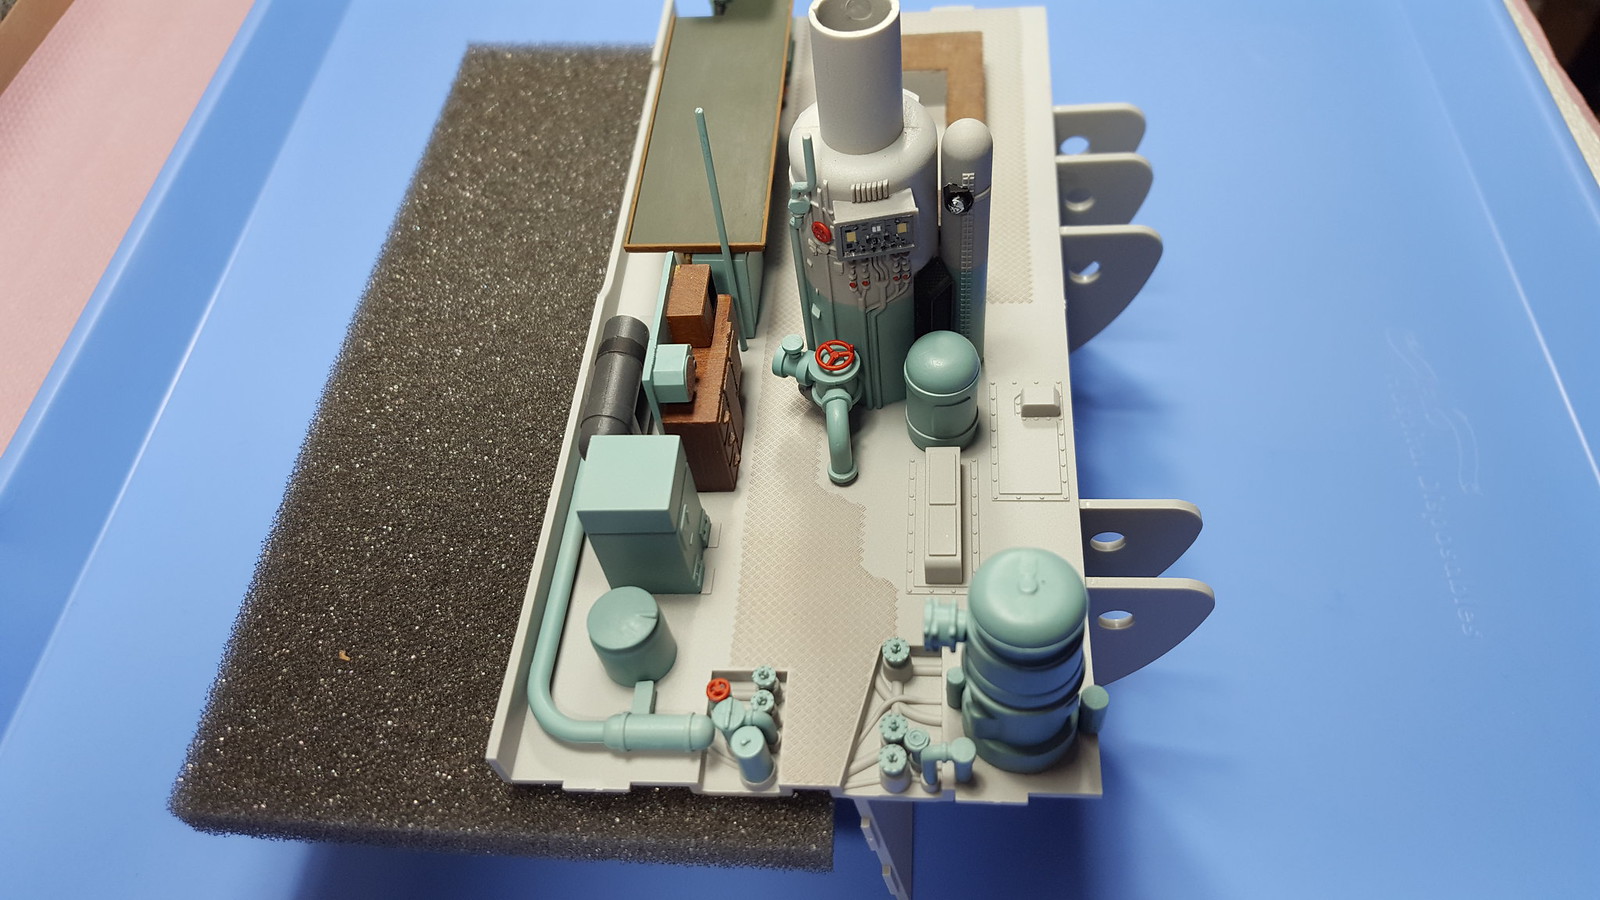
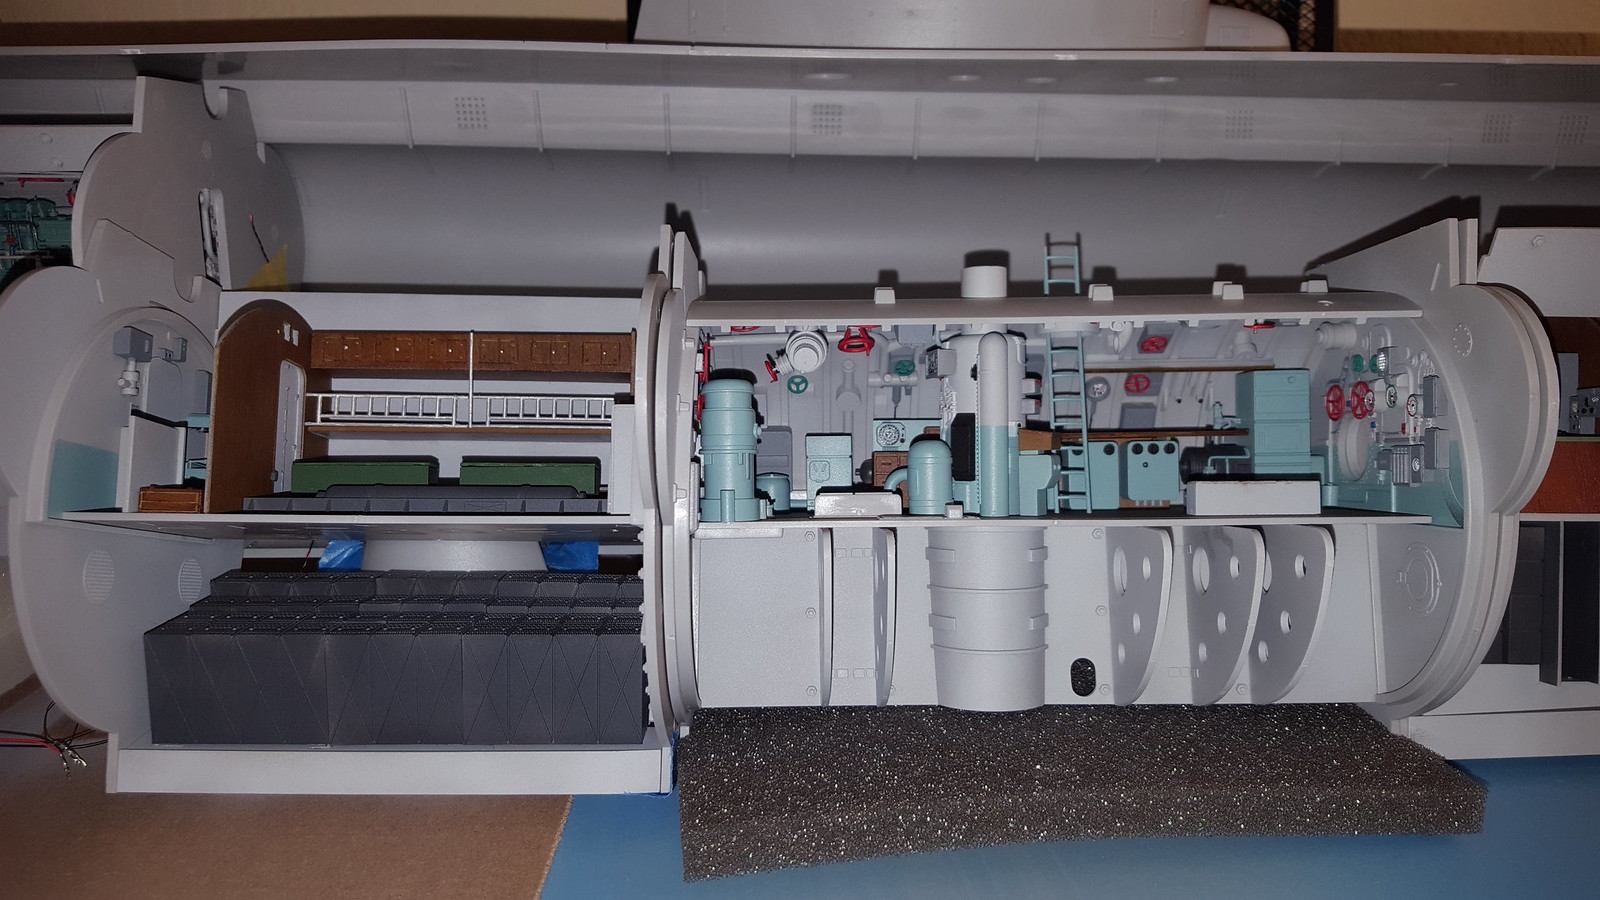
Well here we are back with the “Rear Soldier’s Living Room”… This is a very small compartment and pretty straightforward. The wood effects had already been applied previously and we talked about that process. So here is one of the two bulkheads detailed and ready. Again, there is not a lot of detail on this one.
Here is the other bulkhead. We see the “blue” striping along the bottom edge. I played around with some colors to see what I thought would look good in a darkened area. I settle on RLM 65. I used the Model Air from Vallejo. I really have no idea why that section of the bulkhead would be a blue shade? There is more in another compartment to come. With the exception of the stove, it is also not a lot of detail.
A close up shows the detail to the stove. The small “wrap around” piece is photo-etch.
In the center of the compartment there is another bulkhead. It separates the compartment into the kitchen area and the living quarters. This is the side that will be the opposite wall for the kitchen.
Here is the ceiling section. Again, very sparse. The holes are for the lighting sections I will add later.
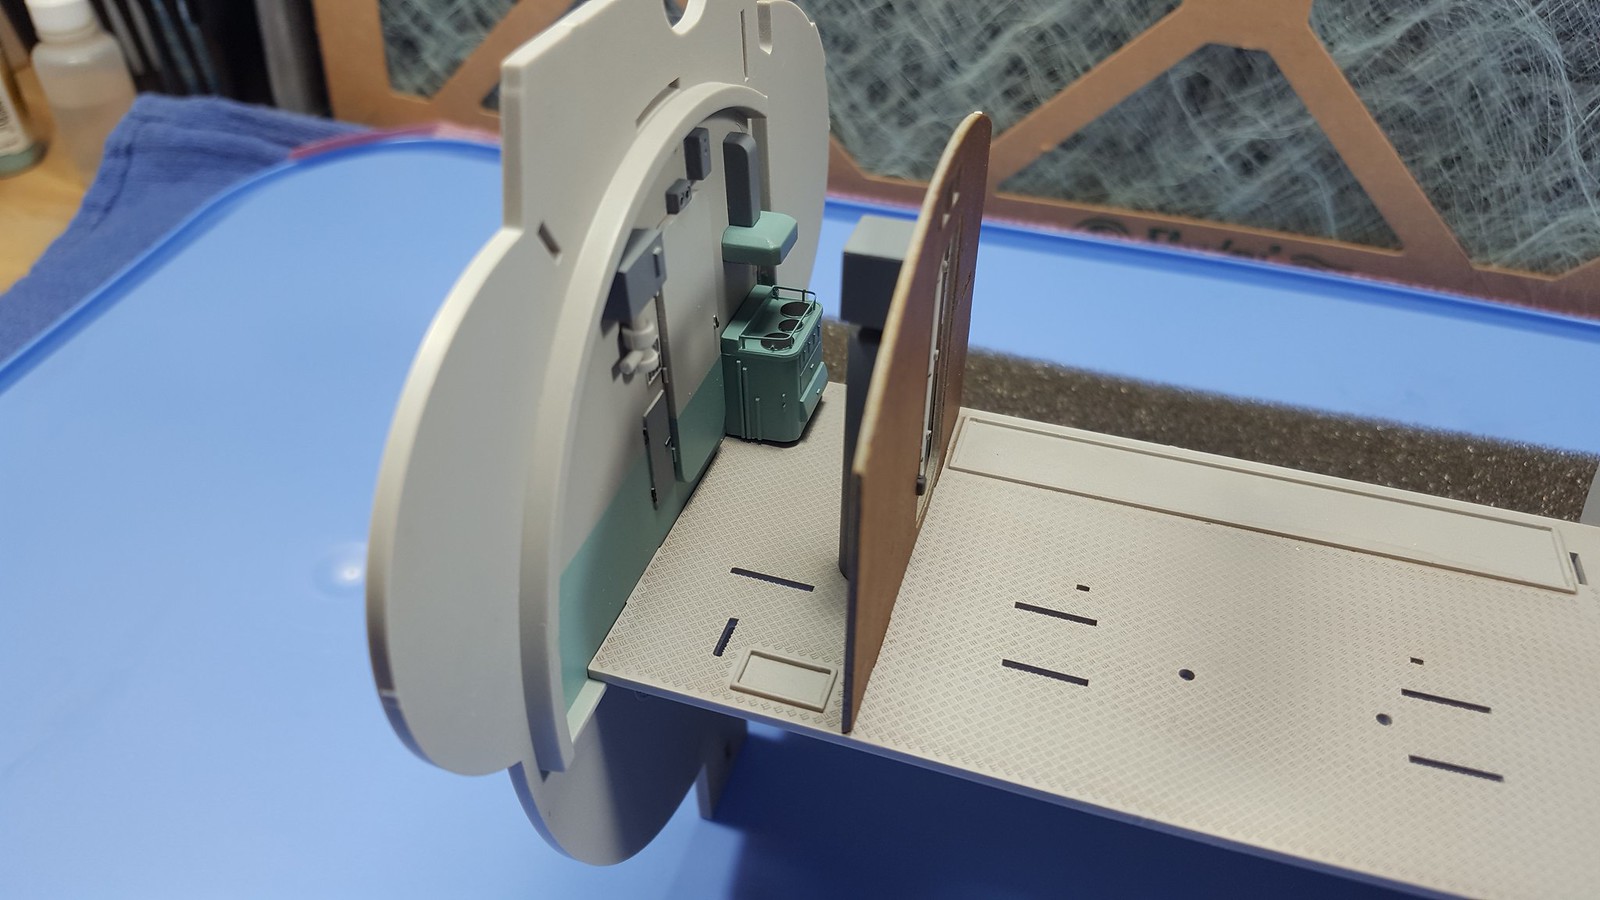
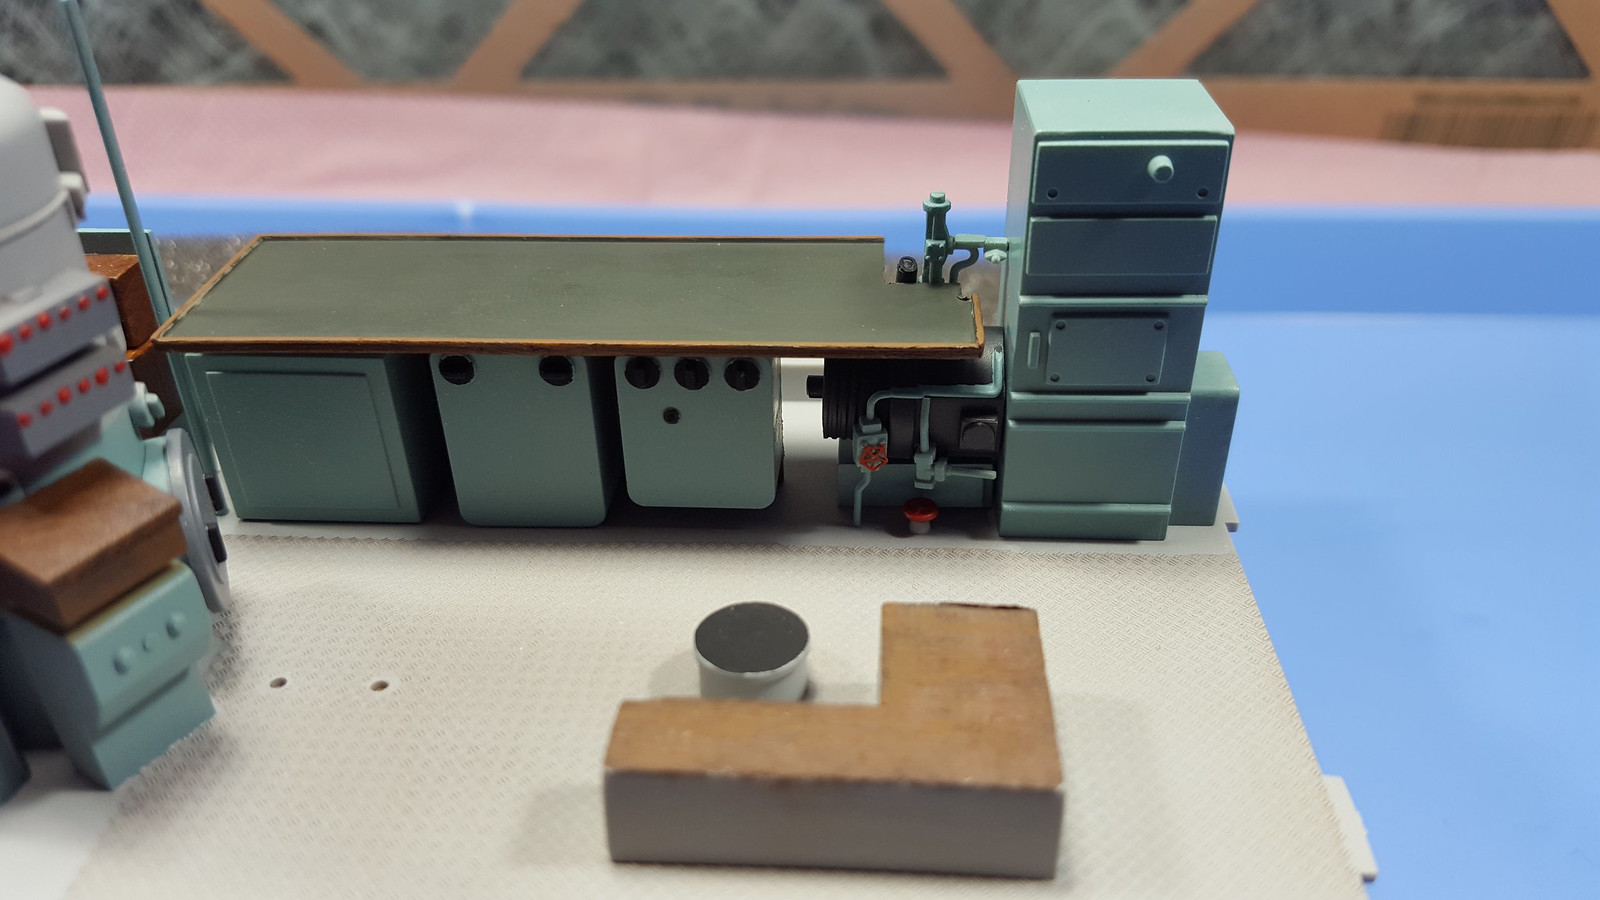
Here is shot looking down showing the kitchen area’s size compared to the rest. Very small. Sorry for the poor quality of the photo.
Here is a sharper view from the front looking into it
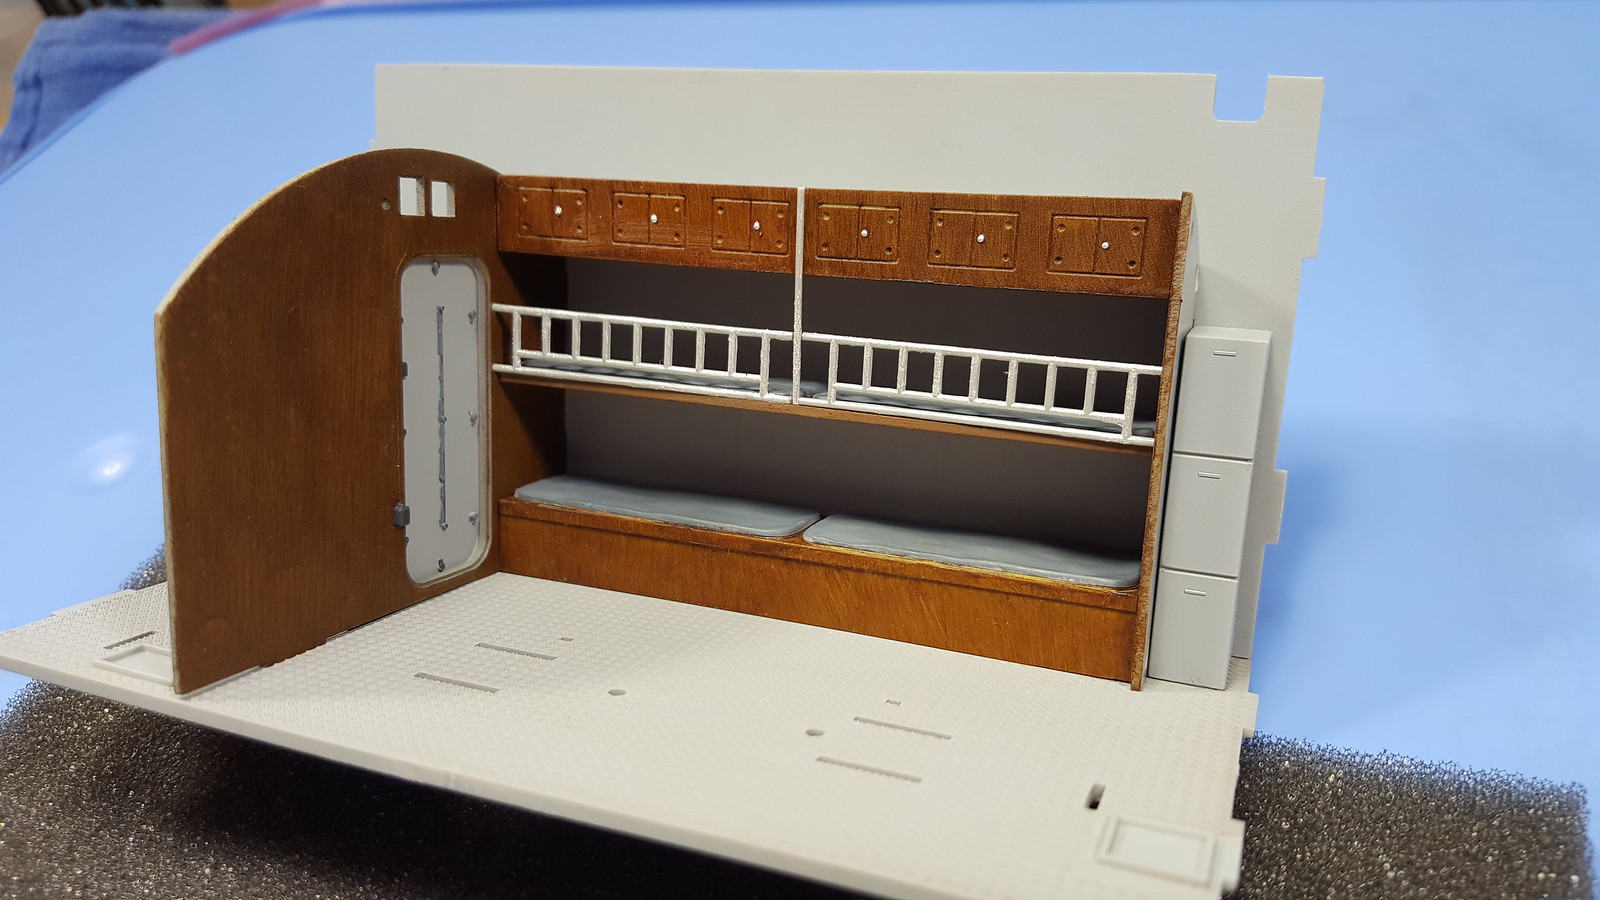
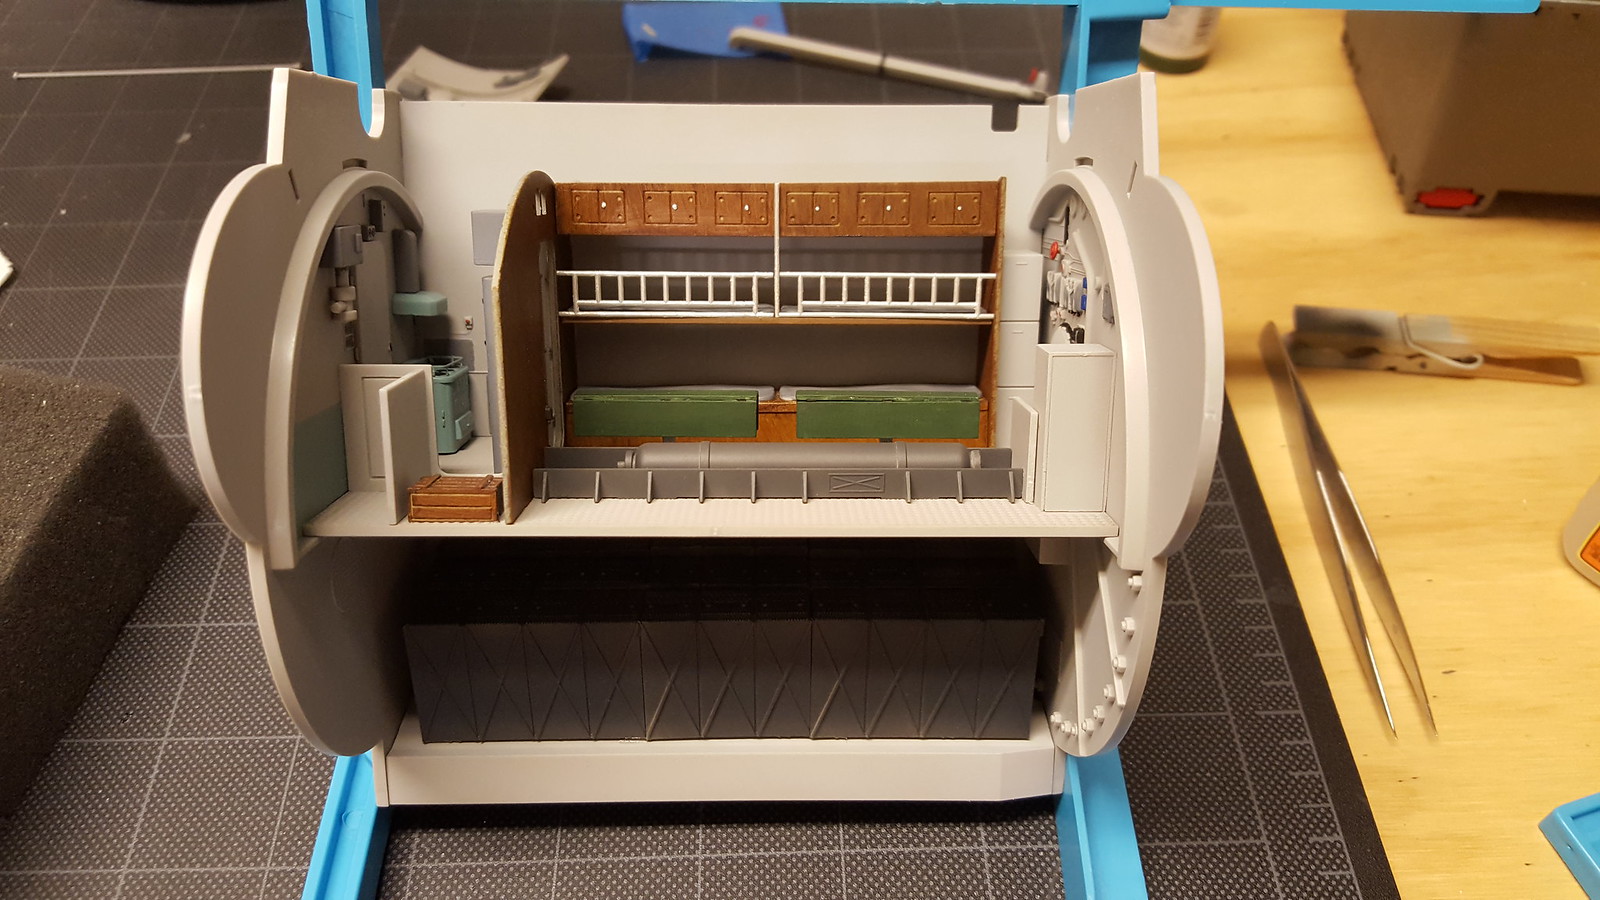
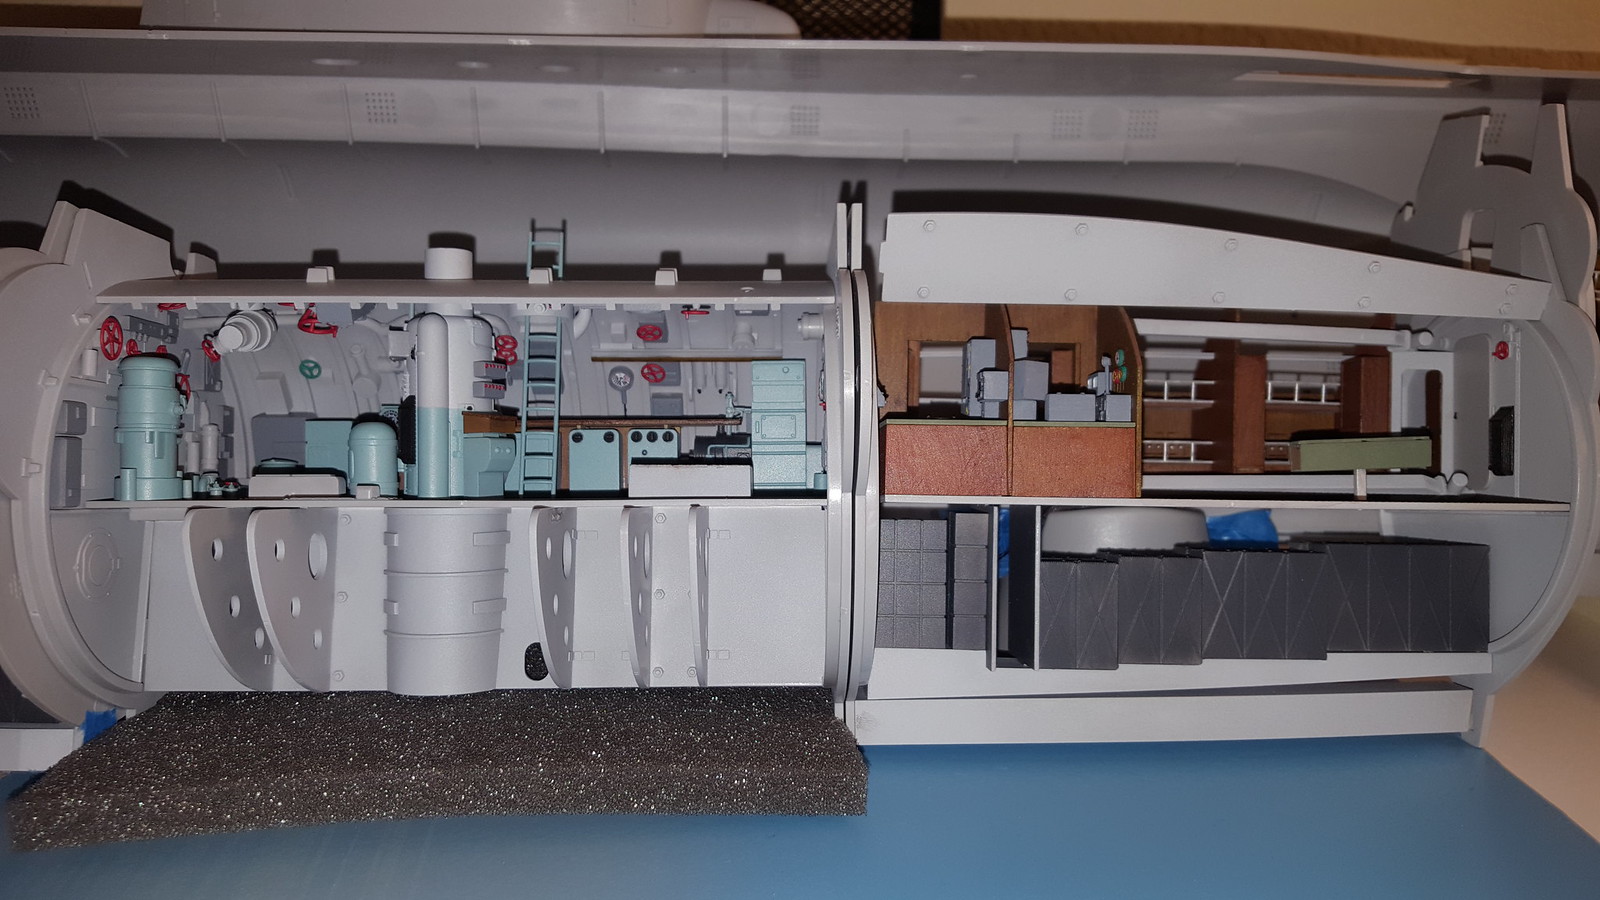
Now I added the bunk sections to the quarters and added the railings and some kind of cabinet. My silver paint is near death and it is very thick and “chunky”, but I painted the railings with it anyway as it will be hard to see that level of detail.
Another couple of shots of the kitchen area. The wood grain effect has come out very nice I think.
I added the two tables and those other parts on the floor. I then added the batteries under the floor and put the back onto the floor and added the bulkheads. As I said, it is pretty plain compared to a couple of the others.
I did not add the ceiling yet as I don’t think there is any way I could get the figures in that small area with the ceiling attached.
That’s it for now. Next up; the Control Room
Actually, you are closer to prototype than you think. Those rail’s were bare steel and got “rubbed” and “dinged” by the crew as they got in and out of their bunk’s. The few I have seen that were painted would eventually get a bit “clumpy” after repeated painting. If your going for that “lived in look” I would give the bunk rail’s a very light wash of Flat Black.
( Please test this first on something Not - so- Importaint . Sometimes my "Advice " is best Ignored. )
And, there IS a reason the bulkhead got the blue strip along it … but I forget why.
I like everything you have done so far, eagerly awaiting the next episode !
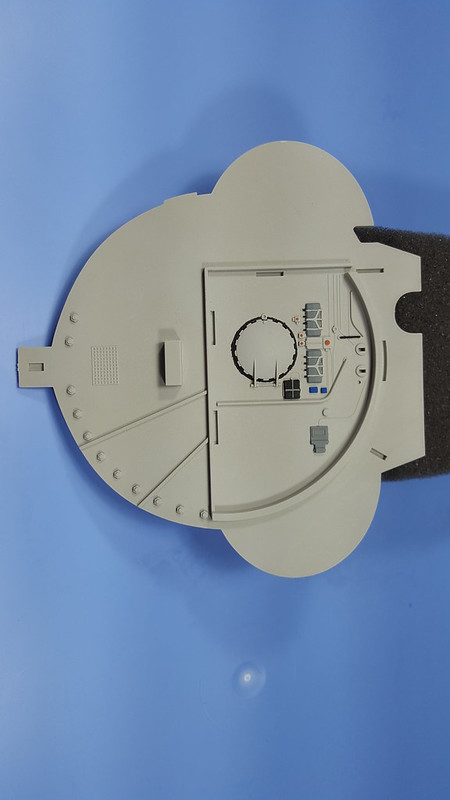
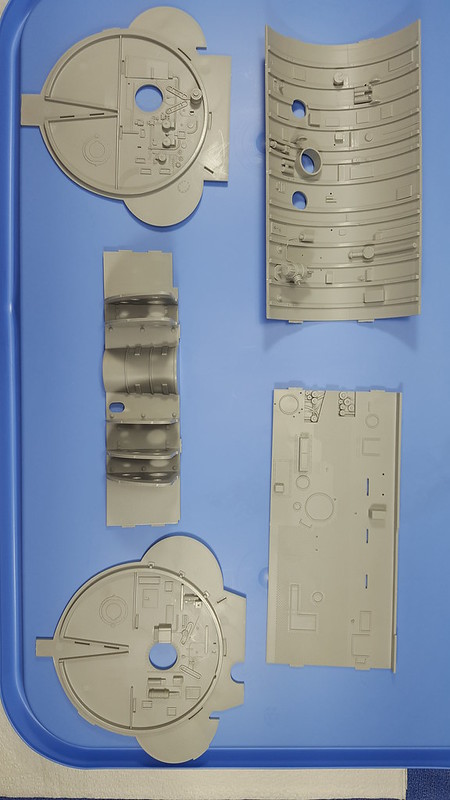
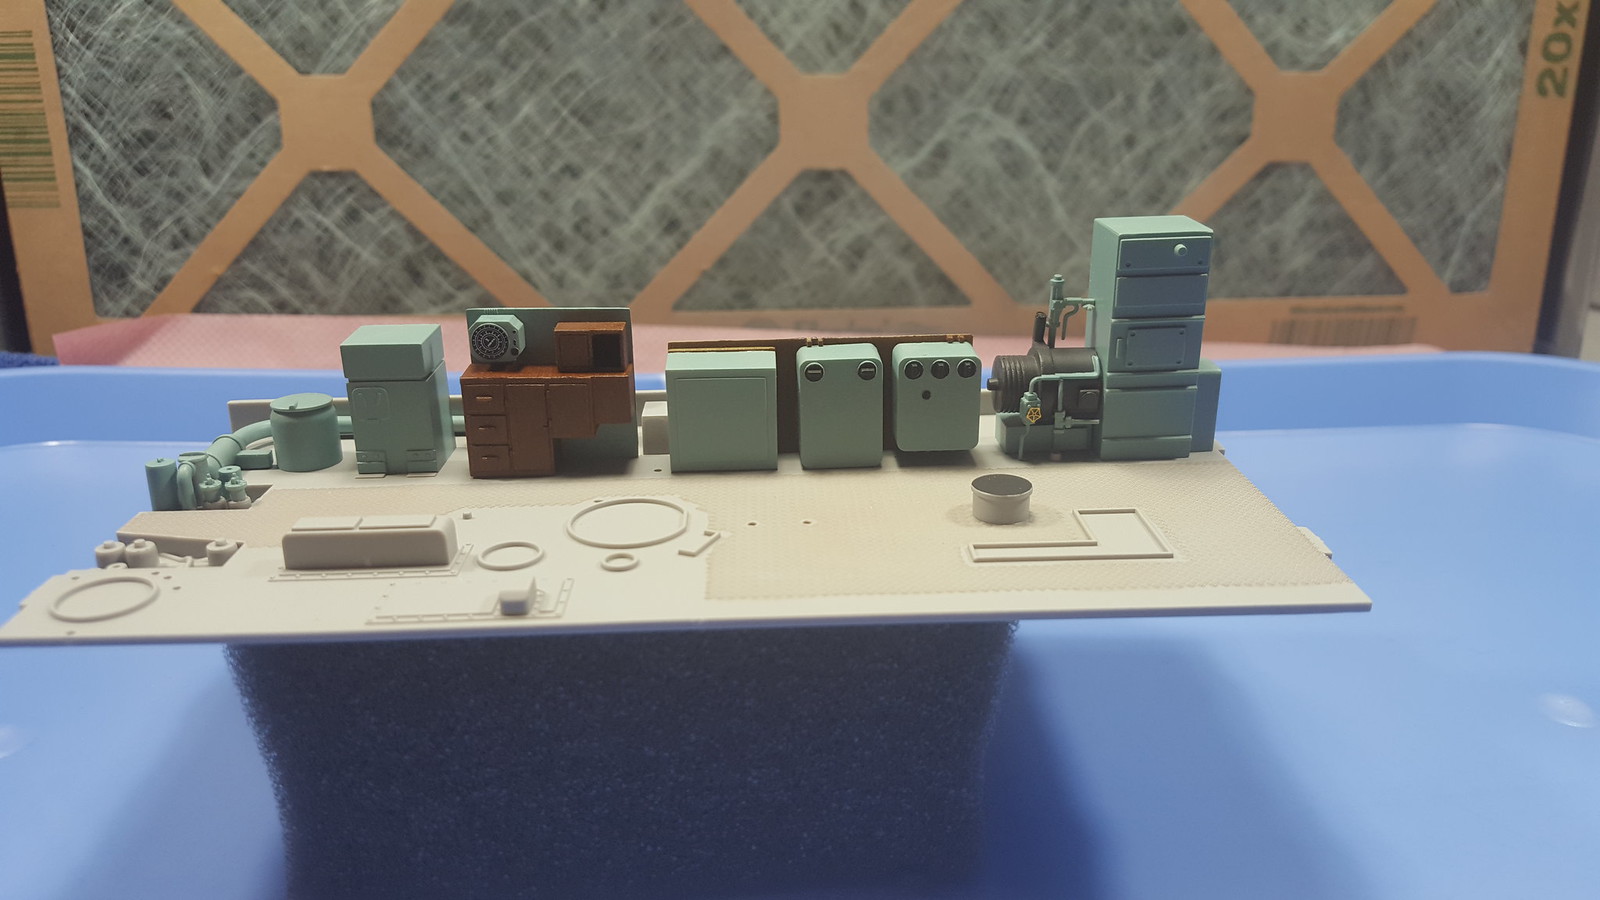
Finally we get to the control room! This one is the complete opposite of the last one. Very busy with lots of parts and colors. There are five main pieces like the others. Two bulkheads, one floor, one ceiling, and one section that sits underneath the floor. These have a lot of pieces that are the base grey color already glued onto them.
Next, here are more pieces that will be added. These are all to be the darker grey.
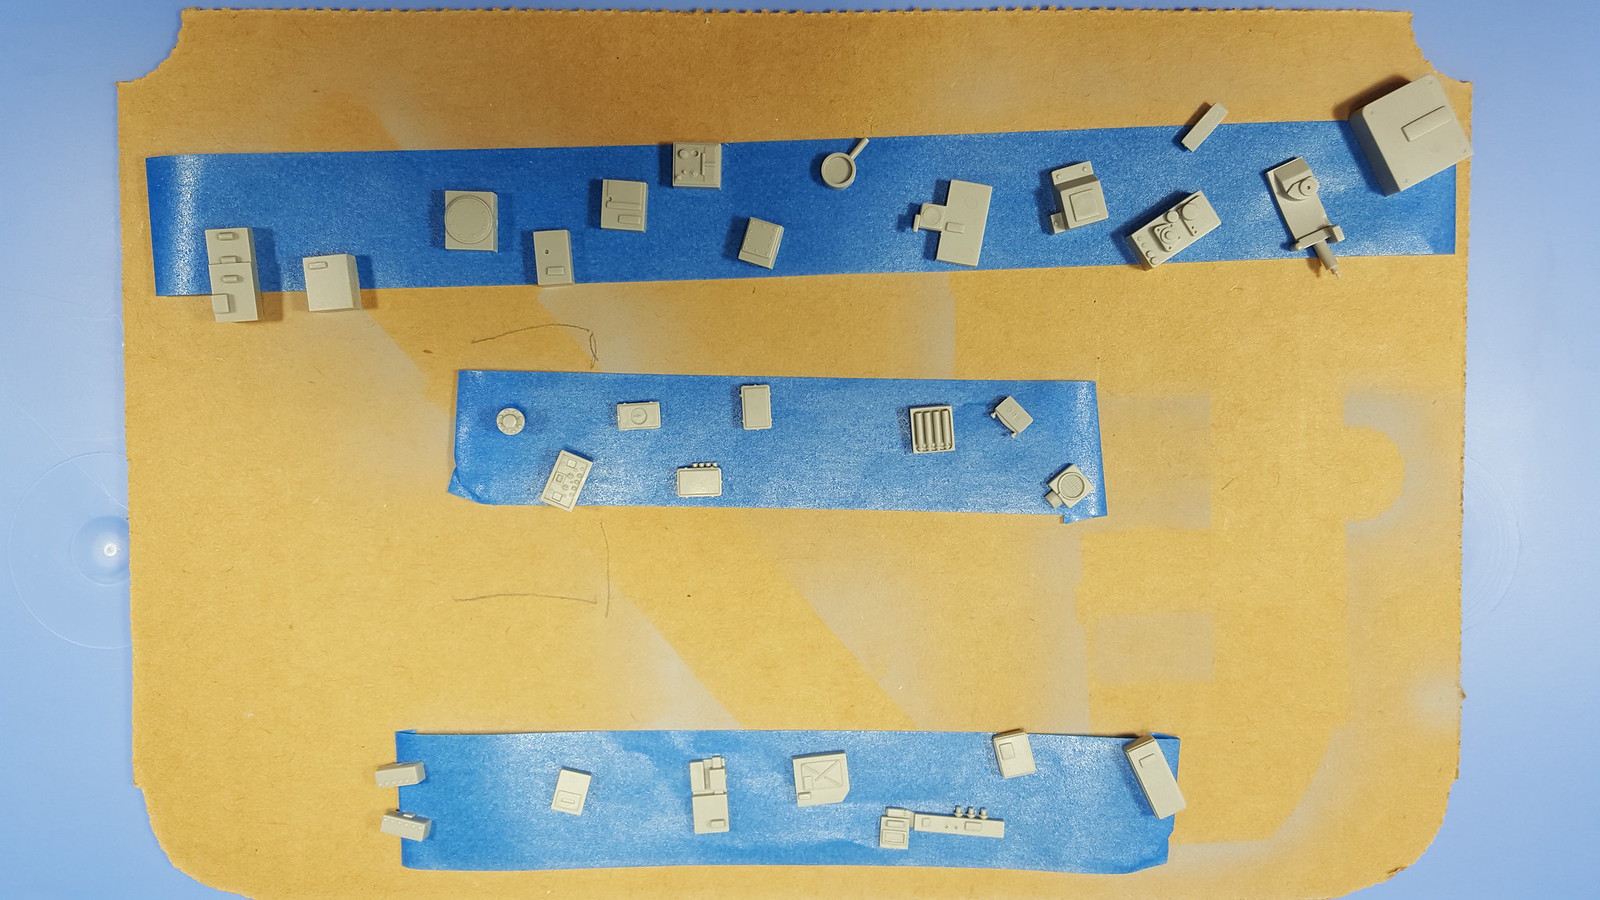
Next, here are still more pieces that will be that eggshell blue color
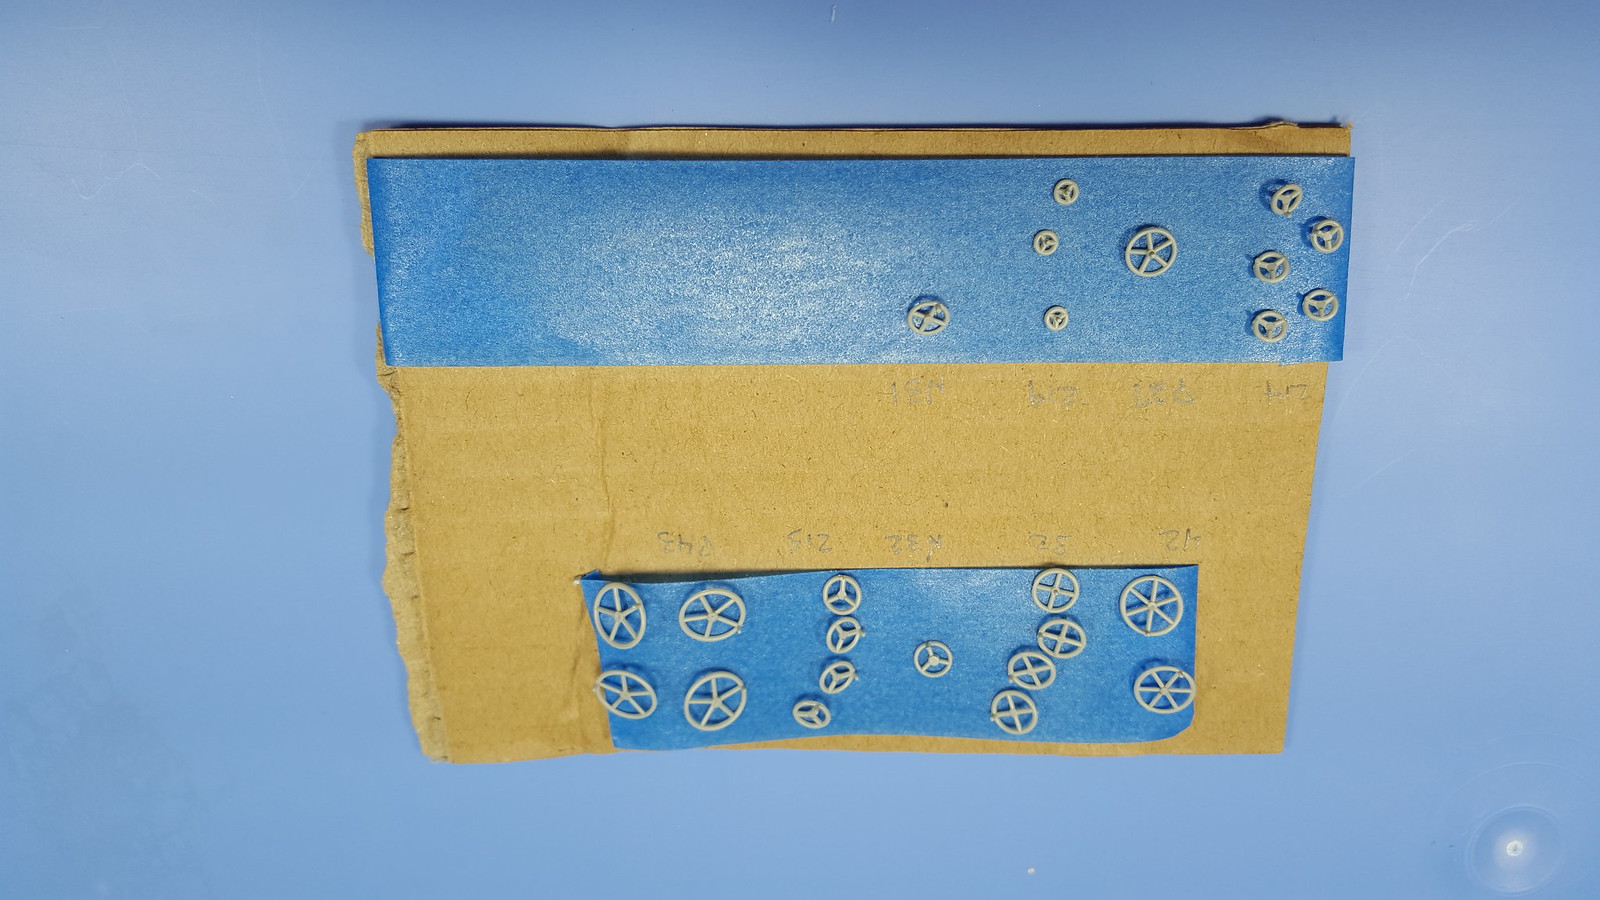
And here are all the valve wheels! These will be red and green. The numbers correspond to the sprues so as to match them later to the instructions as some of them are very close in size.
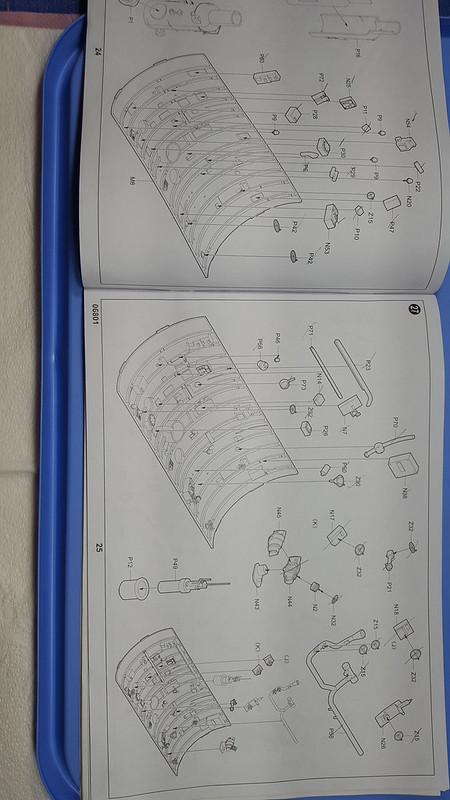
Here are the instructions showing just the ceiling and all the parts that will go into it. Very busy.
Here are the instructions showing all the pieces to be added to each bulkhead. A variety of colors and decals too.
More to come as the control room is very detailed and requires a lot of work.
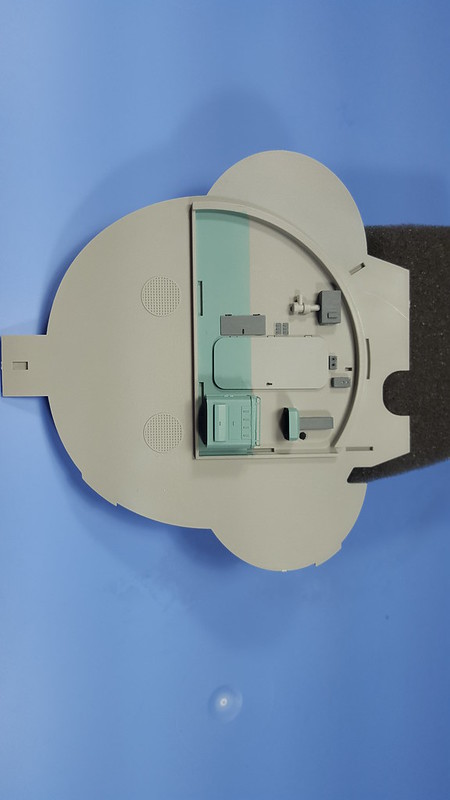
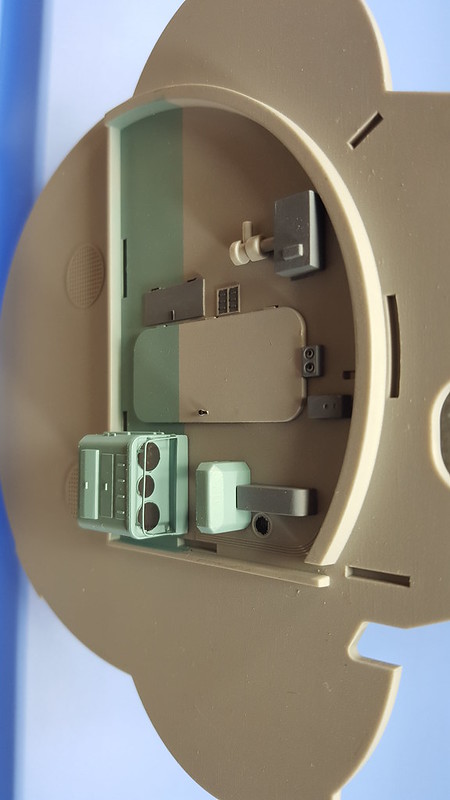
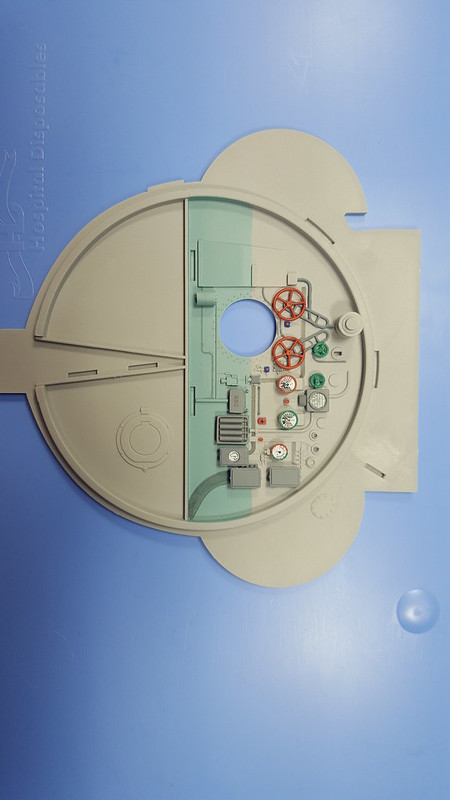
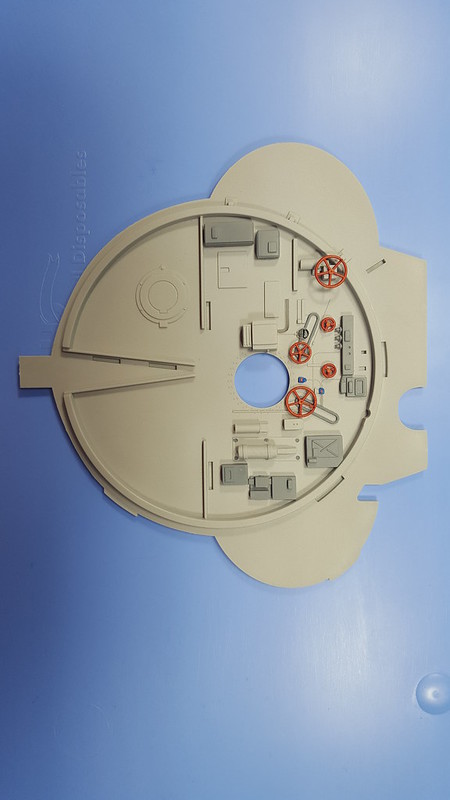
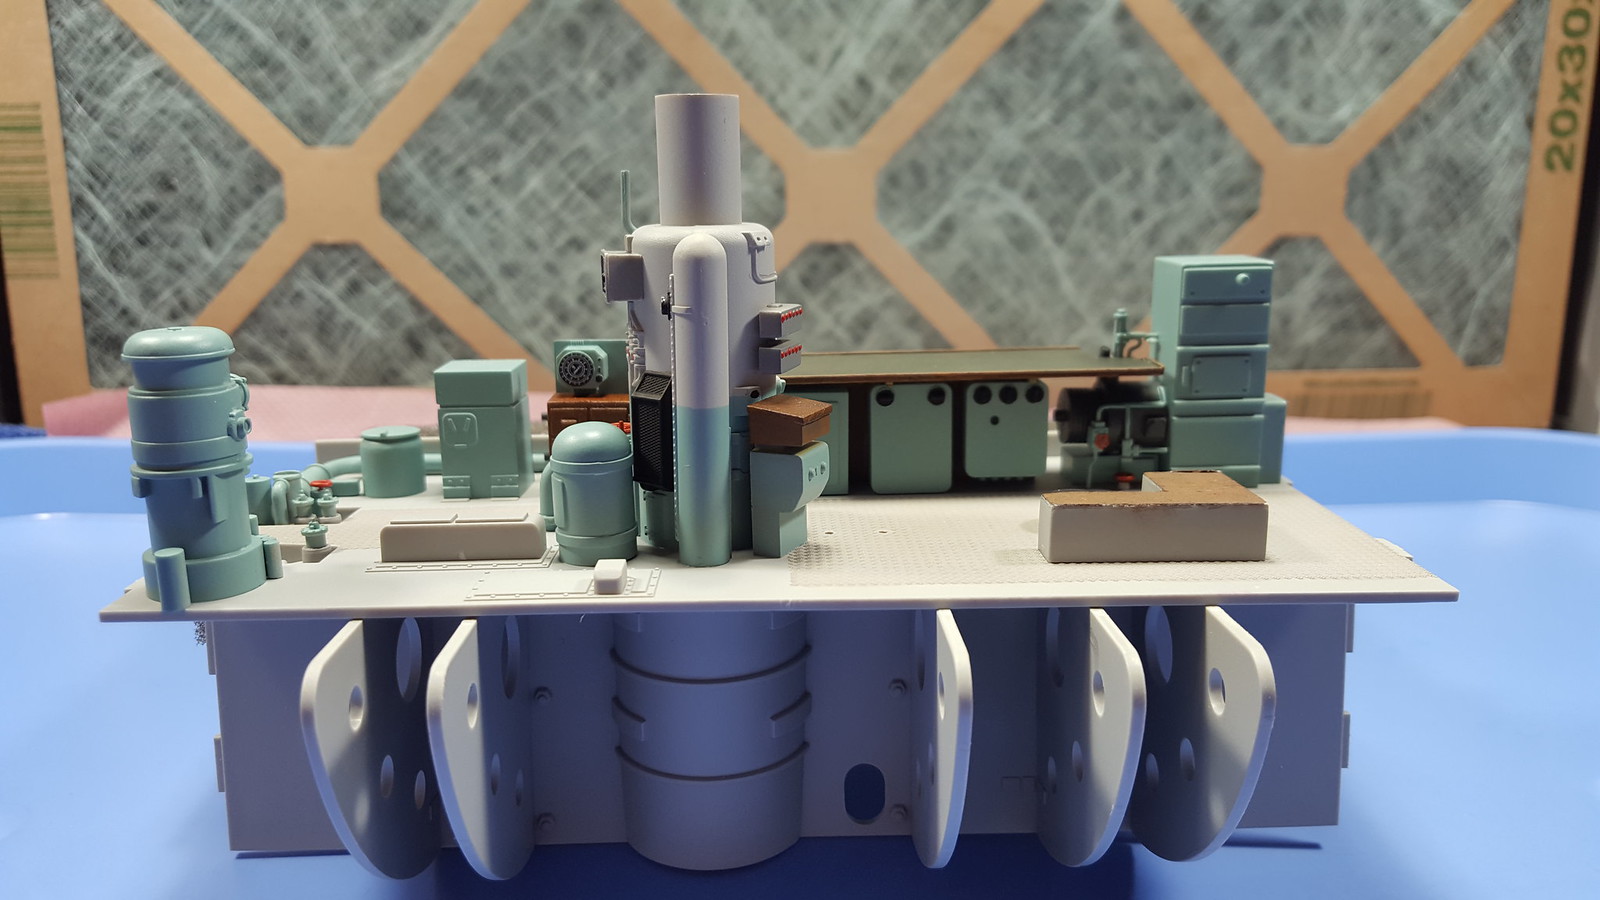
OK, well I have finished the Control Room for the most part! Here are the two bulkheads completed and ready for assembly:
Here is the ceiling section. Wow, lots of parts on this one.
There are a couple of overhead pipes that run across the top that will come in at the end. Also there are some sink marks that I didn’t clean up but they won’t be seen unless you are a contortionist.
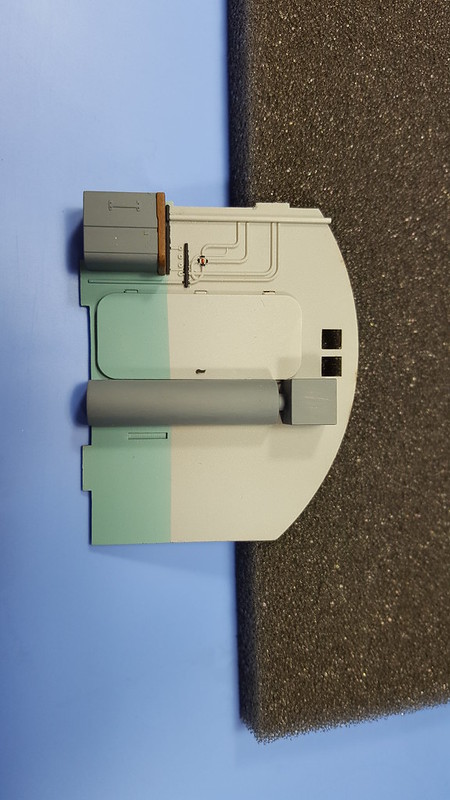
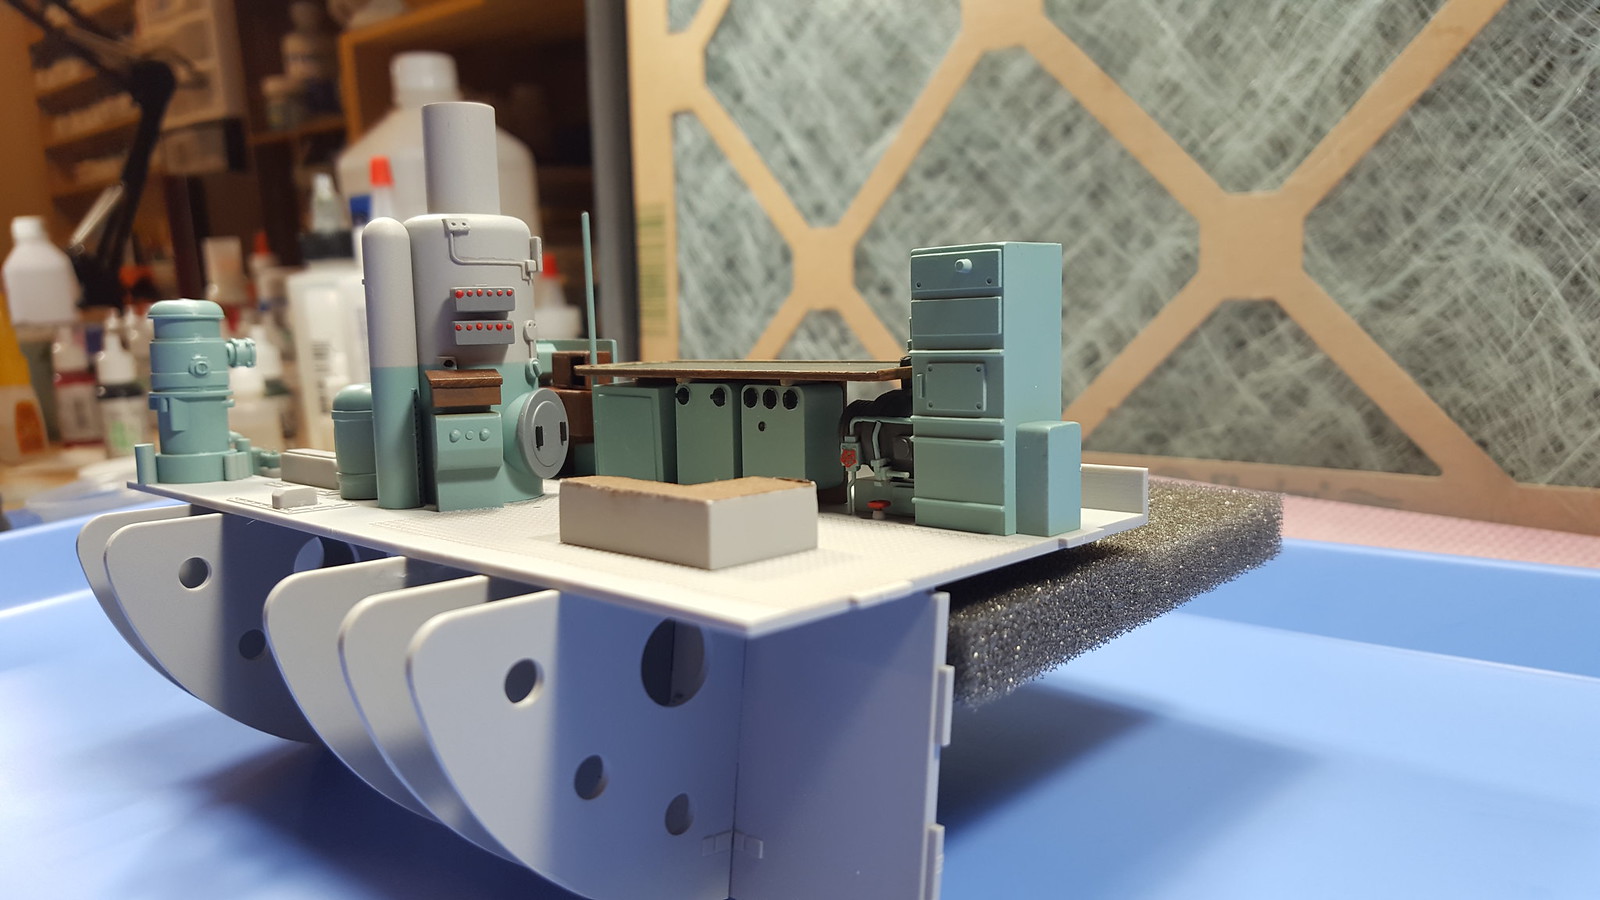
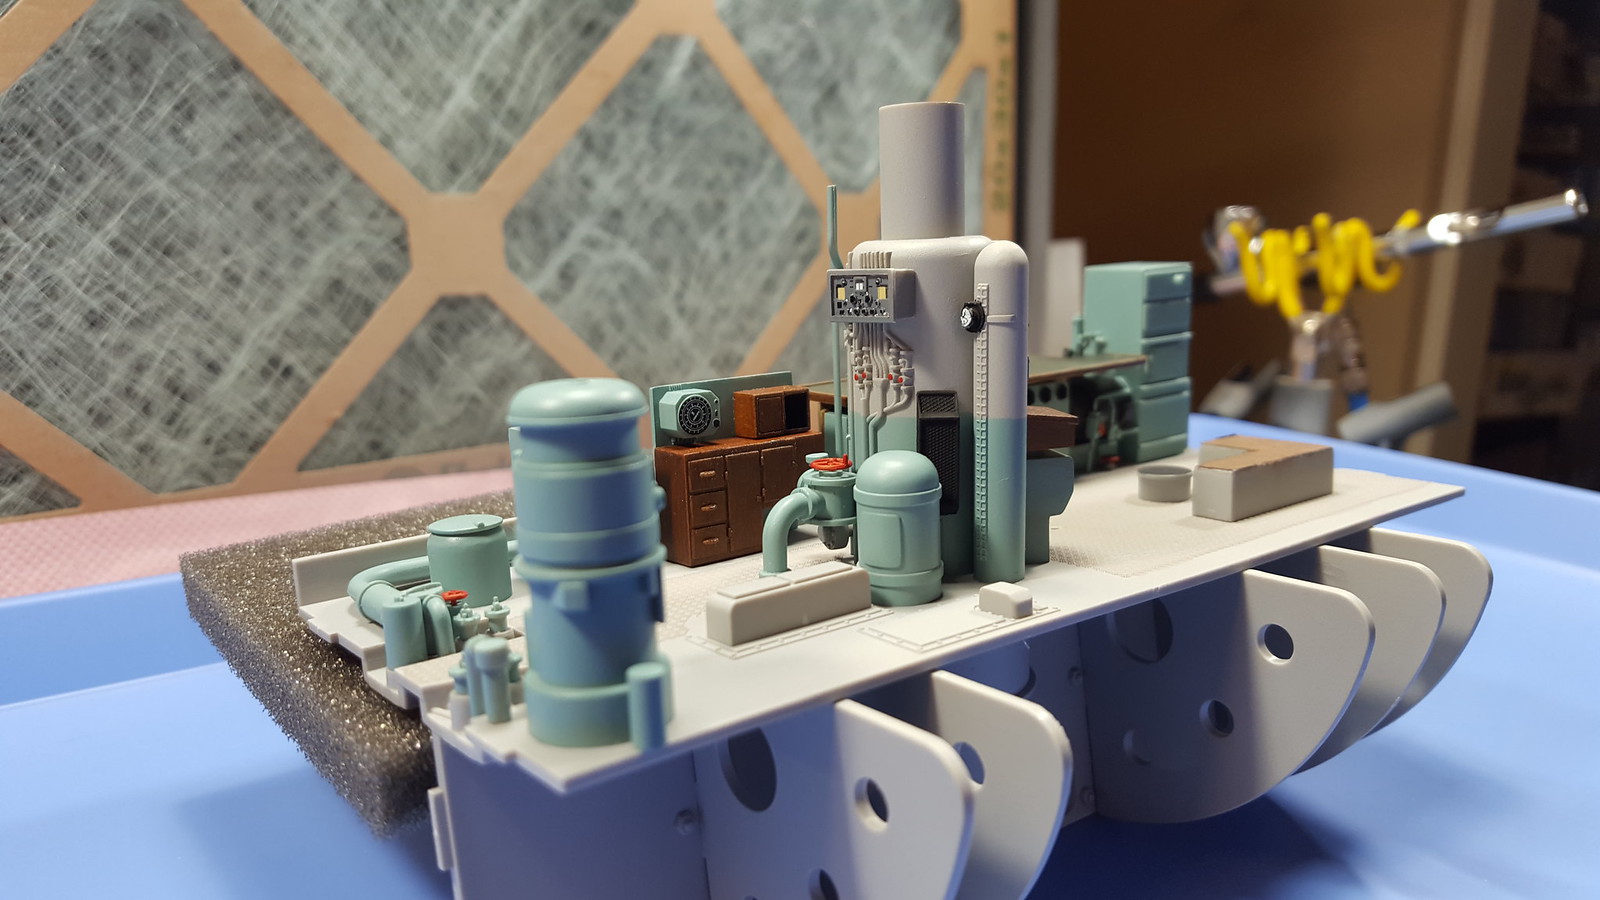
Here is the floor section coming into shape. Many pieces so I thought a few shots in progression would be in order.
Now I put it all (almost) together. There are a couple pipes across the top that I am not going to add yet, and the whole thing is taped together as I want to get the figures all settled first. There will also be four lights in the ceiling as well. The smaller periscope is also not added.
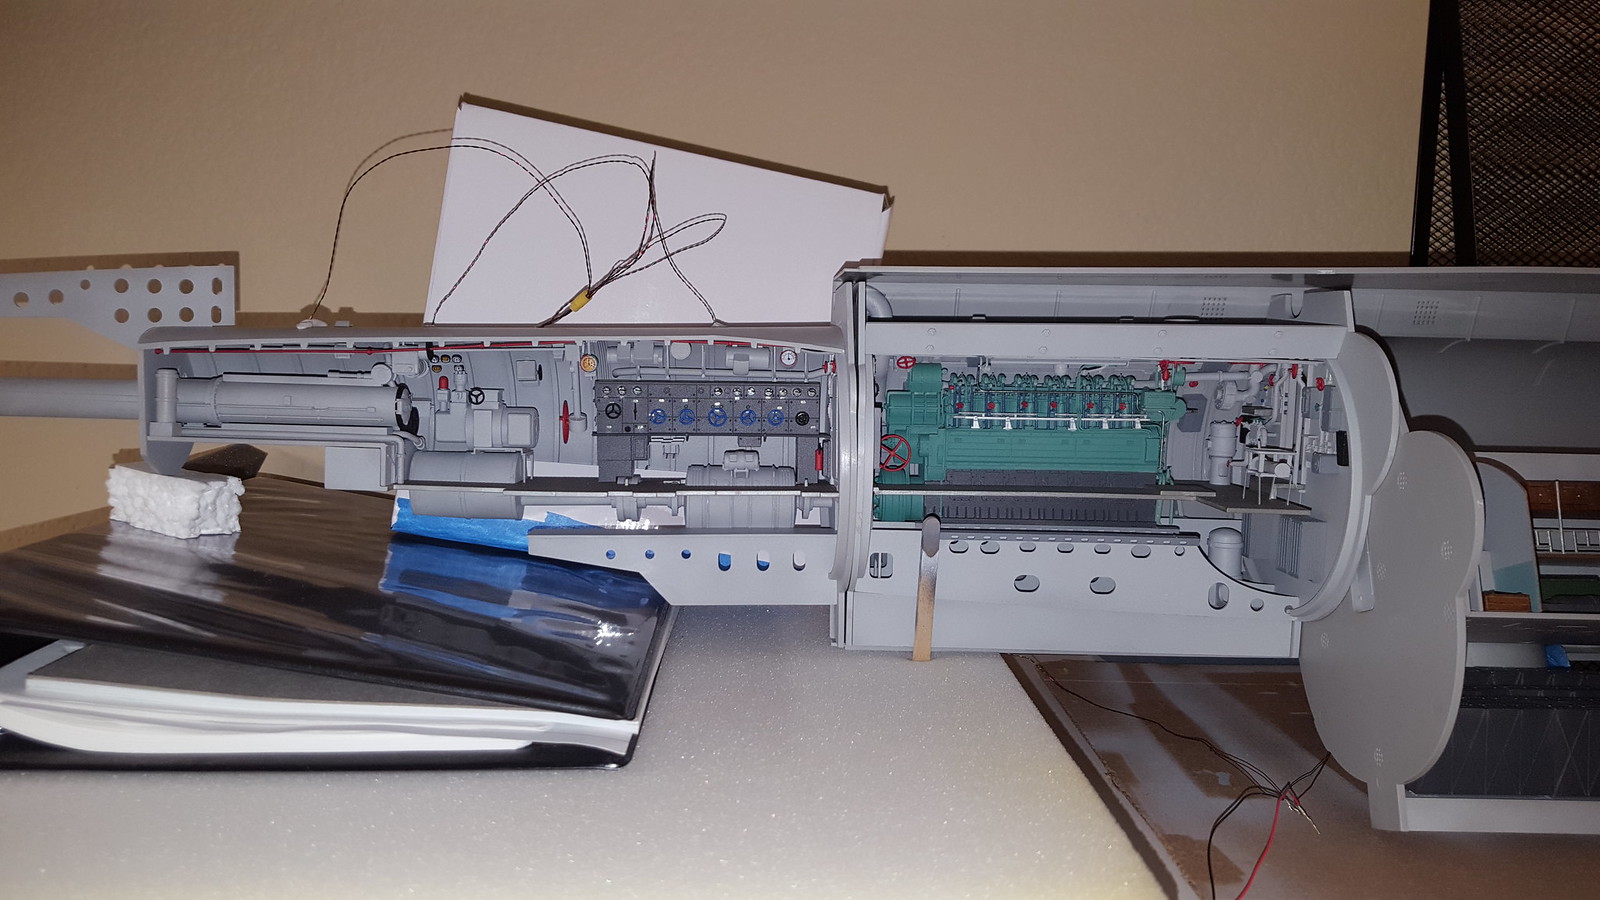
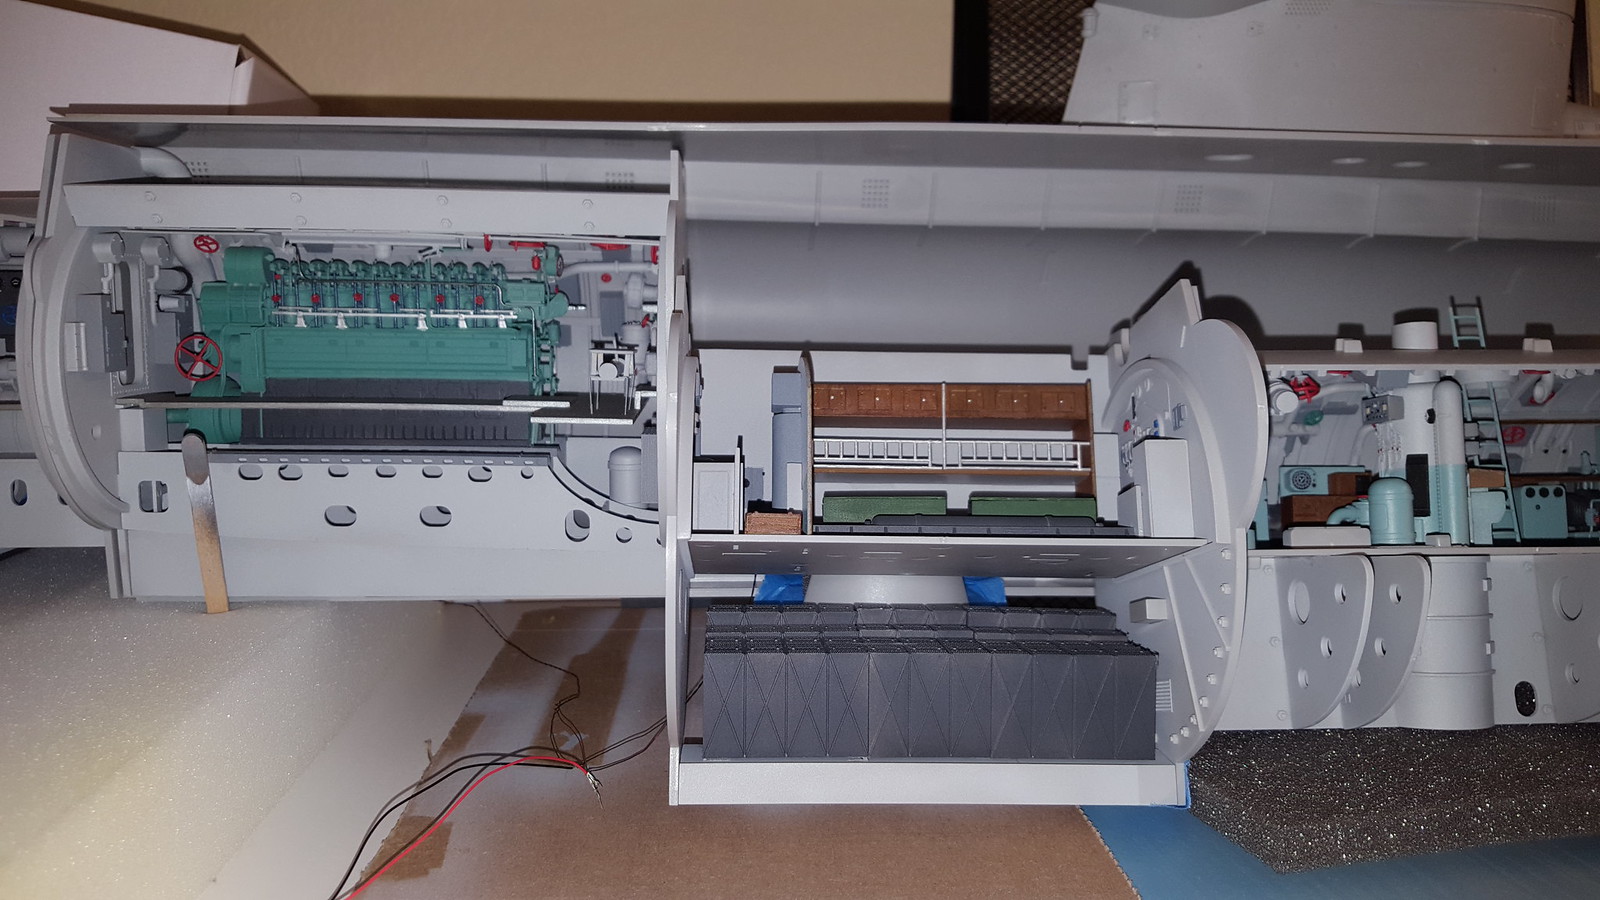
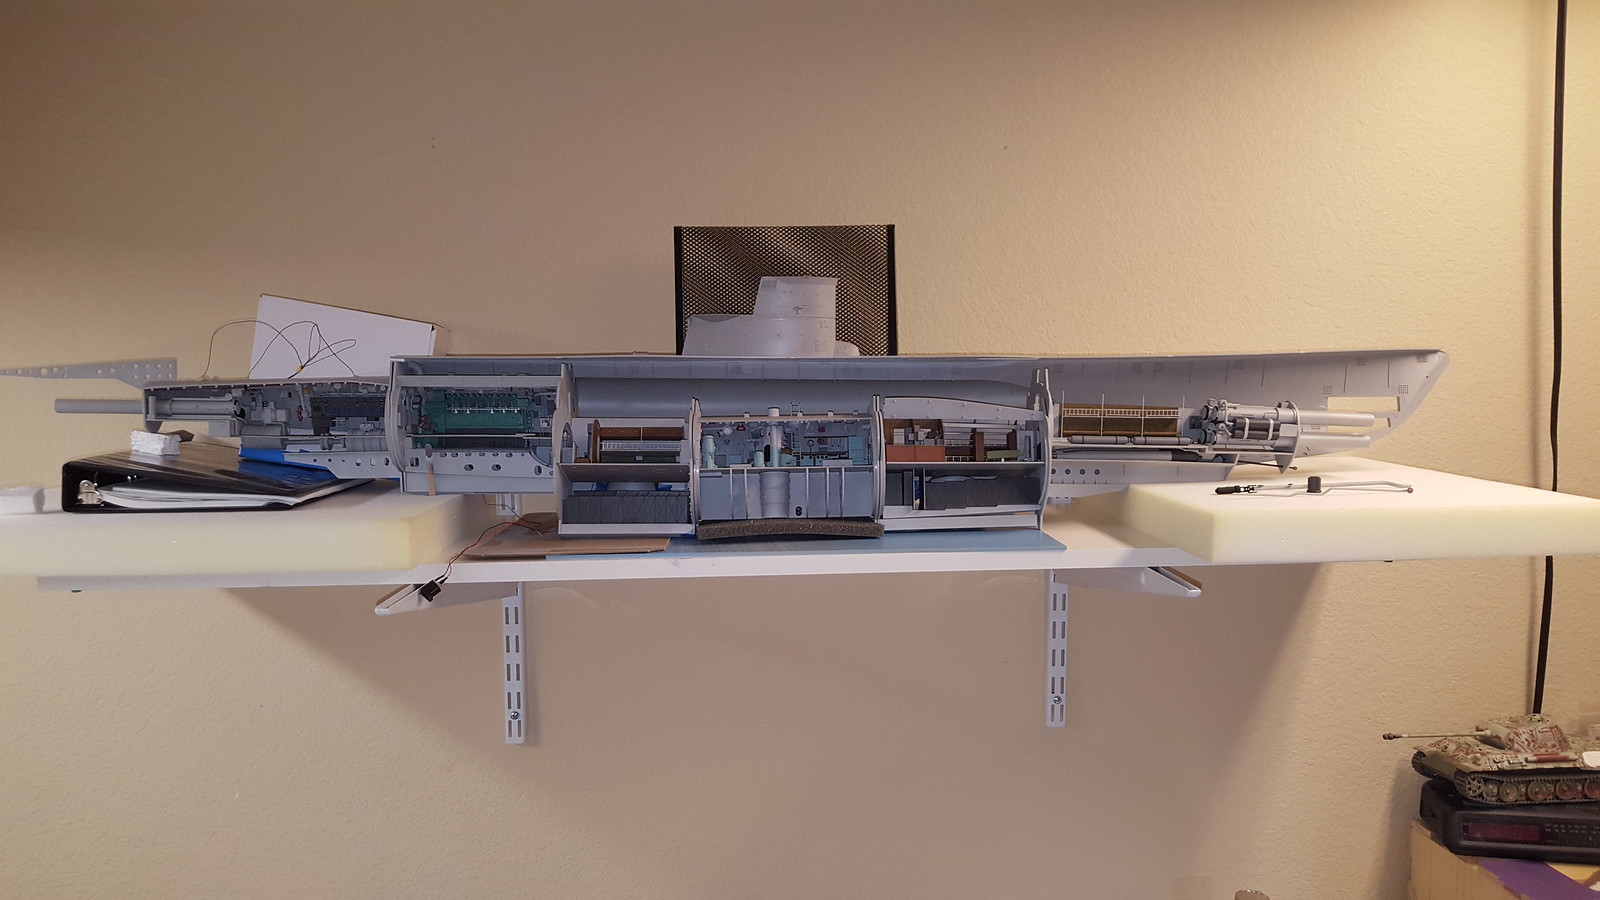
OK, now I added all the compartments into the solid hull section. They are not all lining up in there as I had to rig the hull to stand up but I think you get the idea. So here is the tour from back to front always keeping the last compartment in the next frame for consistency.
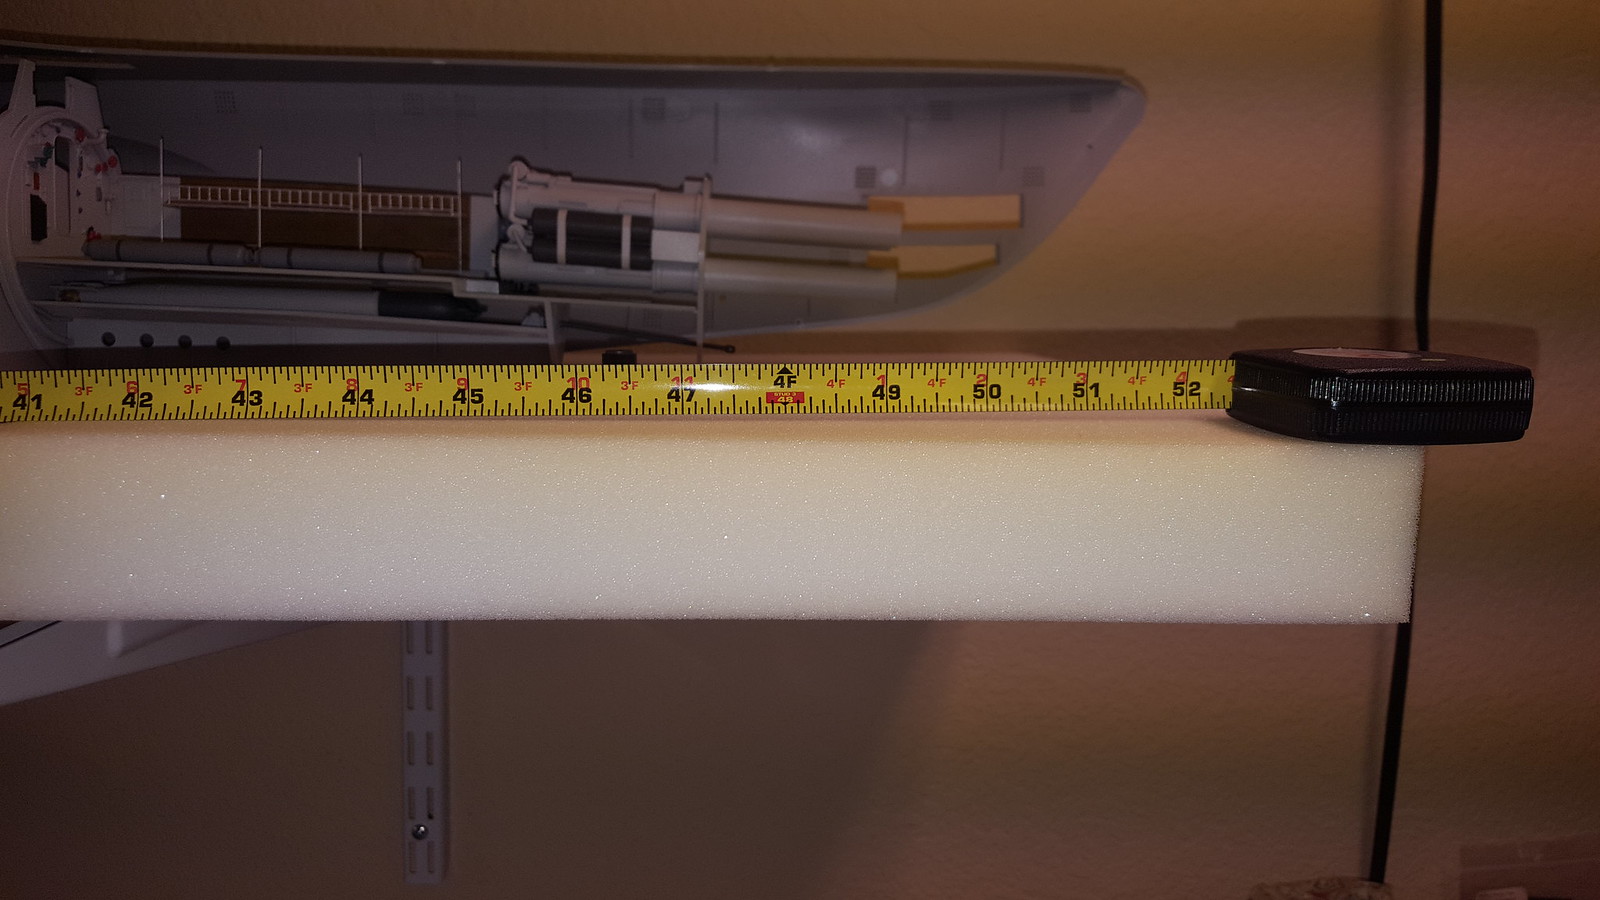
Lastly, here is the whole thing. I have to get far away to get it all in.
You can see she measure over 52”!
Well, there is lots more to do. I think I will tackle the figures next and start to get some closure on these compartments. I also ordered the flag set from Eduard and also the resin 88mm deck gun. Until next time, thanks for checking in.
john
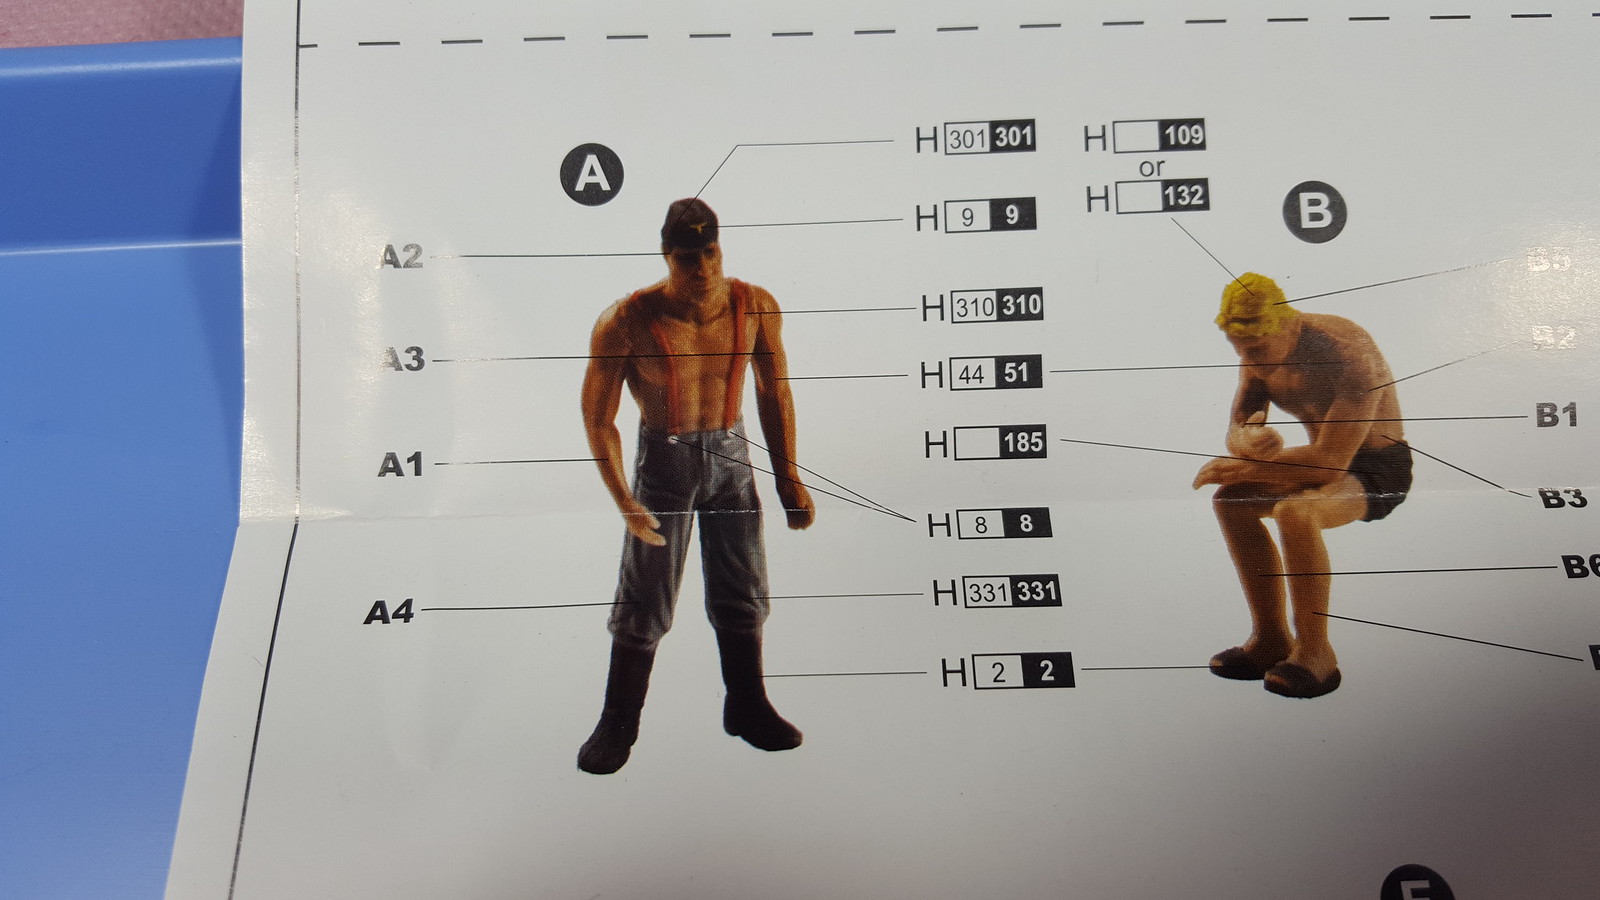
I decided to start on the crew as it will be a long one. There are 48 figures included! My apologies for earlier saying that I don’t know where they all go. there is a separate one-page large color sheet that shows what figure goes in what compartment. It also identifies the responsibility of some of the figures. The figures are identified by a letter and each letter corresponds to between 4 or 5 pieces to put it together and also the paint callouts. Each letter is then assigned to a compartment. Examples:
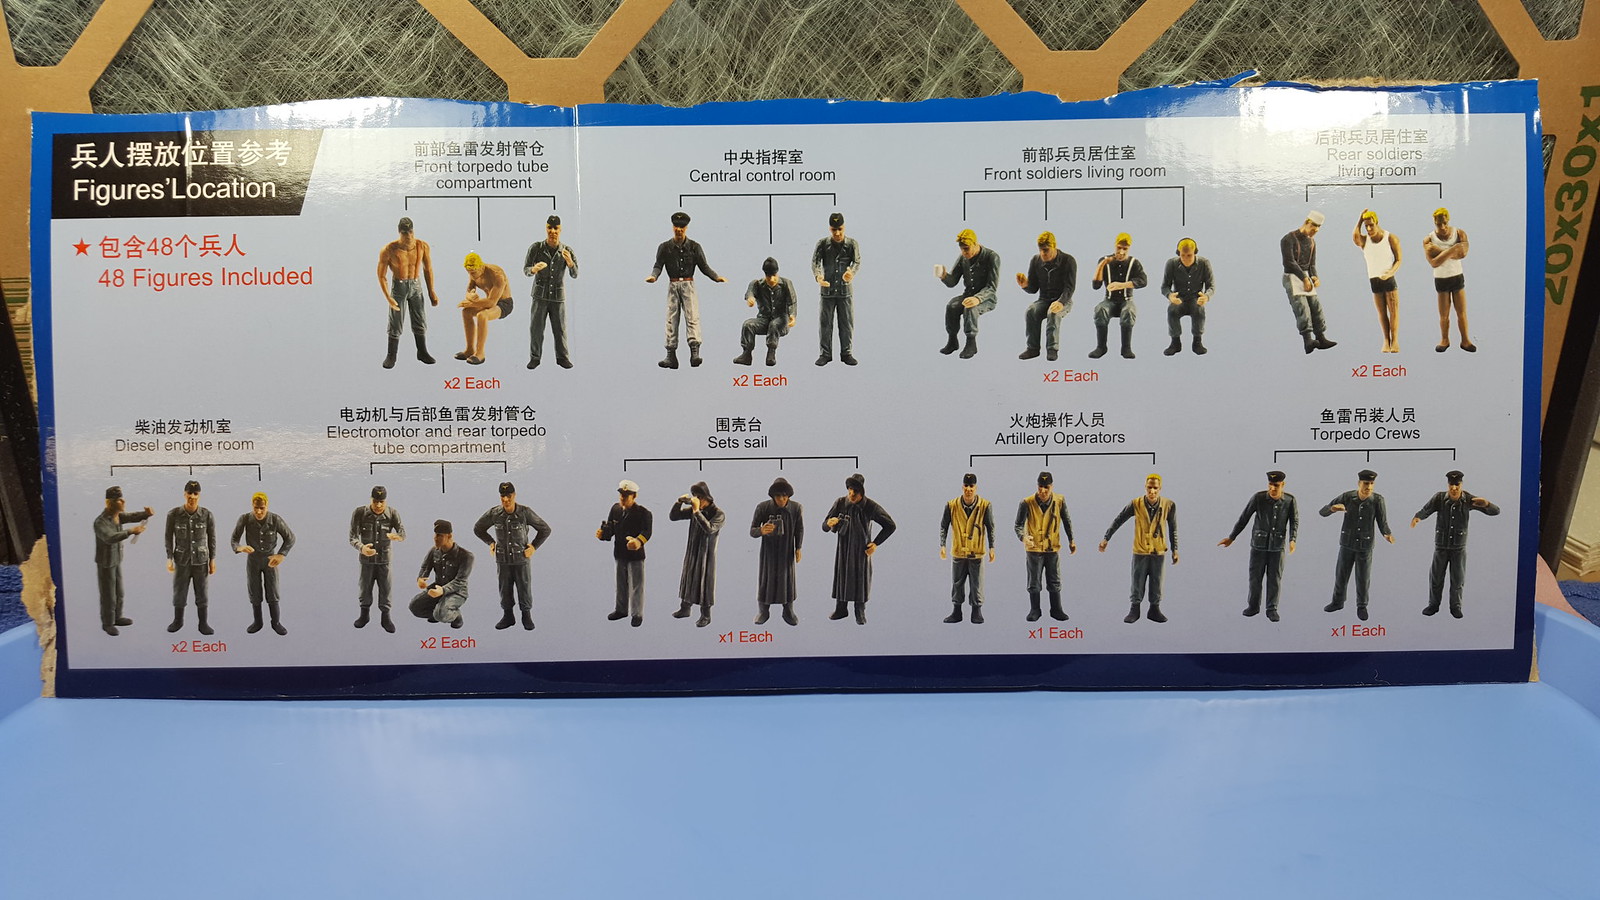
The side of the box gives a pictorial overview of who is in what compartment. There are 2 of each of 19 crewmen and 1 of each of the remaining 10. So there will be redundancy in most compartments. At the small scale here I am not sure that is a big deal.
What is a big letdown for me is the seams on the figures. Again at 1/48 I am not sure it is even worth sanding them all off/out as it will take a couple of hours of nothing but messing with them. Here is a shot of one of the bodies:
Oh well, perhaps strategic placement will avoid seeing too much of them.
Dear John, I’ve just bought this kit and I’m waiting to receive it. In the meanwhile I woulud like to start buying the necessary paints. Would you post the color chart for the sub please??