to be honest i think this is where the artistic license comes in .as there is no real solid proof then you can sit either side of the fence and not be wrong.the perfect example of this is the whitman episode in villers bocage and to which tank was his ![]()
I agree…most who believe that this area was zimmed write that it wasn’t grooved but rather troweled on in a smooth pattern…I’ve seen it modeled both with and without, but when it was modeled it was mostly portrayed as smooth, but it is still an unresolved question…
Interesting point, and well taken. I think the zimmerit issue is a little more defined in this case, however. There are quite a few pictures of these tanks about, most of them are very clear in this respect. There are clear shots showing a bare plate.
But, of course, you are right, one can present the work according to interperetation, call it art if you like. My experience is that as long as the paint and weathering are eyecatching, the little “technical” details, that so many obsess over, fall by the wayside.
Again, very nice basic assembly work.
Steve
Speaking of technical details,I have no idea what part was upside down in one of your first pics.That one and the corrected version look the same to me.
How is it working with all those tiny PE strips?I haven’t attempted that type of PE building yet.
Can’t wait to see this cat finished.Great job so far.
the triangular bit between the stacks ![]()
the p.e is good dragon supply a master on one of there sprues which make the brackets easier
i have just bought the 5 speed hold n fold which is far supior thn the etch mate
and now i am waiting on the etch grip to arrive new way of glueing P.E. without superglue
a few more update pics for your enjoyment:)
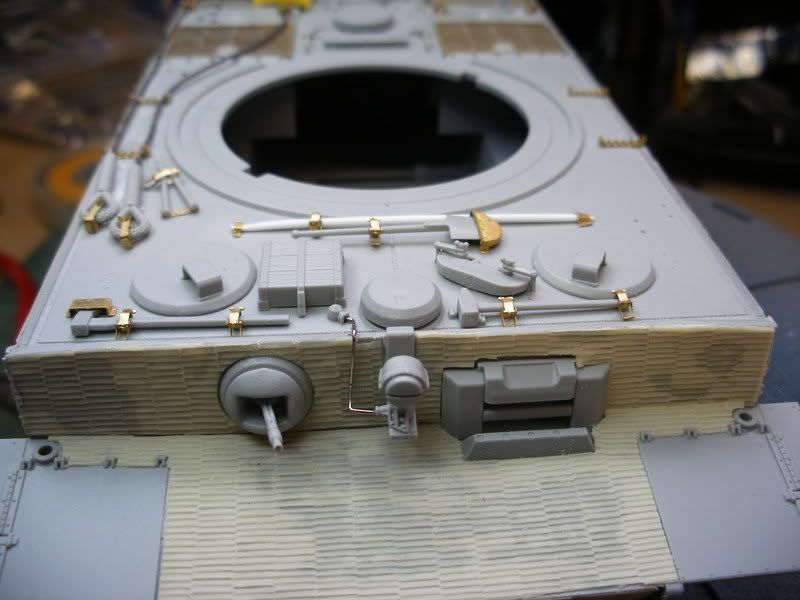
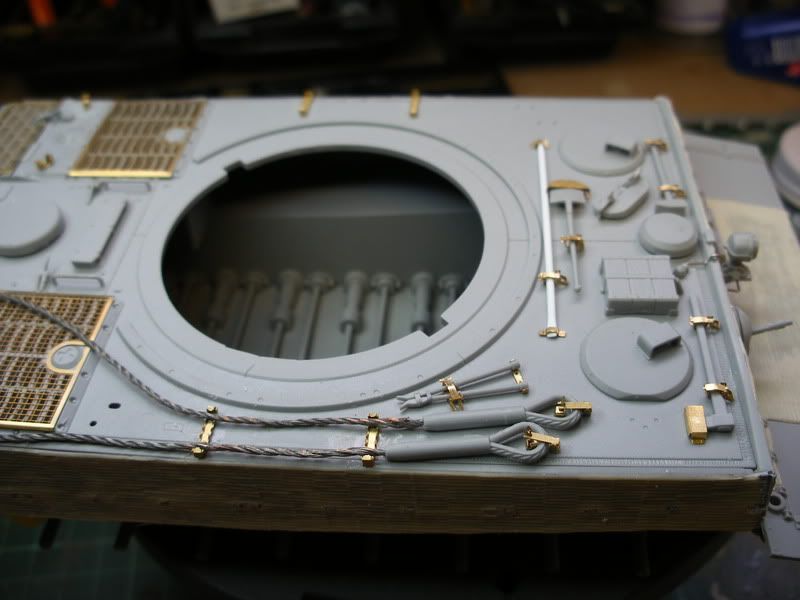
really enjoying this probably why its taking so long making the most ![]()
I agree, Shrooomy; take some thin CA glue, and a fine-tipped applicator and use that to stick some CA under the parts that are lighter than the rest. It will seep under by cappillary action. I’d be afraid that if you left it like that you might inadvertantly chip it when you might not want it to–like after the model’s painted and an edge catches on something…
Shroomy~
Looking precise so far! I’m doing this same kit right now, but my PE doesn’t usually turn out nearly as well as yours has.
Love the Zimm, by the way. I didn’t want to pay for the Atak Zimm, and evidently the Cav Zimm for this kit is extinct planet-wide, so it looks like I’m gonna be green-puttying it, which scares me. Too pricy a kit to mess it up with sloppy Zimm, ya know?
Another BTW, if you decide to install the TWS interior, let’s talk first. It’s not a great fit. Looks perfect until you test-fit the top deck, then you find problems.
Are you doing the kit tracks?
no need for the green putty!

The molding doesn’t look right on the turret, does it?
Maybe it’s not a good picture, but it doesn’t look as good as the KT’s.
Hard to tell…a LOT of Tiger I’s had several different “sizes” of zimm lines…typically you would find a coarser/flatter and thicker pattern on the turret and a finer pattern on the chassis…
…the initial pics of the KT didn’t impress me either but when I got the kit I was sold…
I certainly hope that an aluminum barrel is included
[:O] DRAGON PUT ZIMMERIT ON THE FRONT HULL PLATE! Oh no! o well you could always sand it off. looks great so far I did this same kit a couple of months ago. Your amazing with PE! I tried their PE tool brackets and got frustrated and used the plastic ones instead. I did the old fashioned screw driver n’ putty method for my zim.
I envy your PE work, outstanding! I can’t even see those little pieces, no less bend and glue them. Does the light bracket get zimmed also? And did you scratch those parts (gun cleaning rods and pry bar?) or AM? Again, great work!
…well that is debatable…whether or not some Tigers had zimmed front plates…some evidence also suggests some had un-textured zimm in some cases on this area…
Hey, who knows–maybe they’ll give an option for that part???
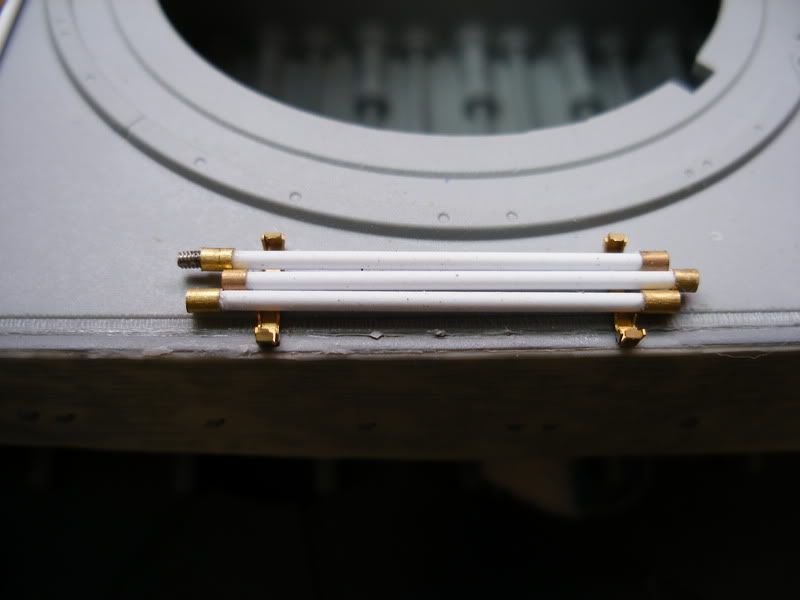
the barrel cleaning rods are scratch from
1.1mm plastruct
1.5mm brass tube
and the threads which have not been clompeted are 1mm screws
the pry bar is scratch because i broke the original.i put it in a dremel to smooth it down and selected the wrong speed spun round and sheared of ![]()
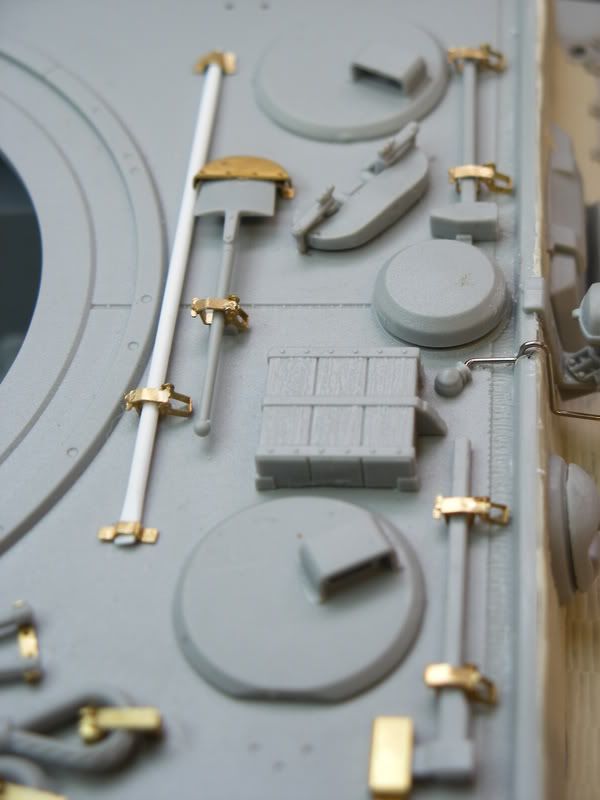
all the P.E tool clasps are bent using tweasers
the rest is using the 5 speed hold and fold
and very tiny amounts of ca glue
|
Tiger! |
|
|
|
|


It seems almost too good to be true to review two German WWII kits in the space of a few months, but Tamiya have finally brought out a late version of the World’s most famous tank, the Tiger I. For those modellers of a few years standing who have tried the conversion, whilst not being too difficult, it was fairly expensive, requiring both Nichimo’s late Tiger, Tamiya’s early variant and a set of Kasten tracks. The total cost of these three items approaches £40.
This offering from Tamiya is a totally new kit which only emphasises how bad the old kit was. Not only is it a fine kit, but for once it is a ‘modeller’s model’ - no moveable wheels, tracks, etc., and is intended to be totally static. Careful research by Tamiya is apparent with much fine detail beautifully engraved and the modeller is also able to choose between a late version and the final production run.

Vehicles with steel-tyred, rubber cushion road wheels were produced from January to August '44 and thus a total of 623 Tigers with this specification could be found. Of these 623, probably only May-August 1944 (245) wee the final version with the smaller muzzle brake, simplified loader’s hatch and single TzF9c gun sight.
Checking the model against Spielberger’s Band 7 I found all major measurements were within 1mm and, therefore, the model is well within scale.

Tamiya have always been very strong in the method and style of instruction presentation and this 15-step sheet is no exception. The major additions to this kit which have been serious omissions on earlier models are the individual torsion bars and track-links. These two features will be greatly appreciated by both the diorama and static modeller. The only noticeable omissions are the rear towing cable clasps on the engine louvers.
As all major German AFV’s in WWII were factory supplied with Zimmerit, and as much as it is a problem to find early ‘drum cupola’ Tigers with Zimmerit, it is equally difficult to find late tigers without Zimmerit.

Just like the real thing the model could be supplied from the factory with Zimmerit, as can be seen from the old Monogram models, but for some reason Tamiya have omitted this from the kit. This is a serious omission that will leave many modellers exasperated, however, whilst not beyond an average modeller’s ability, either the Milliput or pyrogravure techniques of applying Zimmerit requires considerable practice. As this is an essential requirement to complete a satisfactory model, I think it is essential to describe in detail the two basic methods or techniques, either the application of a very thin layer of putty and its ridging, or the use of a pyrogravure. I personally prefer the Milliput technique, especially for vehicles with large areas to cover and the pyrogravure for smaller AFV’s with a lot of cast on detail.
The satisfactory answer to the Milliput technique owes much to the tool that applies the ridges. Available in every Woolworth’s stores is their own brand of women’s shoe repair kit which contains a metal blade, 44x14mm, and serrated both ends for about £1. The size provides perfect handling and the serrations exact scale.
The only other tools needed are an artist’s plastic spatula and standard Milliput. The surface of the plastic should be roughened with a burr in a drill to enable the Milliput to adhere. Clean up with fine steelwork and choose only one or two surfaces per session. Until you have developed the technique, put Sellotape on adjacent surfaces that you do not wish to Milliput.

Mix up only enough Milliput to cover the chosen surfaces and with a hard pressing action, and starting furthest away from you, draw the Milliput towards you using your thumb (see pic. 8). When you have roughly covered all the area, dip the spatula into water and again ‘drawing’ this across the Milliput, bring it to a smooth and level surface. Clean away surplus with a knife. Using this method approximately 0.5 - 1.0mm of Milliput will have been deposited.
The next step is the actual ridging where the serrations of the tool must be pointing downwards, because when you apply a wash in the painting process the residue lays in the recesses and provides the basis of highlights in the finishing stages.
Lots of water is required for the final step. Again, starting the furthest away from you, commence ridging and complete one line of 2-3mm, then start again. Stop every 4 - 5 rows an clean the tool, re-wet the Milliput and continue until a section is complete. If you have applied any tape, remove immediately and generally clean up. If you have detail that requires to be incorporated in/on the Milliput, use either of these two techniques. For substantial objects, position and draw around the detail in pencil, tape the area with Sellotape, cut exactly round the shape and remove the unwanted tape. Zimmerit around the object, and even the edges. Once complete, pick up a corner of the tape with a pin or knife and peel off. The Milliput on the vehicle will not lift, only the unwanted area on the tape. For small detail, impress the object into the Milliput. Either carefully remove the wet Milliput and glue or just leave the object implanted in the Milliput.
Once dry (approximately 3-6 hours), realistic battle-damage can be simulated by ‘flicking’ off small sections of Milliput. The serrations or the ridging tool give a depth of Milliput of .3mm, virtually in scale thickness to the real thing.

The second method of using the pyrogravure is far more tedious, requiring many hours to finish. Whist it is my opinion that Milliput looks more realistic on large areas, the pyrogravure is especially effective on smaller vehicles. Practice on a piece of plastic card before the real thing. Pencil vertical lines, 3-5mm apart on the required surfaces before commencing. Other than the need for perseverance, the results are generally guaranteed. Thin wisps of plastic strings are best cleaned with 0000 gauge steel wool or a liberal coating of liquid plastic glue.
As I required my vehicle to look battle damaged I deleted the plastic side skirts and substituted lead sheet for these parts. Equally the towing and track cables were replaced with brass wire. I also used ‘The Show Modelling’s’ Tiger etched metal set. The anti-aircraft MG mount, whilst the best on the market, still leaves a lot to be desired, and again, I scratch built this item.

Whilst an excellent set of decals is provided, their application on Zimmerit is virtually impossible, and therefore the turret numerals were hand-painted. As the vehicle had etched metal, brass, and lead parts added, I primed the model with white enamel, which also served as the base for the faded winter camouflage. Subsequent weathering was with oil paint and pastel chalks.
As much of this review is about ‘how to Zimmerit’ it, in fact, shows that with this one exception, the kit is an excellent example of this most famous tank. At £21.50 it’s a very expensive kit. Those wishing to enhance even further, by use of the ‘Show Modelling’ set are going to end up paying nearly £30 all in. Previously, modellers would have paid nearly £40 for this version and with none of the finesse of this kit.

My main regret is that the kit is beyond the price range of the new and next generation of AFV modellers, when a price of £10-12 would have probably returned sales so much greater than likely at this £21.50 pricing level. Nevertheless it is an excellent and highly recommended model.
now this is fine detail and makes this kit so good
this is one of the mudflap hinges
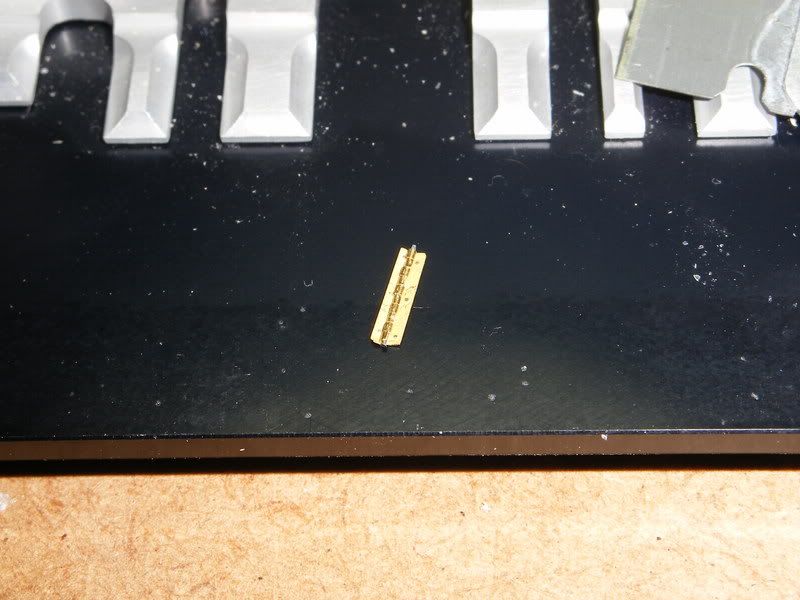
each one has been bent over(very carefully)