hey guys,
i have a badger 155 and i love it but i cannot get it to do very think camo lines without the paint spalttering. i dont know if it is my paint/thinner ratio, psi, or what. i have experimented with everything (hig and low psi, thin and thicker paint, etc.) it looks good when i do it on a piece of paper but not when i do it on the model. i tried to adjust the needle but that didnt help either. someone please help me as i am about to start painting an Elephant and i need to get this technique down to do that pattern. by the way, i use enamels. thanks guys!!
lower psi
Do you keep the airflow on (trigger down) while doing camo? I messed around with spraying a camo pattern recently with an Iwata Eclipse BS. I did a lot better by keeping the airflow going instead of letting the trigger shut off the air. So, it was always down / paint on/off with back & forth trigger only.
This airbrush’s manual also says to remove the tip cone for even finer lines. It’s true! I don’t know if your airbrush will do it like that, but I felt I had better control of the camo pattern with the needle & tip exposed instead of having that cone on. I was doing a real small one like the Luftwaffe brains pattern at 1/72 scale… and I was using orange gloss Pactra acrylic that has been sitting around for 12 years (just for practice purposes). It was thinned with alcohol too, so that was about the fastest drying way to go. I did have to touch the tip with a swab a couple of times to knock off the paint buildup.
No offense intended, but are you experienced with an airbrush? Fine lines are not at all easy to do and they take quite a bit of practice. Many people think that an airbrush is all that is required to do fine lines, and it isn’t that way at all. In most cases it’s the person behind the airbrush that determines how thin the lines are going to be.
I use very thin paint at very low pressure and very close to the surface of the model. Angle the airbrush so that any overspray goes into the color that you are painting. If necessary (and it frequently is) go back and forth between the colors to tighten up the demarcation.
When painting camoflauge patterns I usually spray at about 5 psi (I said “About” 5 psi because it’s so low the gauge barely even flickers). The paint is thinned enough so that it will flow at that pressure (usually about 2:1 paint:thinner), and I spray about an inch from the surface. Using pressure that low, especially with a siphon feed brush, is iffy at best. I can get that low with my Omni 4000 (gravity feed) but I had to go up to about 8 with my Omni 3000 (siphon feed). Do whatever it takes to keep your hand steady; I sometimes put one hand on my work surface and the hand with the airbrush on top of that one. Other people may have different methods, but that’s what works for me.
hey music city, thanks for the tip. i think the lowest i was going was 20 psi. i am faily good at airbrushing but have never had to do very thin camo patterns. most were ambush camo found on german tanks so not too thin lines used there. but that was a fair question and no offense taken. i thank you for your help.
i will second all that Musiccity has said.[#ditto]
initially, i spray the lightest color first at a standard thinning ratio of about 50/50. i prefer my paint to be thin, then just build up the coats until i’m satisfied, i get a nice smooth finishe everytime using this method. then, i swap to the next darkest color and follow the lightly marked out pattern on the surface of the subject. i mark it out with a pencil in a dotted line fashion. at this point, i’m not even worried about tight demarcation lines yet, just get the colors on the subject. progress to the next dark color and so forth and so on. when i’m happy with the coverage of all three or ever how many colors you got in the camo pattern, then i thin the said colors down further to about 60%thinner to 40%paint, drop my pressure well below 10psi as scott has mentioned, and start the long, arduous task of tightening up the demarcation lines. this will require skill, patience and a steady hand. i’m into each color 3 and 4 different times usually correcting slip ups and such until i get the shceme to look like i want it to. i use an iwata eclipse hp-cs most of the time, and this is a gravity feed. do not use lacquer thinner for your thinning agent, you’ll never get a nice thin line using this stuff, it drys too quickly, i prefer turpentine myself, but mineral spirits will work ok.
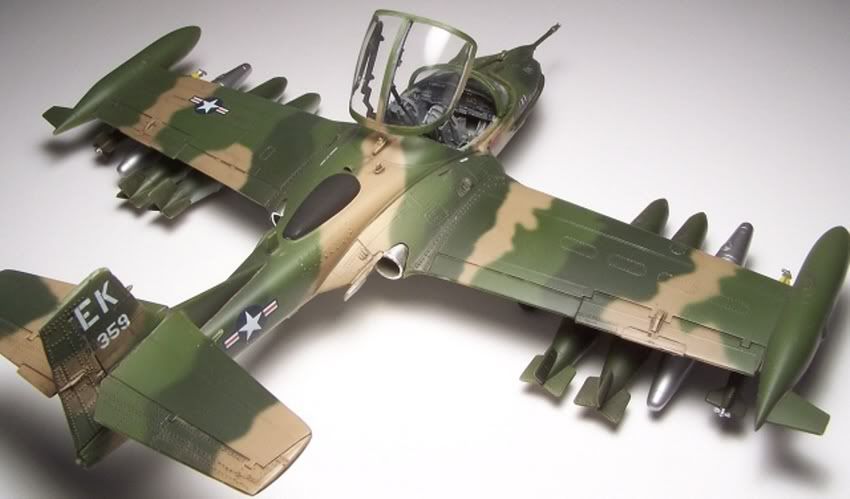
here is an example of the end result of the method i just explained:
The Badger 155 has an exposed needle already so that is not applicable. [;)]
Mike
That’s most of your problem right there. Try it at a lower pressure, take it slow and easy, and as Chris said, just let the layers build as necessary.
Good, glad you didn’t take offense. One of the common questions around here starts out something like, “I just got my airbrush yesterday and can’t get micro-thin lines with it!” I wasn’t sure how to phrase that question without sounding pompous or insulting an experienced airbrusher.
double post man.
and practice makes perfect. a perfect mess.
Still practising…
…and will be for a very long time.
What MusicCity said was spot on.
Best of luck with the AB.
Karl
Yeah, that’s what happens when you get an “Operation Timed Out” waiting for the post to get submitted. I deleted one of them.
I always get that with broadband cable internet 100mb/s