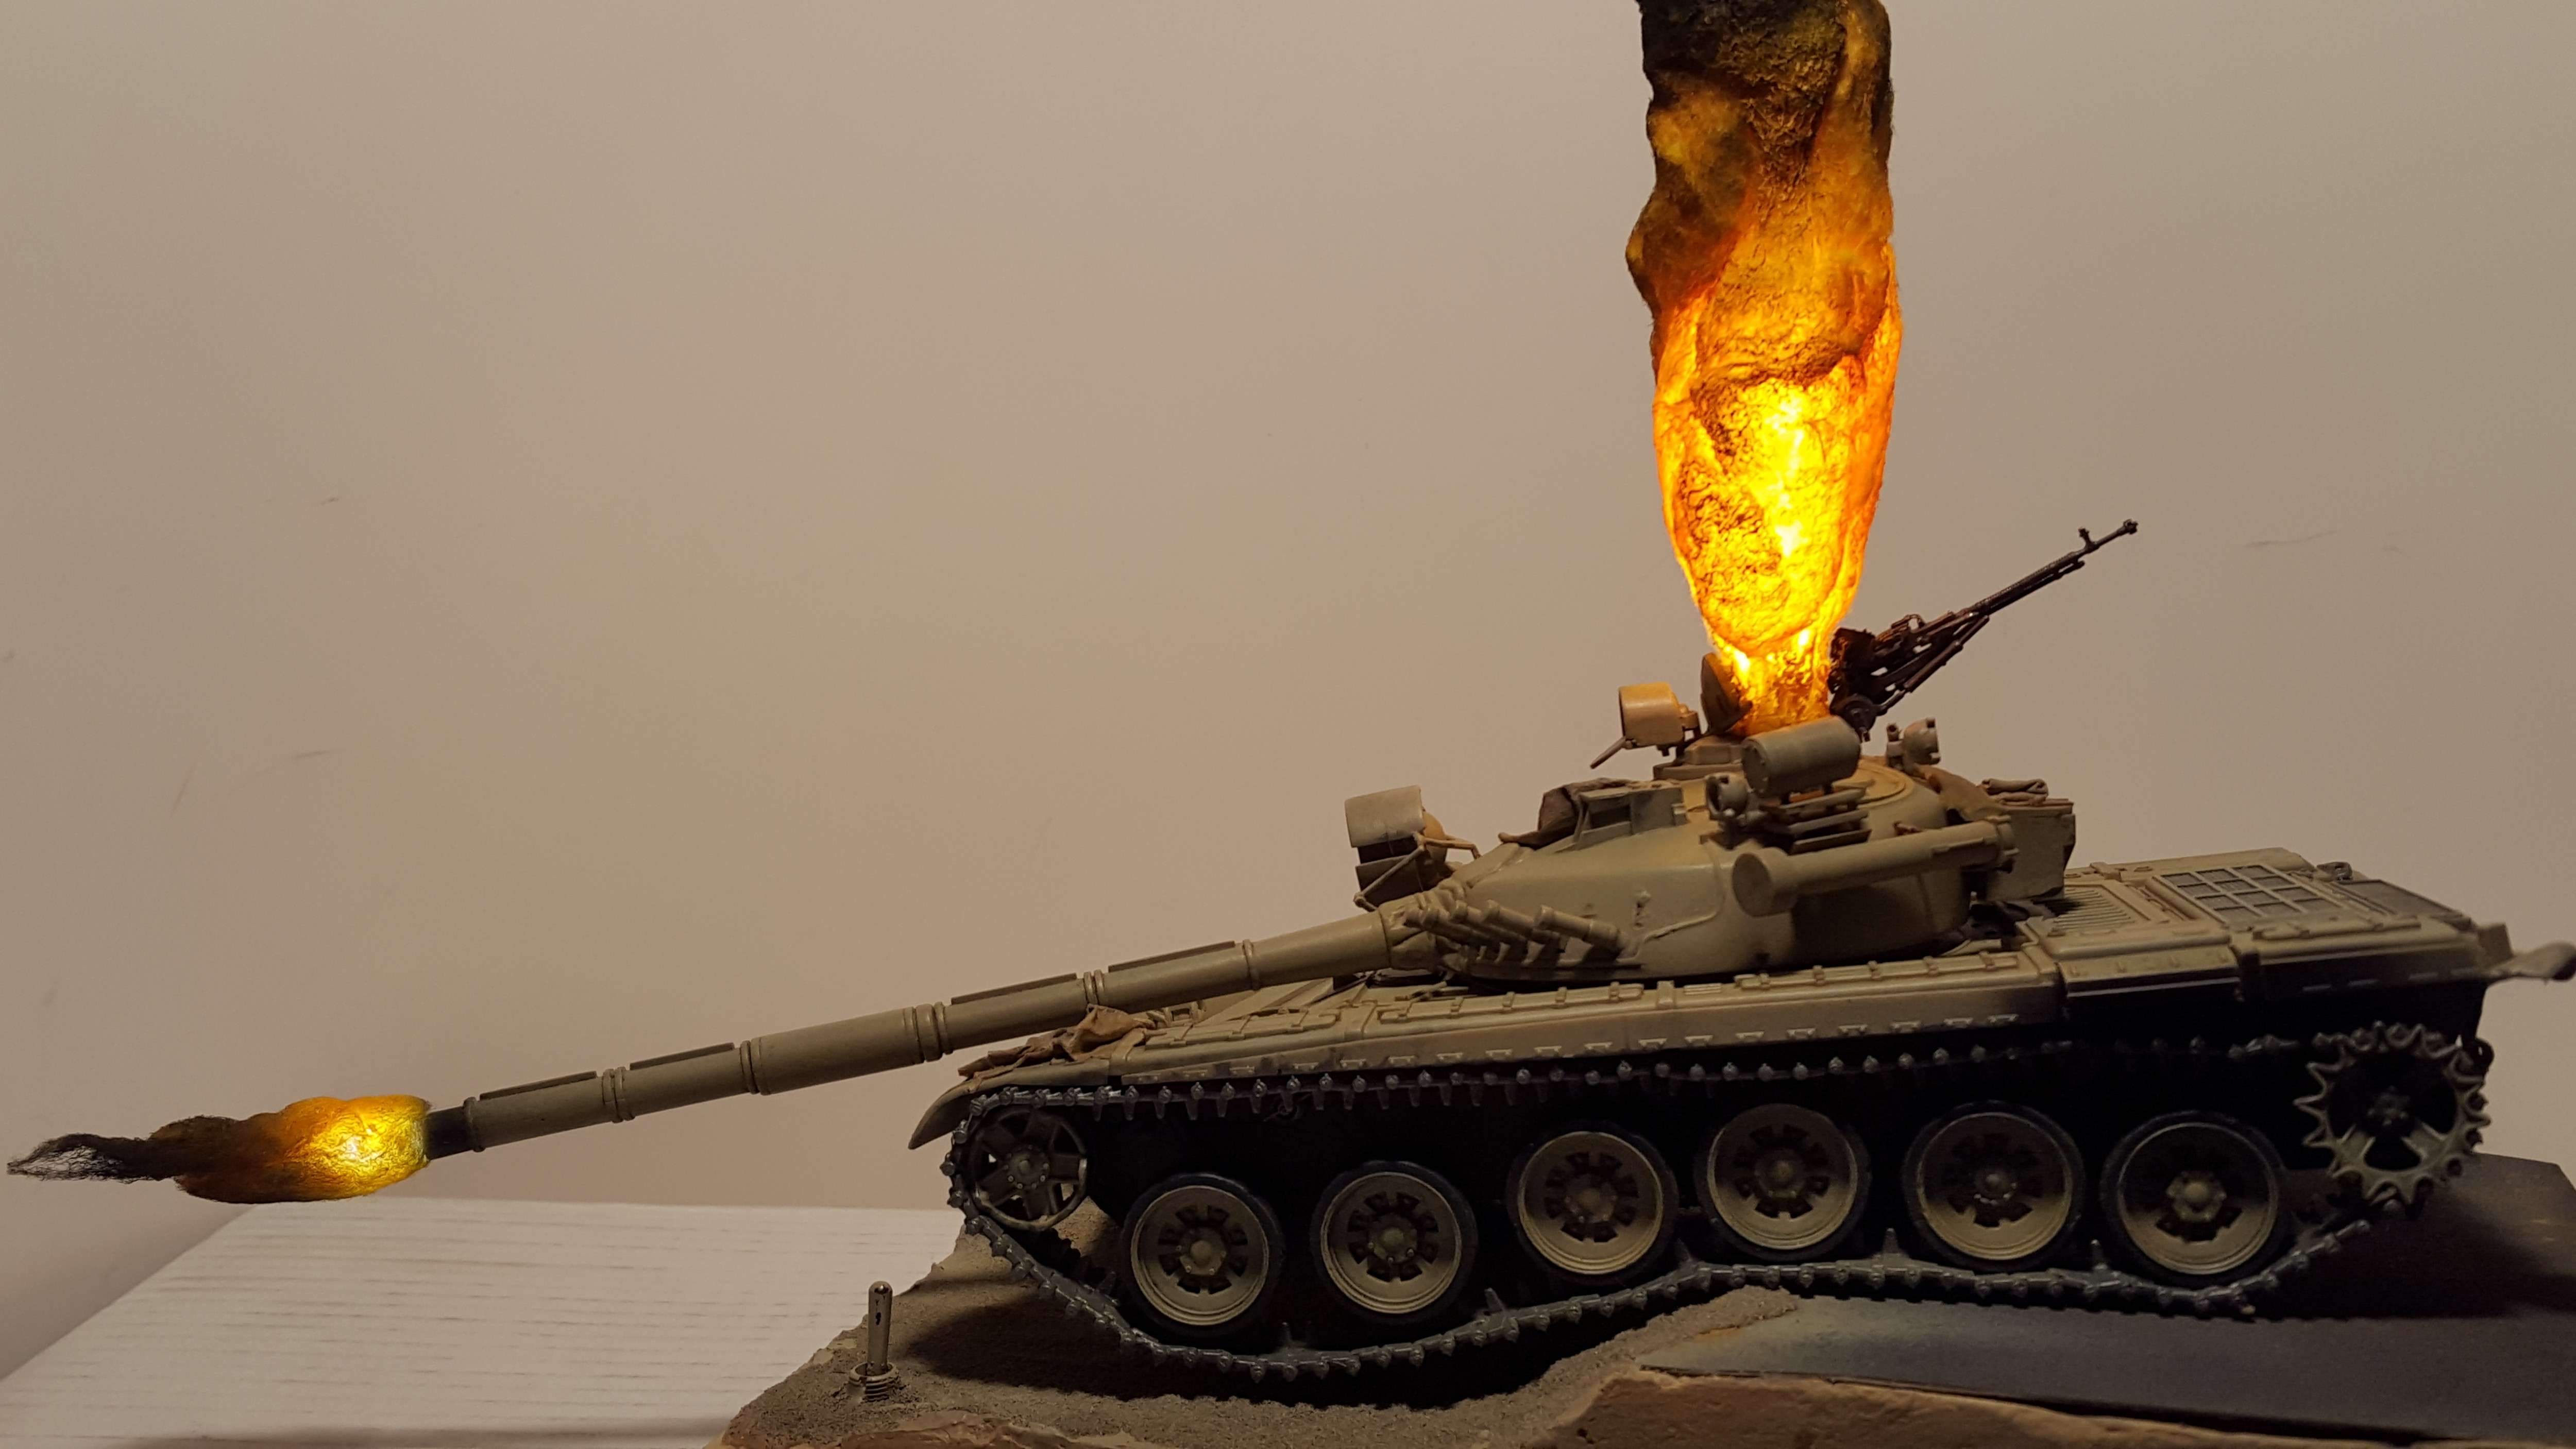
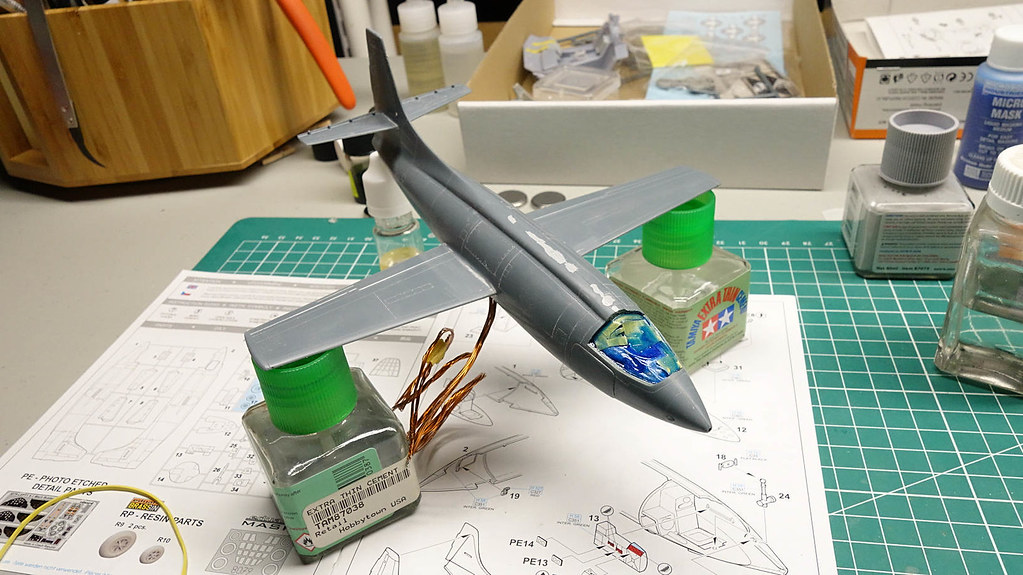
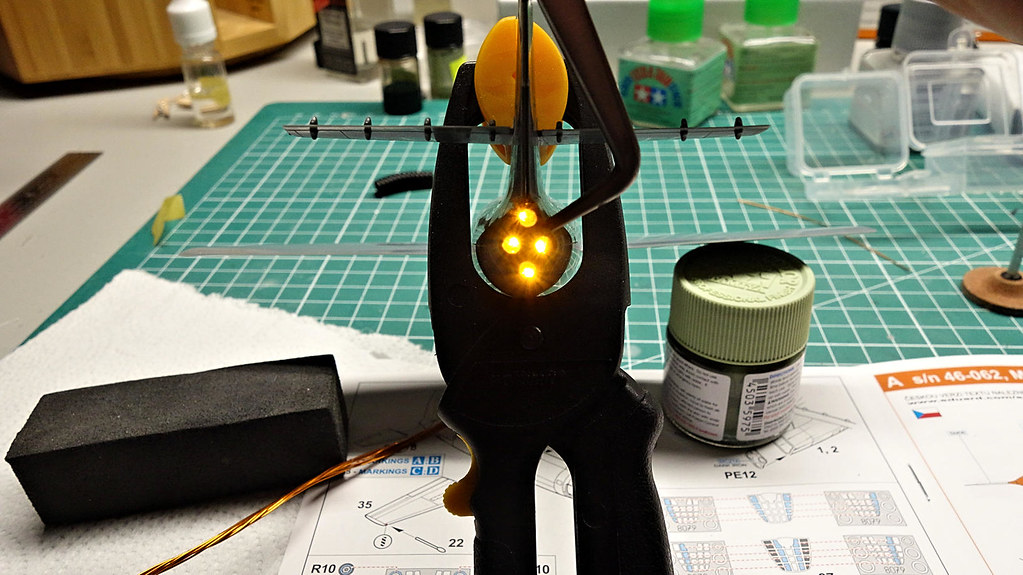
Yeah Steve, I LOVE what you did on that. Awesome! I guess I was shooting for a subtler flame verses a more explosive one. The issue I see in going that way now is that my LEDs are buried in the fuselage–yours are burried in the flames. I question whether it will translate the same way. This is why I am now thinking I’ll have to use fiber-optic bundles with each of the 4 exhaust vents. The FO would draw the light out more. But–I’d probably have to buy different FO than what I have because what I have, the light is strongest at its ends. It looks like they make side viewing FOs. I don’t know–more experimenting to be done.
I will probably have more questions for you when I get to making the flames.
Mach71> Welcome back! Looks like things are coming along, though I thought if it was too cold to airbrush, it was too cold to spray paint (at least it is for me).
Bakster> I haven’t come up with anything for the exhaust. I’m thinking that if you could get a small valve and a CO2 cylinder (like you use in BB guns) you could just mount it in the back with four nozzles branching off. THAT would impress the judges… [:D]
I still don’t have a working heat pump, but I’ve got a couple of space heaters and it’s not very cold in the apartment. It didn’t get as cold as they said it would last night (I think only 25 degrees F). They’re going to have to replace the unit, as the compressor is shot. I don’t know when they’ll decide to pay for it, but we’ll see.
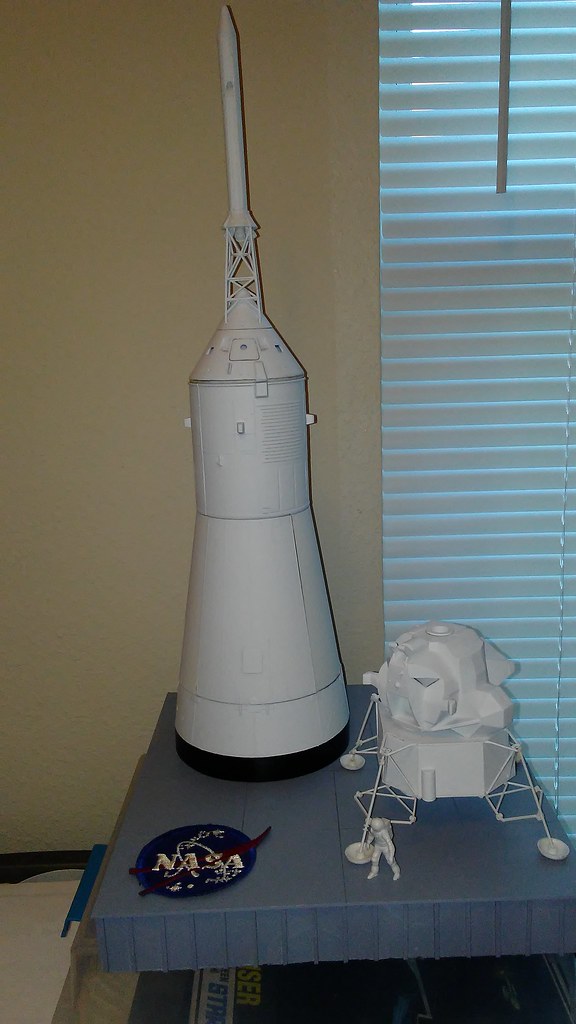
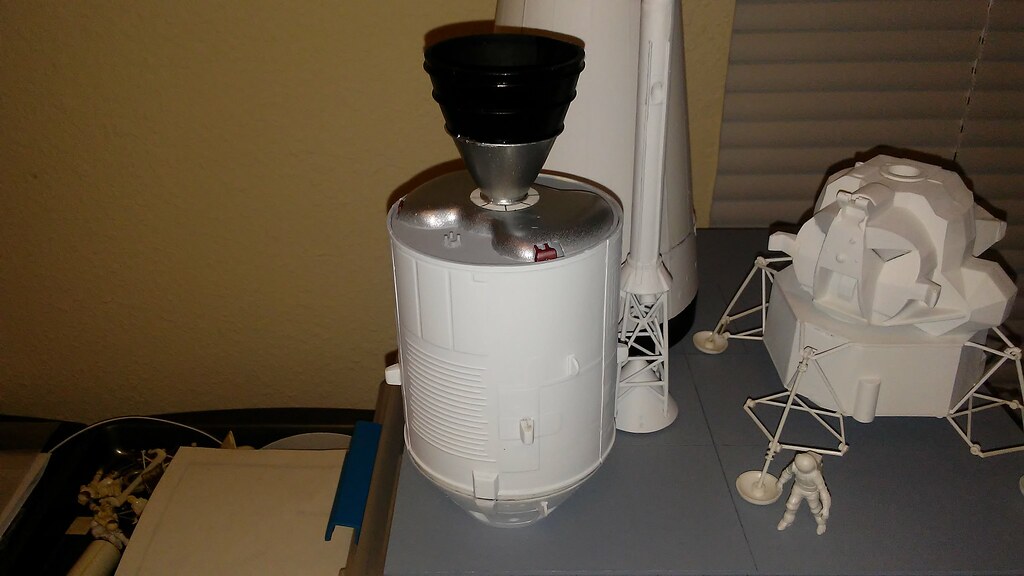
Today it really warmed up, into the 50s, and I took the opportunity to do a few painting tasks. I finished spraying the interior of the folding door panel gray, and sprayed the Service Module heat shield a metallic grey. No pictures tonight, but tomorrow should be even nicer and I’ll take the opportunity to get a second coat on some items. I hope the Service Module can be finalized and then I can finish detailing the outside and glue on the RCS nozzles (though it might be best to hold off on those as I’m likely to break them off if I put them on too early). I also painted the upper portion of the SM engine nozzle with silver, but I’m not happy with that and will probably redo it. Also, the base is ready for a primer coat of grey, and I want to see what it will look like. All in all, progress!
Mercury MR-2 - . Nation: USA. Agency: NASA. Program: Mercury. Spacecraft: Mercury. Apogee: 251 km (155 mi).
Ham, a 37-pound chimpanzee, was aboard the spacecraft. The over-acceleration of the launch vehicle coupled with the velocity of the escape rocket caused the spacecraft to attain a higher altitude and a longer range than planned. In addition, the early depletion of the liquid oxygen caused a signal that separated the spacecraft from the launch vehicle a few seconds early. However spacecraft recovery was effected, although there were some leaks and the spacecraft was taking on water. Ham appeared to be in good physiological condition, but sometime later when he was shown the spacecraft it was visually apparent that he had no further interest in cooperating with the space flight program. Despite the over-acceleration factor, the flight was considered to be successful.
Luna 9 - . Payload: E-6M s/n 13. Mass: 1,580 kg (3,480 lb). Nation: Russia. Agency: MOM. Program: Luna. Class: Moon. Type: Lunar probe. Spacecraft: Luna E-6. Decay Date: 1966-02-03 . USAF Sat Cat: 1954 . COSPAR: 1966-006A.
Soft landed on Moon; photographed surface for 3 days. Landed on Moon 3 February 1966 at 18:44:52 GMT, Latitude 7.08 N, Longitude 295.63 E - Oceanus Procellarum. The Luna 9 spacecraft was the first spacecraft to achieve a lunar soft landing and to transmit photographic data to Earth. Seven radio sessions, totaling 8 hours and 5 minutes, were transmitted as were three series of TV pictures. When assembled, the photographs provided a panoramic view of the nearby lunar surface. The pictures included views of nearby rocks and of the horizon 1.4 Km away from the spacecraft.
Funeral services were held for the Apollo crewmen who died in the January 27 spacecraft 012 (Apollo 204 mission) flash fire at Cape Kennedy. All three were buried with full military honors: Virgil I. Grissom (Lt. Col., USAF), and Roger B. Chaffee (Lt. Cdr., USN), in Arlington, Va., National Cemetery; and Edward H. White II (Lt. Col., USAF), at West Point, N.Y. Memorial services had been held in Houston January 29 and 30.
Apollo 14 - . Call Sign: Kitty Hawk. Crew: Mitchell, Roosa, Shepard. Backup Crew: Cernan, Engle, Evans. Support Crew: Chapman, McCandless, Pogue. Payload: Apollo CSM 110 / Apollo LM 8 / ALSEP / S-IVB-509. Mass: 29,230 kg (64,440 lb). Nation: USA. Related Persons: Cernan, Chapman, Engle, Evans, McCandless, Mitchell, Pogue, Roosa, Shepard. Agency: NASA Houston. Program: Apollo. Class: Moon. Type: Manned lunar spacecraft. Flight: Apollo 14. Spacecraft: Apollo CSM. Duration: 9.00 days. Decay Date: 1971-02-09 . USAF Sat Cat: 4900 . COSPAR: 1971-008A. Apogee: 183 km (113 mi). Perigee: 170 km (100 mi). Inclination: 31.1200 deg. Period: 88.18 min.
The (AS-509) mission - manned by astronauts Alan B. Shepard, Jr., Stuart A. Roosa, and Edgar D. Mitchell - was launched from Pad A, Launch Complex 39, KSC, at 4:03 p.m. EST January 31 on a Saturn V launch vehicle. A 40-minute hold had been ordered 8 minutes before scheduled launch time because of unsatisfactory weather conditions, the first such delay in the Apollo program. Activities during earth orbit and translunar injection were similar to those of the previous lunar landing missions. However, during transposition and docking, CSM 110 had difficulty docking with LM-8 . A hard dock was achieved on the sixth attempt at 9:00 p.m. EST, 1 hour 54 minutes later than planned. Other aspects of the translunar journey were normal and proceeded according to flight plan. A crew inspection of the probe and docking mechanism was televised during the coast toward the moon. The crew and ground personnel were unable to determine why the CSM and LM had failed to dock properly, but there was no indication that the systems would not work when used later in the flight.
By January 1986 it was clear that the project, now three years behind schedule, had no prospect of completion due to problems in obtaining deliveries of equipment for Buran, numerous problems in assembling the orbiters and lack of manpower at Baikonur, and a general loss of management focus. Minister O D Bakhnov called a large group of industry leaders to the cosmodrome to review measures to concentrate and accelerate the remaining work. Three ‘Tiger Teams’ were set up. The first, led by Semenov, was to finish the flight Buran orbiter and associated facilities in time for a third quarter 1987 launch. The second, led by B I Gubanov, was to finish the Energia launch vehicle and fly it, without the Buran mock-ups if necessary, at the earliest possible date. The third group, led by S S Banin, was to complete the assembly and launch facilities.
Bakster> I never encourage modelers to set their models on fire… Large firecrackers on the other hand… [;)]
Well, no replacment of my heat pump today, which means that I’ll be without heat this weekend. It’s not so bad, as I have the “Aux Heat” on the furnace if it gets too cold, and two small space heaters. I really fear my electric bill this month. Luckily, temperatures are moderating for the next few days.
Progress Report:
Warmer temps today and I did some more spray painting. The base got a coat of primer gray, and the Service Module, LES and LM Storage Area base got another coat of white primer. I’ve set it up again to see what she looks like, and I think it’s going to be okay. Still a LOT of details to work on, but I’m happy with my progress after 4 months. [:)]
Also, I did some gray metallic spray on the engine nozzle, but it and the SM heat shield needs some touch-up work. It’s about time to attach the high-gain antenna.
Explorer 1 - . Payload: Explorer A. Mass: 5.00 kg (11.00 lb). Nation: USA. Related Persons: von Braun. Agency: US Army. Program: Explorer. Class: Earth. Type: Magnetosphere satellite. Spacecraft Bus: Explorer. Spacecraft: Explorer A. Decay Date: 1970-03-31 . USAF Sat Cat: 4 . COSPAR: 1958-Alpha-1. Apogee: 1,859 km (1,155 mi). Perigee: 347 km (215 mi). Inclination: 33.2000 deg. Period: 107.20 min.
Explorer I, the first U.S. earth satellite, was launched by a modified Army Ballistic Missile Agency Jupiter-C. Explorer I, developed by the Jet Propulsion Laboratory, carried the U.S.-IGY (International Geophysical Year) experiment of James A. Van Allen and resulted in the discovery of the radiation belt around the earth.
It’s been a sad week in space history – Apollo 1, Challenger and Columbia.
The shuttle Columbia disintegrated over Texas during re-entry at an altitude of 63.15 km and a speed of Mach 18. All hands aboard were lost. The loss grounded the shuttle fleet pending a failure investigation and left the crew of Bowersox, Pettit and Budarin aboard the International Space Station with a Soyuz emergency return vehicle but without means of major station resupply.
Mach71: You’re making great progress, looks fantastic!
Gary: Same there, looks like you’ve got a lot done and everything looks really good. Hope your heating is back online soon. The warmer weather is a big improvement.
Bakster: Nice to see her all in one piece and ready for paint.
BTW: My astronaut now has two legs and an arm. Working on the right arm now…
Steve, I had such good luck using melted sprue on the Redstone, I used it again! I wanted to use it again because it scribed so nicely, and I will need to re-scribe along the fuselage joins. In general, melted sprue works pretty darn well, but occasionally there are areas that need another application. In those instances, and this time around, I am testing Tamiyas liquid primer. So far, I like the stuff. It wet sands and feathers beautifully. For small imperfections it seems to work nicely. The liquid primer is what you see applied in the image. Tomorrow I will sand that out.
I used melted sprue on the wing roots too. I am not sure that is ideal because it can be a little difficult to sand without damaging detail. I think that next-time I will make a bigger effort to make the join tighter, and then use something like Perfect Plastic Putty. I am still groping around on some of this stuff.
A little more info on the sprue-goo: I really like the stuff for sand-ability and works great if you need to build up certain areas. For example, I didn’t like the fit of the X1s side hatch. When installed the hatch had larger gaps than I would like. So, I ran a bead of sprue-goo on the edge of the plate, waited for it to cure, and then sanded it down some. Doing this expanded the edges for a better fit and you’d never know that it was modified. On the Redstone escape tower I used sprue-goo to fill gaps and strengthen some of the delicate bracing. This is versatile stuff.
Oh, one other thing. It just so happens that the sprue-goo I had made using Redstone sprue is the exact same gray as the X1 sprue. It is an exact match and this is why you can’t see the work I did. It is neither here nor there, I just wanted to clear that up.
No actually that’s not more than I wanted to know, that’s about right. One question about sprue glue, what is it? Is it a product or something you make yourself? I read that you said you made some. I’ve read others using it and was curious.
Steve, yes you can make it yourself. To the best of my knowledge it is not produced commercialy. Here is what I recommend:
Get a bottle of Tamiya Extra Thin cement. Hopefully, not a full one, it should be maybe half full.
Cut up sprue into small pieces maybe 1/4 inch long or less.
Drop them into the bottle of Tamiya Extra Thin. I filled mine level to, or slightly over the level of cement. Stir it up a little and let it set. It will take a day or two to melt all the plastic. It helps expedite the process by mixing it the next day, then let it set again.
It is that easy. Once fully melted you can use the cap brush to dab or smear the plastic where you want it. I try to dab some of the excess on the inner wall of the bottle. Otherwise, you will get big globs of the stuff and that will cause you more work later.
The first time I tried this I used another brand of cement. It did not work that well. I had issues with bubbles that caused divots in the final application. When I tried Tamiyas cement, the problem decreased dramatically, almost to nonexistent. It Will need to gas out some. I noticed some bubbling with the Tamiya too, but they eventually gassed out over several days of curing in the bottle. So, I highly recommend using Tamiya cement, and the brush is a handy applicator too.
One other tip that I can give you. Over time the cement gasses out of the jar and the plastic becomes too thick. If that happens, just add more cement until you get the consistency that you like. You can keep reactivating the stuff and you can keep adding plastic if you get too low. If you get stringy plastic when you remove the applicator from the jar, it is a sure sign that you need to add more cement. The same is true when you first mix the batch. You will need to adjust things a little. There is no magic to it, so don’t worry. Make it thin enough to where it spreads pretty easily and to where you are not getting stringy plastic.
I’ll be giving that a try. It just so happens that I have a half filled bottle of thin. Is there a manufacturer’s plastic you prefer likr Hase, Airfix, Tamiya, Trumpeter etc?
No, not at all. If you want to be on the safe side of things, I would suggest that you use sprue from more recent kits. Something from the last several years and not lets say a 70s kit. But truthfully, it probably does not matter either way. I think the type of liquid cement may play a bigger role in how it performs. Oh–and you might consider what color sprue. My recent batch is gray–which is a pretty common color for kits. Here again, it is not that critical, but if you use lets say red it might take more pre-painting prep in terms of primer to get a consistent base color.
I know, hey? That is so true.
I am excited to see you try this. I hope you find it as useful as I have. Once it’s laid down and cured, it acts just like the original plastic. You can drill it, sand it, cut it, etc. Heck–I even use the stuff as an adhesive! This stuff can in many ways bond just like epoxy. It depends on what you are attaching. It is so-so with PE, but it gives a strong bond when used on other plastic. It seems to chemically attach to it.
One other thing. Once you apply it to the model, you’ll want to wait about 24 hours before sanding. It takes a bit of time to fully cure, depending on how thick a layer you put down. That is a slight negative to it but the benefits far out way the negative.
Just wondering, I have already submitted my “eagle” lunar module and X-15, but I have a NASA XB-70 that is done, would it qualify for the race to space too?
I need to make a correction. I was wrong about this. The plate goes on the outside of the fuselage. That piece had such a poor fit to it that I assumed it must fit inside. After I tried that, the problem was worse. Then I pulled the PE and tried that instead. Sure enough–it goes on the outside.