Thanks, guys! I believe the base will look great once it’s painted and detailed. I’ve got things masked up and ready and it looks like the weather will cooperate today.
I think there’s nothing there at the site of the Apollo 1 fire except some concrete blocks and a pad. I can imagine it’s rather depressing. But this was a bad week in American space exploration, as today’s space history item continues with the bad.
Today in Space History:
“Challenger, go with throttle up.”
1986 January 28 - . 16:38 GMT - . Launch Site: Cape Canaveral. Launch Complex: Cape Canaveral LC39B. Launch Platform: MLP2. LV Family: Shuttle. Launch Vehicle: Space Shuttle. FAILURE: Seal on SRB failed, allowed hot gas to burn through External Tank… Failed Stage: 0.
You are an astute dude there–Gam Dude. That’s kind of the idea but no smoke. I’d like to simulate the flames as shown below. I will give cotton a try and see how it will look. I haven’t done this before so it will be another adventure. Anyone with tips–feel free.
Updated…
I am not sure how well cotton will work with the LEDs located behind that exhaust plate. Light will come through those ports, but will it be intense enough. I kind of think it will not work well, but I will try it.
Bakster: I’m not sure, I’ve never done it myself. Maybe you could stretch the cotton balls to thin them out? In any case the balls are cheap so if you mess some up it’s not too big a deal.
Bakster> I’ve not seen much in the way of flame representation on models. I’ve seen some interesting rocket exhausts for the Saturn V using fiber and leds. I’m always concerned about real fire when using cotton balls. I’m sure there’s something a bit more fireproof. Like lighting for models, I would consider using fibre optics with red leds in the exhaust, or red / orange plastic rods carved into a flame shape. I have to admit that it’s something that might be too complex for me. If you need some fibre-optic cable I can send you some as I got a large roll in a Star Trek model I won on Ebay that someone was going to use to light the windows. I don’t think I will need it all.
Anyway, good luck! I’m interested in seeing what you come up with.
I must admit I spent the day watching episodes of HBO’s “From the Earth to the Moon”. Not a lot done today, except for some sanding on the LES.
Project Report:
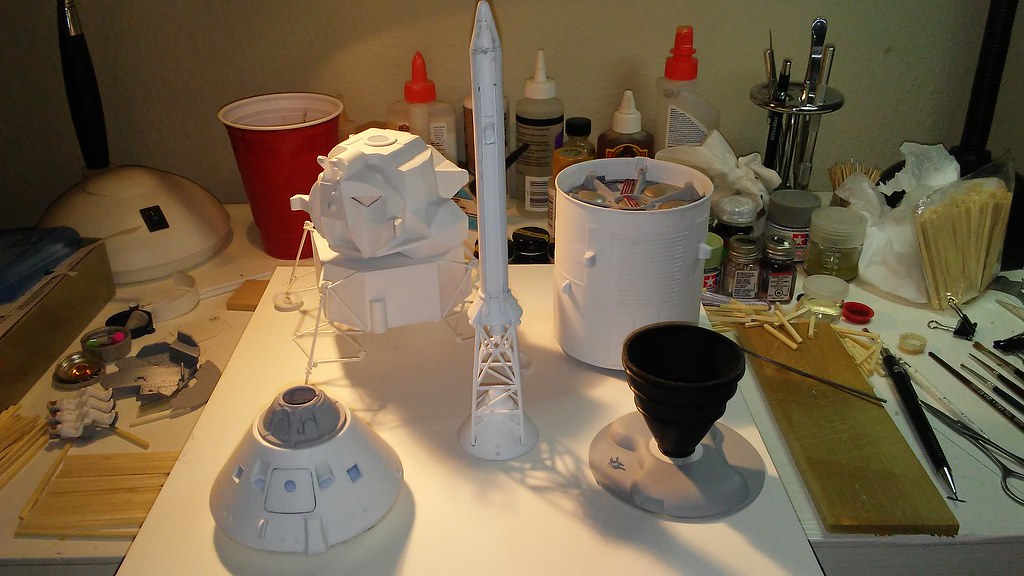
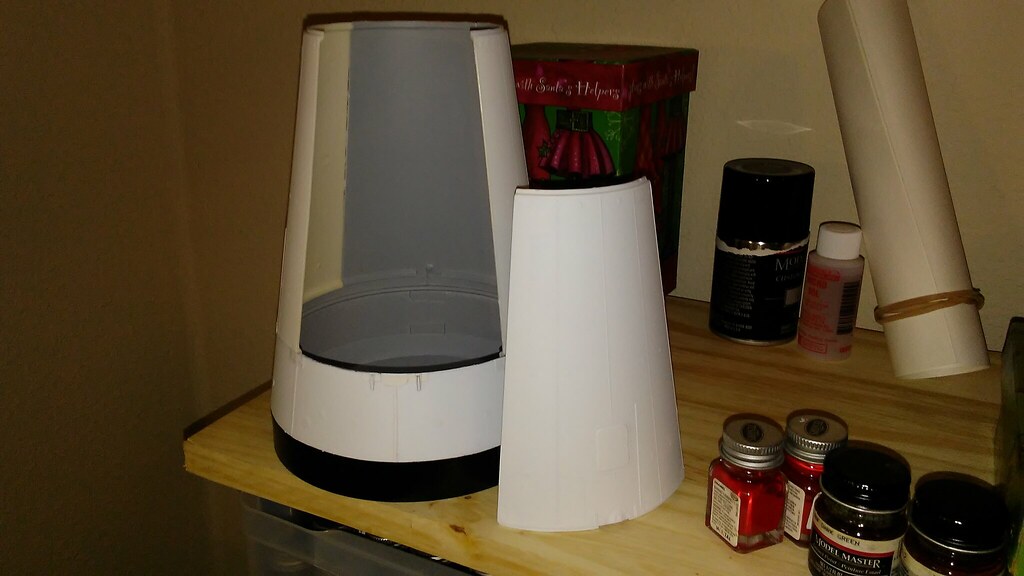
The weather cooperated yesterday and I was able to get some primer on the main components of the Apollo model. This was mainly to ascertain where I had seam problems. Boy, do I have them! At the moment, I’m trying to figure out how best to fix them. OTOH, this is a 50 year old model so the fit is not going to be perfect. The fact that I’ve had to deal with plastic bending after all this time in a box, old glue, and scratch-building some major parts makes me realize there’s some things you will just have to live with. I’m going to give it my best shot!
Looks like we’ll have some more nice weather this Friday, so hopefully some more painting can be done to finish up the major pieces. Then it’s on to detailing!
You’ll notice a white ring around the nozzle where it meets the SM heat shield. It’s paper, and I’ll detail it out a bit to make it look like the gimbel cover for the engine. The heat shield for the SM will receive a final metallic grey coat on the raised portion. The LM Storage Area is coming along, though I need to give one panel a final grey interior coat. I have determined that the lower bay does NOT seem to have an access hatch as I thought. This is from blueprints of the Saturn 1B AS-207. It’s possible the hatch was added later when the LM was actually carried on the Saturn V, but the S-IB storage area apparently did not have one. I’ve decided to leave it off.
The LES is looking good, and the primer makes it look pretty nice with a uniform white. I’ve started sanding around the nose-cone to help even out some of the rough areas, so it looks a bit stained there. Even the CM has a prime coat, and the parachute storage area needs detailing. The LM really needs some work on the seams. That’s going to be a chore.
I hope to have the base finished up by Friday so I can give it a primer gray coat. I want to see what it looks like and what sort of further detailing it may need.
She’s getting close.
Mission Director (GAF)
PS> Doesn’t look like I’ll be able to make it to Huntsville this month. Maybe next.
Saturn 5 - . Payload: Saturn-SA 5. Mass: 17,100 kg (37,600 lb). Nation: USA. Agency: NASA Huntsville. Program: Apollo. Class: Technology. Type: Re-entry test vehicle. Spacecraft: Jupiter nose cone. Decay Date: 1966-04-30 . USAF Sat Cat: 744 . COSPAR: 1964-005A. Apogee: 740 km (450 mi). Perigee: 274 km (170 mi). Inclination: 31.4000 deg. Period: 94.80 min.
First first mission of Block II Saturn with two live stages. SA-5, a vehicle development flight, was launched from Cape Kennedy Complex 37B at 11:25:01.41, e.s.t. This was the first flight of the Saturn I Block II configuration (i.e., lengthened fuel tanks in the S-1 and stabilizing tail fins), as well as the first flight of a live (powered) S-IV upper stage. The S-1, powered by eight H-1 engines, reached a full thrust of over 680,400 kilograms (1.5 million pounds) the first time in flight. The S-IV’s 41,000 kilogram (90,000-pound-thrust cluster of six liquid-hydrogen RL-10 engines performed as expected. The Block II SA-5 was also the first flight test of the Saturn I guidance system.
The first manned test of the airlock fails before an audience of 60 government and industry leaders. A VVS pilot in a spacesuit was to demonstrate the entire sequence involved in exiting into space. (release of the forward ring, inflation of the airlock, opening of the hatch between the spacecraft and airlock, closing the hatch, evacuation of the air from the airlock, opening of the outer hatch of the airlock, then the sequence in reverse). Two attempts are made at 15 km equivalent altitude, but the hatch from the spacecraft to the airlock cannot be opened due to defects in its construction in the first try. This is fixed, but on the second try the Vega system that monitors the cosmonaut’s condition failed.
1965 January 29 -
Emergency defecation capability added to the Apollo LEM - . Nation: USA. Program: Apollo. Spacecraft: Gemini.
ASPO concurred with the requirement to provide an emergency defecation capability aboard the LEM as established by MSC’s Center Medical Programs Office. The addition of a Gemini-type defecation glove appeared to present a satisfactory solution. Crew Systems Division was directed to proceed with their recommendation and add the Gemini gloves to the LEM crew provisions.
(Well, I guess they had to jettison weight somehow for liftoff from the moon! [whstl] )
Hey Gary, thanks for the offer but I already have some fibre optic. That is very nice of you to offer, though!
You have suggested two of the three ideas I have been mulling over. One of them would be to fashion some sort of colored plastic pieces that will mimic the flames. I thought about fibre optics as well but I don’t know how I could use them to make convincing flames. I thought of bundling them but it just doesn’t seem like a convincing way to go. I could be wrong and I won’t know until I experiment.
The cold weather has forced many local businesses and schools in our area to close. My employer has closed for tomorrow. So, I will have a full day to start on the light assembly. I won’t be tempted to go outside, that is for sure. So… barring any bad mojo, I might have an update to tomorrow.
Gary, your project is looking really good. You are getting near to the finish line! Isn’t that a great feeling? I don’t know about you guys but starting a new model can often feel daunting to me. Once when the end is in sight, it is an exhilarating feeling.
Thanks! My feeling is more like fear. I always have a feeling I’ll screw something up even worse than it is now. Maybe that’s why it takes me so long to build something. [:)]
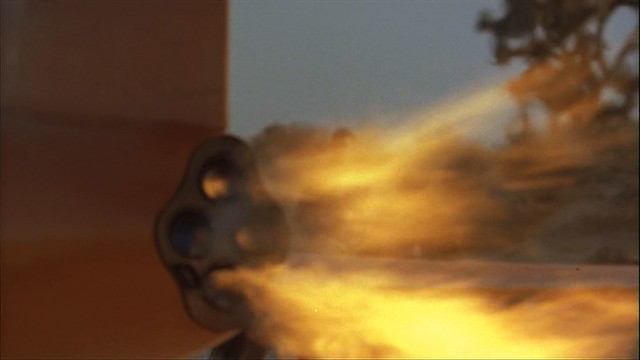
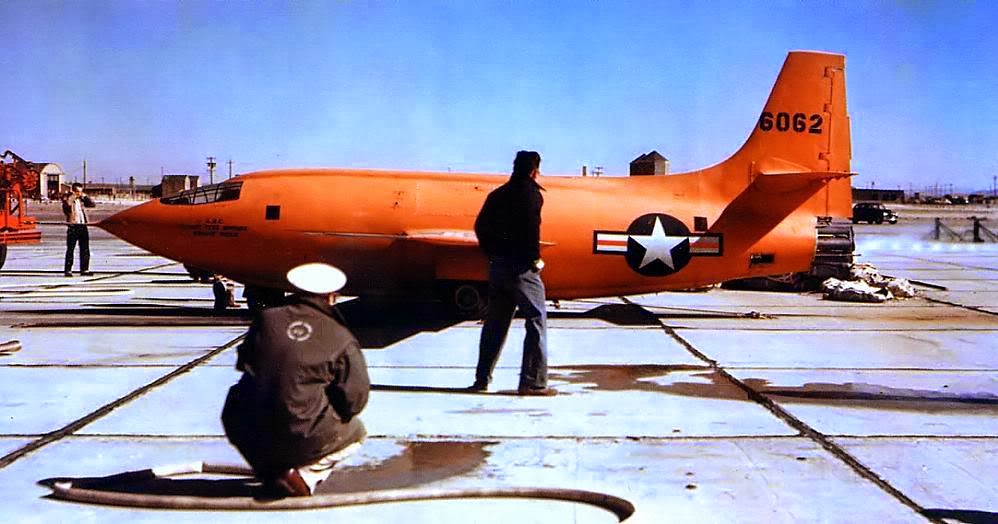
Well, I did manage to find a photo of a ground test for the X-1. The flame is nothing like the Hollywood version. No hose running into the side either! Back in the day when people didn’t wear protective gear, or fear an explosion from a test vehicle… [:O]
Oh man… we are wired the same way. That is exactly what goes through my mind on a build. Let’s face it. There are dozens of ways for a project to go sideways, and many ways where we will never see it coming when they do. Hence, the fear. Lol…
Buddy! You get a gold star for perseverance! That is a great image! And yeah…look at how that changes the flames. Suddenly, fibre-optic is looking like a better option than before. You came through for me, Gary. This changes things. Way to go sir…
Here is what I did on my day off. (Saying that makes me think of the essays we used to write in school, What I did on my summer vacation.) Those were the days.
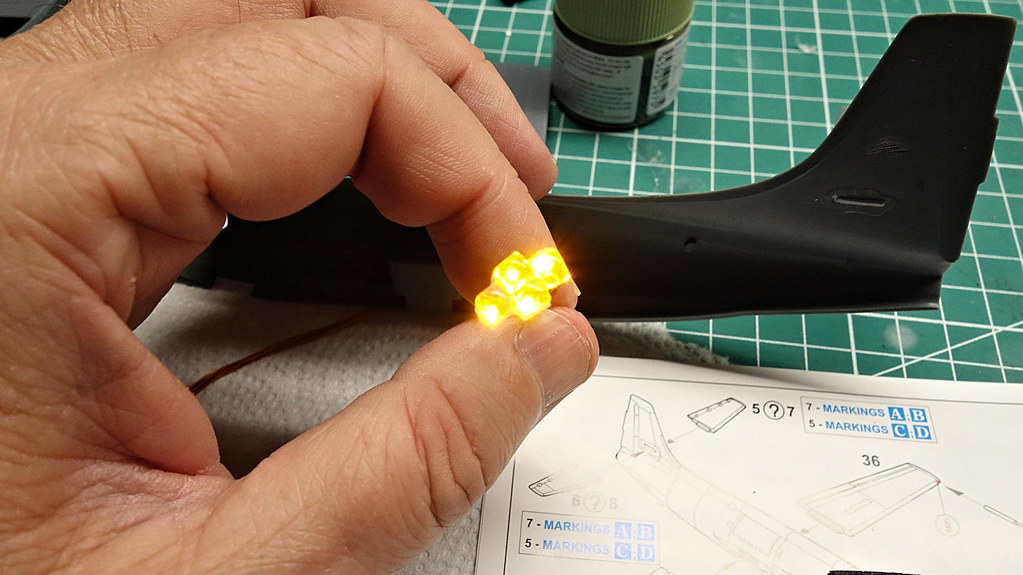
I used tea-light LEDs. Why? Two reasons mainly. The first is that they give a fiery yellow color. The second is that they modulate in brightness. The latter will add a little bit of motion/animation to it.
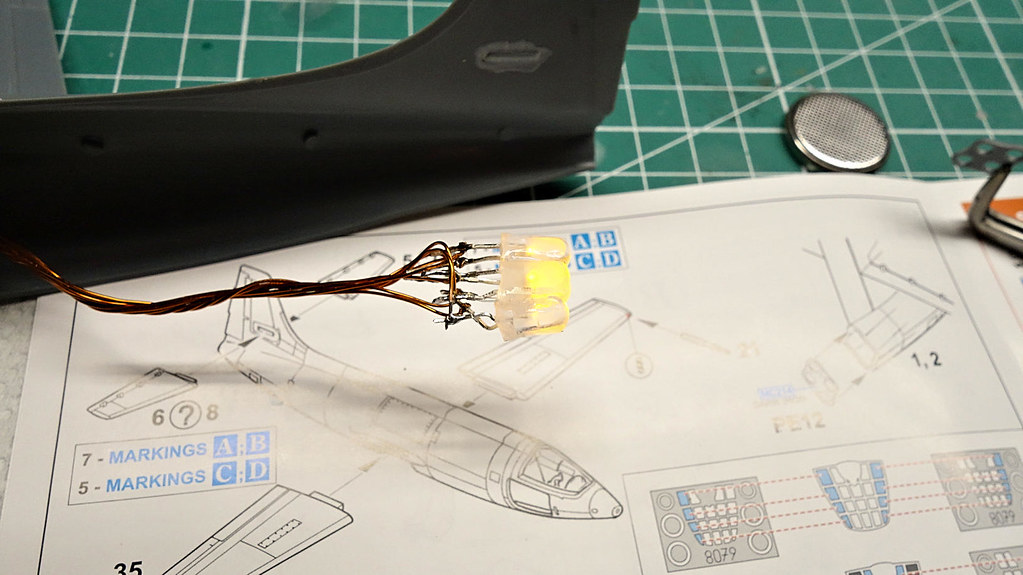
I extracted 4 tea-light leds and ground down their housings so that each LED has 4 flat sides to them. By creating flats on them it helps with the gluing, and it also helps to reduce the overall size of the assembly. I glued the leds into a cluster using CA. The wire I used is 26 awg magnet wire. 26 awg is probably over-kill, but it is what I had on hand.
A rough mock-up looking into the fiery furnace.
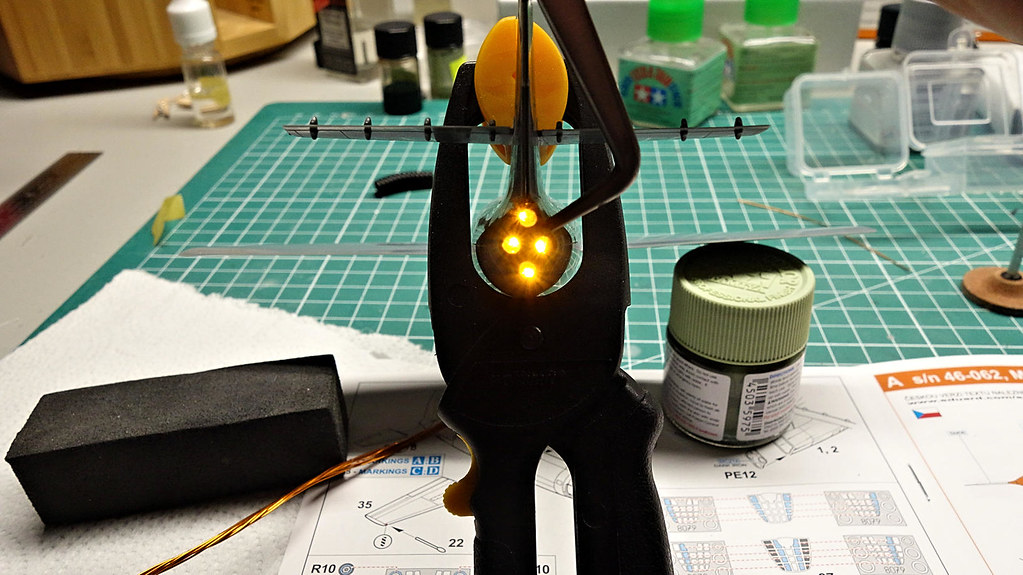
With me holding the exhaust plate. That plate should go on the inside of the fuselage, and that would have been too tough to mock-up without gluing it. I can’t glue that yet.
I did some experimenting. I tried glass tubes and acrylic rod, both did not transfer light very well along their sides. So, using fabricated plastic is probably a no joy. It is looking like I am locked into using fiber optic strands with some cotton and or just cotton. I will cross that bridge when I get there.
Bakster> Those look very good! As for exhaust, I just don’t know. Perhaps a wire with some acetate wrapped around it? Try looking up “artificial flame effects”. You might get an idea from that.
Thanks, Gary. Yeah, more research to do. No worries. For now I need to mount that assembly and begin closing up the fuselage. Then it’s more seam filling and more body work. After that, it goes to paint. The exhaust can wait until the very end, if needs be.
Bakster> I’ll keep looking around for ideas. I’m sure someone, somewhere, has done something similar.
As for me, not much happening here. I’m in a survival mode at the moment as the heat has gone out (again). I have a small space heater to keep my workroom warm, and I’ve made a pallet on the floor to sleep. The apartment is in the 60s, and I run the Aux Heat on the furnace every so often to keep it tolerable (it’s only 28 F outside, going down to 17). My electric bill is going to be through the roof though! In the morning I’ll have to get the apartment manager to call the HVAC guys to come out and fix the fix they did Monday. sigh
I am just doing small things like masking the heat shield for the Service Module and finishing details on the base. I’m also looking at making a new blast cover for the top of the Command Module out of plastic card, as the old one I glued completely together. Now the CM cannot dock with the LM, so I’m making a new top so it can. They’ll be interchangable, so no problem there.
Hope everyone is doing well and trying to stay warm!
Oh man, sorry about the heat situation Gary. That sucks, and I pray they fix your furnace fast, and right! That happened to me last year in the dead of winter, like your situation. It’s a bit disconcerting. Hang in there.
Yeah you would think someone would have done it. So far I am coming up empty. We will figure something out. I appreciate your looking but please don’t trouble yourself too much. You have bigger problems to worry about.
Progress continues on your end, good to hear! [Y]
I installed the light assembly tonight. What a big waste of time. I decided to affix it with ApoxySculpt. Almost two hours later I decided to pull it apart. That epoxy is good, but it is very slow curing, and not so great when you are trying to hold a piece in a specific position. If there is any tension on the piece it will walk on ya. In my case the wiring has just enough tension to make the piece drift. It was pretty frustrating. So, I pulled it apart, mixed up some 5 minute expoxy, slathered some on, adjusted, checked, adjusted, checked… done. Son of a… its a learning moment.[:S]
Gary: ACK!!! Hope they get your heat back up soon. It’s supposed to warm up this weekend but still this cold is no joke. It dipped down to 10F/-12C here last night.
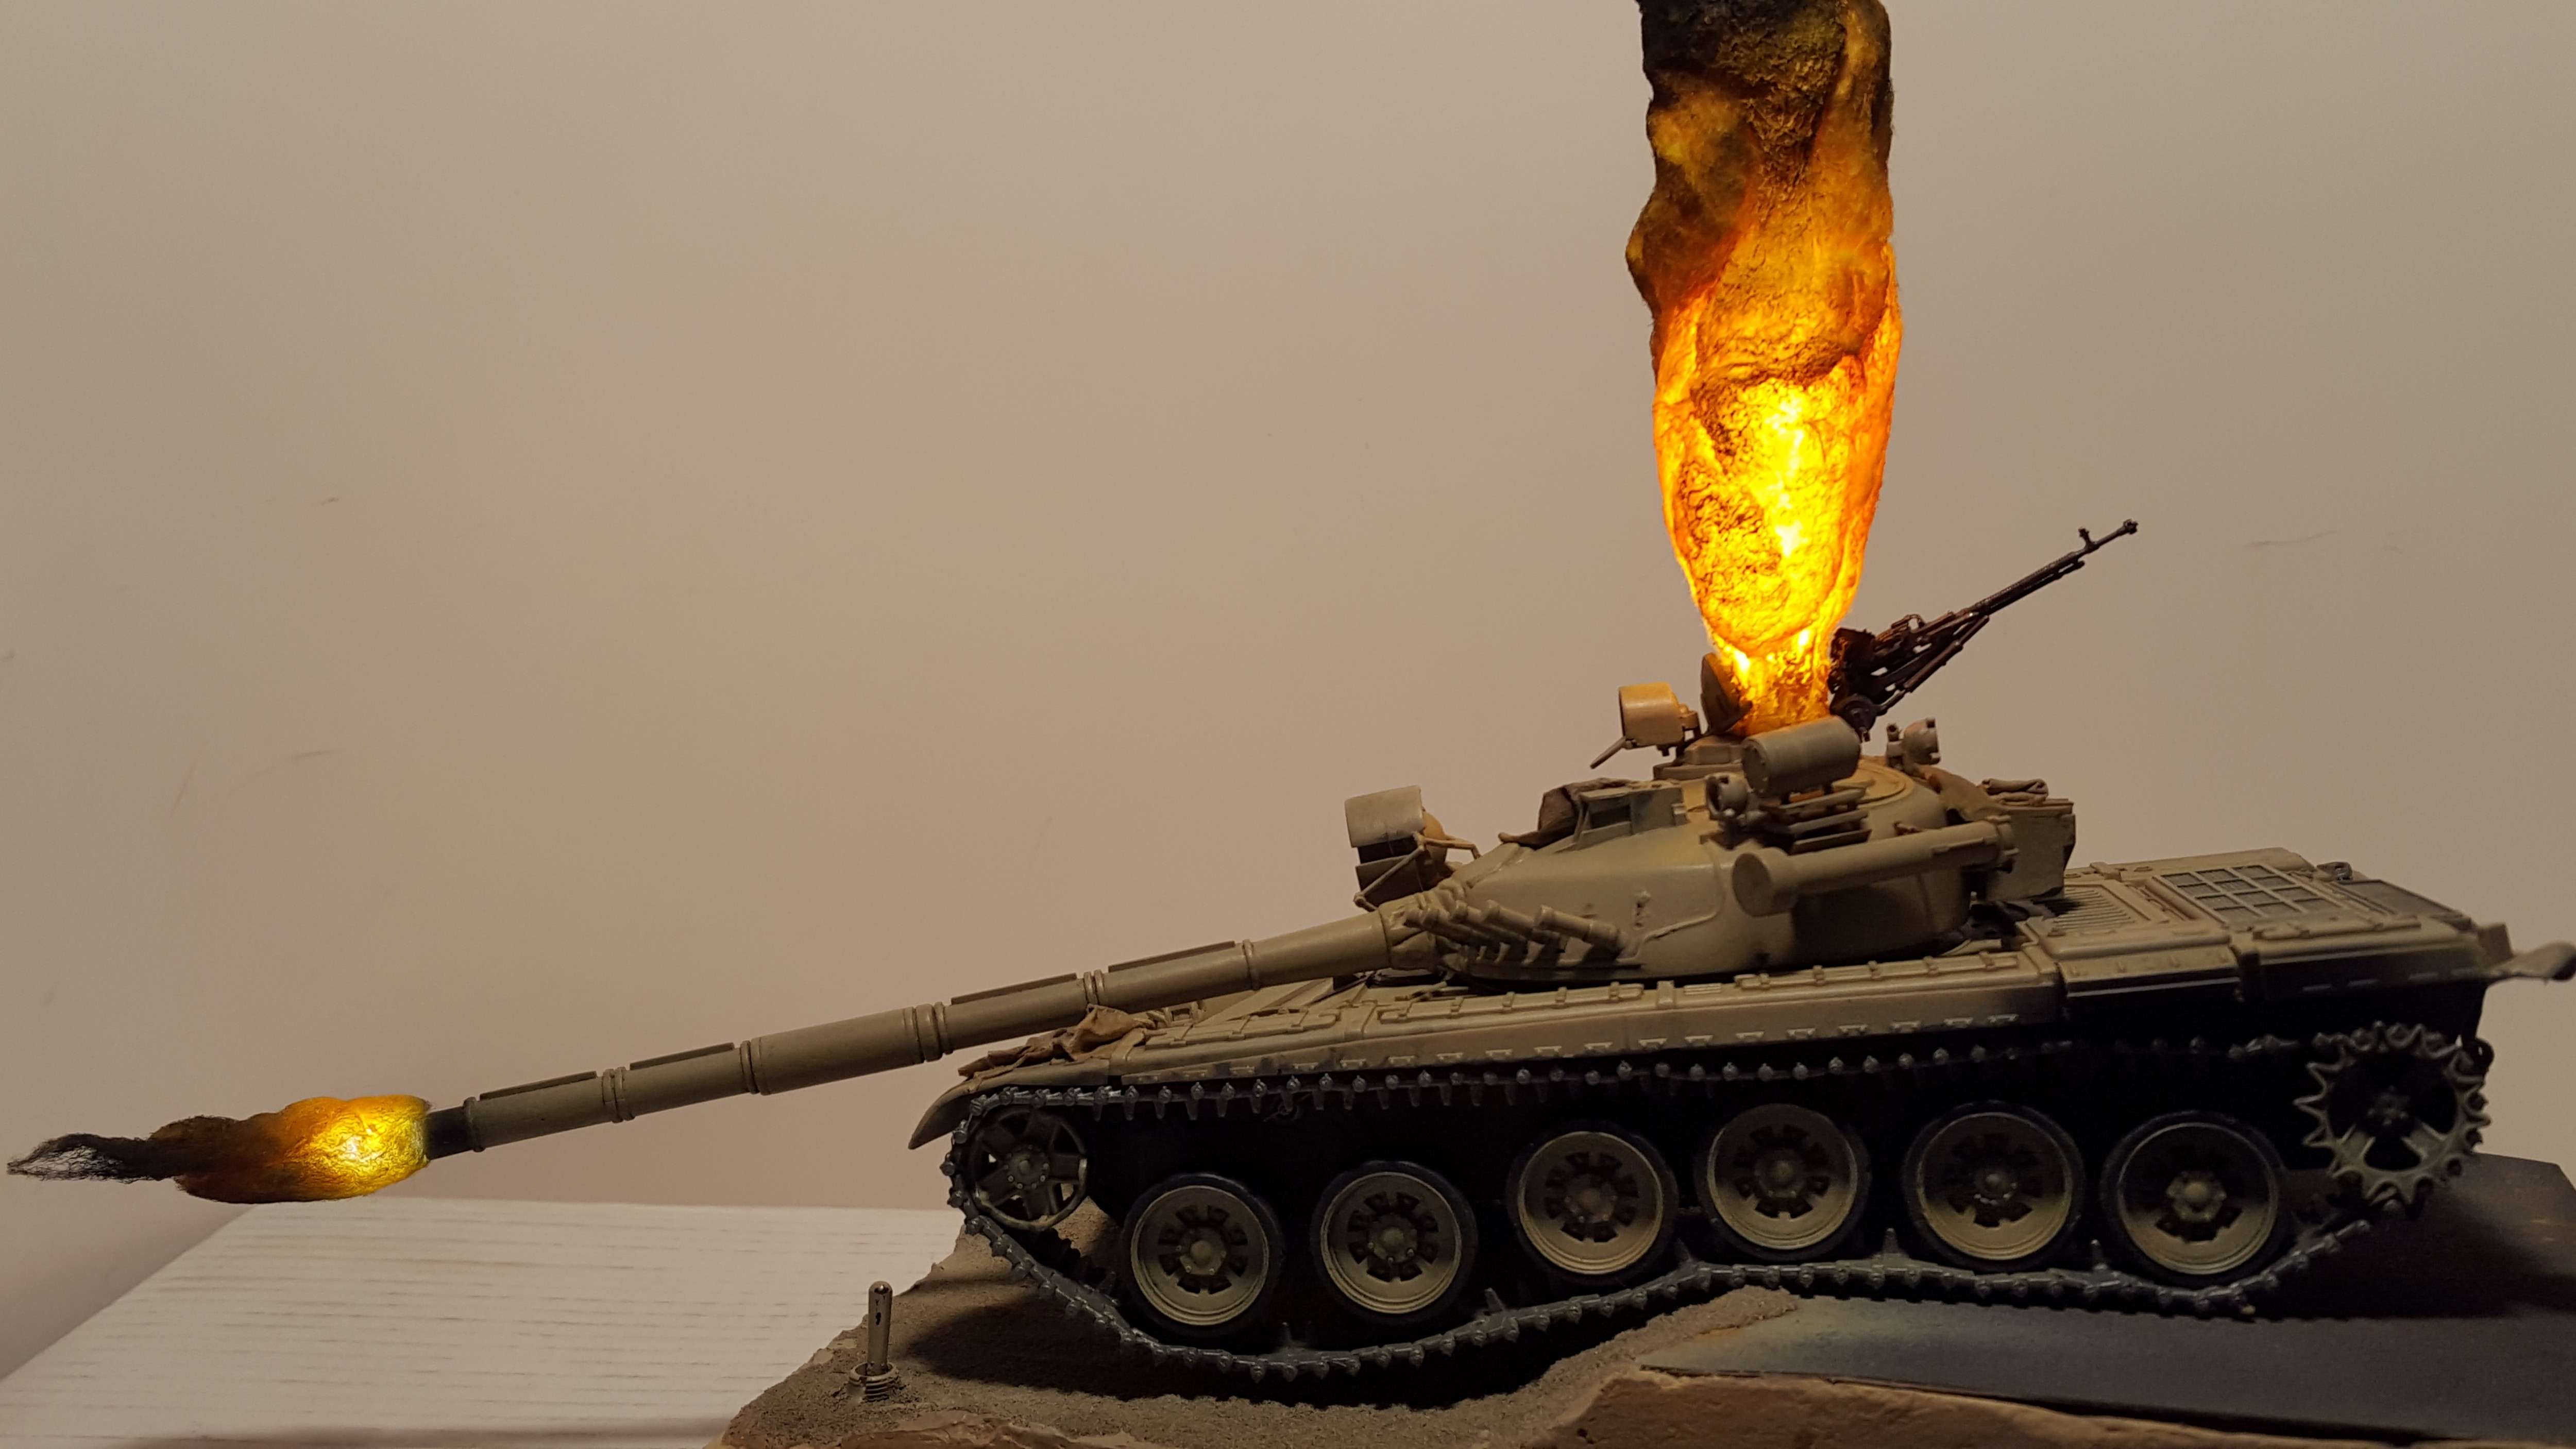
Bakster: I really like what you’ve got there, the flickering effect of the tea candles should look really good. Tim LEDs would probably look better, but I’m not sure it’s worth the extra expense- esp considering you’re using four of them. Steve’s use of cotton balls on his T-72 is largely what I was thinking about when I brought them up.