Diggin’ it!
This is pretty cool - nice work!!
!http://www.sherv.net/cm/emoticons/reptiles/green-frog-smiley-emoticon.gifrivet… rivet… rivet…rivet…rivet…
“there’s a crossover point where a legitimate hobby starts to shade into a human rights violation”
That quote is going on my wall.
Cool build! Kinda remind me of an old Hornsby chain tractor.
I love those things. Yes, very much the territory I was going for.
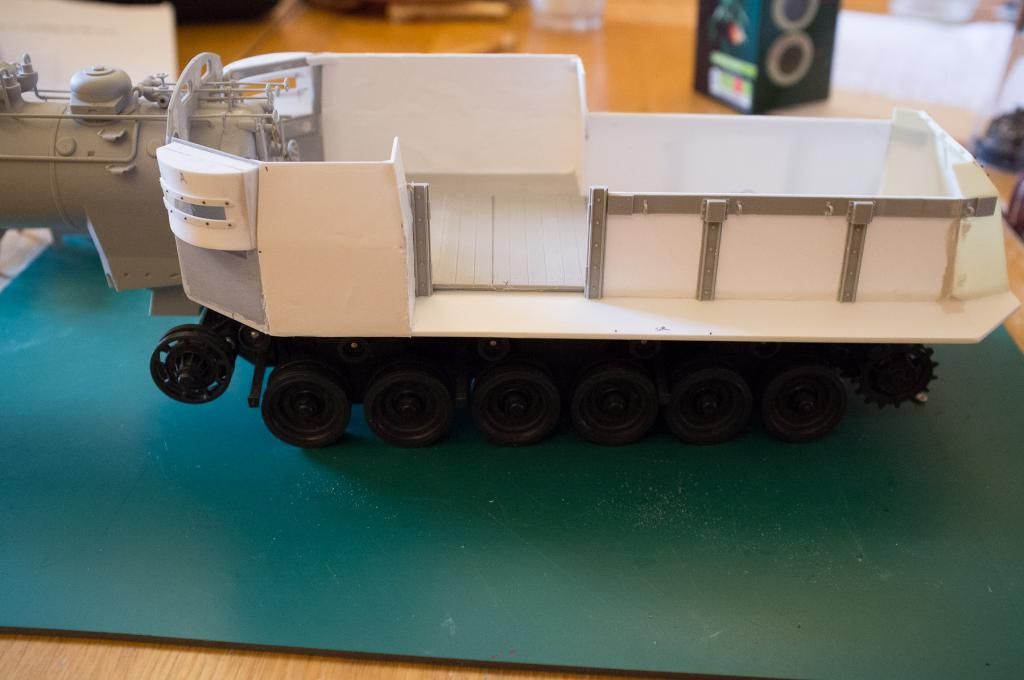
As promised, some more pics:
The sides for the rear portion are now in place, with some uprights taken from the railway carriage kit and scratchbuilt panels. Right at the back is a slightly modified artillery emplacement shield.
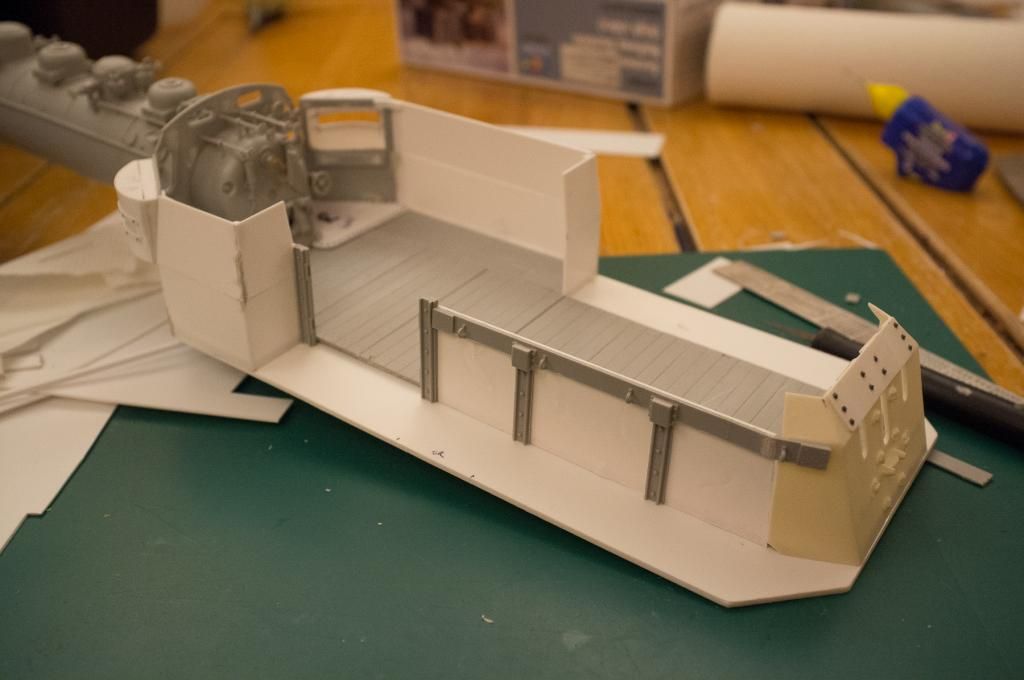
Other side on:
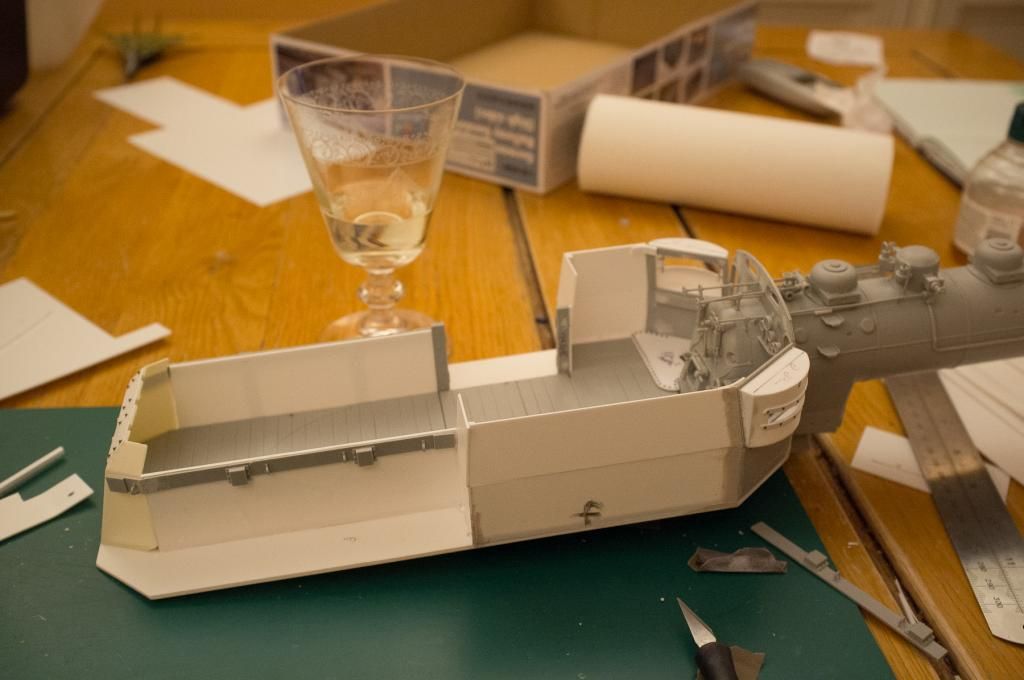
Here’s the whole thing perched on top of the BR86 undercarriage, though as it turns out I’m unlikely to use much (if any) of that in the end; it gets kind of swamped by the Centurion workings I mentioned above, and I suspect I’ll probably go with the Centurion stuff and perhaps just incorporate the odd bit of the original locomotive underpinnings. Still, it gives an idea of how the thing would look “sitting up”:
Here’s the Centurion undercarriage I found part-built. I’ve cut the upper portion of the hull off completely to level it and bring its top in line with where the original “skirts” were:
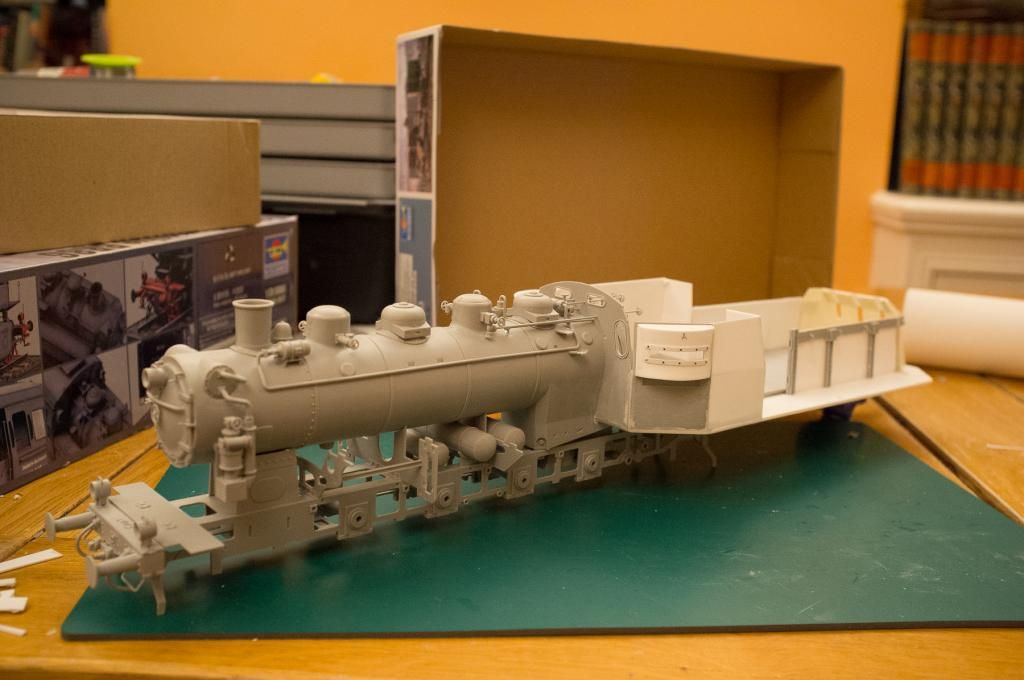
Now here’s the working PATW sitting on top of the Centurion assembly, just to give a rough idea of where we’re going. First, under the rear:
And also under the front – I’ve precariously balanced the kind of blocky side running-board of the loco (I really should learn what things are called) in place as well, because that’ll be in place by the end of the build and it neatly disguises quite a lot of the join between the two models. This also shows why very little of the original loco undercarriage is going to be useful / visible if I go with adding a second Centurion kit to extend the wheels under the whole thing:

Initial thoughts are that I really like how the Centurion assembly looks underneath the loco portion. I can probably do something to close up the front of the Centurion and connect it up with the boiler above it that both removes the need for the loco’s undercarriage partly or entirely, and looks like it might contain some kind of set of gears and sprockets for connecting the loco’s steam power to the tank wheels (even some kind of basic blocky box or whatever would at least let me believe that this was happening… somehow… somewhere).
I could reinstate the loco’s front buffers and stick 'em on the front of the tank portion. That might look fun. Or it might look daft… may have to try it out and see [:D]
I’m now not sure whether I should have cut further windows / gun slits in the side emplacements on the rear. They look a little blank compared to the prototype [:S] Maybe I can get away with closed hatches, and not need to cut apertures?
Looks pretty darn cool so far, thanks for the shots of her in construction.
Hey man, that’s really looking like something. How fun is that!
It was nice to make a sudden burst of progress! Perhaps getting other people to build it for me is the way forward [;)]
Thought------use the loco’s steam pistons and driving rods to tie to the tanks drive sprockets through a “gear reduction box”
I love the idea. Especially if you use one track on the two tank chassis’, instead of two separate tracked chassis.
[clwn]
I found this contraption using a gnarly gear reduction mechanism… Looks like most of that stuff could be replicated with the guts of an old clock or fishing reel.

Fishing reel [^o)] That’s a great idea CN,
I love finding modeling uses out of mundane items, such as wire, rocks, solder, nylon mesh, clock gears.
Ooh, that’s interesting. It would have to fit on the outside of the tank wheels and treads, which might be tricky to pull off – it’s certainly going to be further out from the sides of the loco than is intended in the original kit. Or maybe I could somehow imply that it’s driving the axle inside some kind of boxed-in structure? That would get me out of the woods in a hurry [:)]
Definitely going with one track on two chassis (chassises?). Exact details TBC, but I think that’s the look I’m aiming for.
That is just brilliant. How cool is that thing?! Exactly the kind of look I was thinking of – now if I can just work out how the hell it’s supposed to work, maybe I can steal some of its mojo… Basically it’s just great big chain-drive belts coming down to drive wheels…
I want to drive one now [:D]
The rude-word-filter went to town on my previous post! The word was pretty innocuous, too: starts with an M, ends with an O, has a J and another O in the middle. I mean, I’m aware of its etymology, but still… hasn’t the rude-word-filter got better things to do with its time? [:S]
Fantastic work…thanks for sharing…and please share more of your work in the future. It’s indeed top-notch.
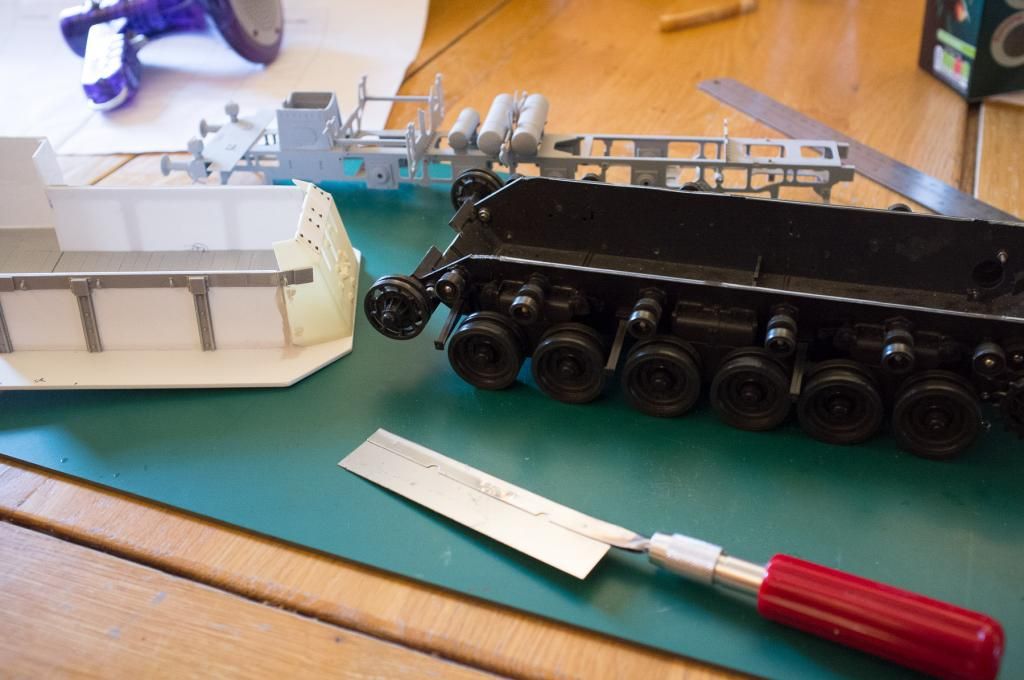
Okay, a little more progress to share! I managed to track down a second Centurion chassis, this time with some parts missing, for a pretty low price; so the next step was to weld the two together in a classic back-street chop-shop fashion…

That is a LOT of wheels [:D] Rather brilliantly, these things come with pre-assembled plastic tracks, so no more fiddling with little lengths of wire and superglue. The two welded sections were then given a plasticard top with a cutout to allow the loco cab firebox to sit through:

With the loco sitting on top of this, there’s a small portion of the front of the undercarriage that’s still visible under the front end of the boiler and through the boxed-in treadplates, and so I glued some bits of the original loco undercarriage and some spare tank parts on in this area to make it look like it was mechanically and structurally coupled in some reasonable way to the boiler itself. I’ve given up on trying to make this technically convincing, but I think it looks more or less artistically convincing – Stuff is going on down there, probably important, complex Stuff. Just don’t ask exactly what Stuff, okay? [:P]
Also some rivets, cos you can never have too many.

With the loco section perched temporarily on top you can see how it joins up:

And with the side treadplates in place, most of the Stuff is neatly disguised from view in any case:

I then took the opportunity to undercoat the undercarriage in black, since the next stage is probably to glue the whole thing together and at that point it’ll become quite difficult to get into all that middle section.

So the final shot is the loco perched on the black undercarriage, which does make the Stuff vanish quite nicely. The eagle-eyed among you may have spotted that I did decide to put some closed hatches on the rear section: those panels just looked too blank without something going on. I’m pretty pleased with the overall look – really digging All Those Wheels! [:D]

That’s going to look very cool.
Opinions wanted! Front of the PATW without loco bumpers (more of a tank look):

…and front of the PATW with loco bumpers (more of a train look):

What do you guys reckon? I can’t decide if they look cool, or a little undersized given the great big treads that are going to go on either side of them. All input gratefully received!
Loco bumpers on for sure. You have a “Steam Boy” look going on with this build that is absolutely fantastic!
I can imagine it crossing over some train rails on some old dusty back road. ![]()