Hi Casper,
Looks like fine work there! Top notch! [Y] [Y]
Ken
Hi Casper,
Looks like fine work there! Top notch! [Y] [Y]
Ken
Hi “O”,
Sounds like you are on “overload” with that schedule! I am only taking 8 credit hours this semester and that keeps me busy enough. Nice work on the fabric cover, looks very cool! [Y] [Y]
Ken
Hi Carlos,
That is looking sweet! Great job! I hope my bird comes out looking half that good! [Y] [Y]
Ken
Ok, time for some Squadron Green. It also helped with the nasty gap between the kit fuselage and the resin sidewalls.
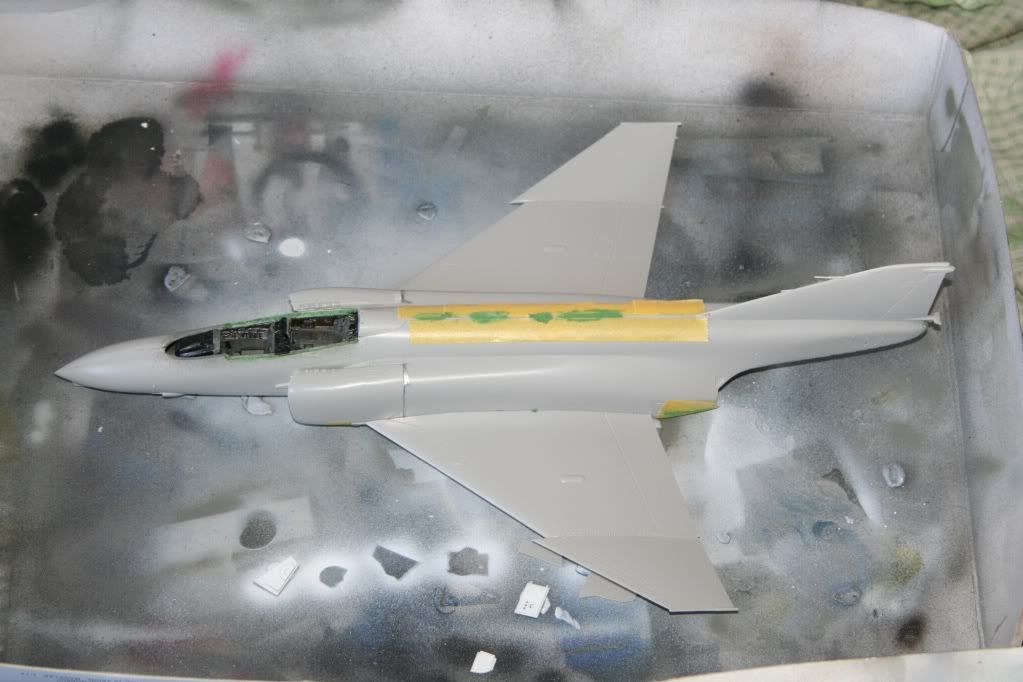
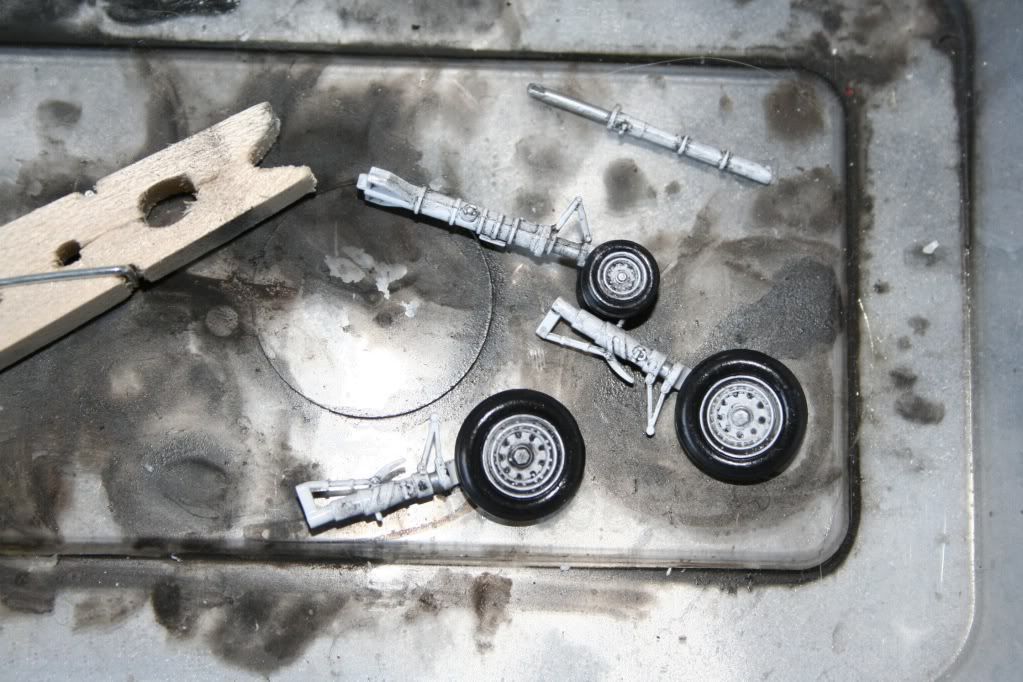
Wheels done. Will add some unused coloured PE from my F-16. Lots of wheelbay cables. Some weathering grays on the tyres next;
Weapons pretty much done. Also used some unused PE from the F-16 set.

Strangely the Hasegawa kit only contains one decal sheet for the Midway markings. So there is only really a choice of one set of markings out of the 3 shown on the instructions. Included in the missing decals were all the coloured bands for the missiles. So the decals shown are also unused from the F-16 plus some coloured ones I found that I could cut thin stripes. I guessed and used my best judgement so I hope I haven’t offended anyone with my inaccuracies! [:O]
Cheers
I would have to agree that the foil seems a bit too thick, SOMM. I understand tank and armor modelers use tissue and I think white glue to simulate tarps. Perhaps that might work? I don’t know anything about the technique as I am mostly focused on aircraft.
Casper, I certainly won’t be offended. It seems that of the few kits I have where markings are provided for the weapons, all of them are different! And then if you search for photos on-line of the same weapons, they are different yet again.
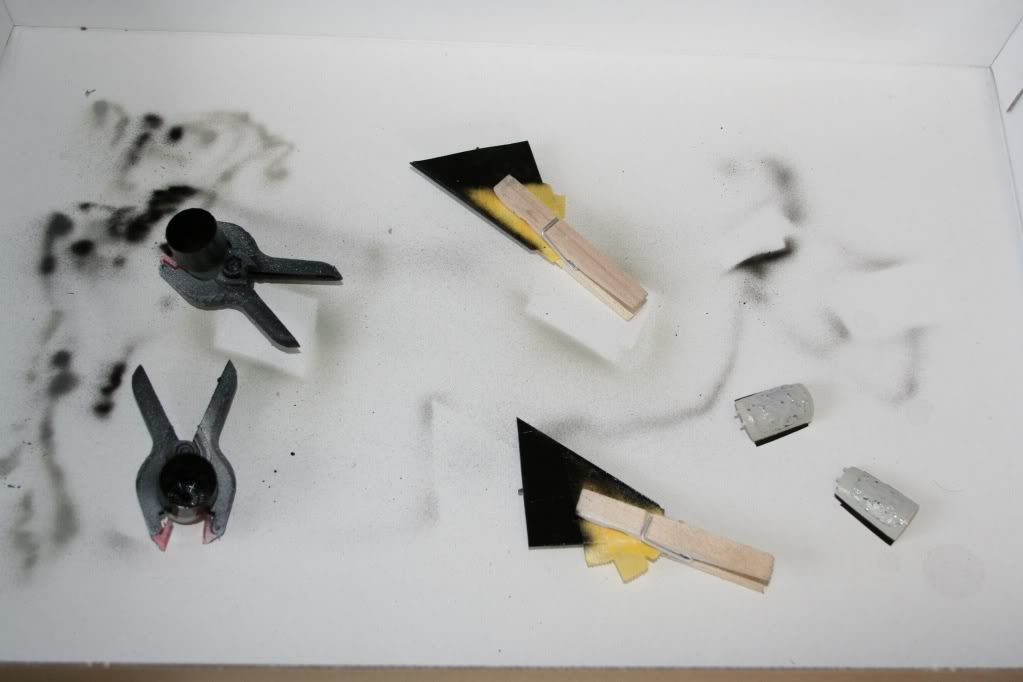
Tonight was a bust for me! I finally sat down with the Phantom for a bit of wok as I have been busy lately and find it hard to find time. I am trying to close up the cockpits for painting, which includes masking of the canopies. I almost forgot the HUD beneath the windscreen, and when I went to install it, my tweezers went SNICK and the display was launched into the unknown! It’s so tiny, I didn’t even bother to look for it! I cut a tiny piece of clear sheet stock and cemented it in place and called it “good enough”! I decided to walk away from it at that point as the frustration level was a bit high at that point!
Jimbot,
I’m mostly an aircraft builder too, but I’ve tried the “tissue technique” once or twice with some sucess. I think I’m gonna use this first “thick foil” attempt as a “rough pattern” for a second try made out of thin kitchen foil. I’ll see how that looks, but if that still looks too thick, then I’ll use that kitchn foil effort as a “fine pattern” for a tissue attempt. Make sense?
Once I get going on that, I’ll post pix so you guys can give me some feedback.
Cheers!
-O
Shissshhh…I hate that SNICK sound, it’s the sound of the carpet monster, snapping its jaws…devouring its prey whole…never to be seen again…
Well, until you hear the vacuum monster go TICK.TICK.Tick.tick.tick.ticktickticktickTTTTTZZZZZZ…never to be seen again…
So true.
Hi Everyone!
Okay, maybe you all have already heard of this, but it is news to me. There was an unofficial version of the Phantom II called an EF-4C Wild Weasel. This bird was developed during the Vietnam War. Here is a link to a web page that has the description:
Pretty cool! I just might have to build one of these!
Ken
two good sources of Weasel pics, drawings and intro dates are
the Spirit in the Skies book
and the old Weasel, the Sam Supression story by Squadron
the Phantom Weasels used in VietNam were all EF-4C’s,the two EF-4D’s were test aircraft, and the G’s didn’t get done until after the SAM threat in Israel in '73
the EF-4C’s also couldn’t carry the Standard, just the Shrike, and had a unique “2 herpes” style of IR nose fairing for the electronics
as much as we love our Phantoms,the bulk of the Weasel work was done by Thuds,Skyhawks and Intruders, the last two as Iron Hand strikes,with the EF-4C coming along just in time for Linebacker, with Navy Corsair IIs also providing Iron Hand missions later in the war
Hi fellows:
Thanks Bocscar & Son of Medicine Man for the nice comments [:)]
Bockscar: I didn´t use any special thecnique for masking the stabilators to paint the sloted edges. Just used Tamiya masking tape and a lot of care to place it, the rest comes alone. Not even myself could believe the result when finished [:P] If you come to Buenos Aires it will be a pleasure to drink a couple of beers with you, and some good Argentine red wine too. [t$t]
Now, decaling is finished and I´m weathering the bird. I applied a gral oil wash and drew with a hard pencil the subtle circles on the spine of the fuselage. Next I´ll place the UHF antena and, fix the broken antena on the ruduer (secaond time [:S]), and some other details that I left. This weekend I´ll be working with the misiles.
!(http://i101.photobucket.com/albums/m52/CSCH/F 4 Phantom/P1000444.jpg)
!(http://i101.photobucket.com/albums/m52/CSCH/F 4 Phantom/P1000443.jpg)
More pics on the way…
regards
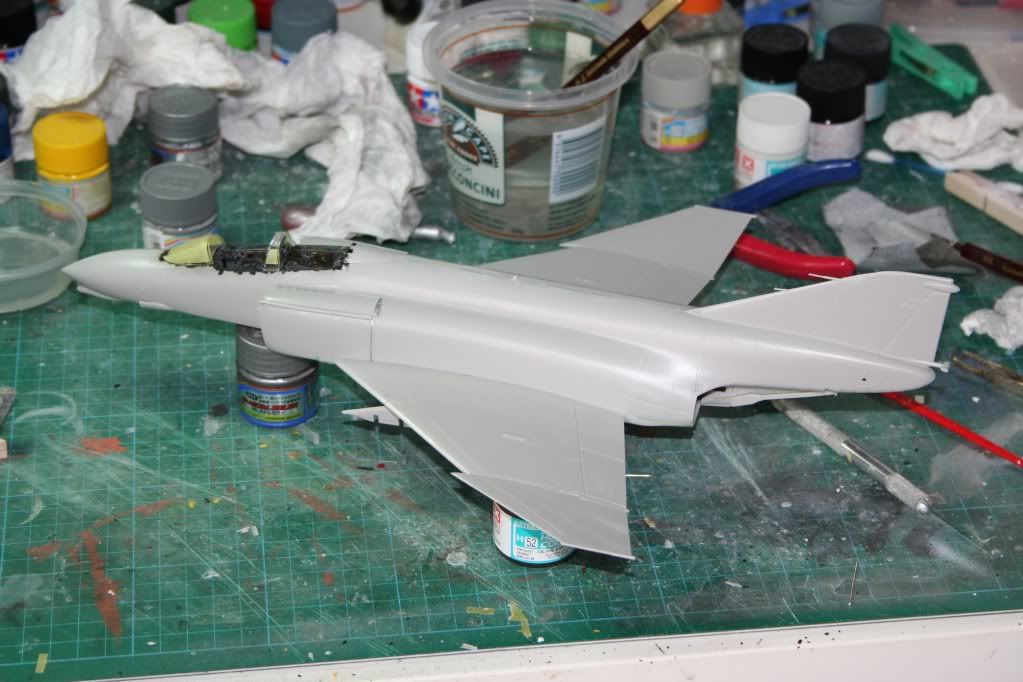
Ok, I’m pretty much ready to mask up the cockpit, prime and then start laying down the colours.
Cheers
So underside sprayed with White FS17875, top with Gray FS16440. I decided not to use the black decals supplied for the large stripes along the sides down to the nose. Big decals like that just don’t entirely set properly and often break. I masked off all the right areas and decided to paint it. I also primed the exhaust panels in gloss black as well ready for the Alclad metals I’ll use in that area.
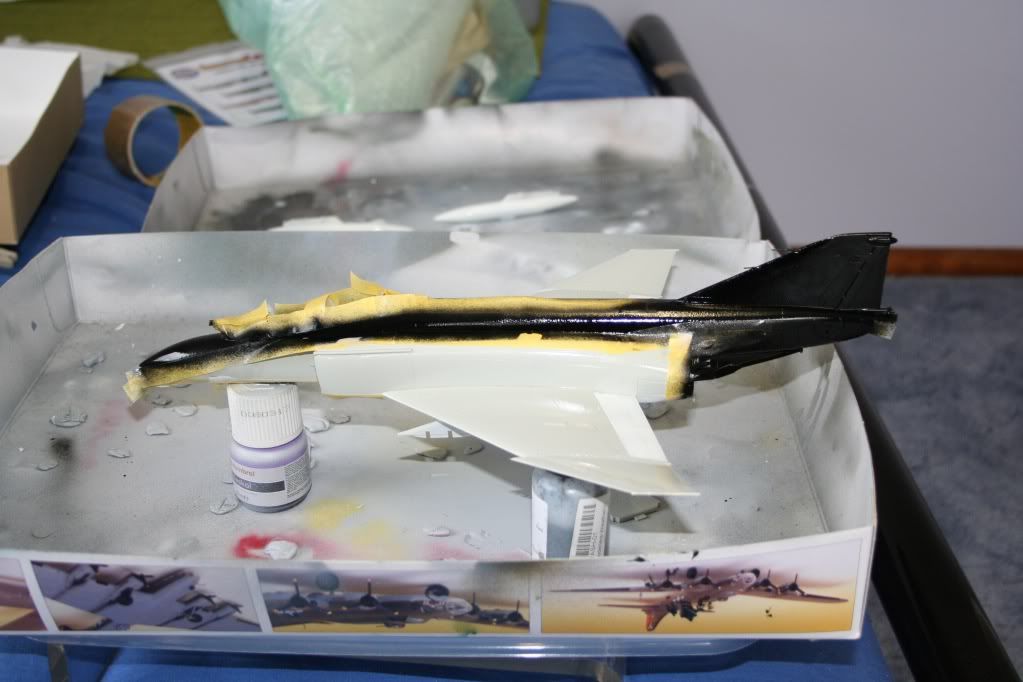
Also rear wings and exhausts primed for Alclad. I plan to use magnesium for the exhausts, jet exhaust for the panels with trimmings in Alclad aluminum. Should look great. Also I’ll try a gradient pattern in various shades of gray to get the jet exhaust looking more stressed closer to the nozzles.
Cheers
I picked up this Hasagewa kit amongst others from a deceased estate, Kit # DOC:500, not sure how old it is, cant find any reference to it on the net?
Its a pretty basic kit, not too many parts, solid but it doesnt fit together very well.

The raised rivets on the panel lines are massive - dont think these are to scale!

Managed to hide the fuselage seam but how do I restore the rivet detail???
Big gap betweeen fuselage & left wing, also between tail fin & right fuselage, intake covers dont fit. 
My inexperience has been exposed here, tried filling the with gaps correction fluid & primer, sanding, then superglue & debonder - result was a big sticky mess on left wing, more sanding & loss of detail…
I dry fitted the intake covers but couldnt remove them so glued them thinking I could sand them into shape - too hard, more loss of detail, which I have no idea how to restore - not a pretty sight!
I think this one is destined for the ceiling above my son’s bed - I’ll finish it, but its not going to be one for close inspection - put this one down to school fees. Maybe give some inspiration to all the novices out there?
Definitely need a beer now
Hi NeedBeer – I can see why you need beer after this! I’m pretty sure it’s a 1960s tooling, going by the mid/later '70s box livery. The 1969 (I think) F-4E had raised lines but the rivet detail was much more restrained, so this one looks earlier again.
My recommendation: sand away all raised detail completely. Forget the rivets, they’re virtually invisible at 1:72 at the best of times, and try your hand at either rescribing (engraving) panel lines (which would have been easier before assembly, but still hard enough) or using the nifty technique of drawing them on with a mechanical pencil and small plastic rule, after the paintjob but before the clearcoats (if you use them). For the joints, whatever won’t stabilise as a usable filler, dig out with a hook or twist of wire and replace with putty (my recommendation is always Squadron White cut with liquid cement and applied with a brush), sanded wet with fine-grit paper wrapped around a stiffener, like a sanding stick, (which grade and lubrication you’ll be using, freehand, to repolish the plastic overall after eliminating the surface detail); then use CA glue to build up areas that need reshaping, i.e., to restore lost mass. There’s no need to bother with kicker, just be patient a few minutes. When the CA has set solid, adze it to shape with a flaking action, gently dragging a knife blade across the CA deposits. You’ll find the knack before long. This is best used on convex shapes, concave shapes don’t allow blade penetration or control.
If you can bring the hull back to an acceptable contour with the surface detail completely removed, you’l be in the baallpark for a good finish. Paint, decals, get artistic with the panel lines and let a clearcoat draw it all together, a little weathering with graphite or pigments… A lot of work, to be sure, but you might surprise yourself with the skills that will develop!
Cheers, Mike/TB379
The 1969 F-4E (I’m building 2 for this GB) has a mix of raised on the fuselage and recessed on the wings!! Very strange, quite hard for me to preserve the details, because I have not much of a clue on how to scribe with an X-Acto blade. Any info helps… Anyway, those rivets look downright scary. I need some Squadron/Milliput filler, anyone know any Aussie retailers?
Phew, now there’s a lesson! …
Mike, appreciate this input, thanks …
I’m going to take a break from the F-4 GB for a few days, will concentrate on my Zero ( a more recent & better fitting production) for the Jap GB … I’ll take all of this on board, reassess the project & give it another go …
Can now appreciate how the modelling generation from that era have built up their skill base
Beer & spa now
Cheers!
MA101 – You can get Squadron White through Australian Hobby Centres (Brisbane and Sydney, IIRC, the one in Adelaide changed hands and is under a new name, and they’ve run down their styrene stock and supplies bigtime.) For scribing, I recommend either a purpose-designed scribing tool, that looks a lot like a dental pick (Squadron have an excellent one in their range), or Pat Hawkey’s standby, a sewing needle chucked in a pin vice. The latter is very good, and produces less “swarf” than the other (plastic shavings).
NeedBeer – my pleasure, and I hope you come back to that beast with some new ideas!
Cheers, Mke/TB379
For small scale scribing, a fine common pin (sewing Pin) can work out better when put in a pin vise. It’s narrower shaft and finer tip seem to me to make more close to scale panel detail. I don’t do 1/72 or below anymore, my hands and eyes just can’t handle it; But that’s what I used to use after a lot of experimentation. Just don’t apply too much pressure. I also came up with a kind of home made guide which can help make the scribed lines more even. Take one of those inexpensive plastic rulers (the kind with metric on one side and standard on the other), and using a razor saw, carefully cut it in half length wise. Using the kind of ruler with a concave channel down the middle is recommended. Then take a small thin length of styrene, and shave it until it is very very thin. cut it into two pieces and insert the styrene into the center of the ruler, between the two halves, at each end. Use these strips as a spacer to create a very narrow slot in the middle of the ruler. You want a channel wide enough for the pin to slide down with little effort. Glue the two strips in place and let them dry. You now have a nice little scribing guide. You can make them any length you need. I used to have a few of different lengths and some which were very bendable to get across gentle low gradient curves. They work great. I hope this helps.
Rich
(BTW Still working on the FGR.2)
I could almost call you Brother! I look at this photo and not only is my Phantom in the exact same stage of progress, the clutter of the work area also appears nearly the same! I have just last night, attached the two sections of the canopy as you have here!
I do have a question though for you all: Is there a method you prefer for tacking canopies in place temporarily for painting? I usually use a few drops of diluted white glue or clear parts cement, but still i always seem to mar the areas when I remove them and have to retouch the sills around the cockpit.