Looks good so far Eric. You must have read my mind, I was going to ask you what you meant by “rub out” the primer.
Thanks Dale.
The paper towels work great and are not as messy as wet sanding.
L8TR
Eric
Here I am with the late start [:$] and I am just leading off with my impressions of my kit out of the box.
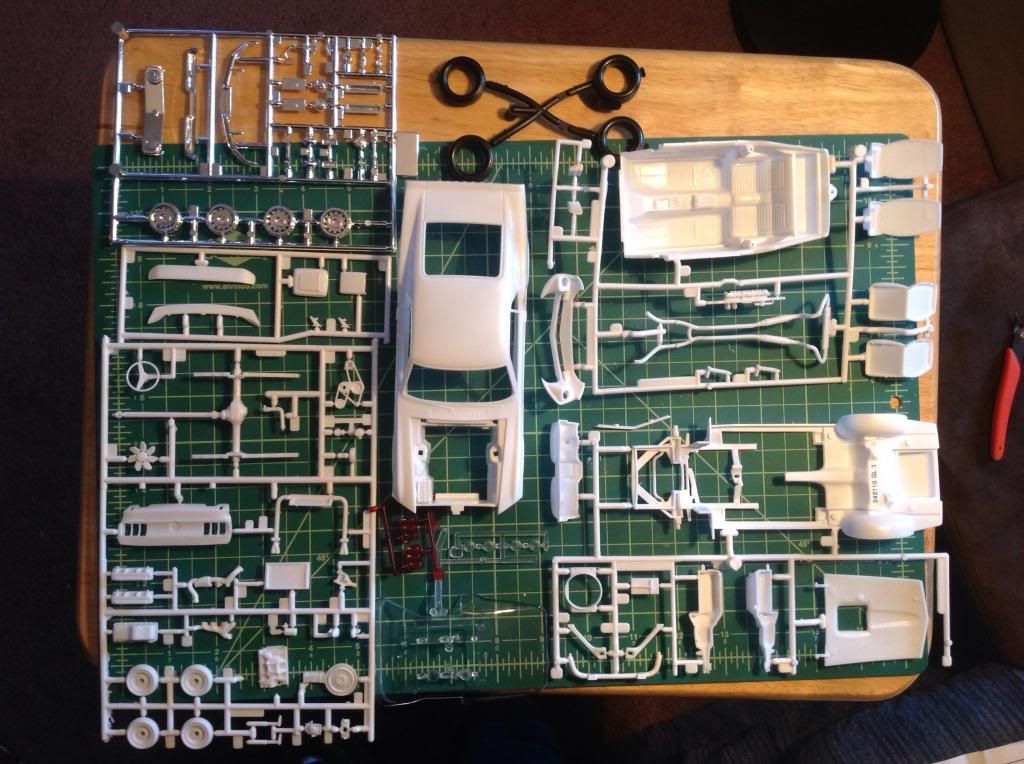
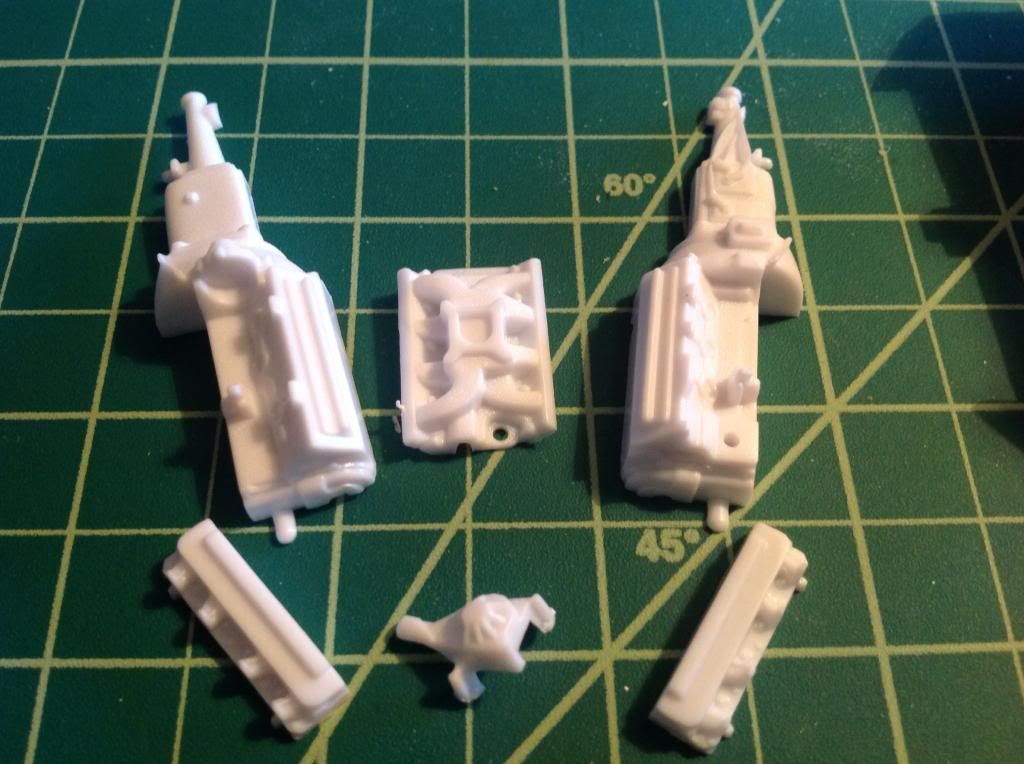
Parts are pretty clean and detailed. I am actually surprised at the amount of detail around the engine parts. I was considering if I was going to get any aftermarket parts or detail kits, mainly around the engine seem to be satisfied by the kit contents.
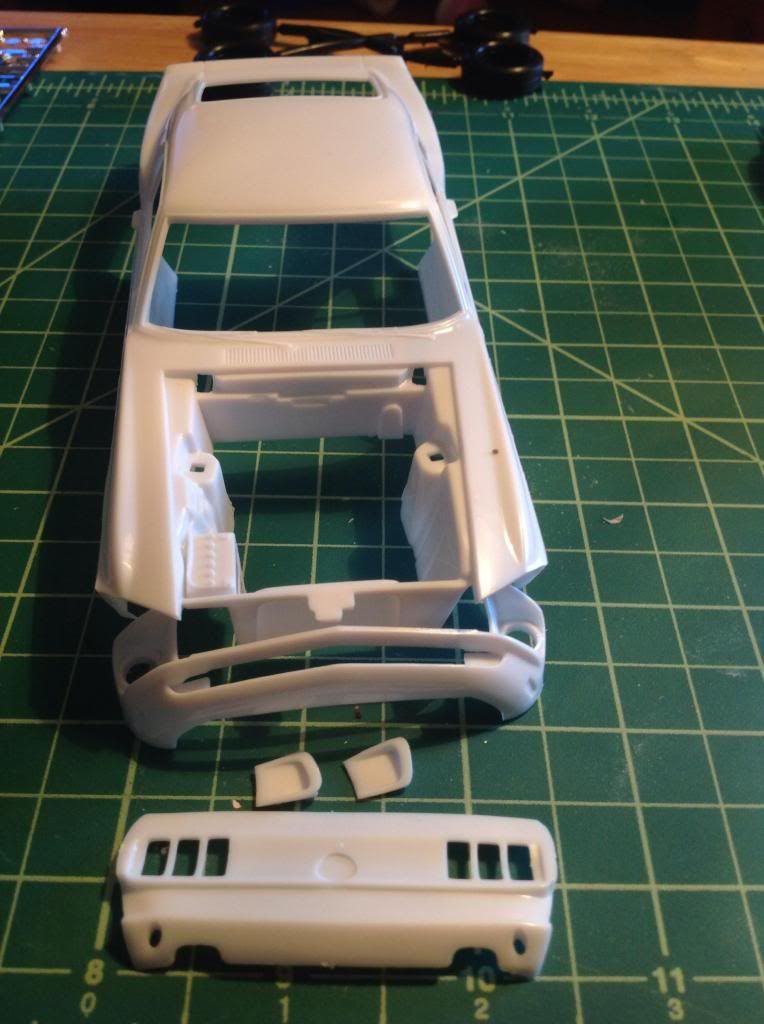
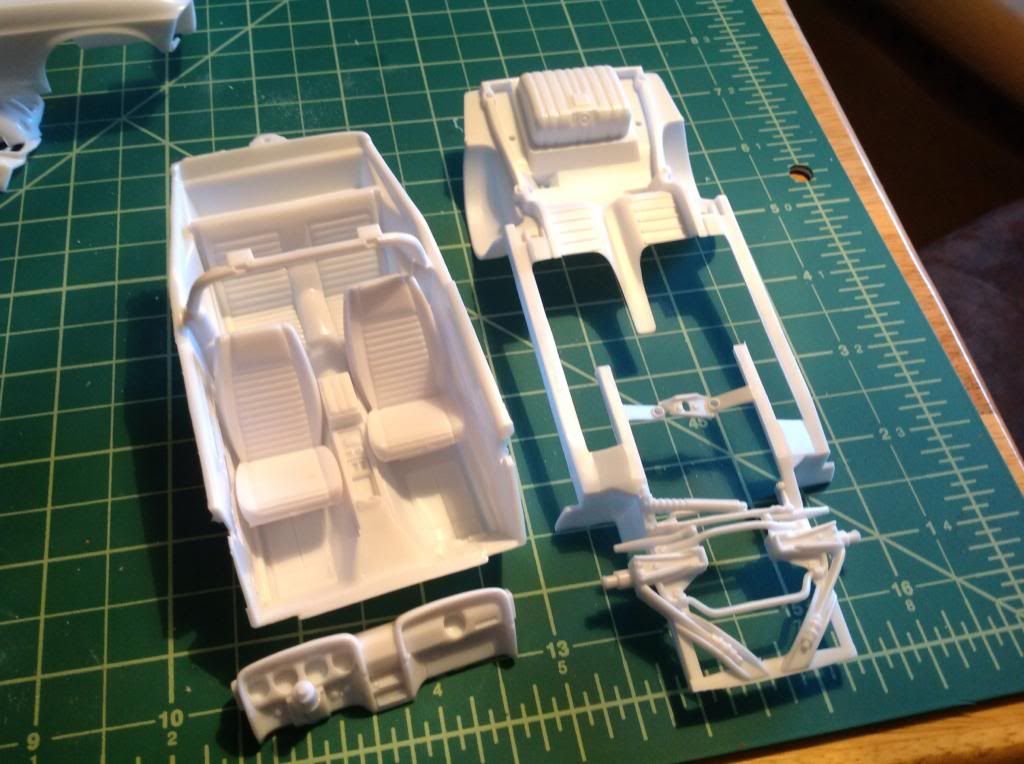
There is some great detail on the dash, radio detail and even wood grain on the passenger side. I was going to do a wood grain but with the plastic molded this way a preshade and dry-brush could be all it needs.
I really love the body lines. They did a great job on it. It is actually smooth and glossy enough, you could leave it white and throw the decals on it (LOL - j/k).
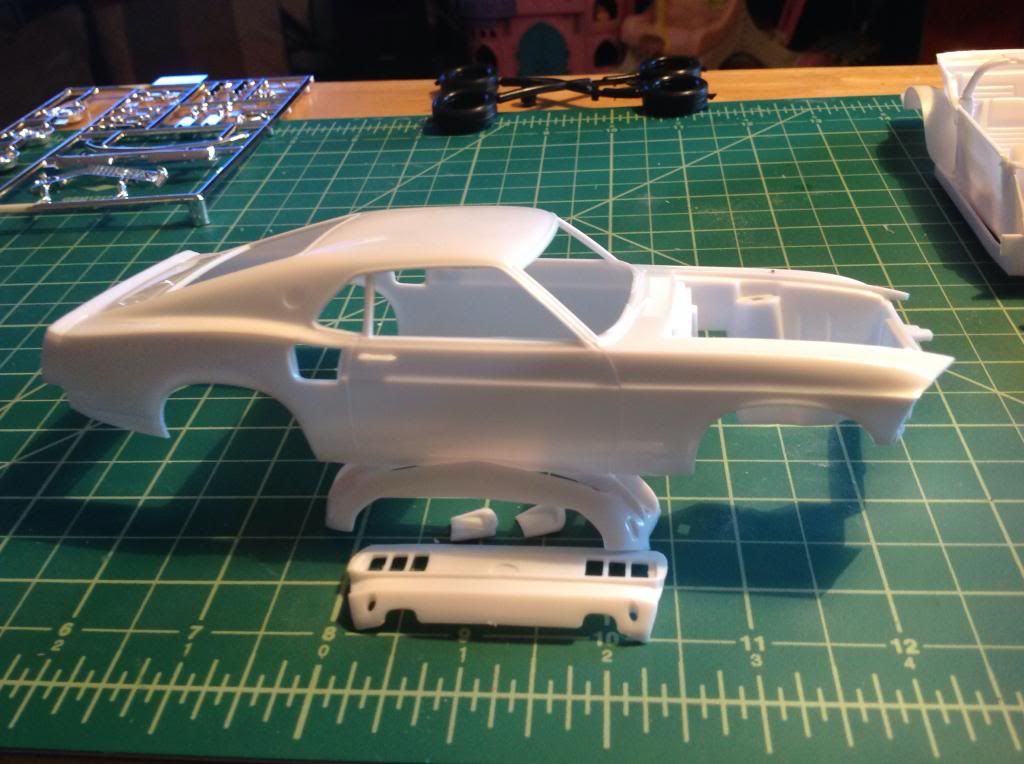
I can see that there are some minor fit issues, some small gaps and seams, as I test fit things, but nothing too big to overcome.
I have some questions for the group, if you would entertain them:
- One thing I don’t like is the wipers as part of the body. I would like to craft some real windshield wipers. Is this typically done? Any tips on materials/making them?
- Would it be wise to glue the front and back ends on before painting the body? I have seen it where they are painted apart, and then attached, but I am not sure which is better. I’m also not sure if it will create a challenge when I go to put the chassis into the body (i.e. will it go in without a fight with these parts already attached).
- Same question on the air scoops behind the doors. Affix before or after painting? I would hate to ruin the body paint, but I think I can manage either way.
- Side view mirrors…same question - affix before or after painting???
- Rubber tires??? The kit came with them. They are decent, but have a mold line around the center (I could live with it), but also 2 rubber sprue points on each side (not sure I can live with). Any tire recommendations appreciated.
I am going to start gluing and sanding for primer, just the main components (engine block and seats). Not sure I’ll prime tonight, but tomorrow for sure.
De-chroming tomorrow too!
Bear with me, as I will have more questions along the way. [:D]
@Eric - great work and great progress. I am assuming the paper towel was wet as you were talking about wet sanding, but was it wet or dry?
Thanks all,
Ken
HI Ken,
I would mount the front and back end and before painting. As for the wipers, they are aftermarket photo-etch ones but I haven’t tried them yet. Anything would look better than the molded ones though hehehe. If the mirrors are the sport type then I would also mount them before painting. It’s best to paint as together at the same time so you don’t get color variations. I usually trim the mold lines from the tires with a new #11 blade.
Also, the paper towels are dry. I was using sandpaper for the wet sanding, but no matter how hard I tried, I would always have areas that were back down to the plastic. Since I started using the paper towels, I don’t have that problem anymore and the paint is really smooth.If you look at the 62 Bel Air I’m doing in another group build Tony is running you can get an idea how smooth it is.
cs.finescale.com/…/1692780.aspx
L8TR,
Eric
@EW, I’ve been reading that GB. It’s so huge, I am only about half way through.
Nice coat on the Bel Air. Thanks for the advice!!!
Kt, EW pretty well covered your questions. Mount the side scoops before painting also. As for the tires, after you trim em like EW said, sand em a little with some 220 and 400 sandpaper. That will give you the slightly used tread look. If the sidewall still shines a little too much for you, scrub it with a little “Comet” cleaner or hit em with some Testors Dulcote. Keep glooin’ guys, I’m trying to catch up!
@Rommel, thanks for the add on.
Hopefully more will follow tonight.
Got some parts welded last night (LATE) and some sanding done. Also scribed the body lines.
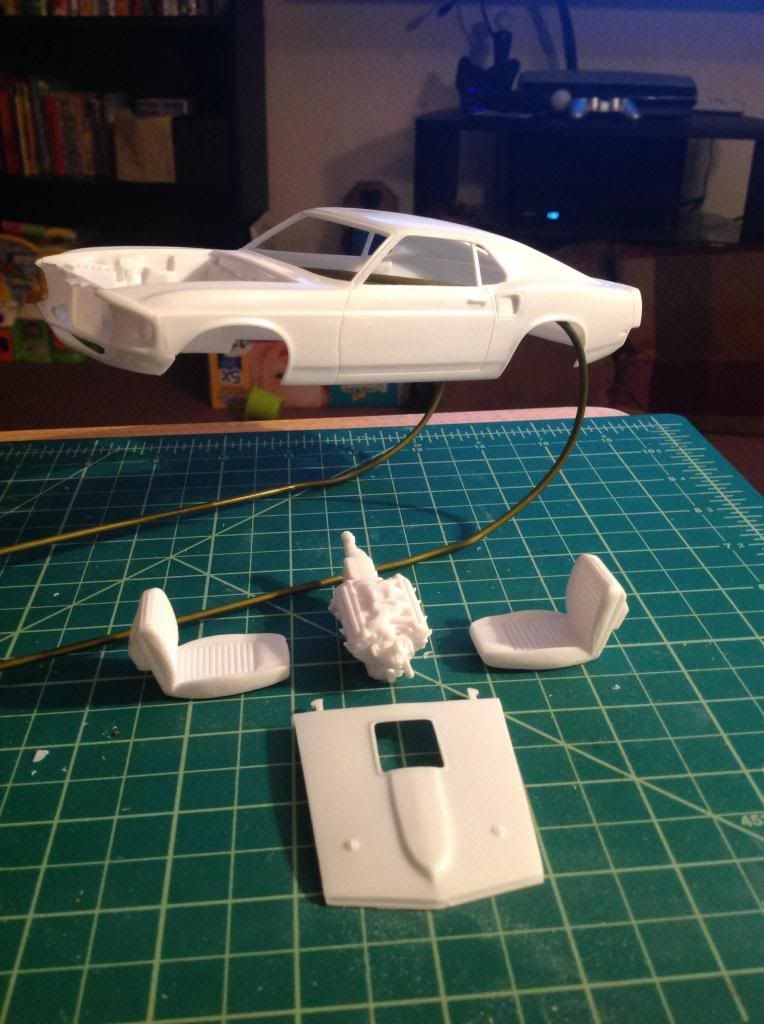
A little more sanding and I should be priming today!!!
FYI. I sanded off the wipers, so I am totally commited to getting the PE wipers. Problem is, I can’t find anything specific.
If anyone knows of a source for 69 Mustang PE details, please let me know. back to google for me! [:D]
Well the furnace quit working on Sunday, so I had to stay home from work on Monday and wait for the repair guy to come.[:D] That gave me some time to get some work done. I started putting the motor together, so far no issues there.

Then I started doing some sanding on the body, and removing some ejector pin marks on the under side of the hood.


There were some mold lines on the upper edges of the fenders. I’m hopeing when I sanded them I did not round the top of the fenders to much. I finish sanded with 800 grit wet dry sand paper, should that be fine enough before the primer?
Woops forgot to include this in my last post.
Looking good so far Ken.
What did you use to scribe the body lines and how did you go about doing it?
Kt, try Modelcargarage.com. They have some mustang PE sets of different years and I think the wipers for the '67 would work for you. Check em out, you might find something else you can use.
@Dale - Thanks. I got a scribing tool for the job. It is basically a metal handle with a small curved hook on the end. I got it at my LHS. It works awesome, but practice with it first should you get one. Once you have a feel for the glide along the groove, move to your actual work. At first, it is very easy to jump off track and mar the smooth surface as well as groove too deep and go through the plastic. It doesn’t take much to get the hang of it.
@Rommel - My guy at my LHS also told me about modelcargarage.com and I was checking it out already. They do have the 67 mustang kit, but it does not appear to have wiper blades. I think some of the other parts line up though, like the grill and pedals and the big plus is that they have some of the emblems and the letters for the rear M-U-S-T-A-N-G lettering. I ended up getting that plus a generic wiper kit for both 1/24 and 1/25 cars which should work just fine.
I have to make my GB badge smaller!!! lol
Dale and Ken - good progress, thanks for the updates.
I might have a look at modelcargarage.com too.
Cheers
Tony
This was to be my progress post on my Mako Shark kit. I did get the engine painted, some assembly and wired. I went through the rest of the kit cleaning up parts and removing pin marks and found the interior tub is missing along with the dash. Normal luck for me. If this run of luck don’t stop soon I may just clear my workbench, put everything in storage and take up needle point. I have had that kit in my stash pile for at least 20 years and NEVER noticed the interior missing. I have began the search for parts at this time but the Mako will be on hold for now. I won’t take it off the list just yet, I know the parts are out there….somewhere. For now I will start the Revell 66 Penske/Donohue Corvette. I just finished Mark Donohue’s book, “The Unfair Advantage” and there was a chapter about the car. I have the kit, its molded well with no warp and will, or should, be a fairly easy build. Having said that I hope I don’t barf up on the assembly. With a little luck, I should have some progress to show soon.

@Rommel - hope you find the parts!!! In the meantime, feel good, as that Vette is a beautiful car. Can’t wait to see more of it.
Rommel - I’ve had the same experience before as well. I ended up buying another kit to make up the missing parts. I’ve updated the build roster for you.
Thanks for the tip on modelcargarage, I’ve just ordered the detail set for the '53 Corvette (and a '60 Corvette). It has the photoetched badges for the body, which means that I can sand off the plastic ones. That will look much better, I think. I had some custom made for some Triumph sports cars I was building a few years back and it made the world of difference.
Cheers
Tony
KT, Dale, your builds are looking great. .
Rommelkiste, I LIKE IT! Are you planning to do a 1:1? 
I mostly did parts cleanup but did get the body shot with the first coat of clear. I’ll let it sit for a couple of days and then put the decals on.

Also tried tinting the windshield. I think it came out ok. I had some clear blue paint and mixed it with johnson’s acrylic floor wax.

L8TR,
Eric
The body looks smooooth Eric, man I am envious of your speed building. That’ll look great with decals.
Cheers
Tony
Tony, I think you will like the MCG detail stuff, I have used it and its nice. Eric, your paint looks super nice. Hope I can lay one down on the vette that smooth. I will do this one pretty much out of the box and try not to do too many add on details, I wanna get it finished! Wish me luck guys, seems like everything I have touched lately has turned to……has turned out unsuitable to my liking. back to the bench!
Thanks Tony,
I try to get at least 1 or 2 hours a day after work if nothing else is going on. I still need to finish the Bel Air also hehehehe.
L8TR