The Last Warning (April 1944, Normandy) Bunker Interior Stuff

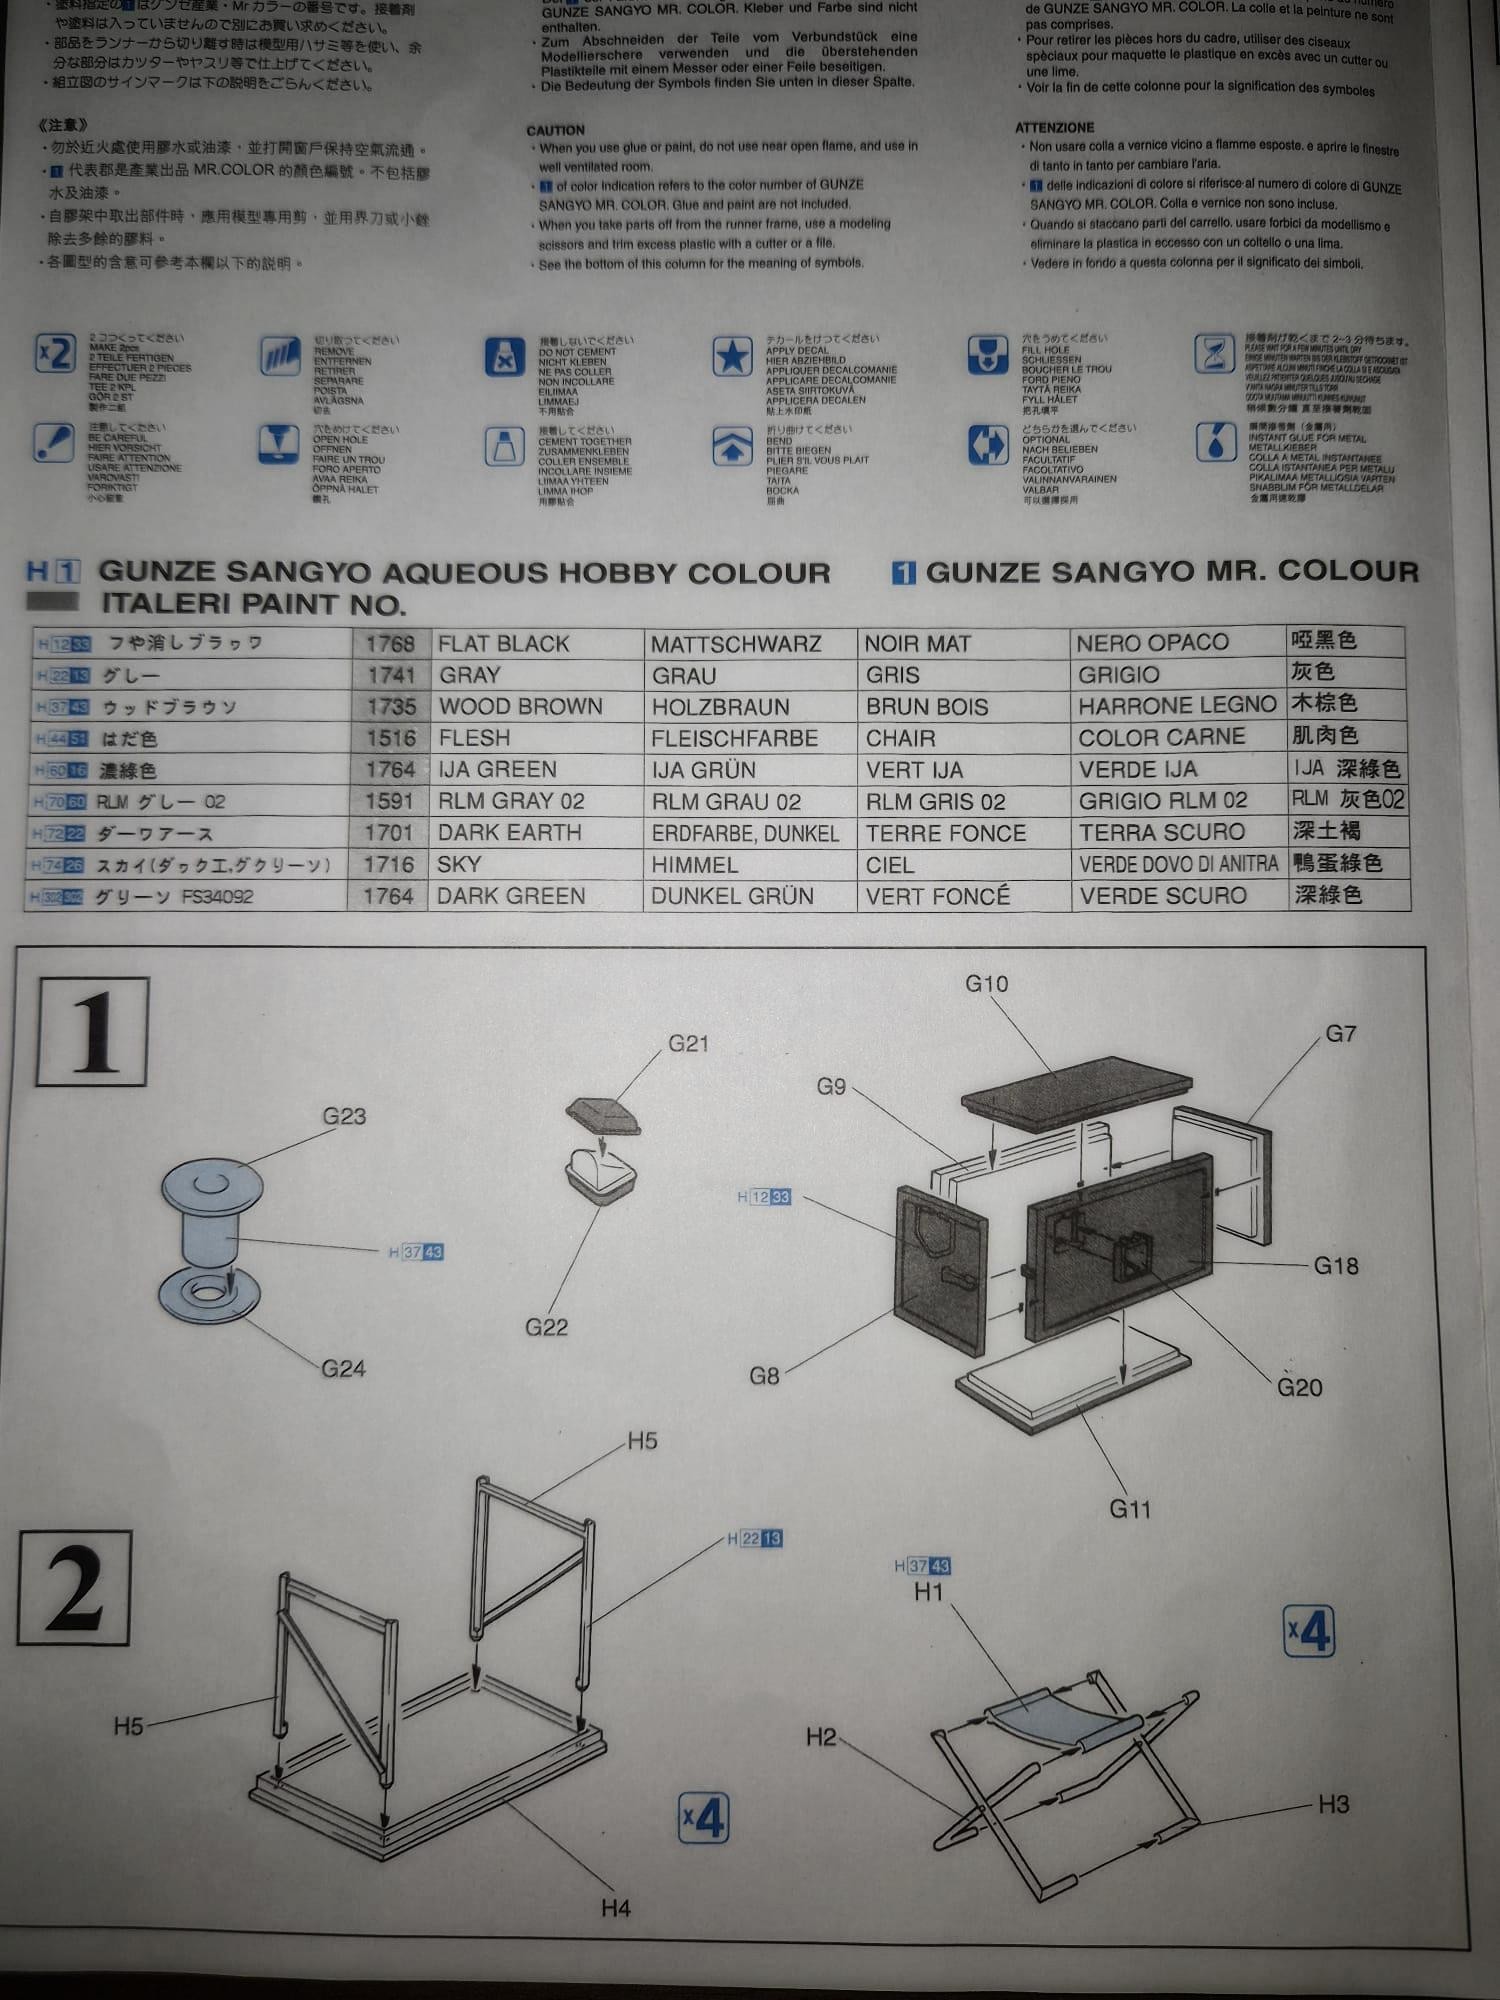
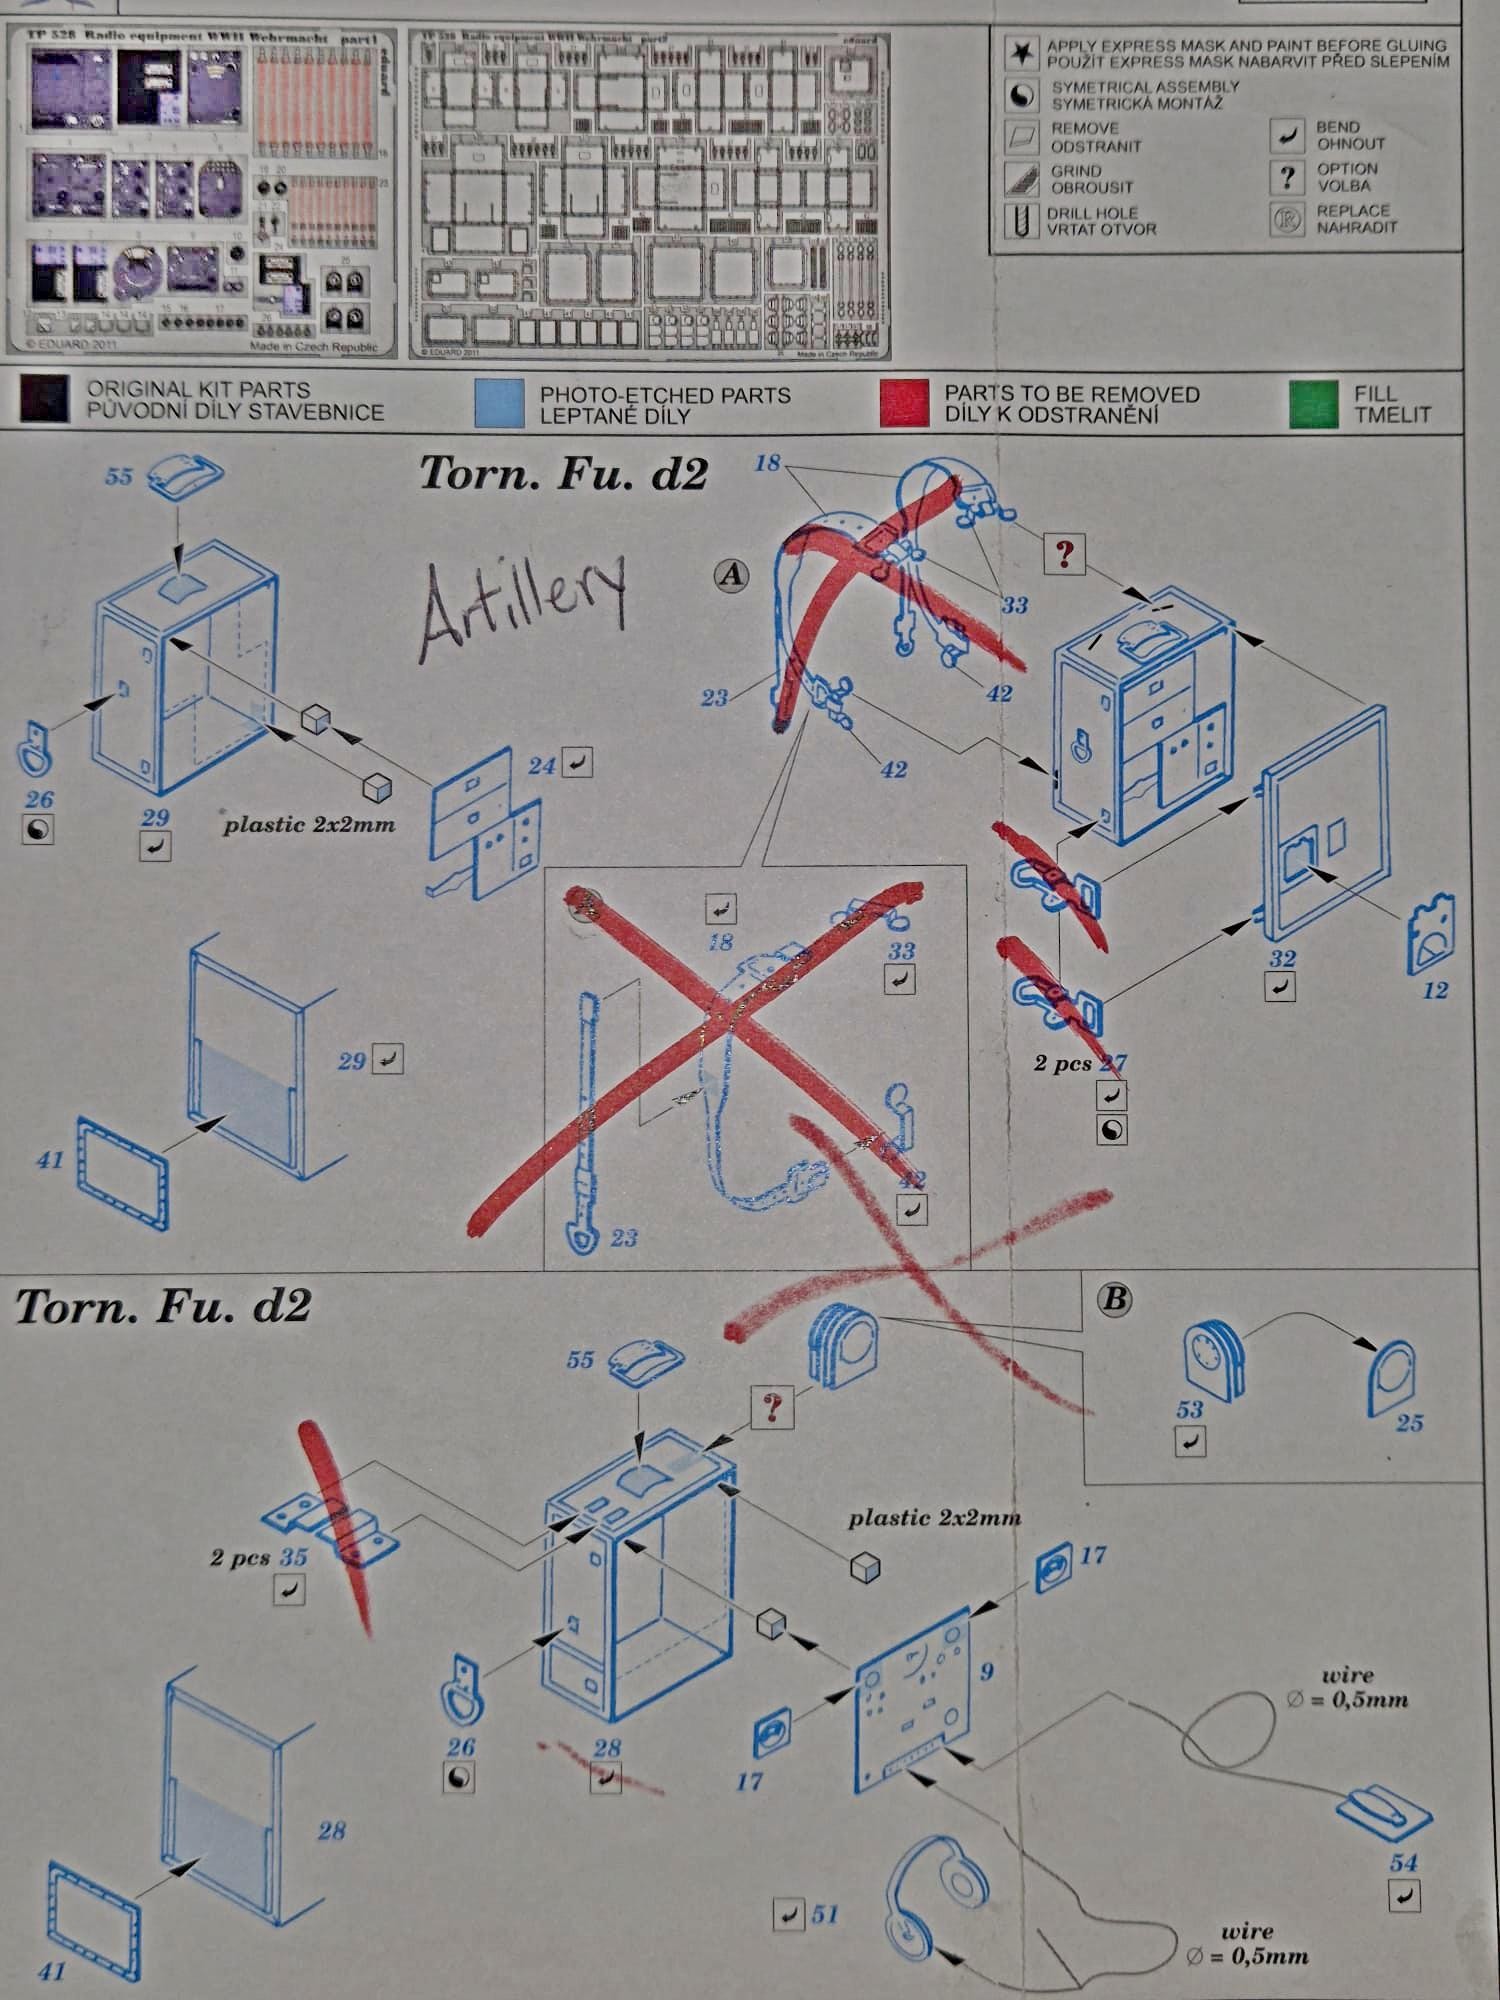
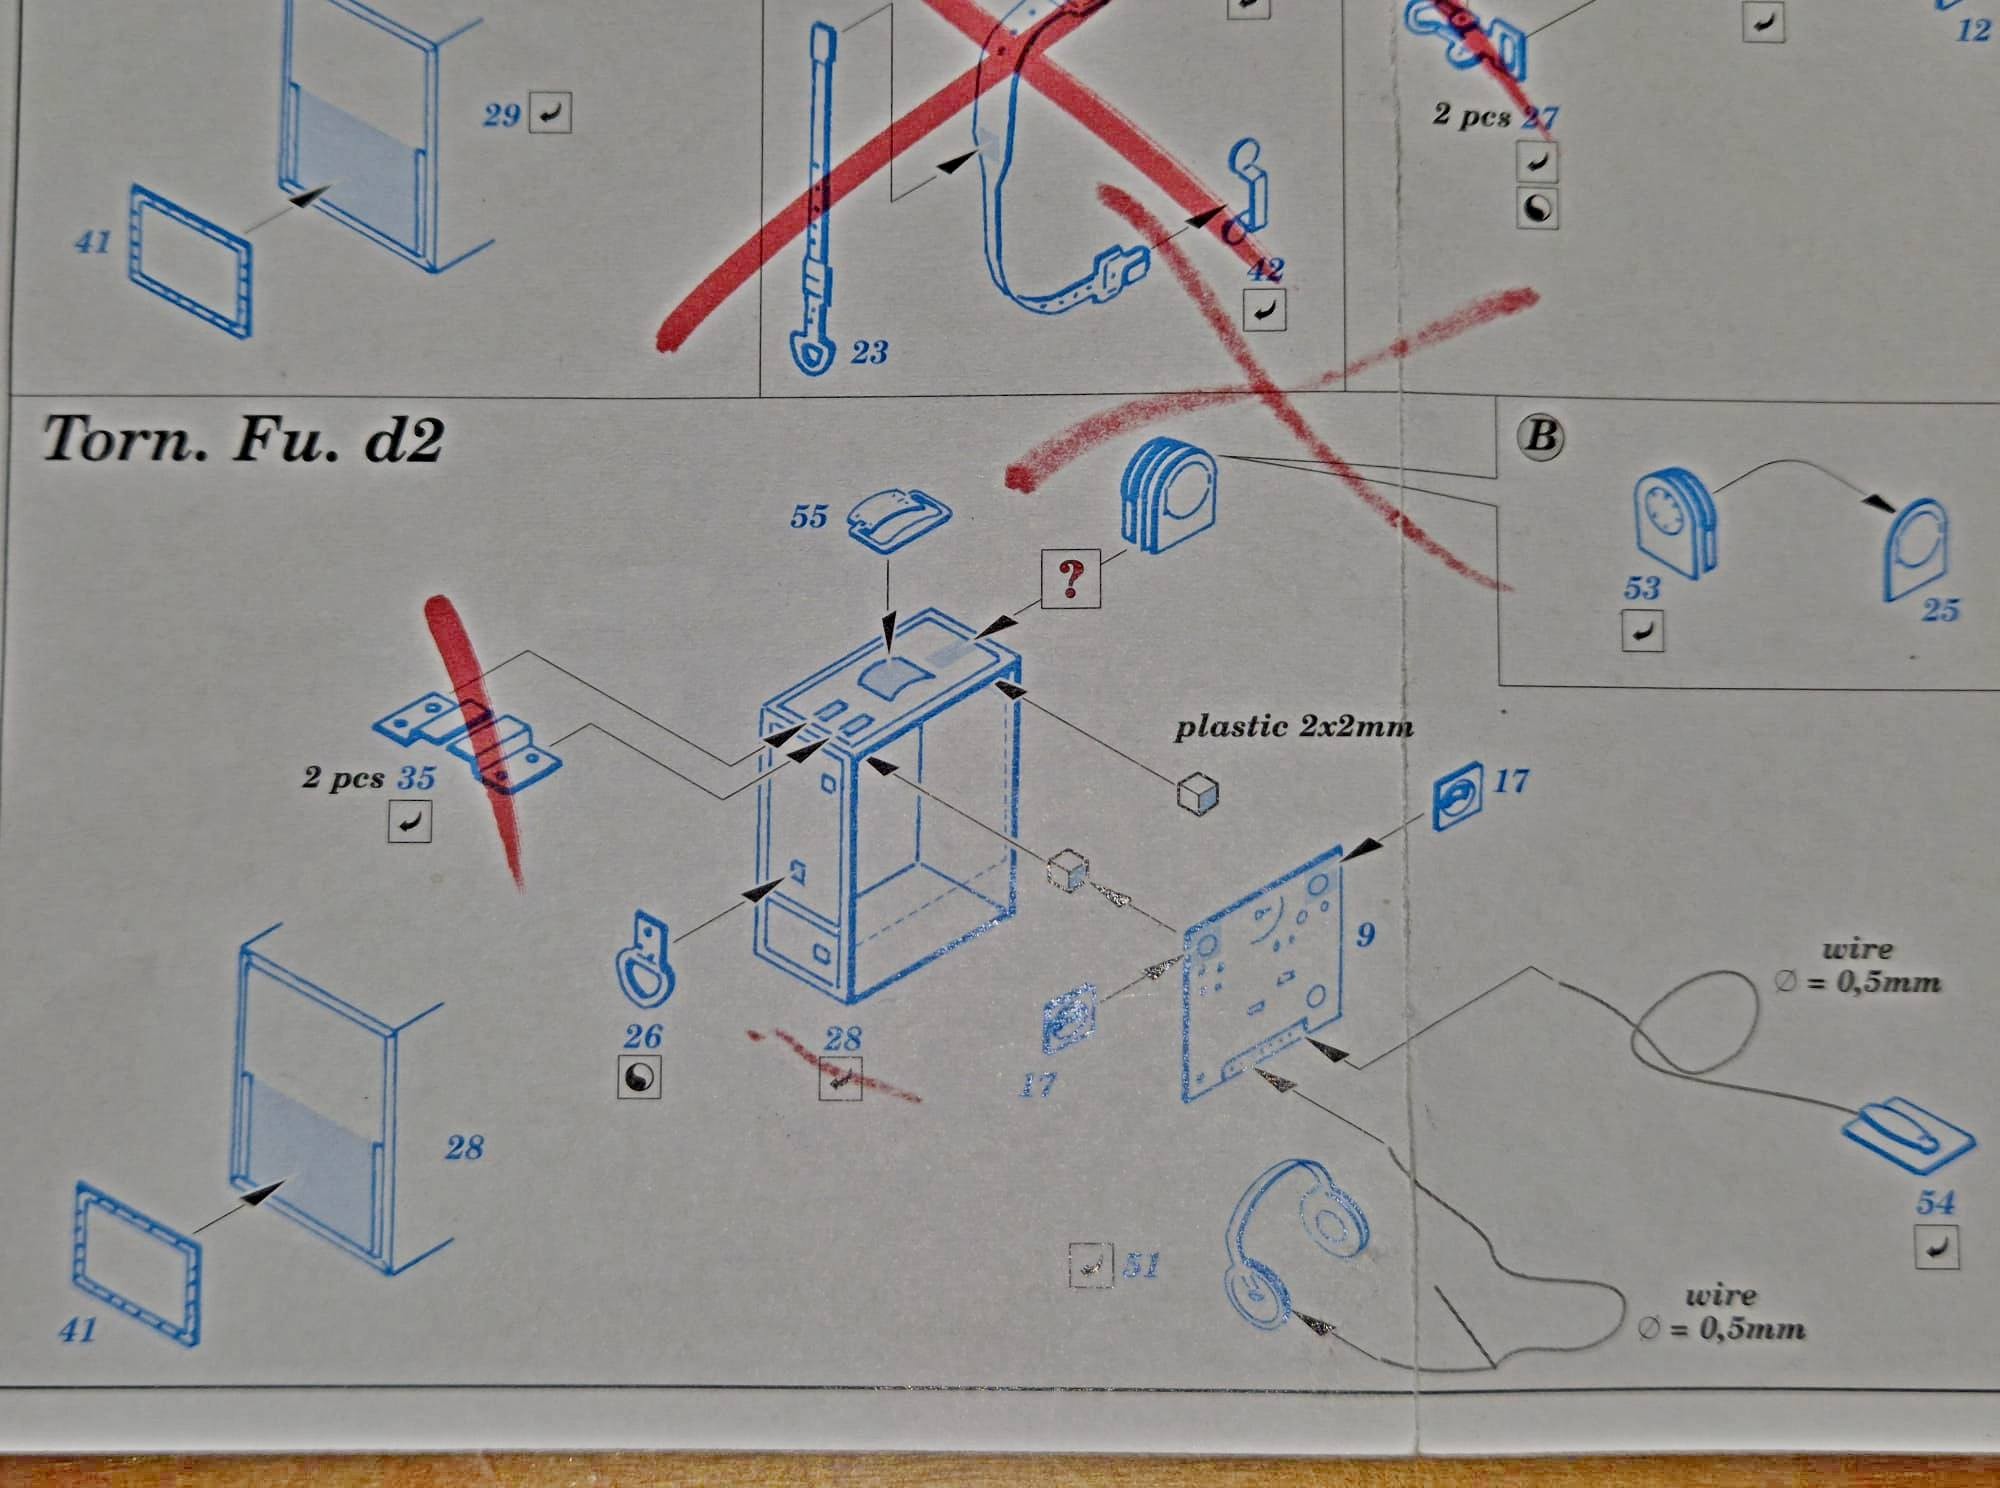
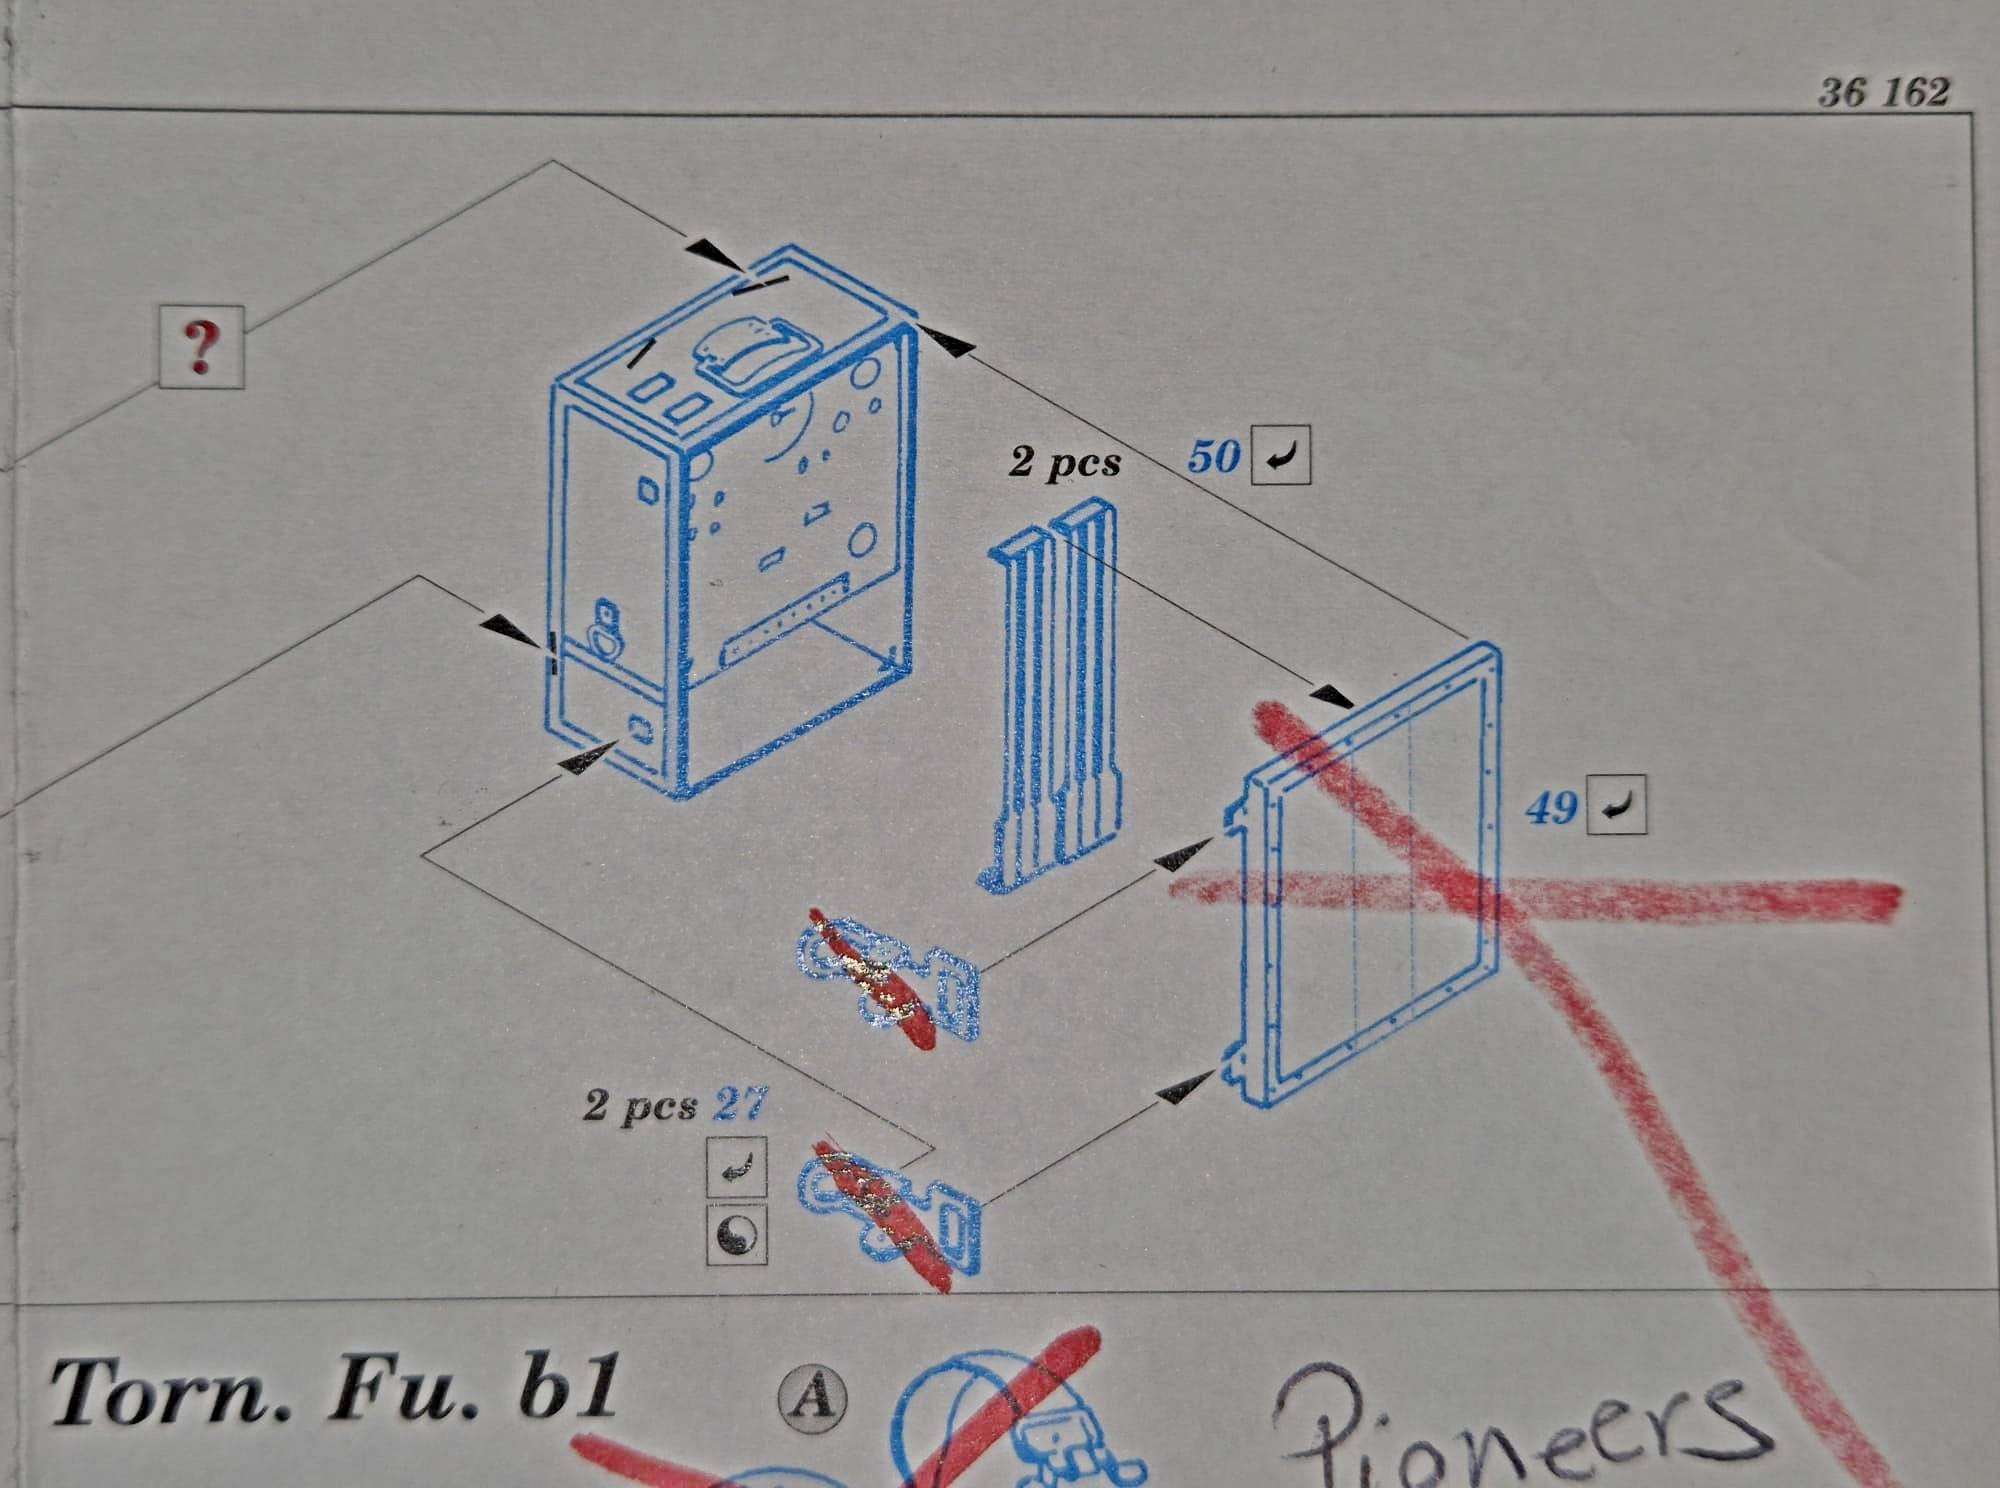
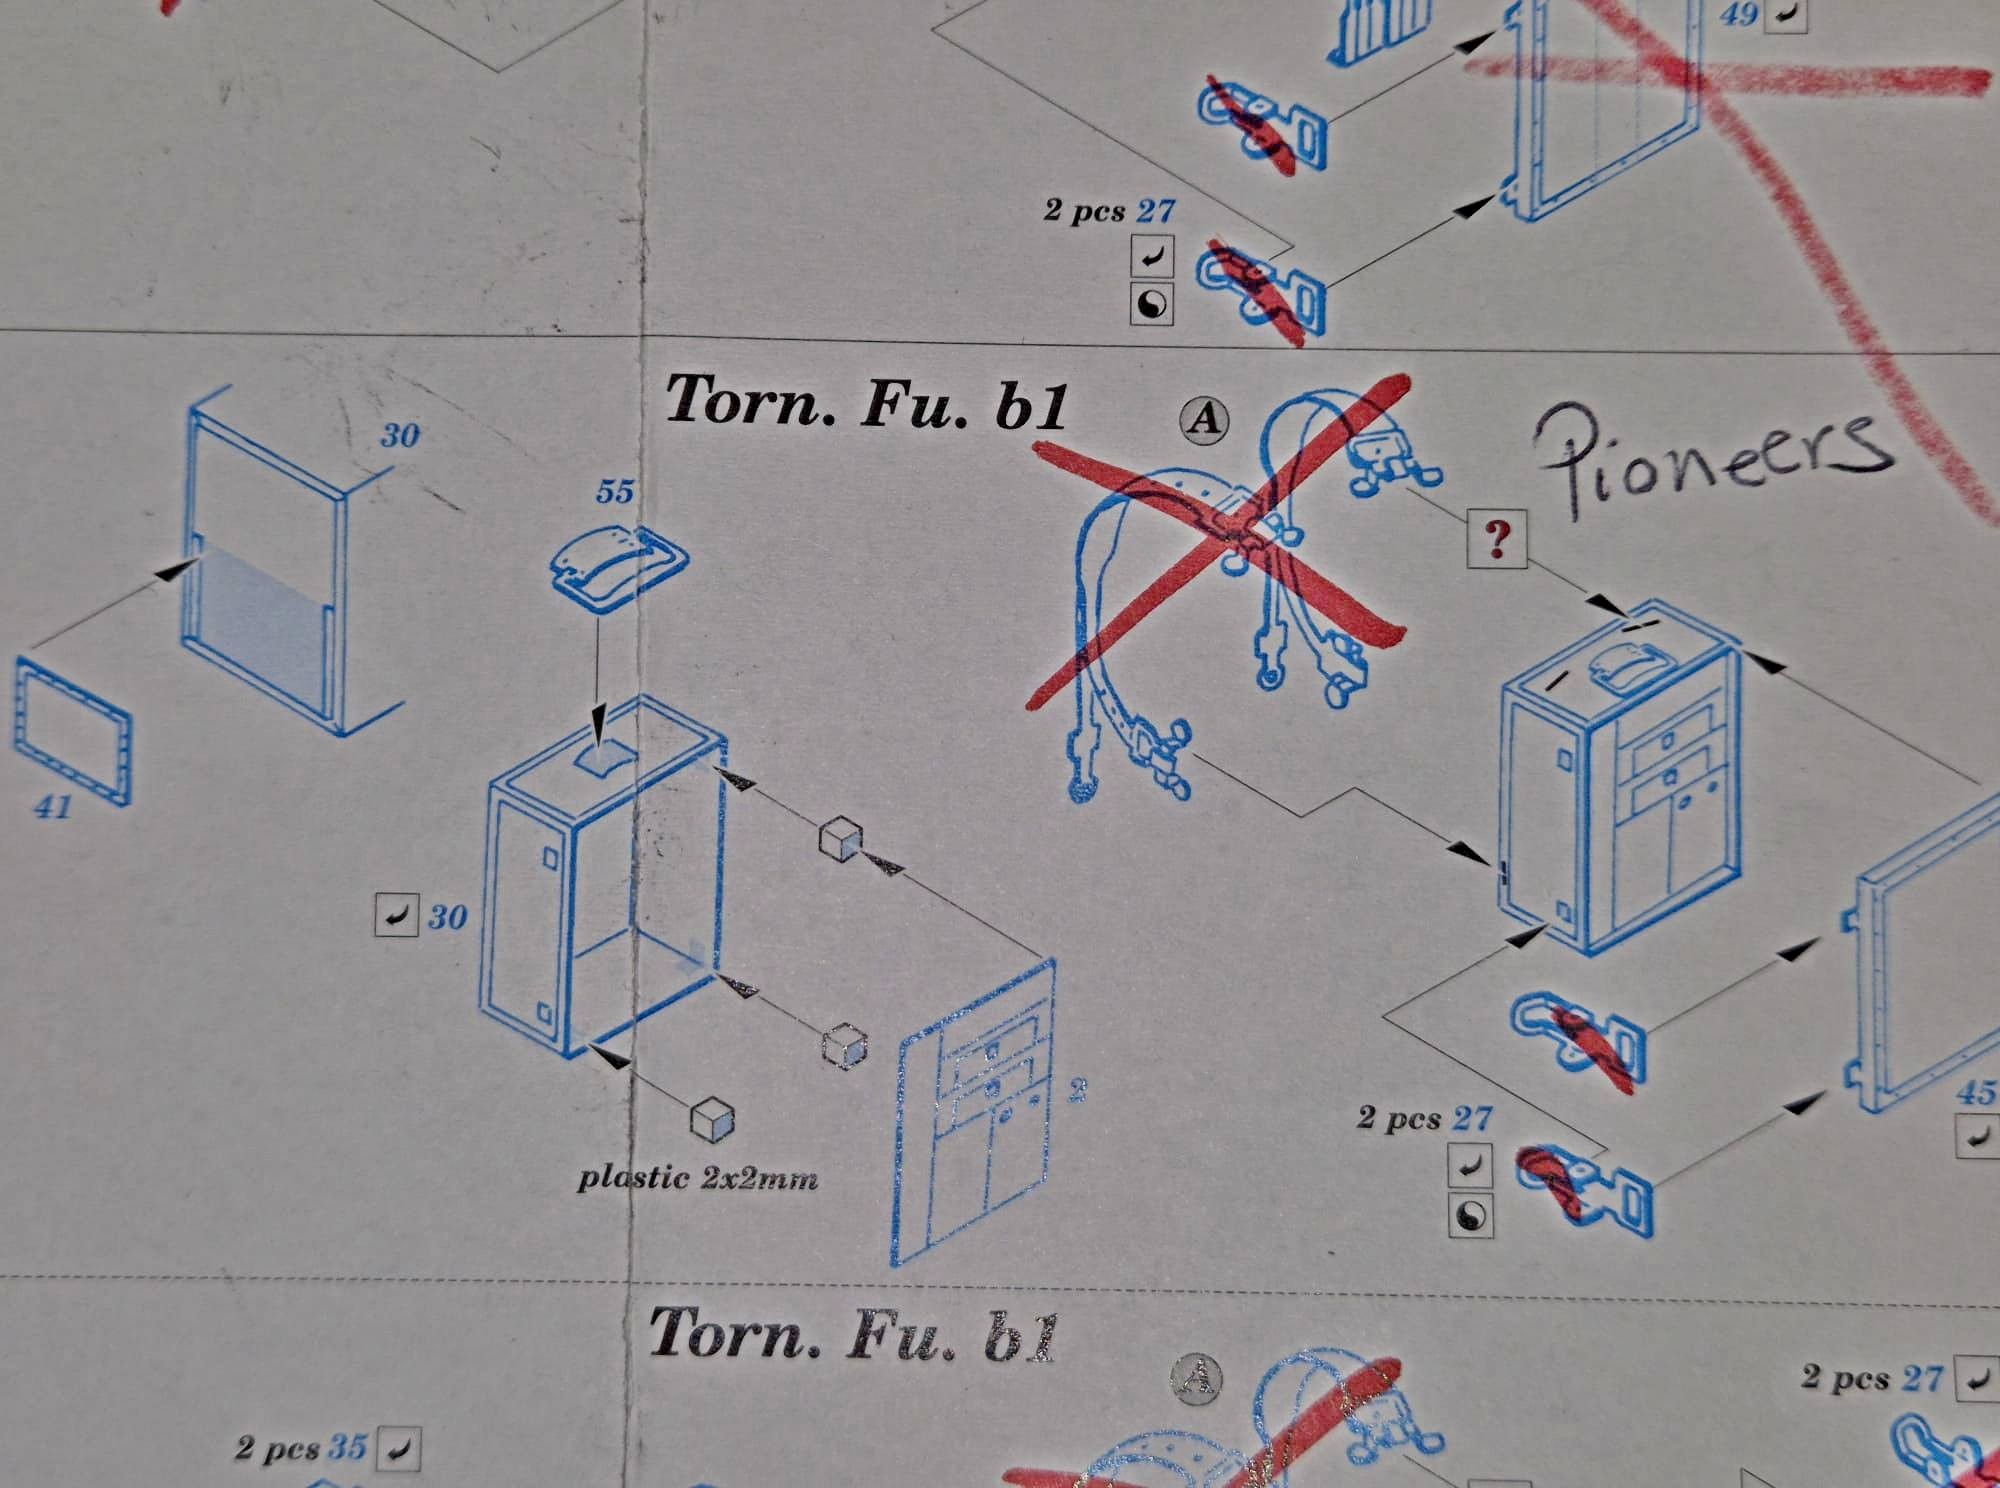
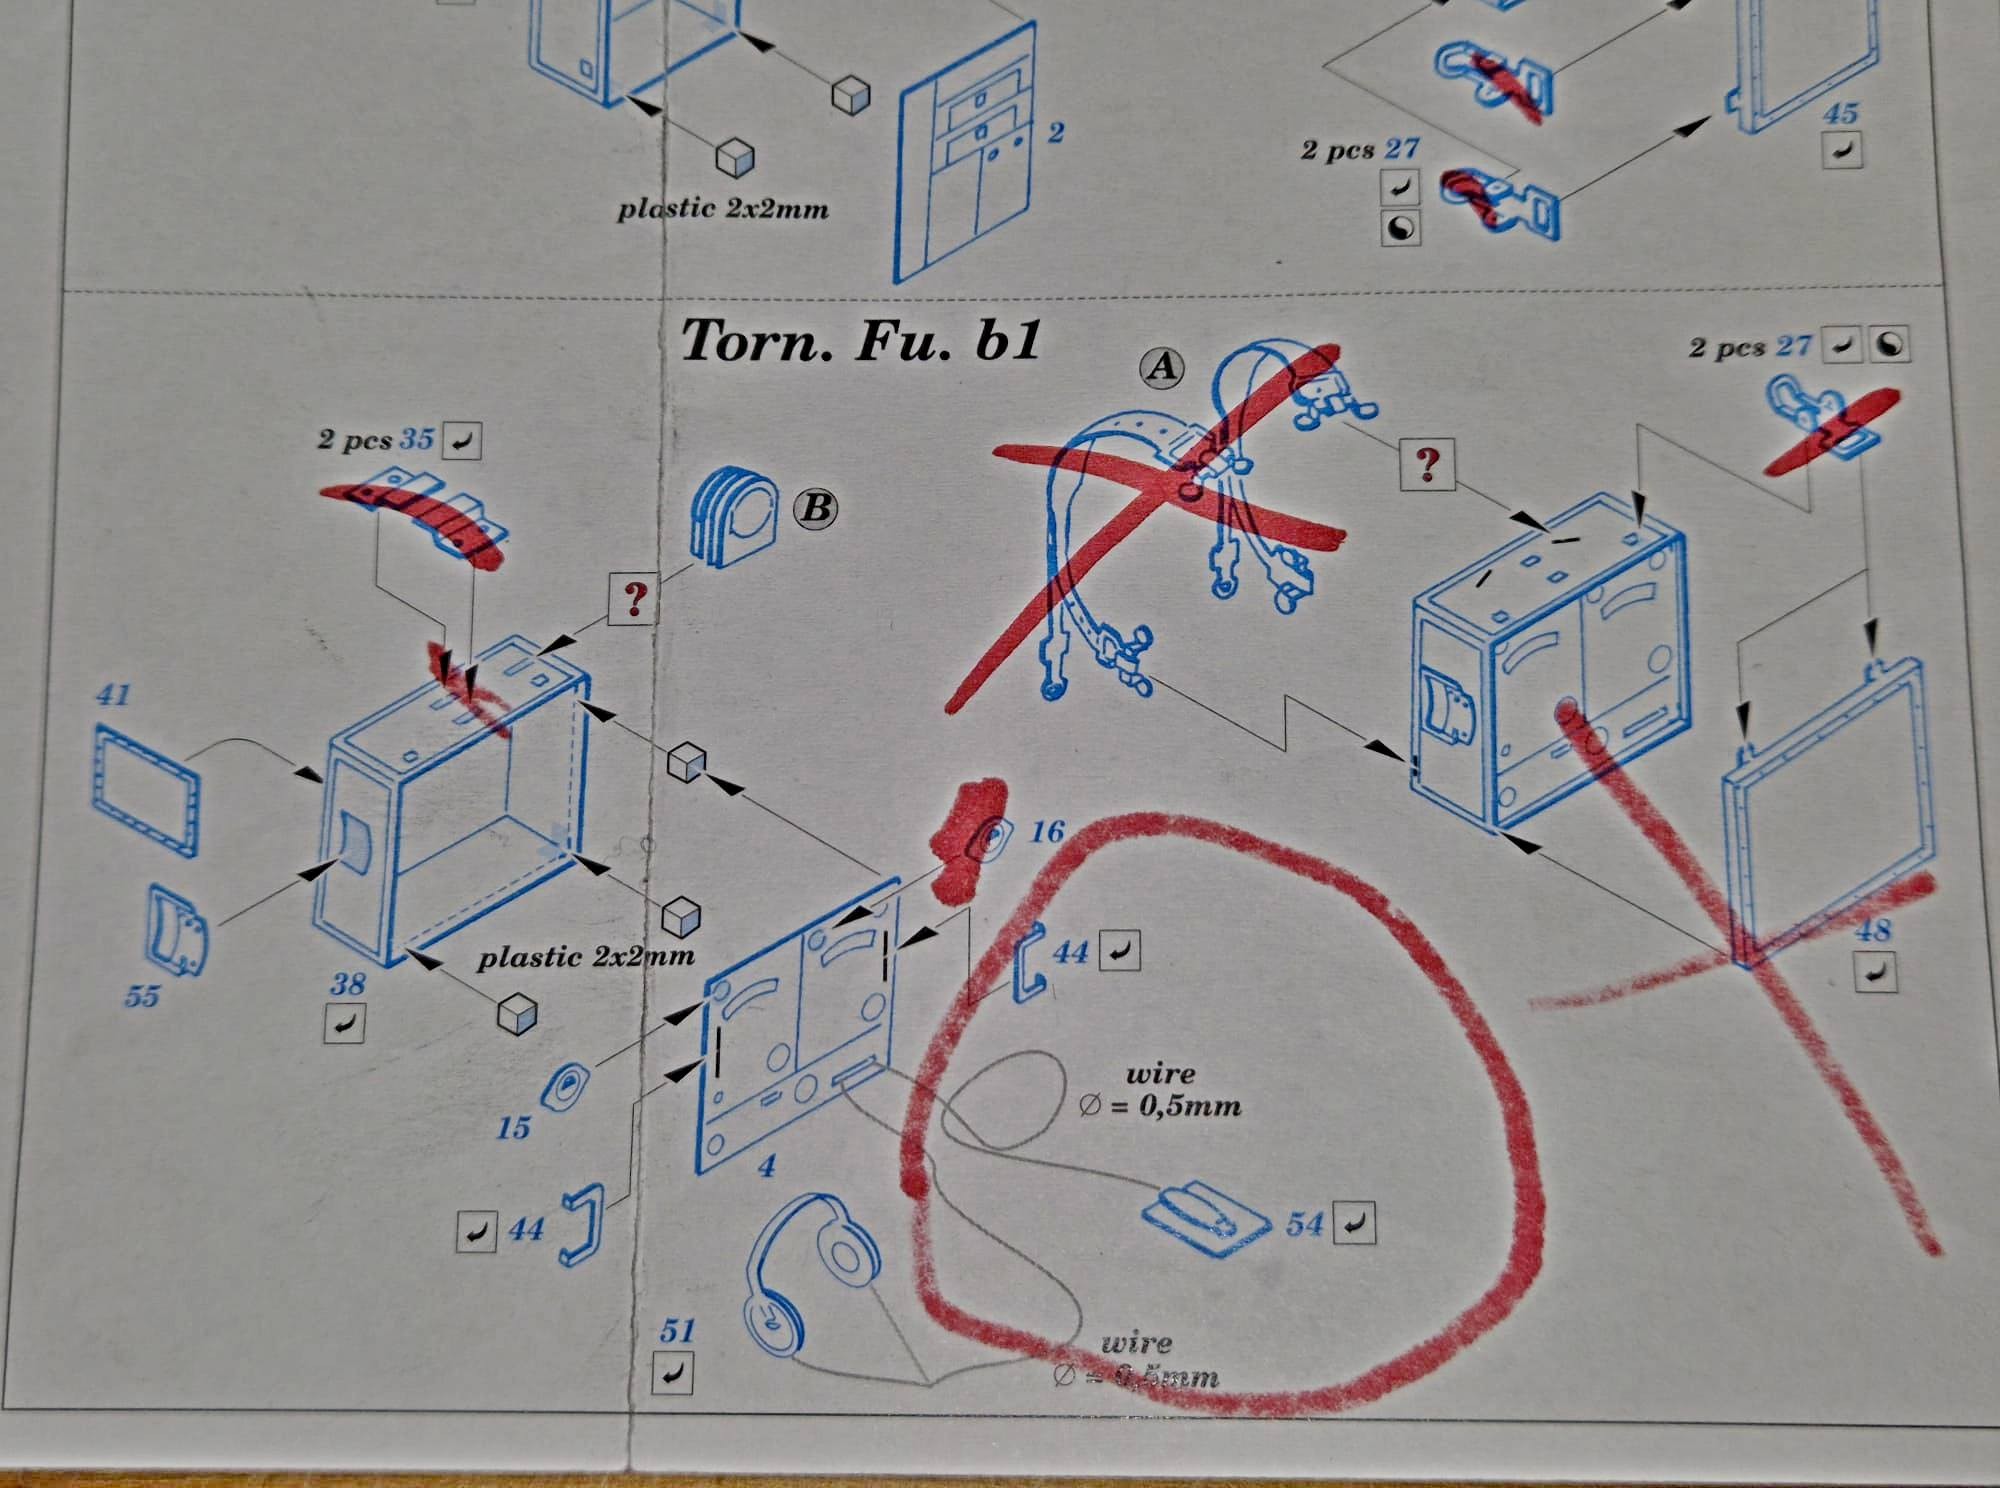
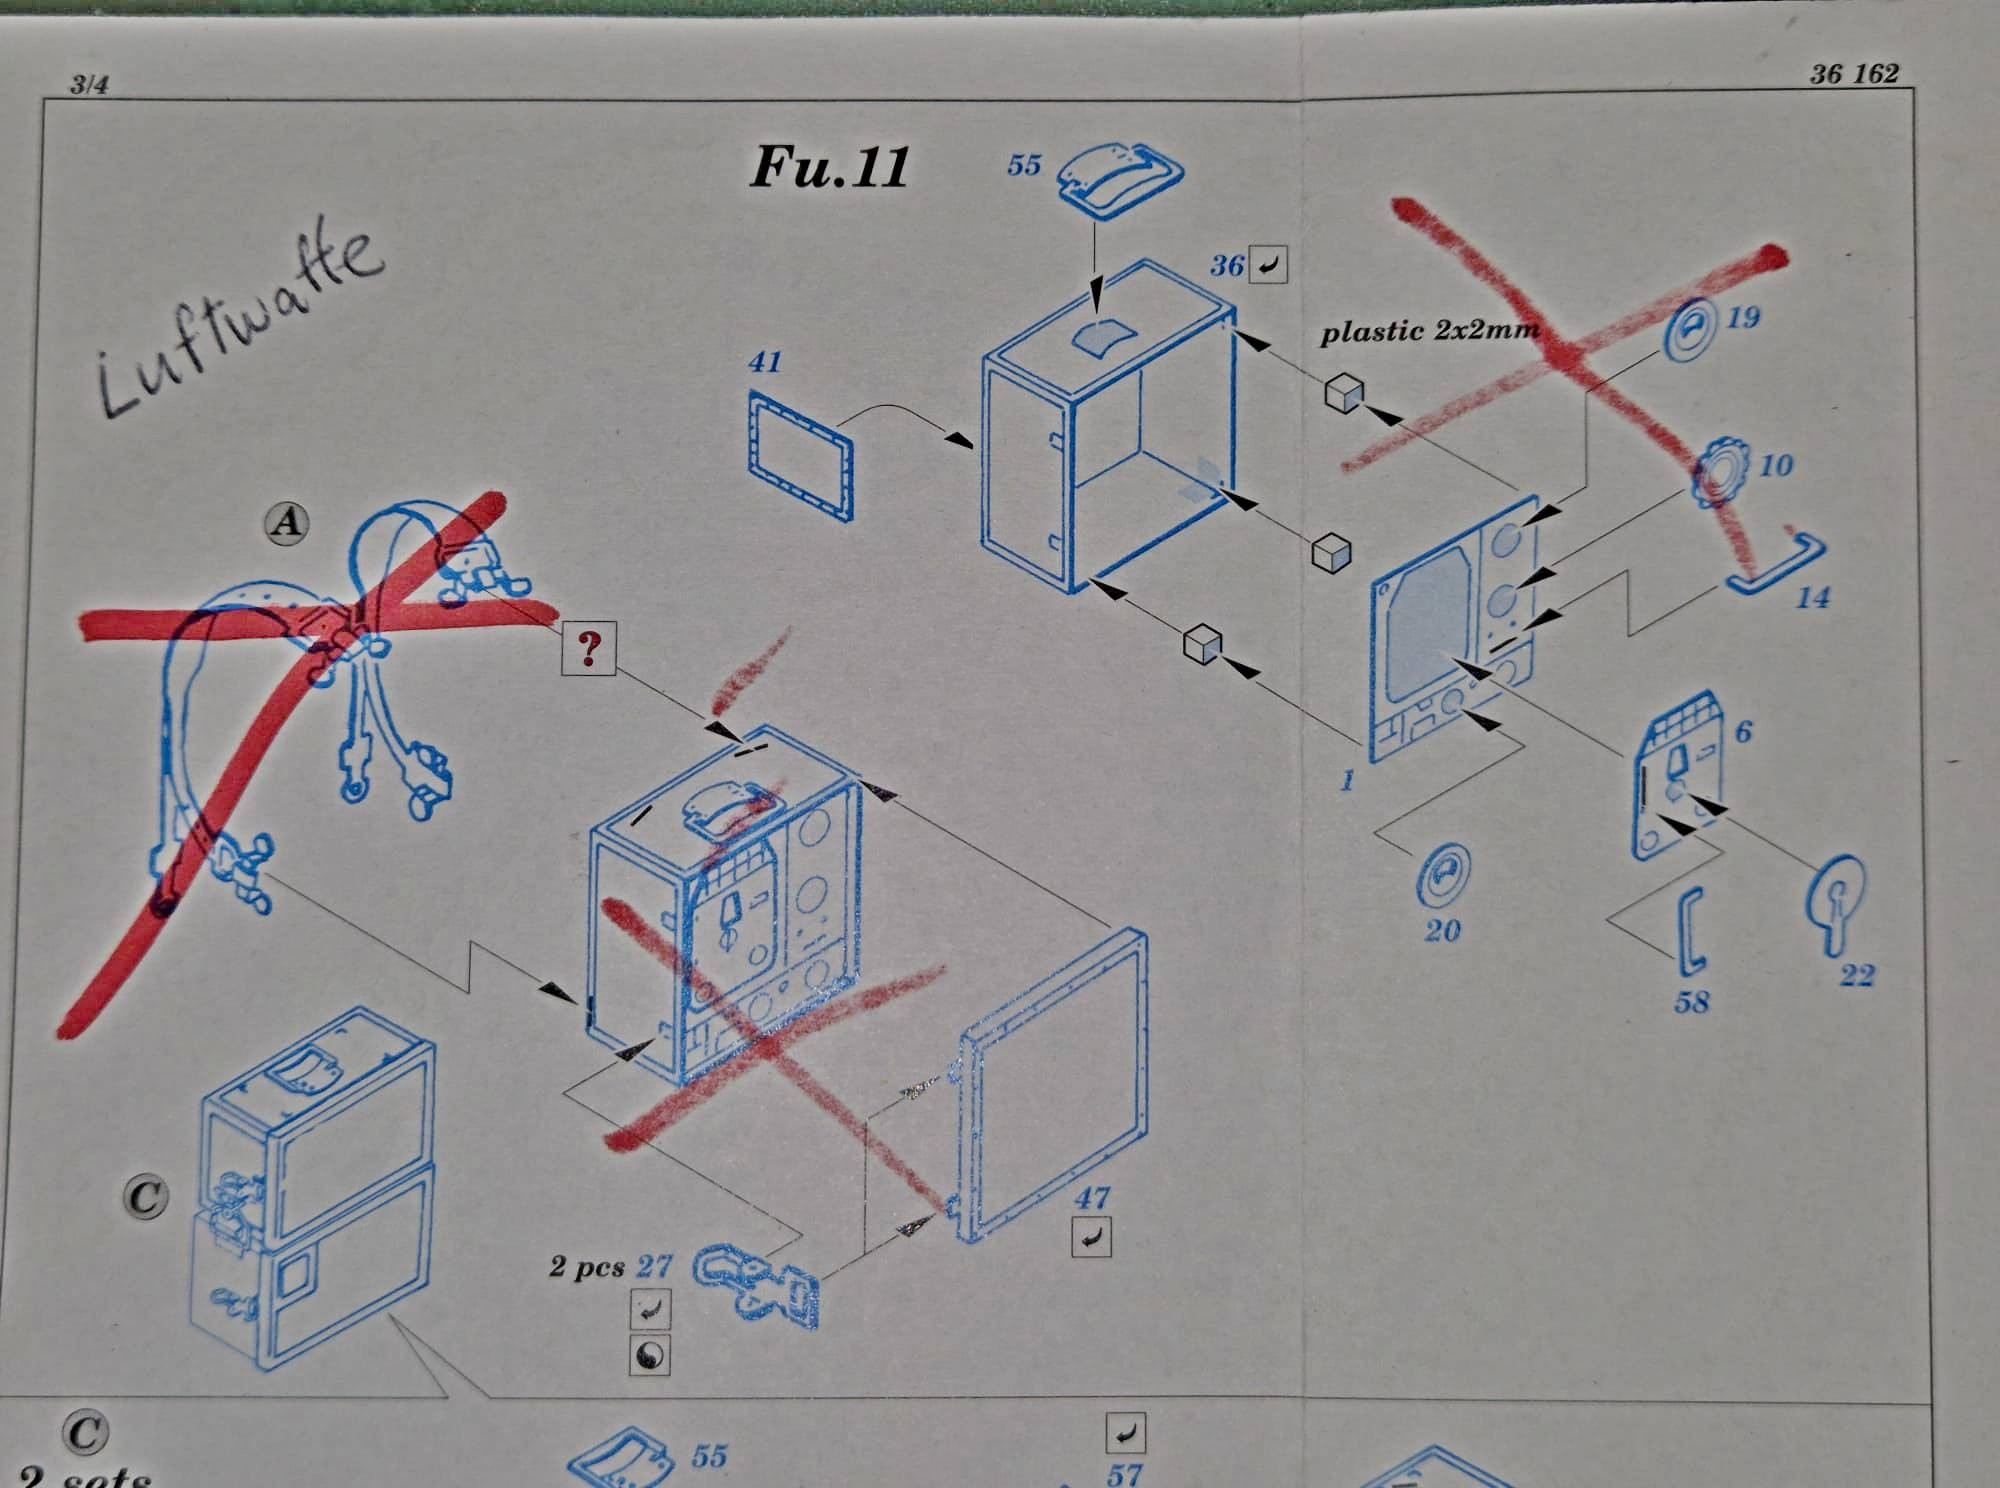
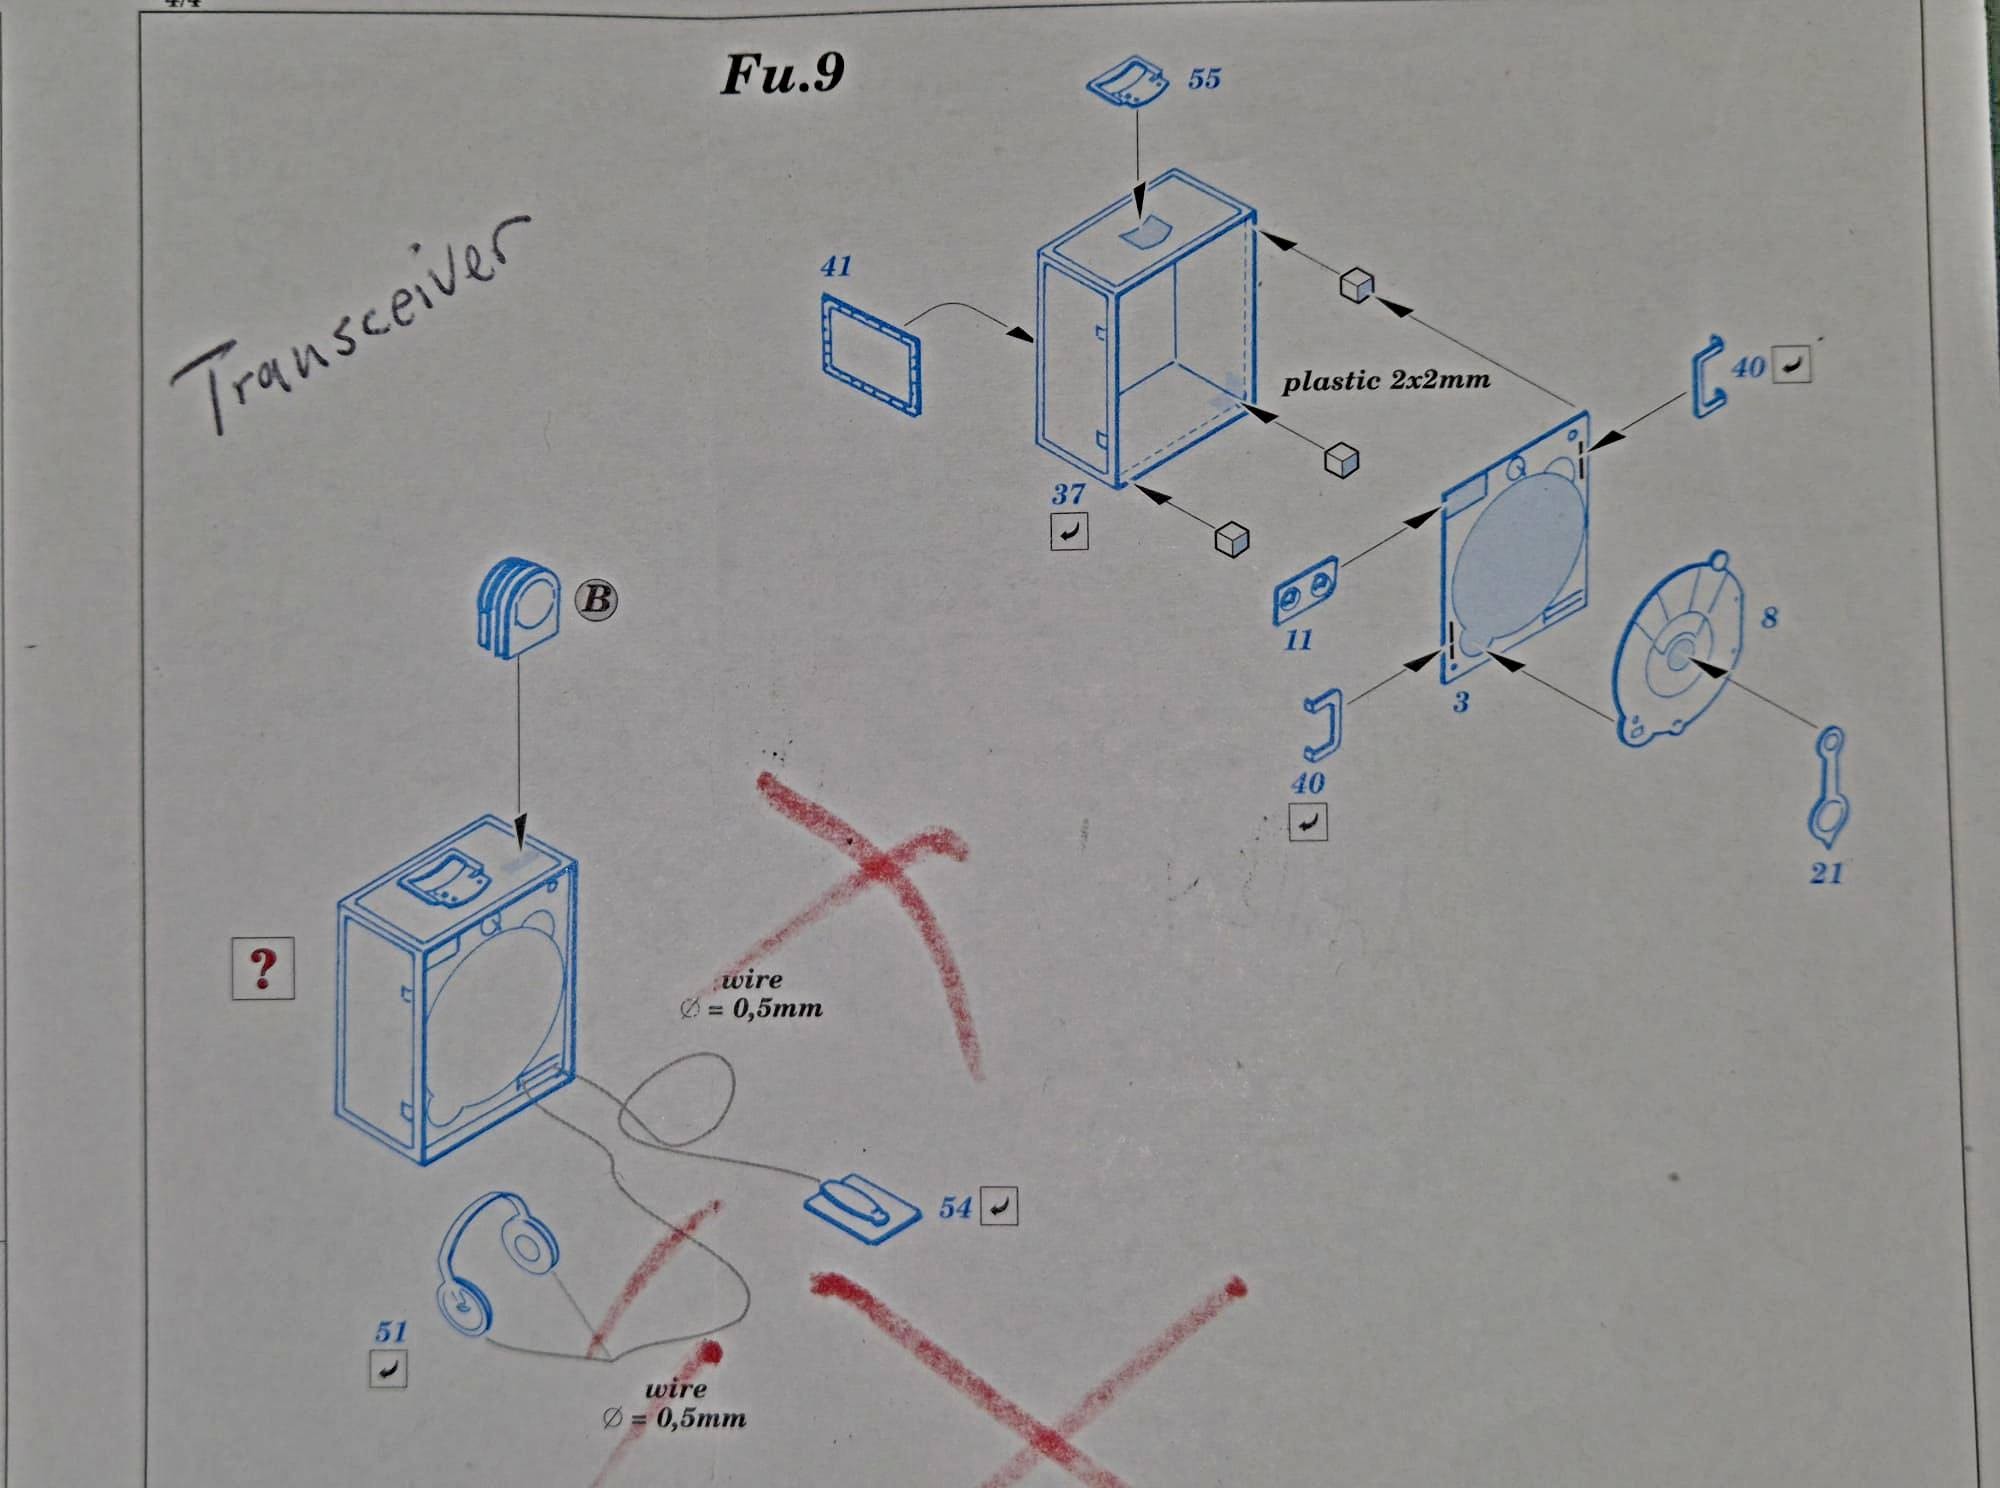
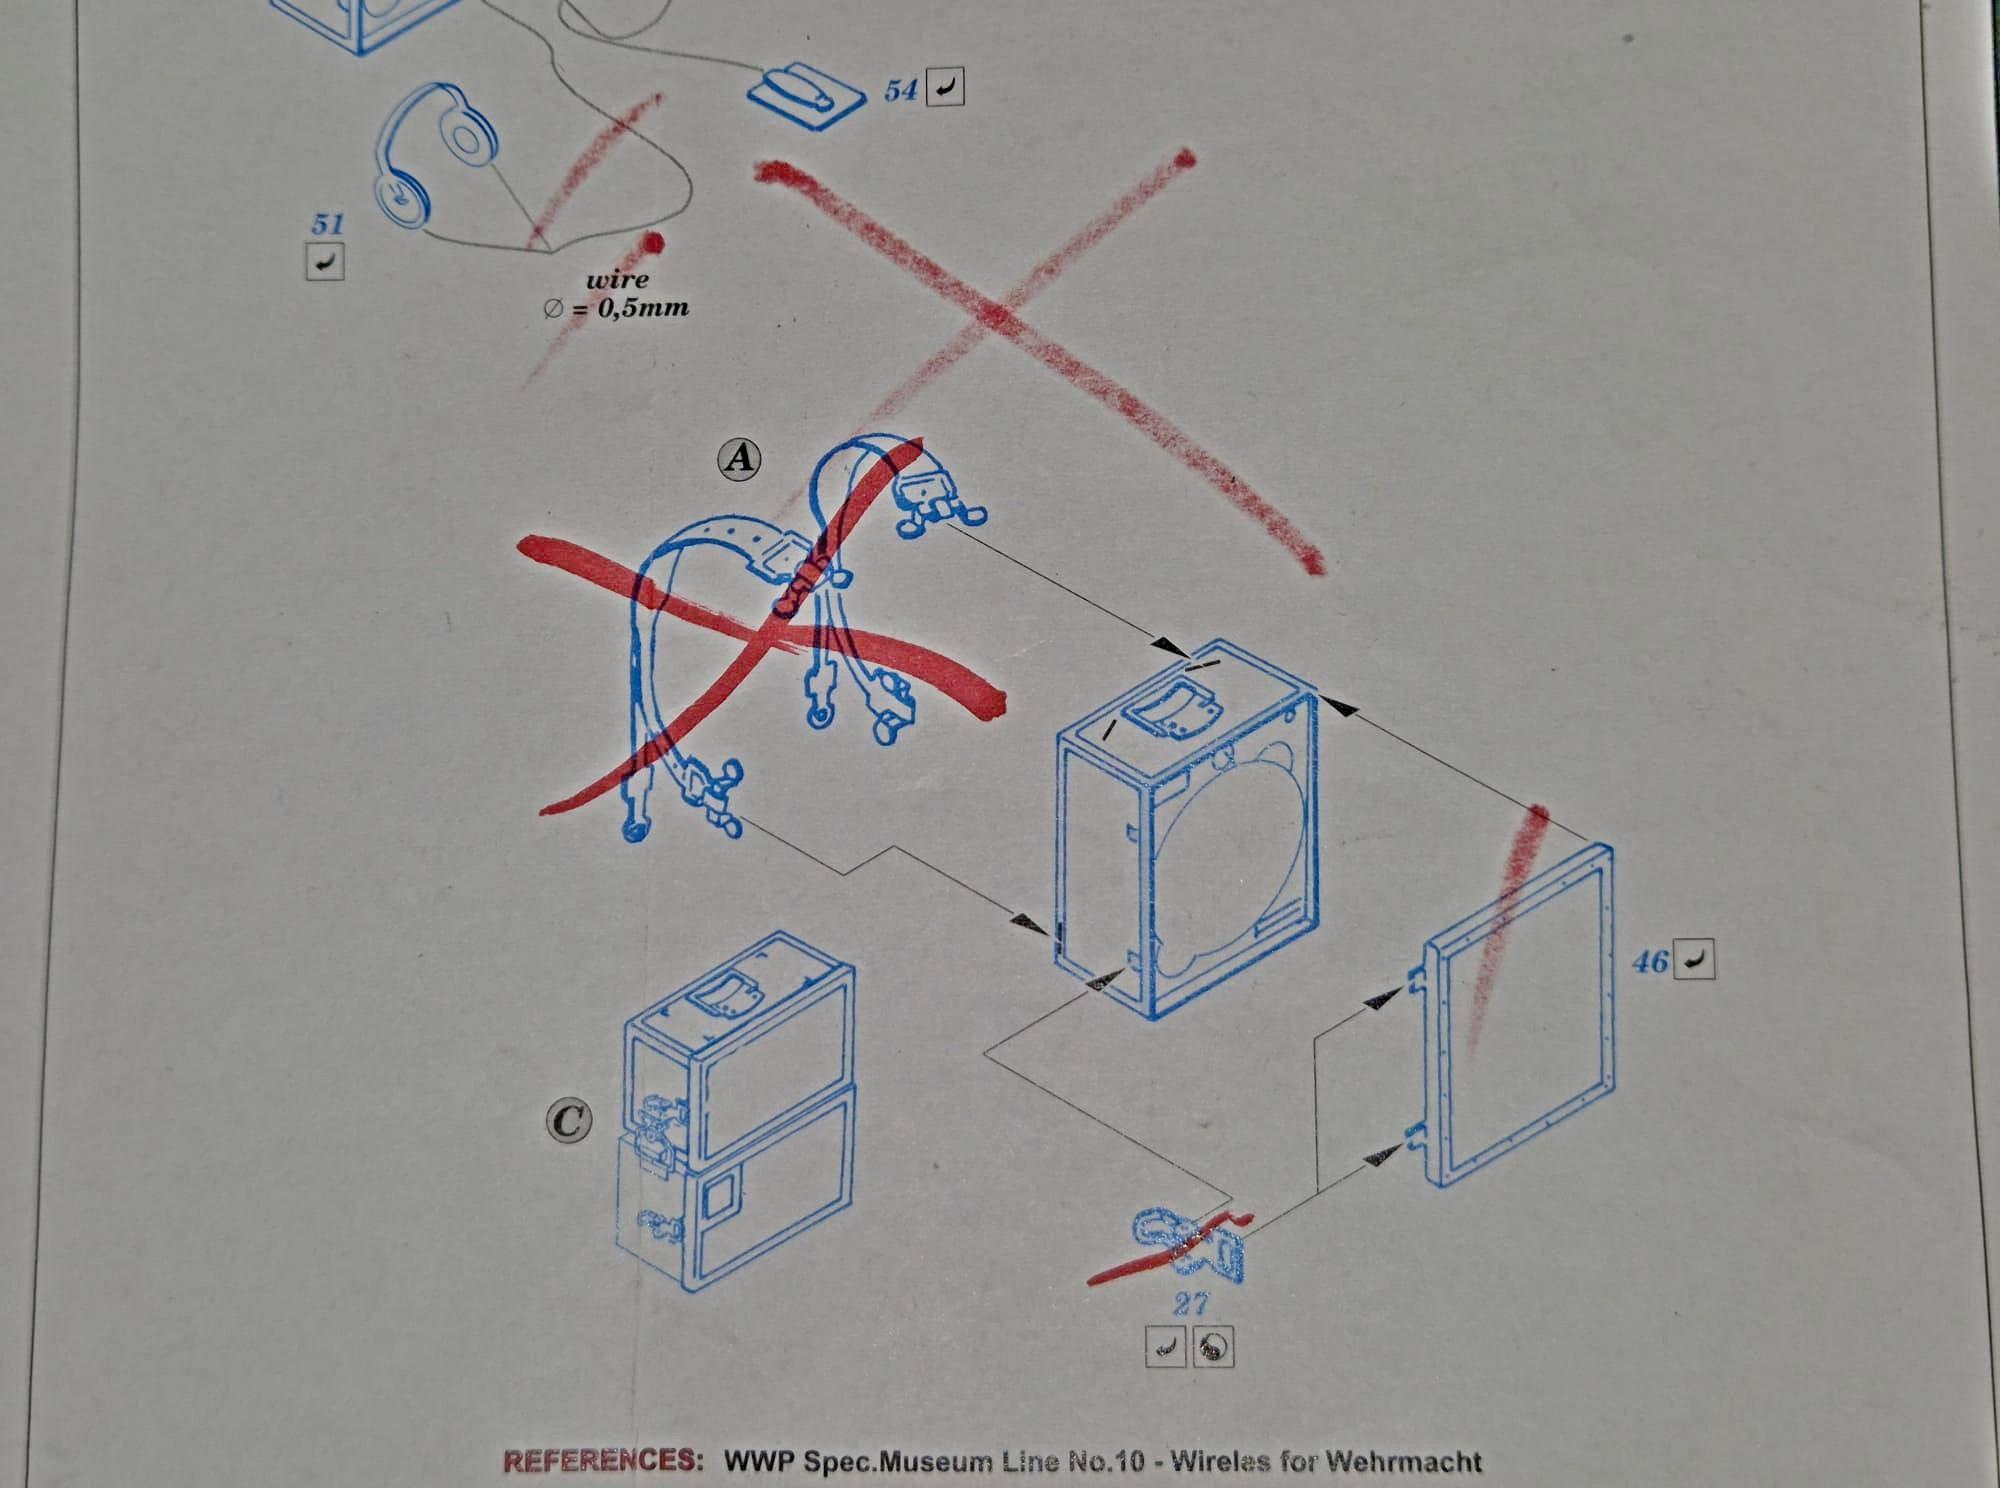
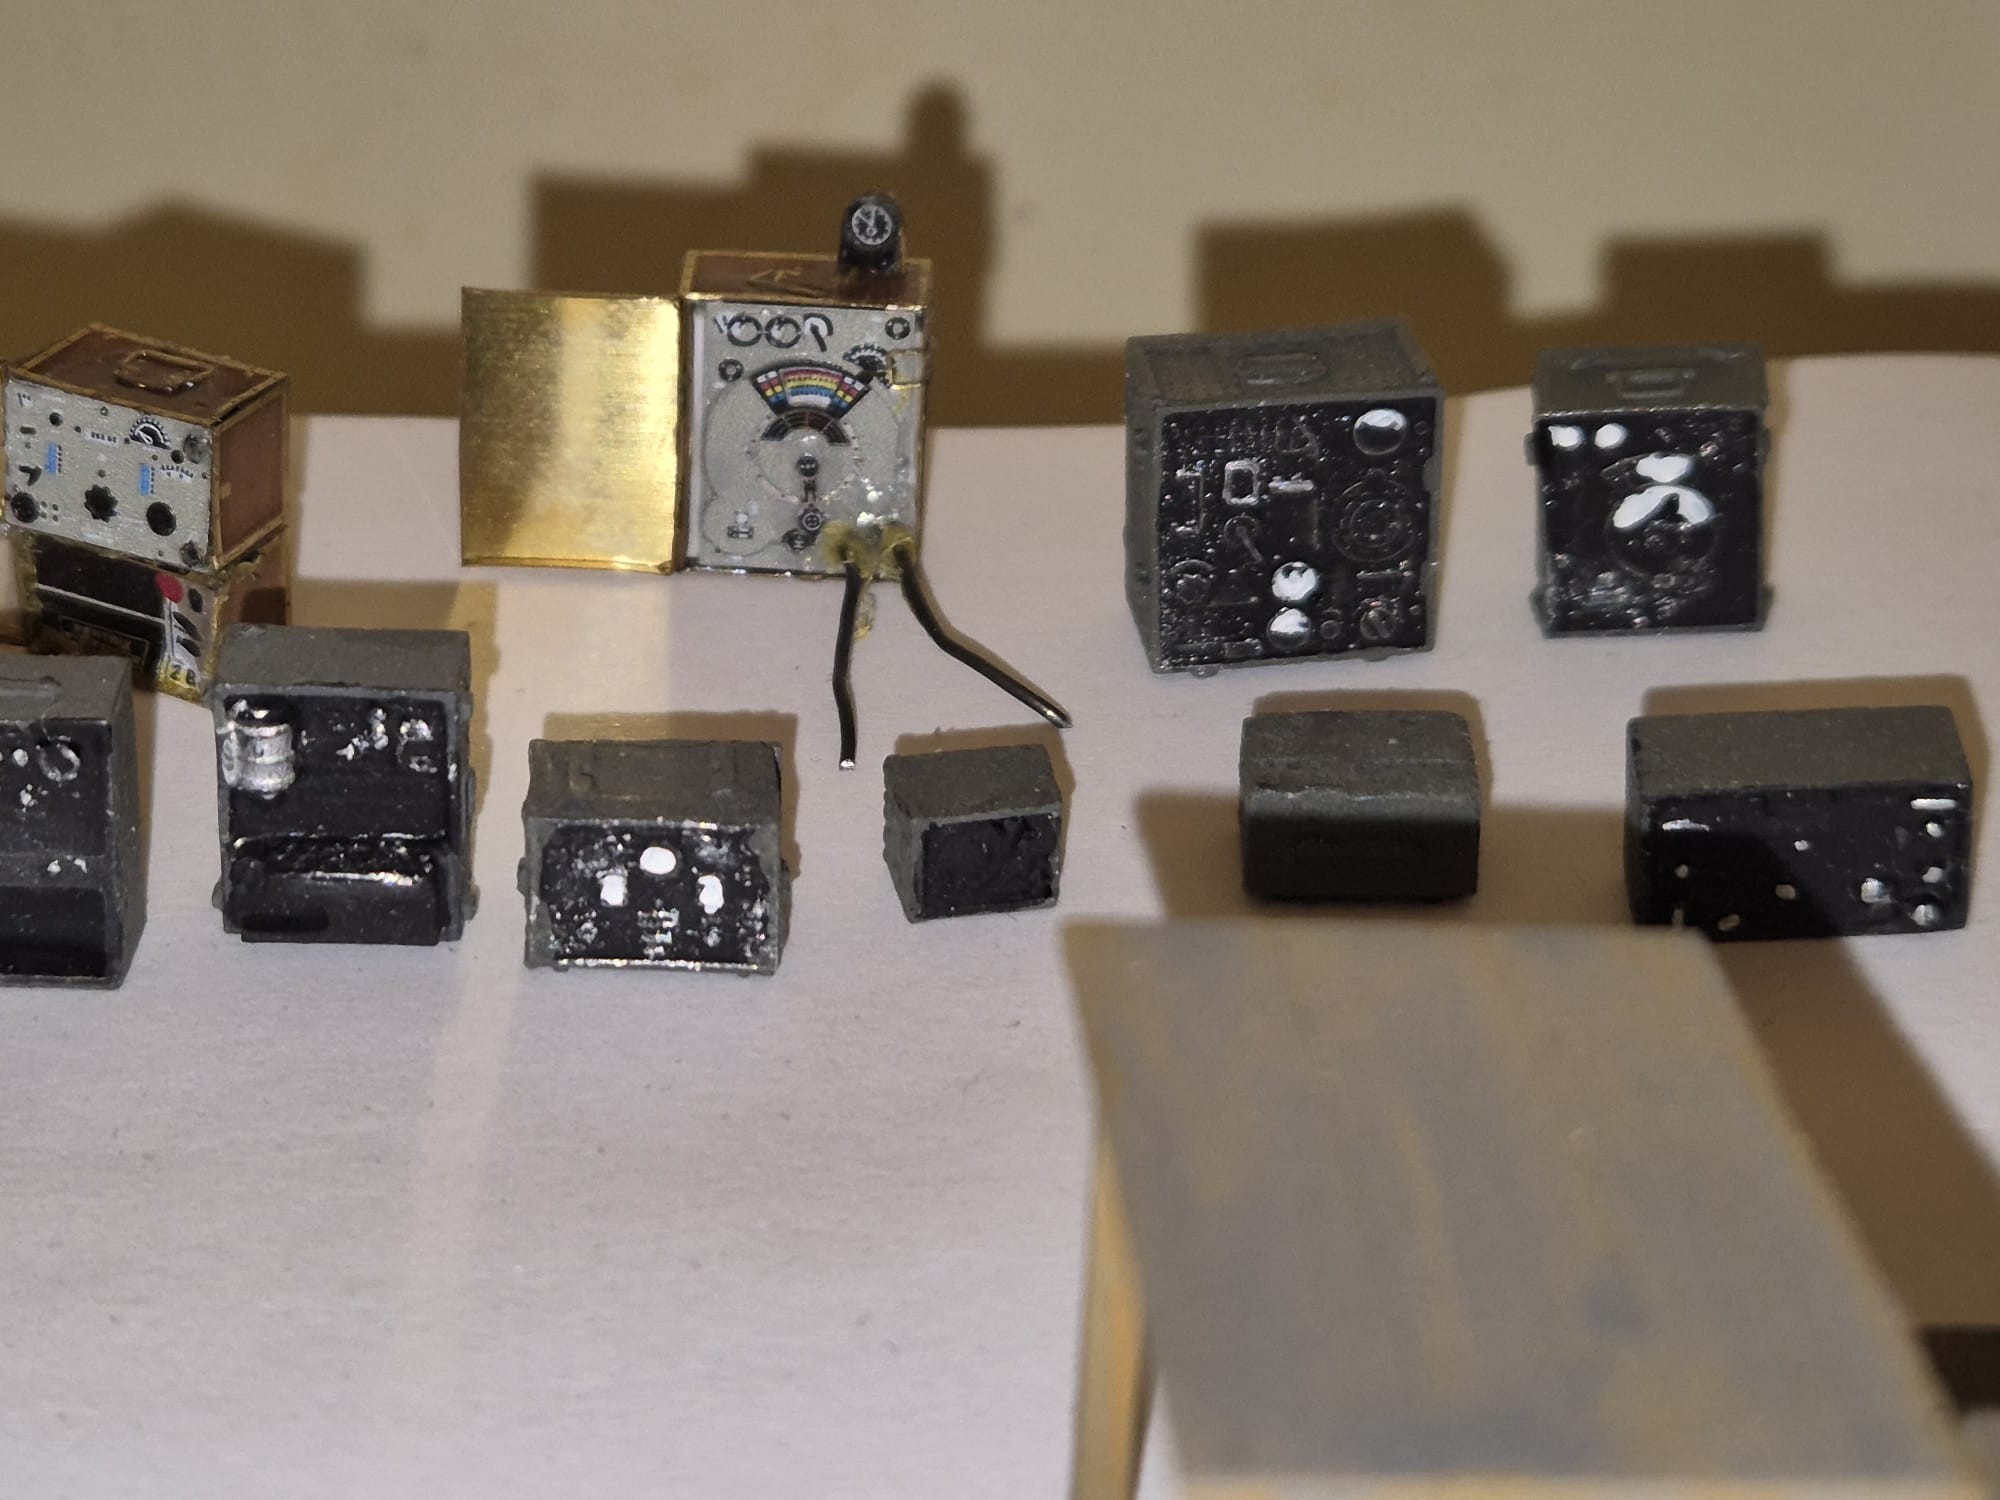
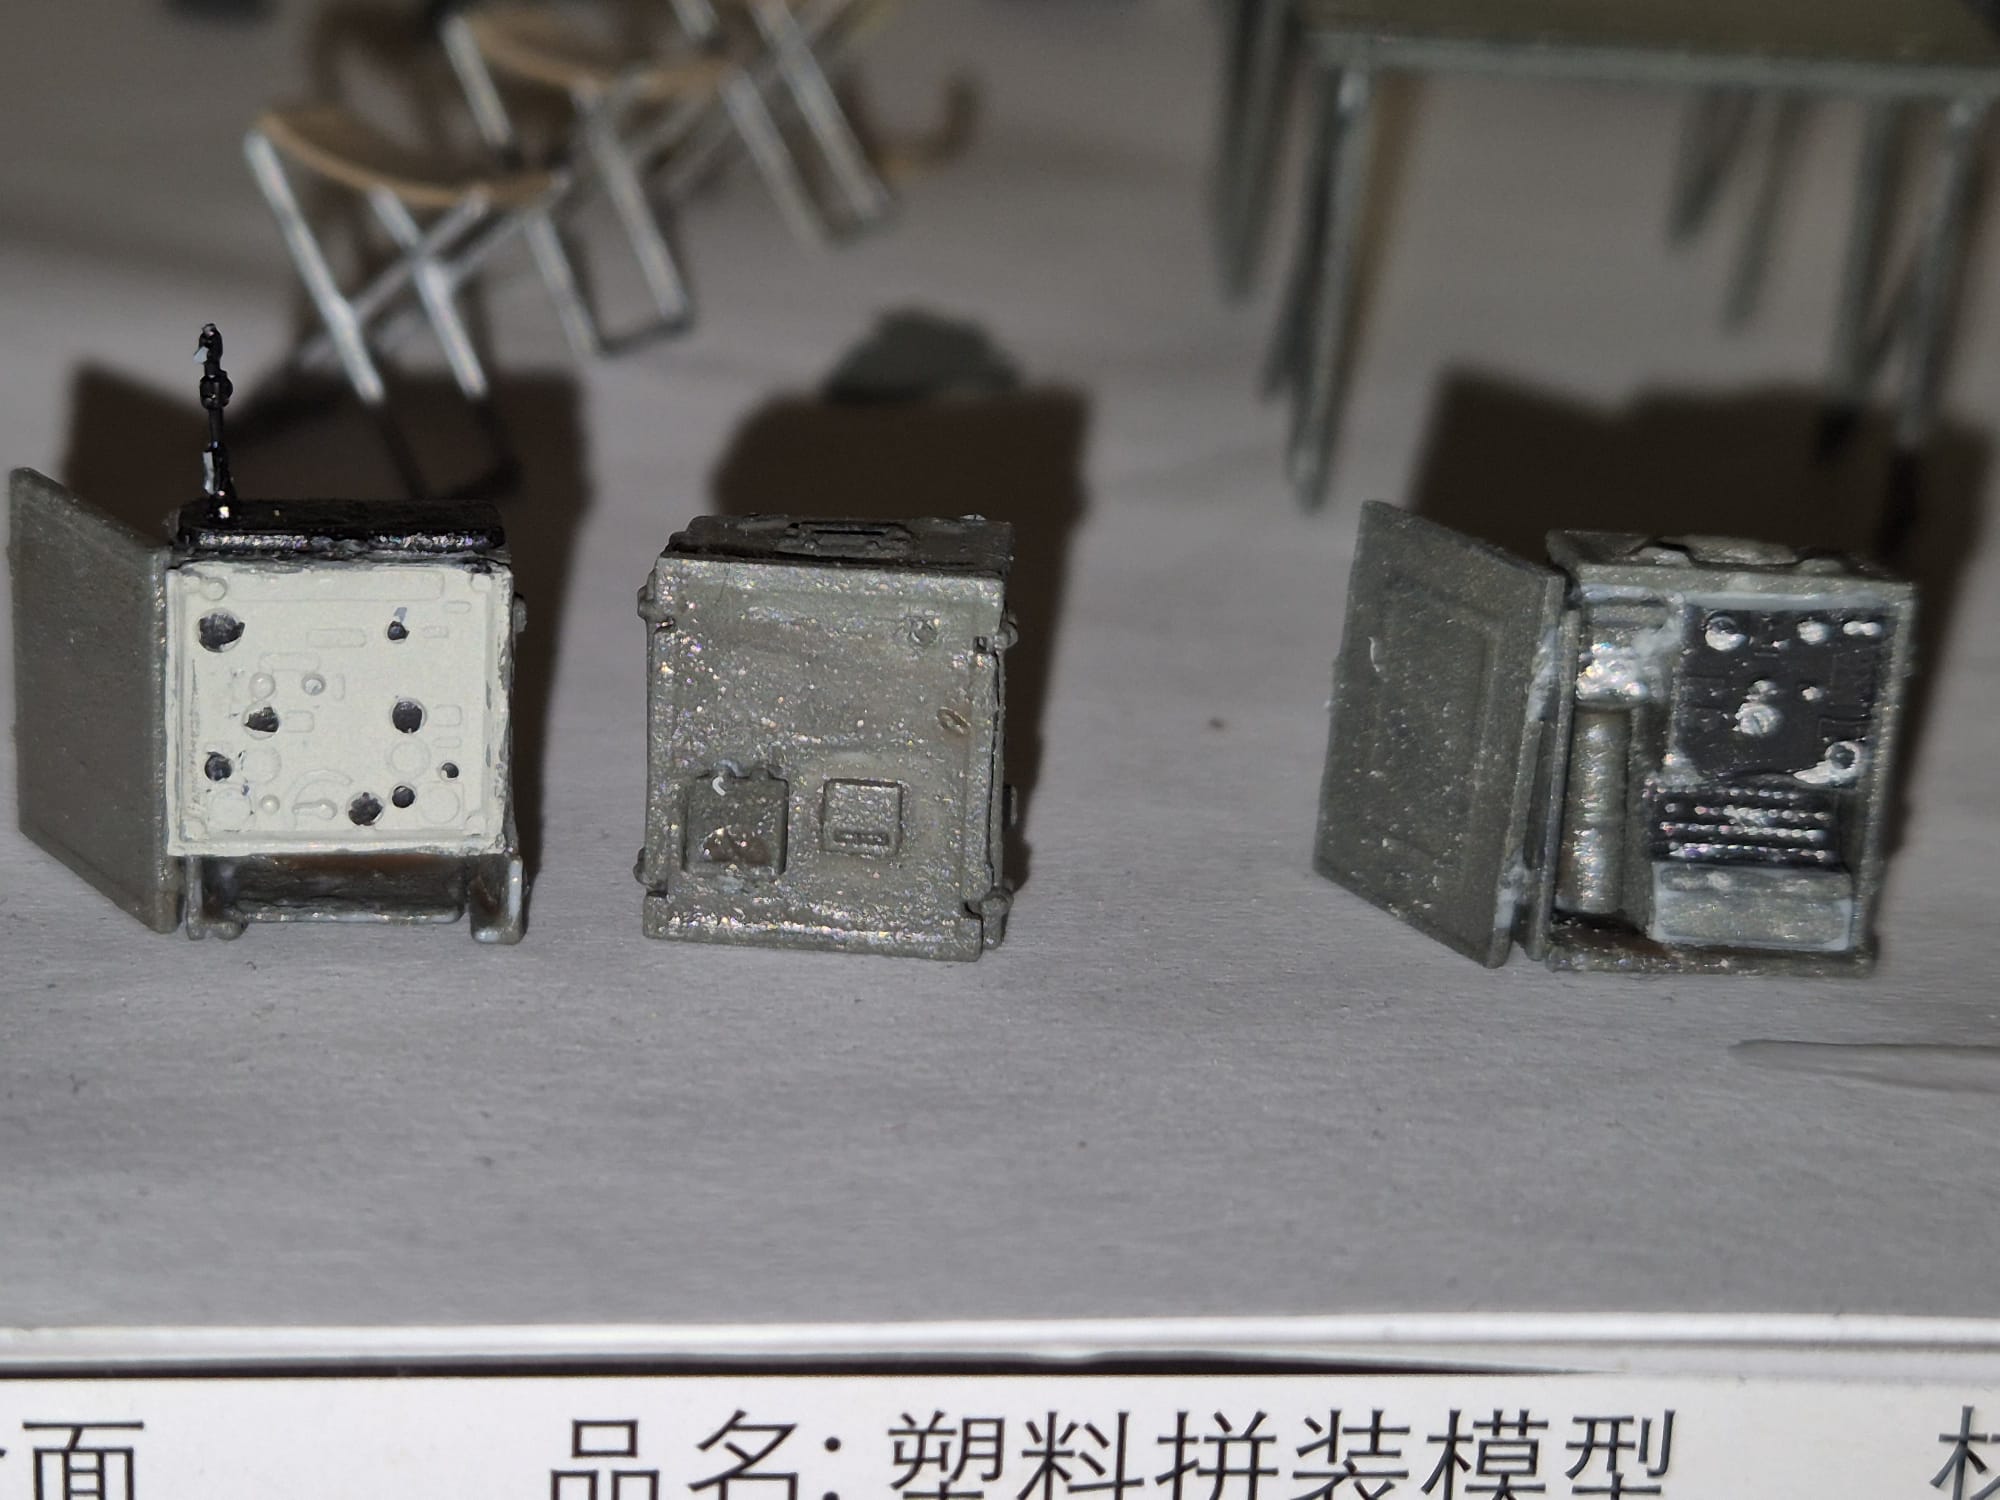
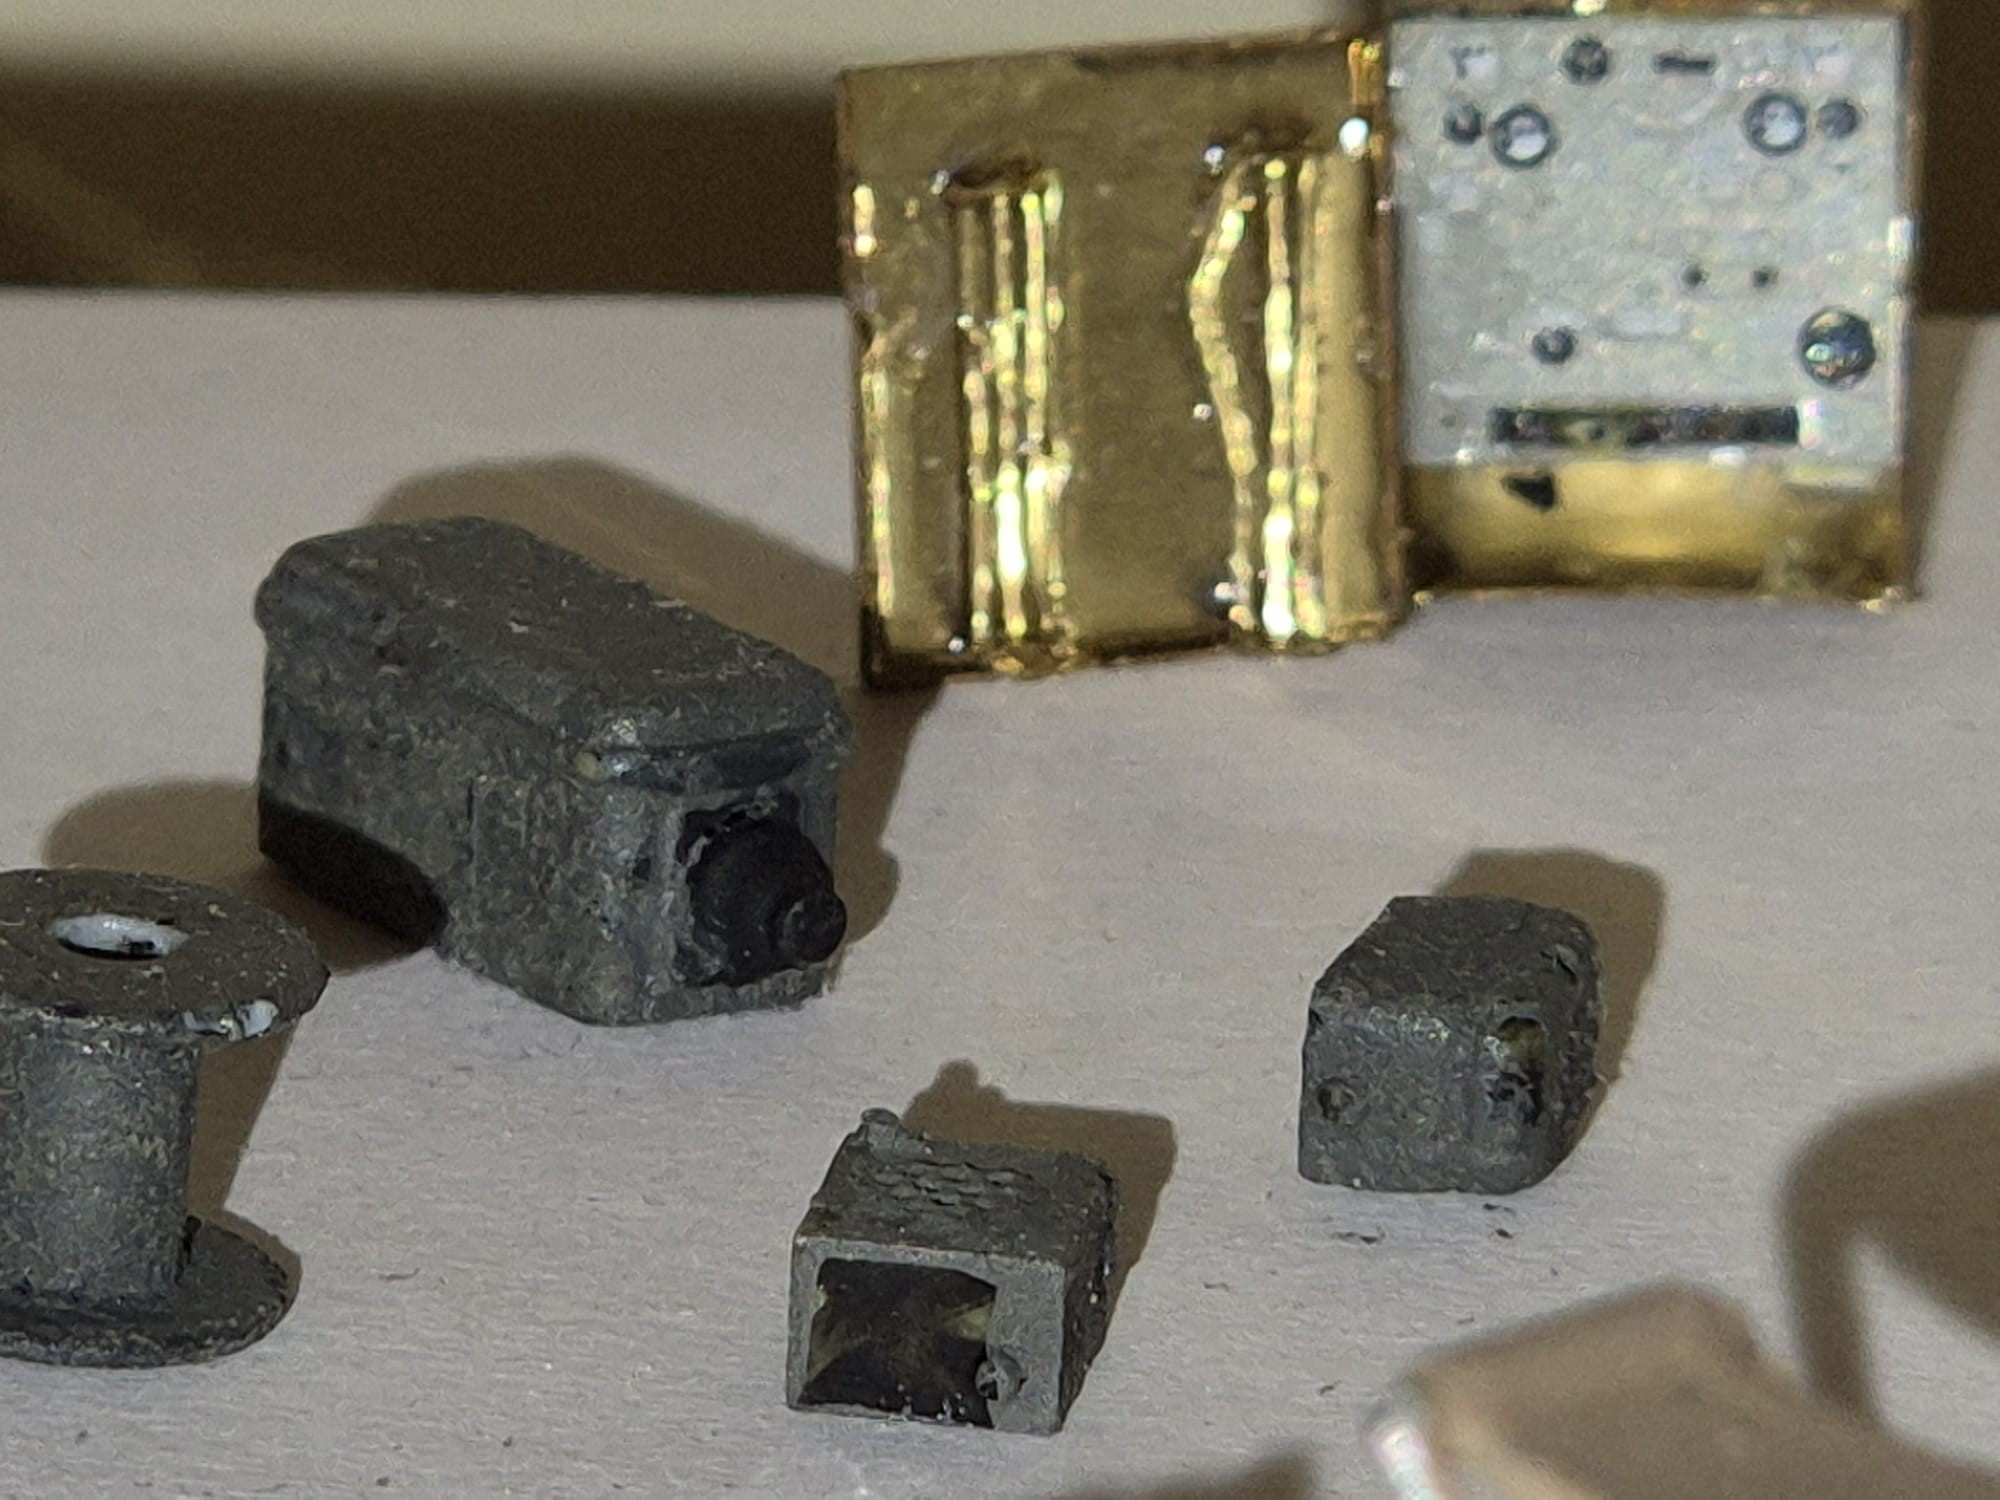
So you were all wondering if I dematerialized into another universe, and you may be right. In fact, to build all those tiny things that have to fit into the Bunker I almost seem disappearing into nothingness. Besides things not going as they should (usually due to details that either do not fit or simply dry transfers not wanting to stay where they are meant to be), it is a real jeweler’s work I am doing since some parts are simply too microscopic in order to make a mode really worthwhile in 1:35 scale.

I therefore decided to become the “Rebel of the Bunch” and forget about all those tiny bits that anyway no one would actually see with the naked eye when seeing them. The key word: taking shortcuts where possible without renouncing some quality.

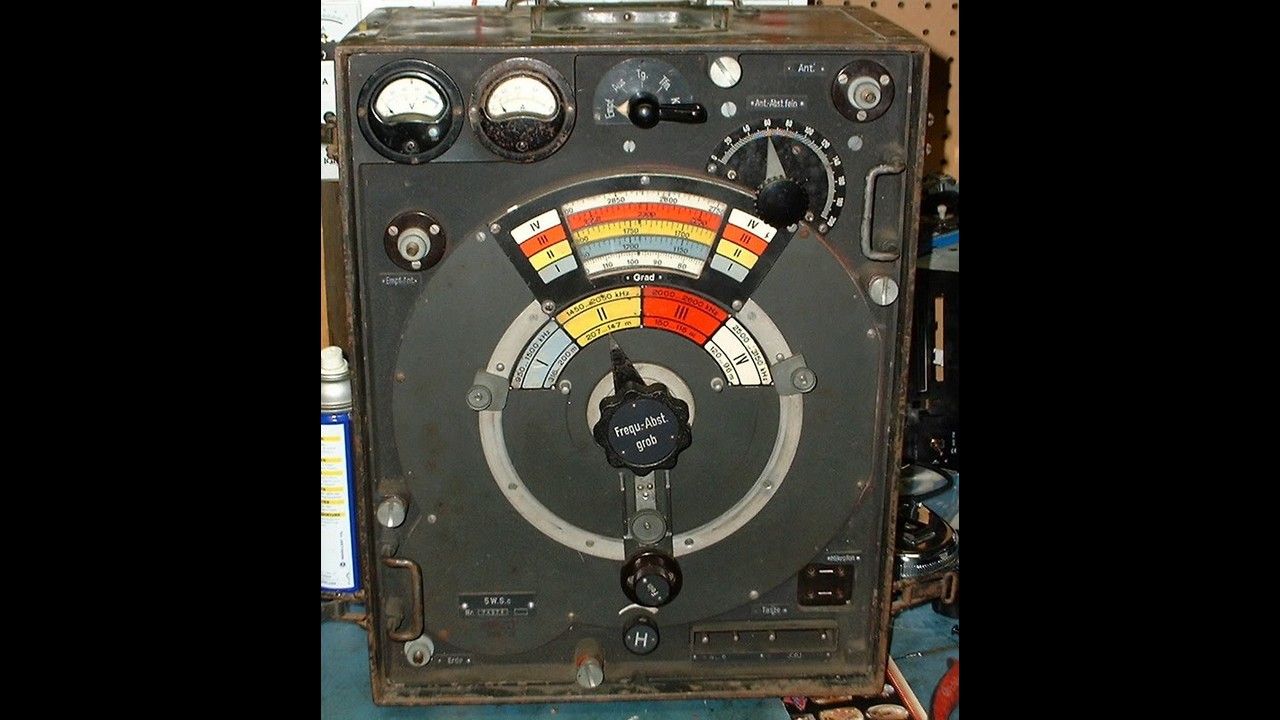
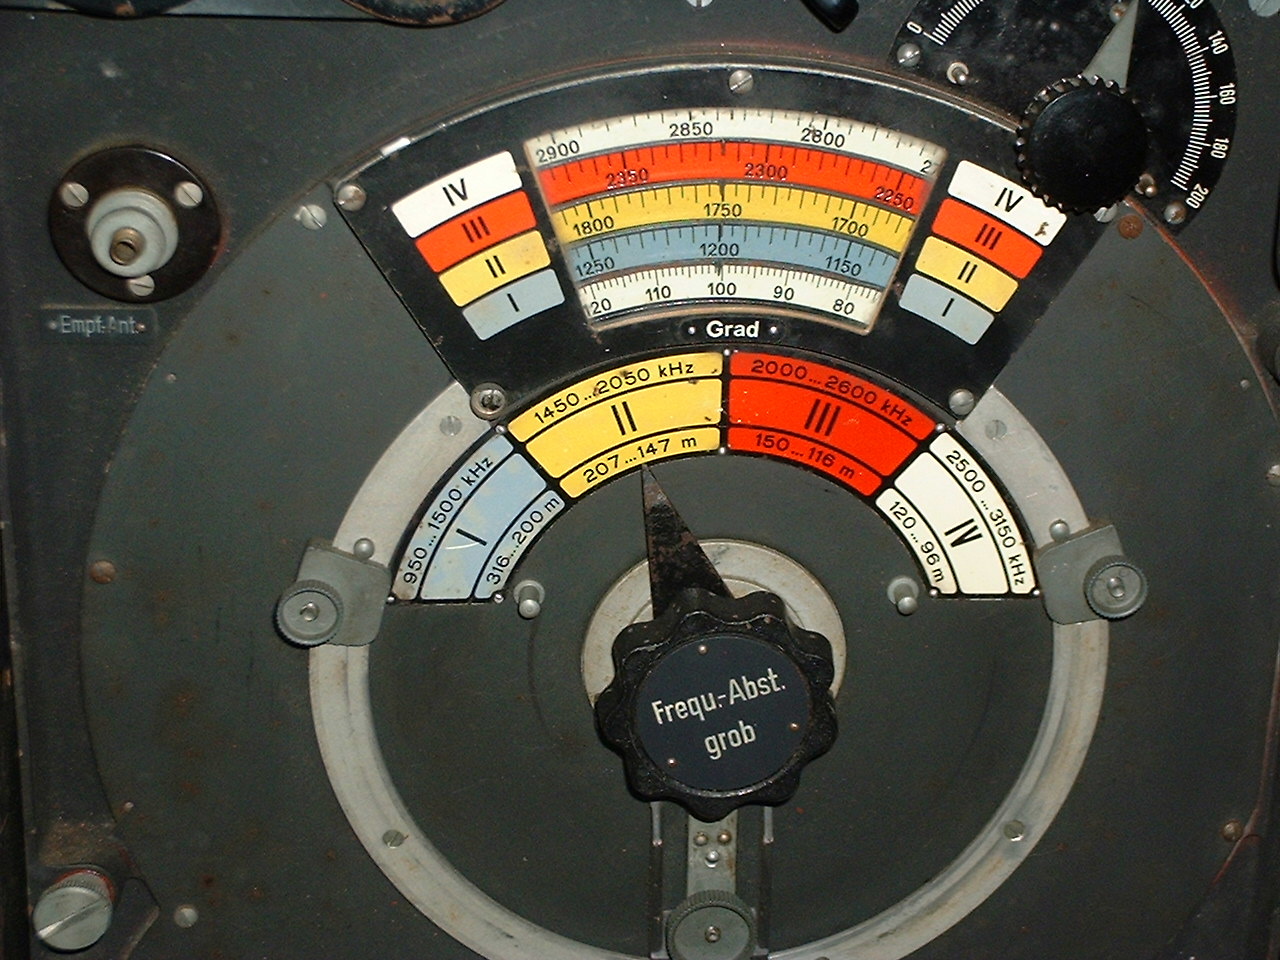
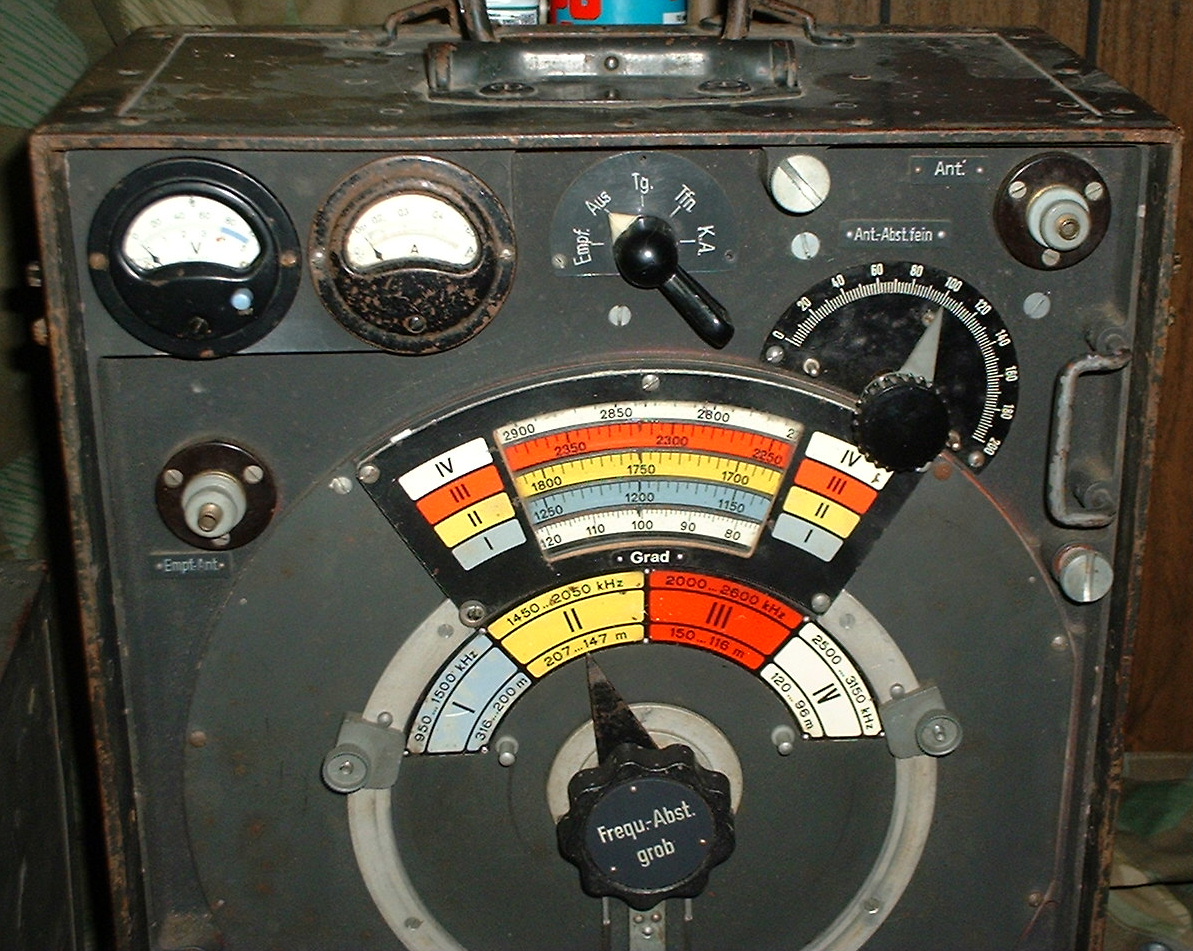
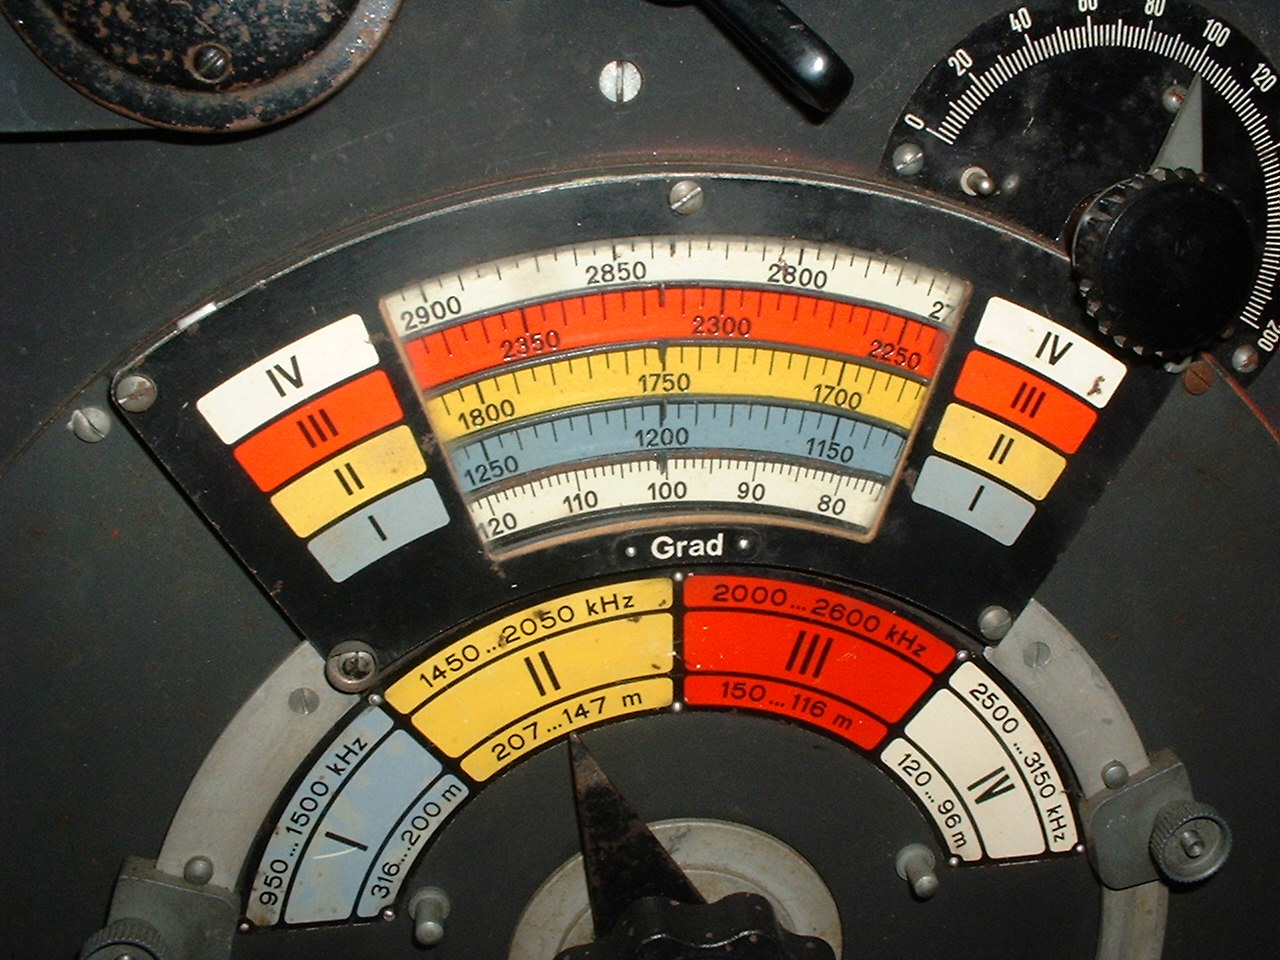
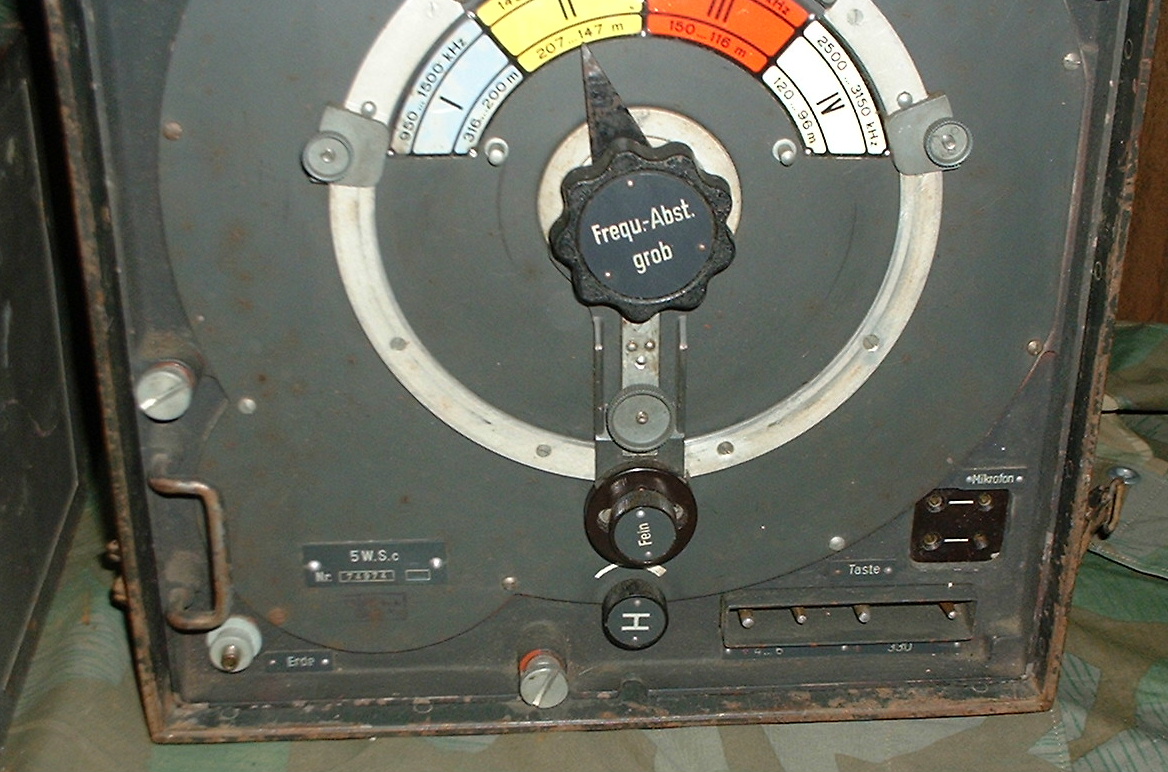
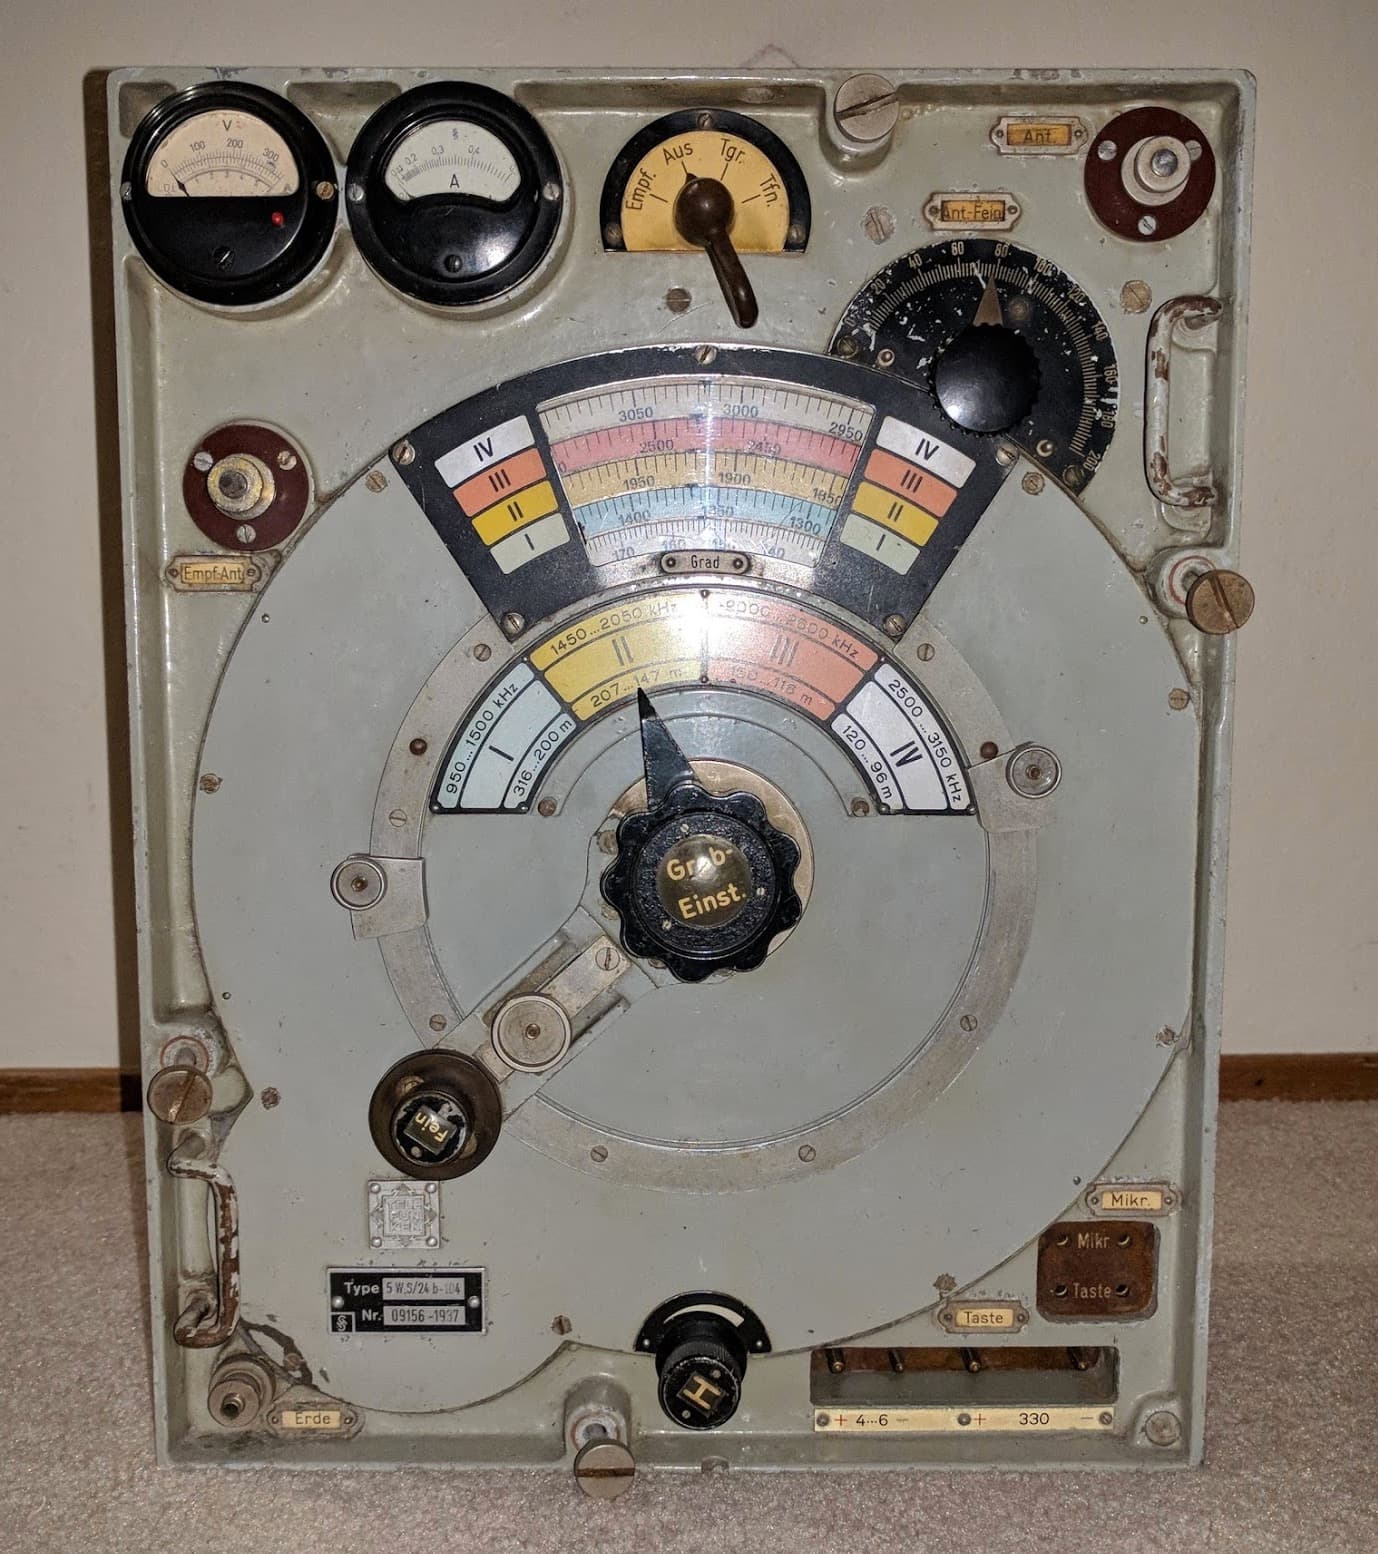
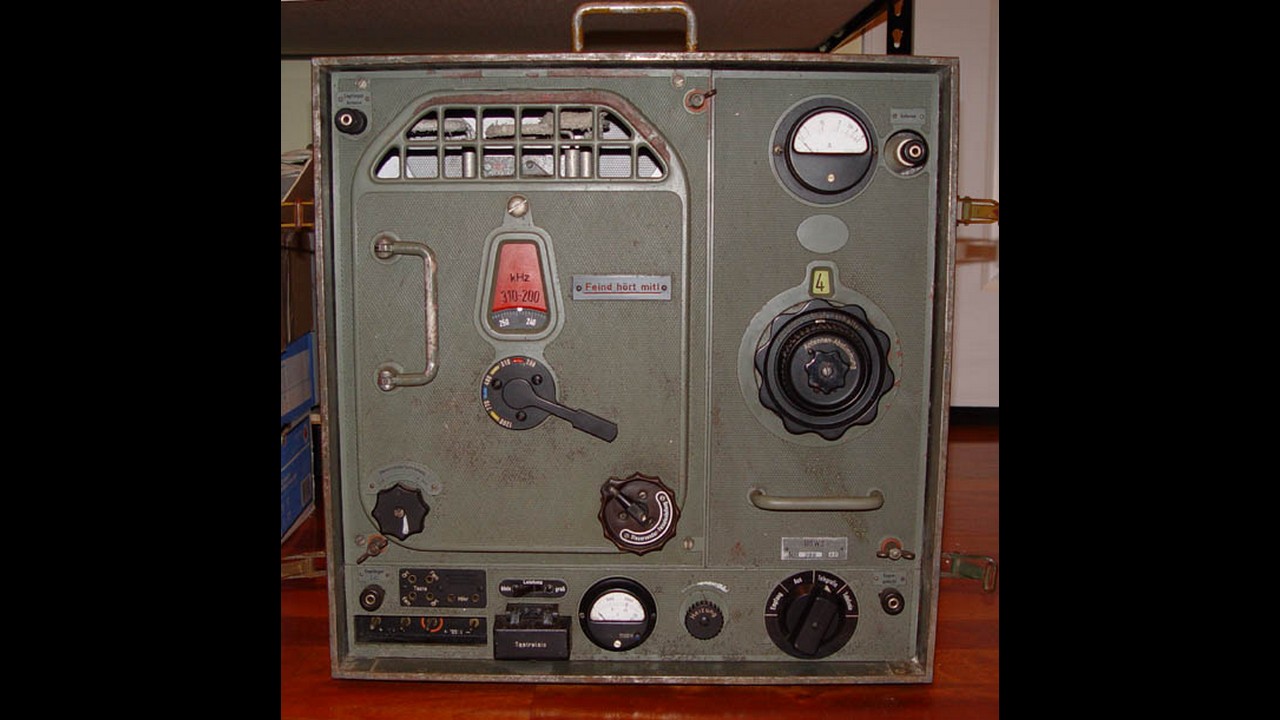
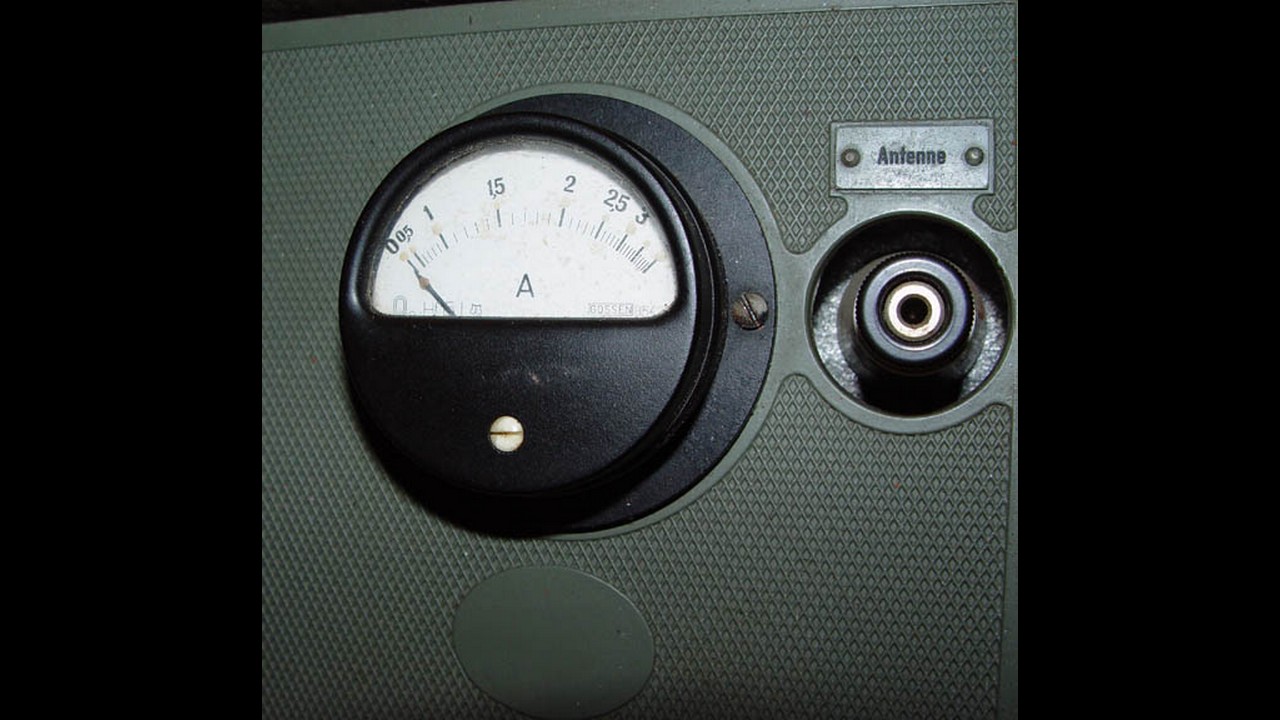
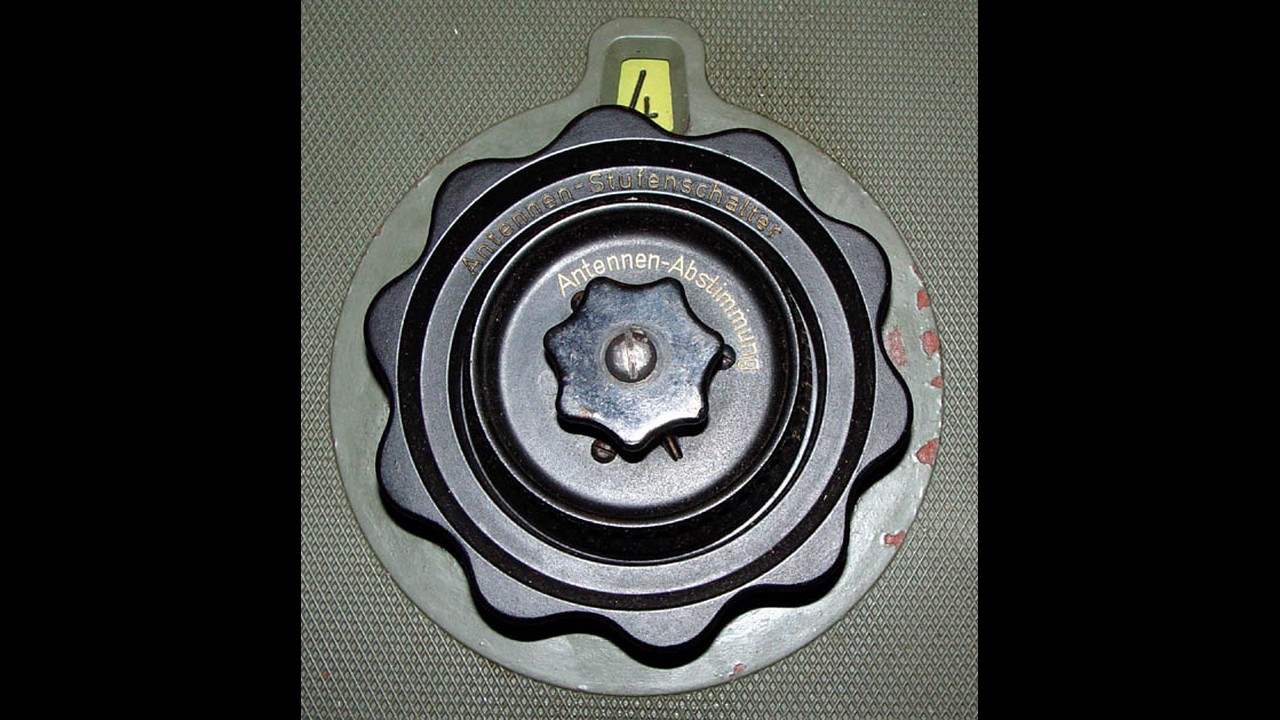
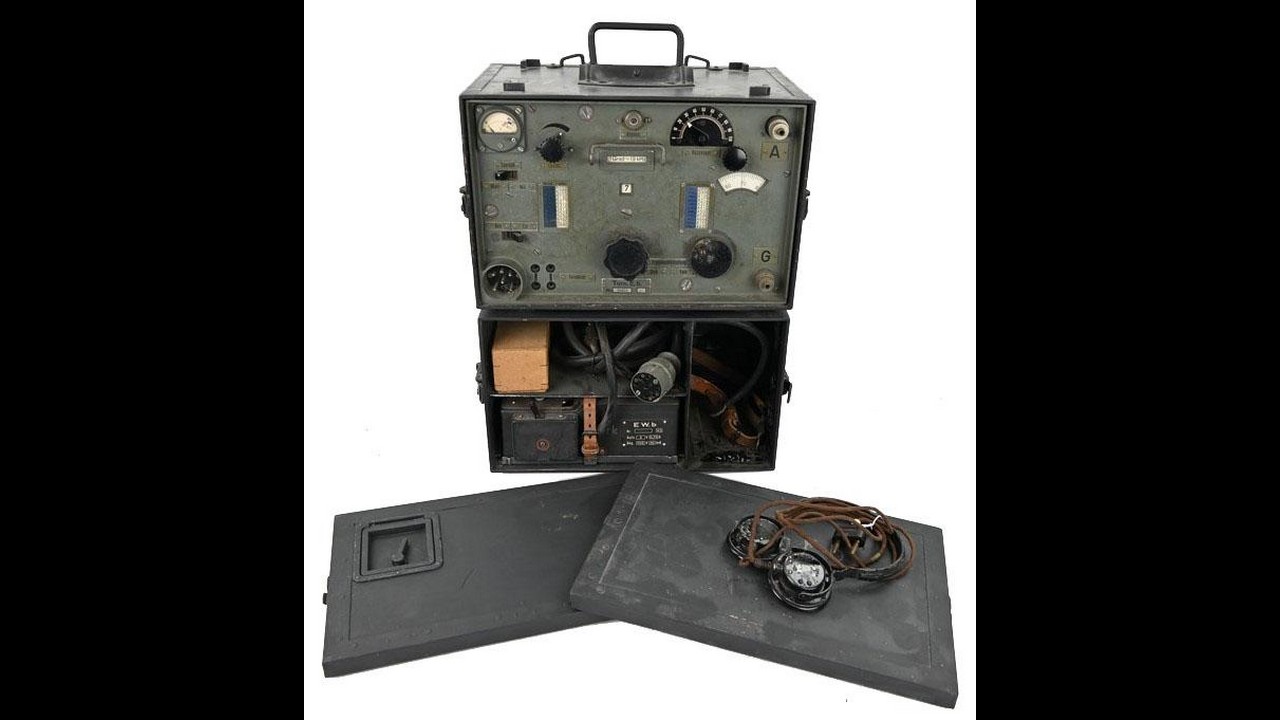
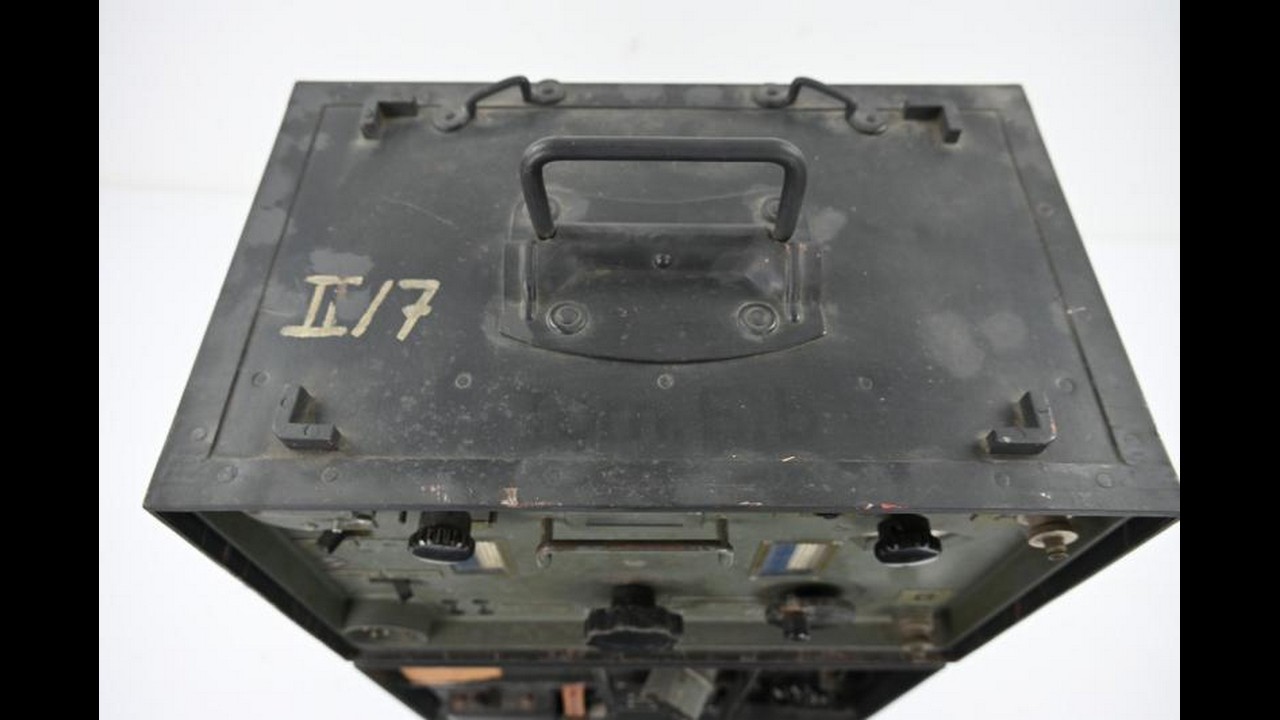
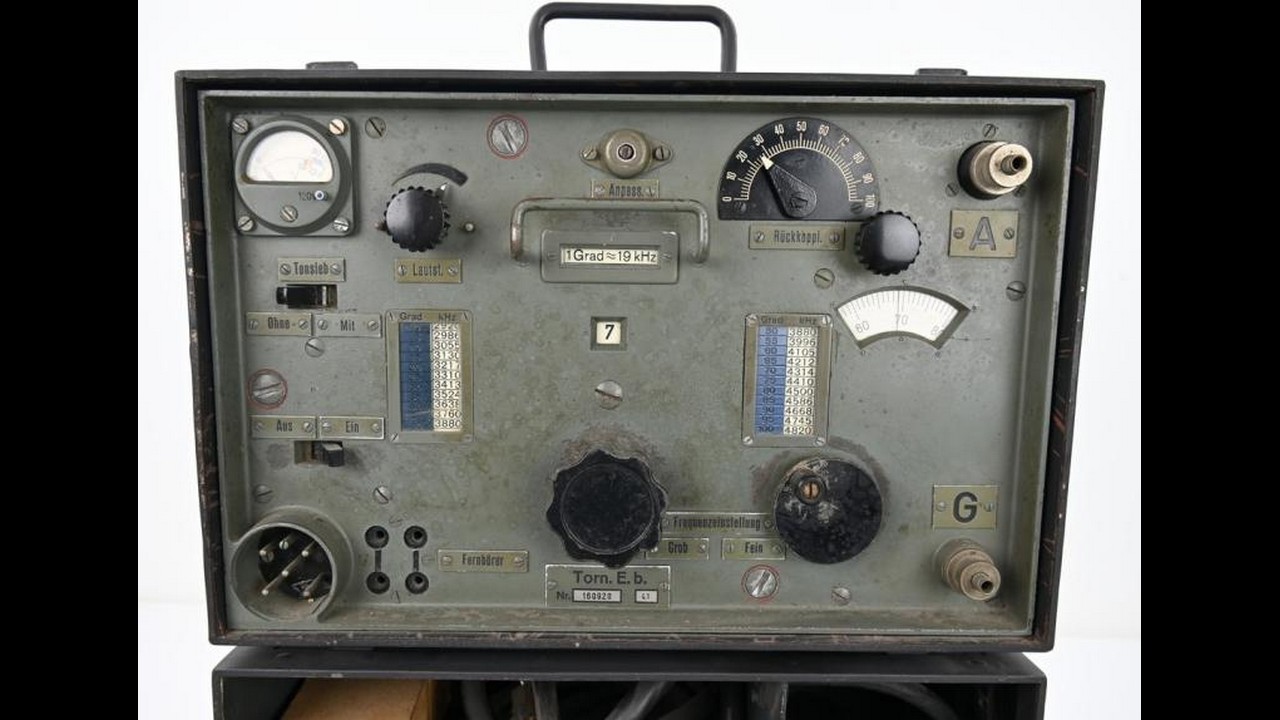
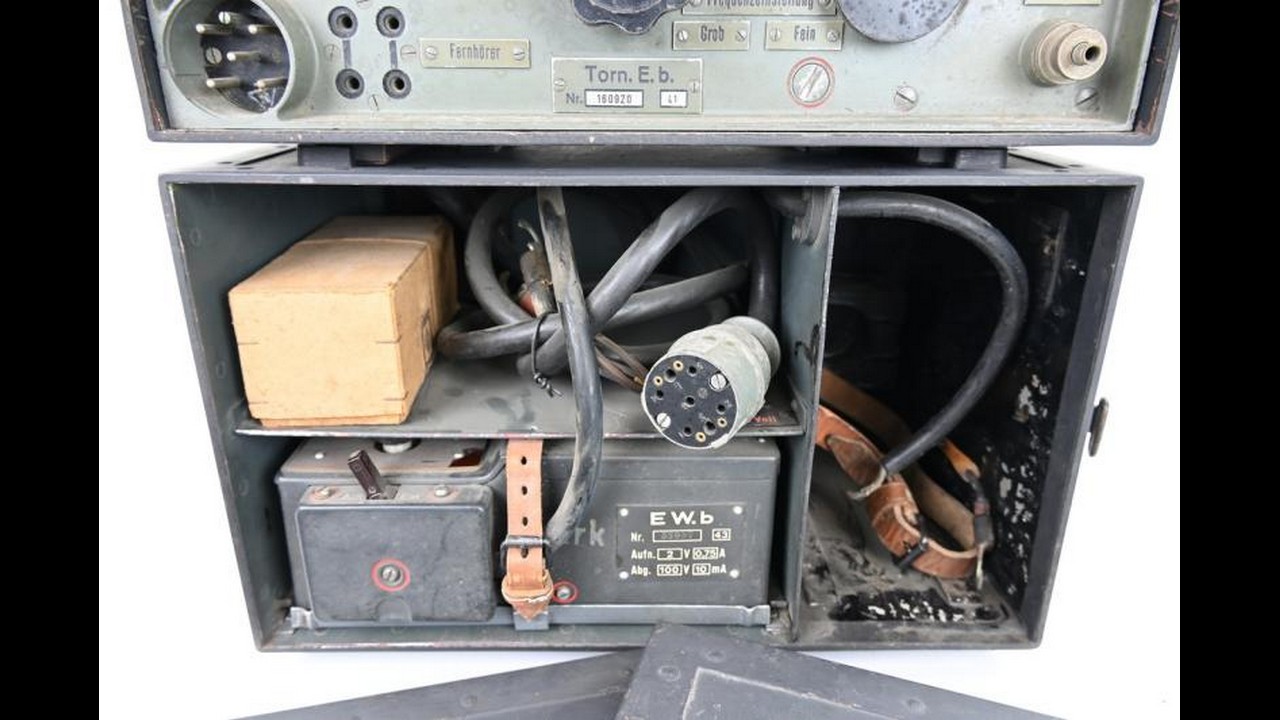
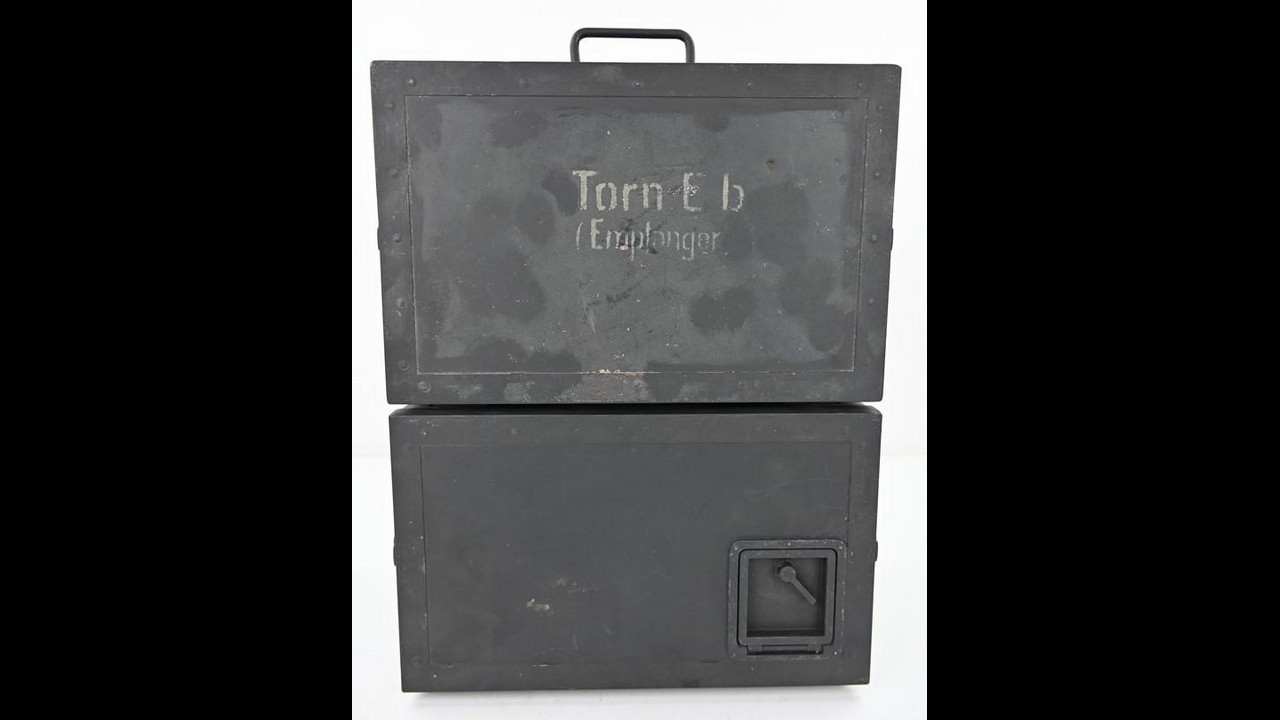
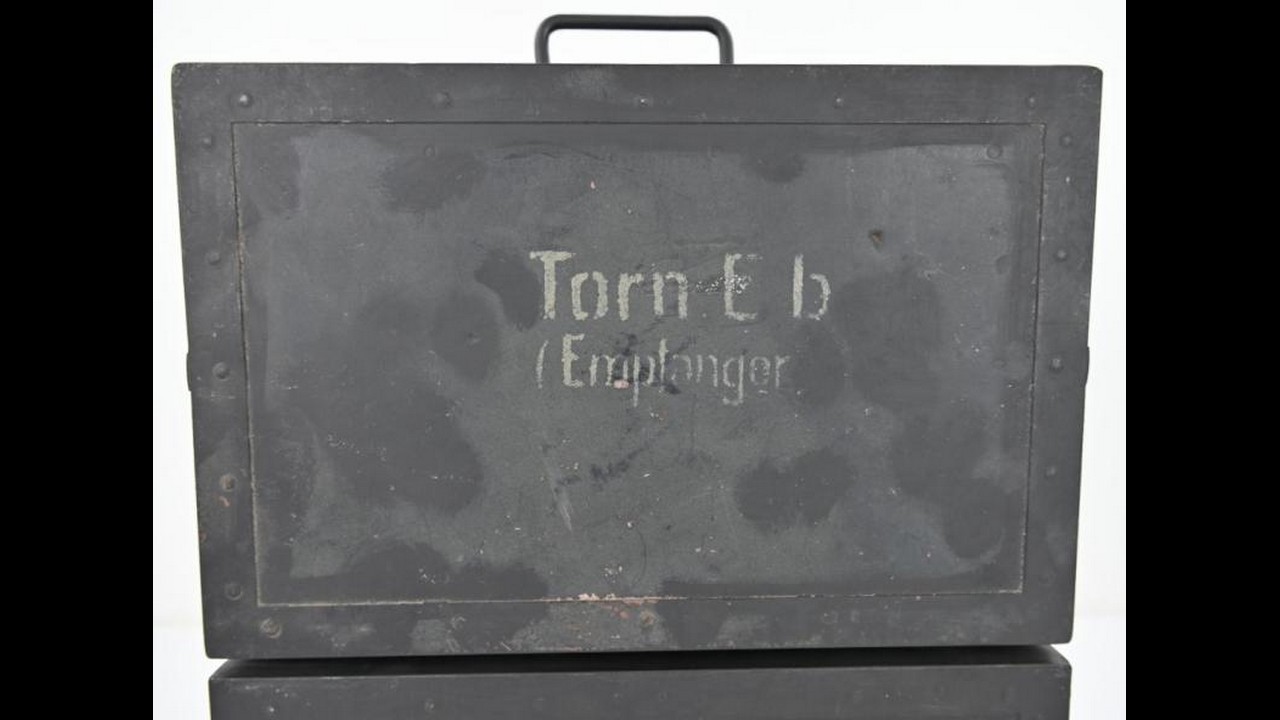
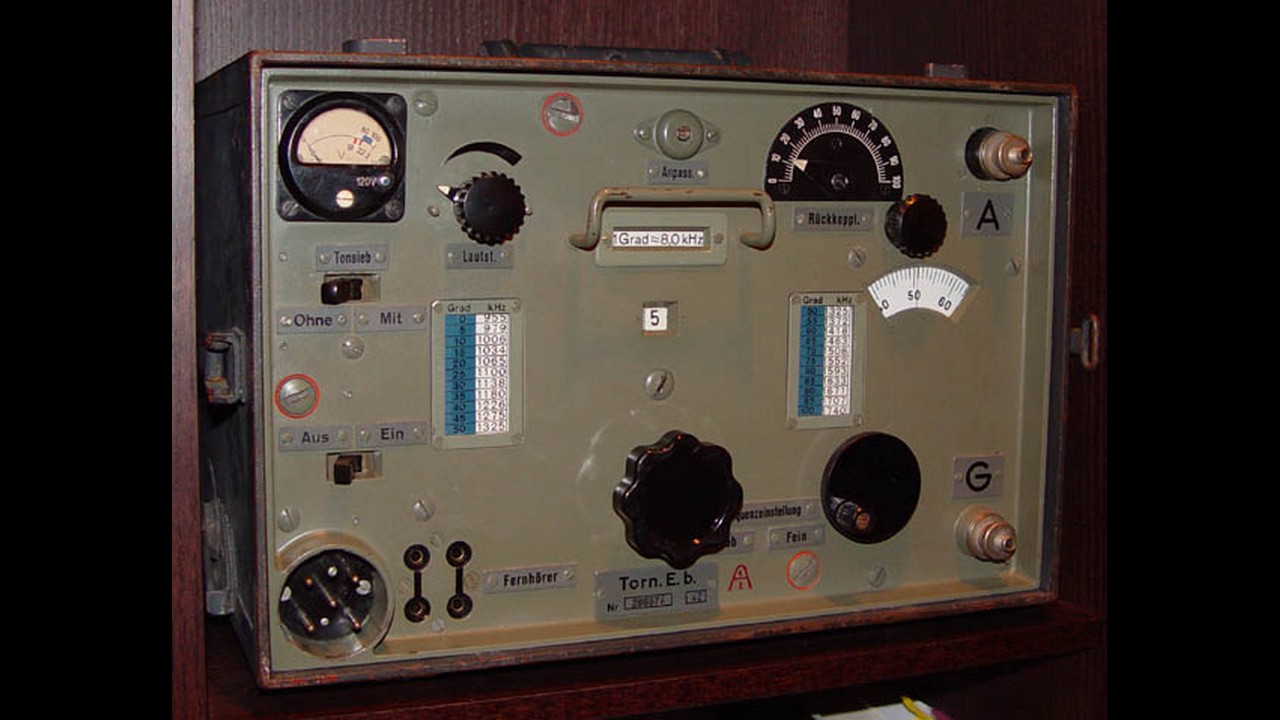
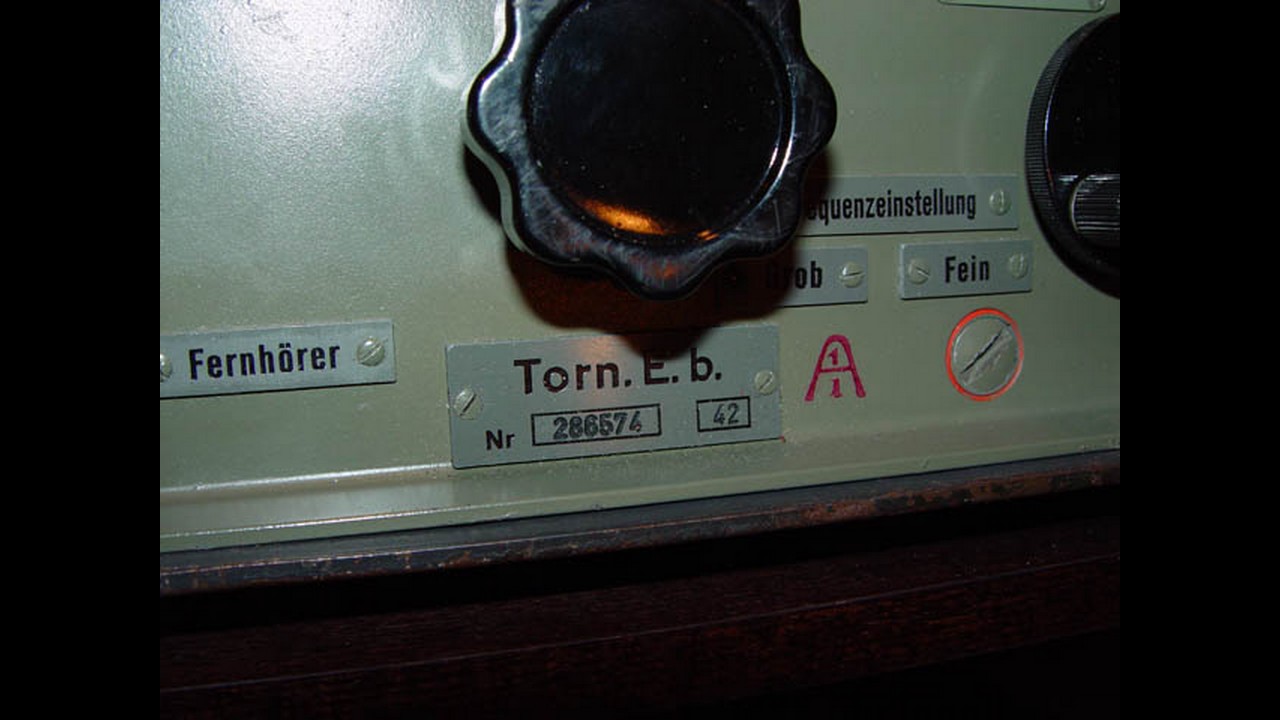
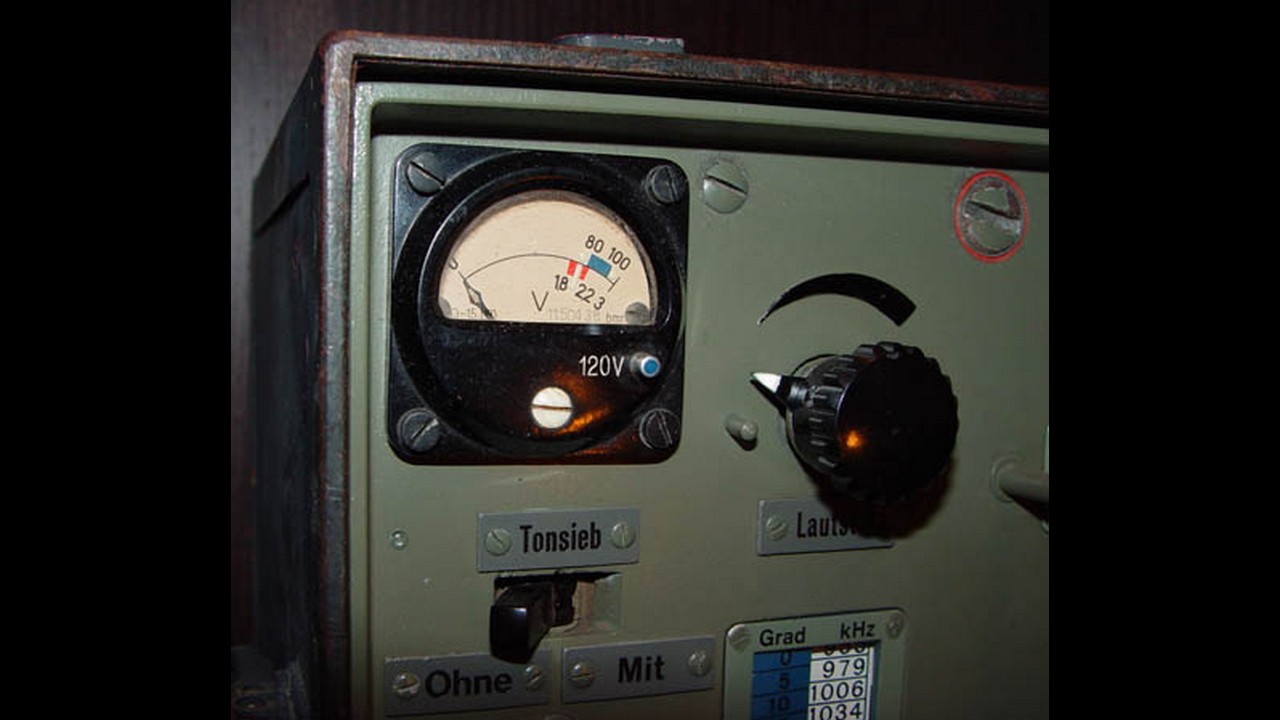
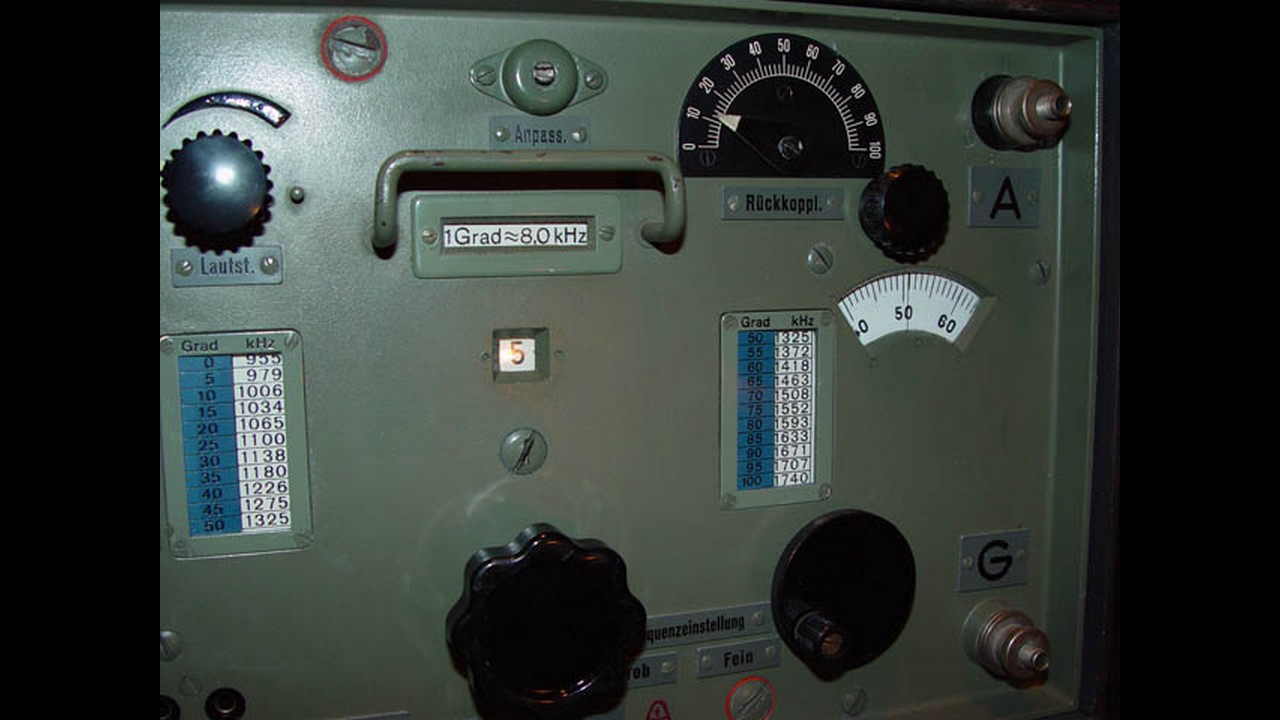
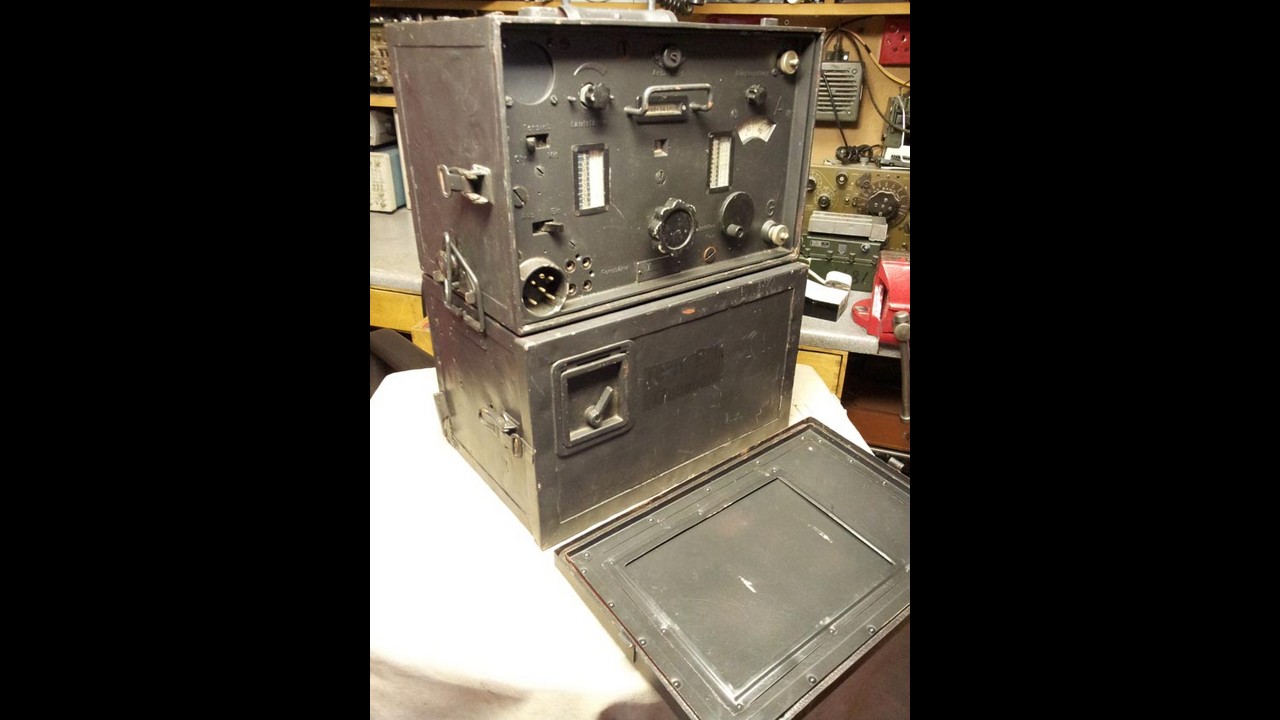
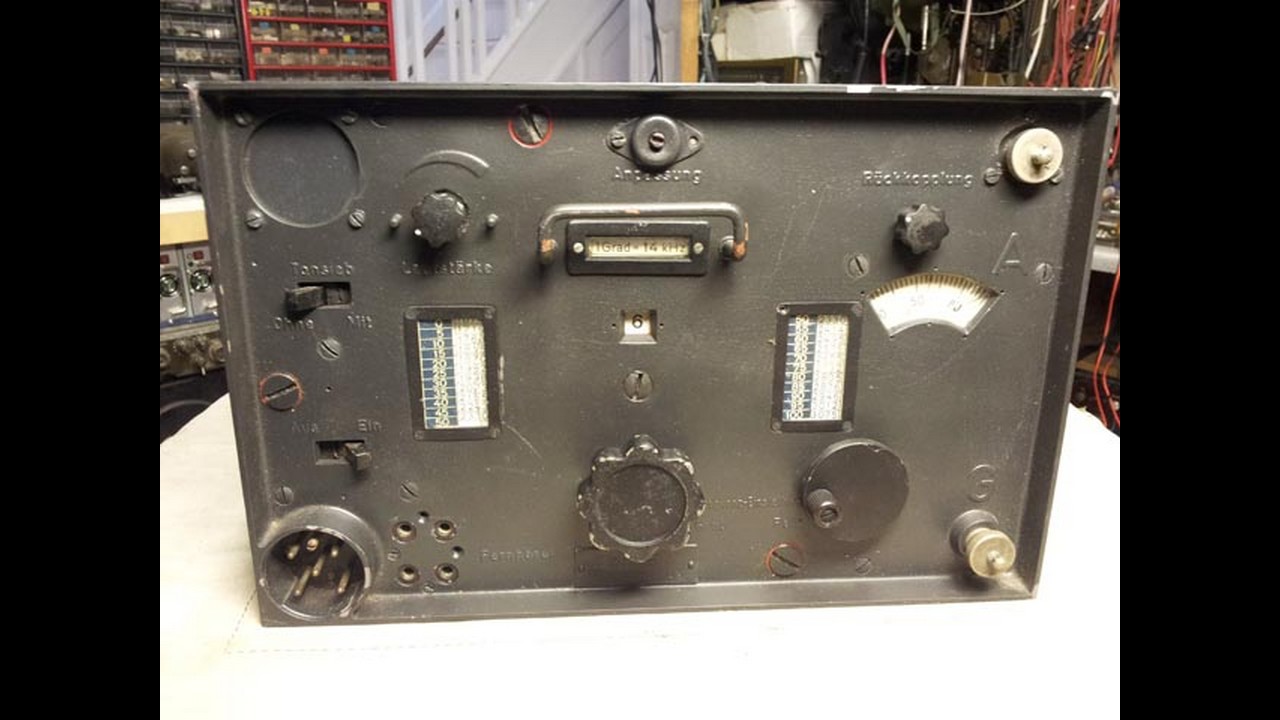
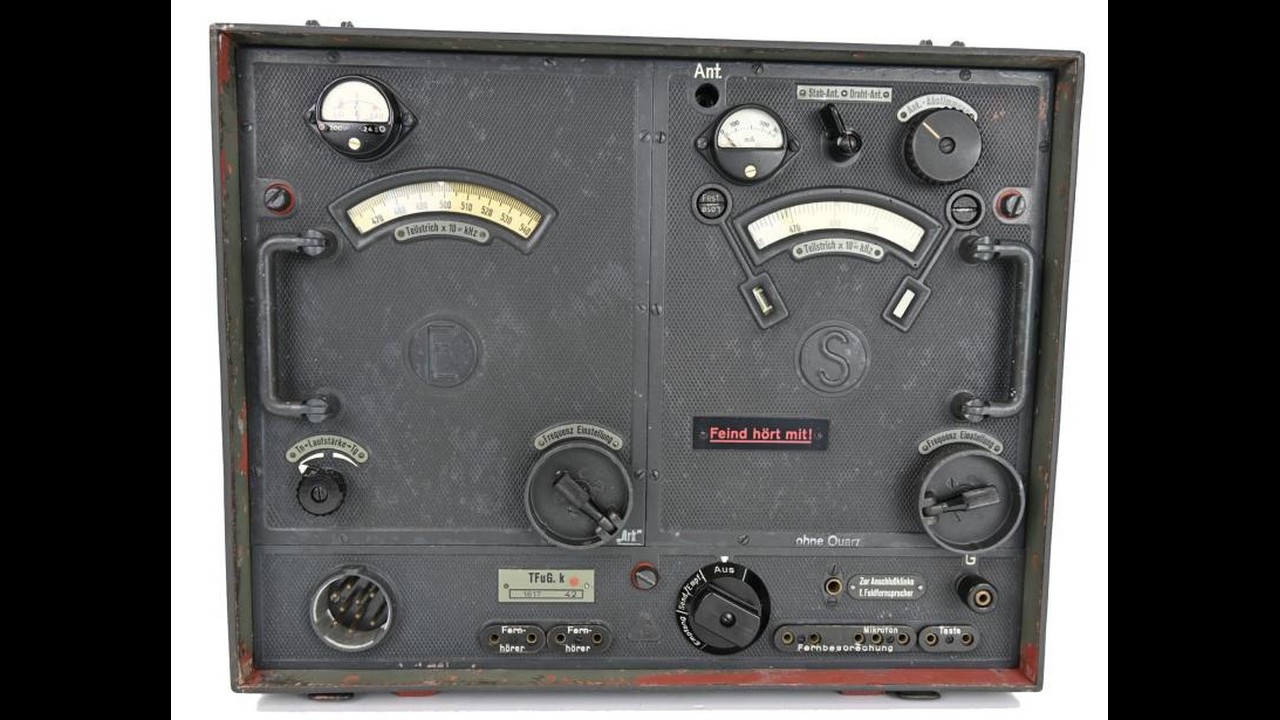
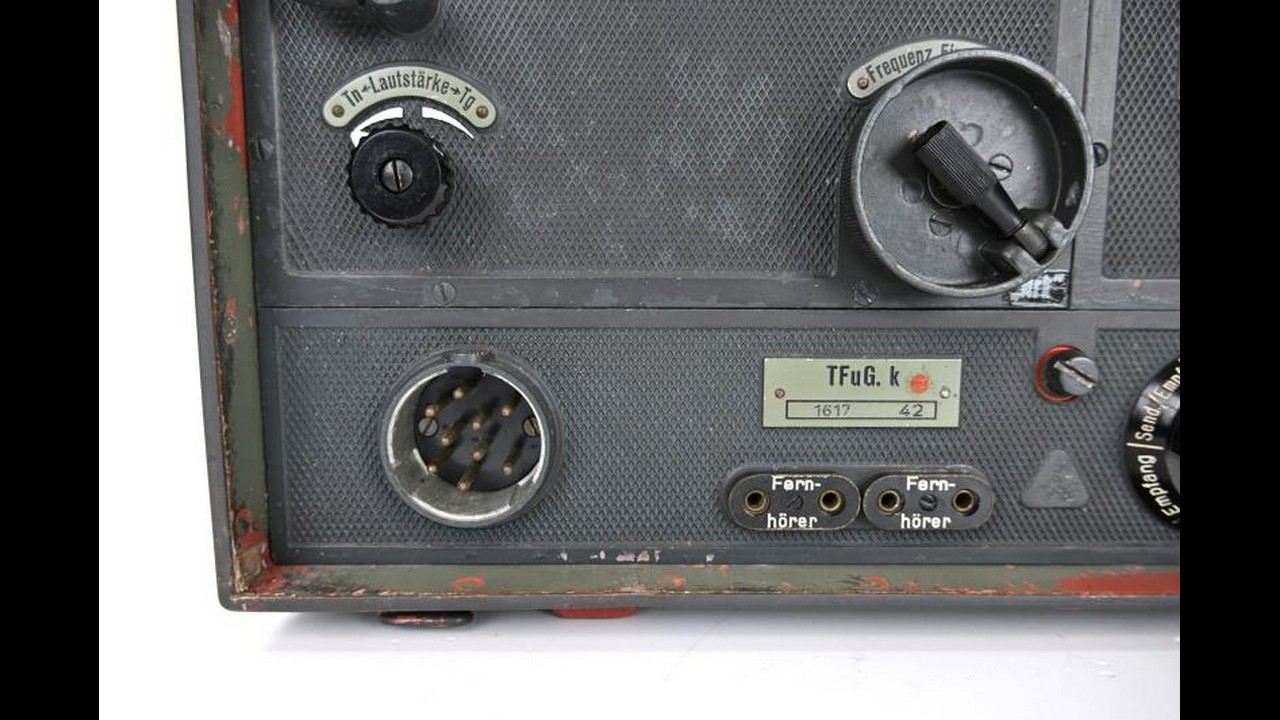
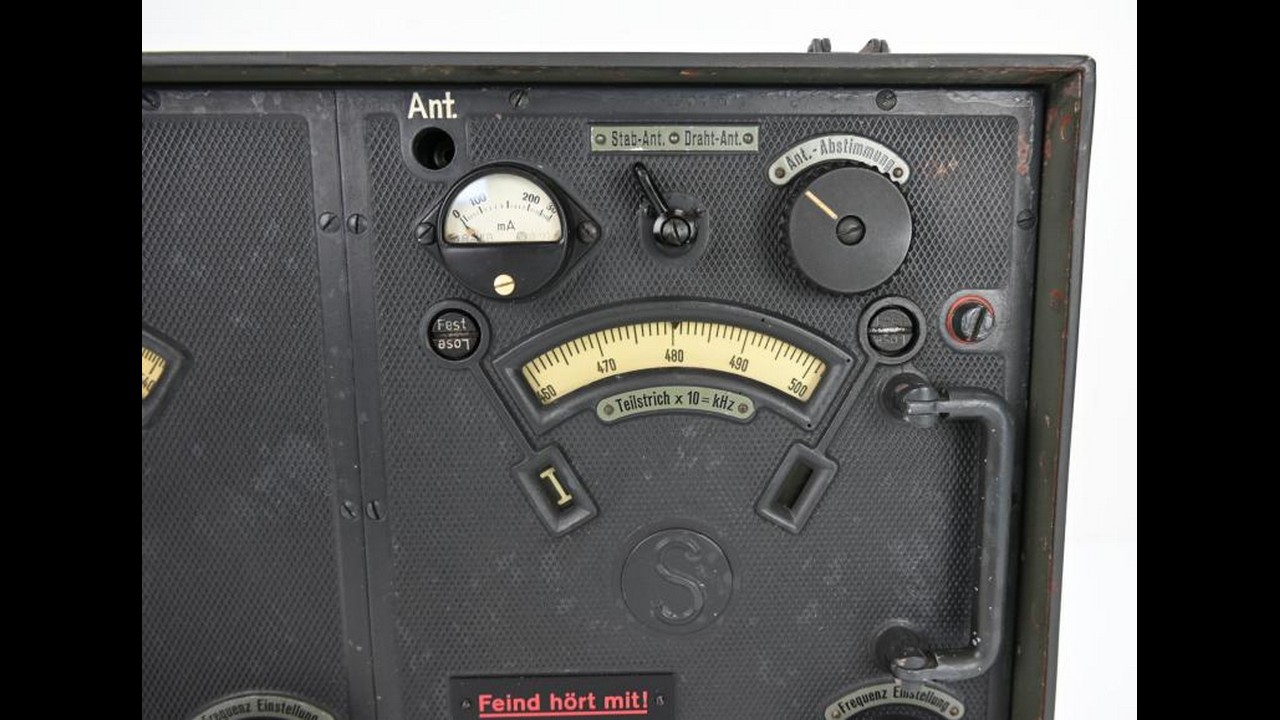
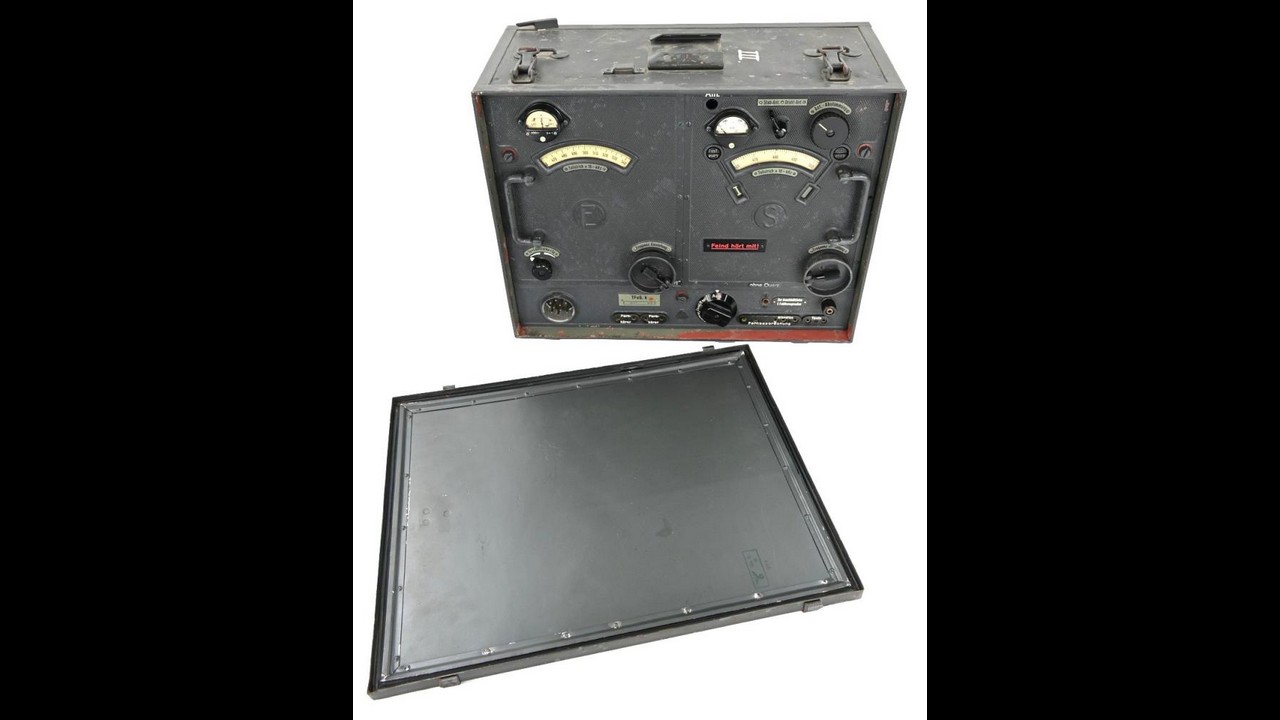
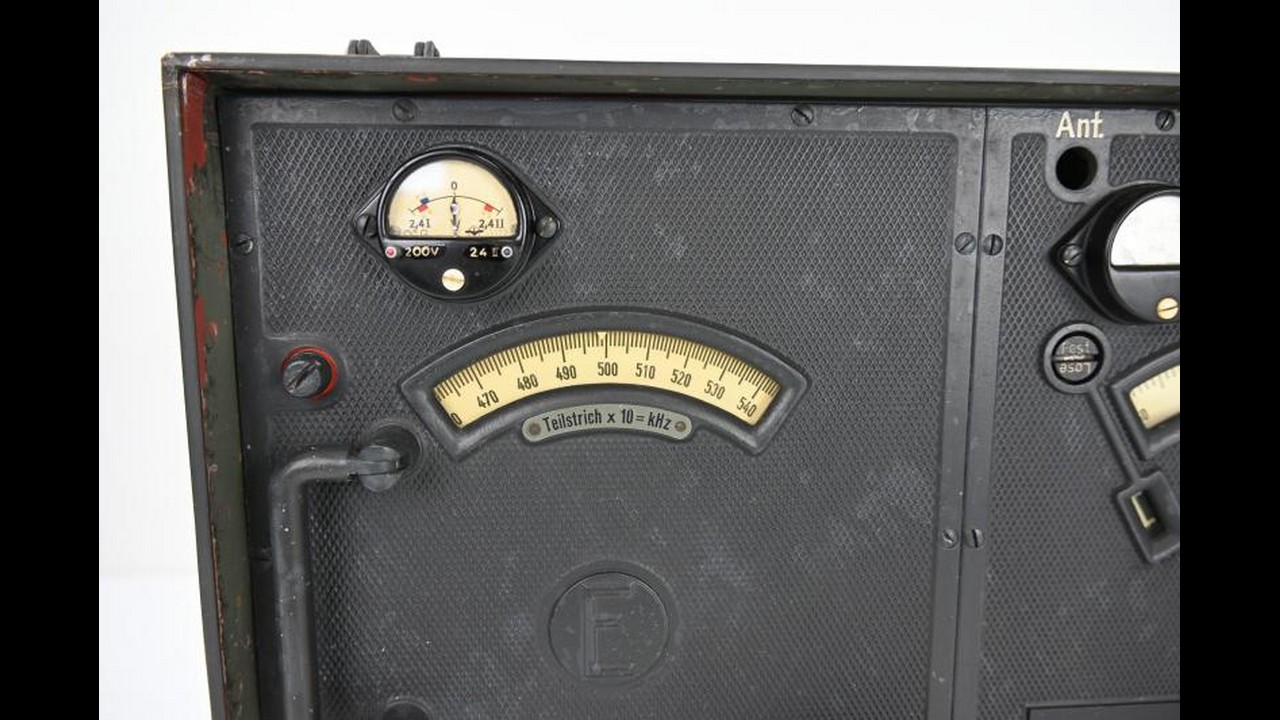
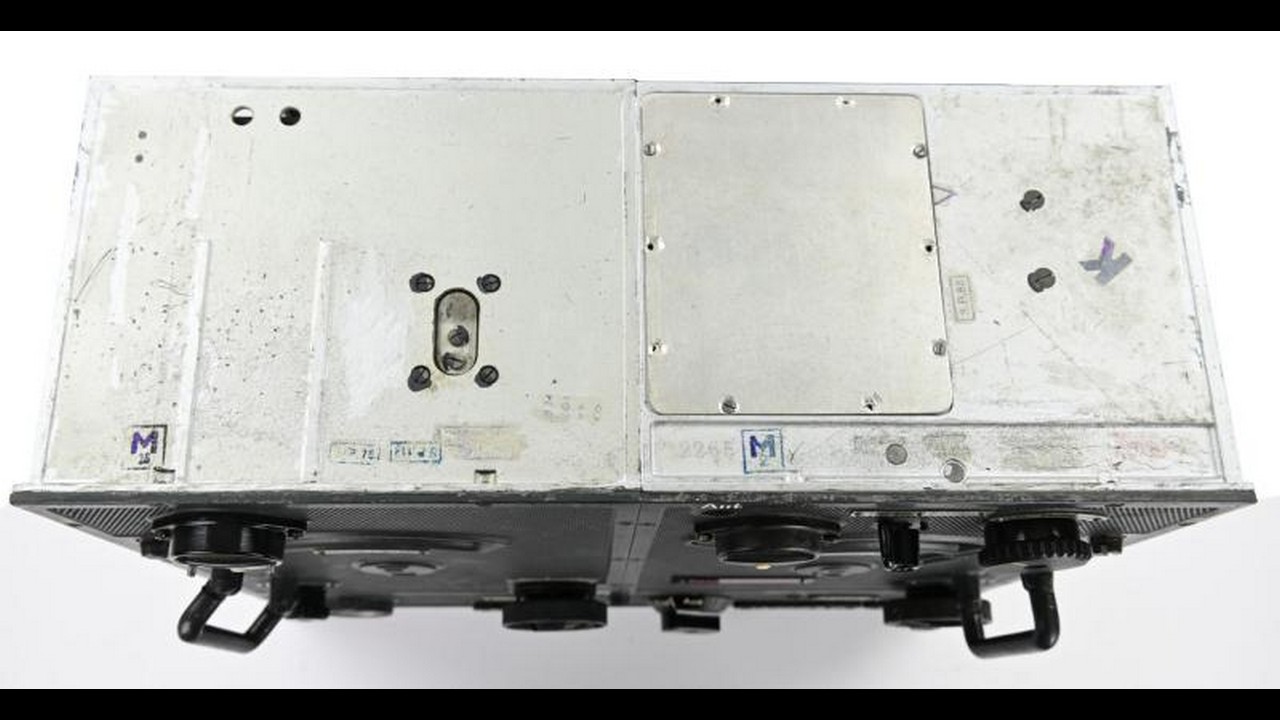
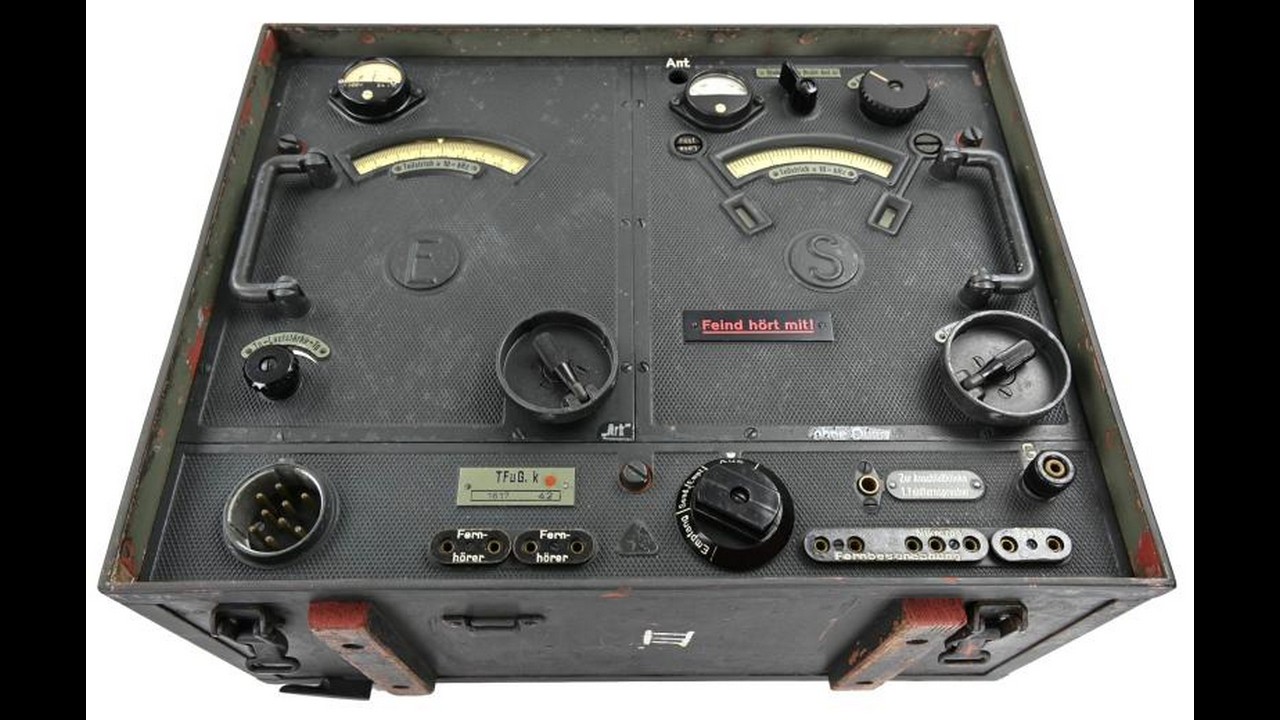
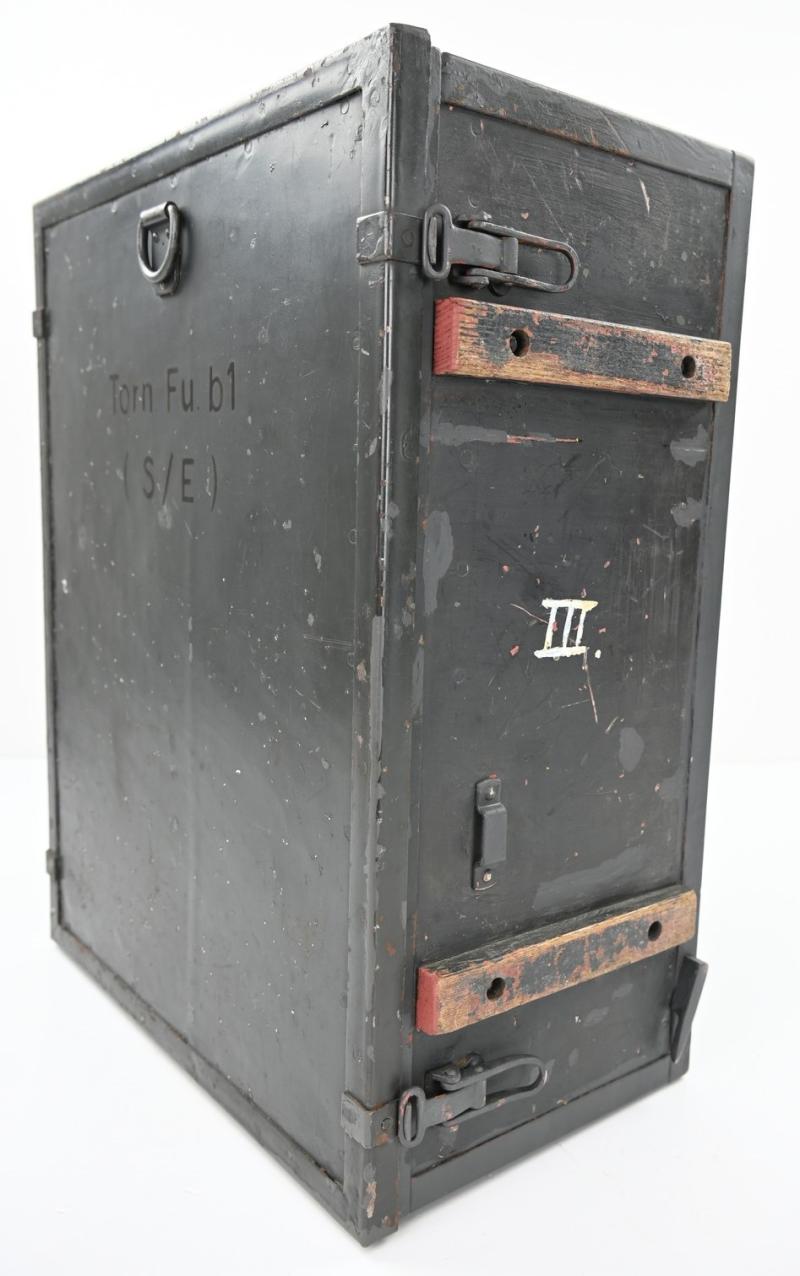
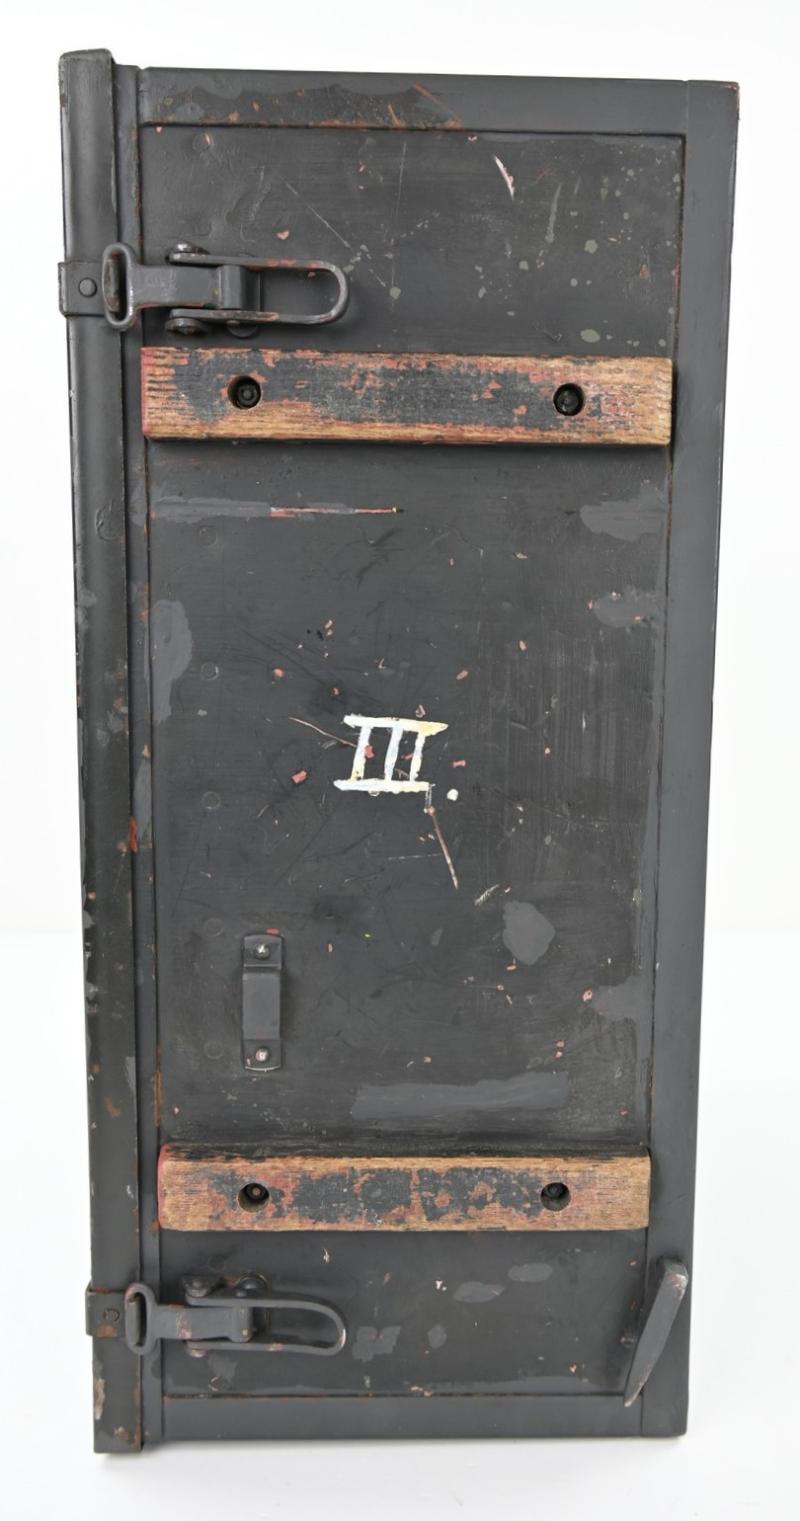
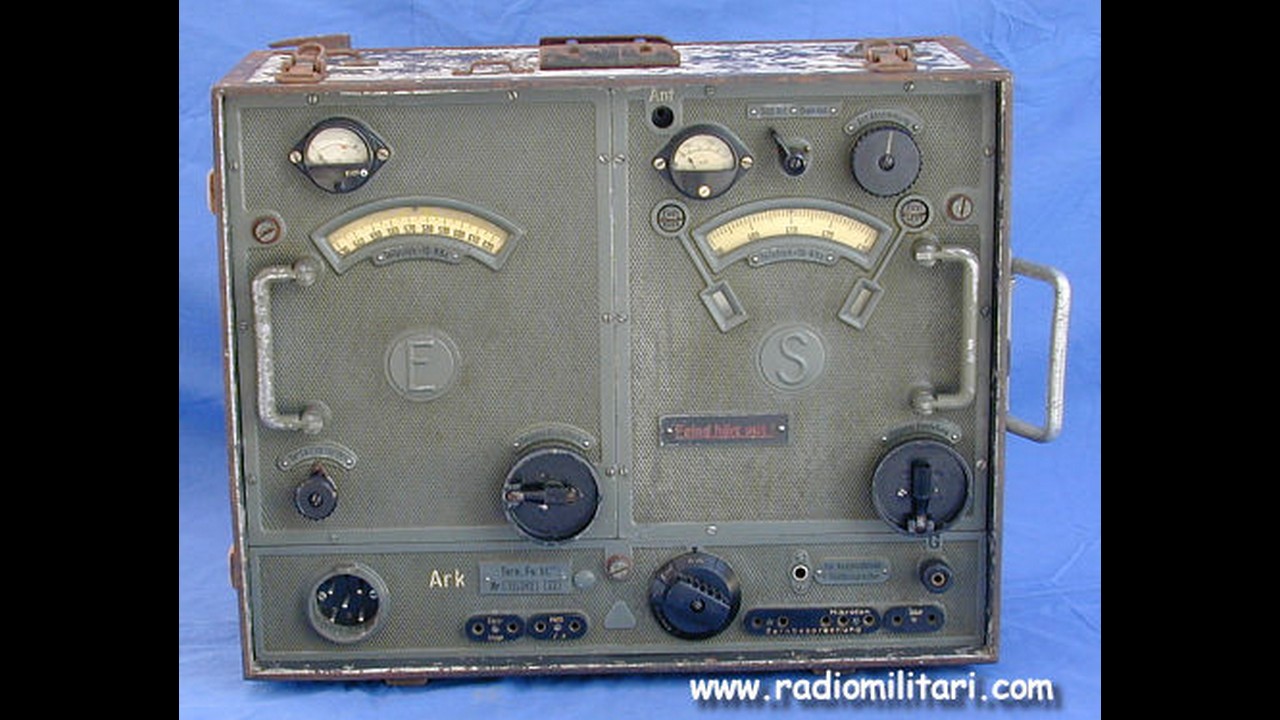
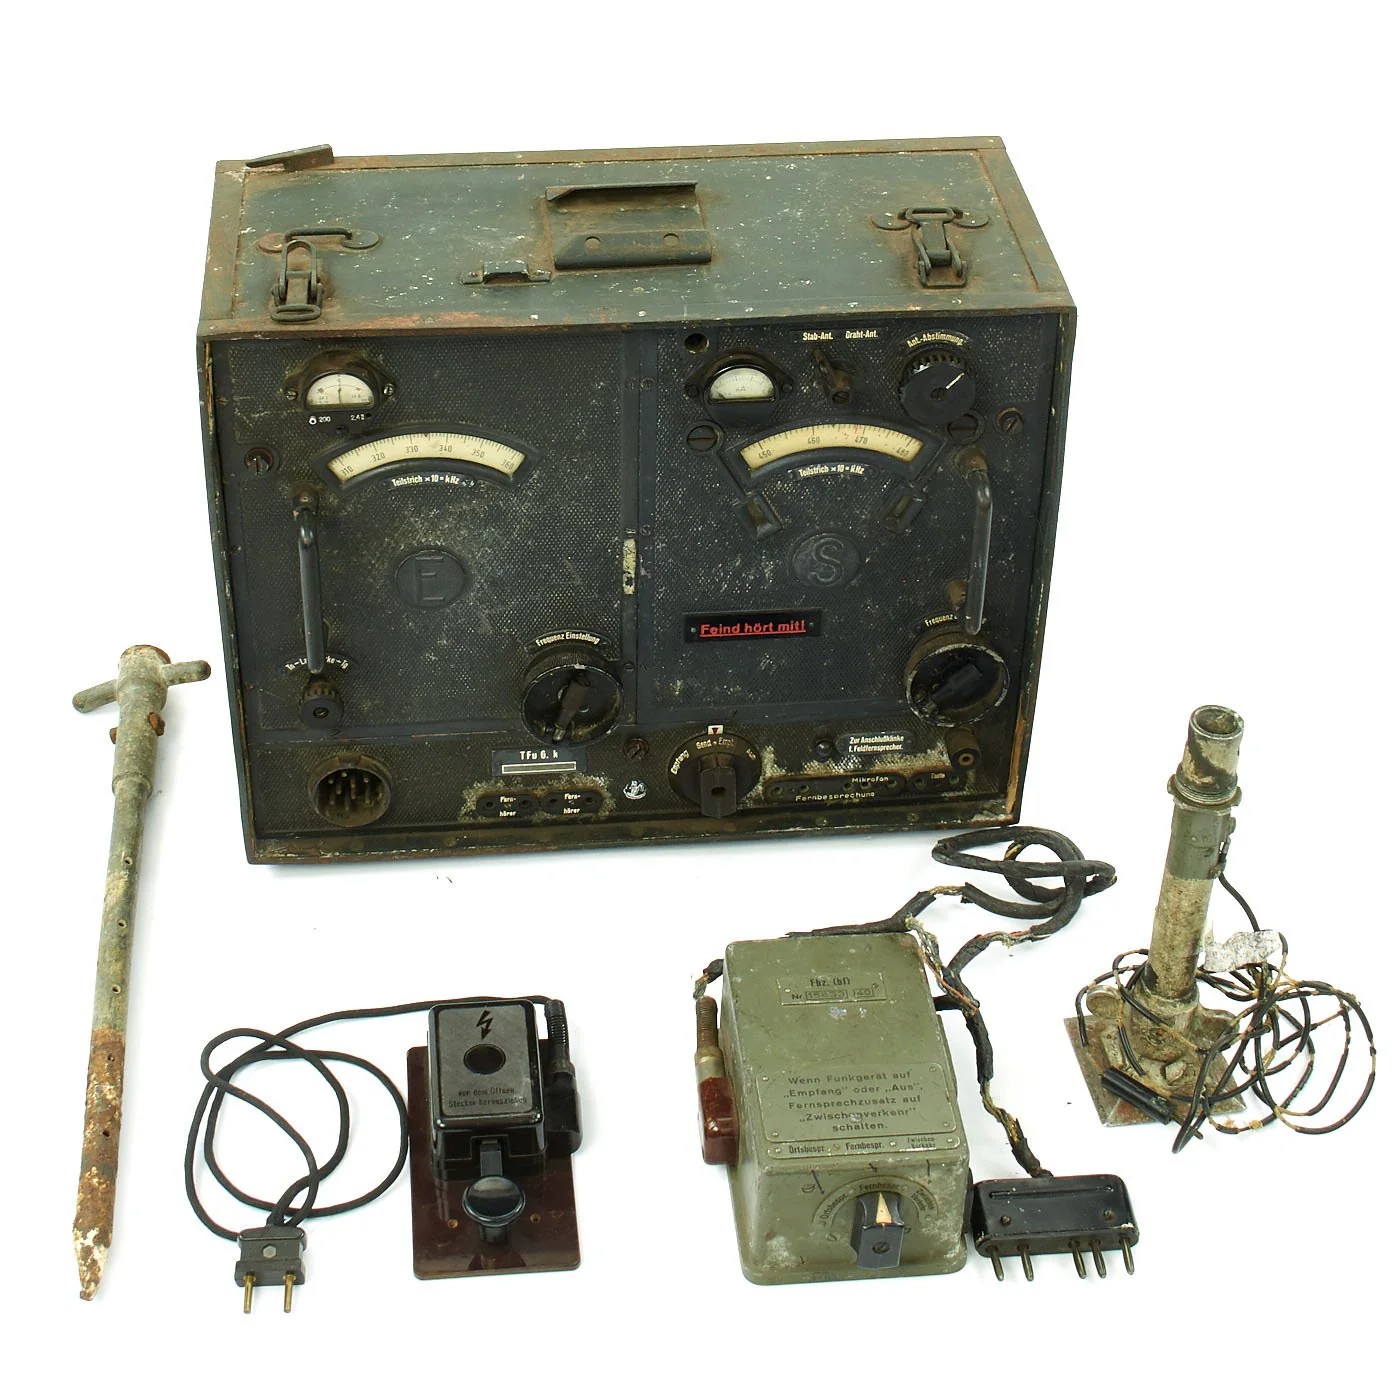
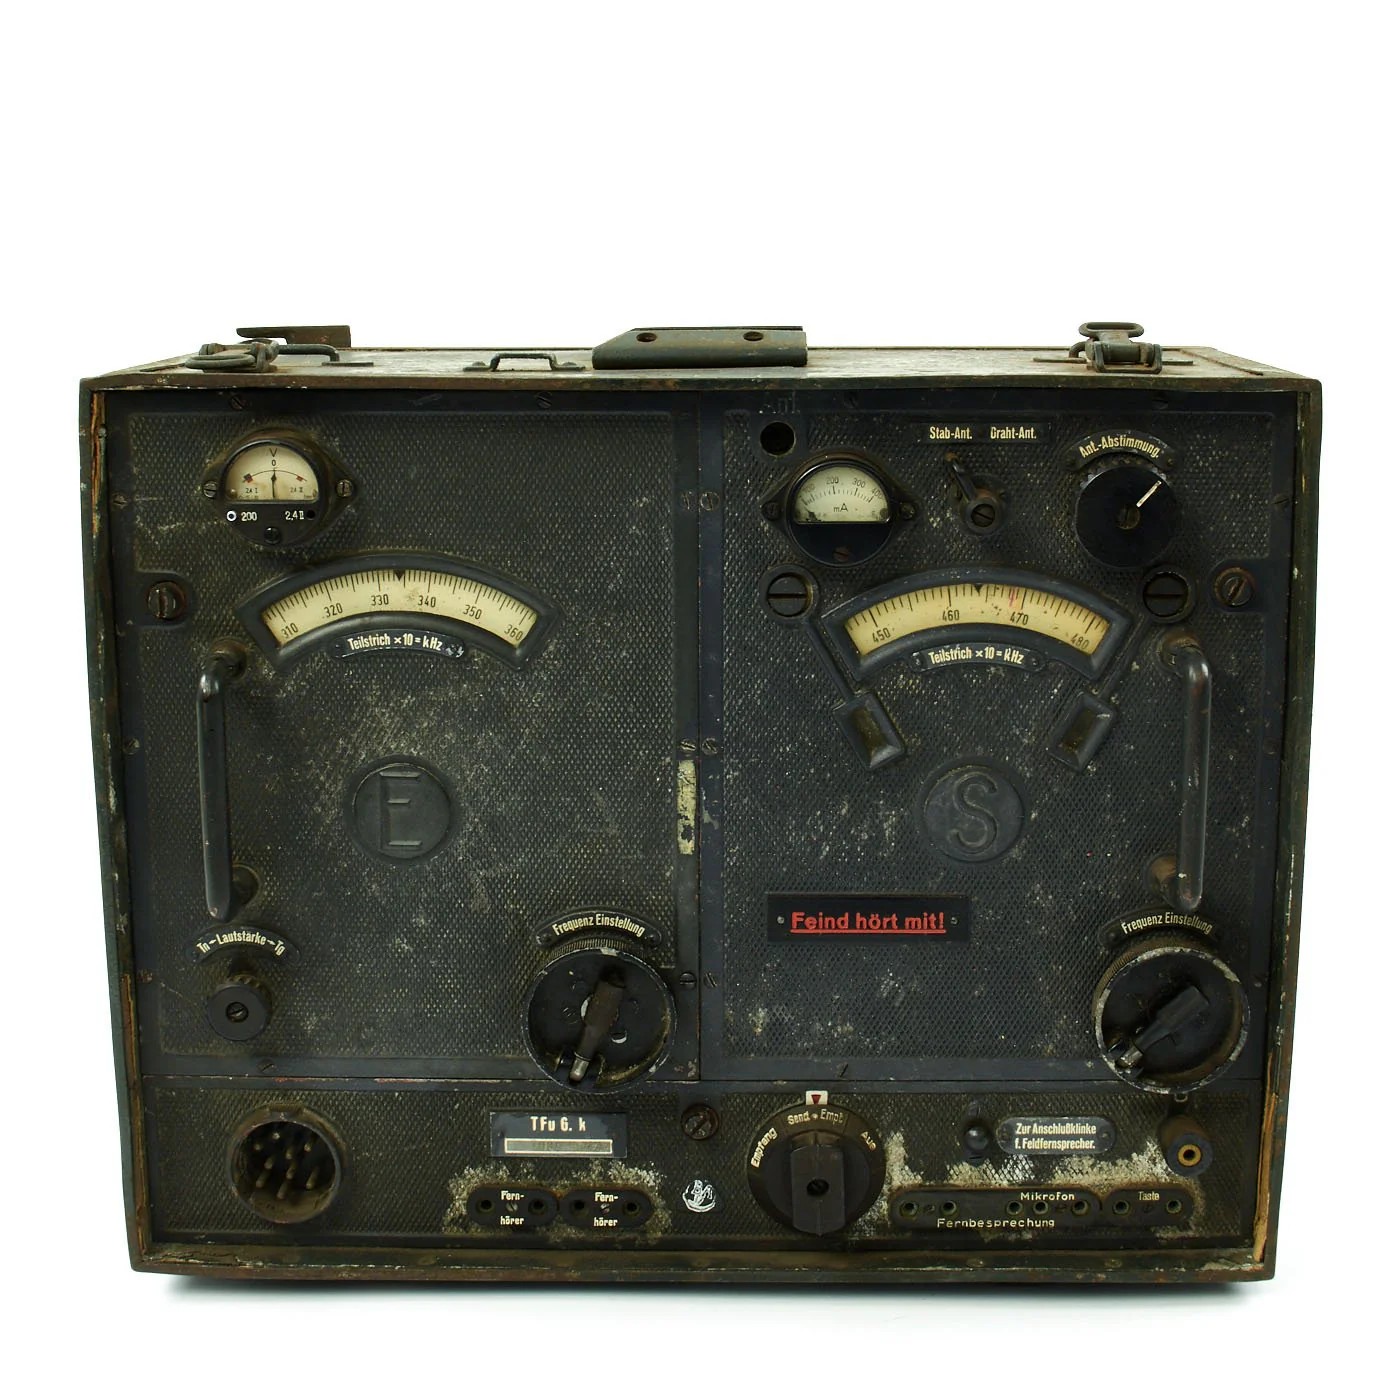
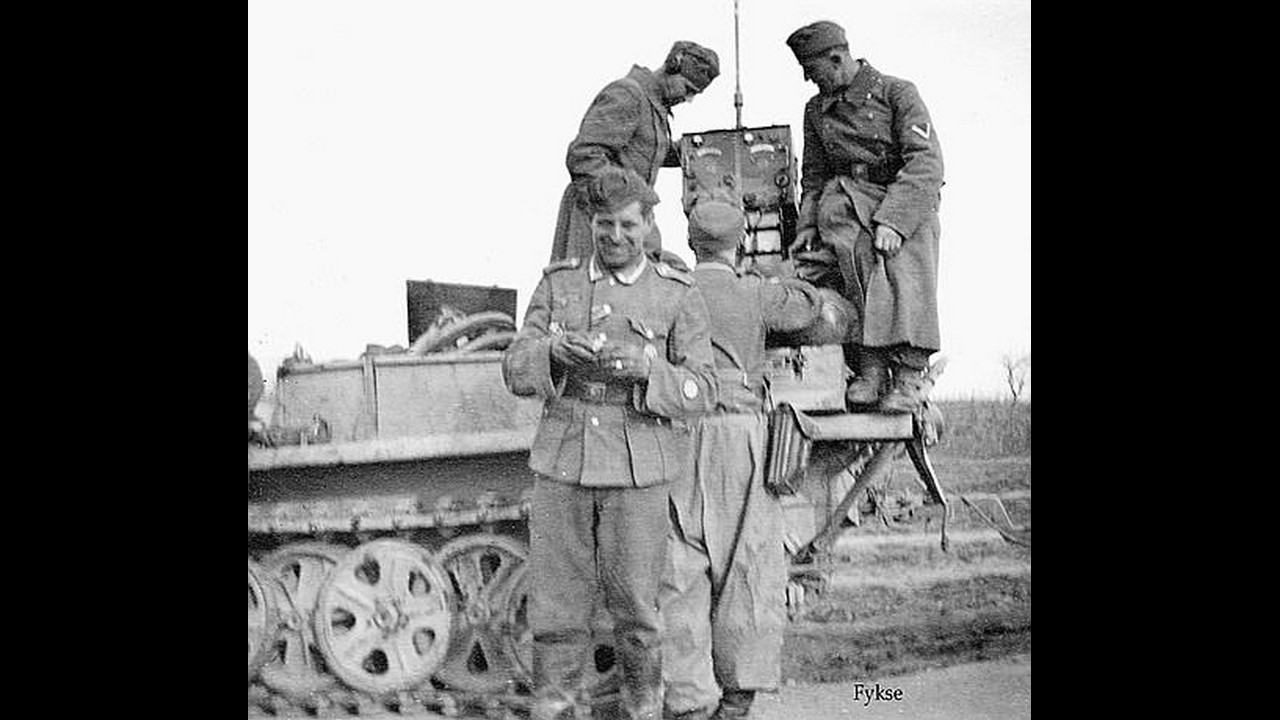
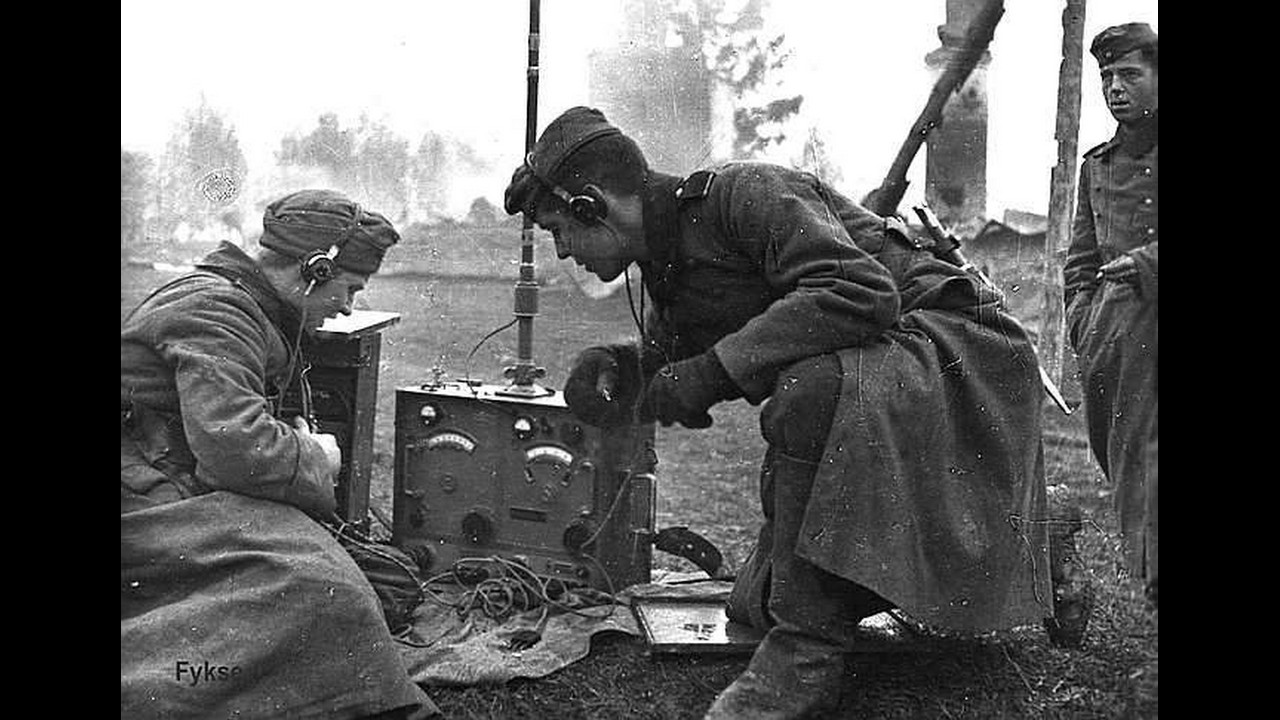
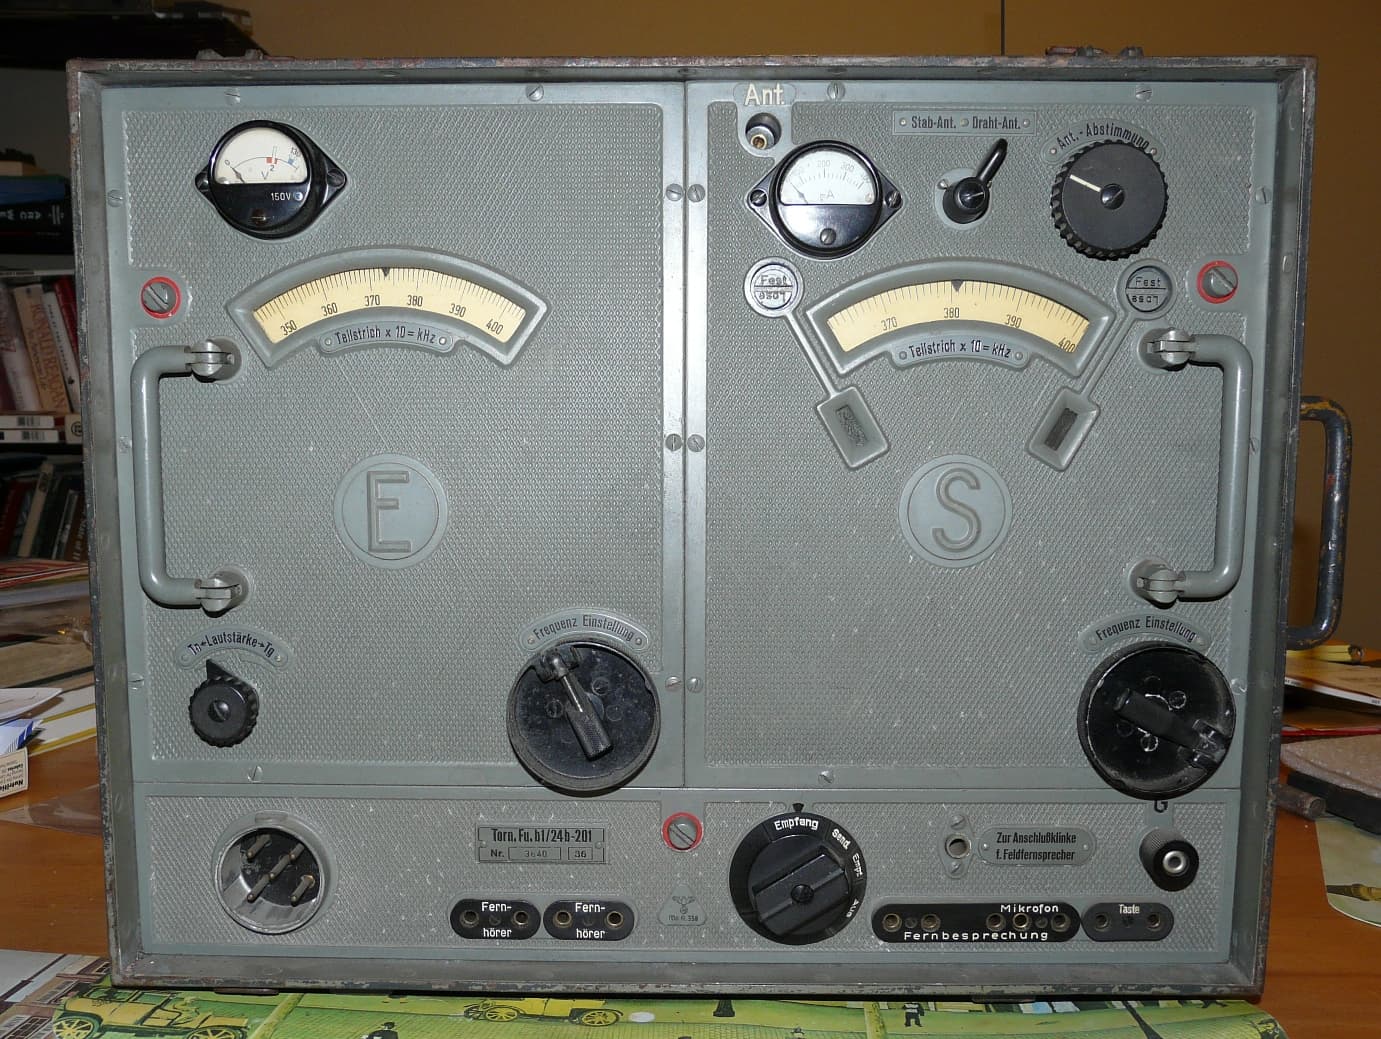
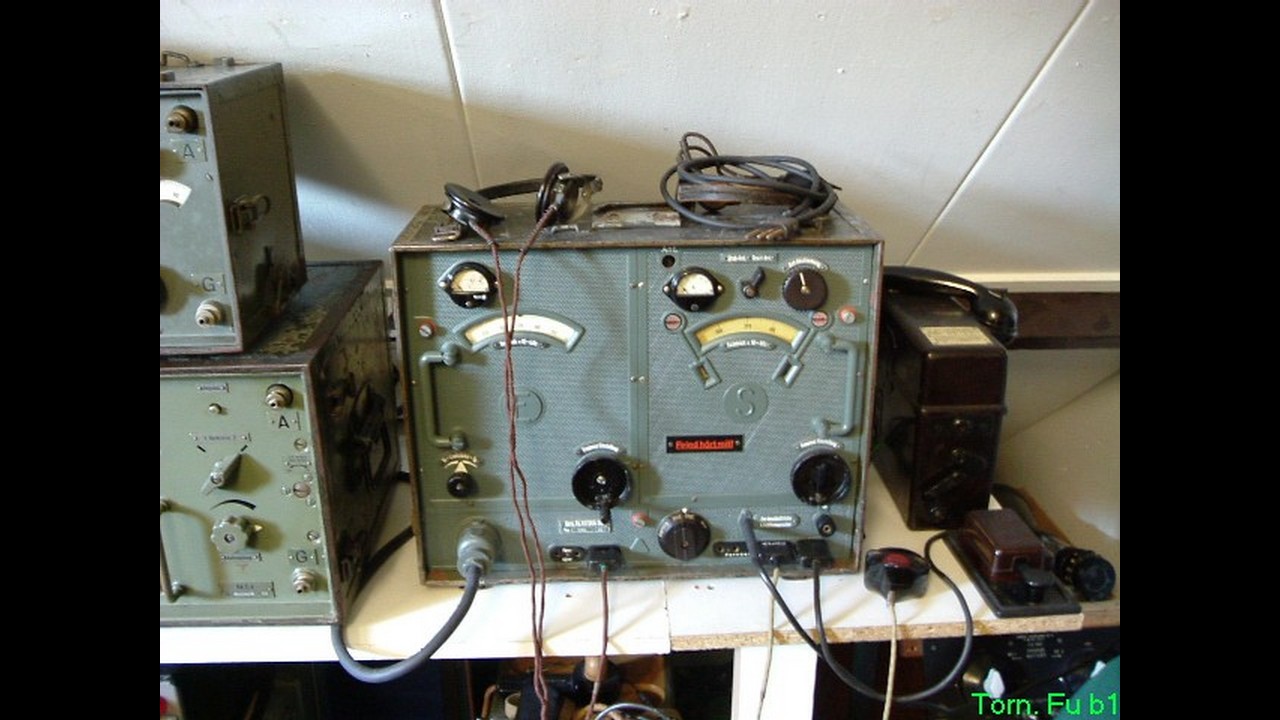
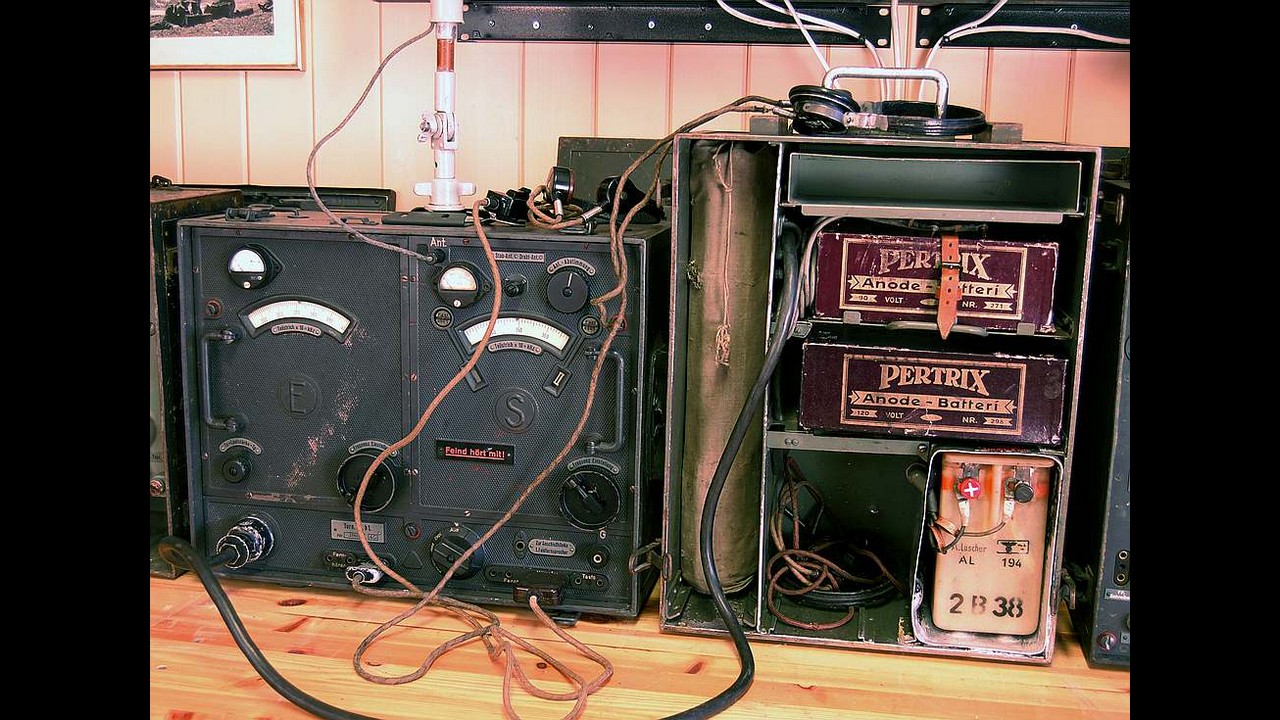
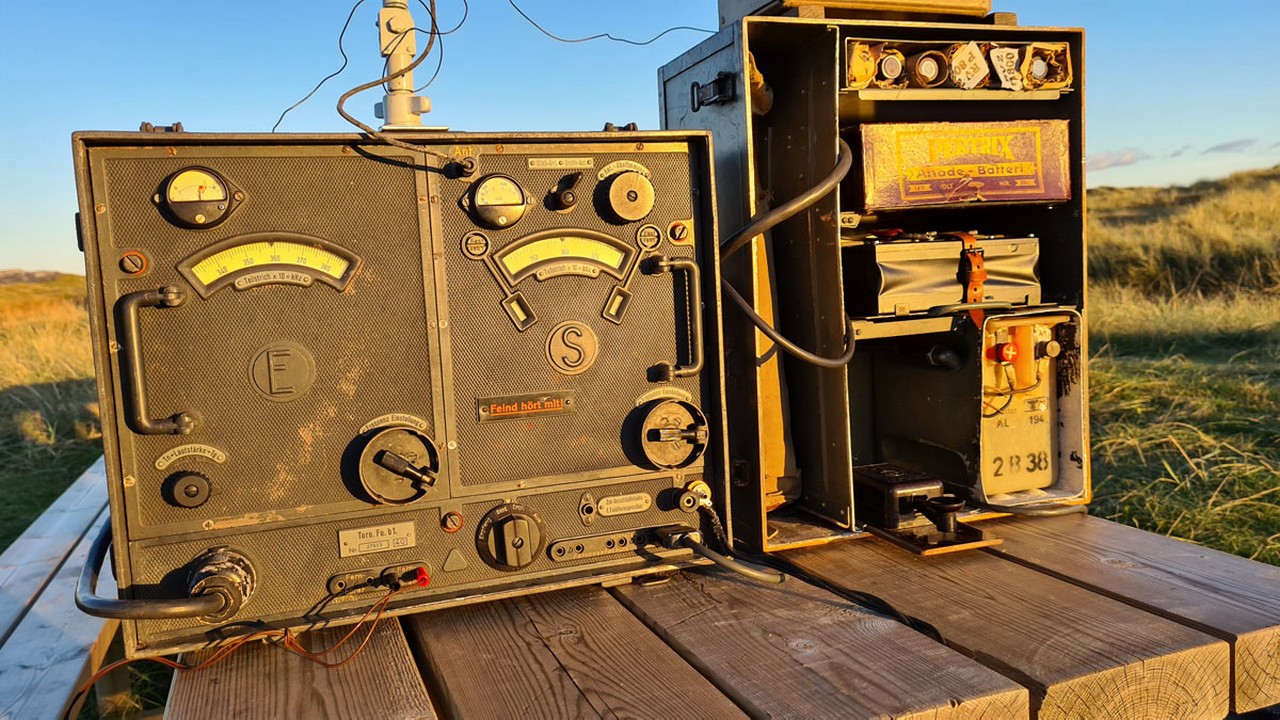
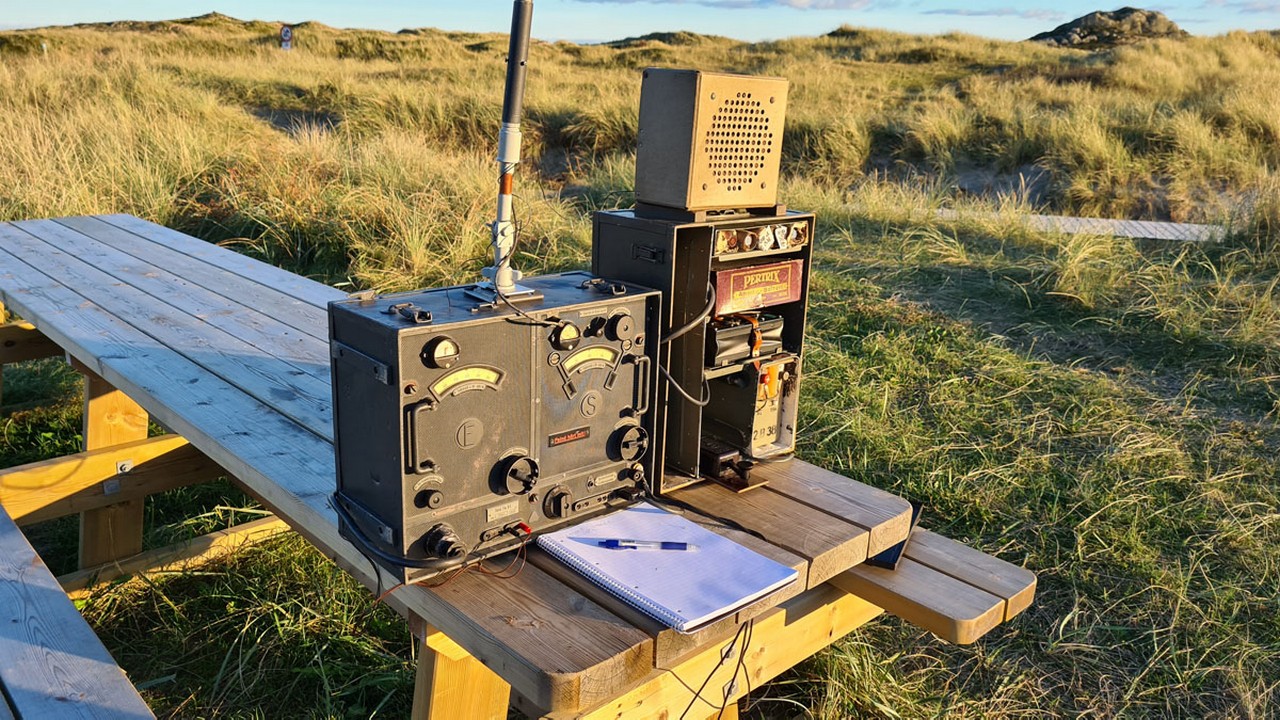
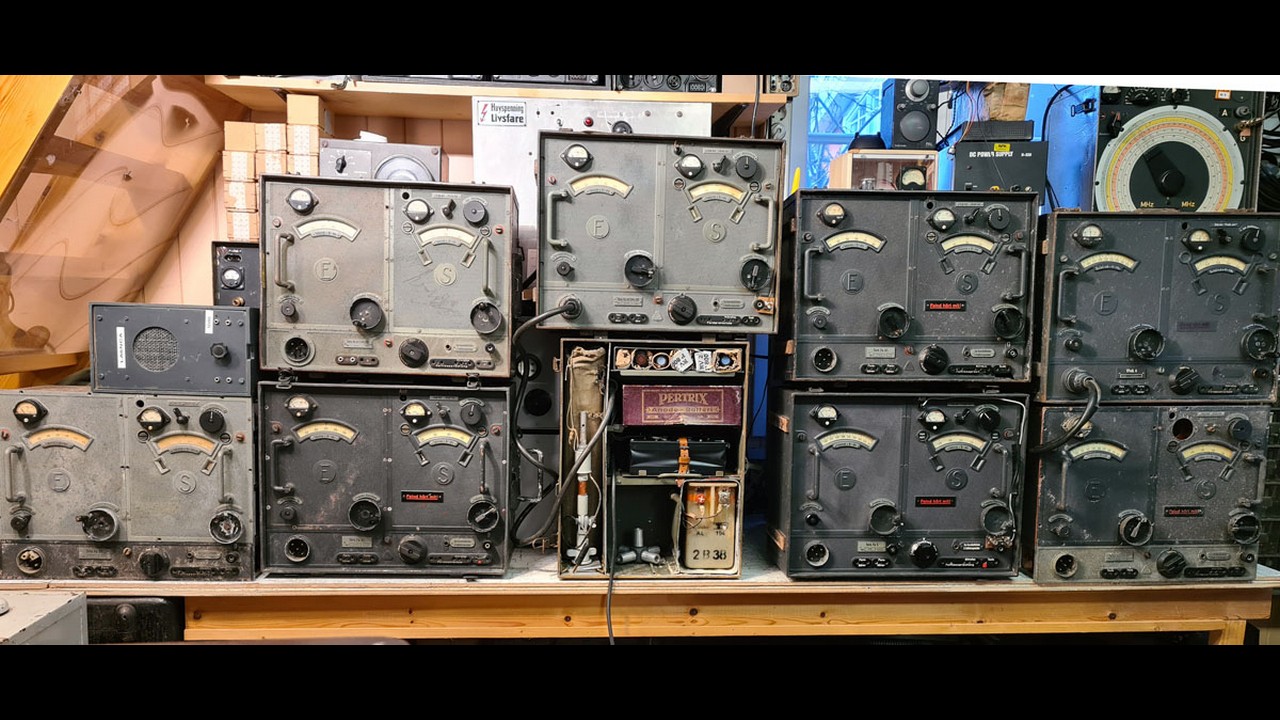
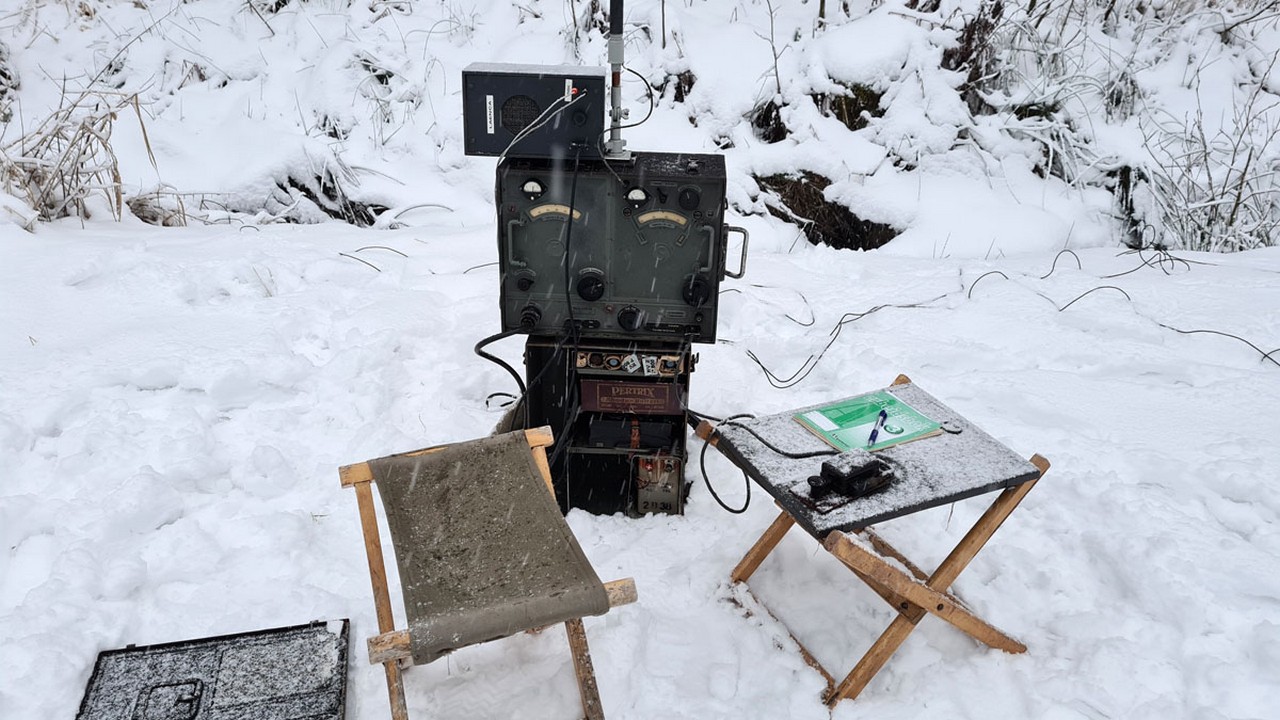
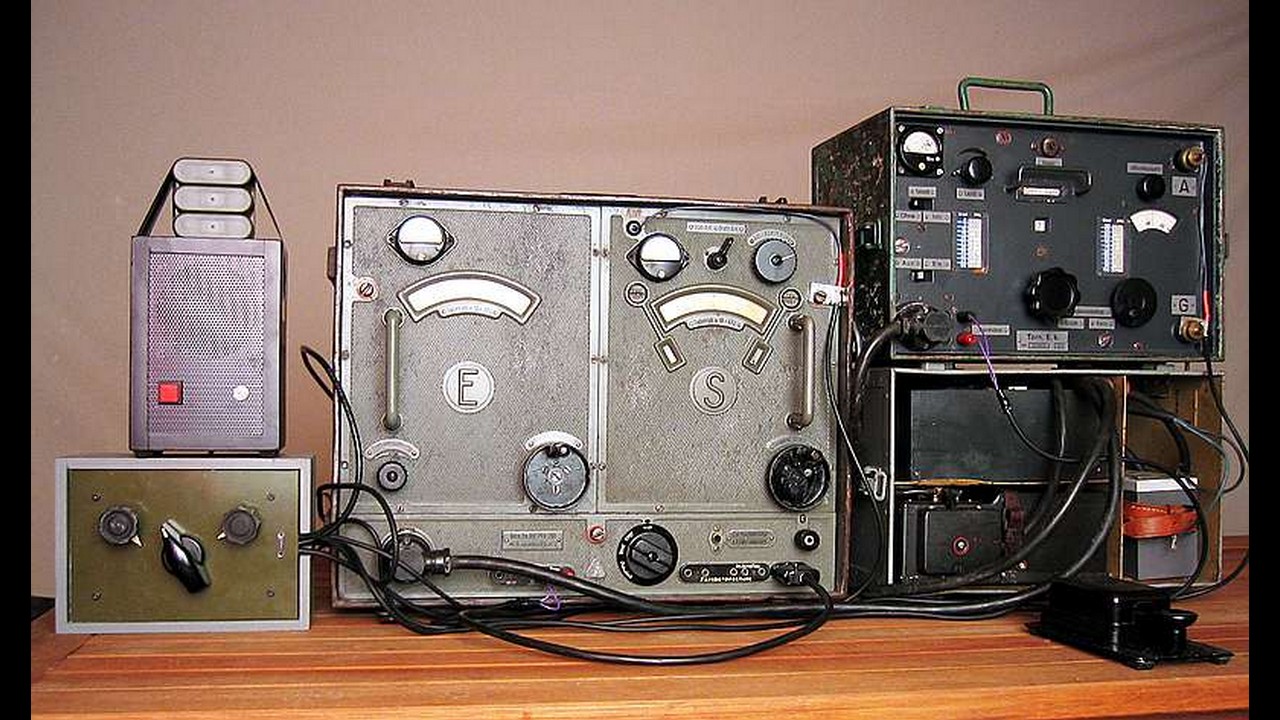
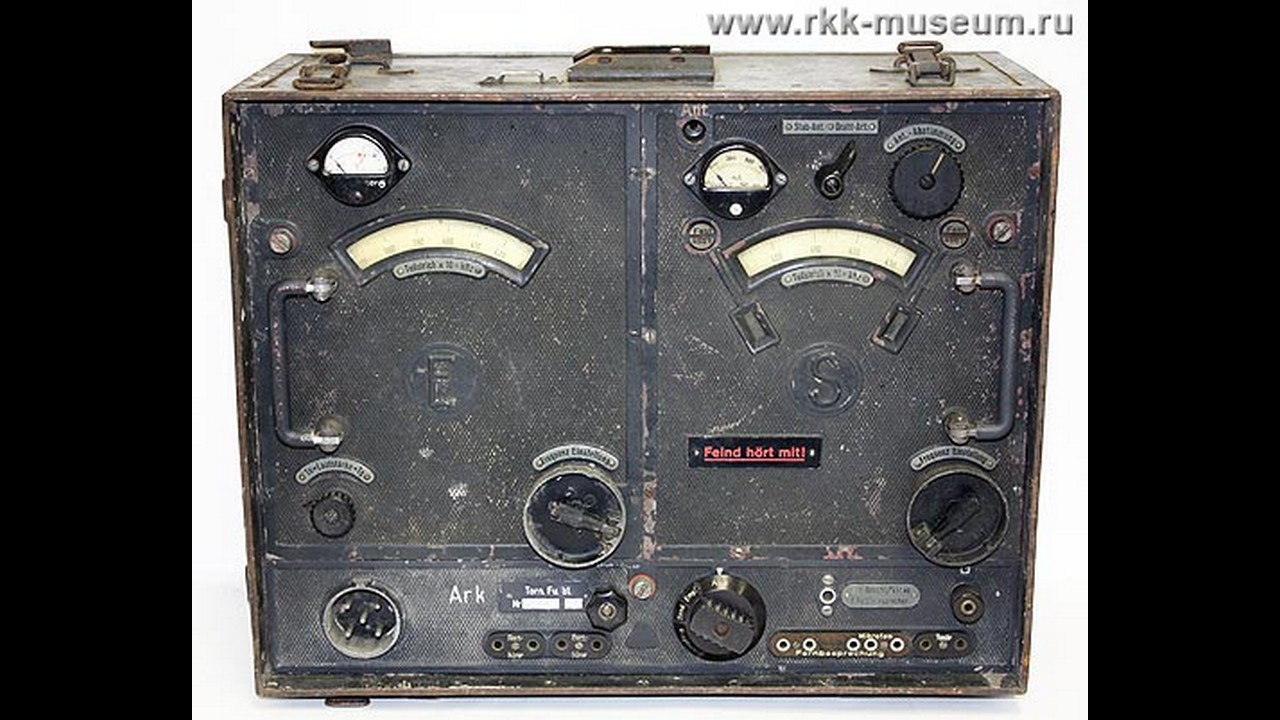
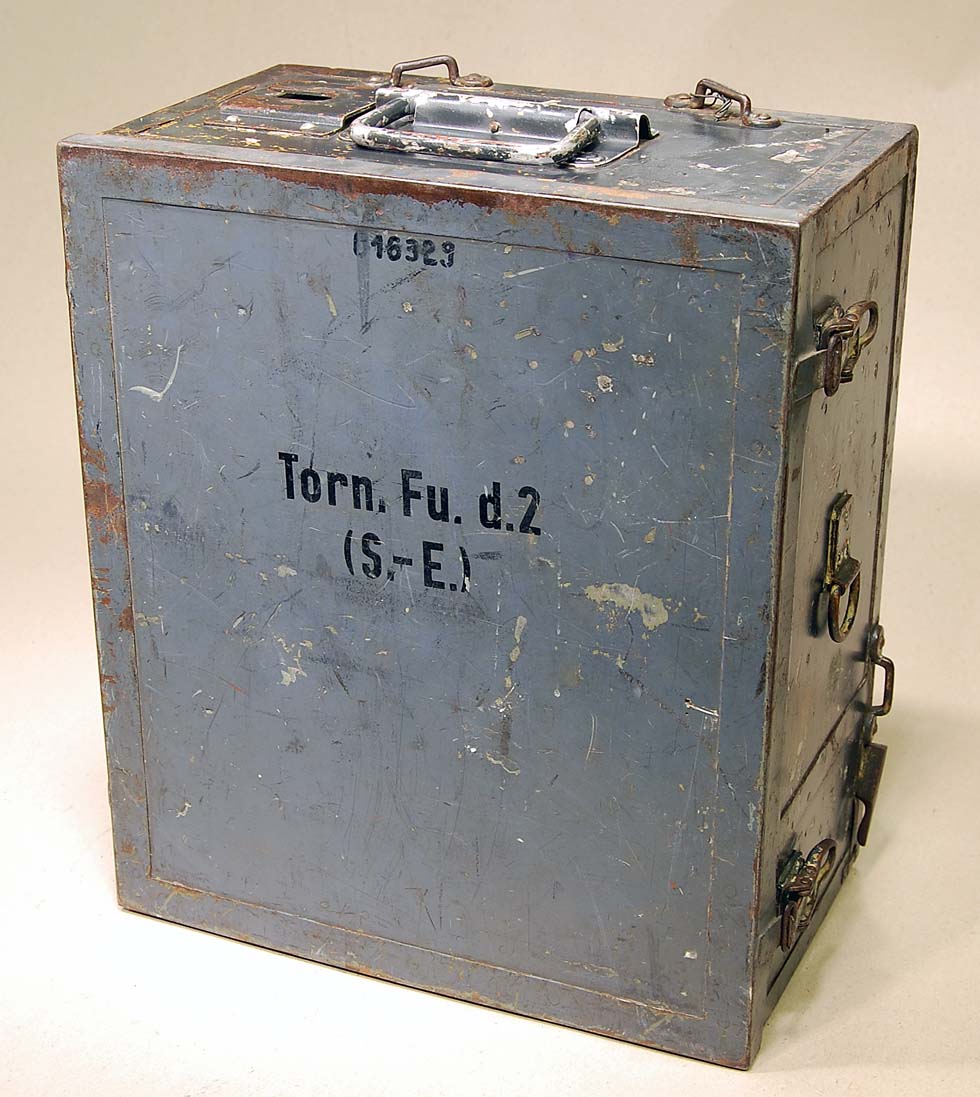
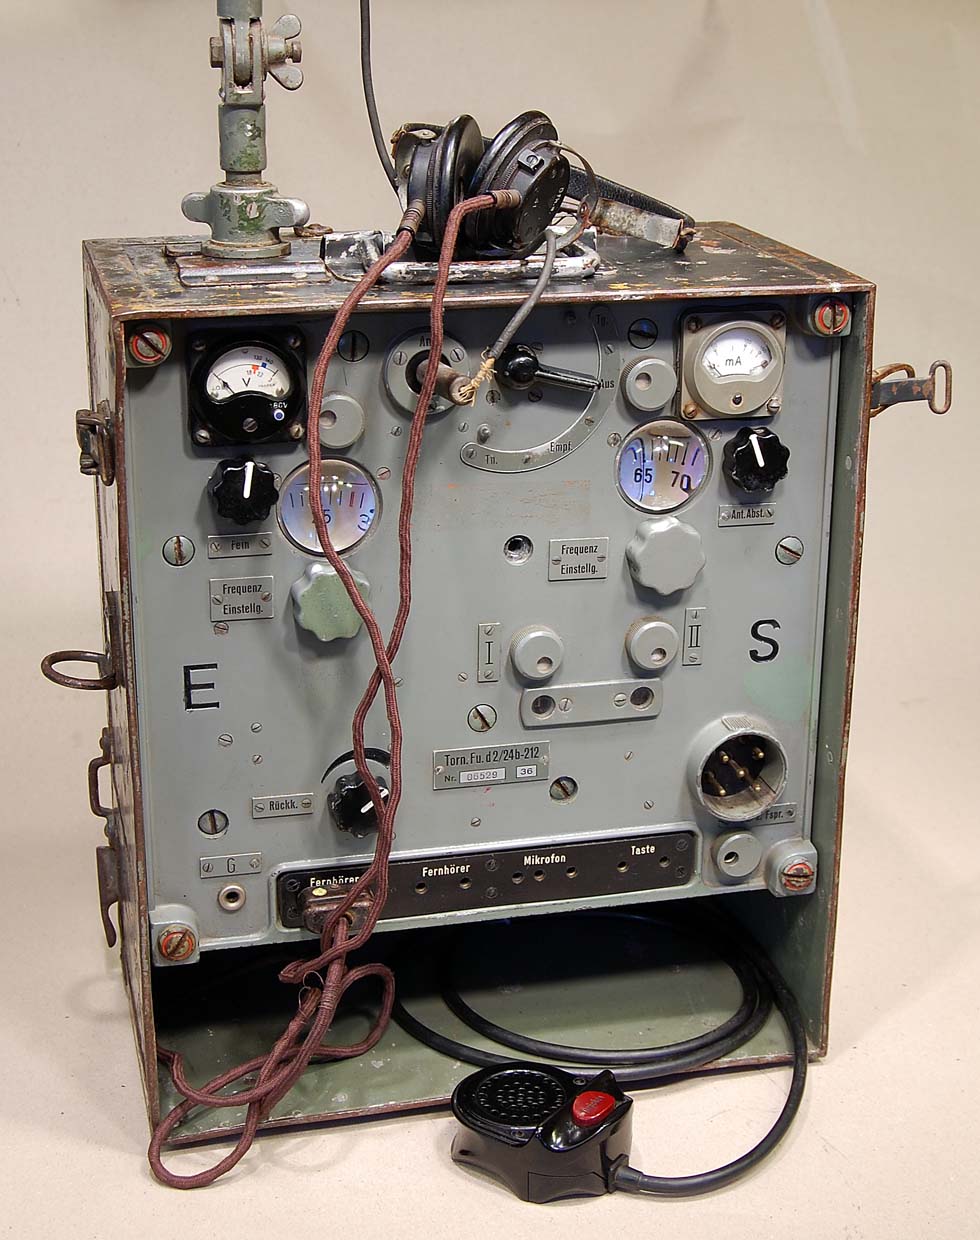
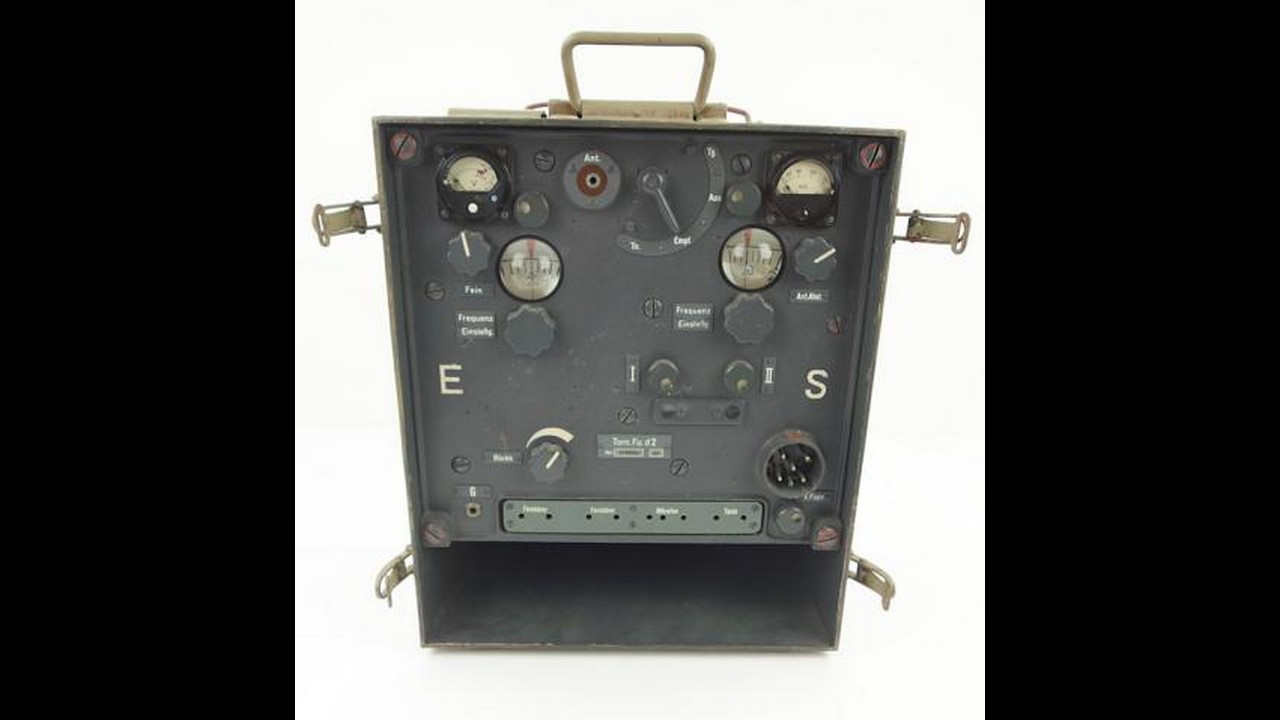
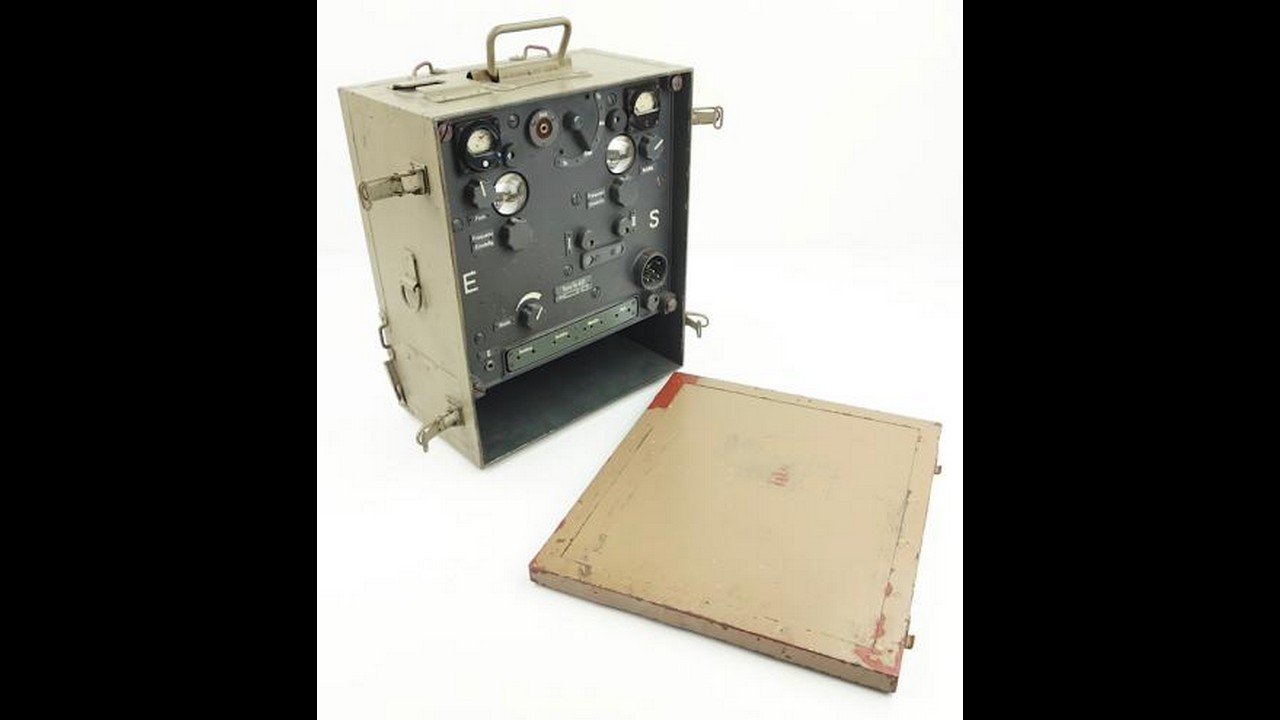
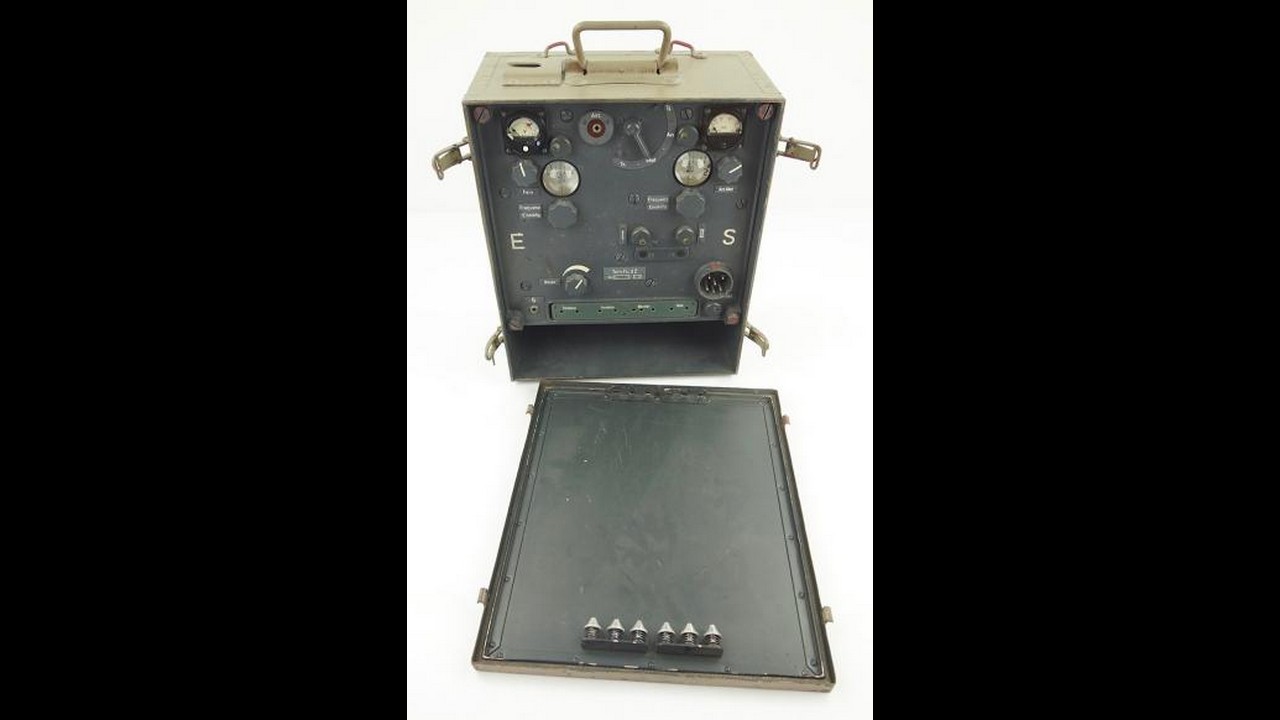
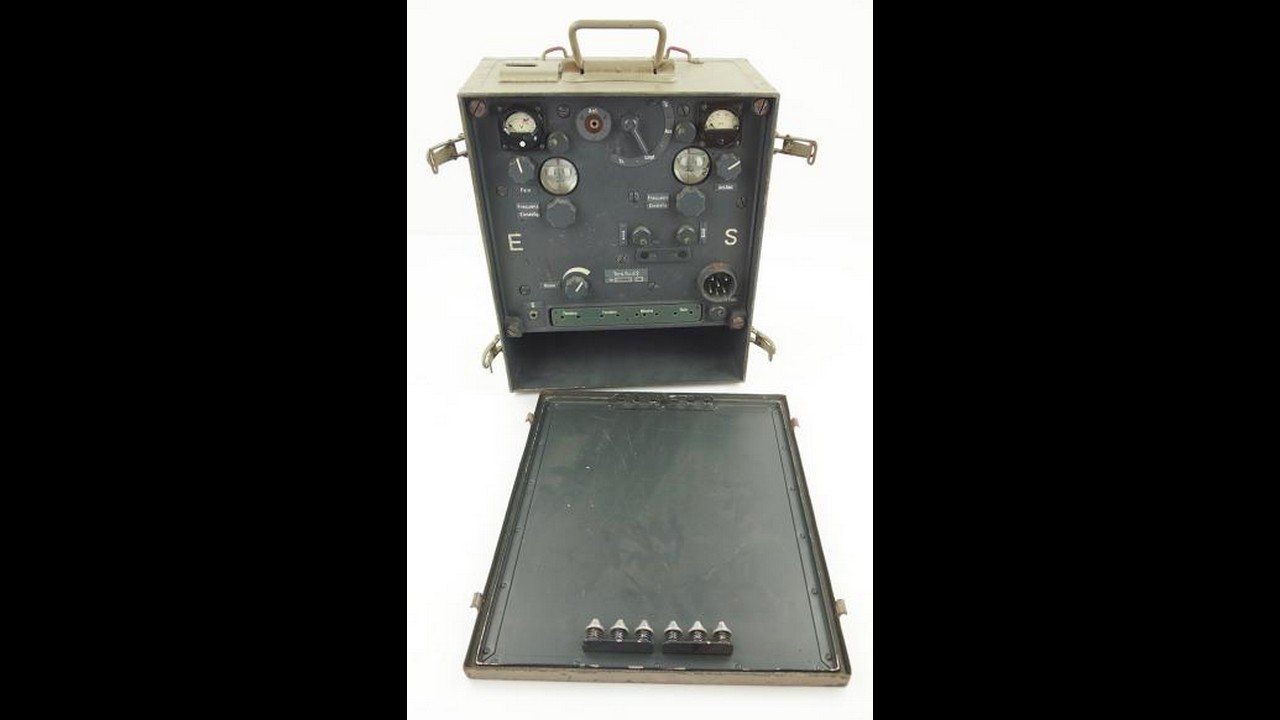
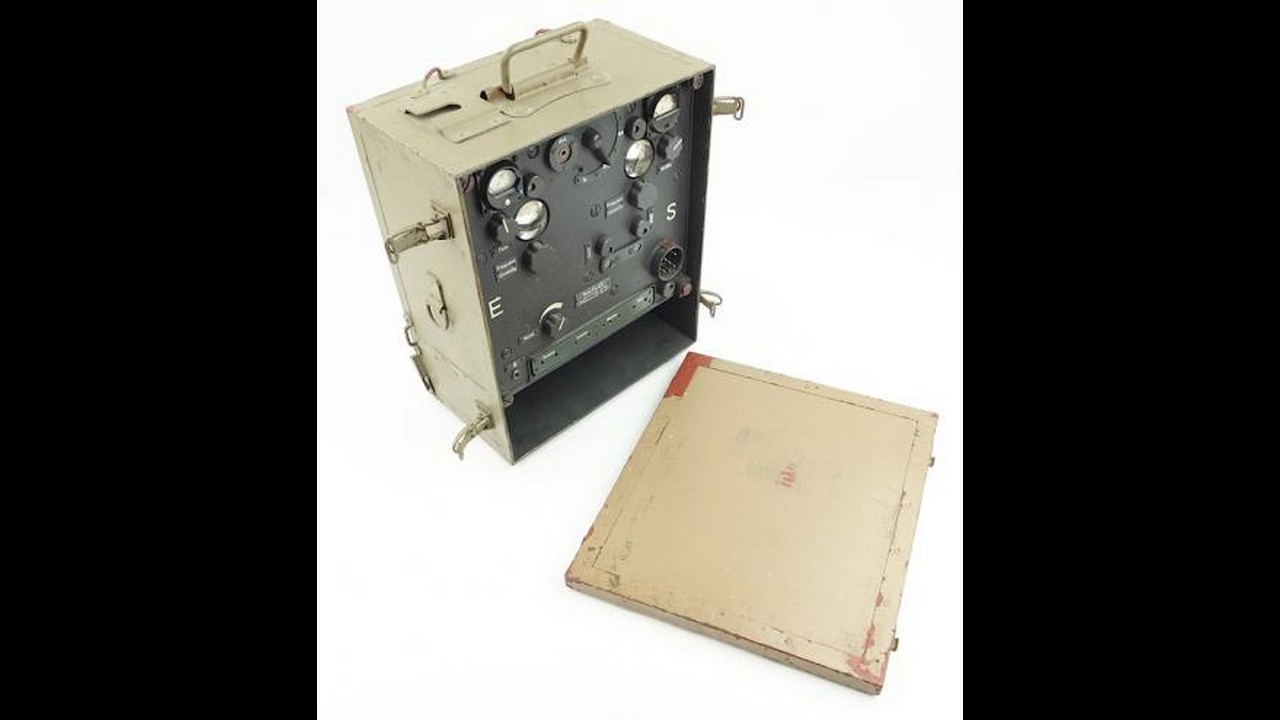
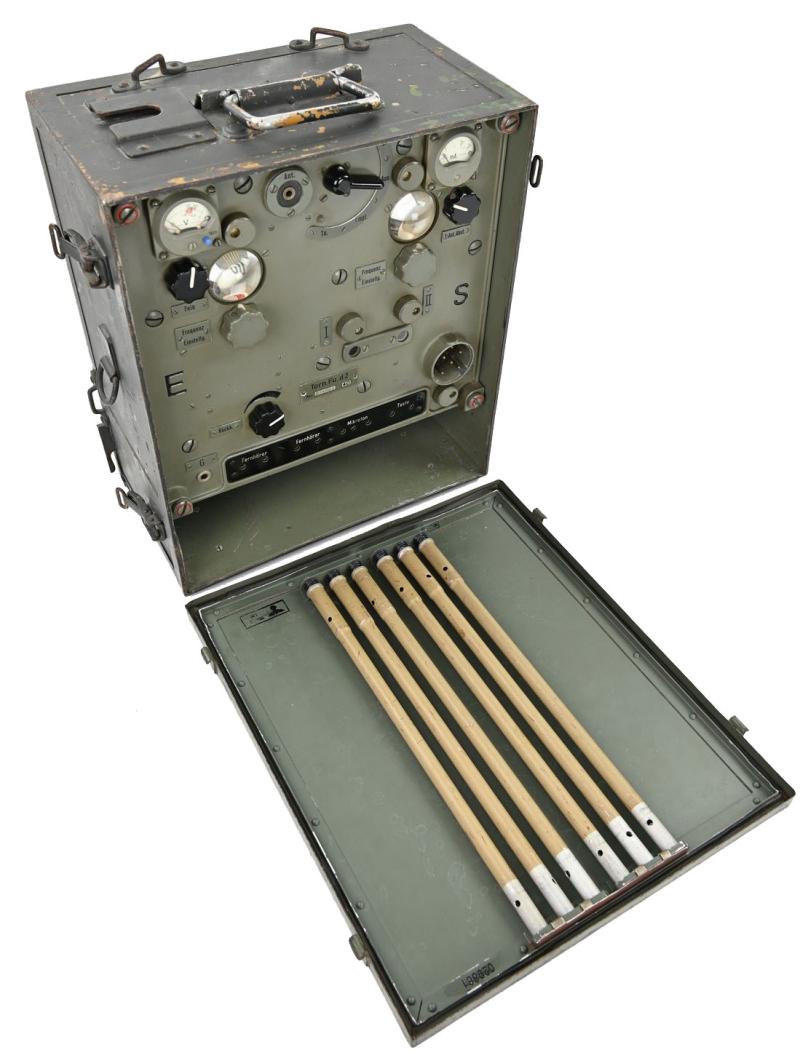
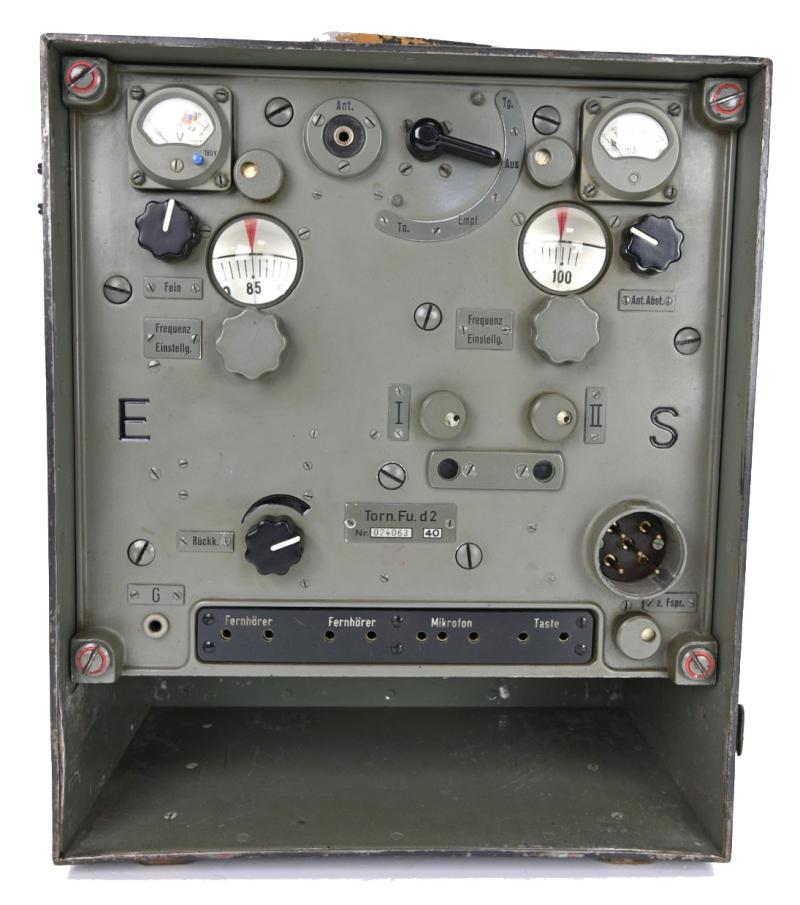
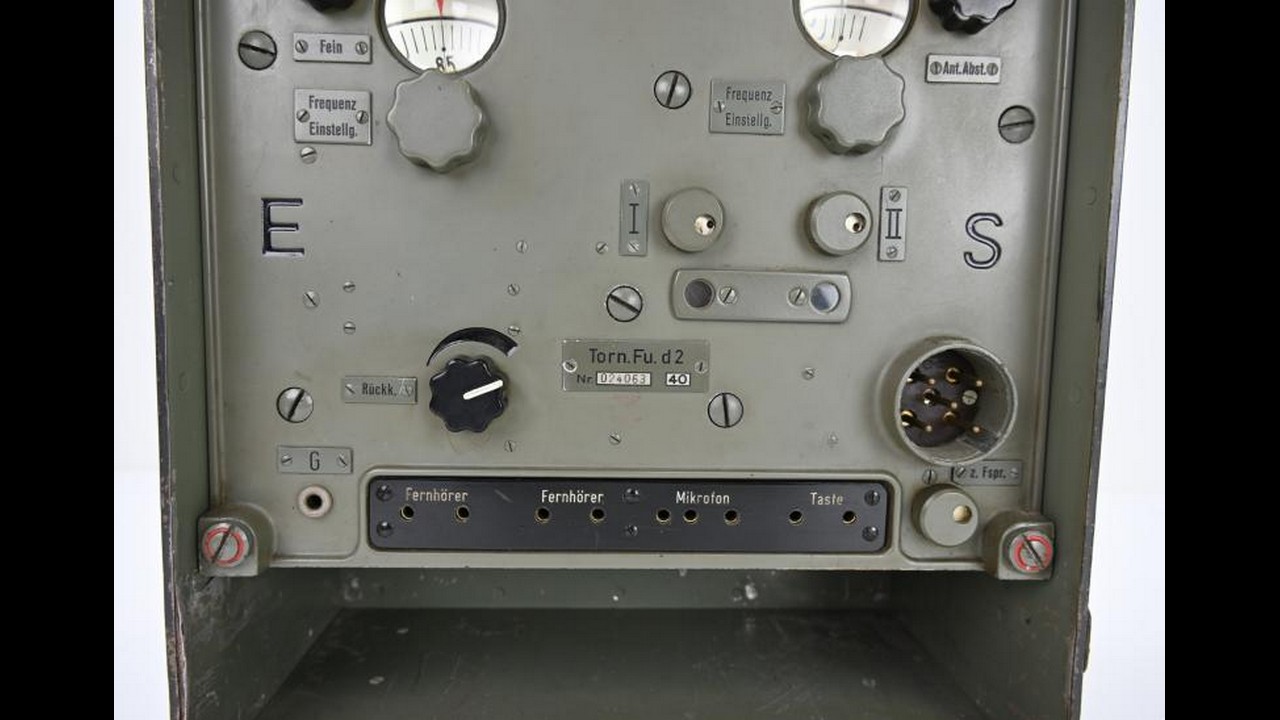
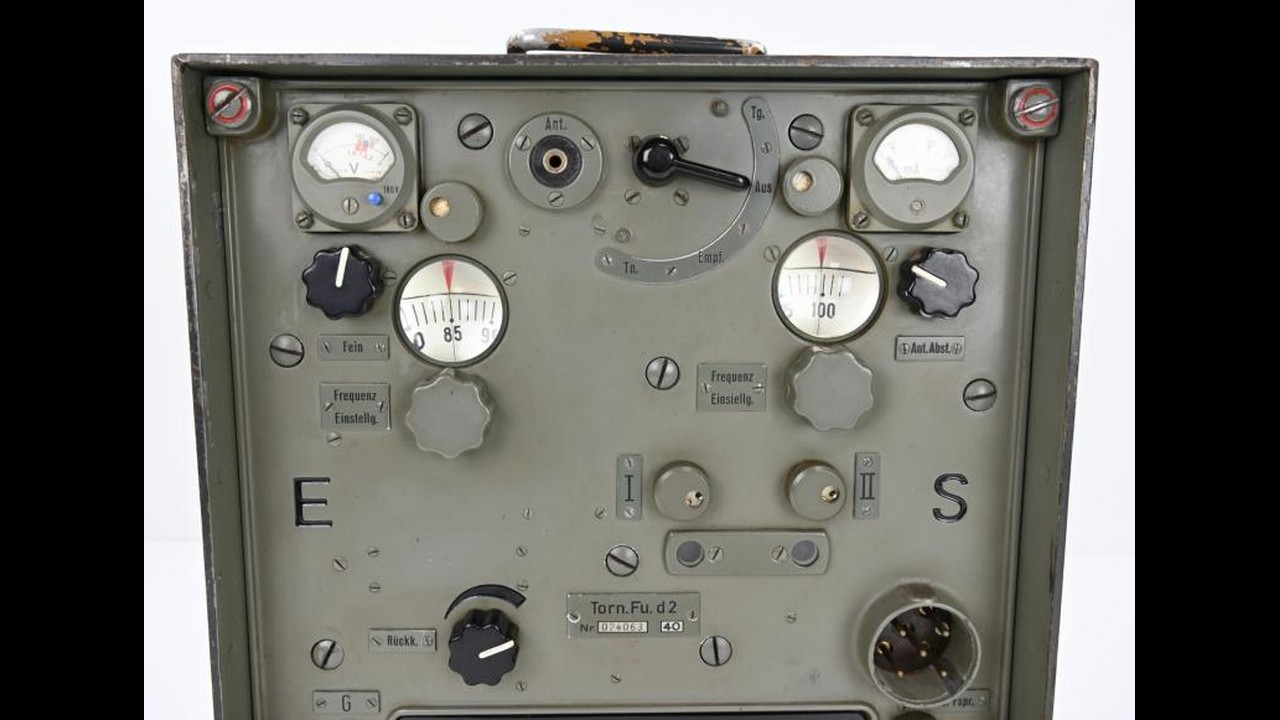
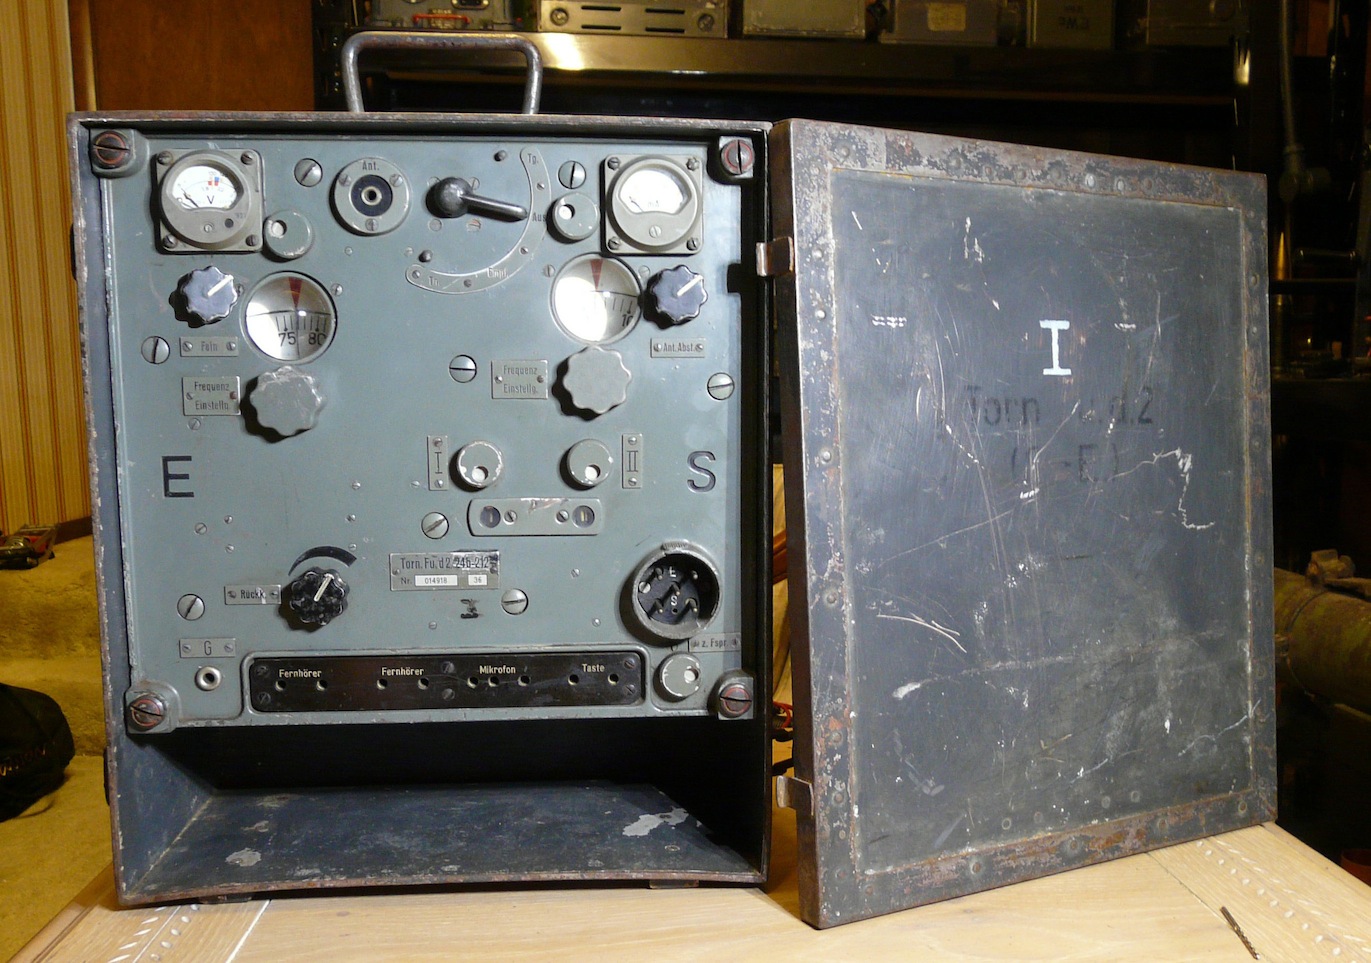
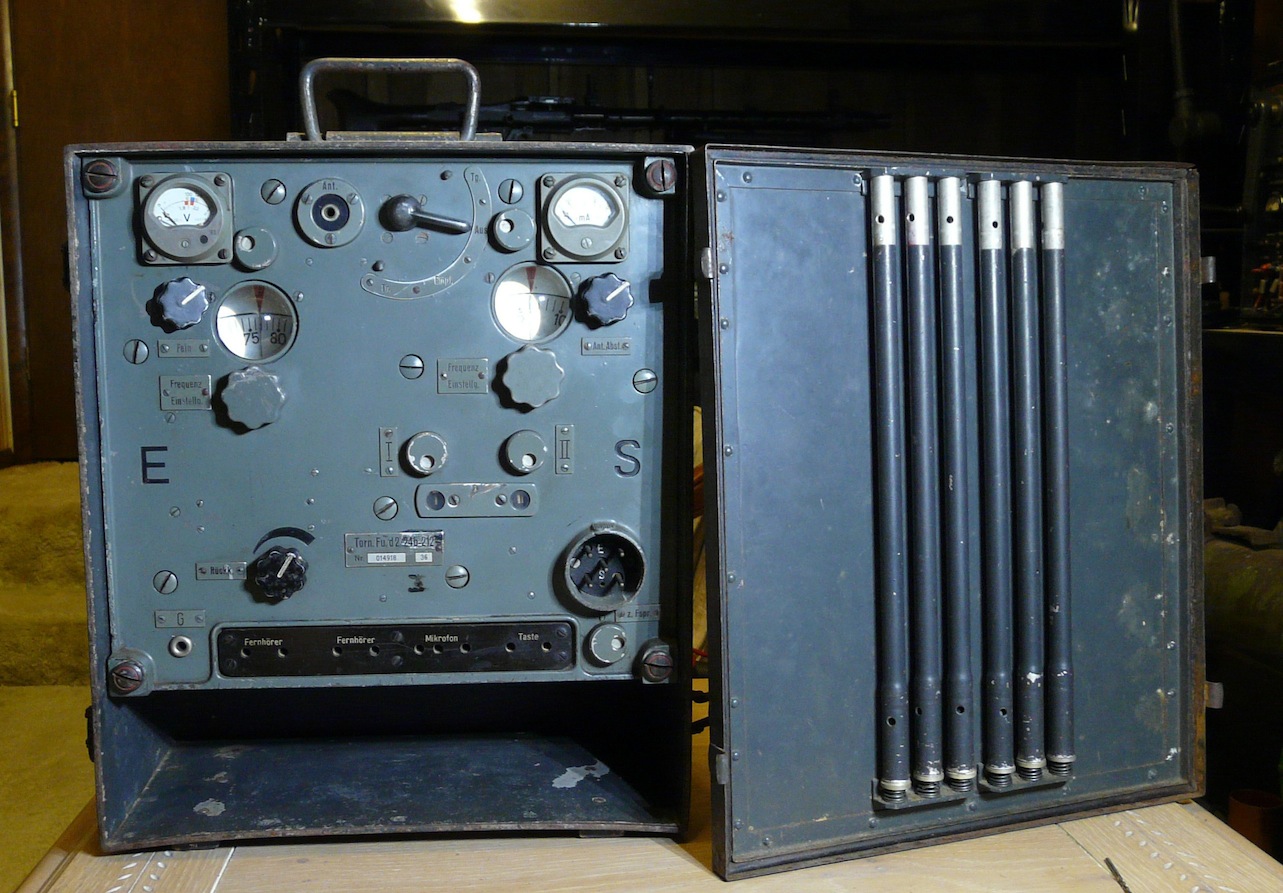
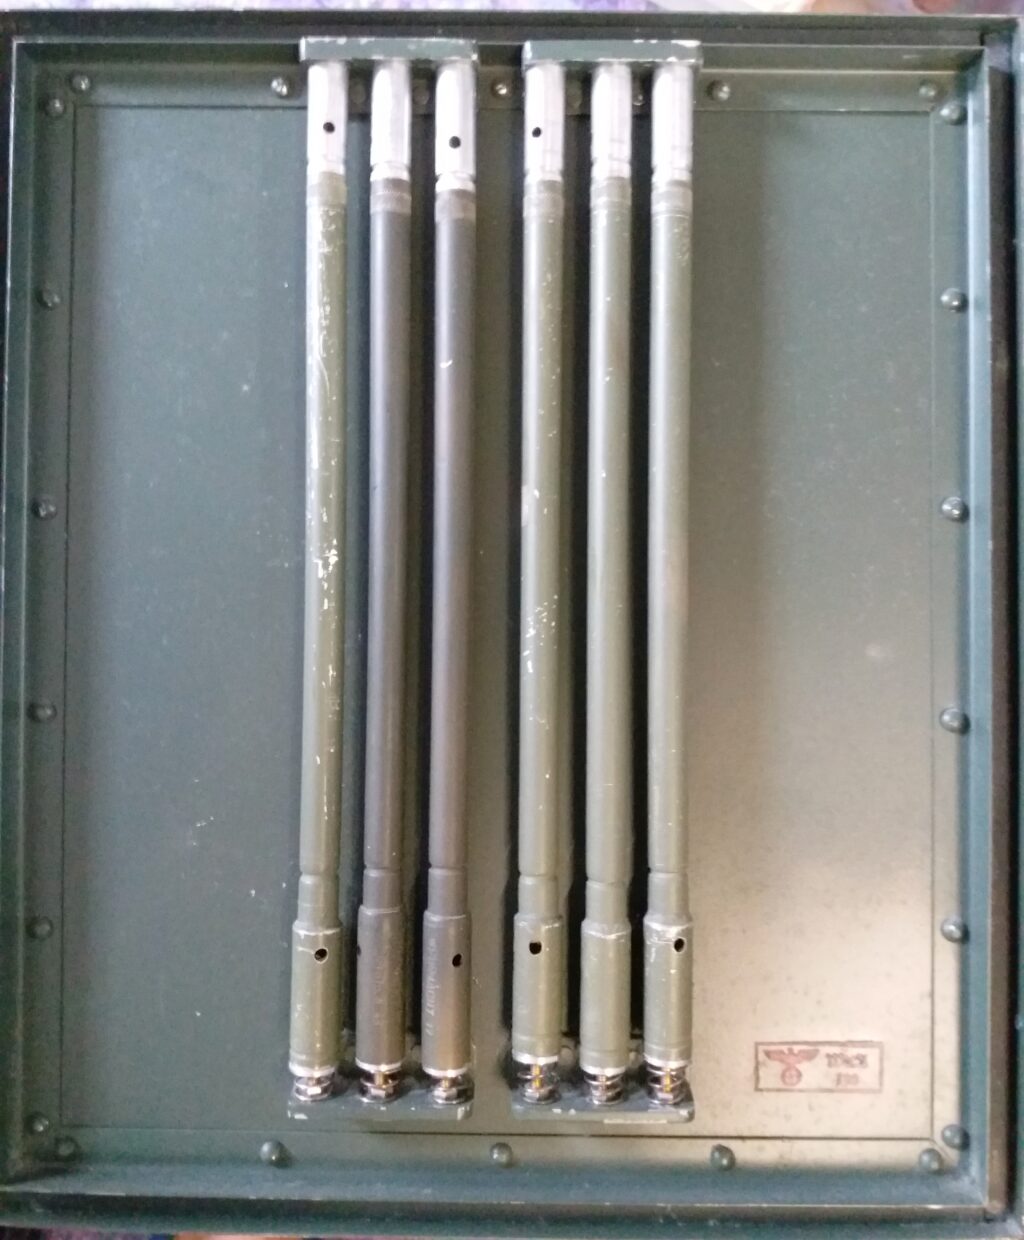
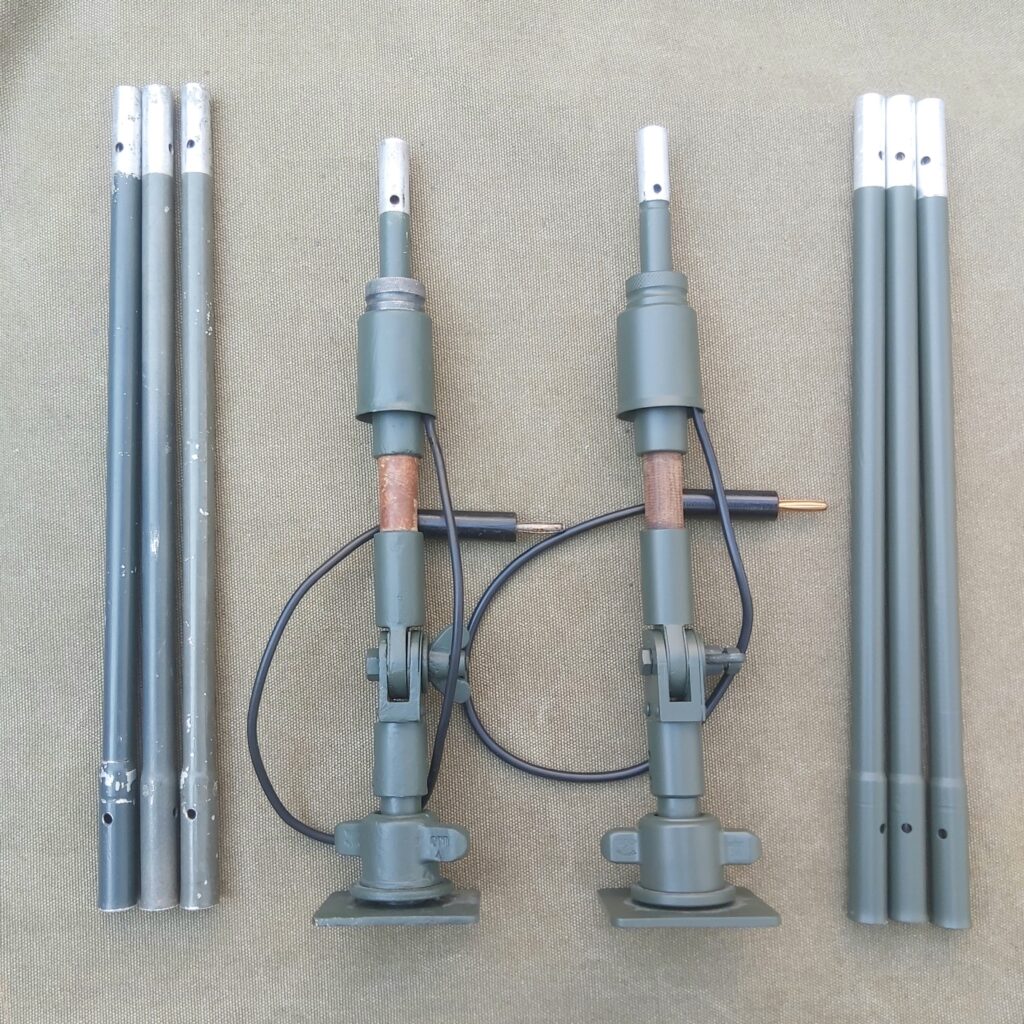
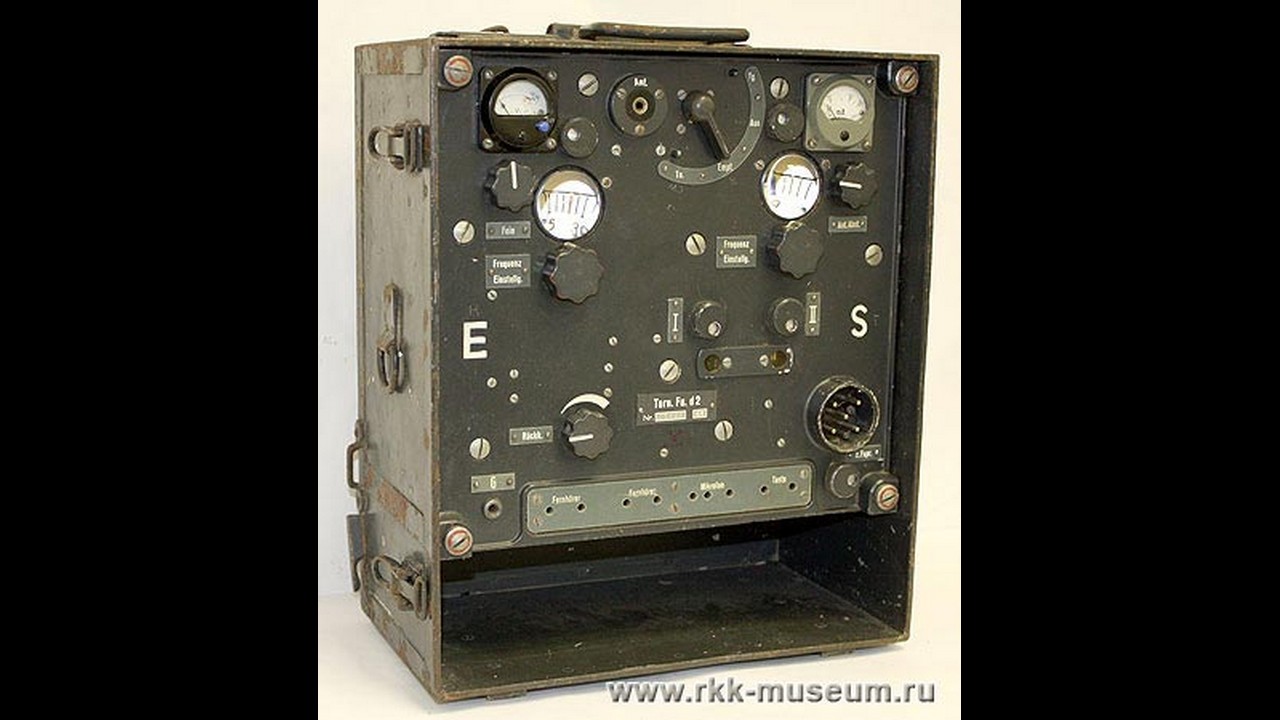
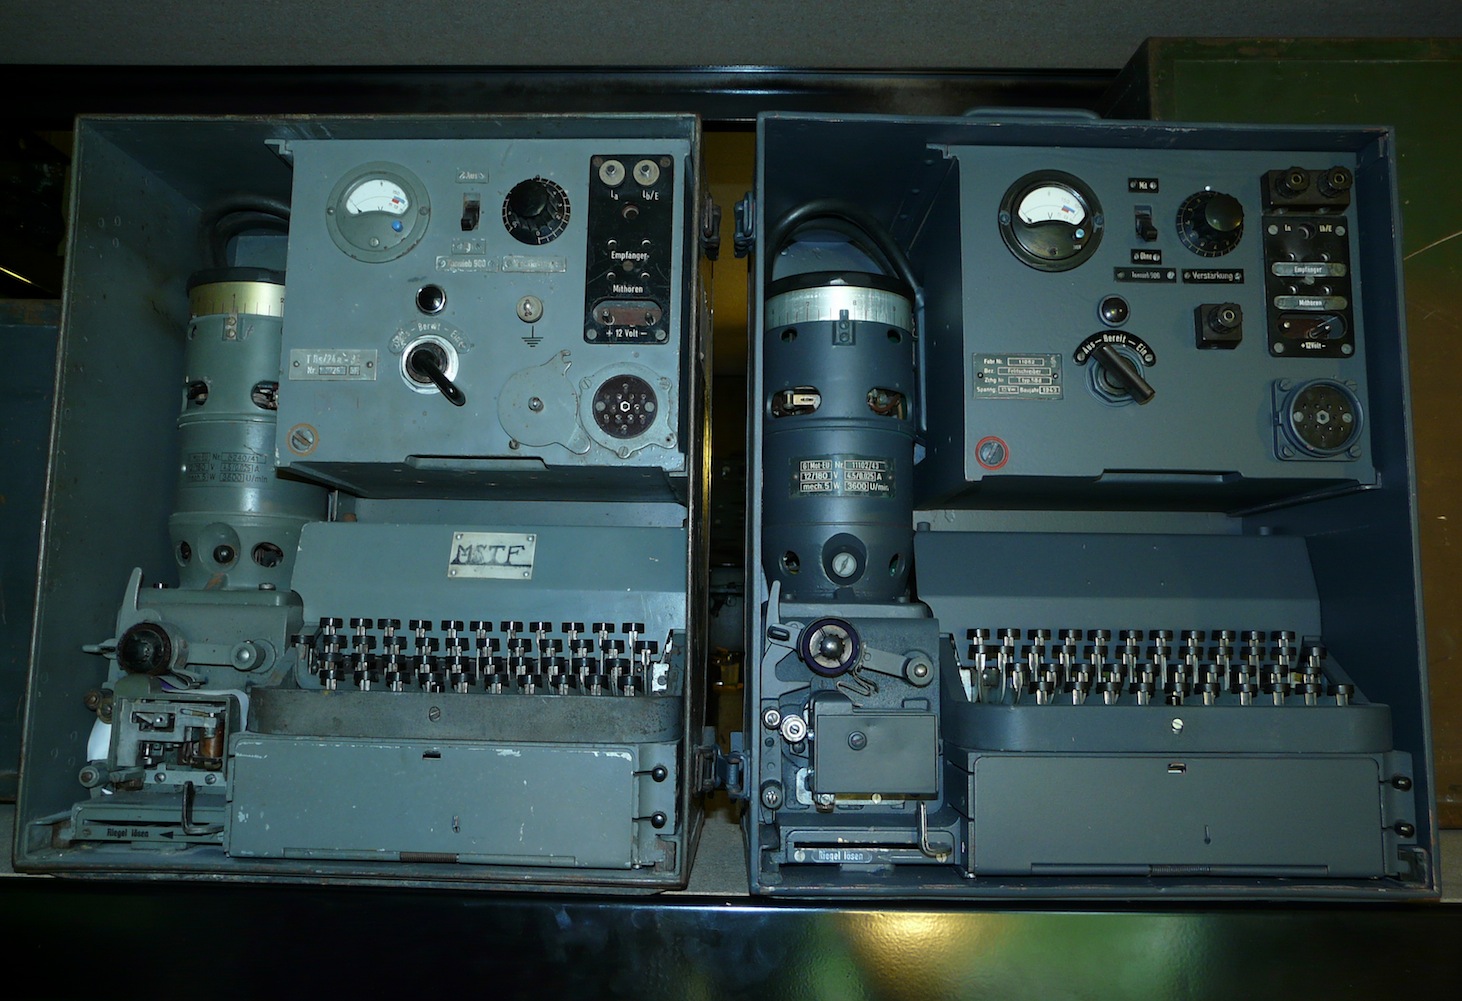
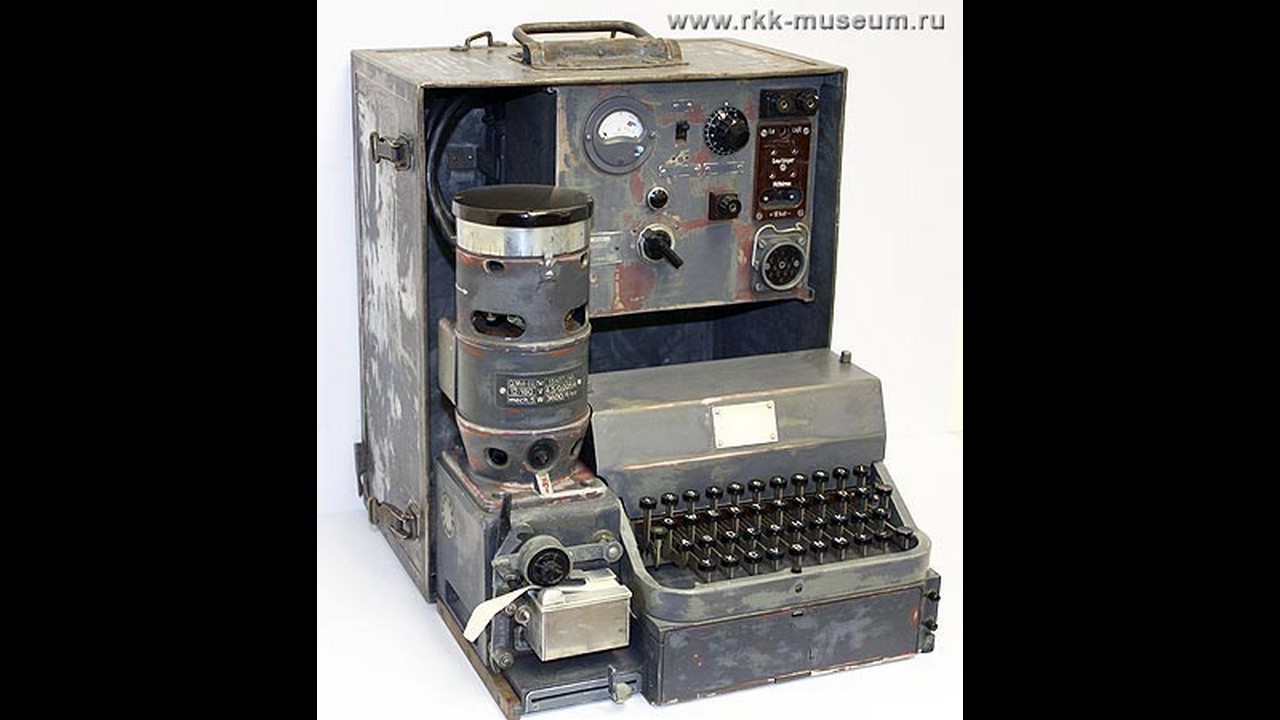
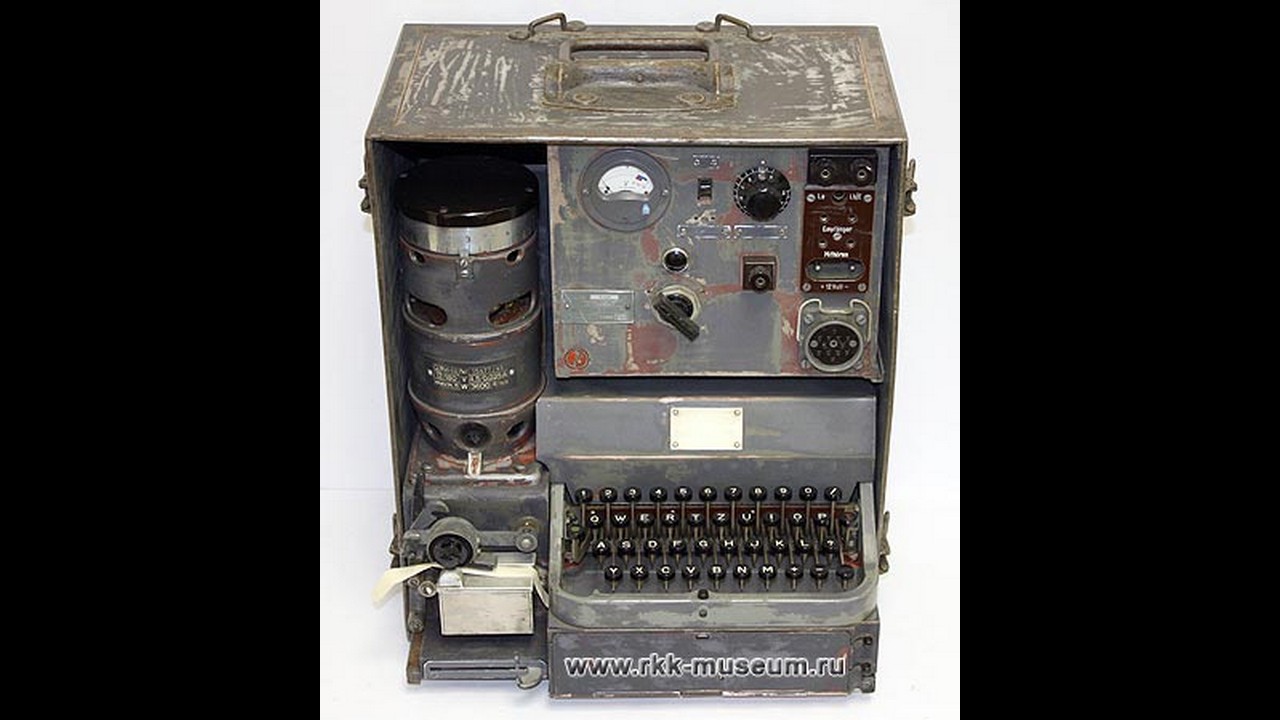
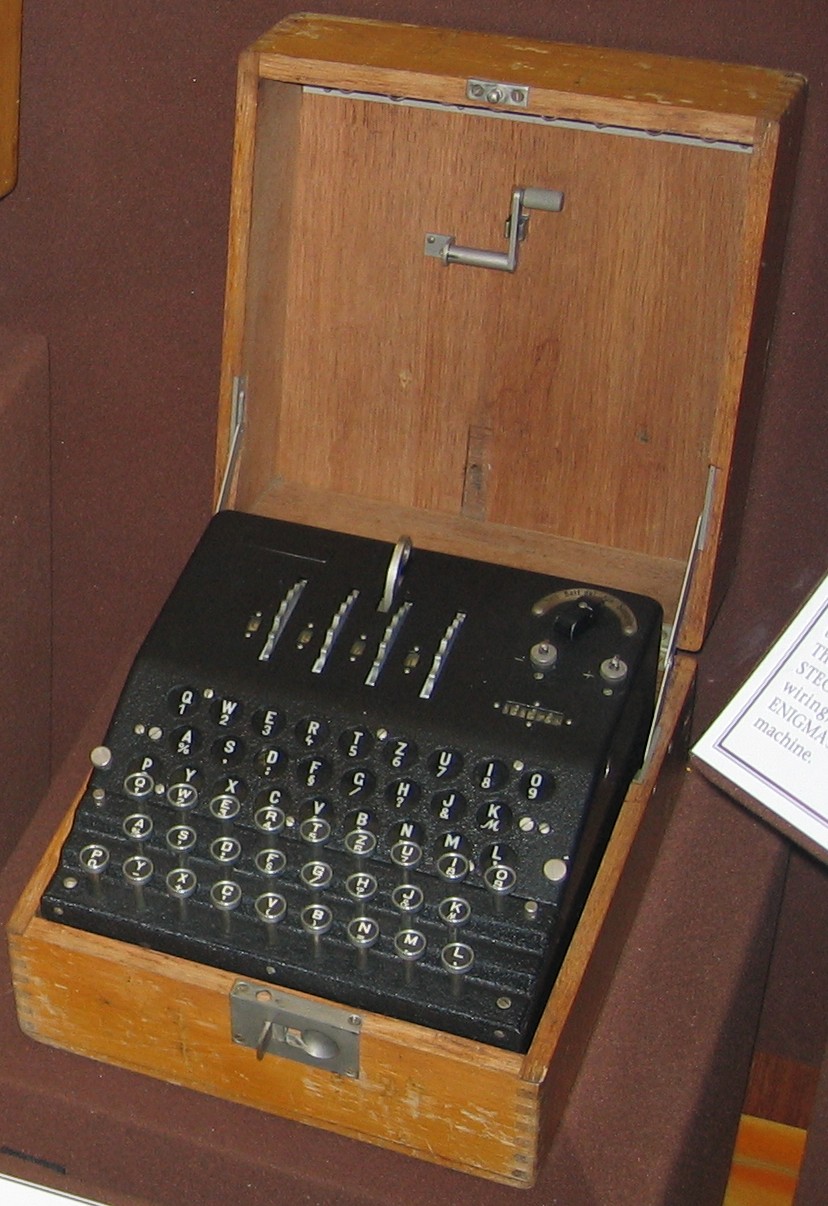
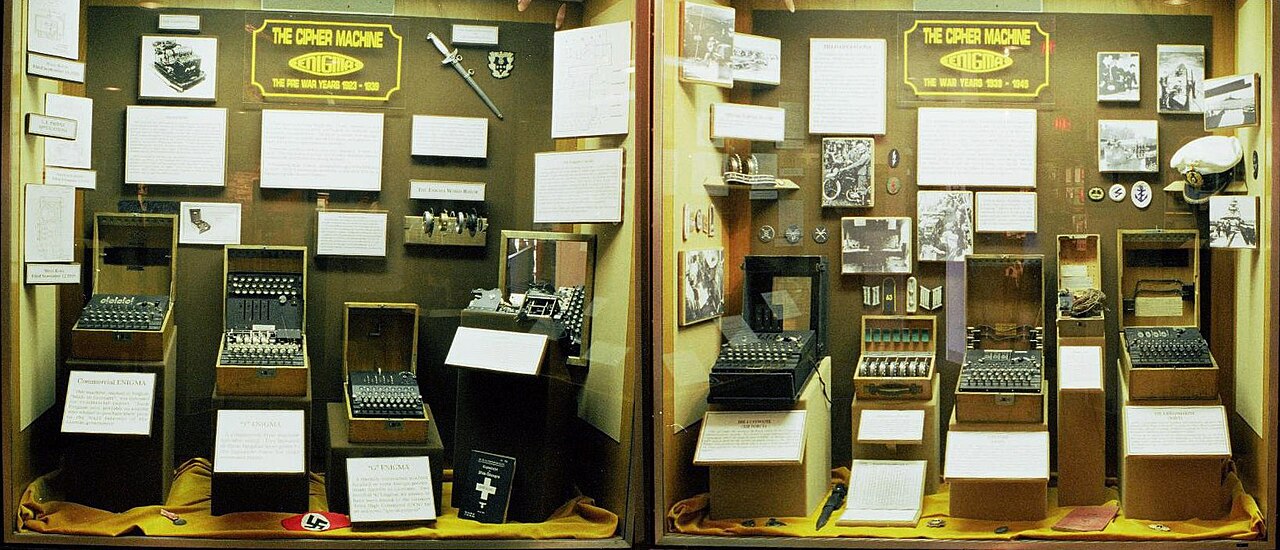
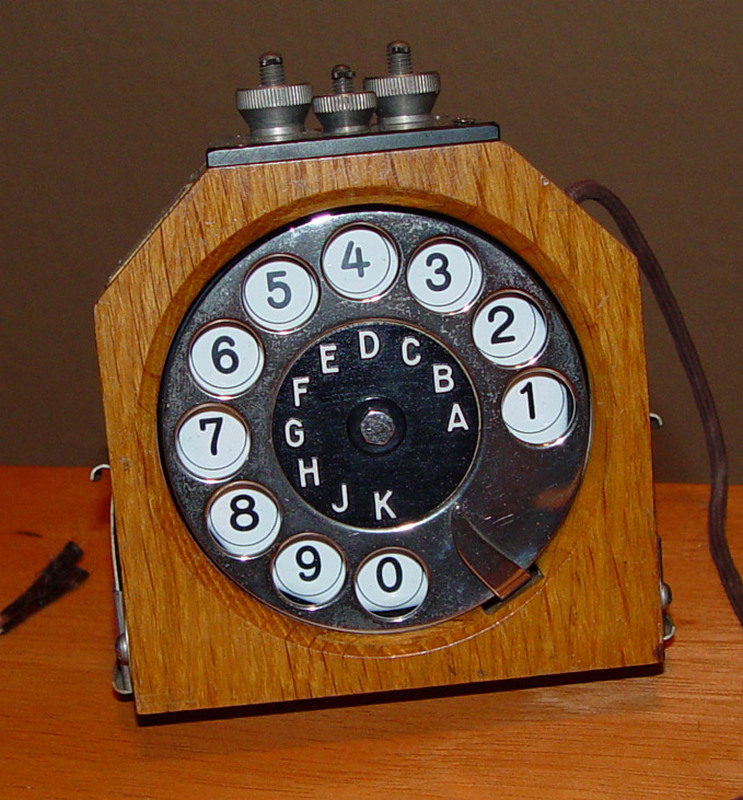
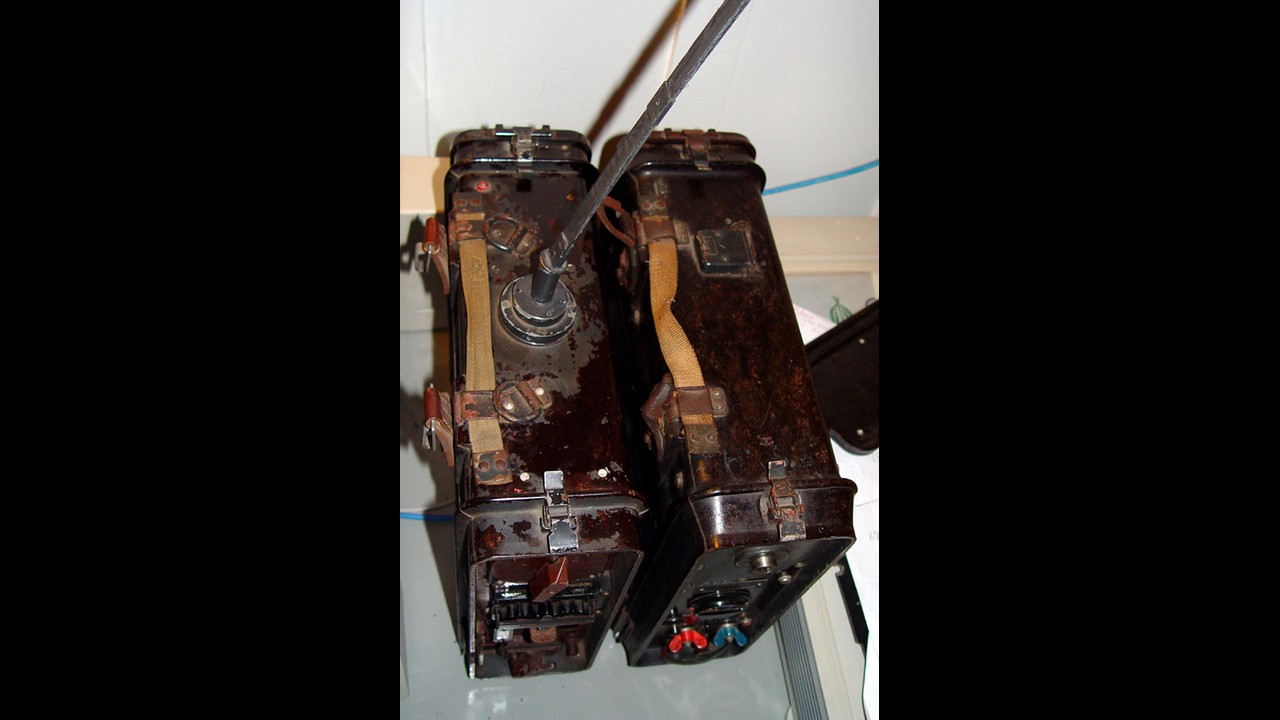
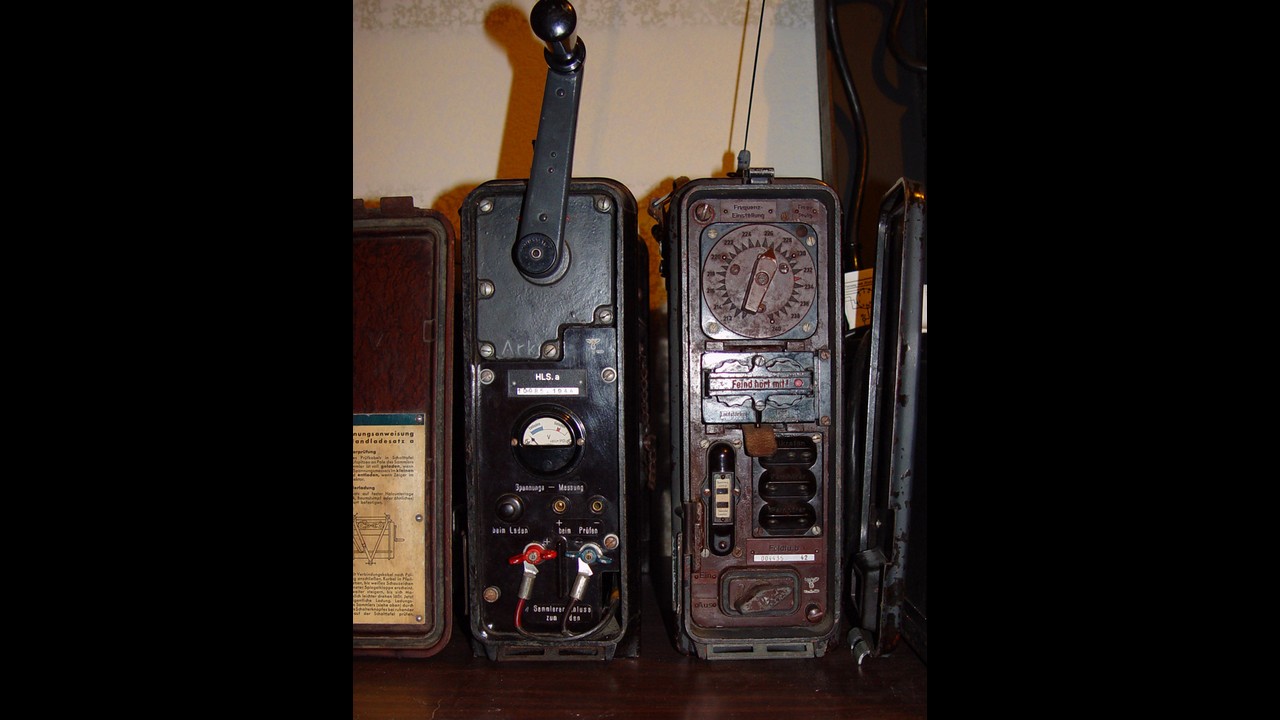
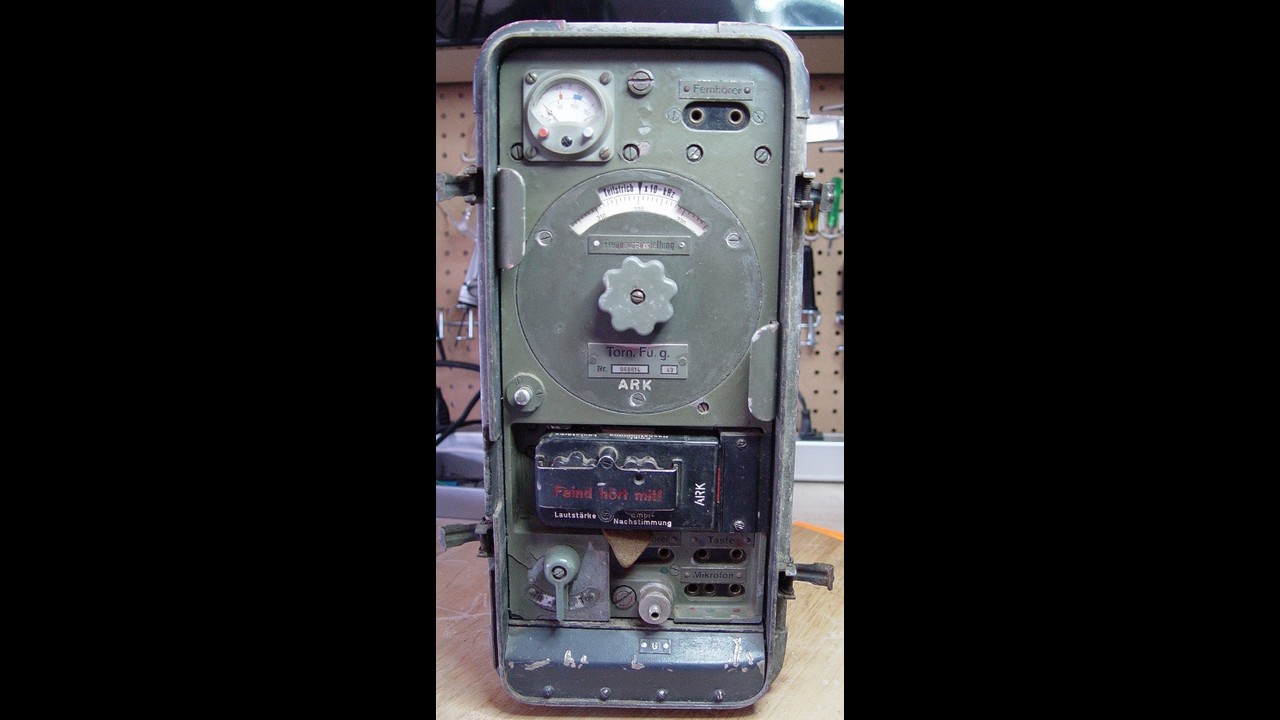
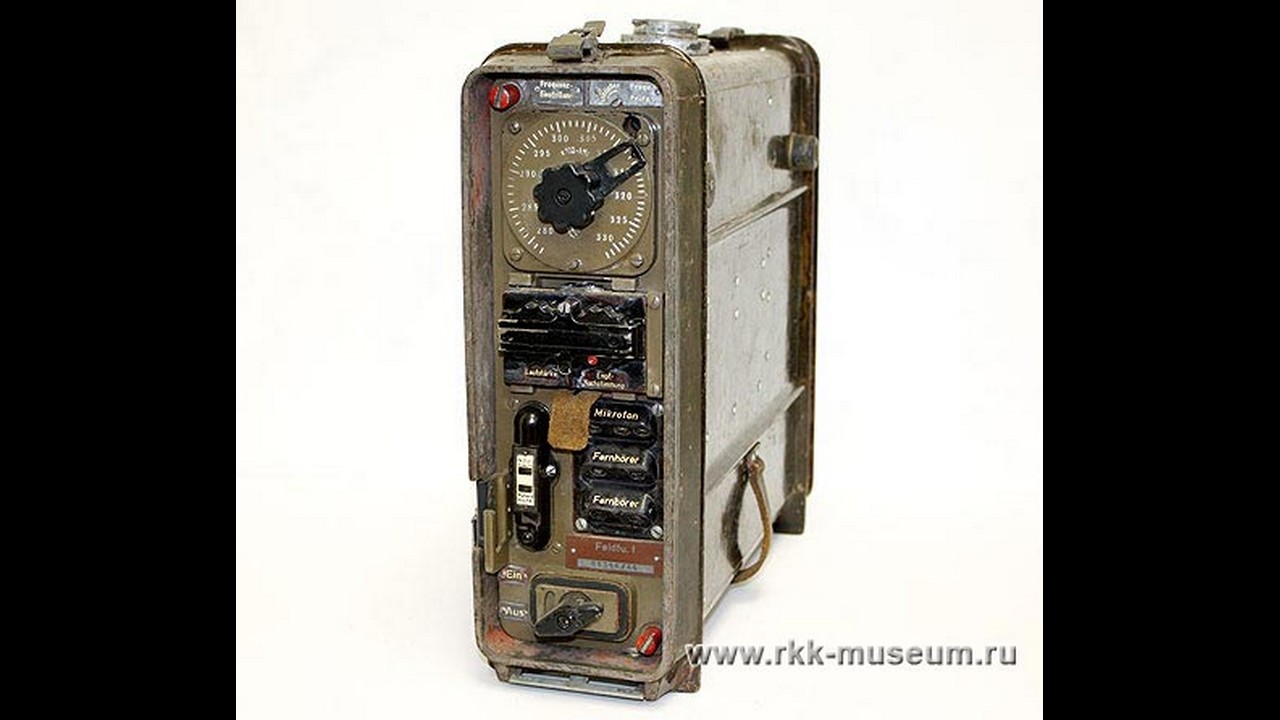
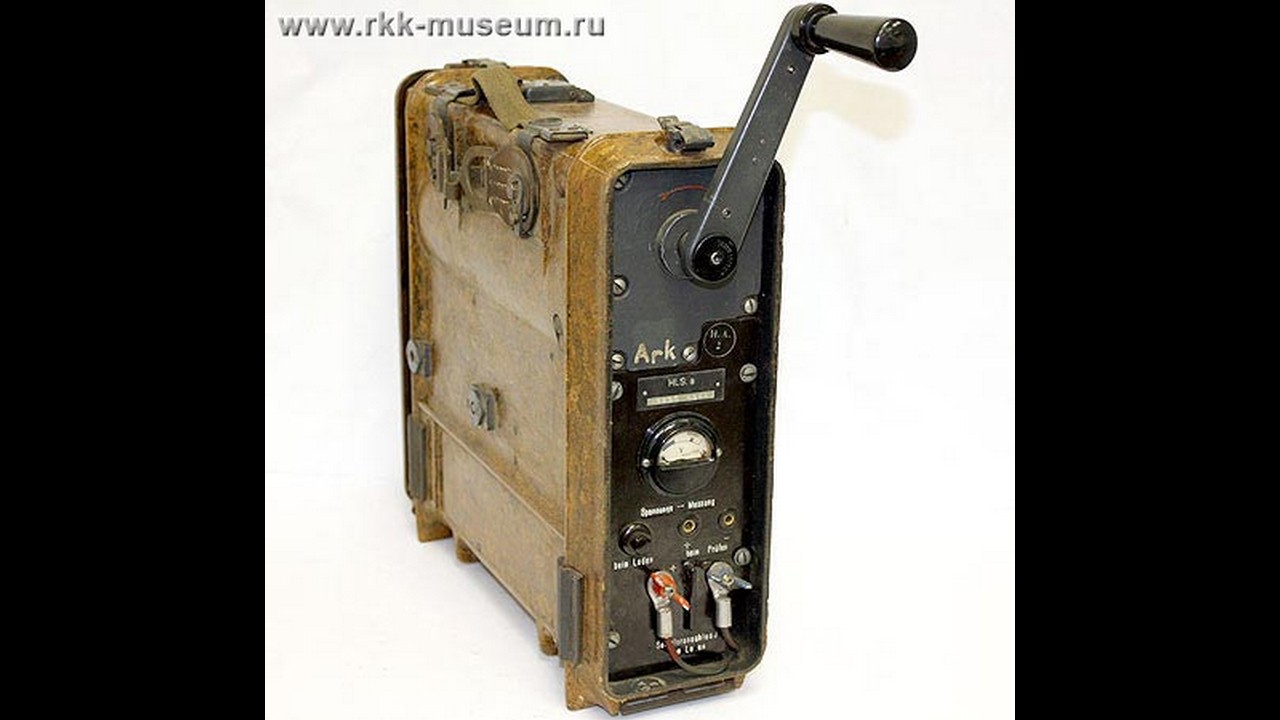
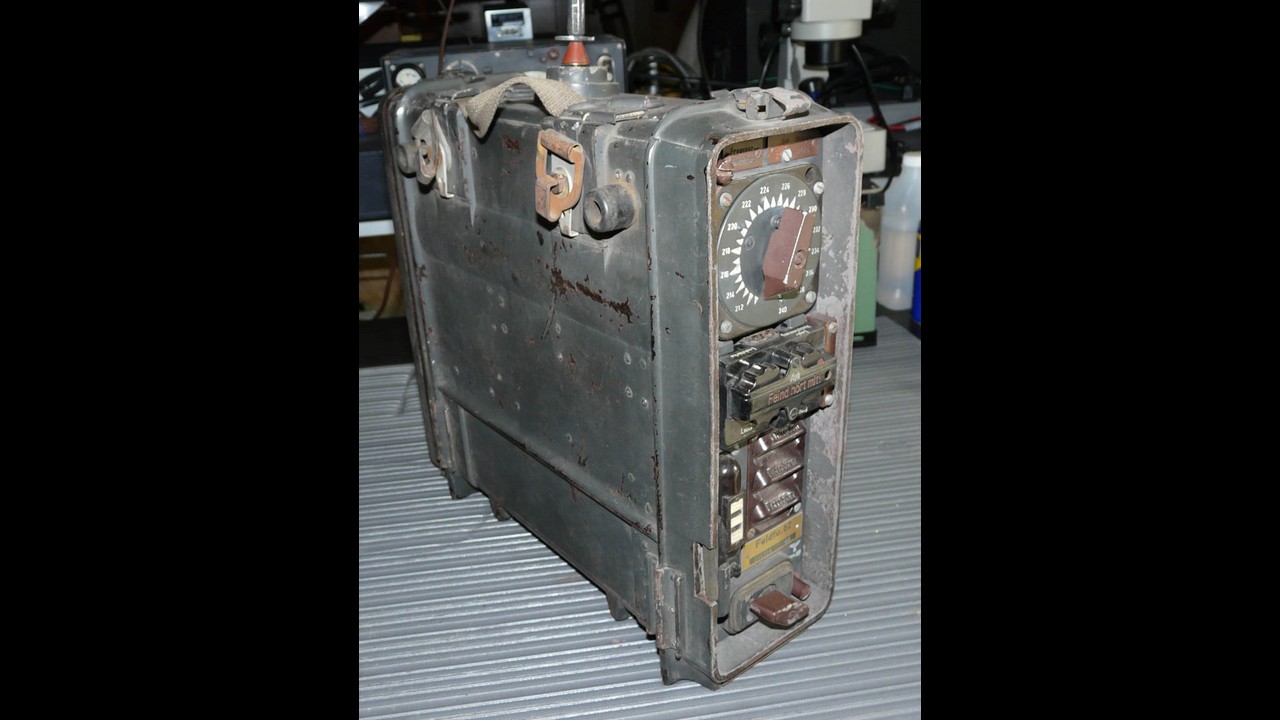
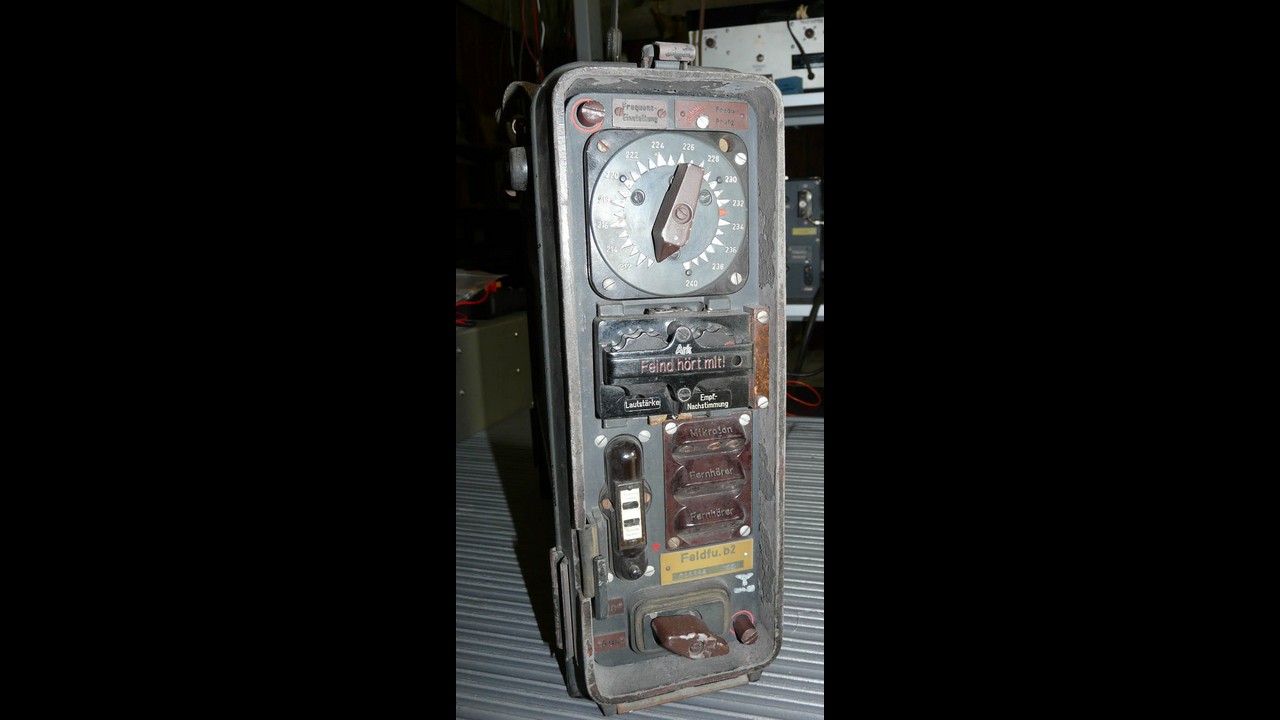
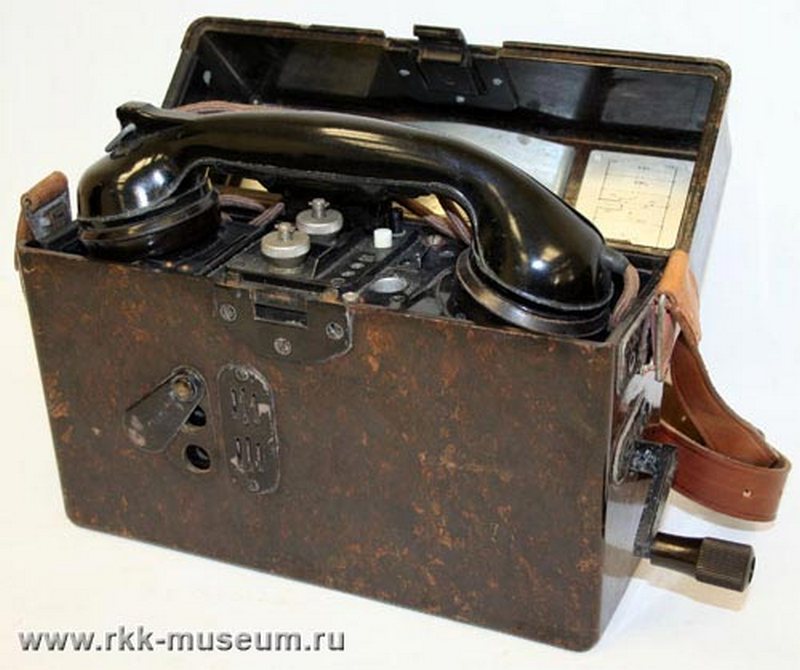
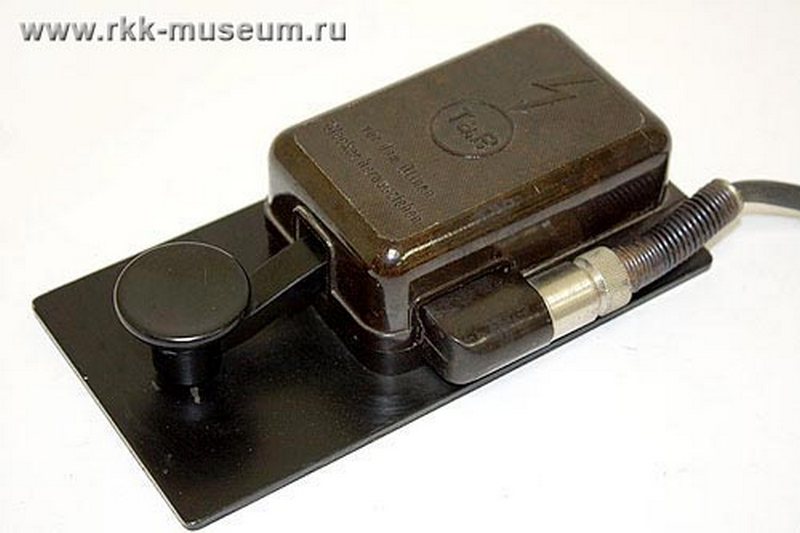
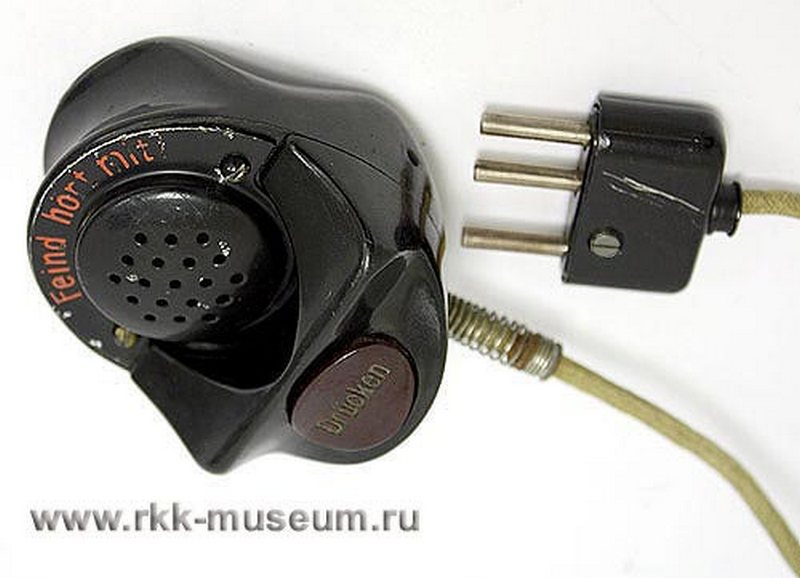
In the following galleries I will specify what I am doing and with what kind of various Brands I am dealing. I will also somehow detail some of these communication devices for you and present them both in their original form (No replicas, the actual thing) and then my poor attempts to reproduce them in scale… but at least I am trying. Please don’t hit me… :rofl:

OK… Where do I start? From the beginning of course.
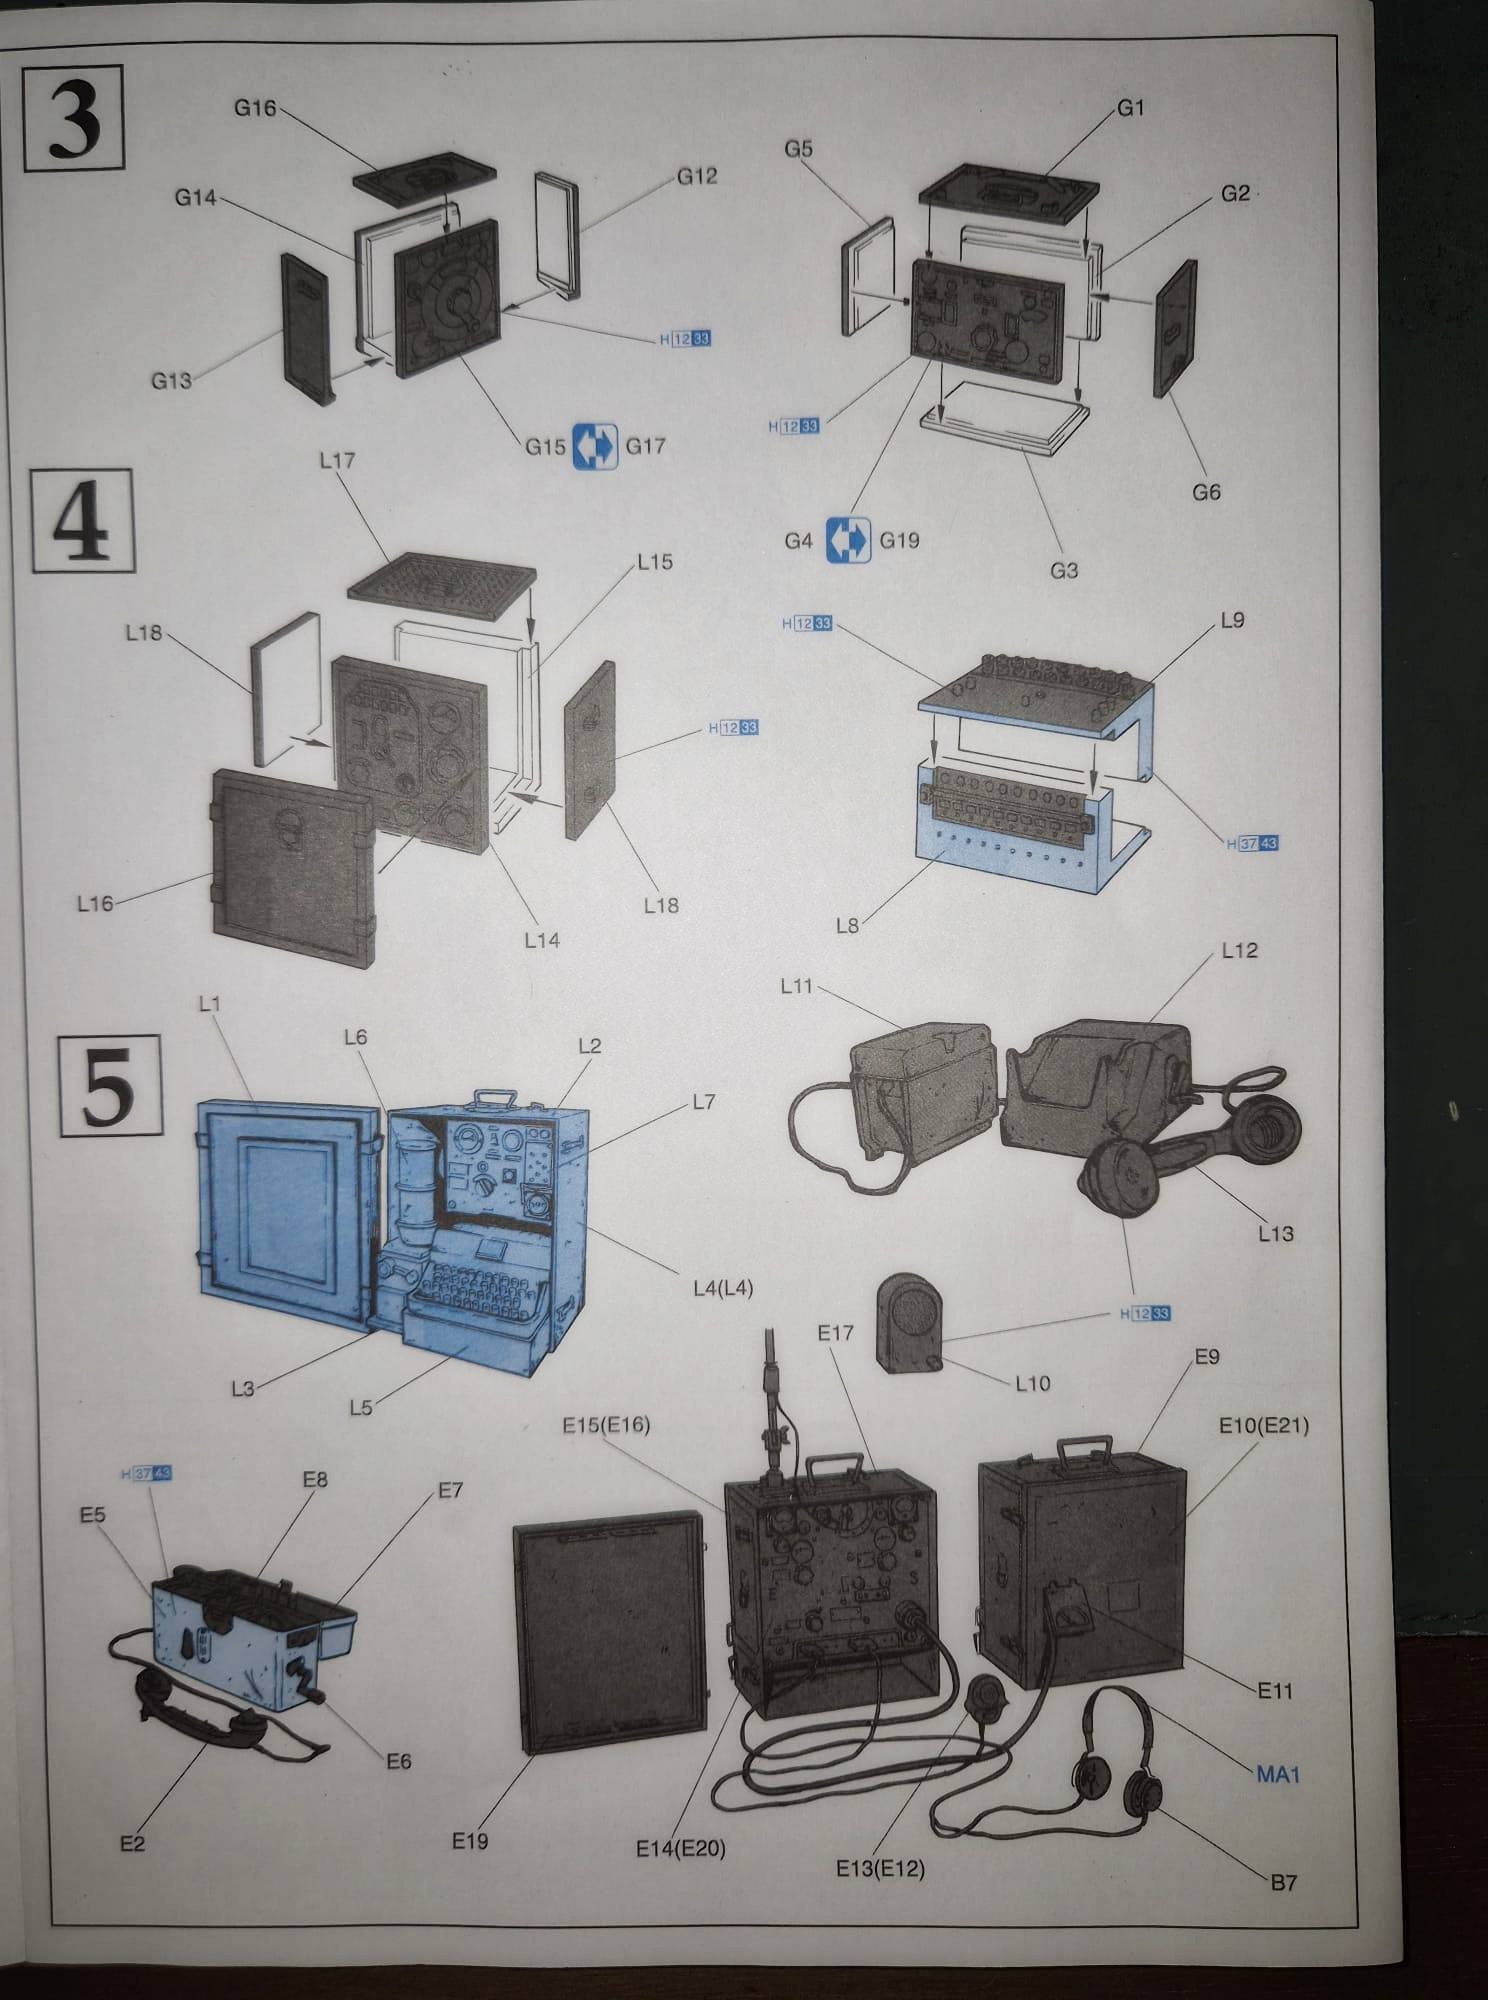
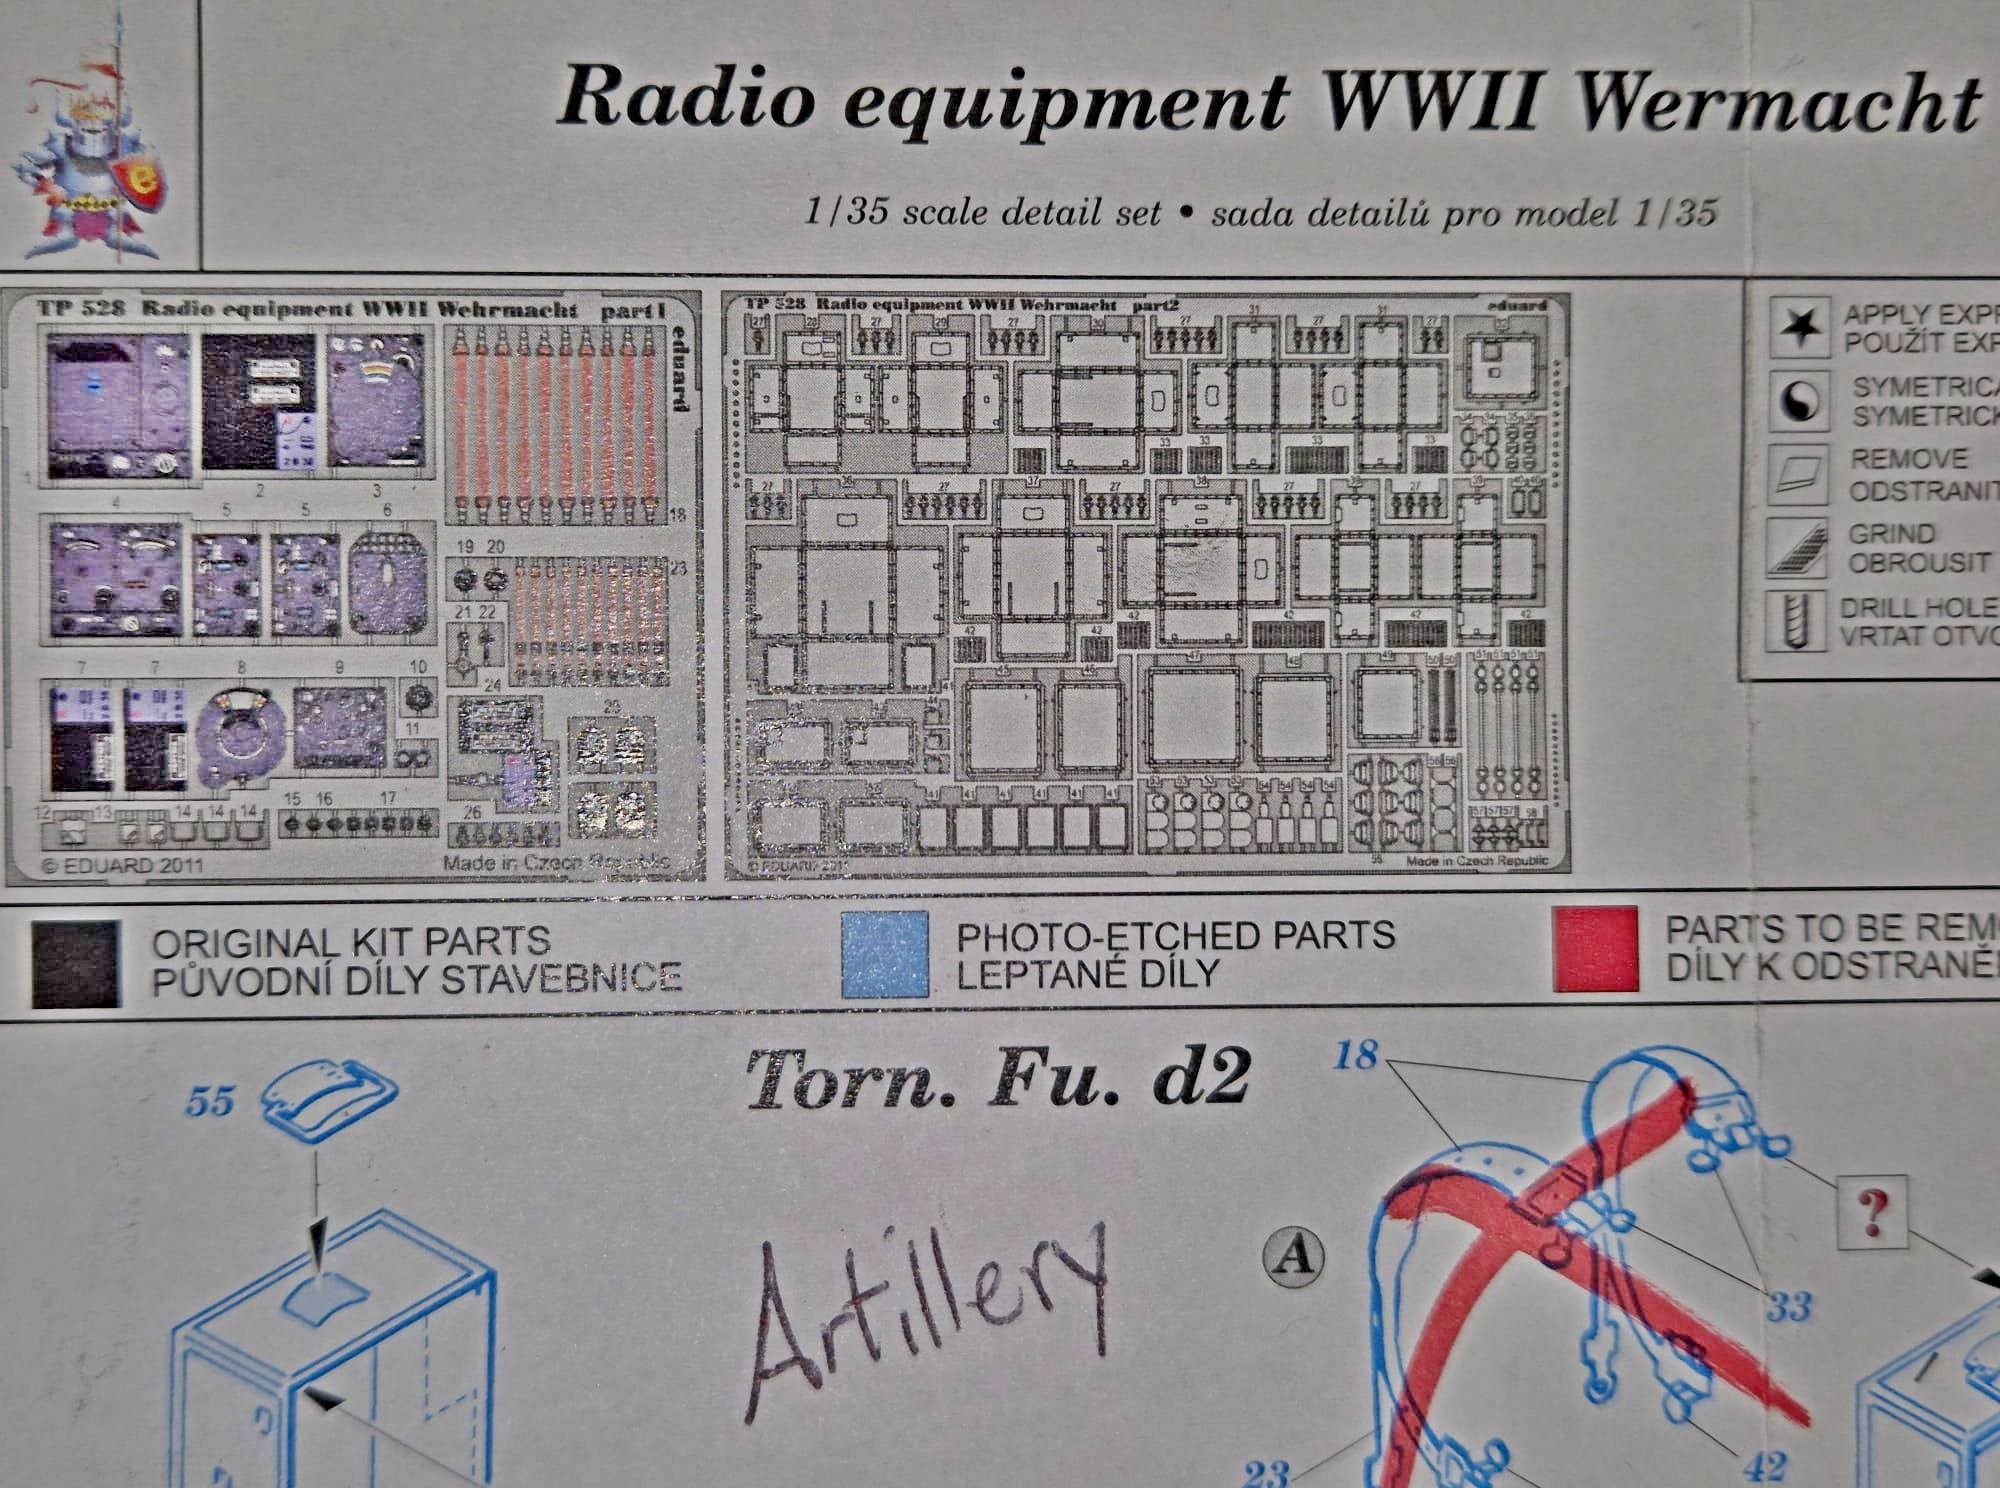
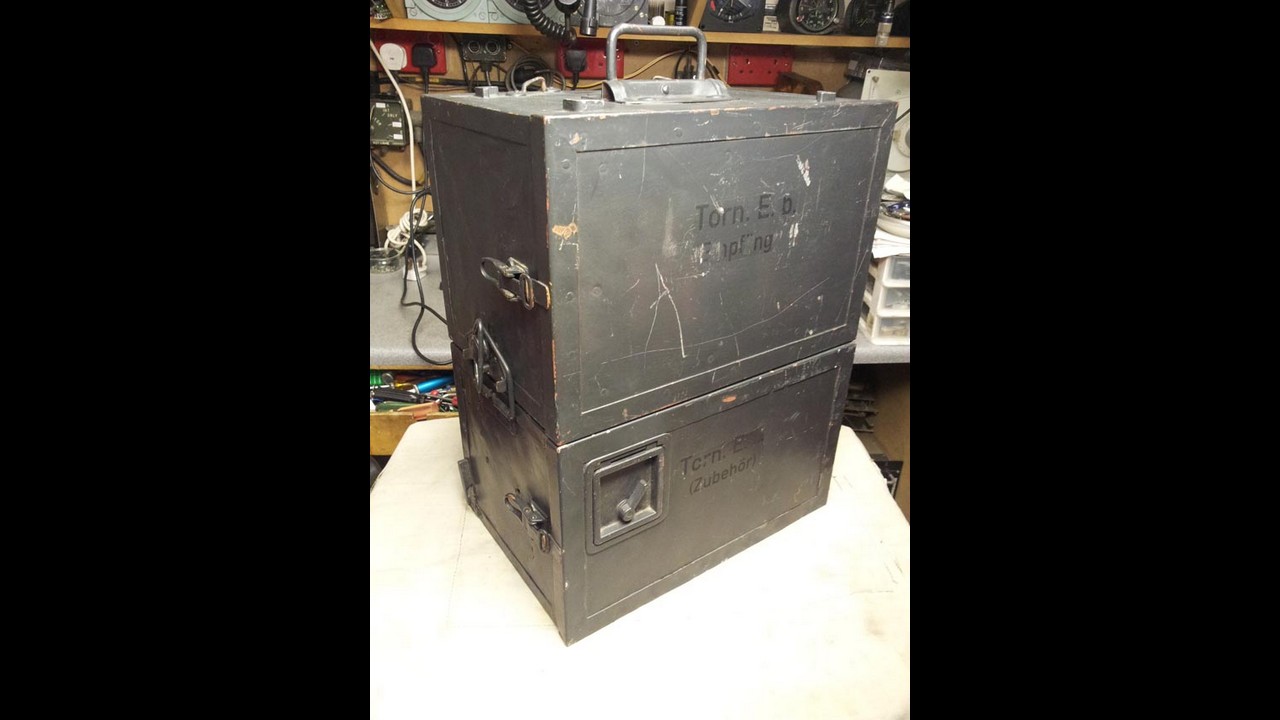
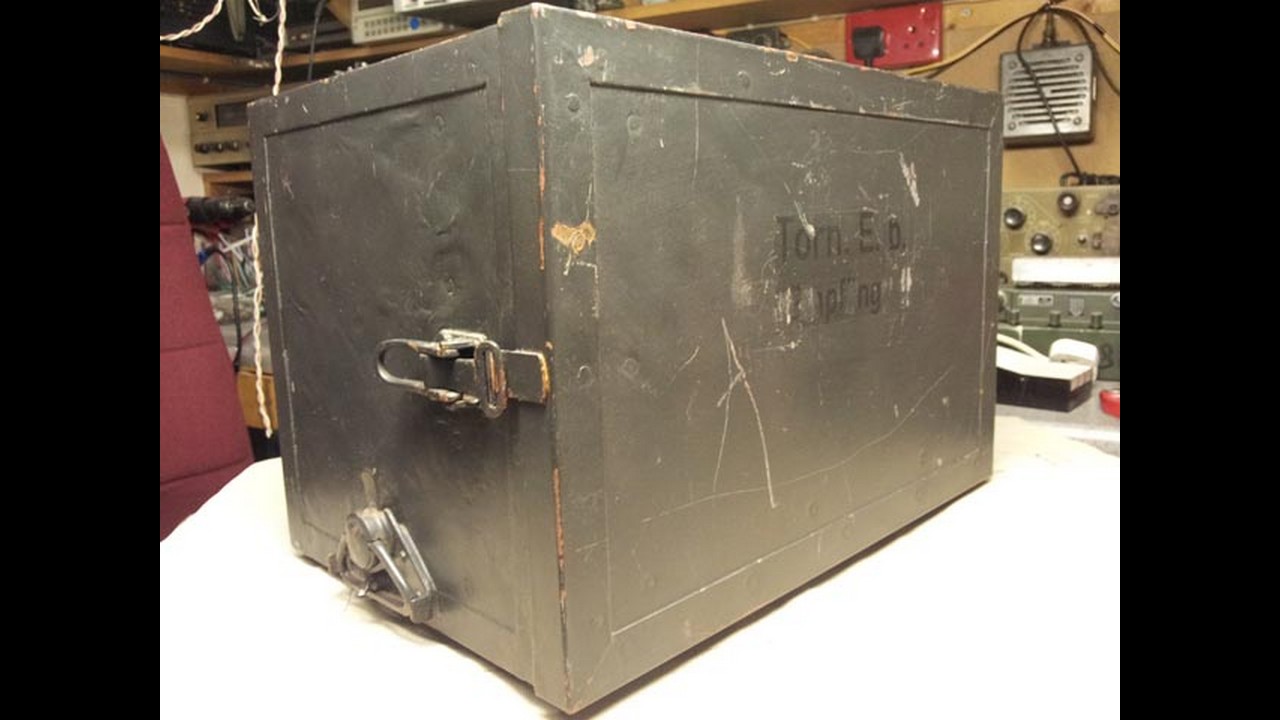
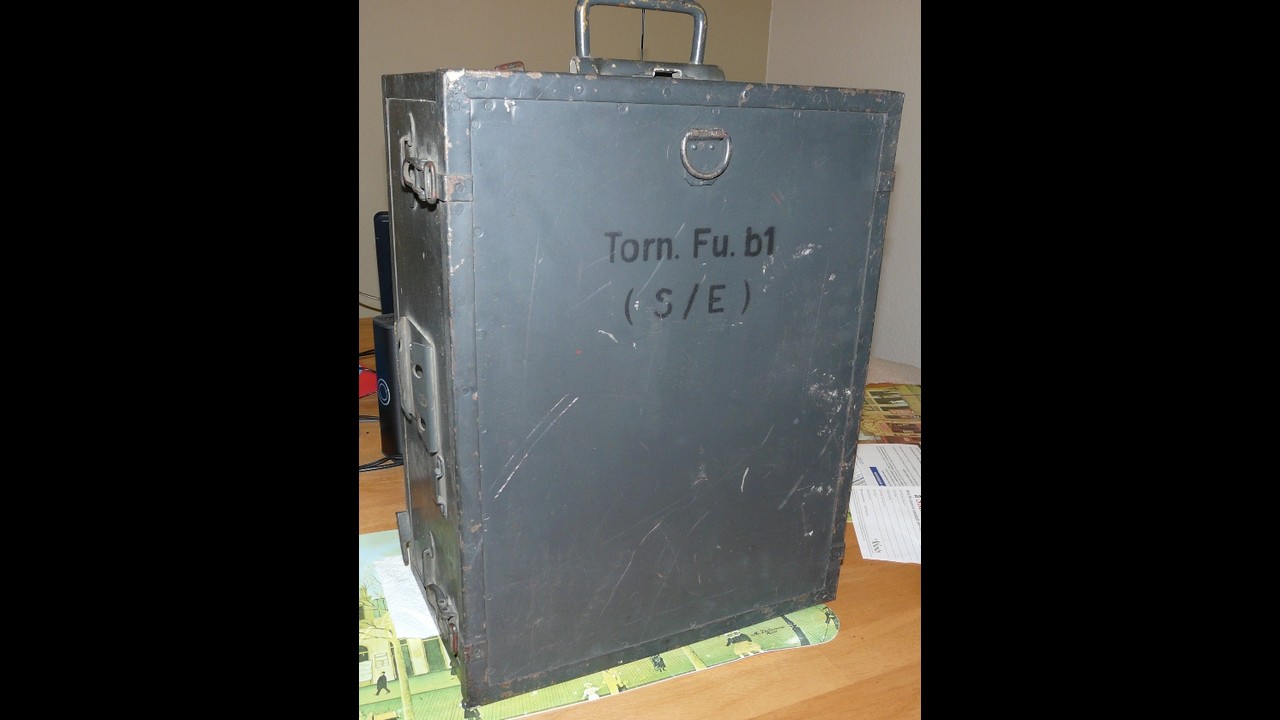
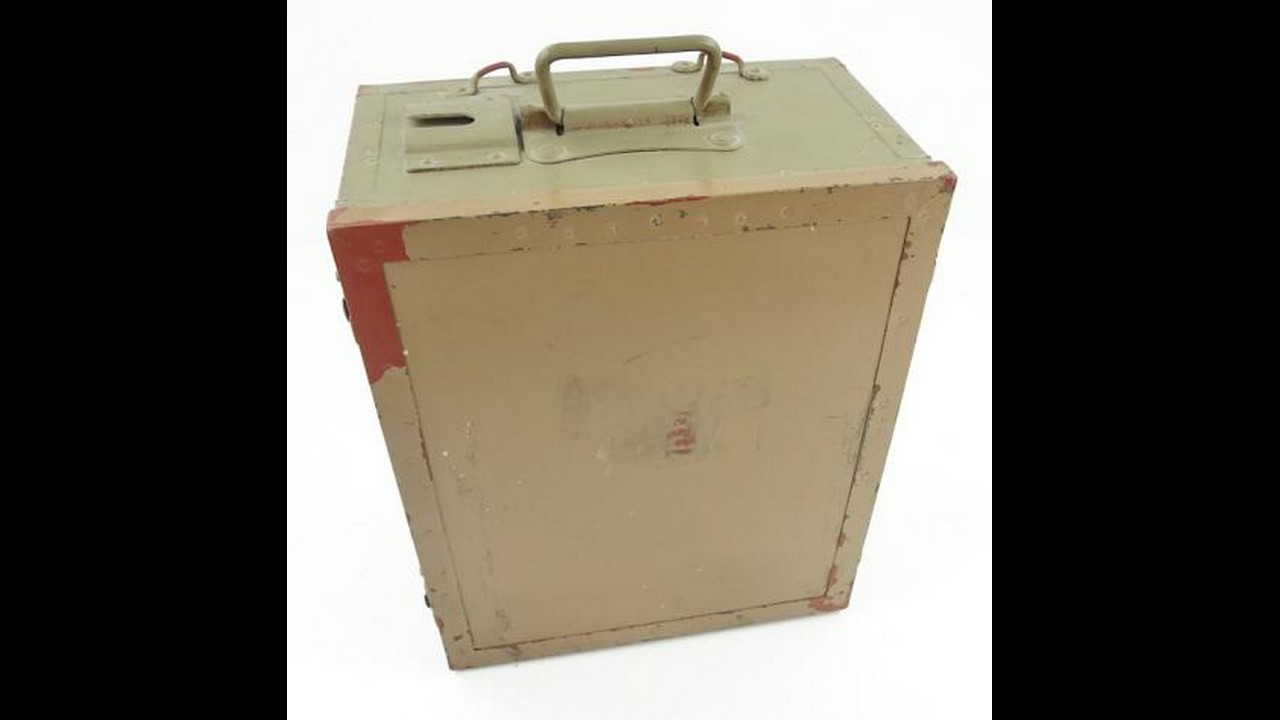
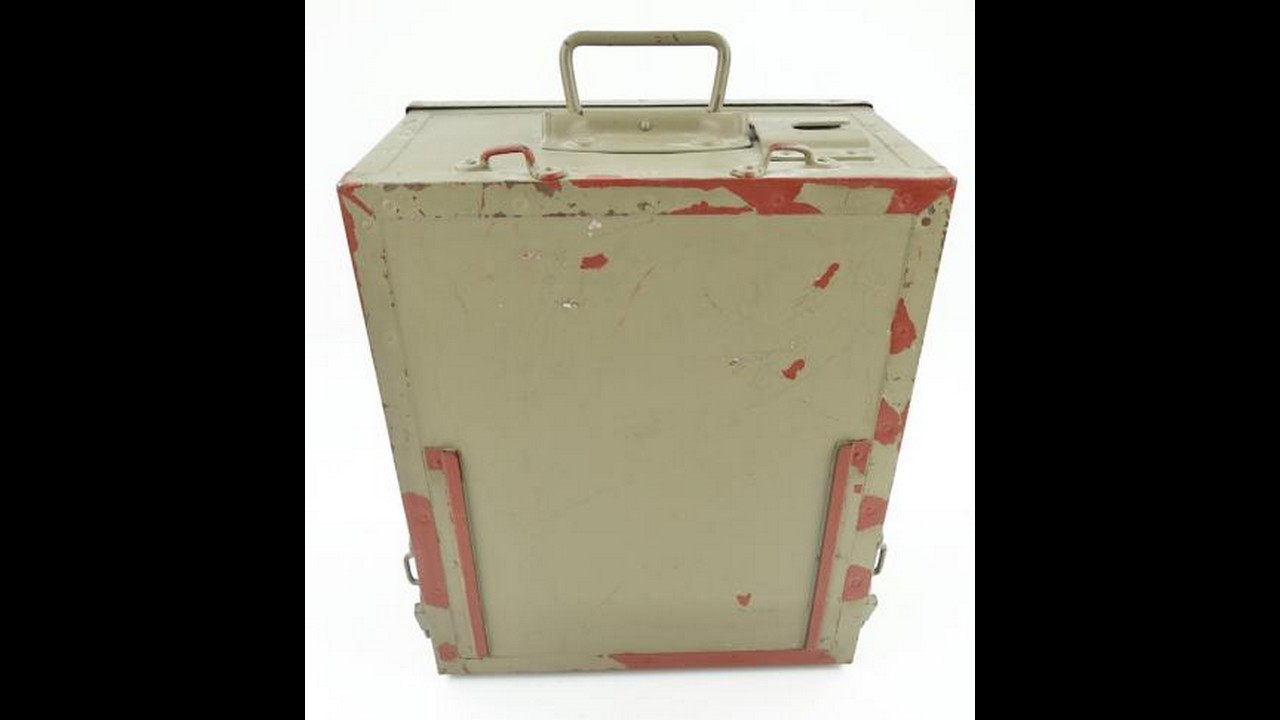
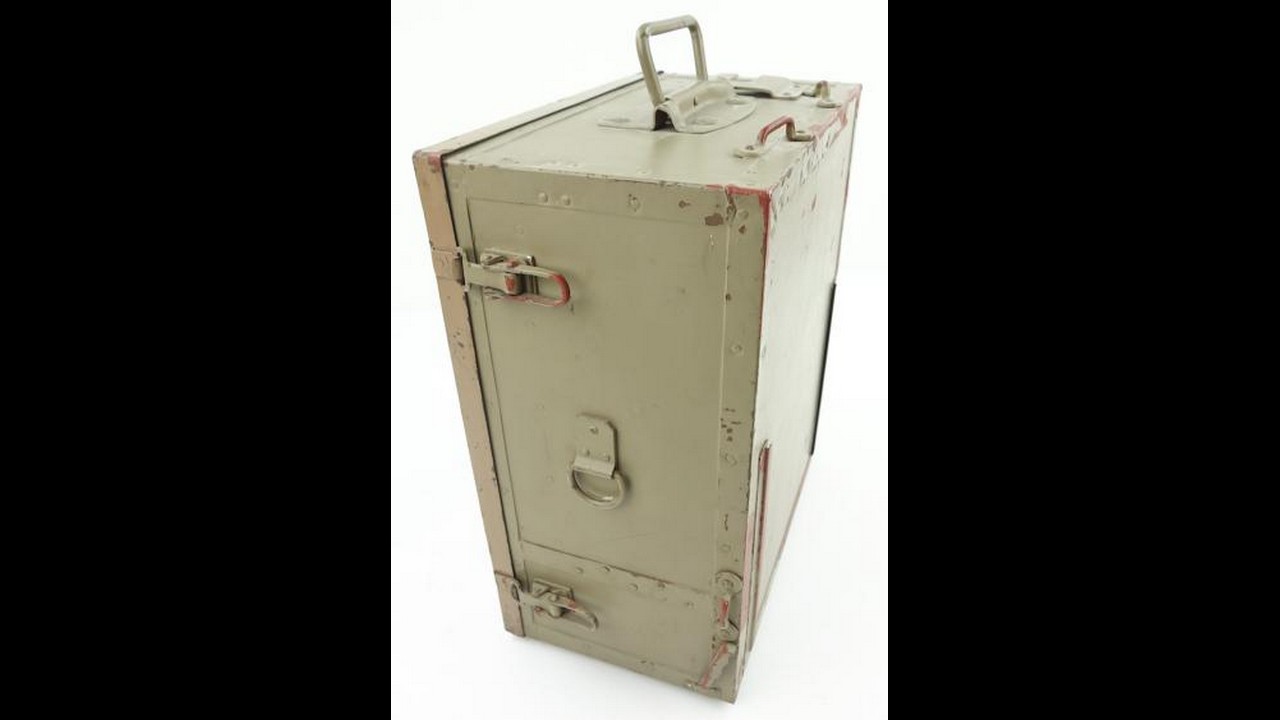
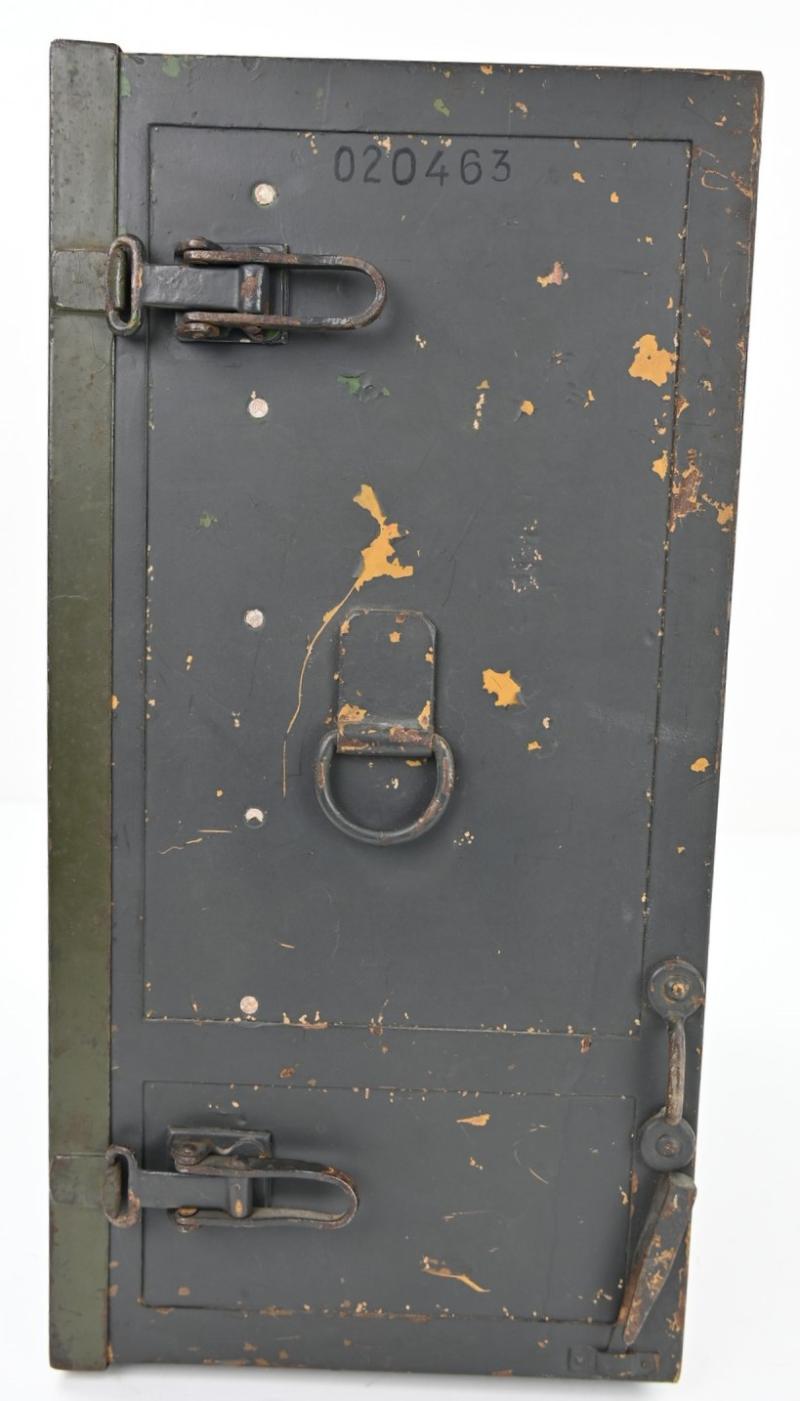
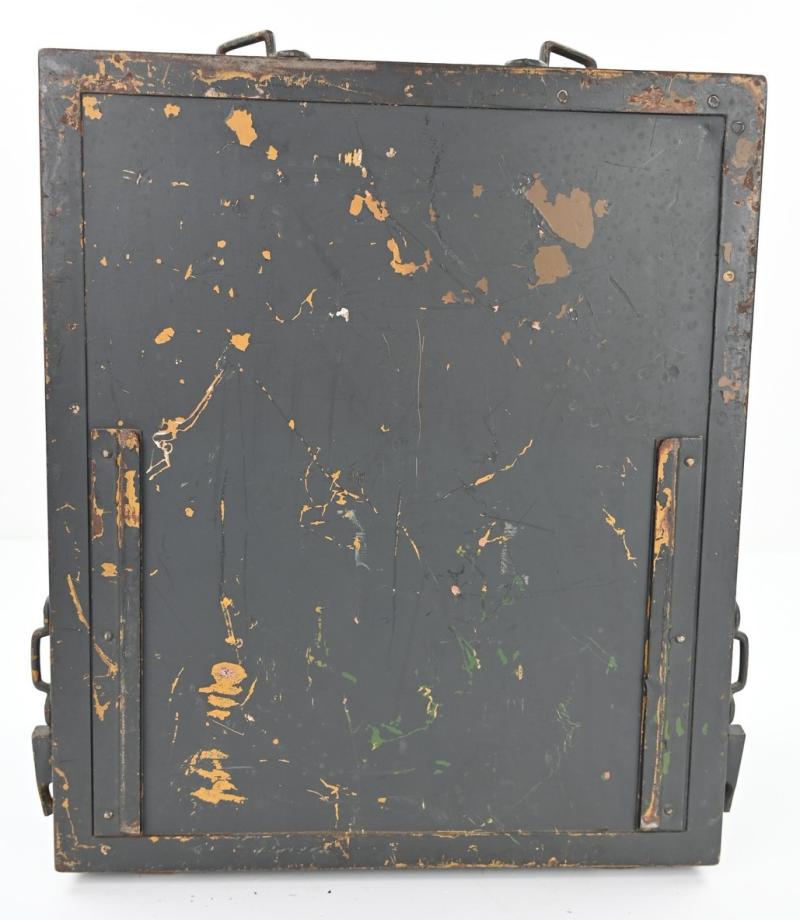
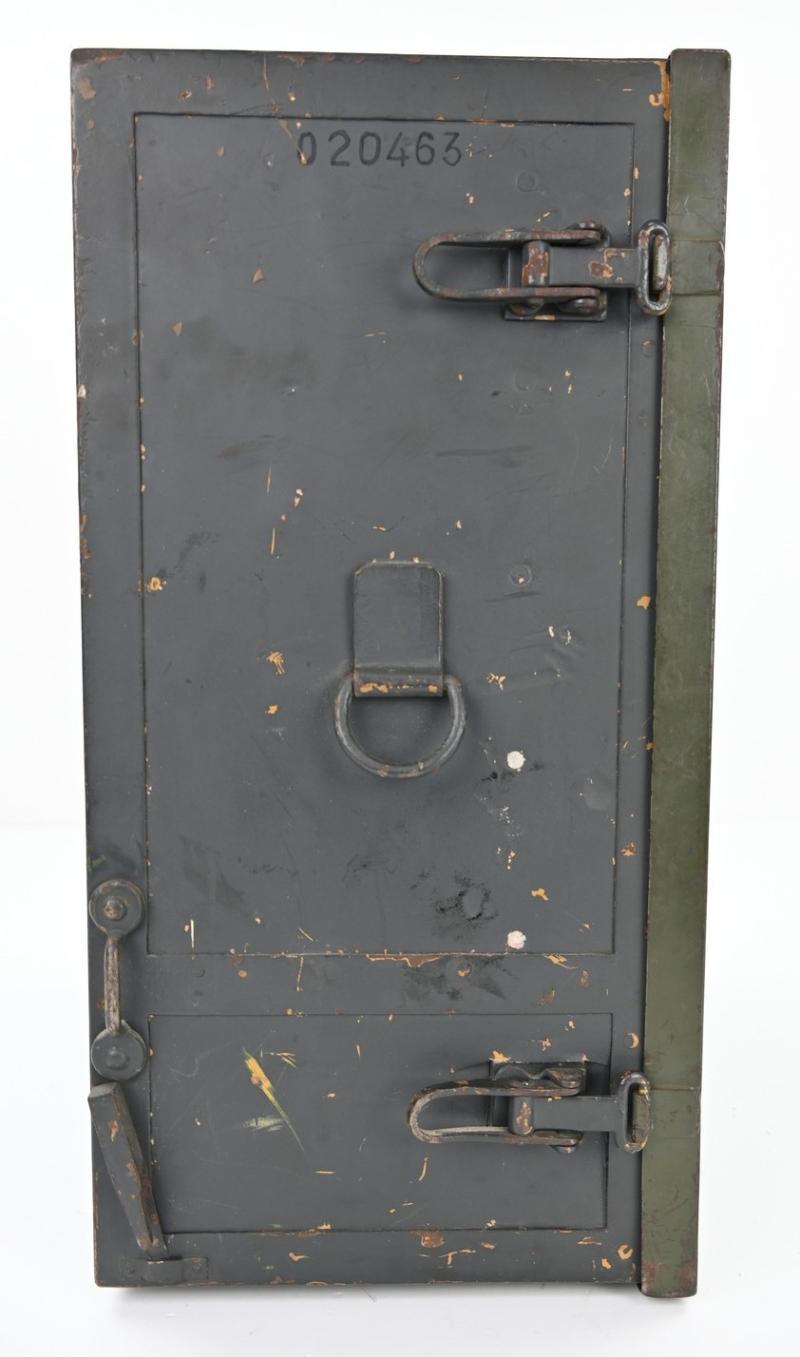
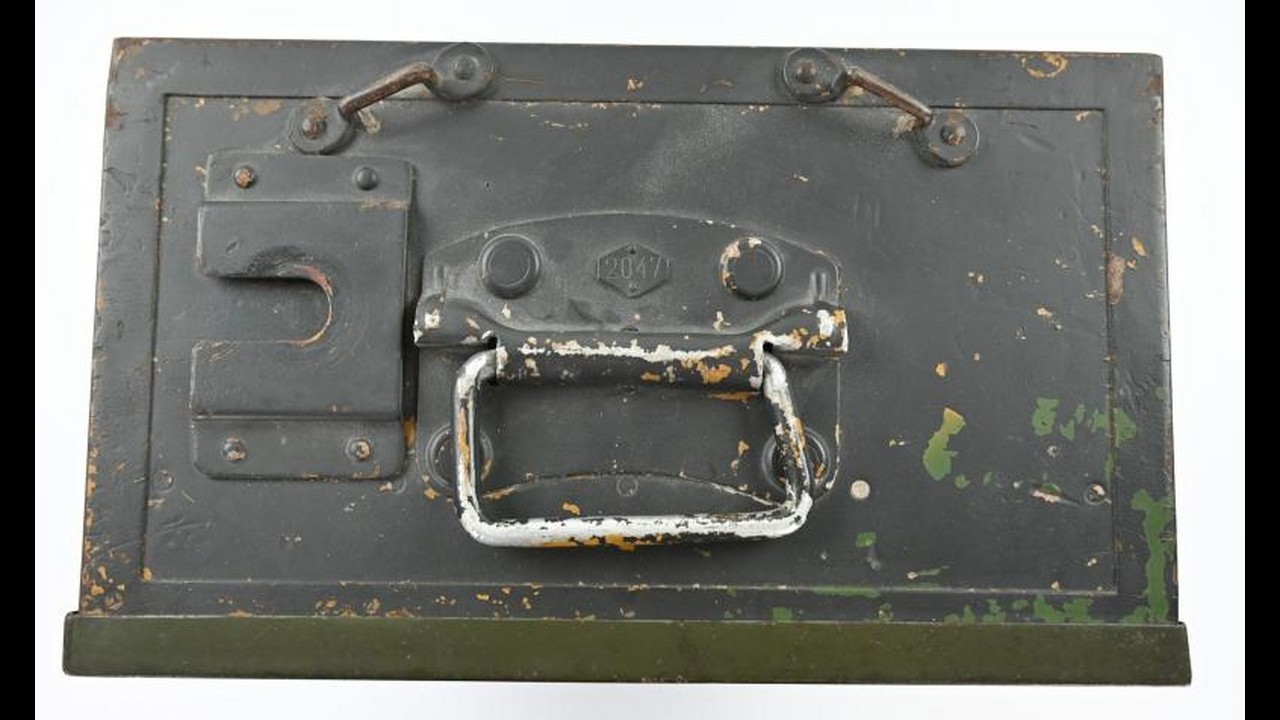
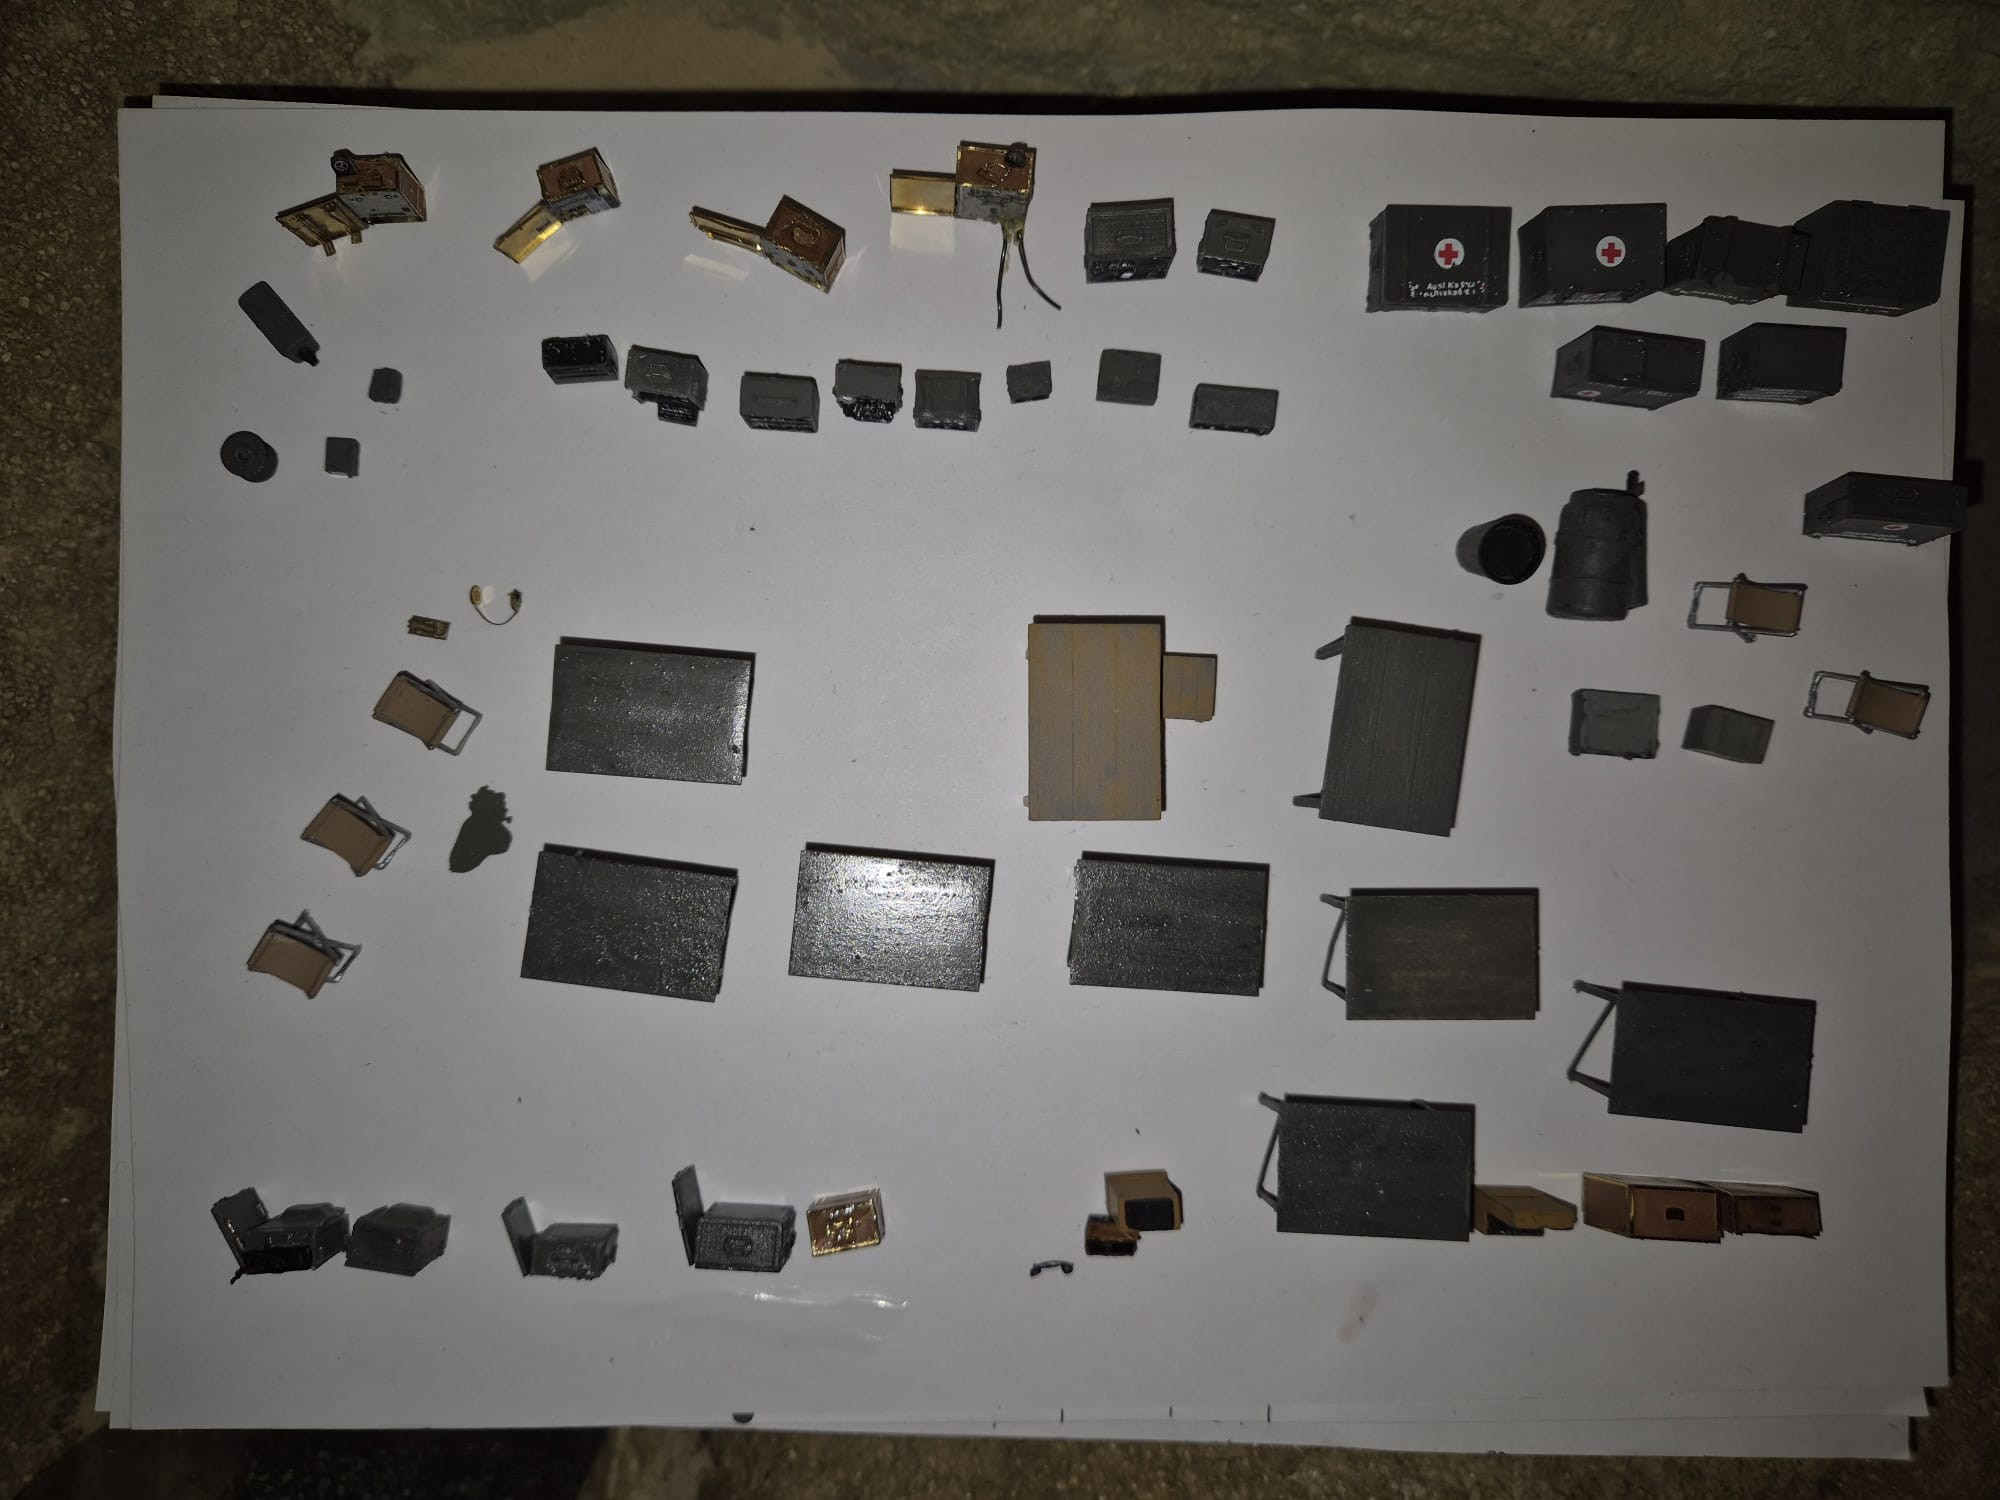
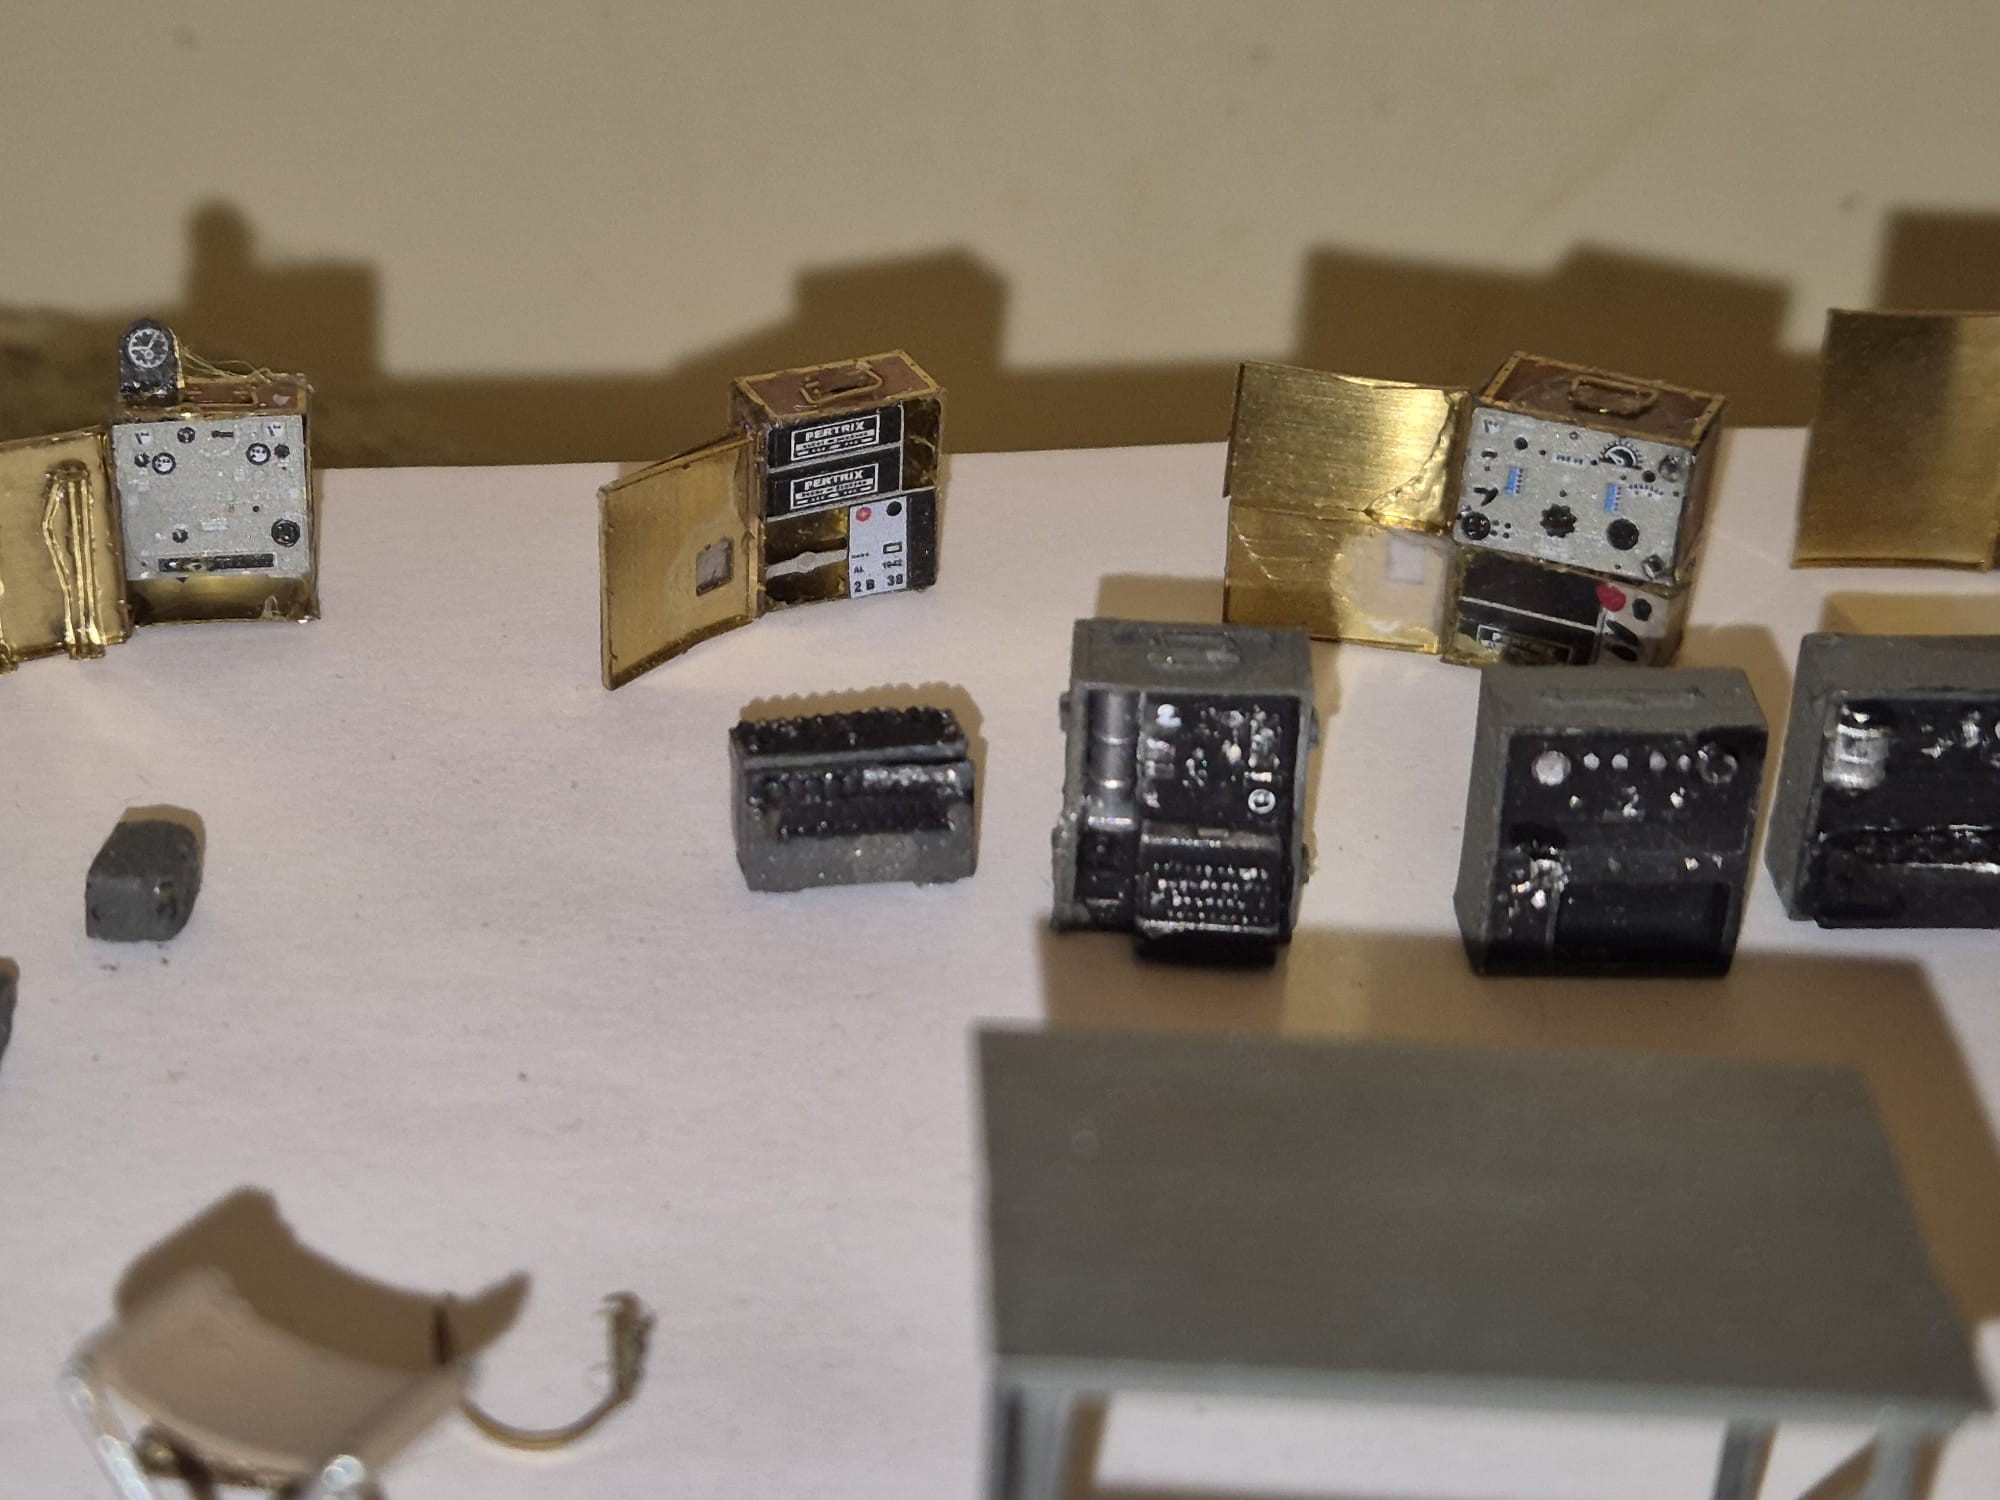
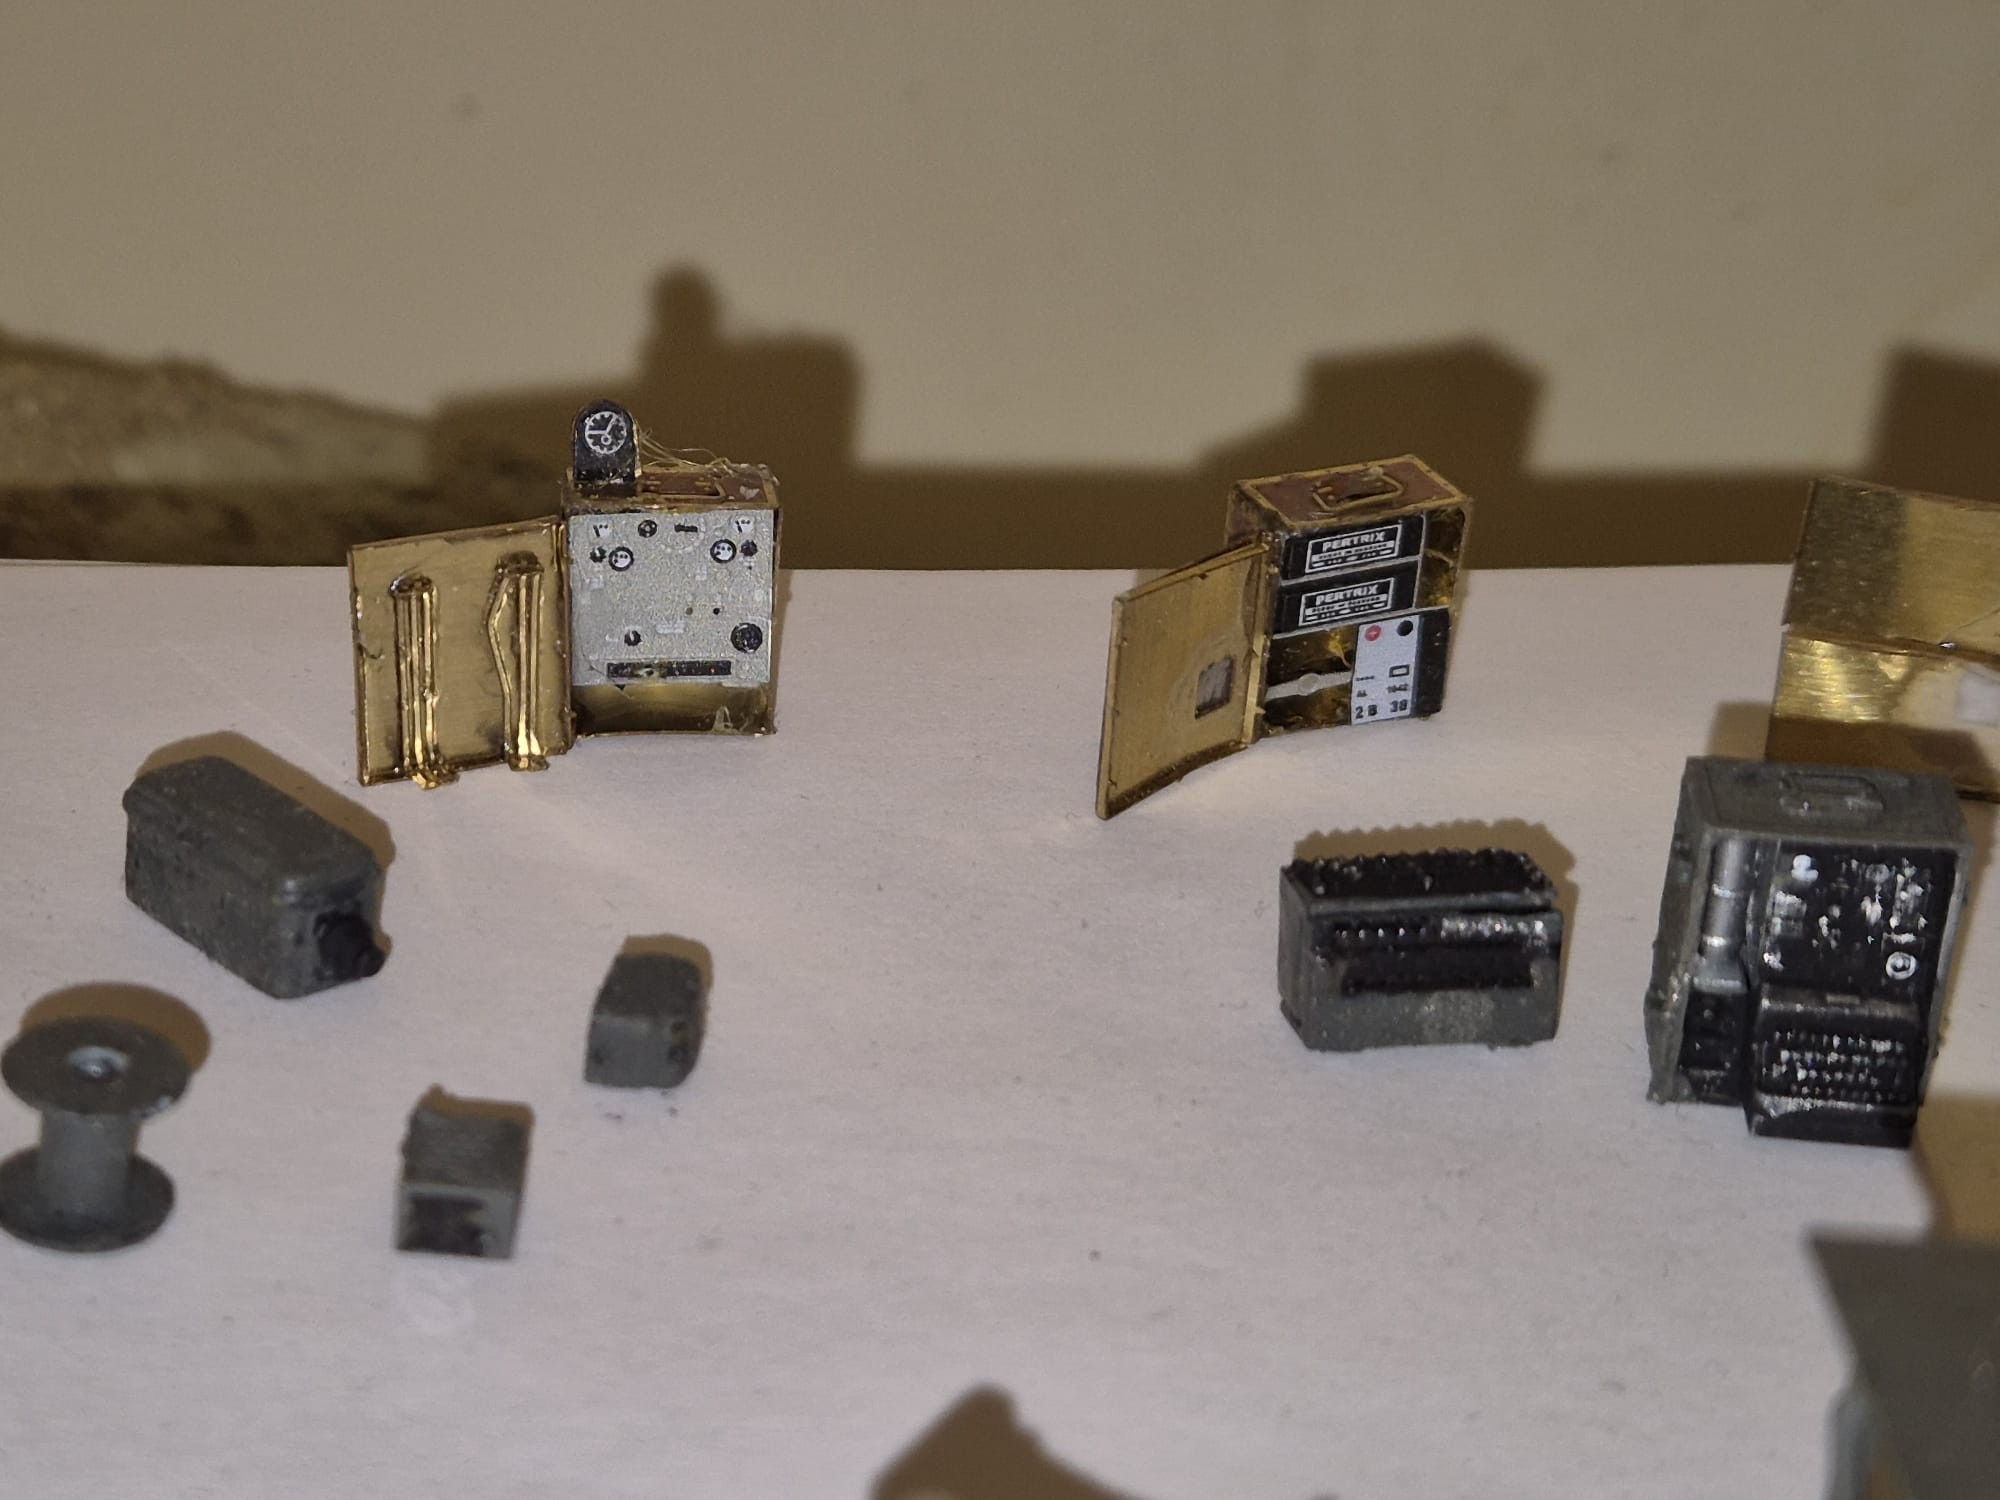
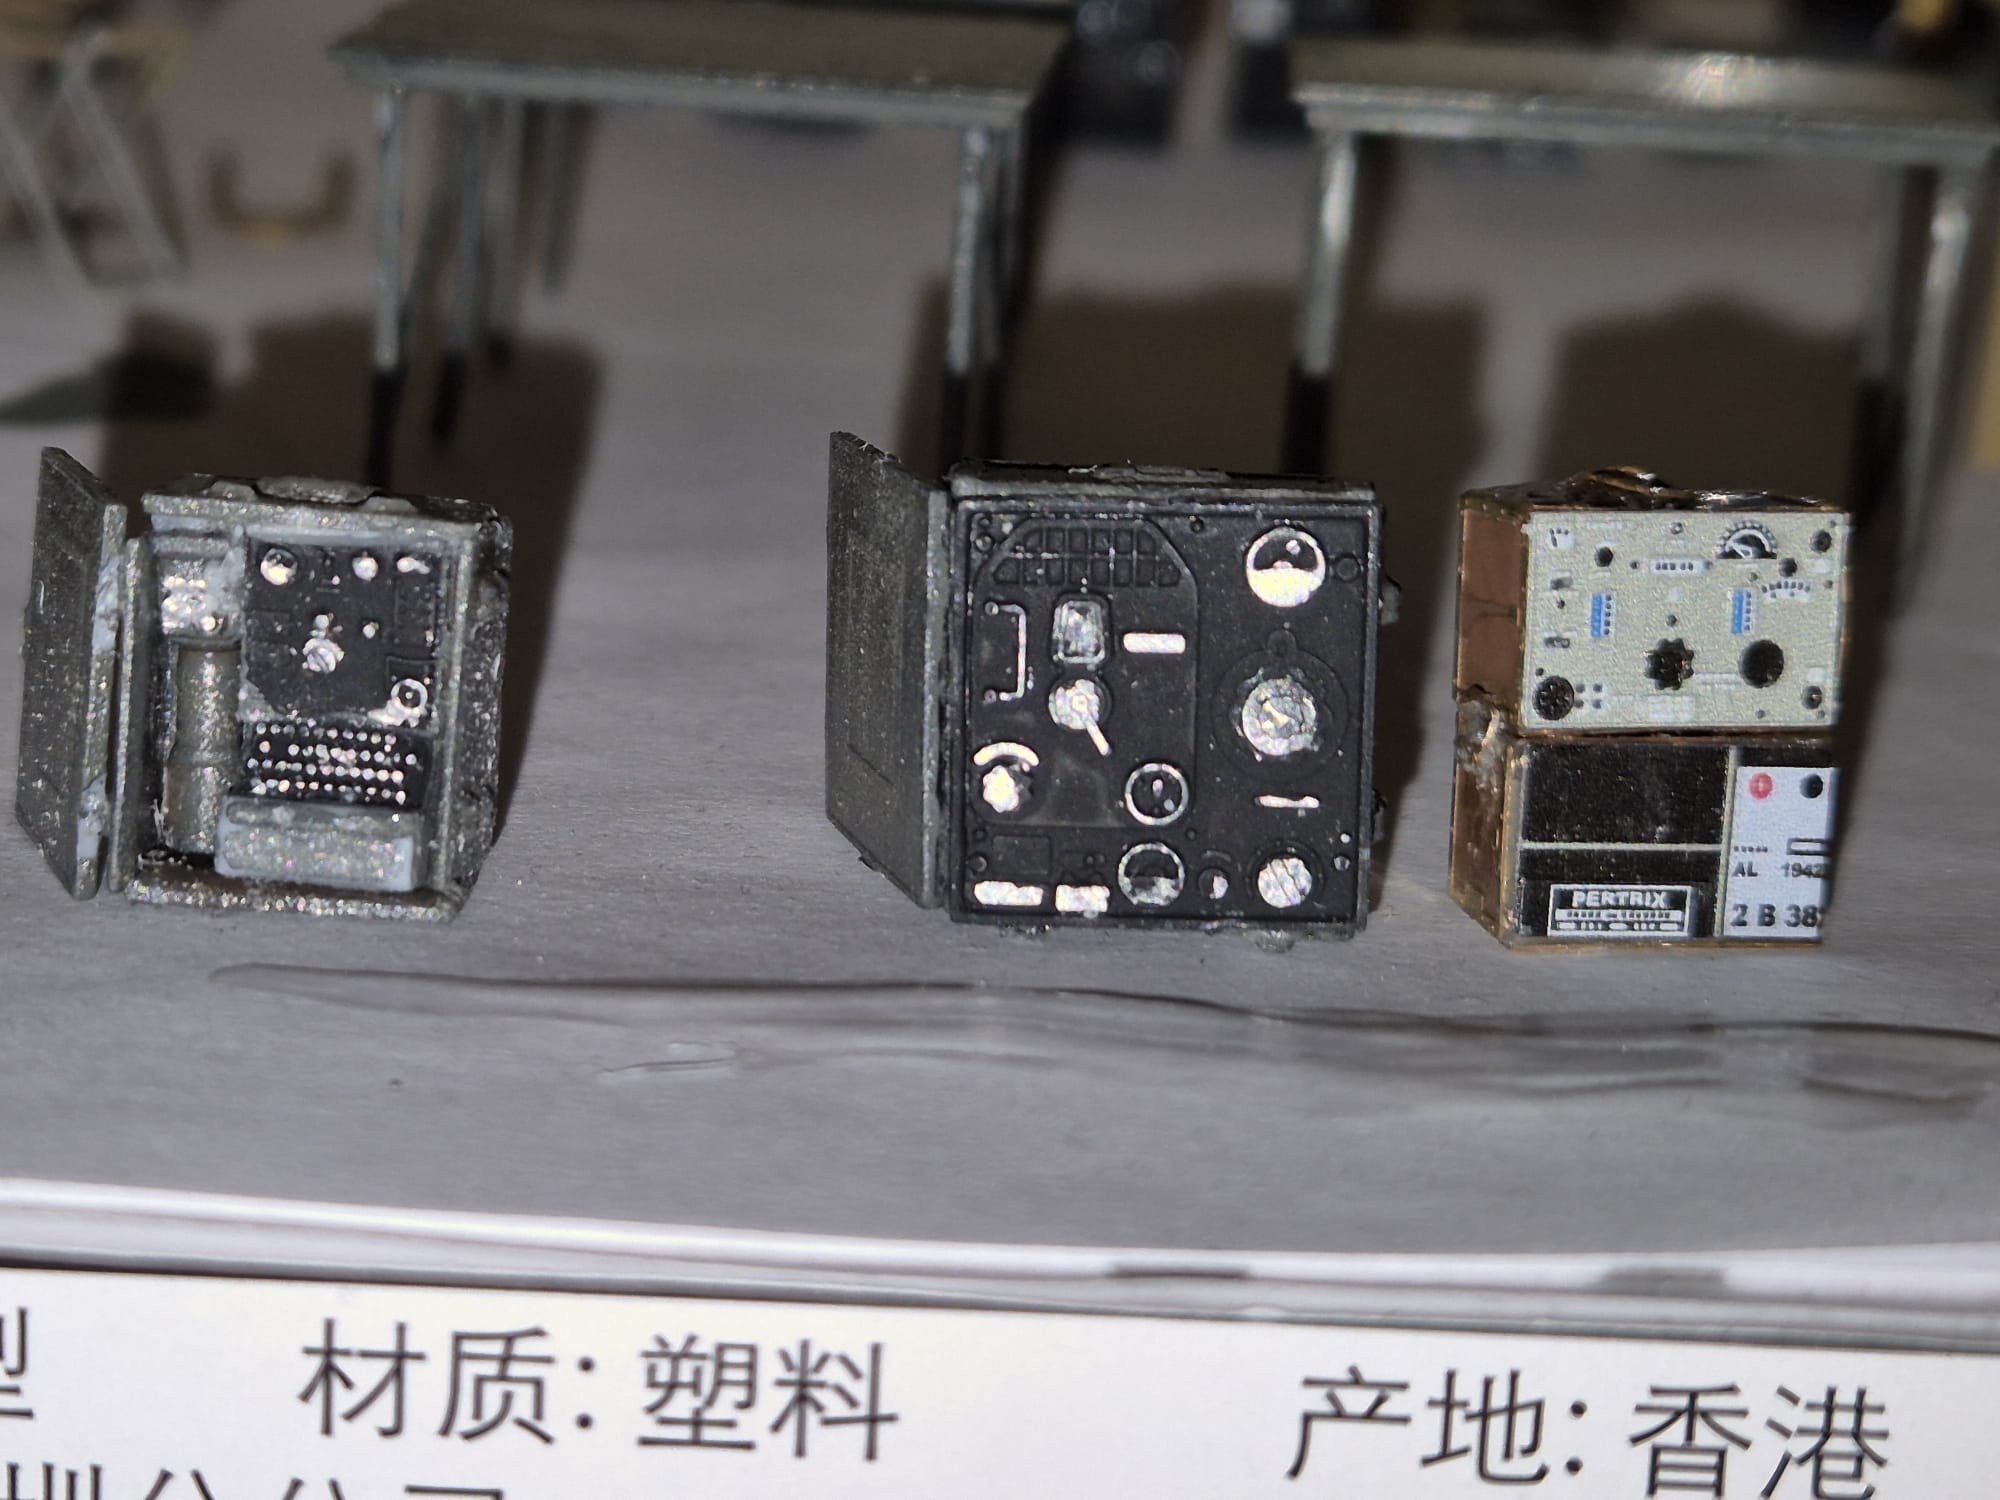
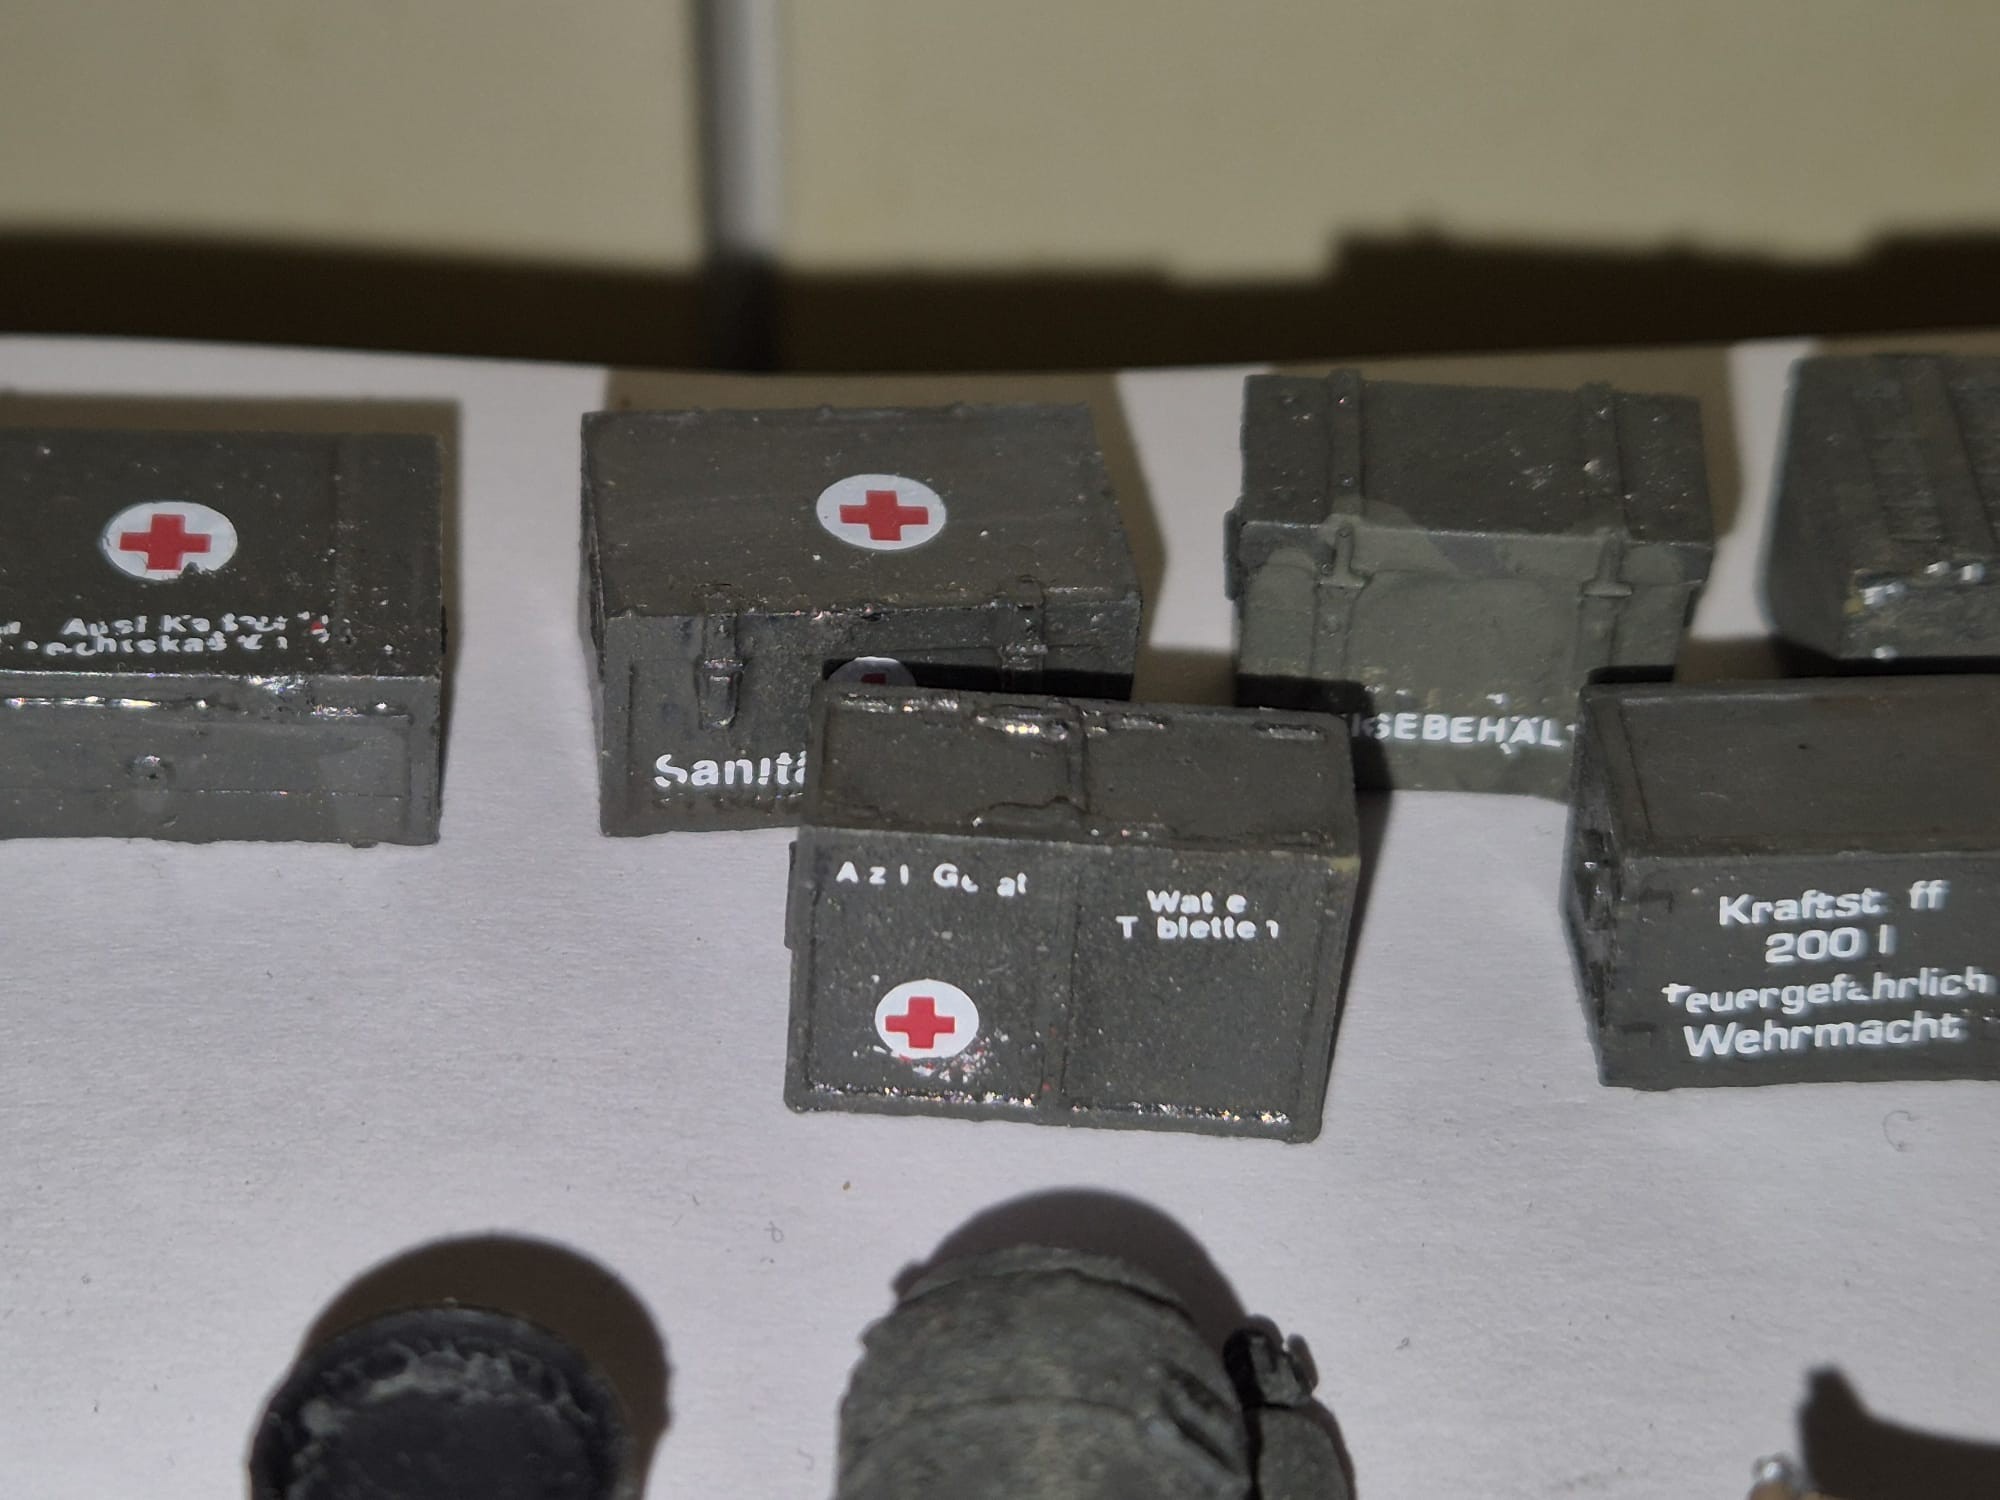
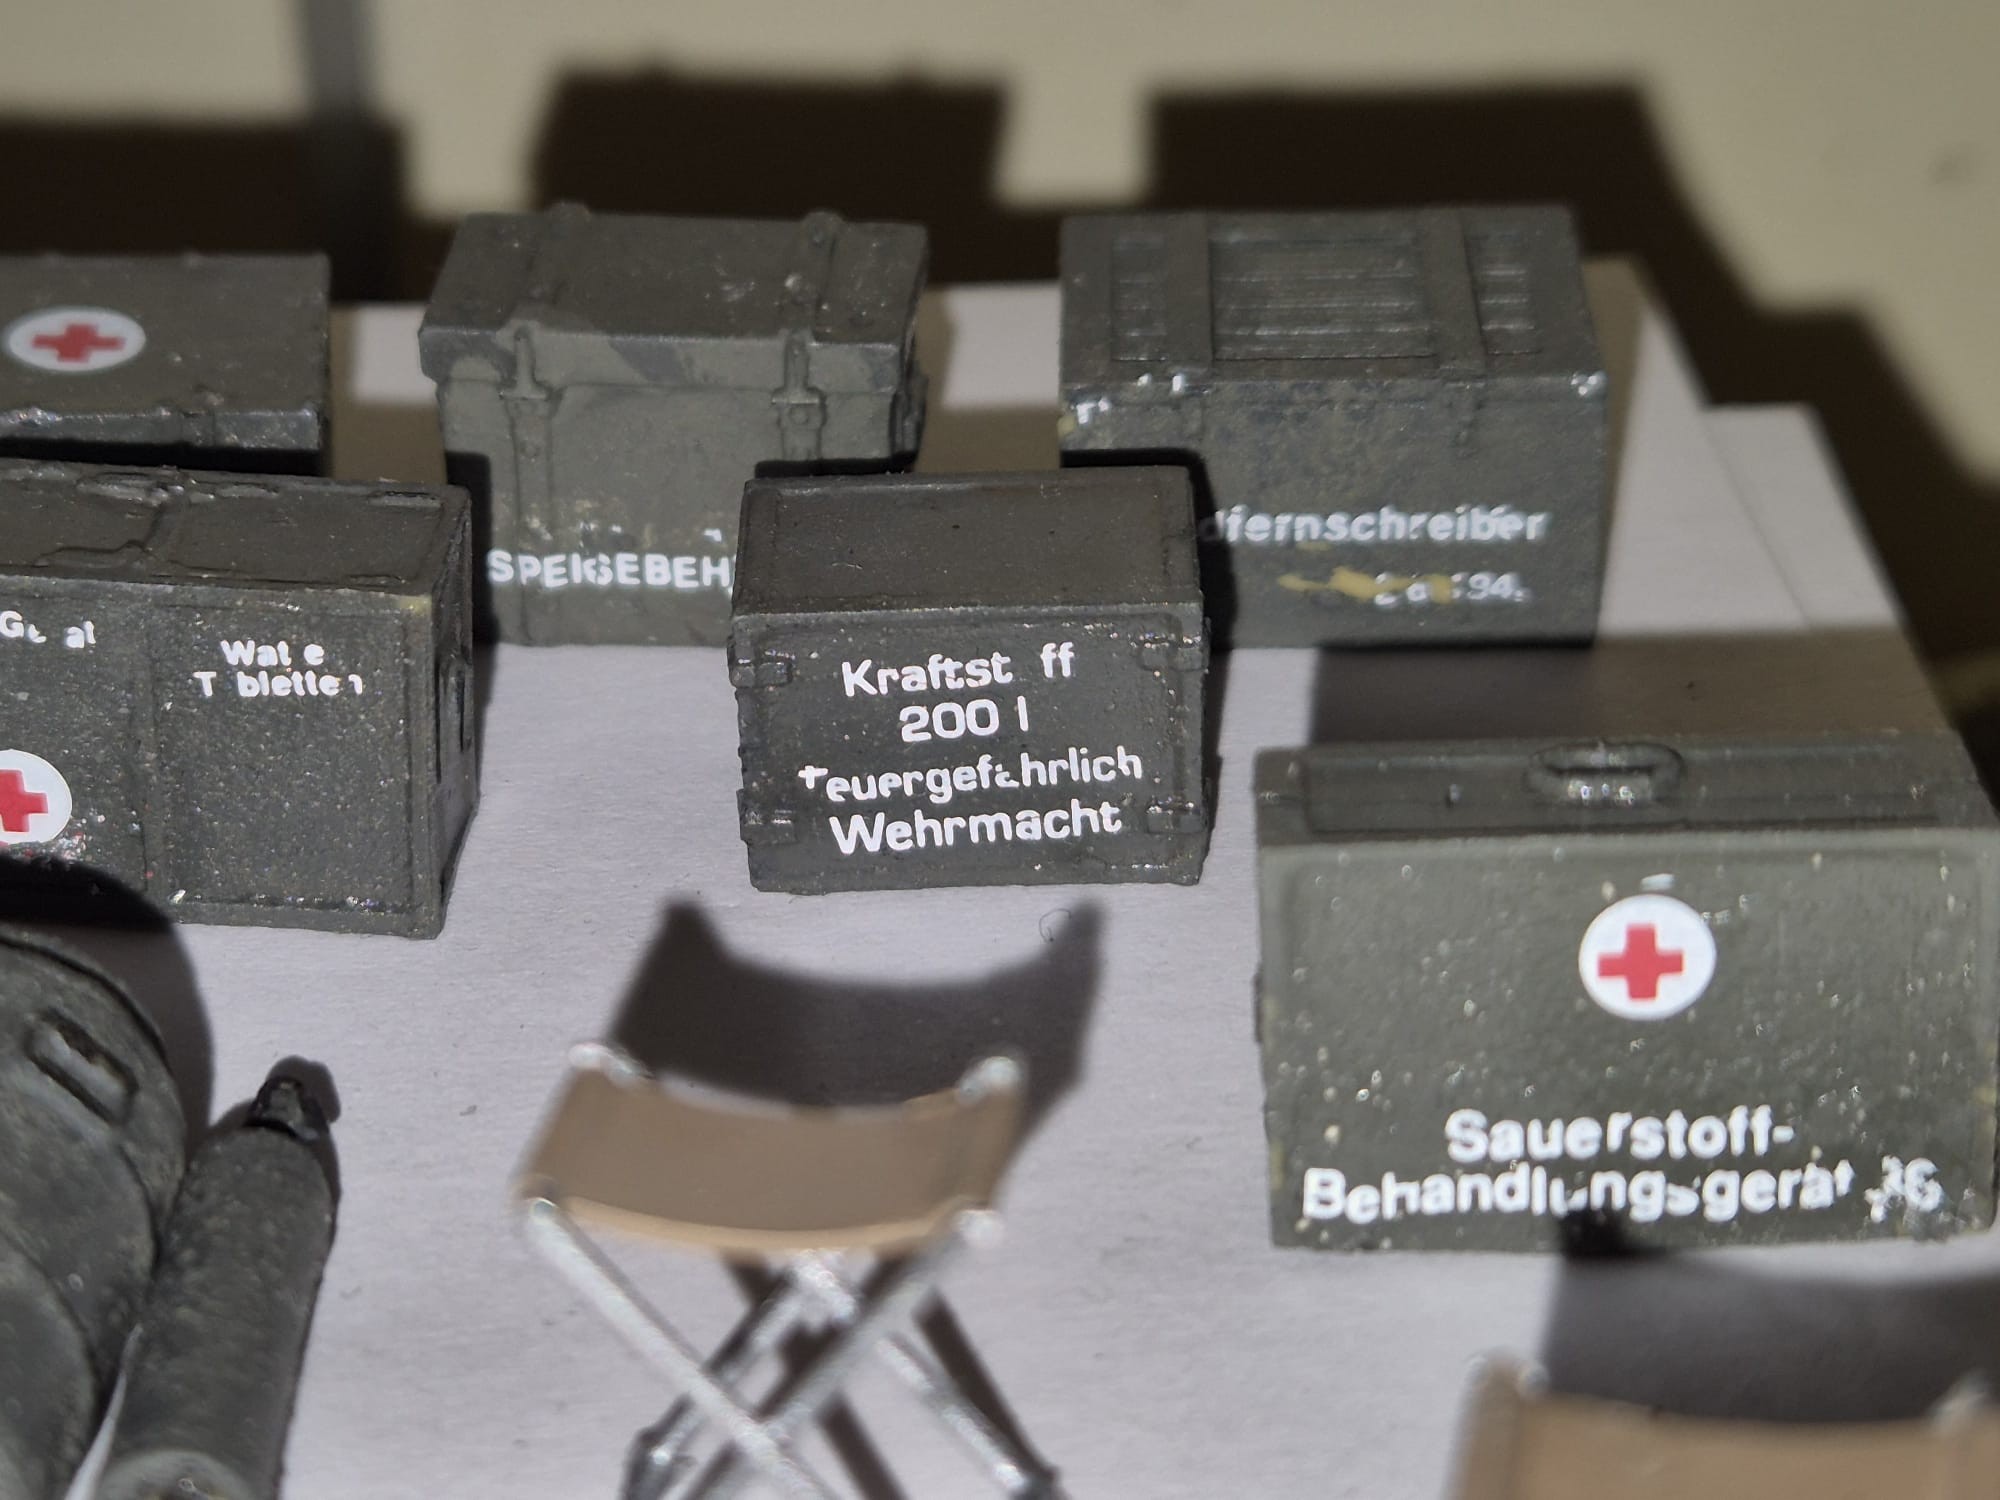
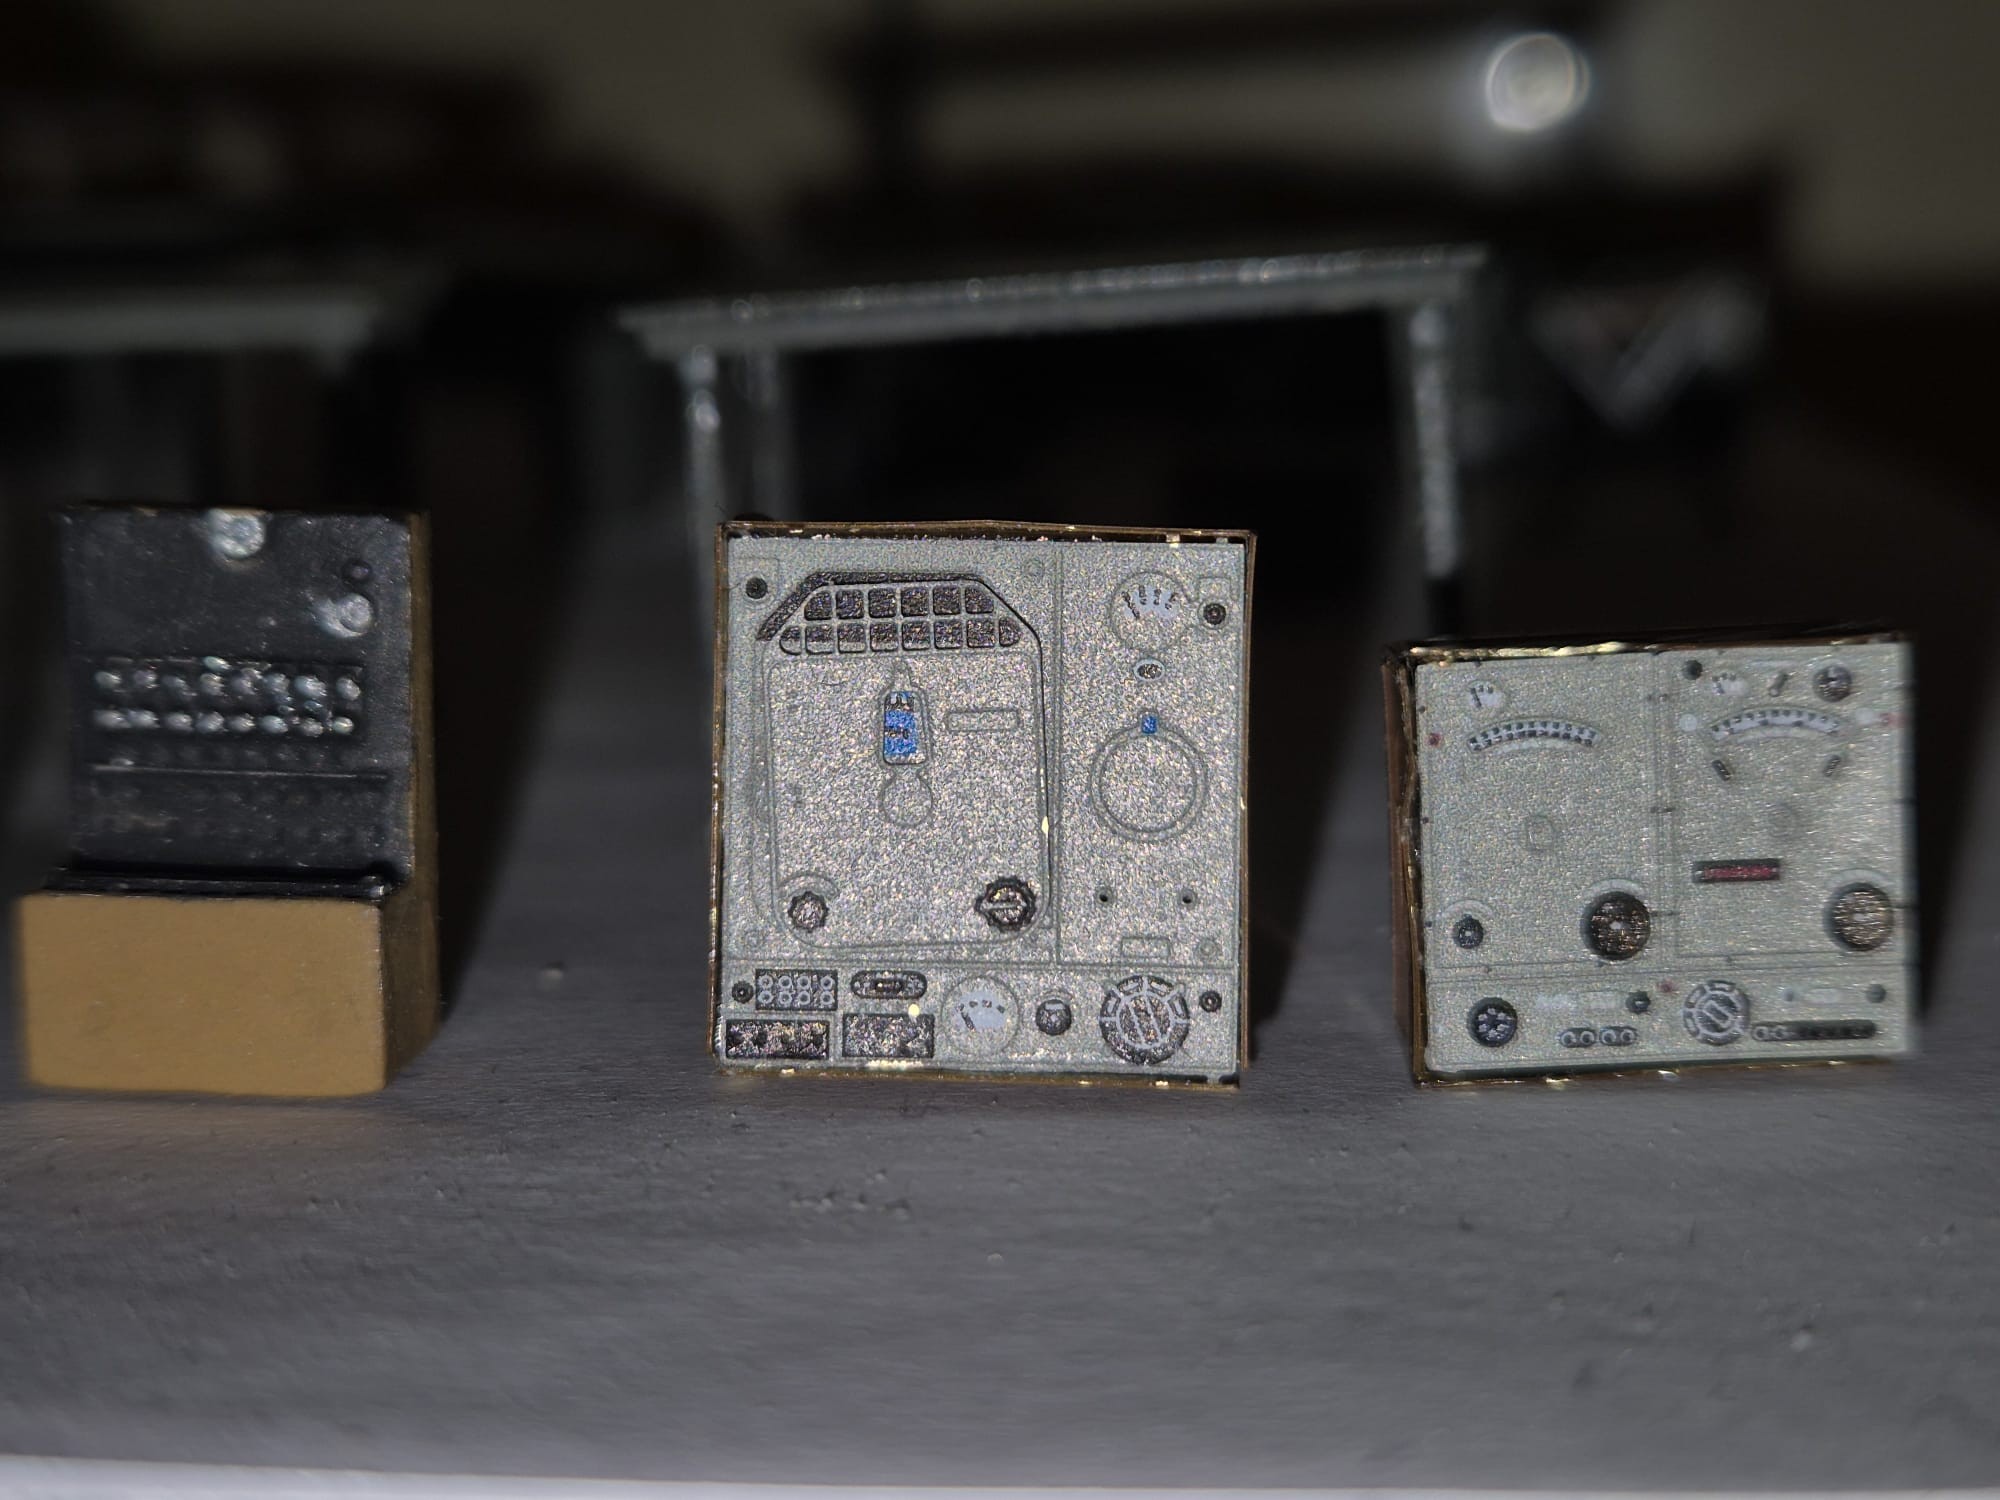
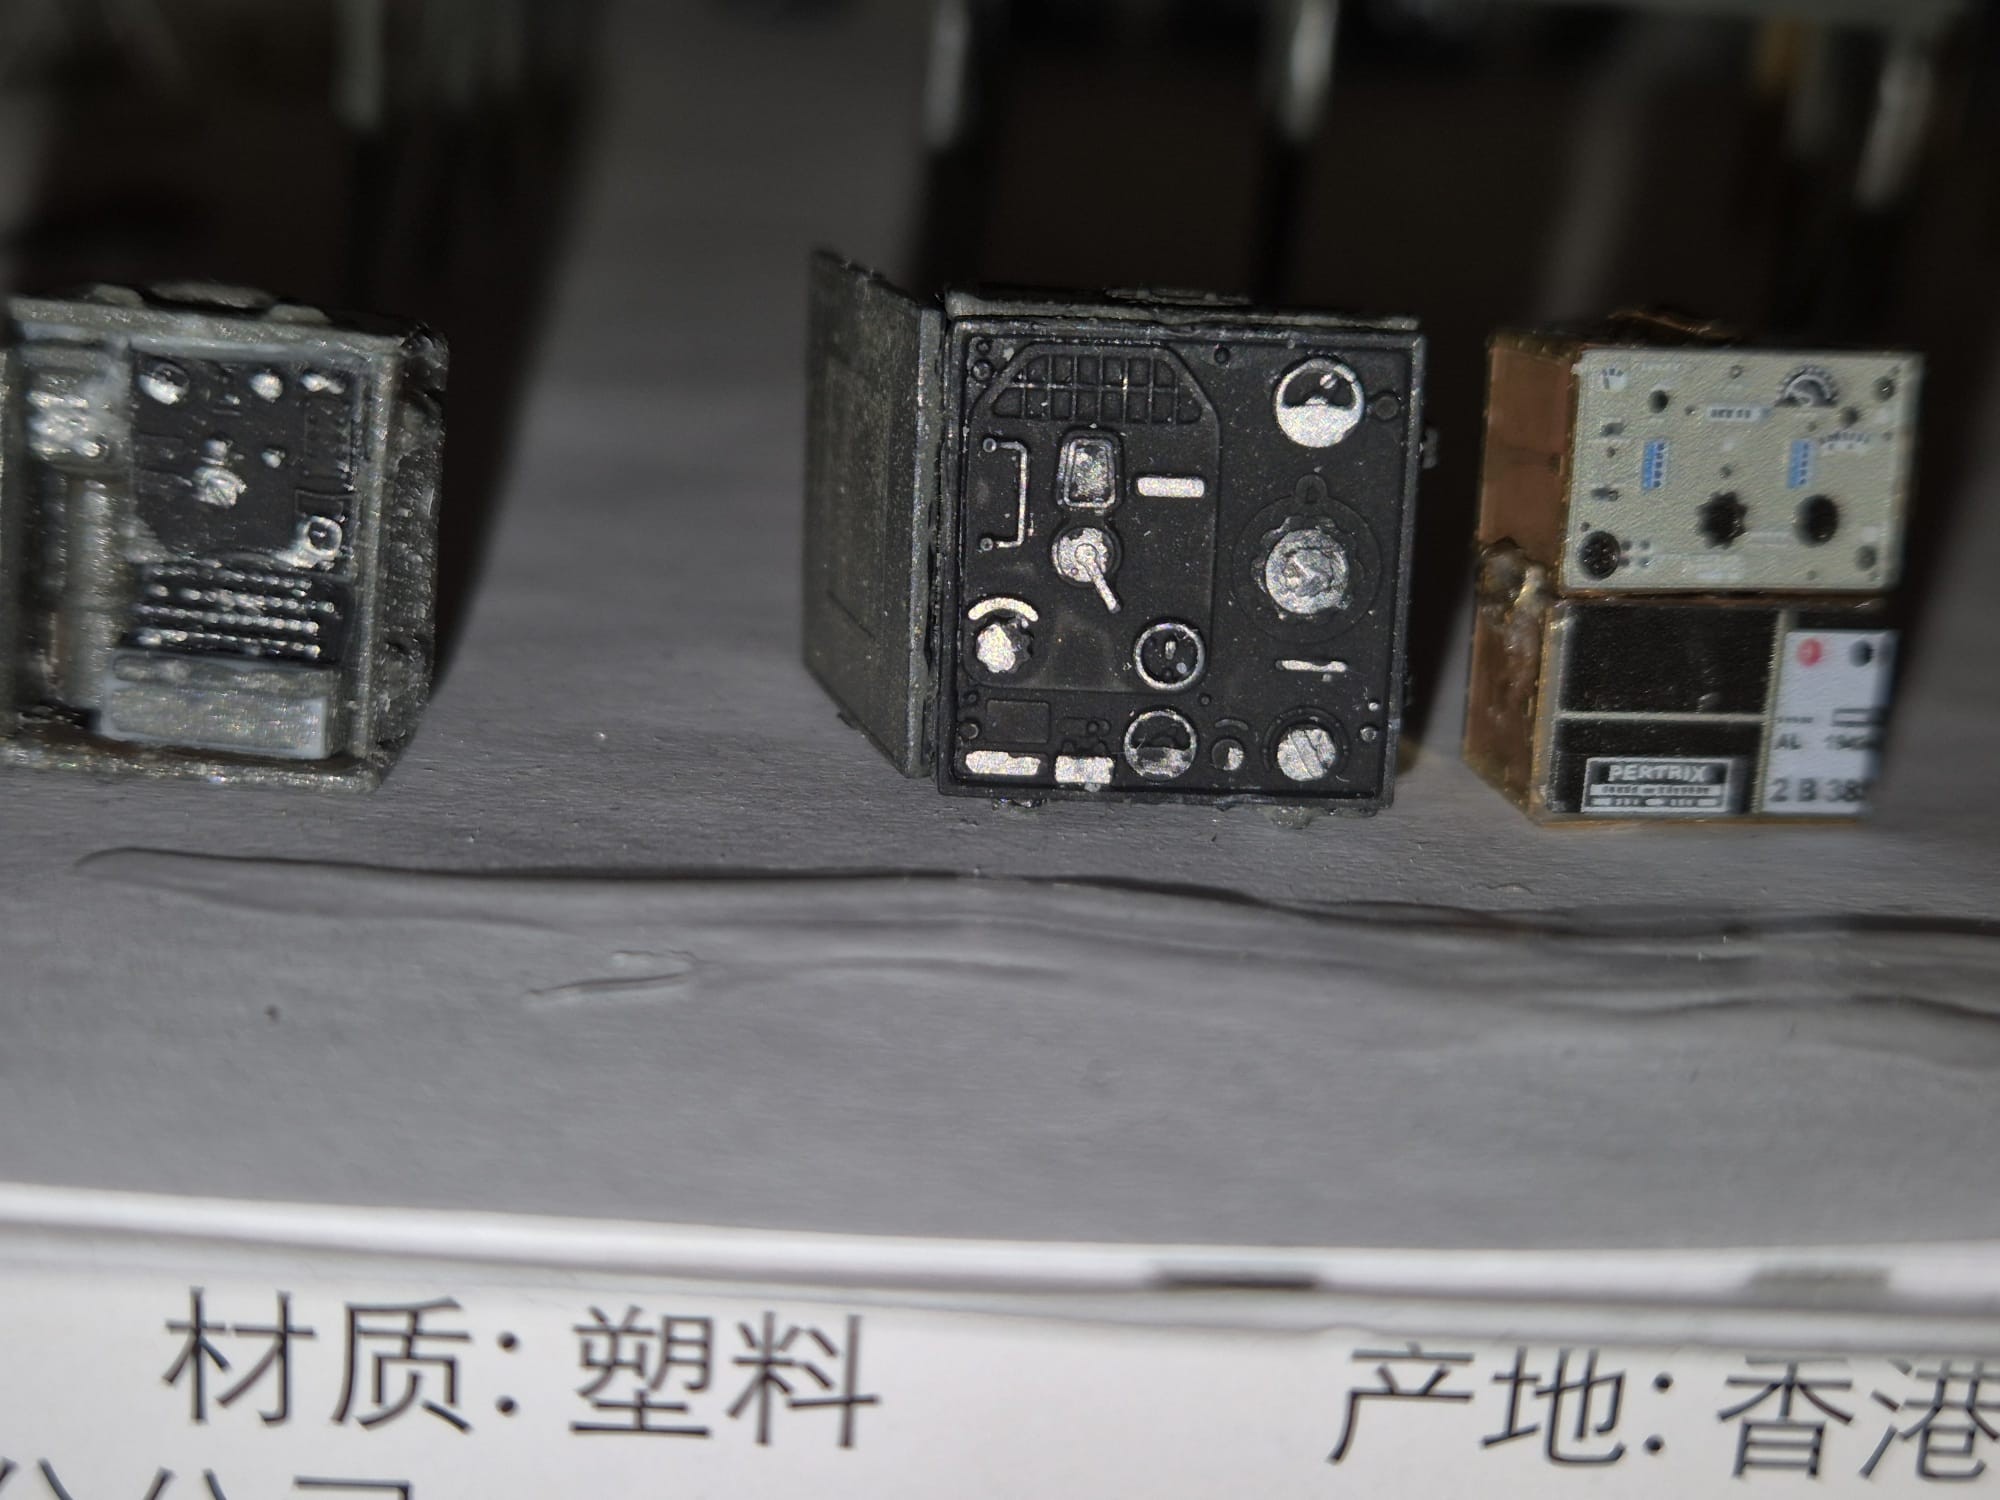
OK so here I introduce you to the “makers” of those said reproductions, starting with an old VLS, or Verlinden resin offering, which also includes Medical Equipment and other Field Stuff…


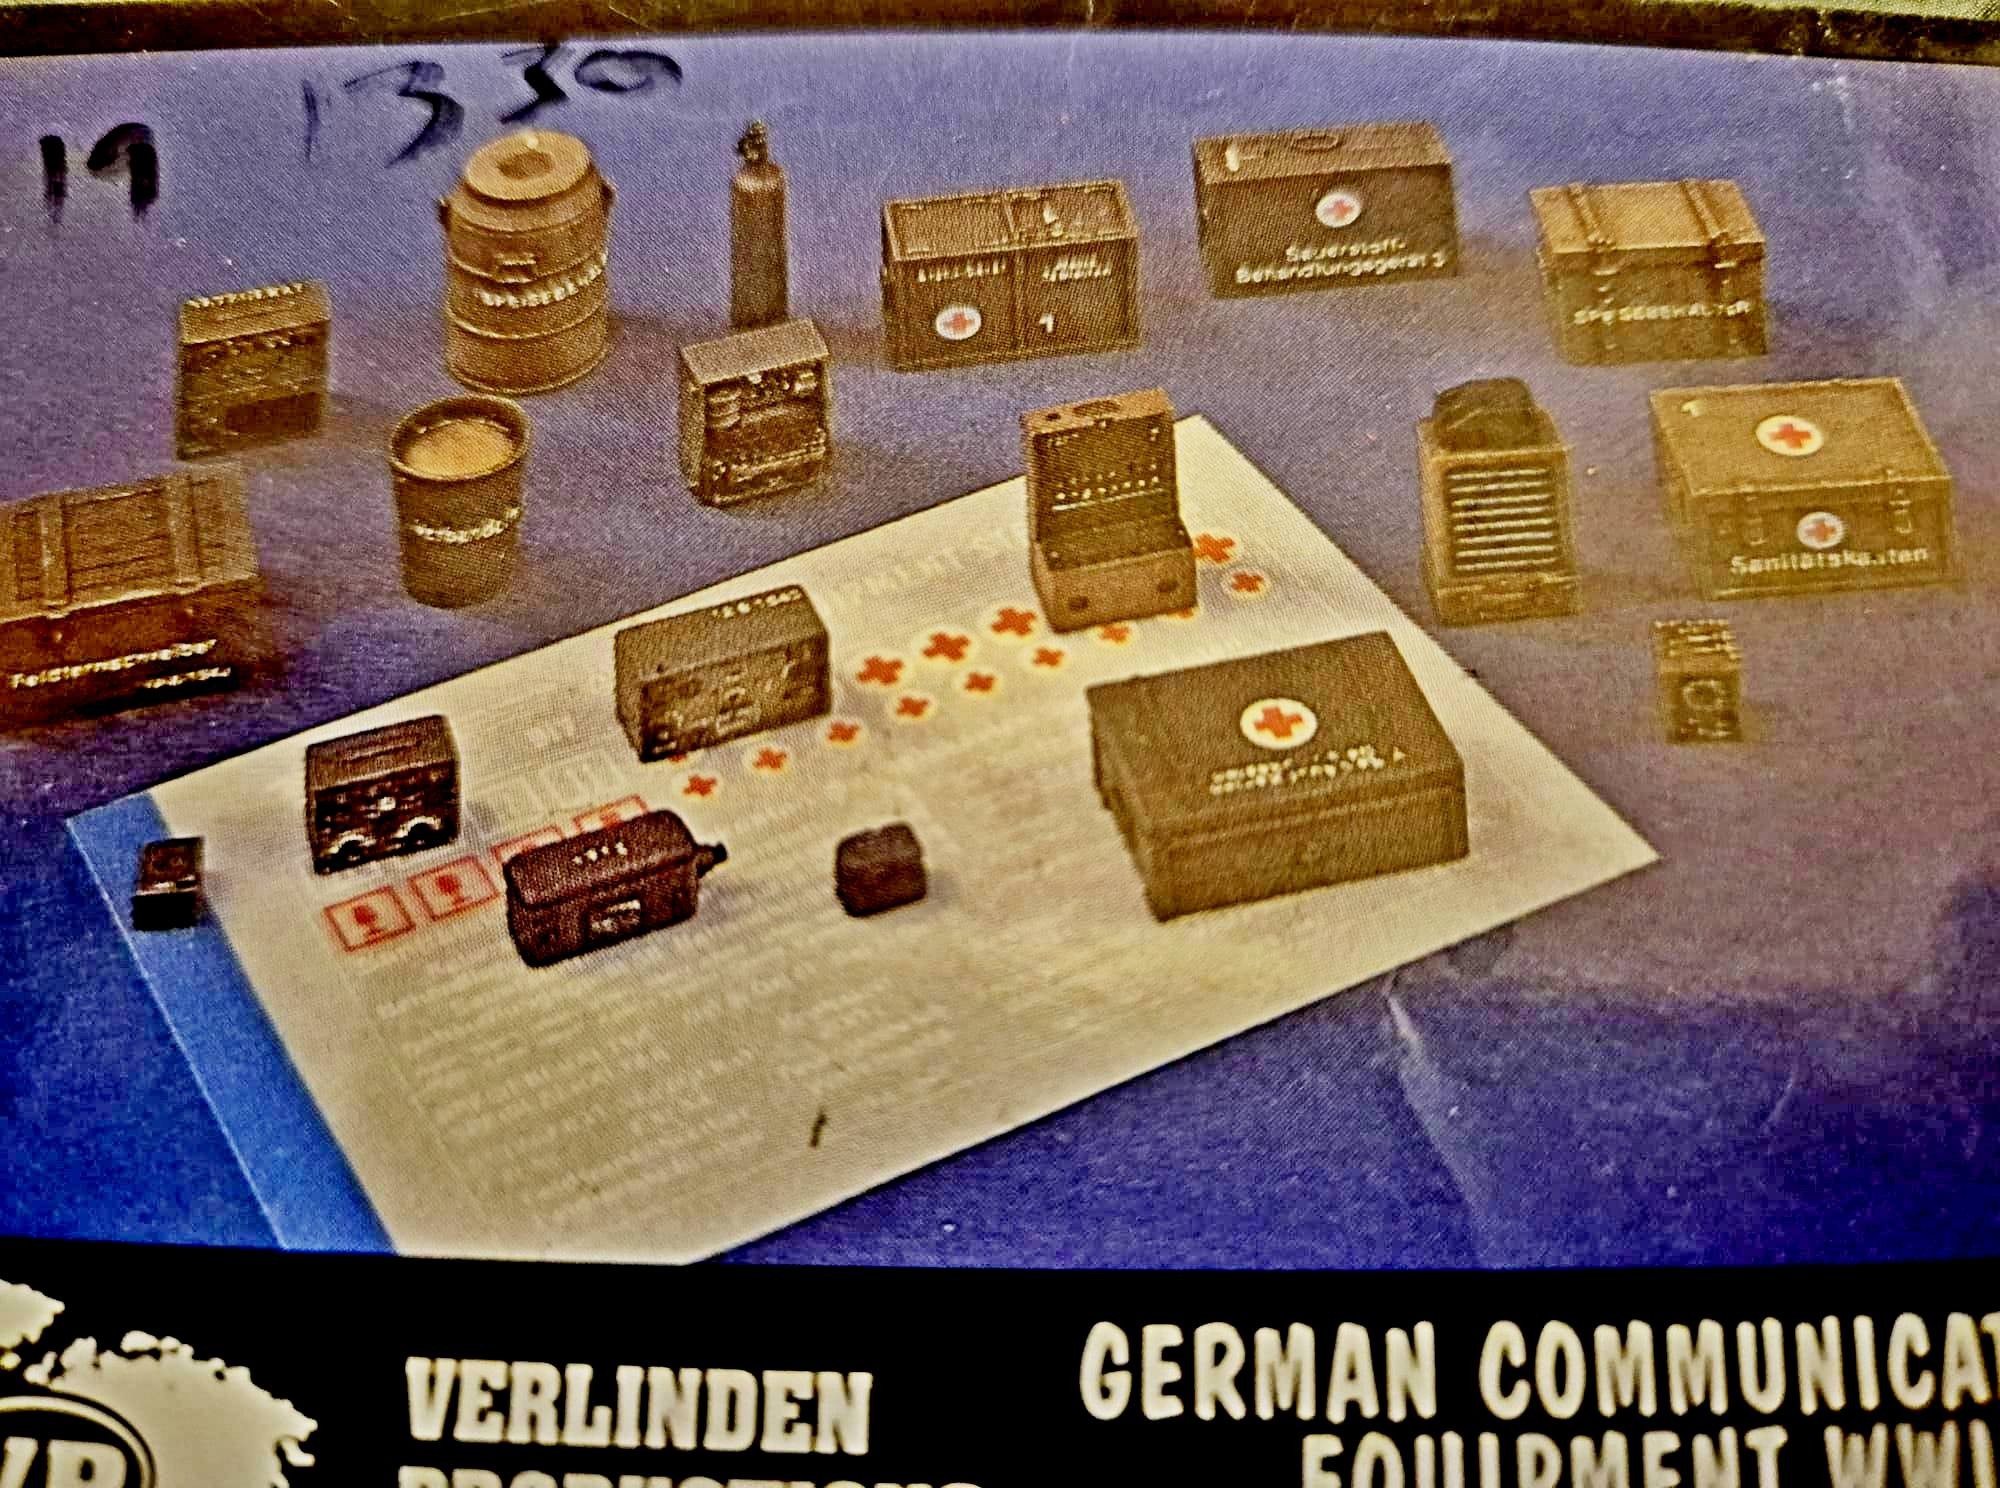
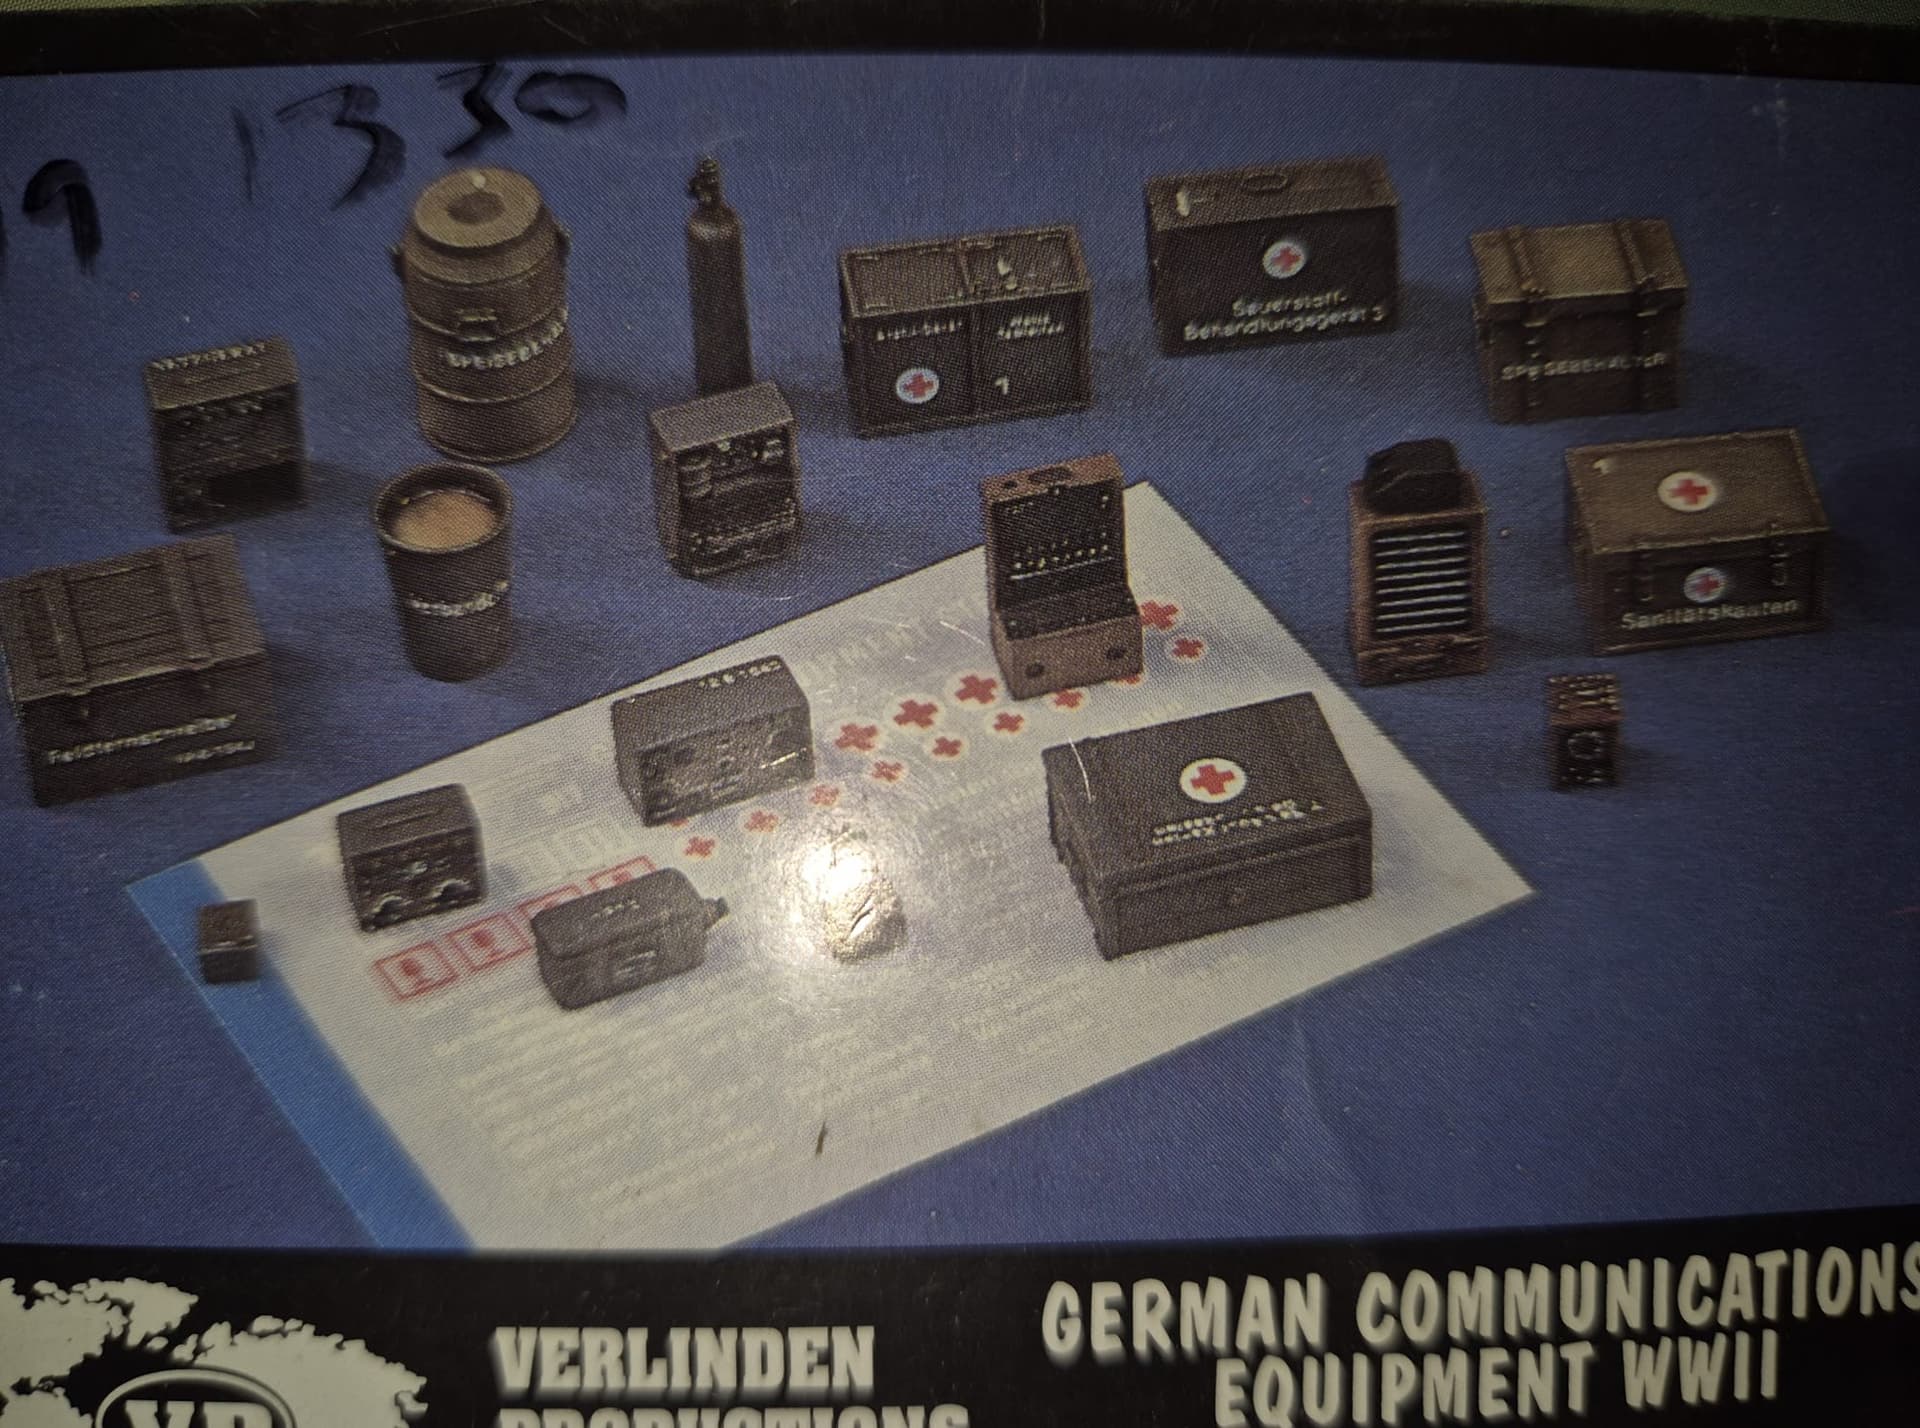
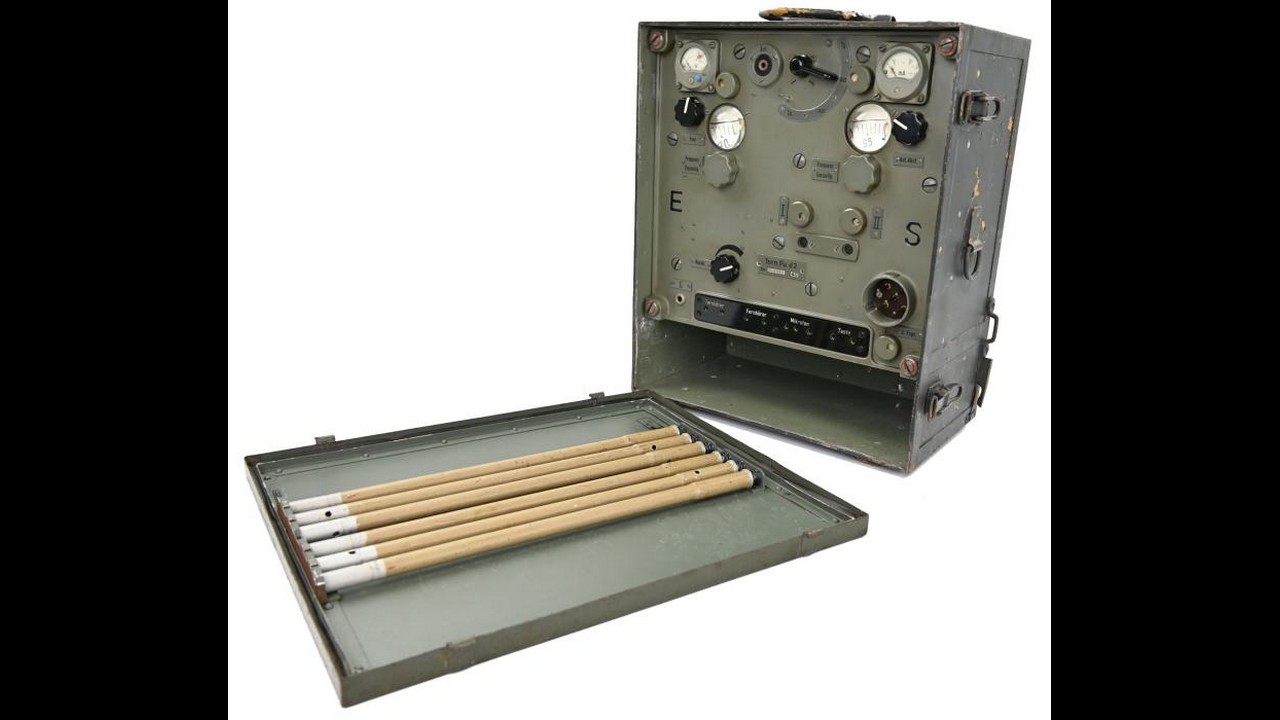
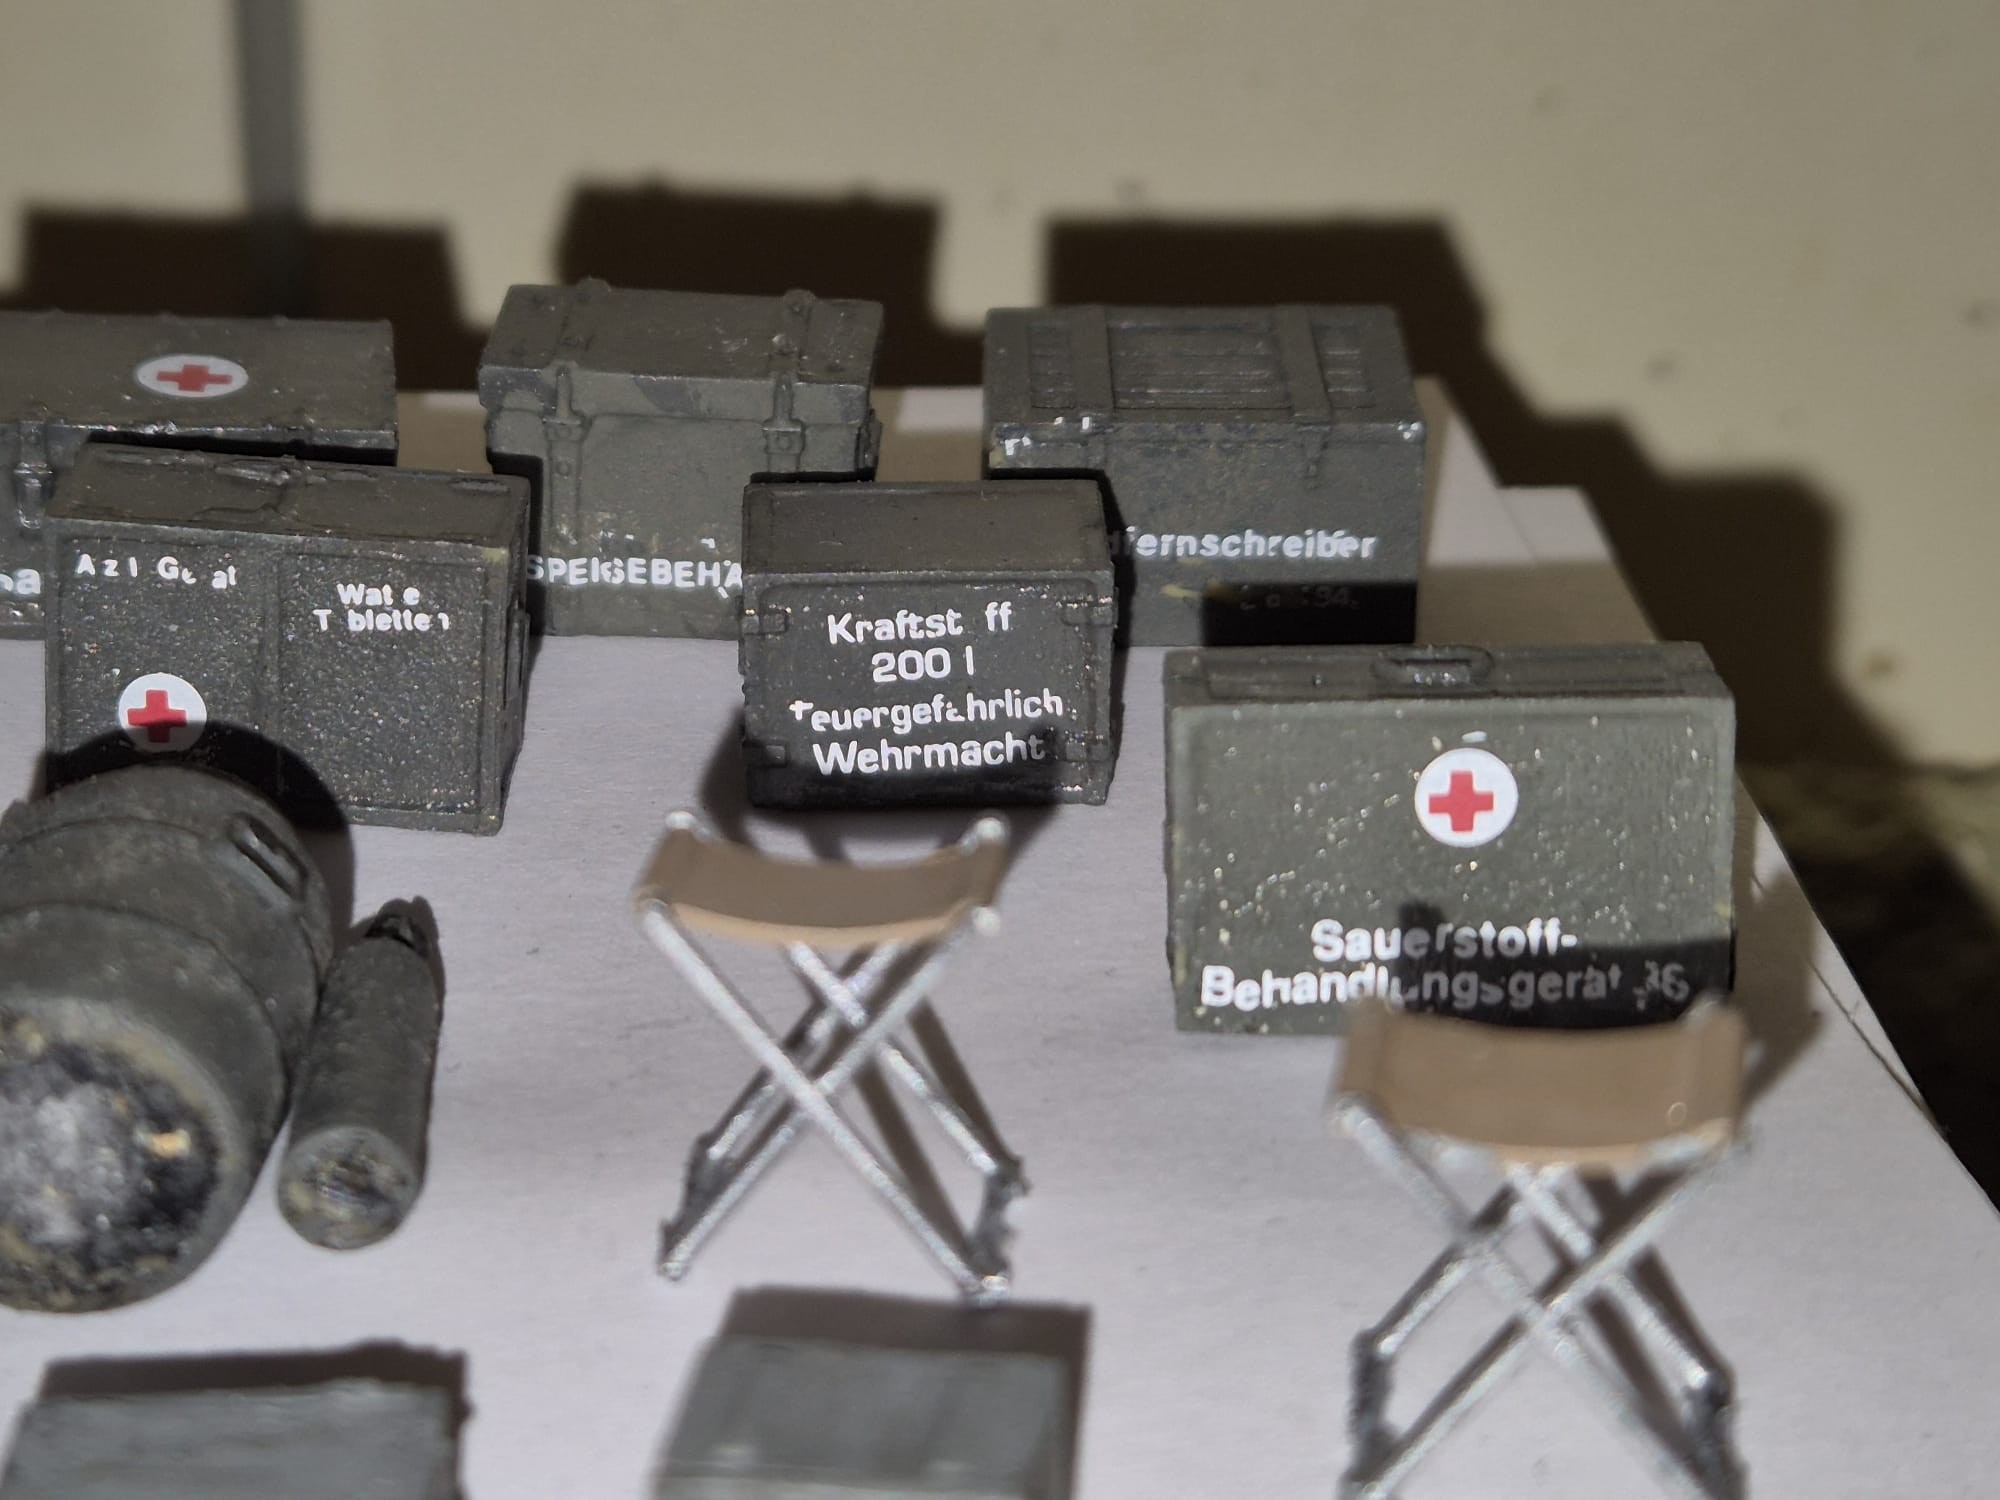
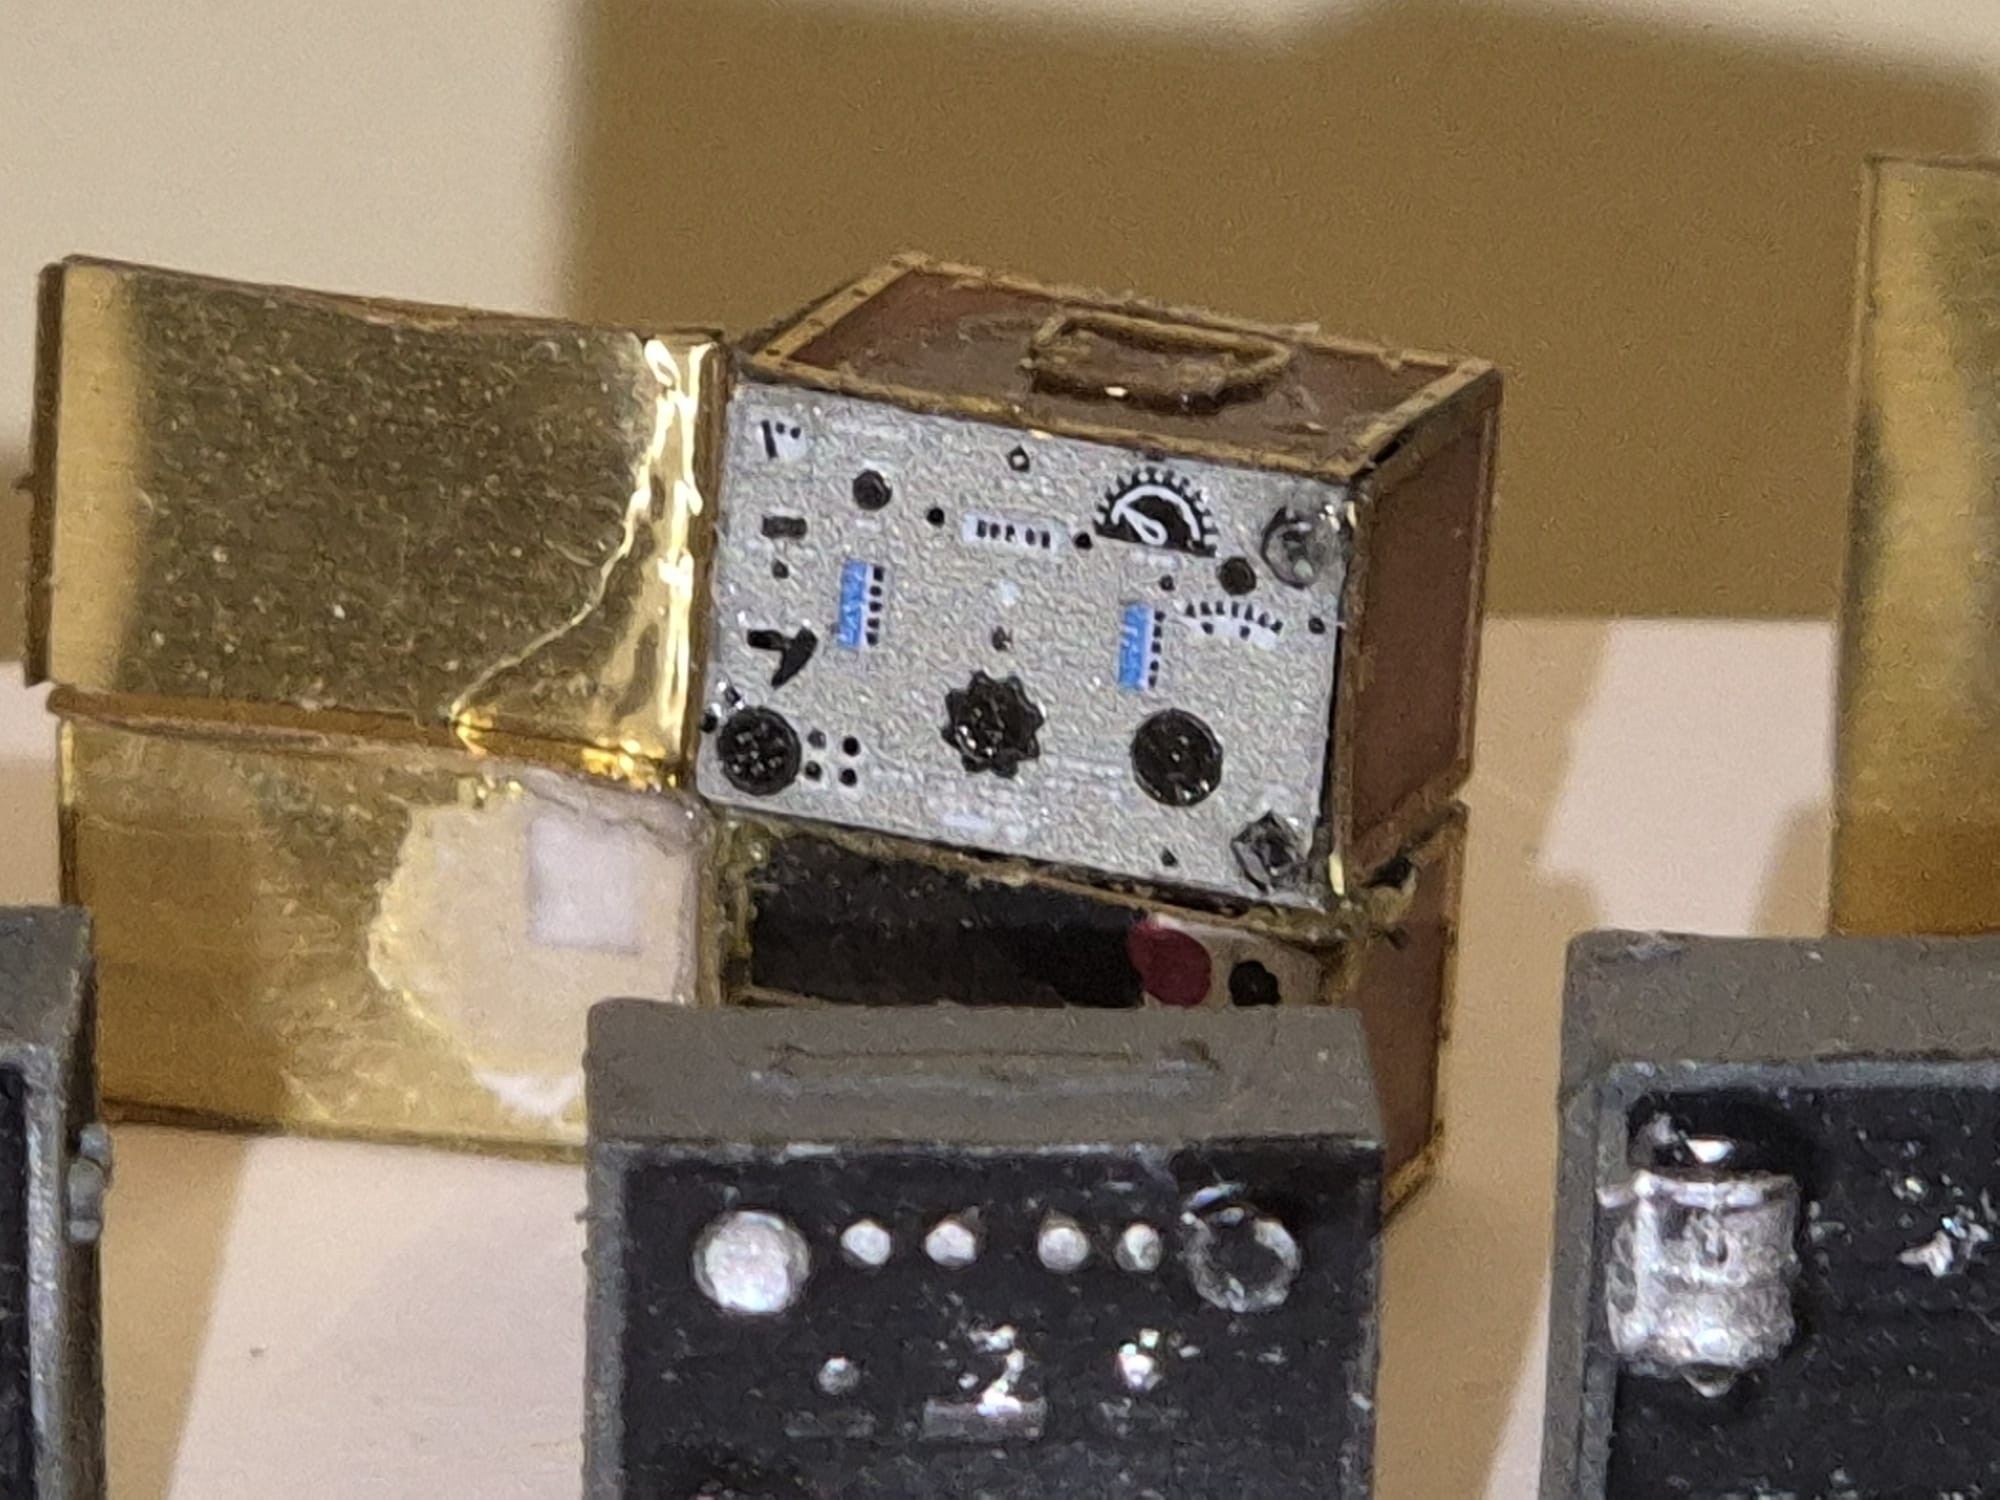
Nice looking at first glance, but forget instructions, there are none except for what you see in the tiny picture they present and even then you can’t really clearly read what’s written on the boxes except for a few exceptions, but you need a powerful magnifying lens to do so. Nothing about how to paint the minuscule details in those tiny things and heaven beware they should have included decals with them.
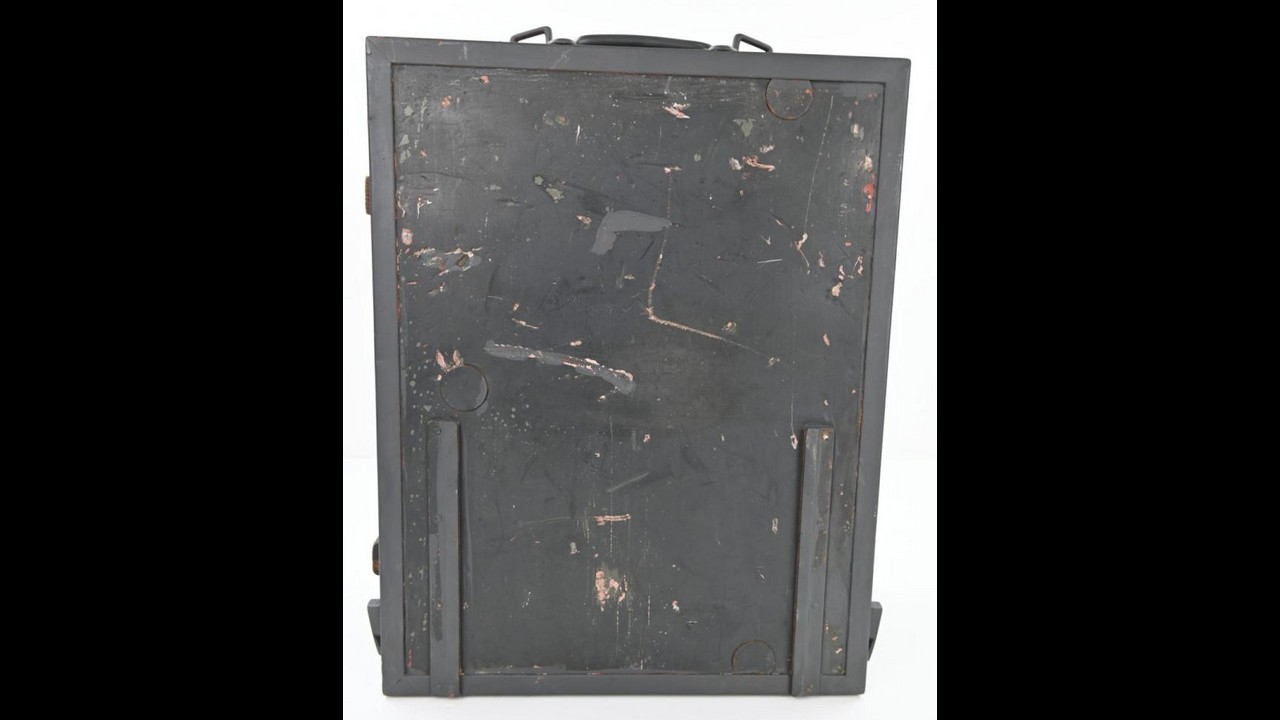
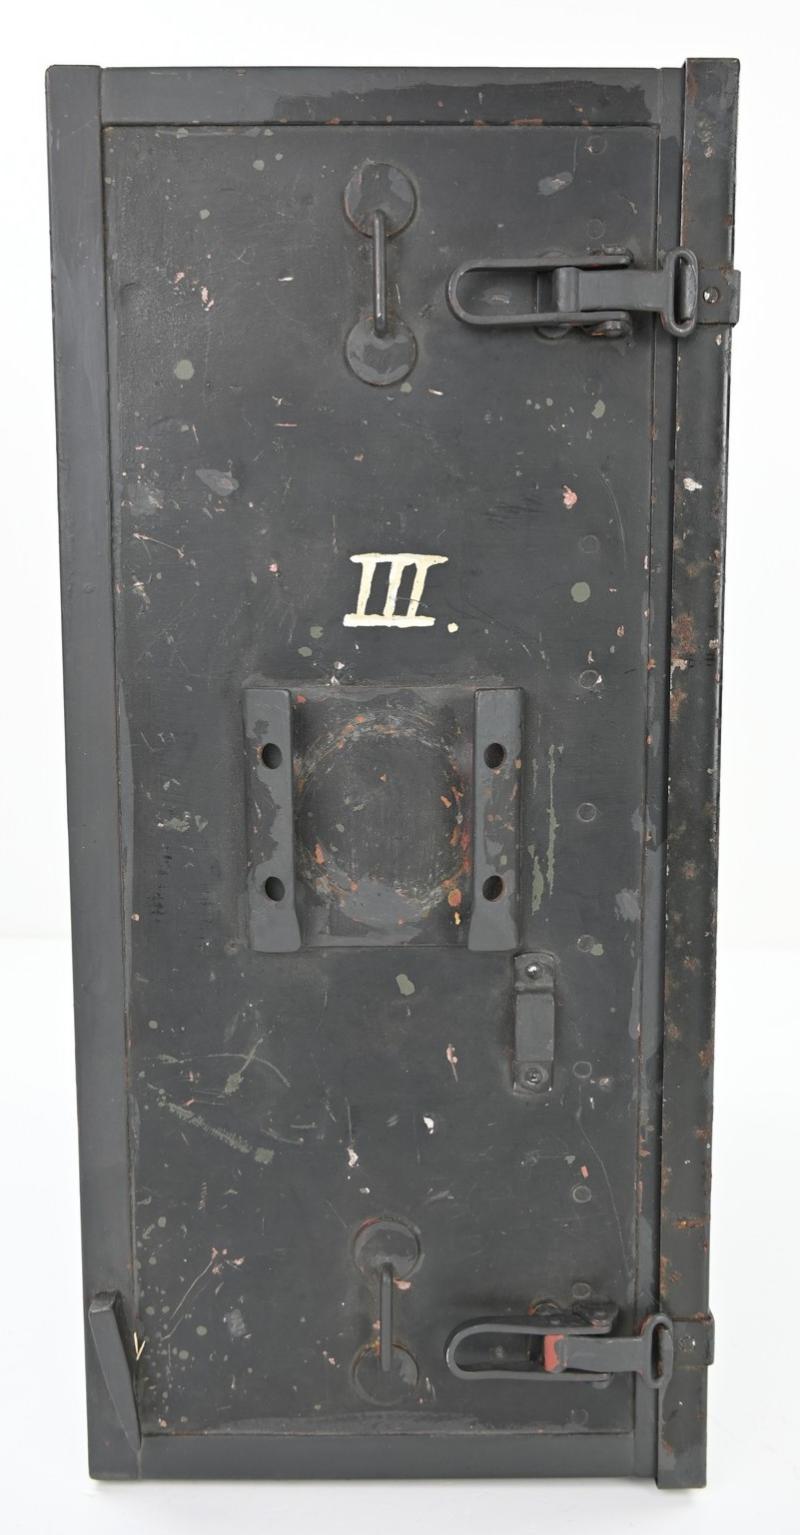
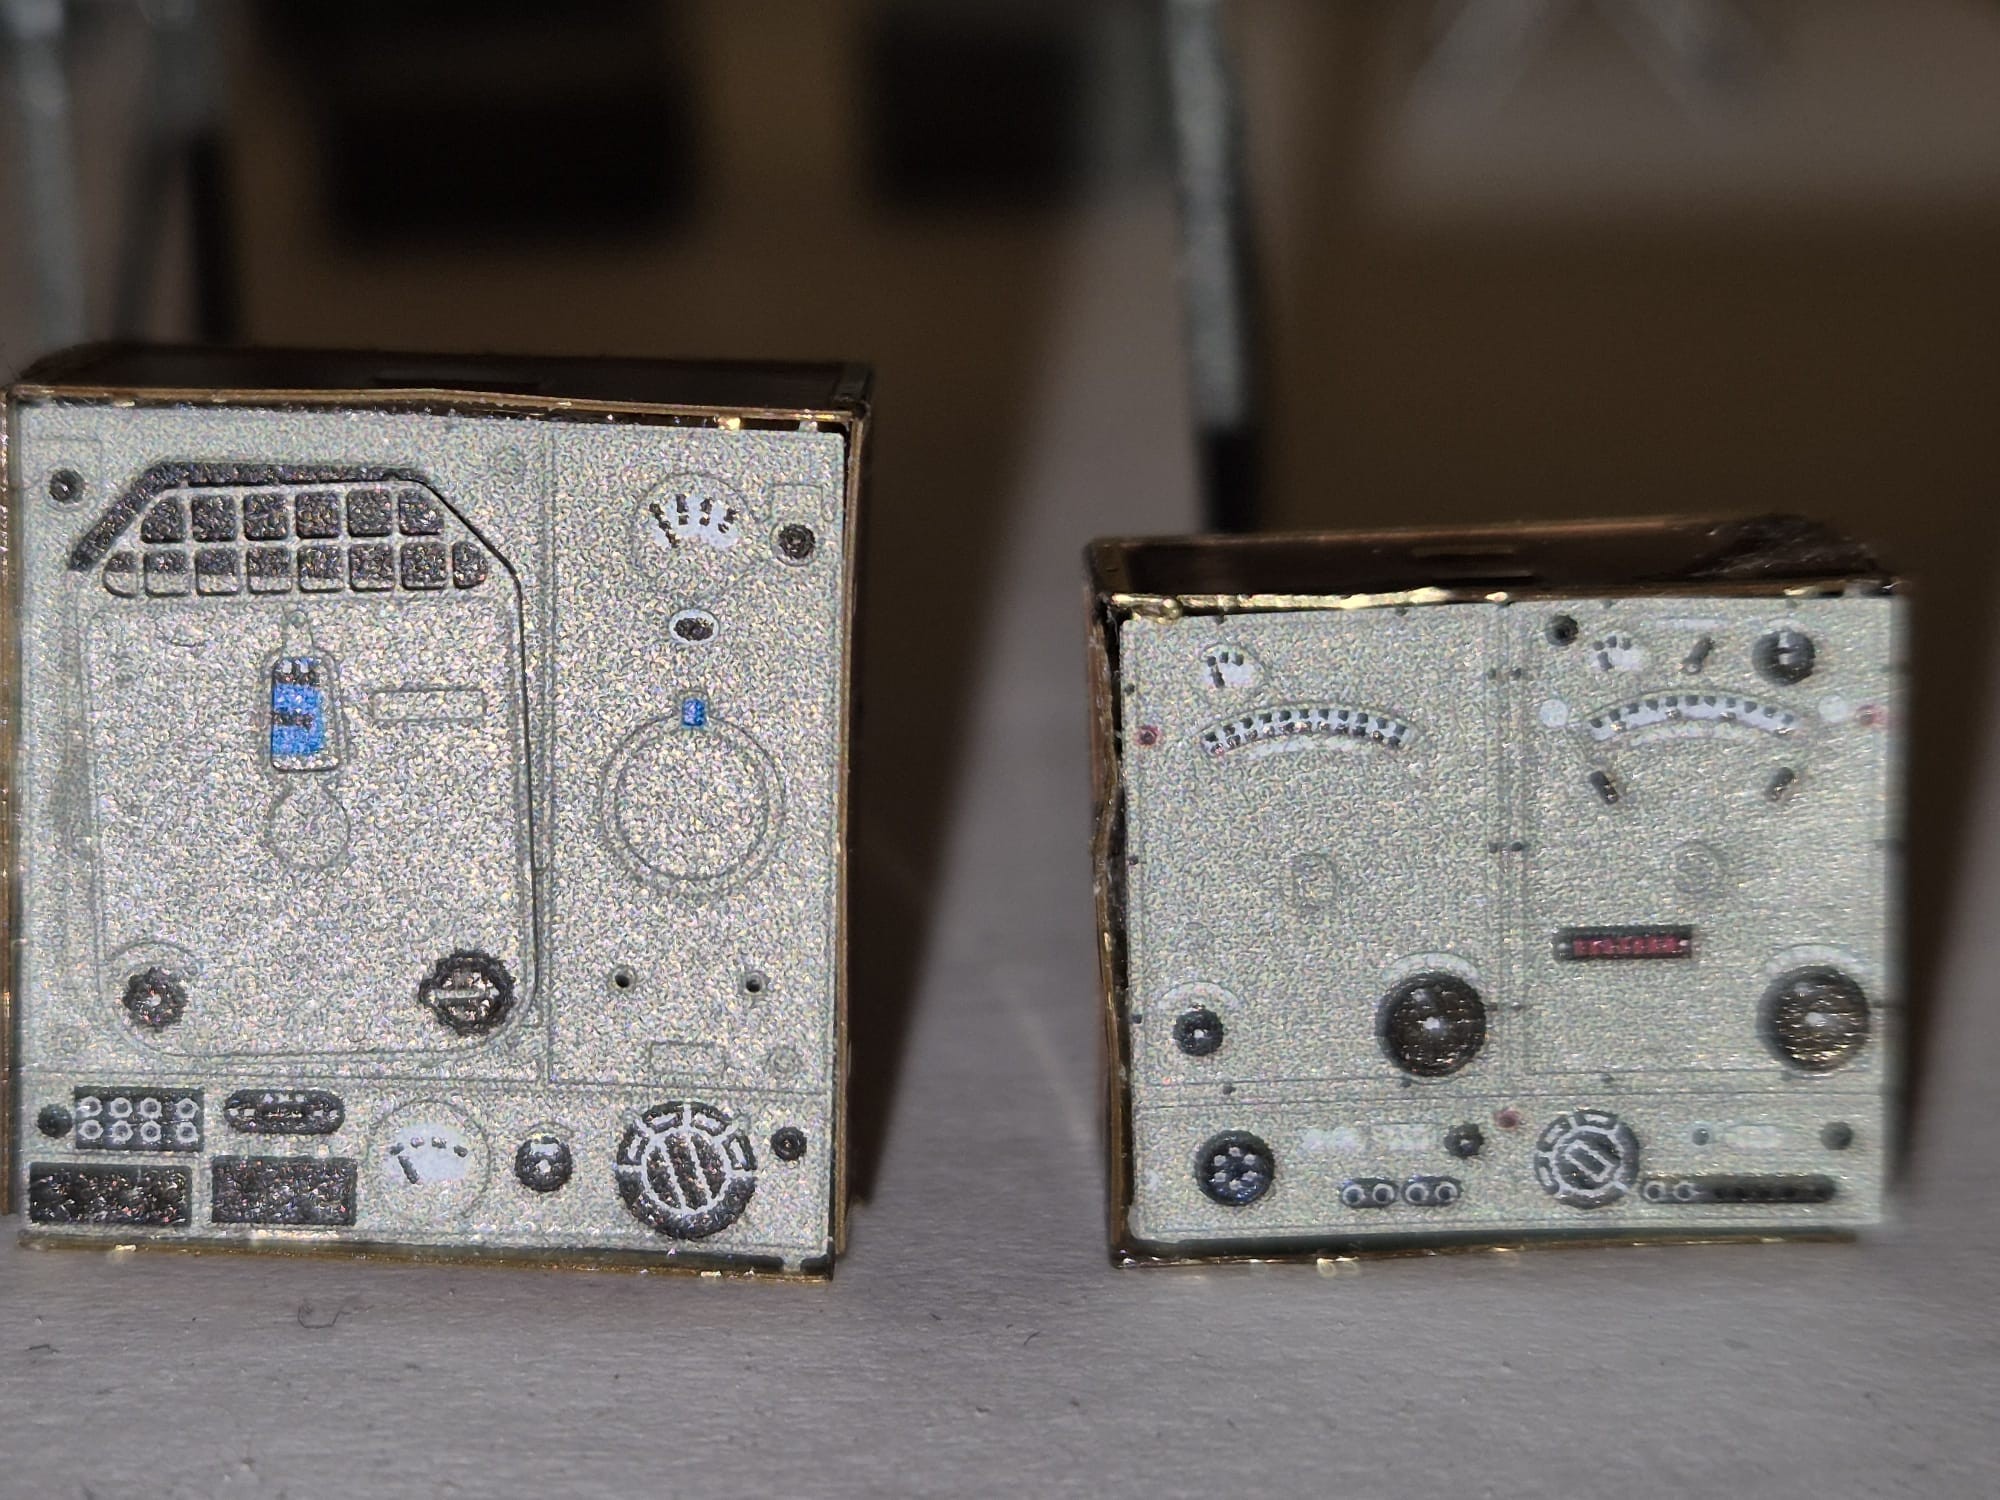
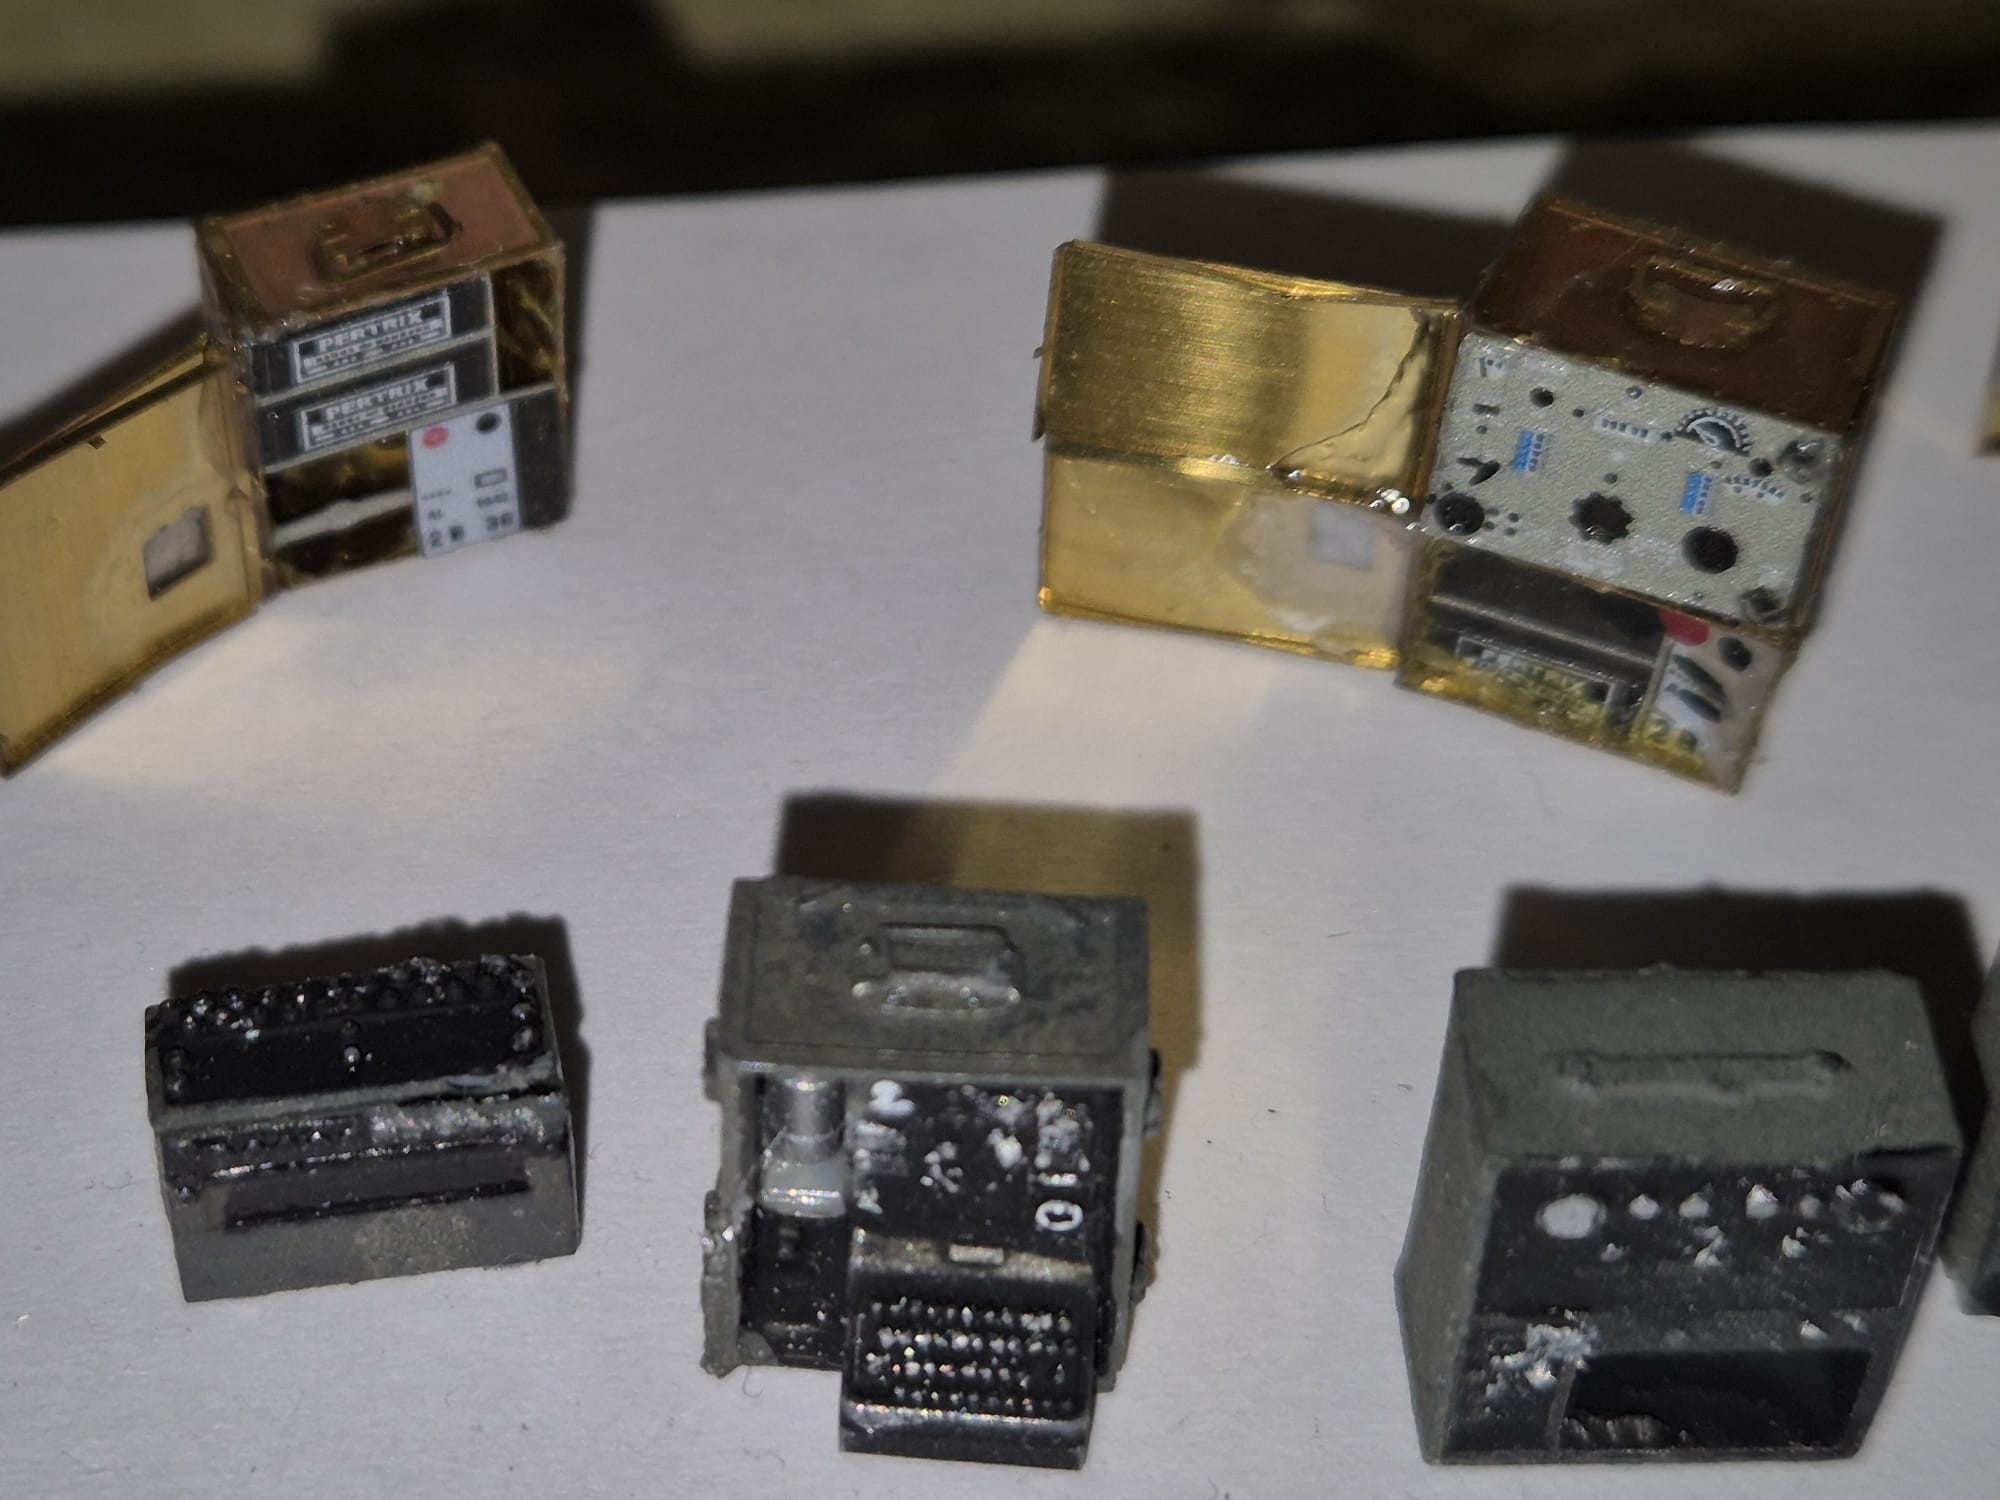
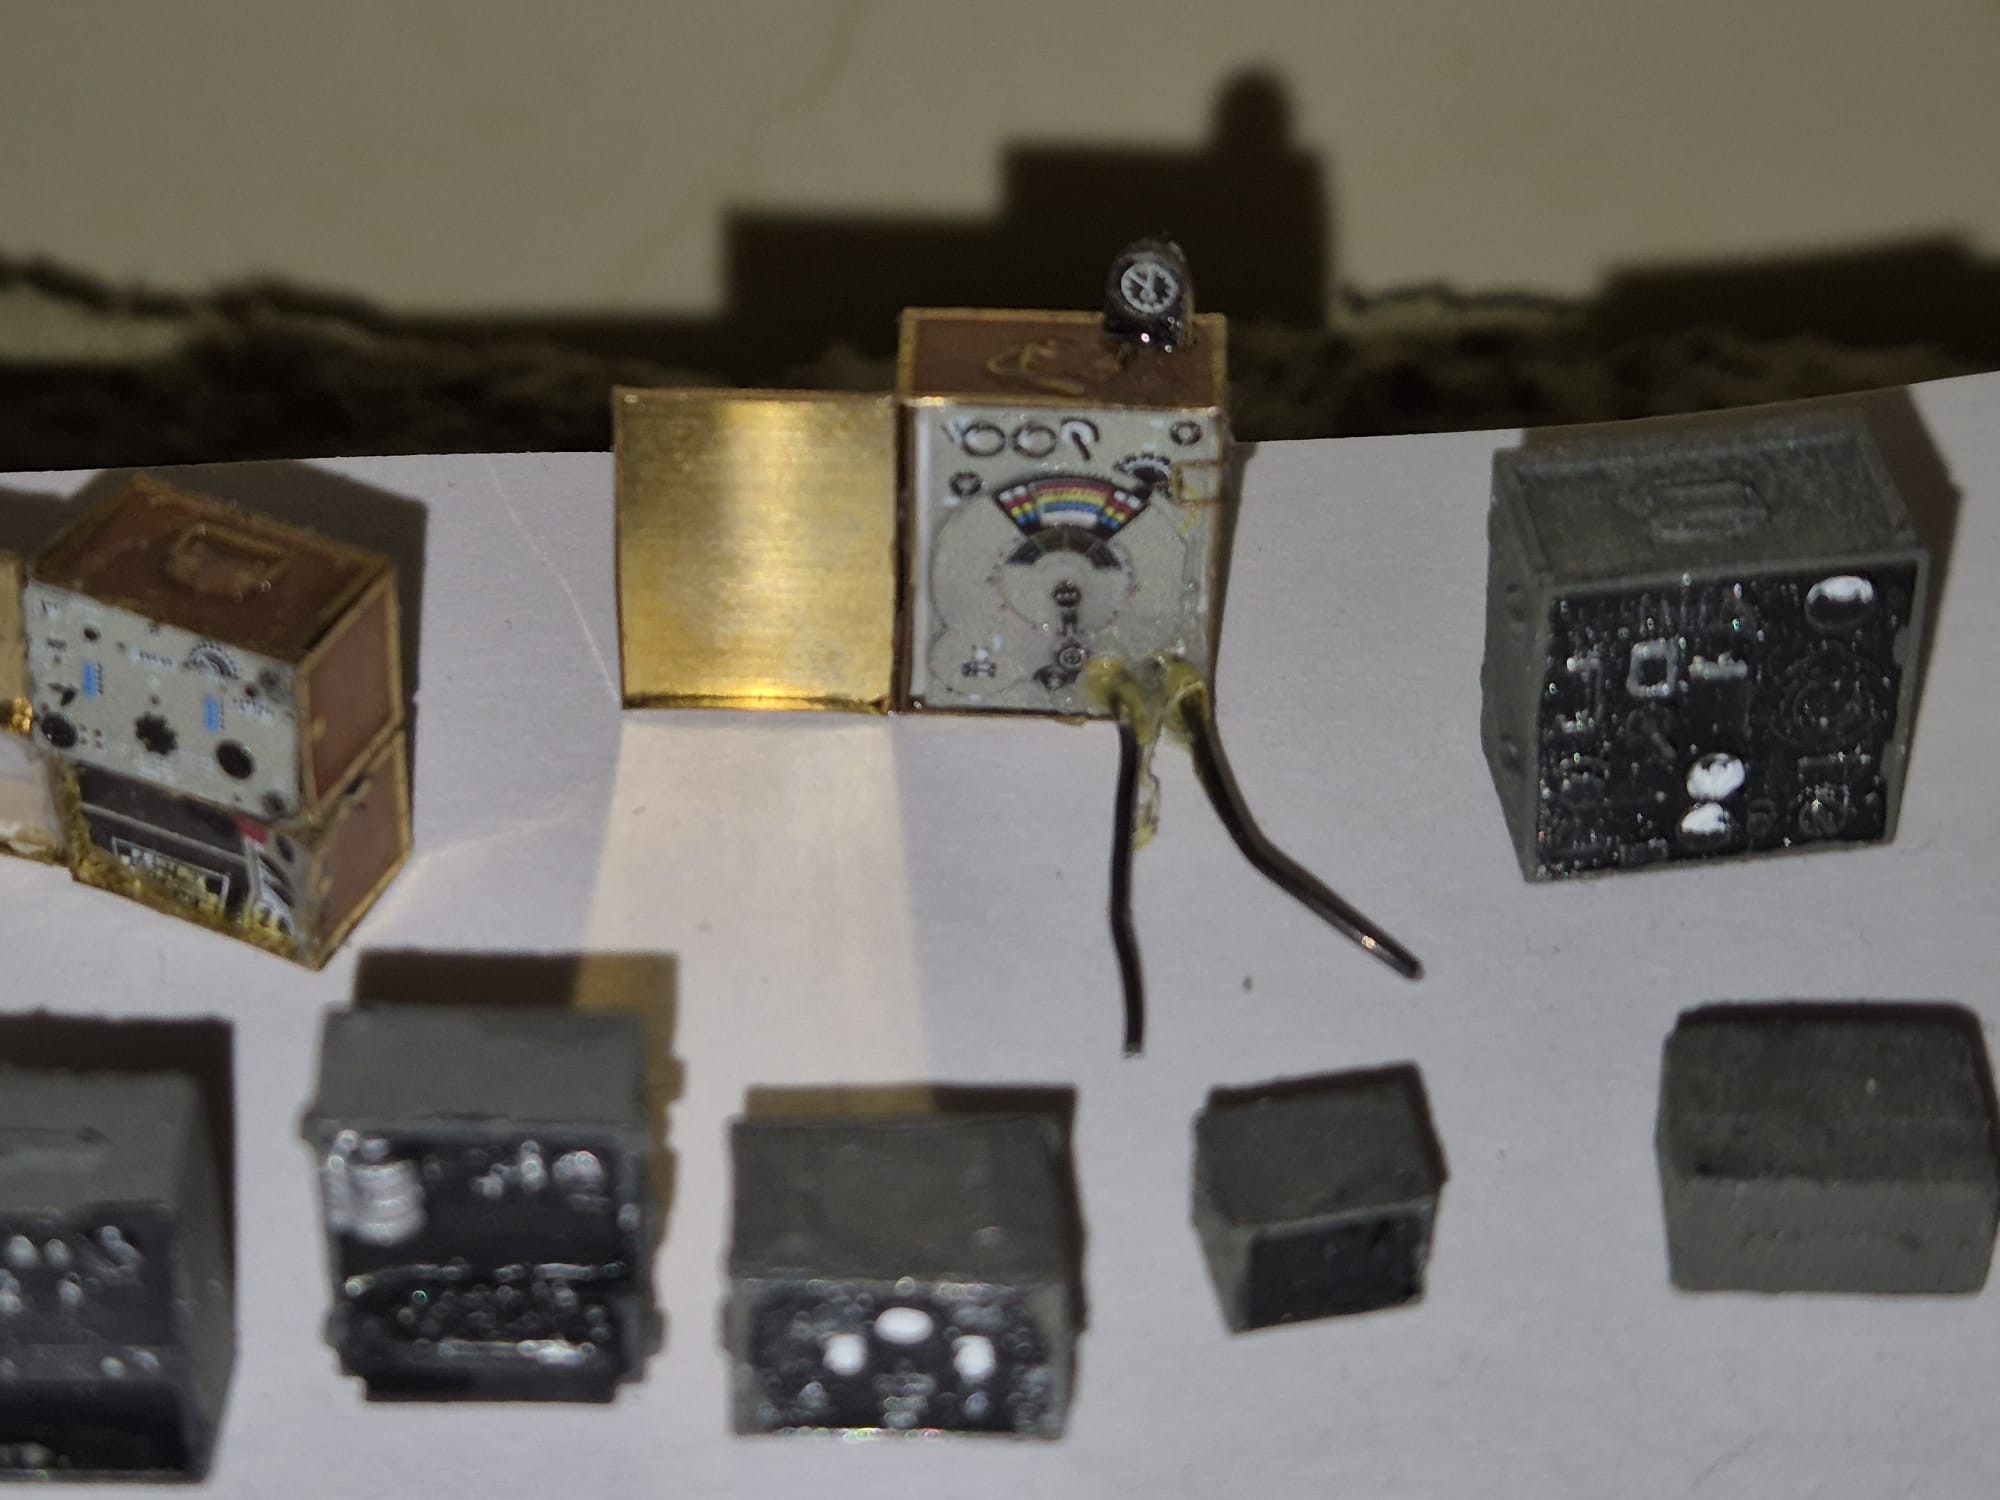
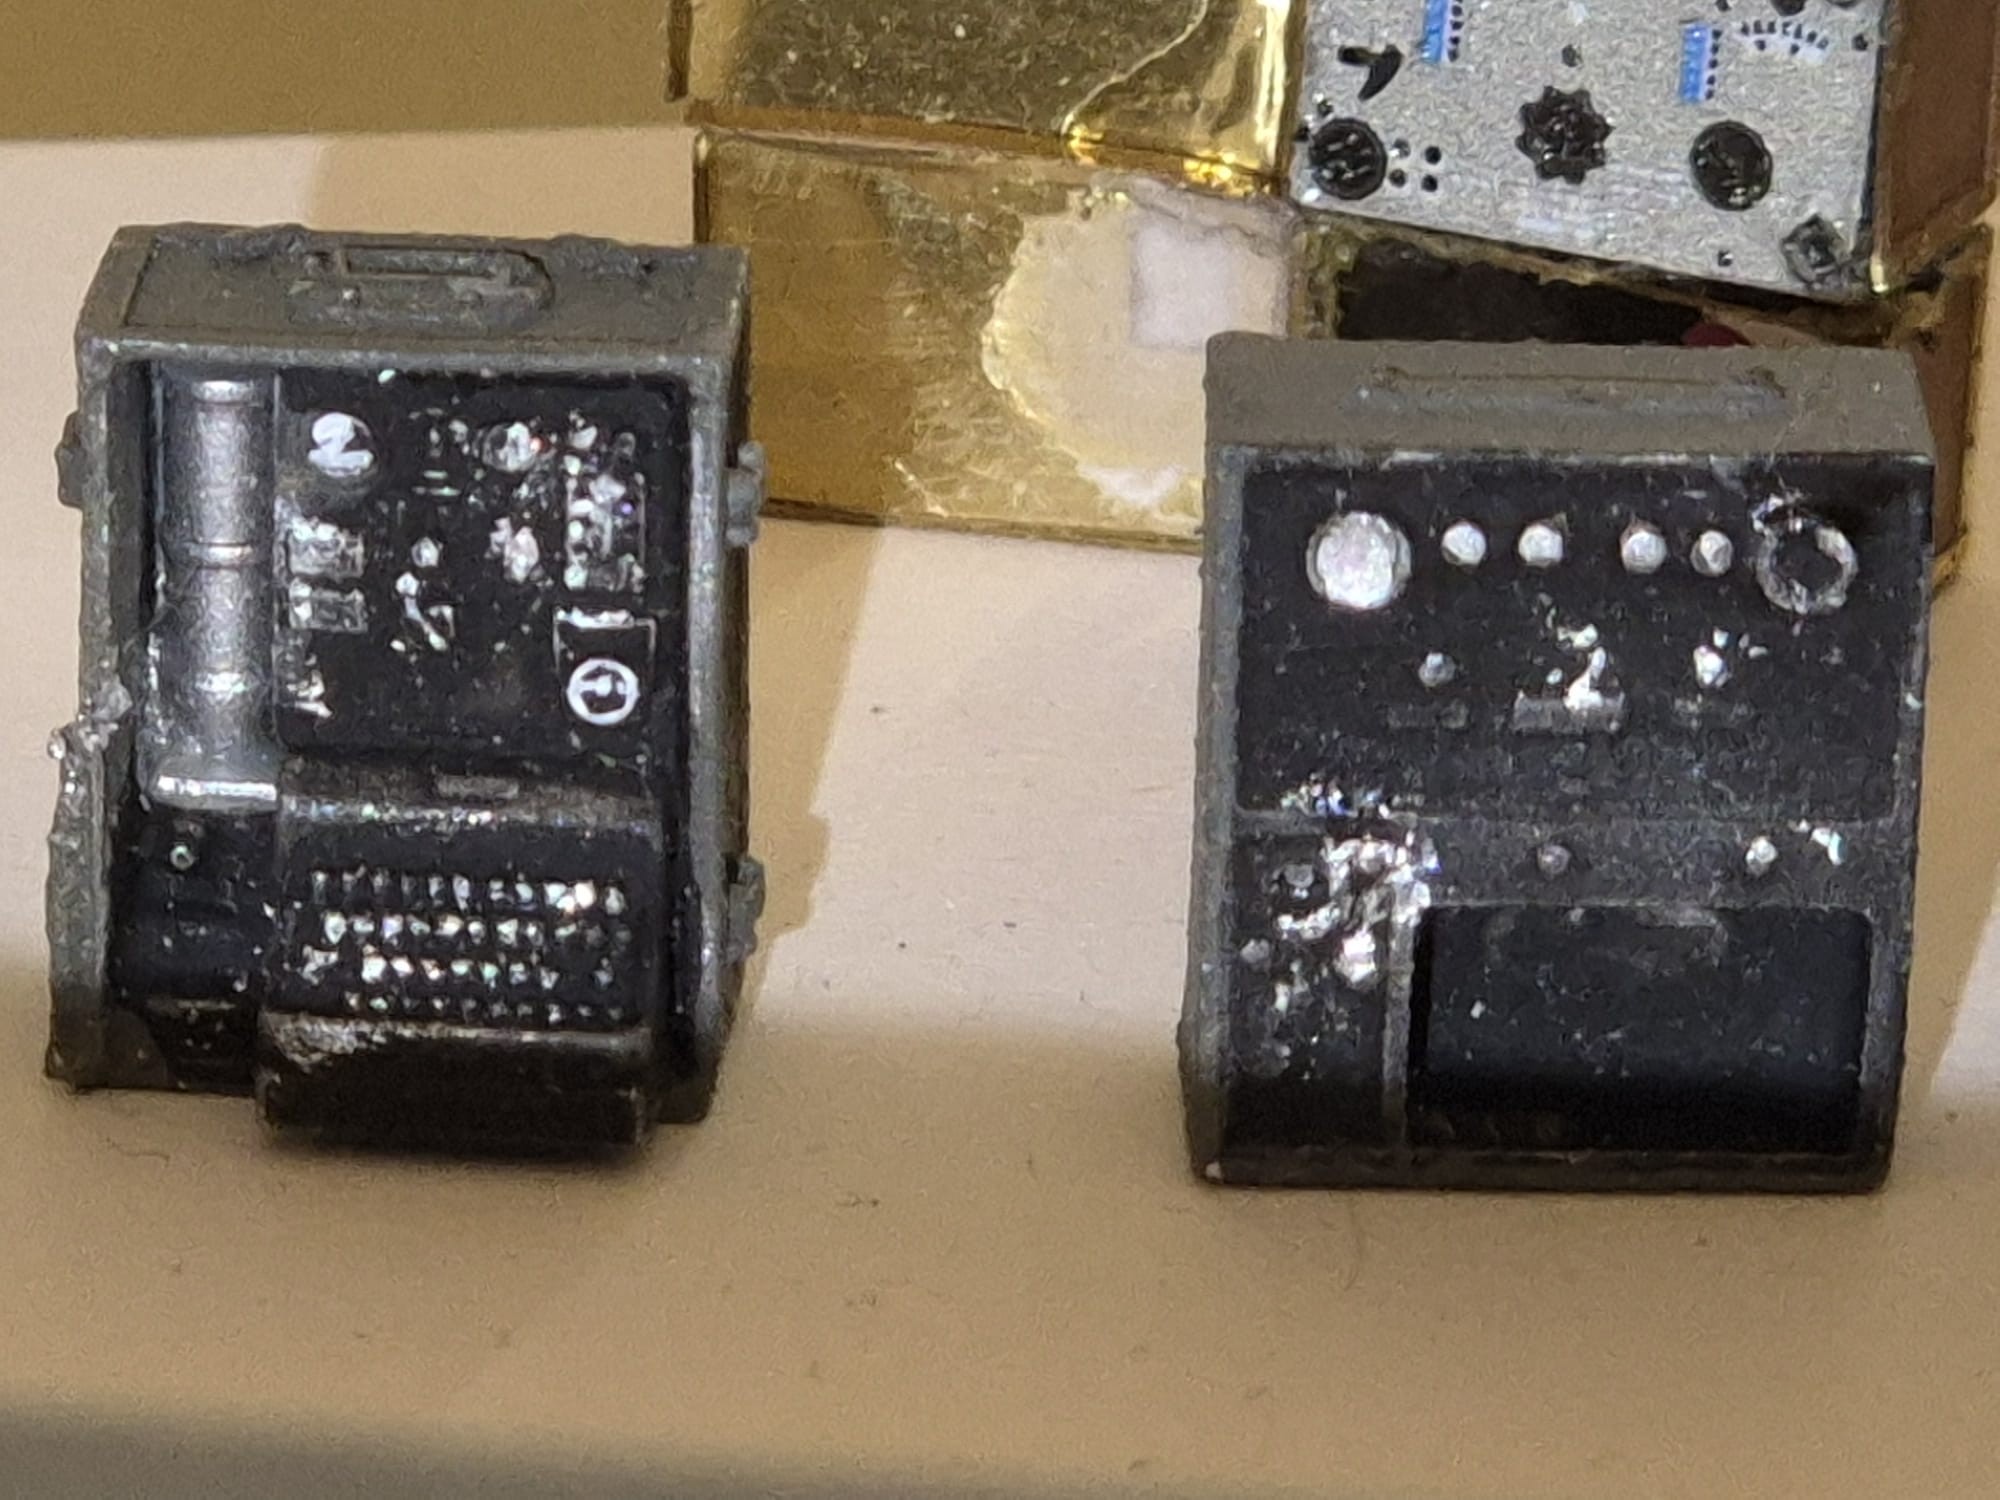
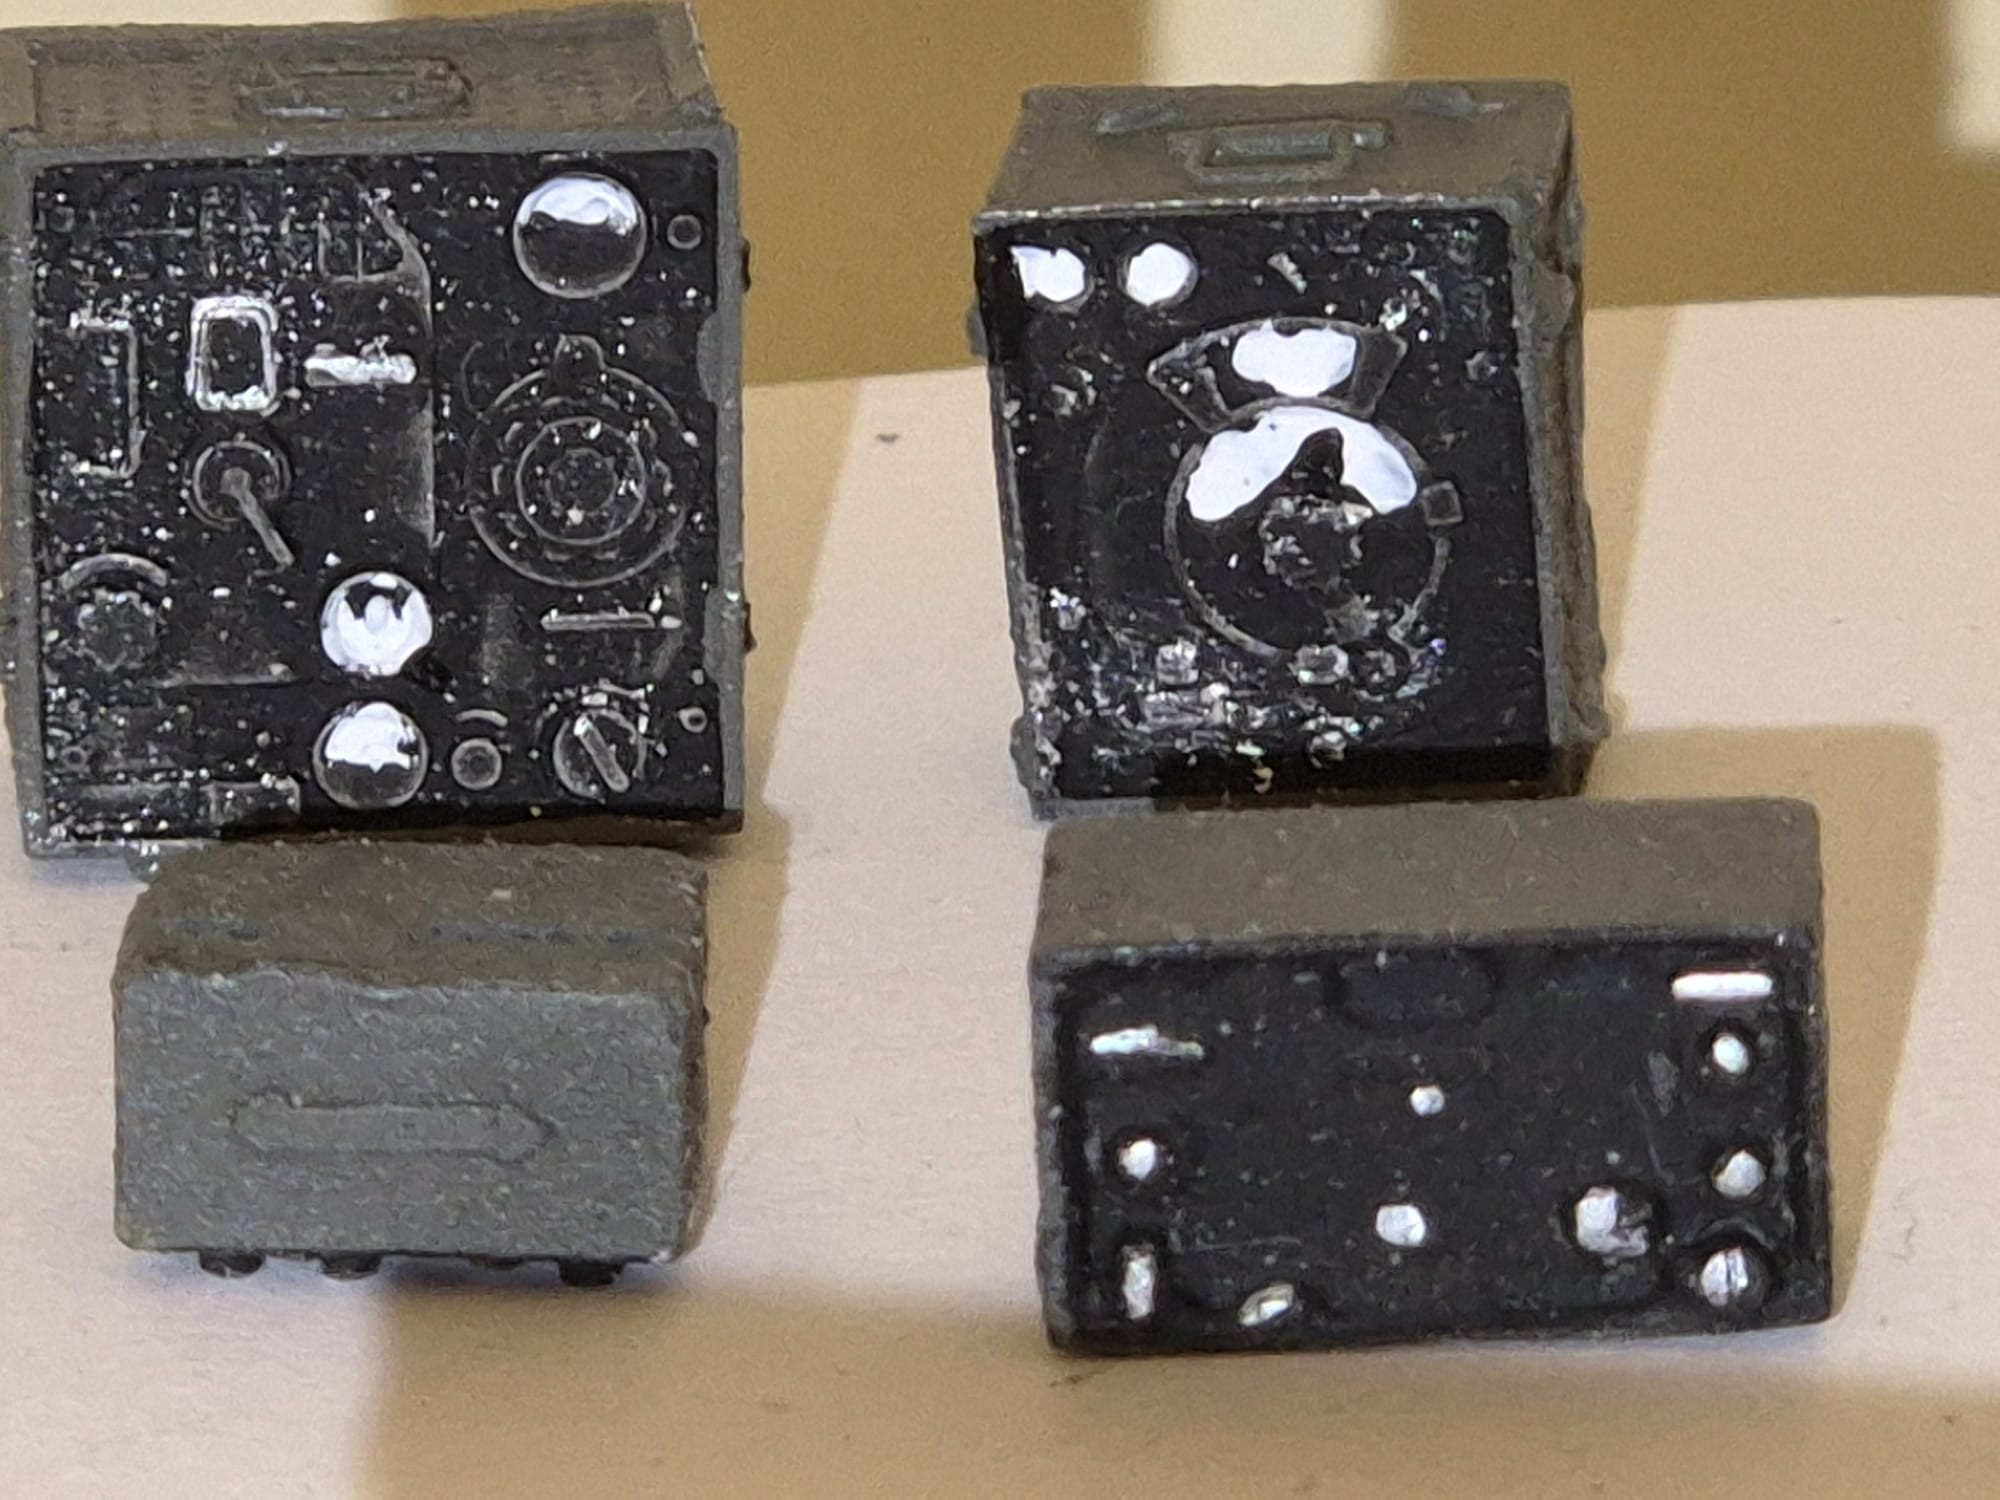
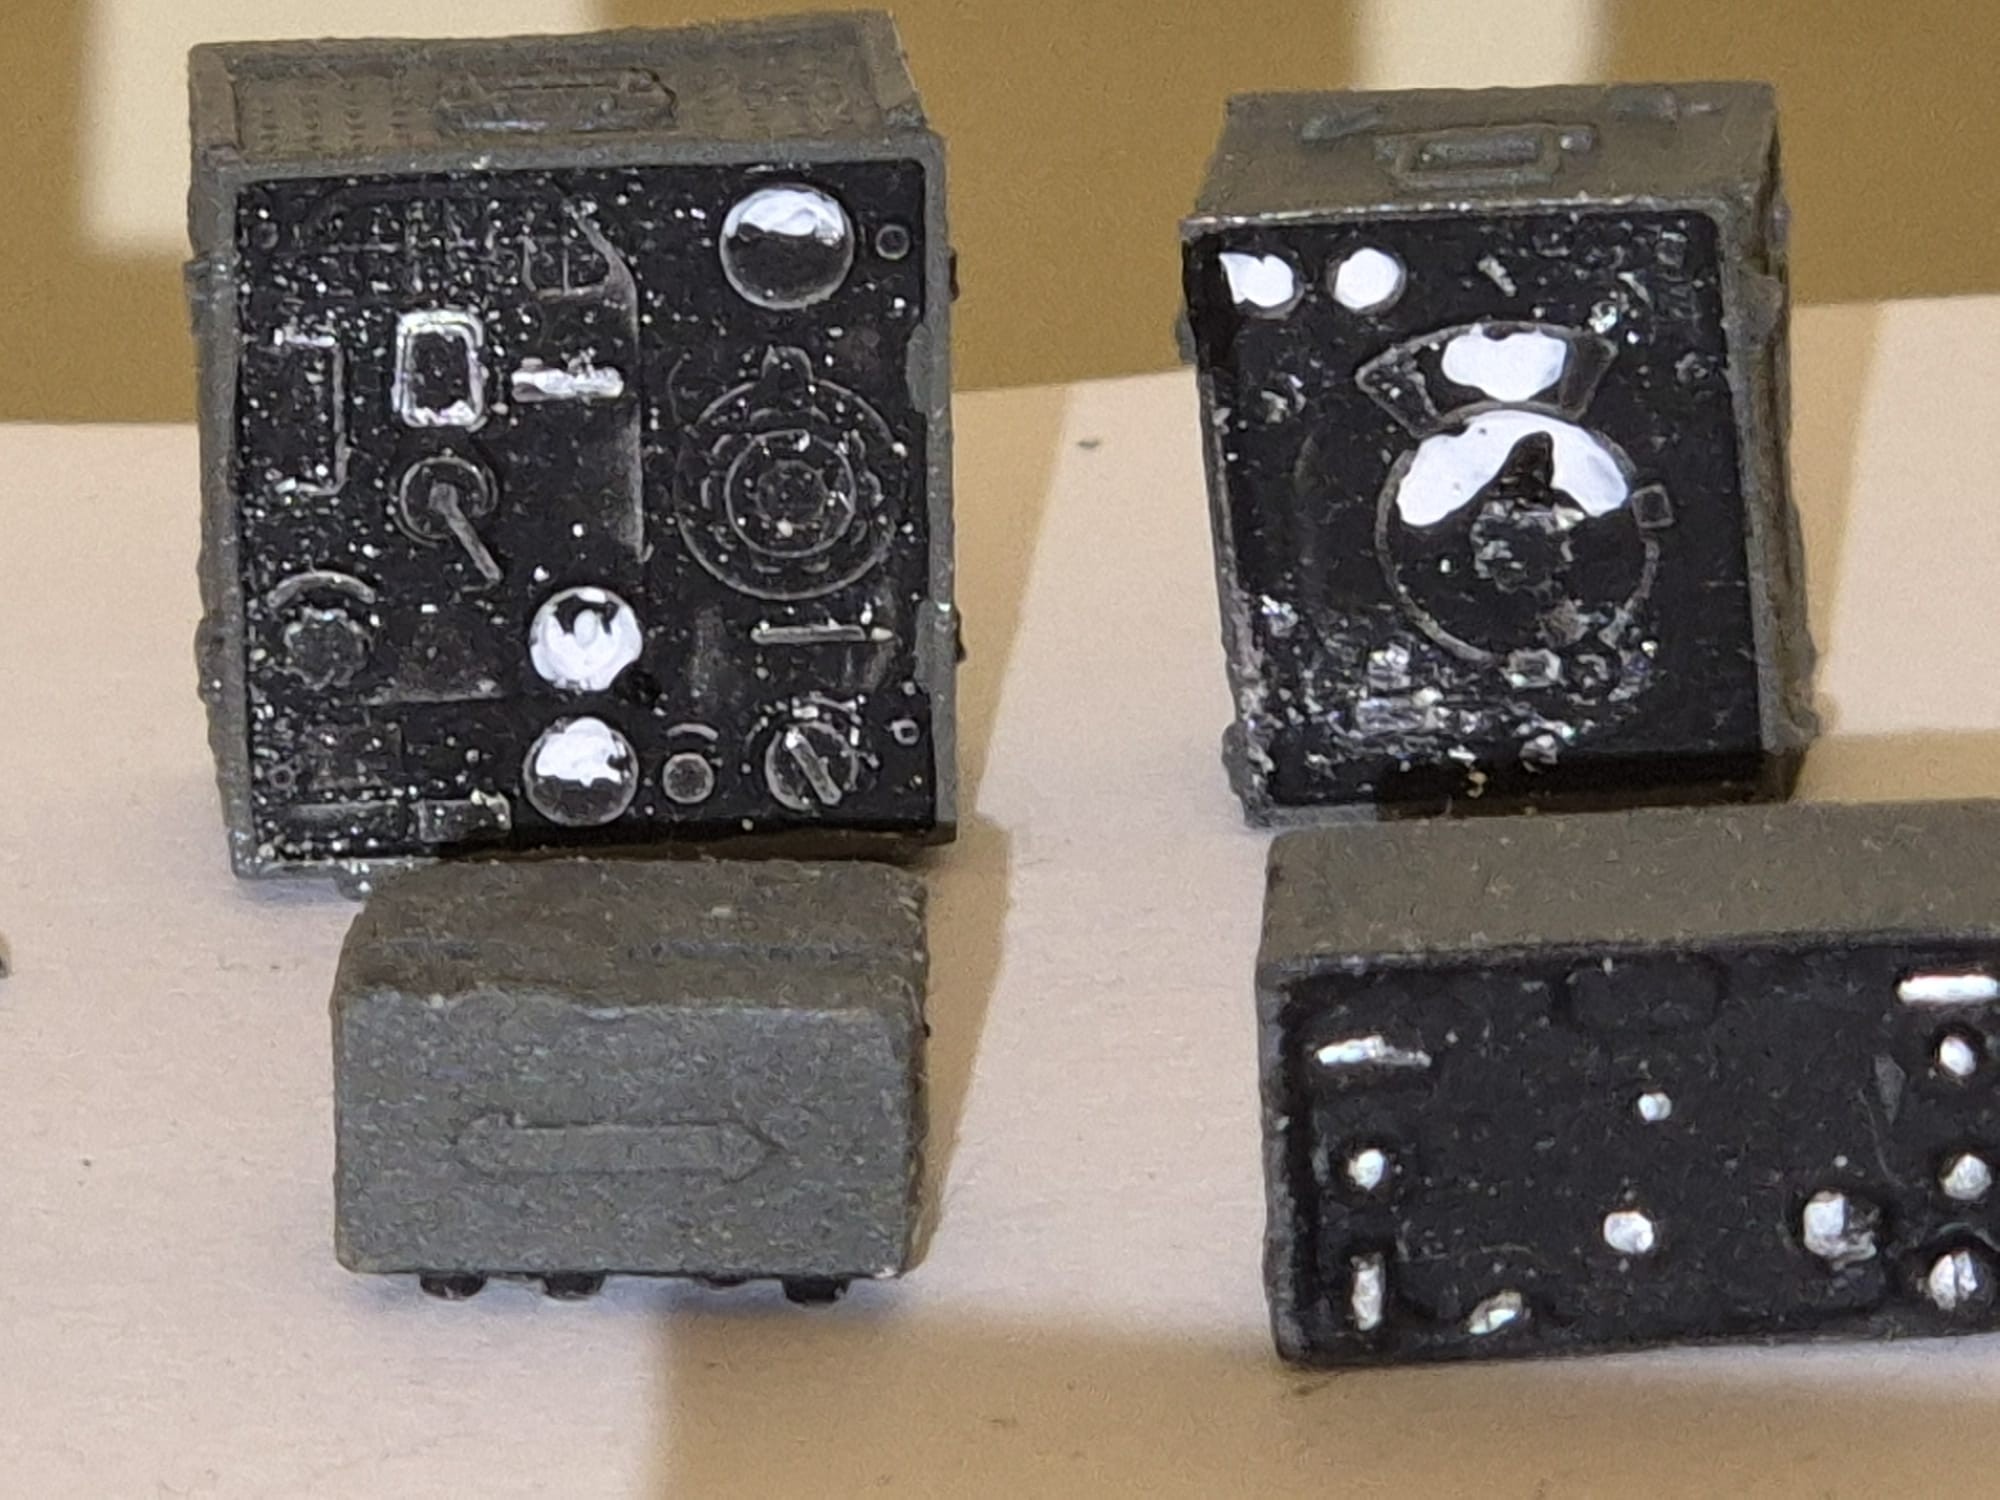
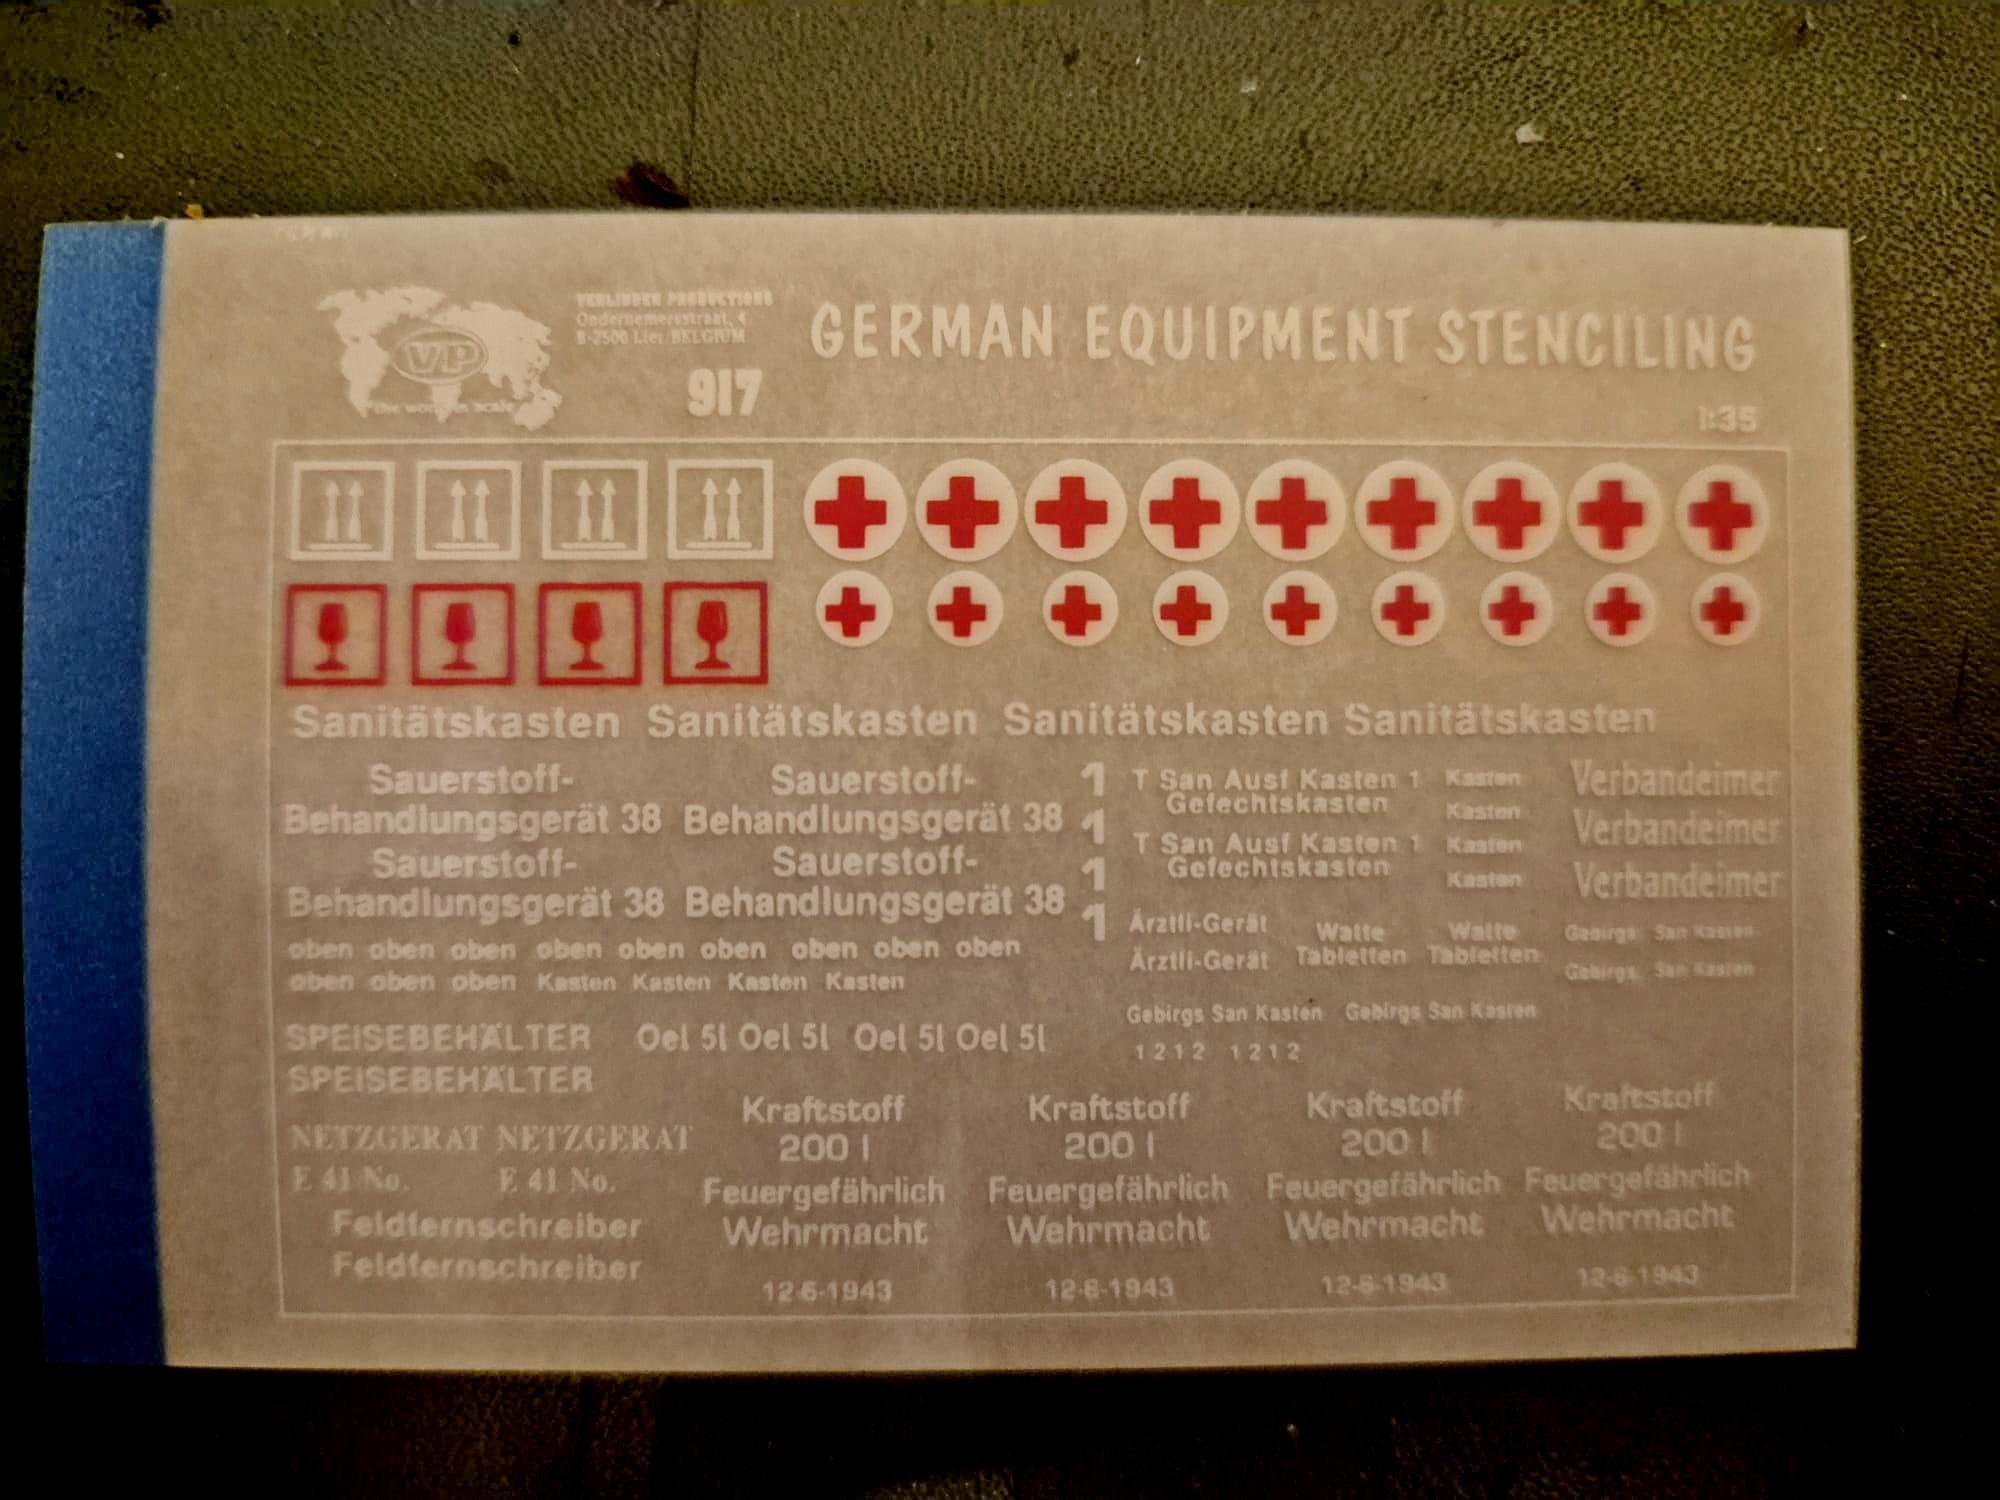
The dry transfers, as you can see (there a 2 sets of the same), seem nice and easy to apply, but they are by far not what they seem.
First of all the transparent paper on which they are sticking is by far too thick to obtain a decent result with them, secondly, they do not stick and some eve fly away by themselves, and third they are too densely wrapped together that even cutting them out in shape is a pain and a half.
I show you the disastrous results with these that I achieved, and believe me, I know how to apply other more modern dry transfers perfectly well, but they are also applied to much thinner material and stick where they are supposed to go.
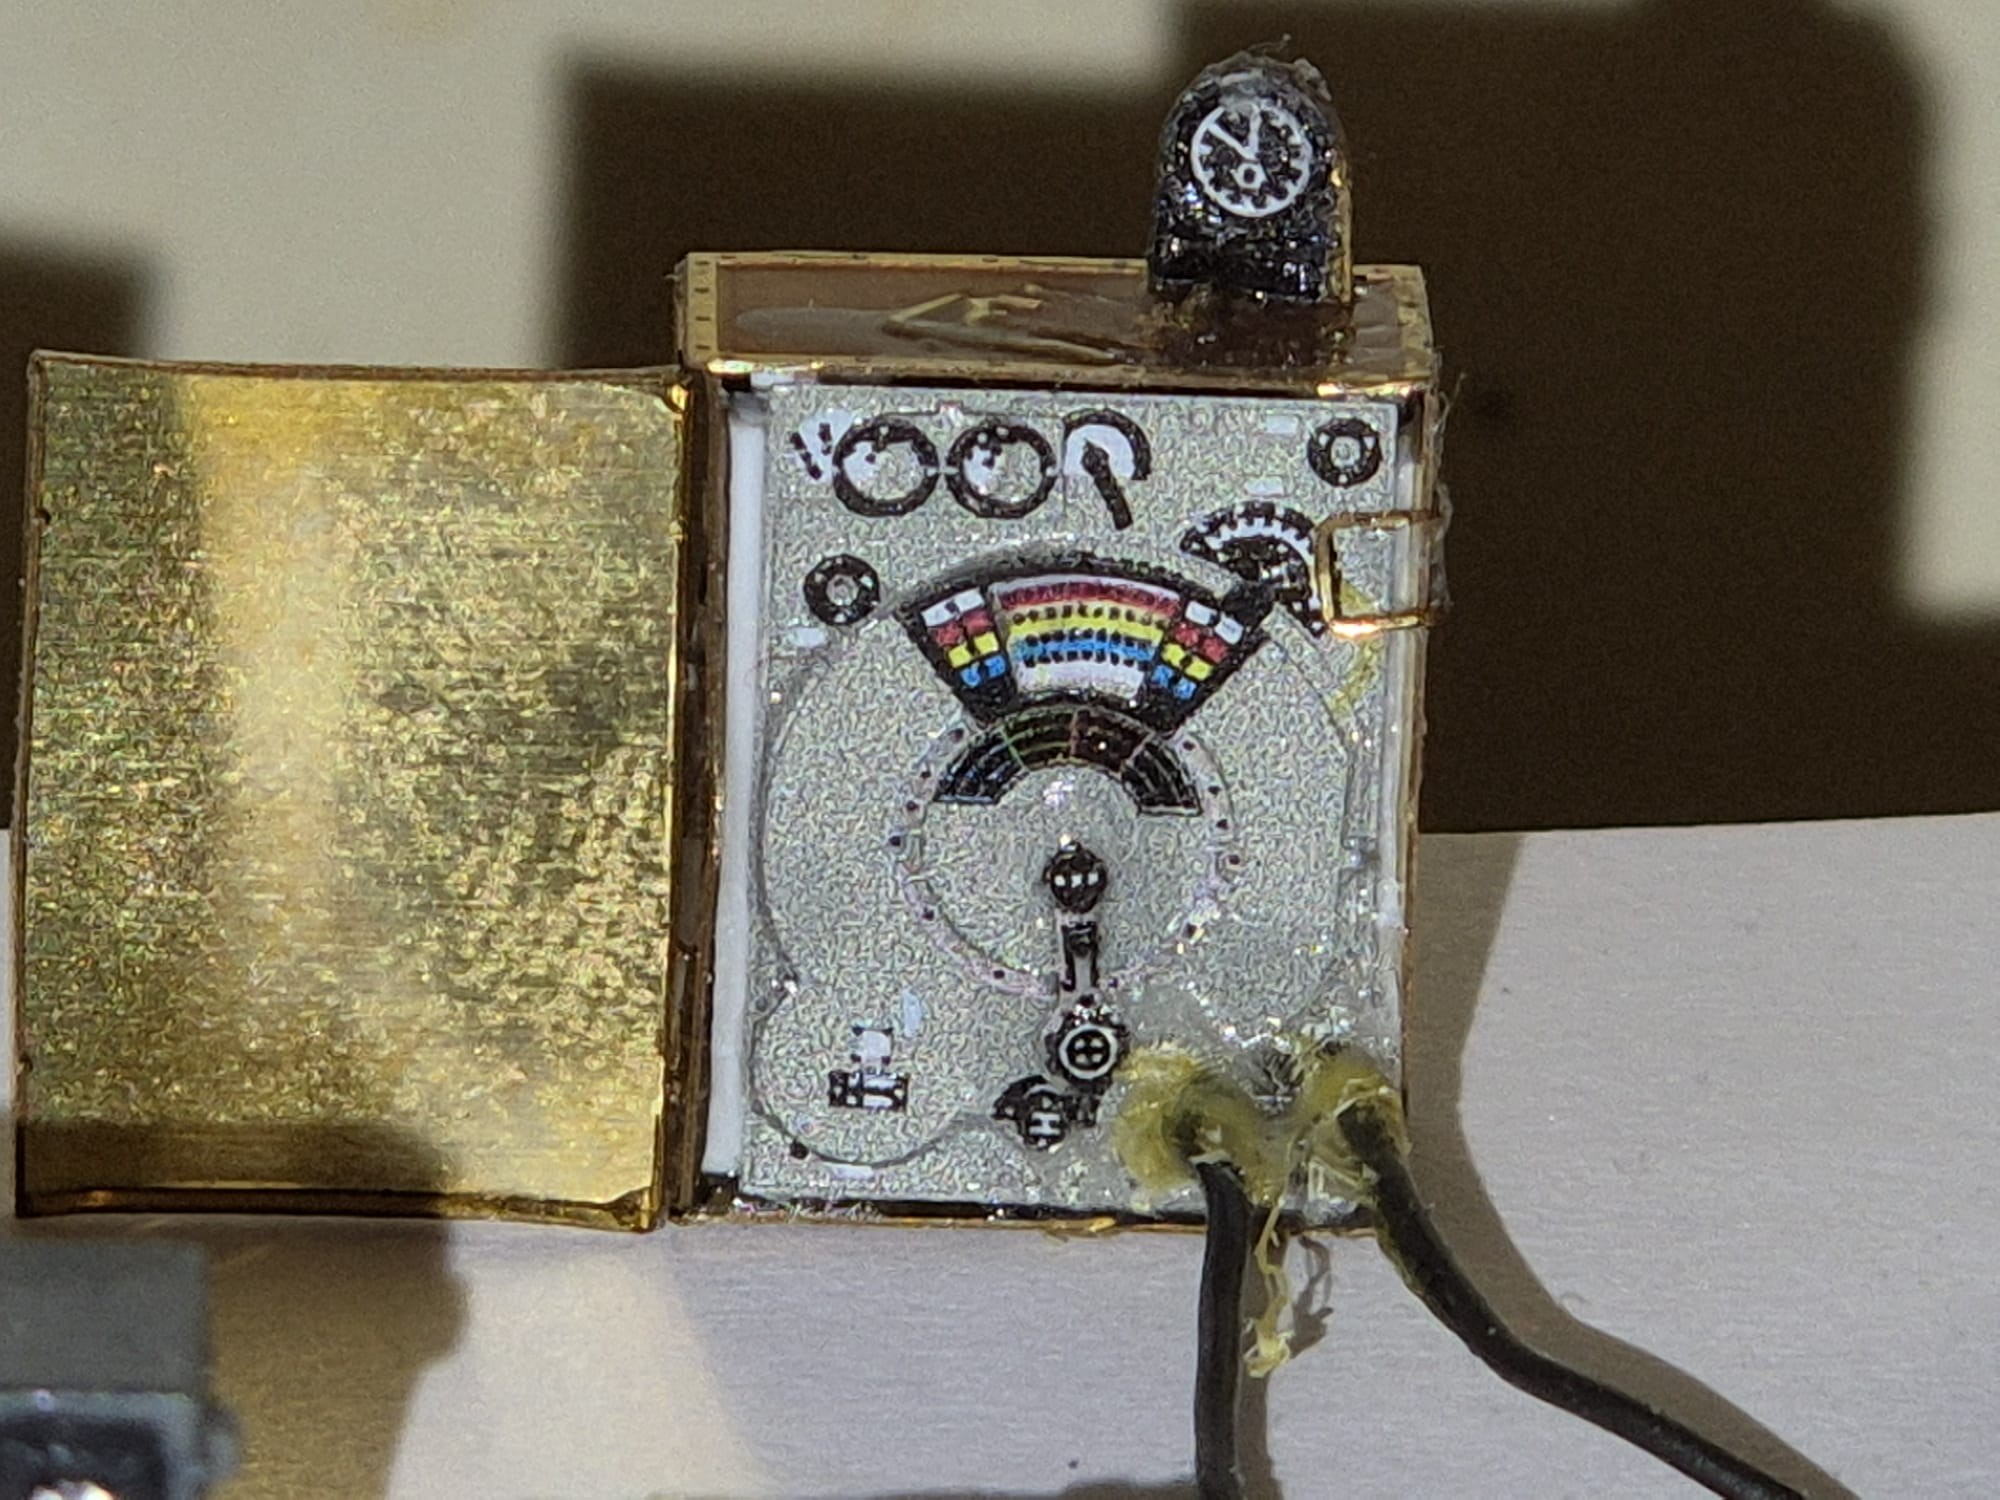
And here are these examples:


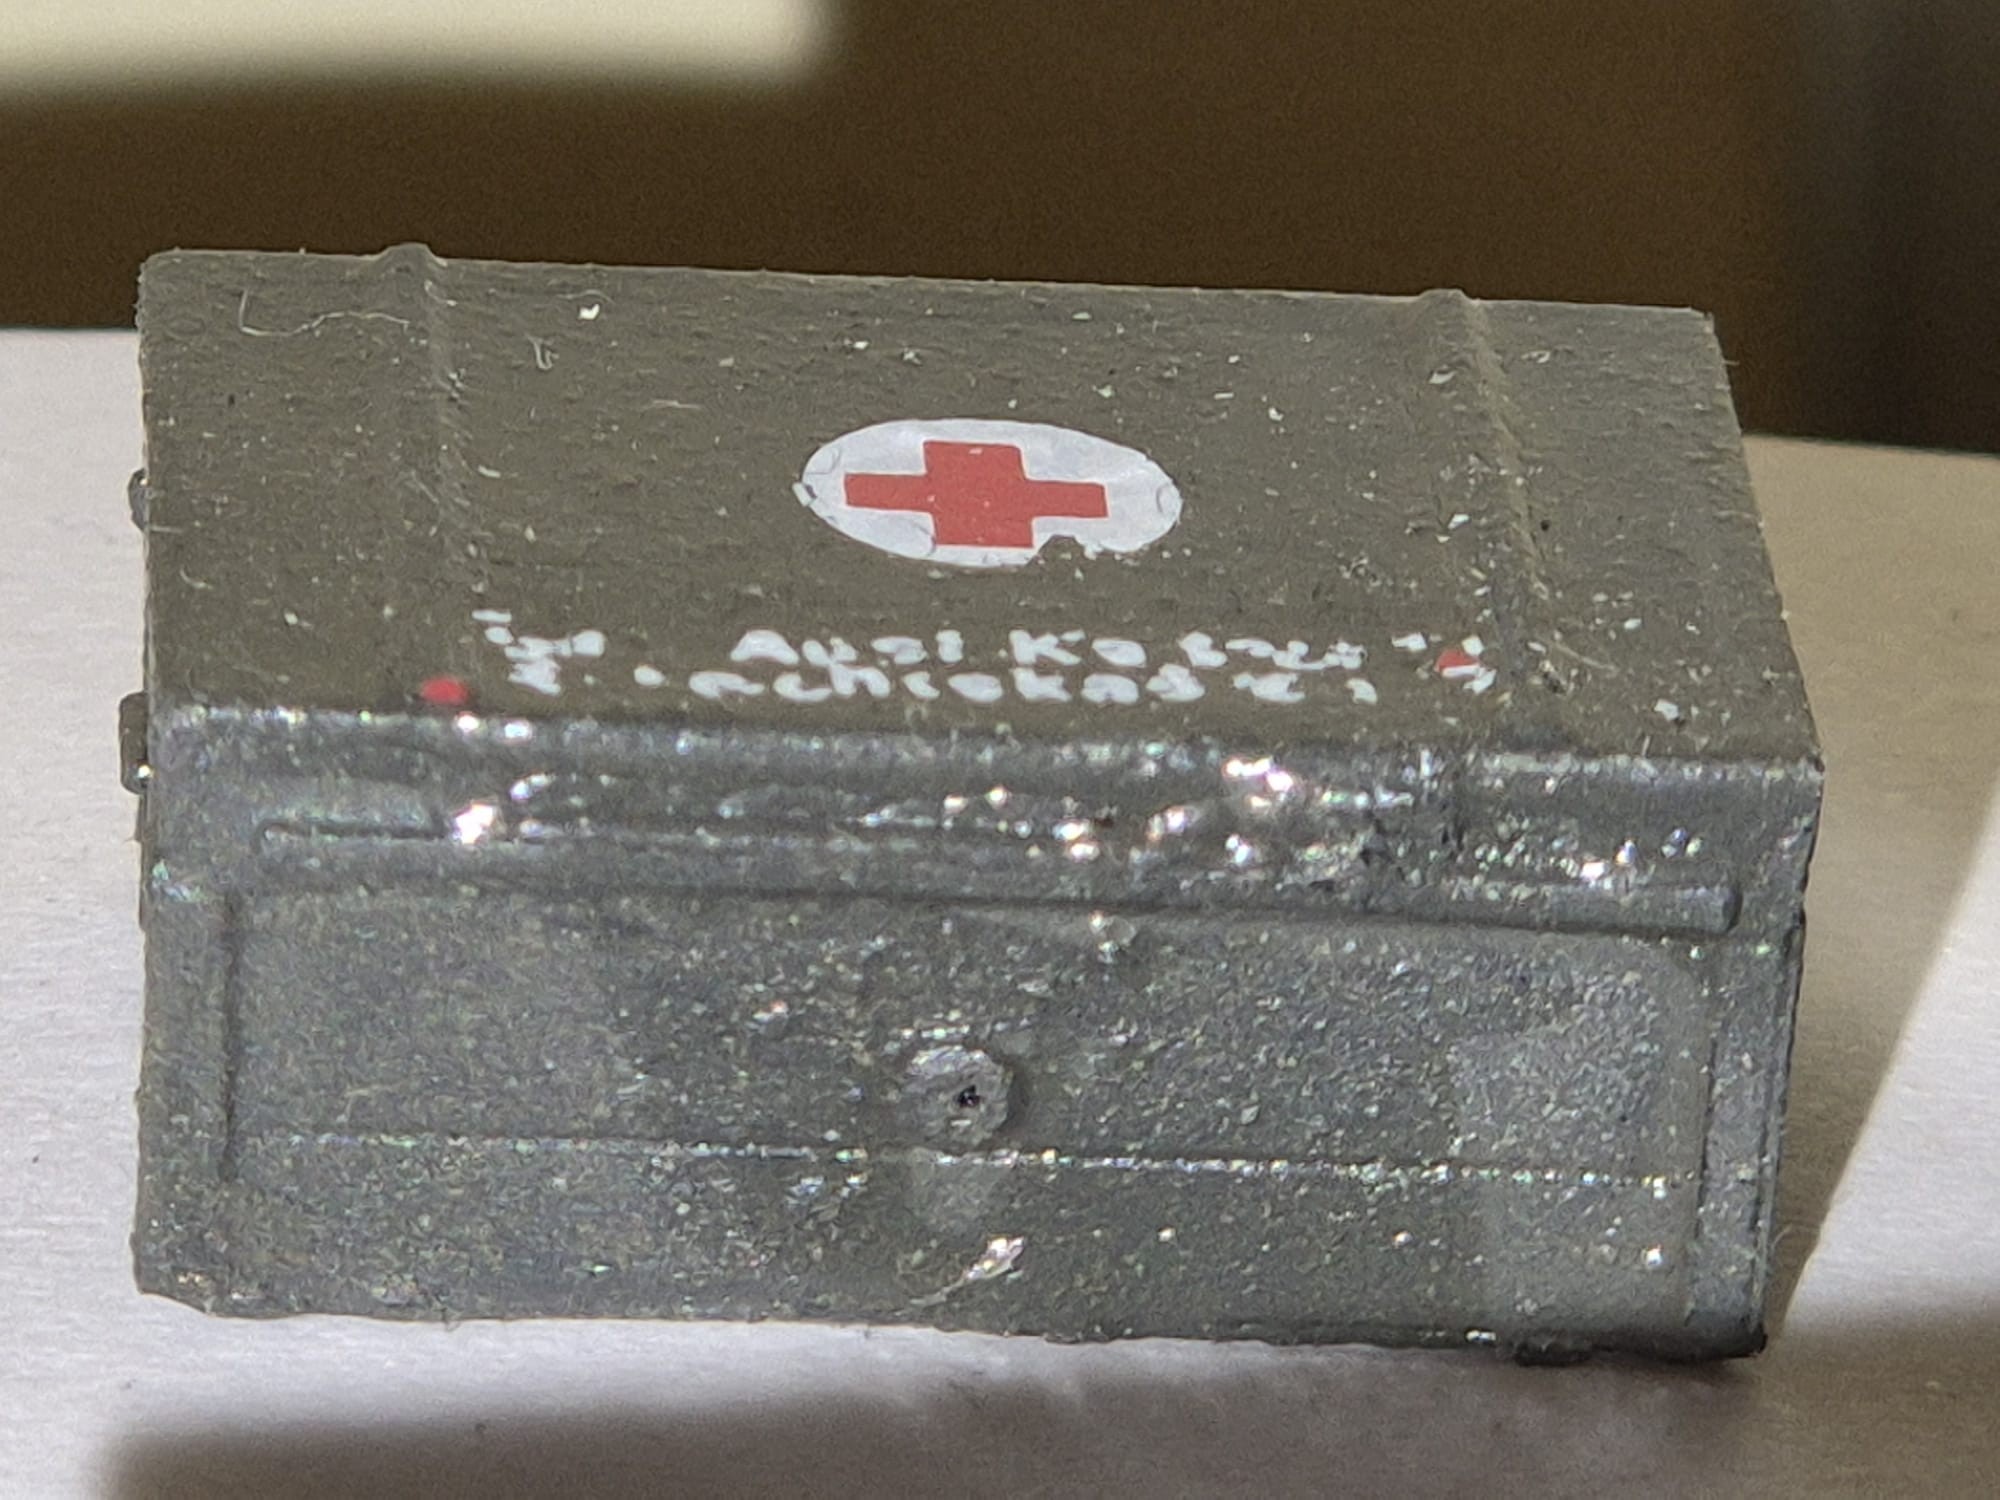
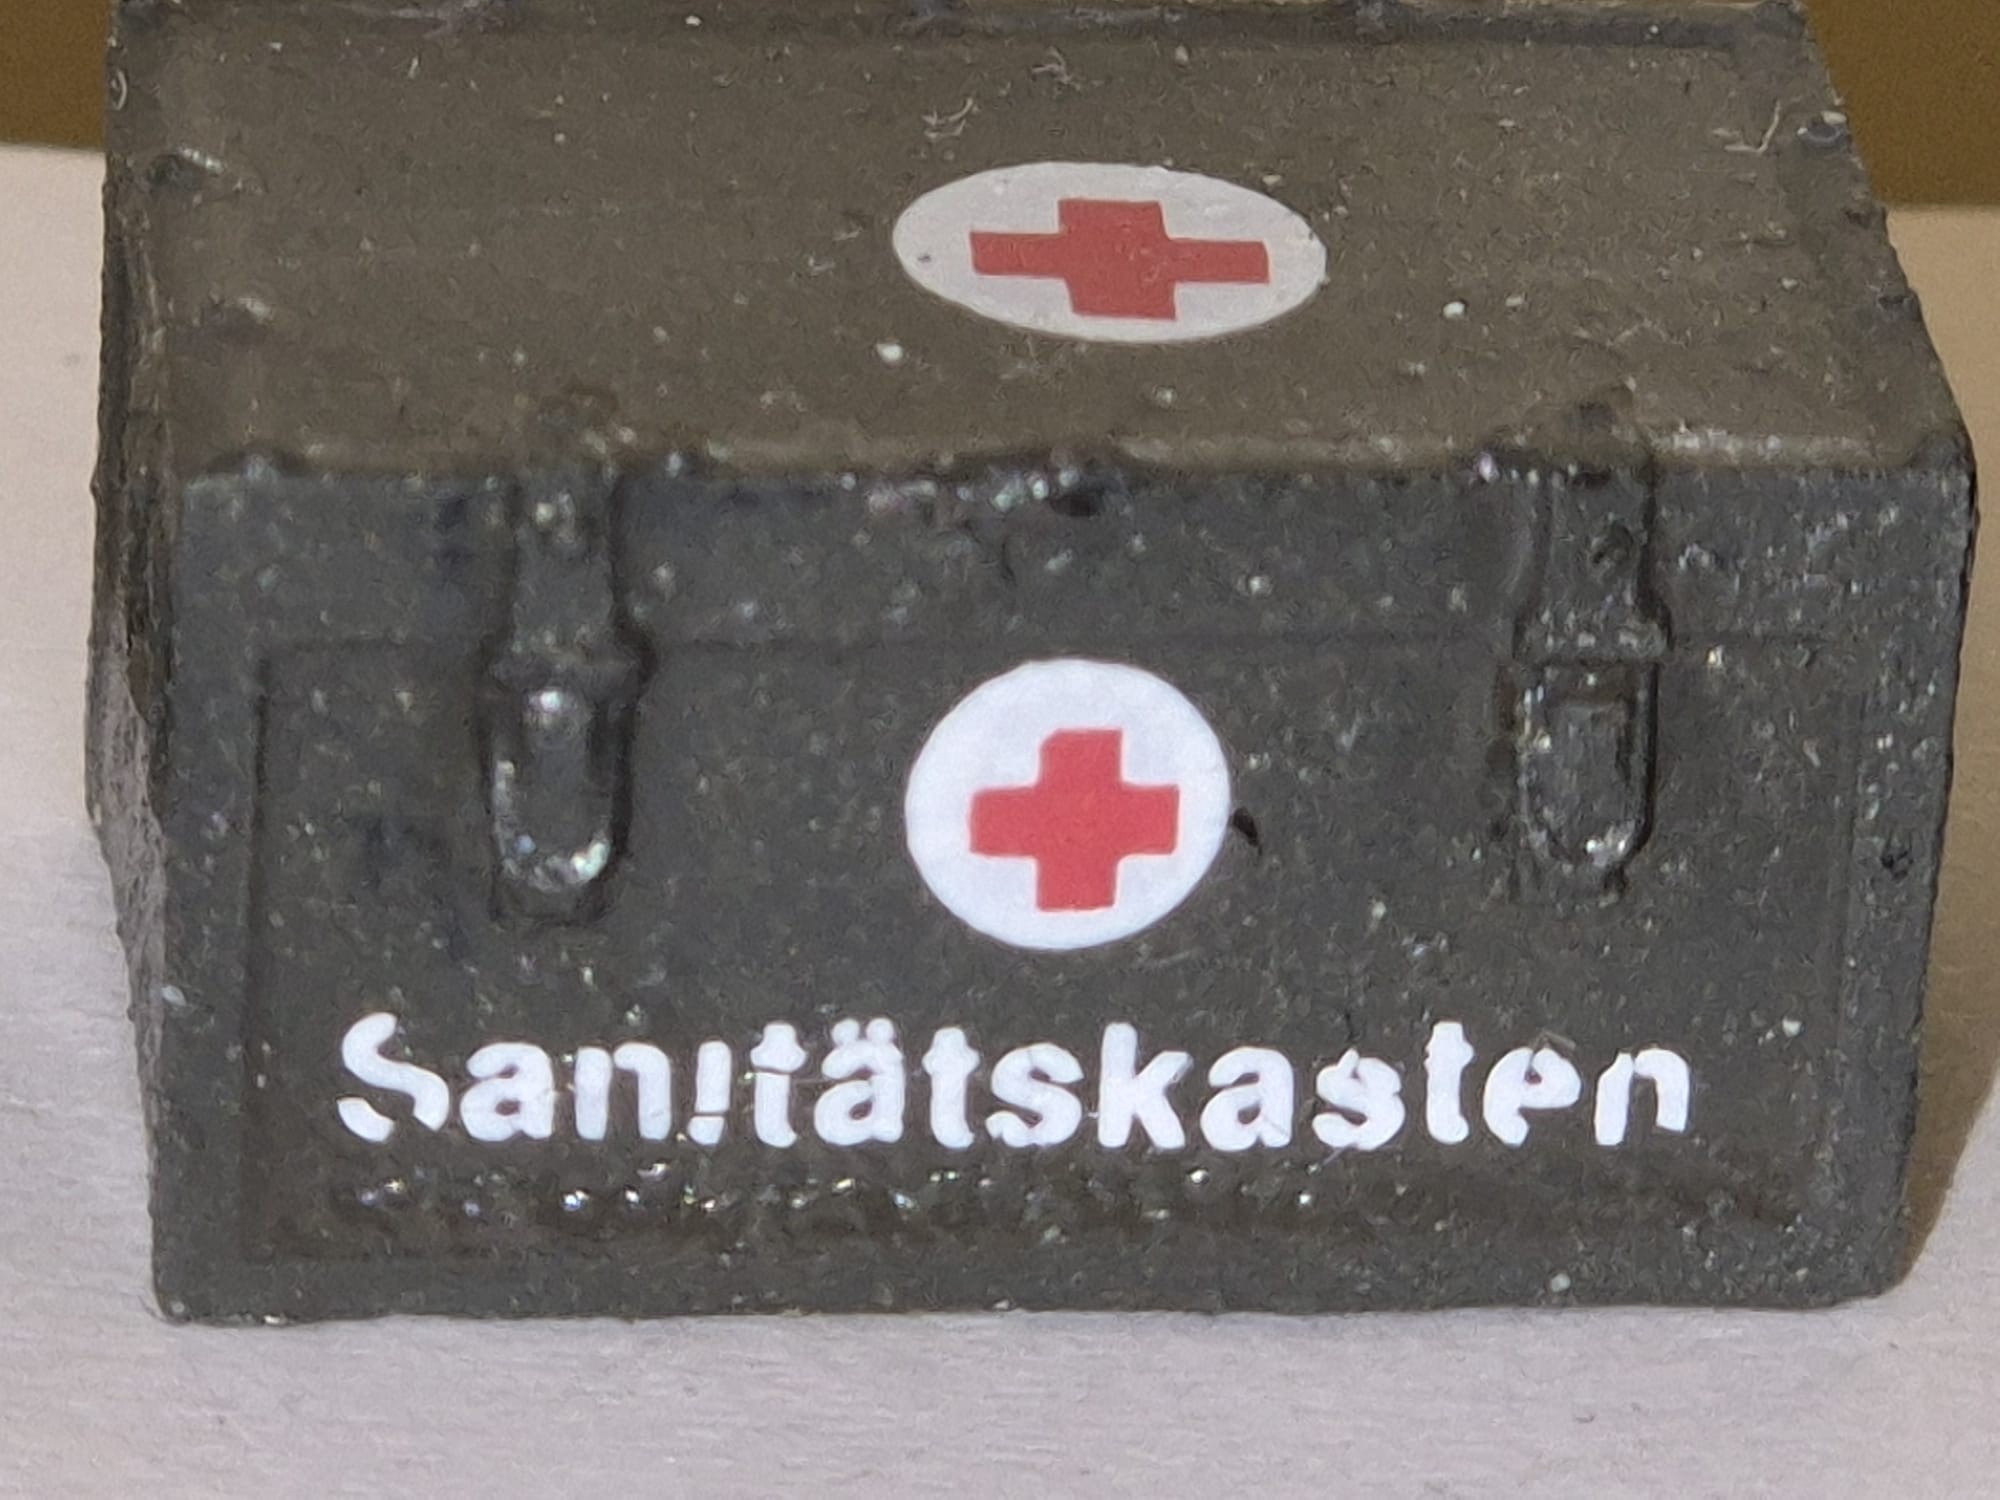
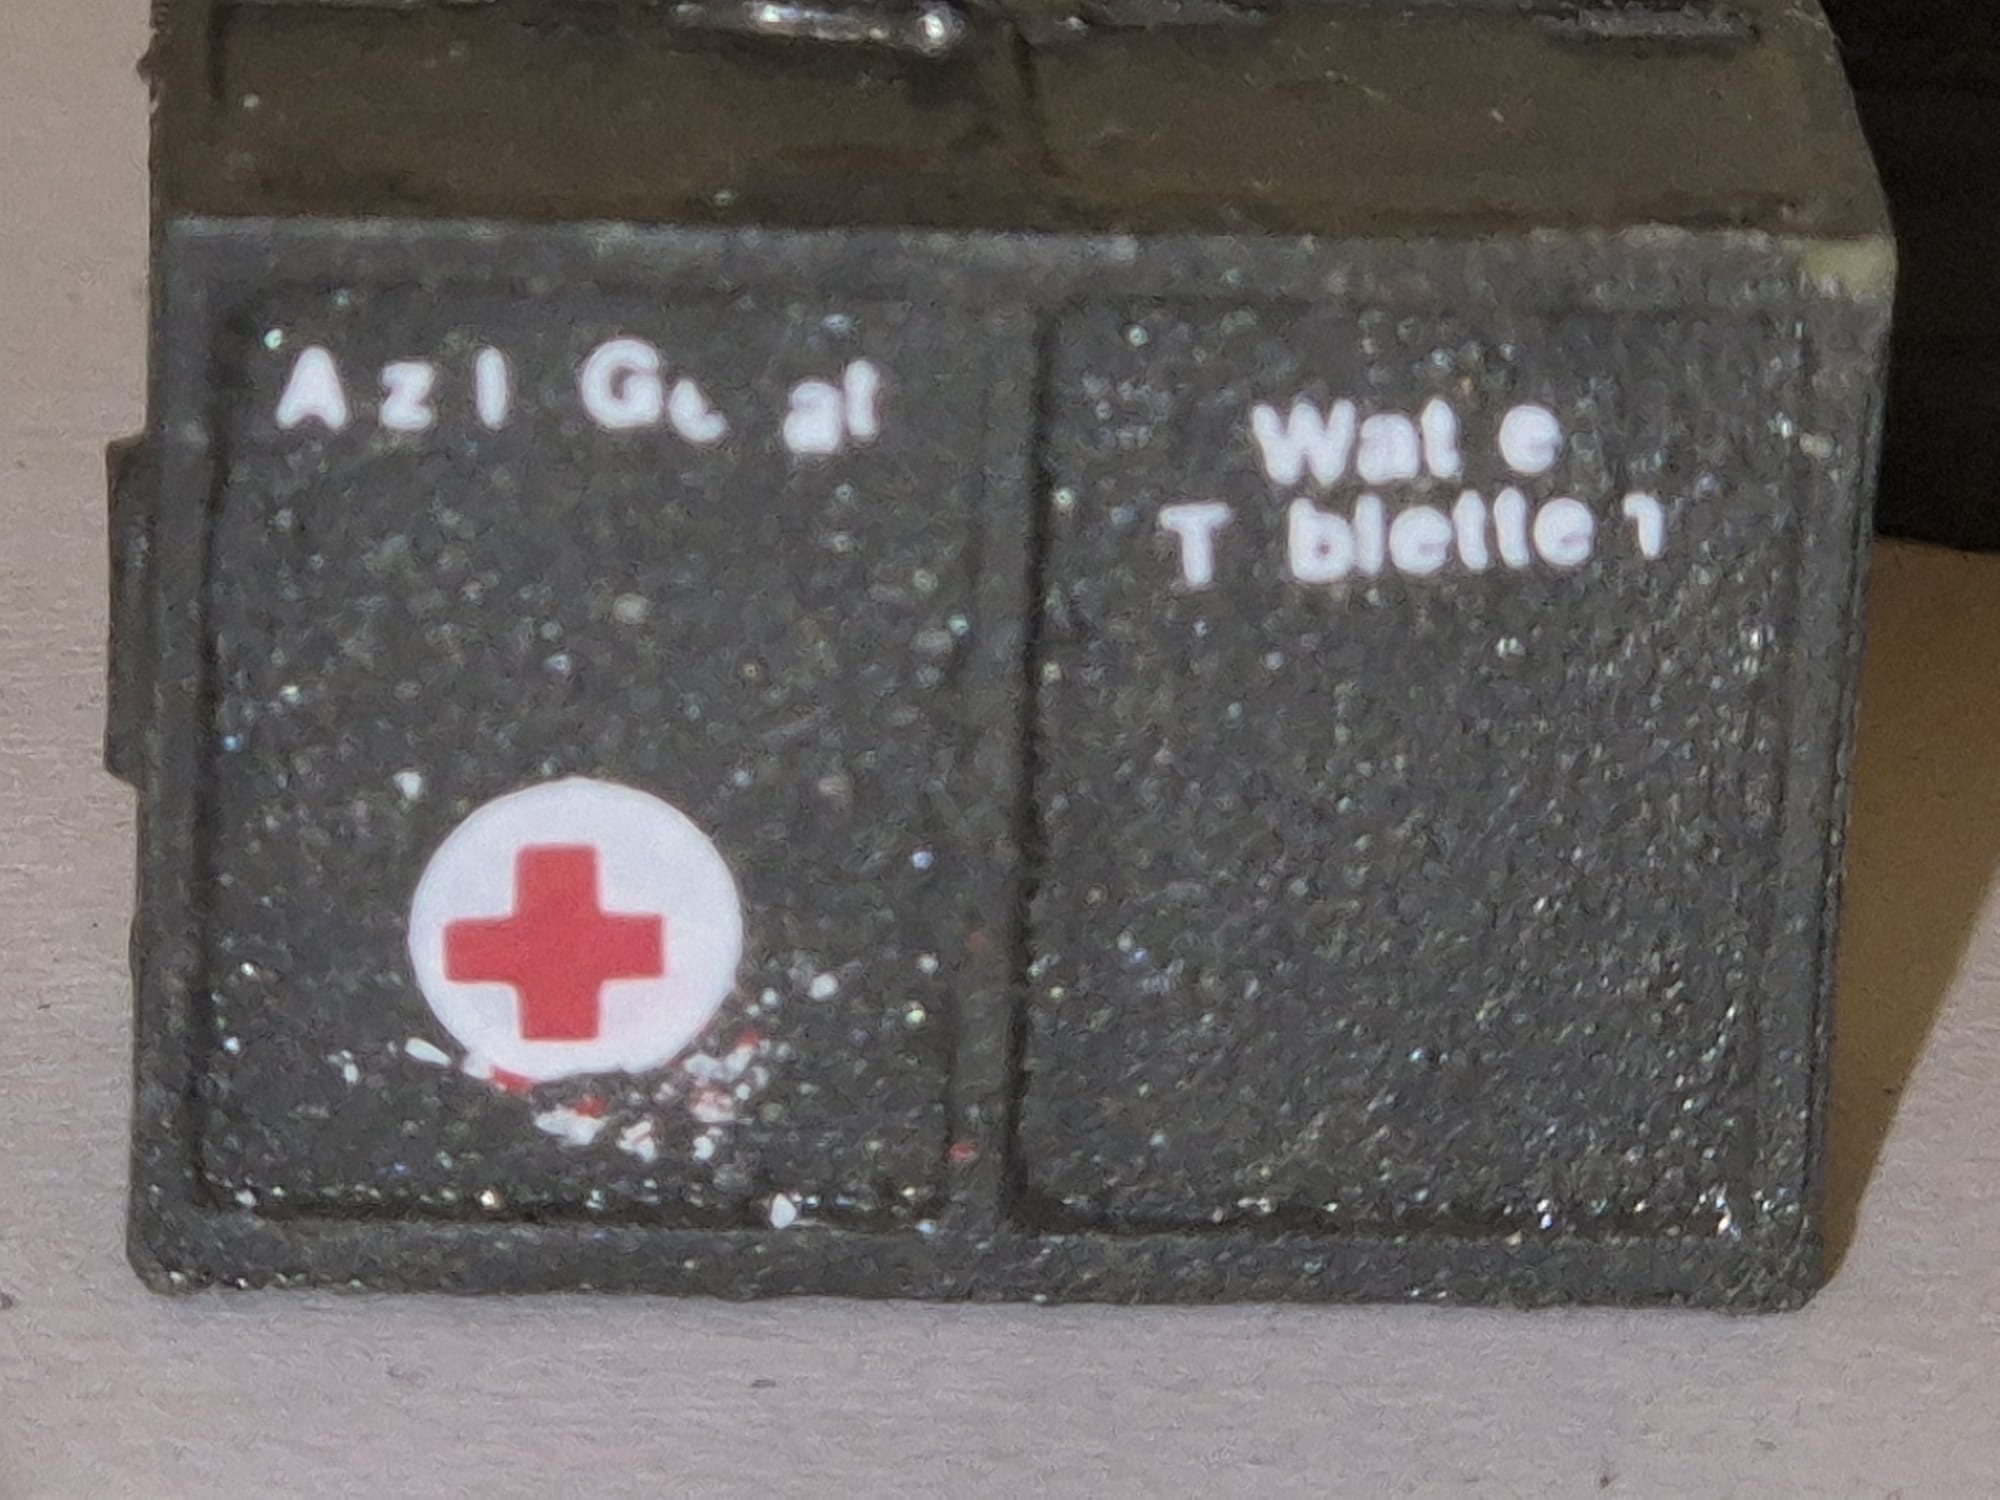
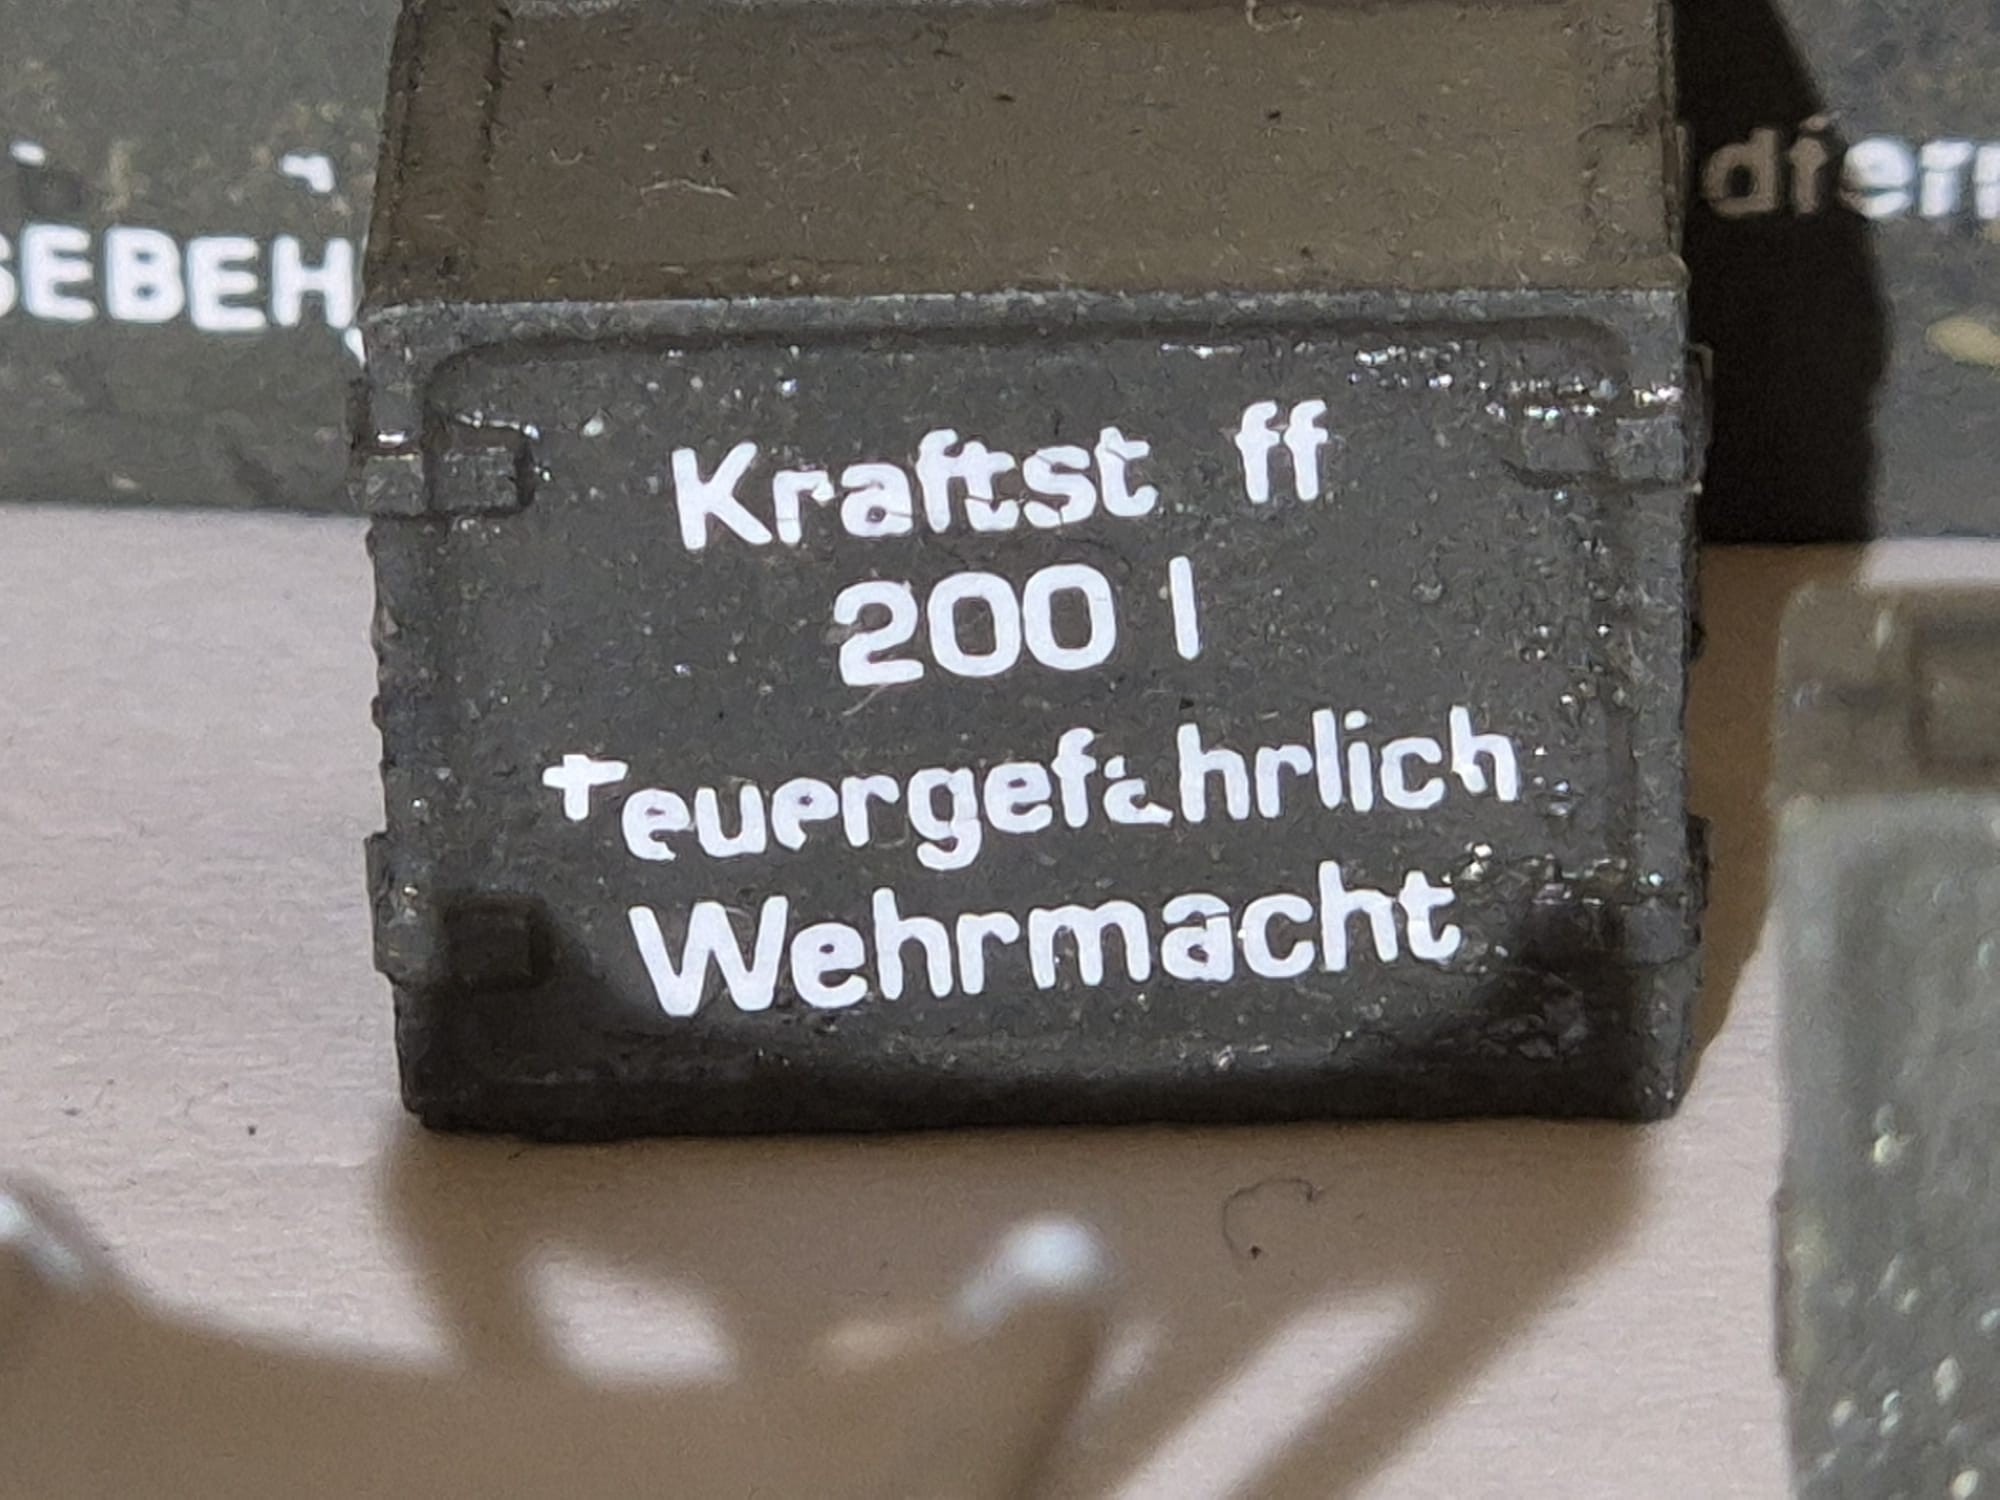
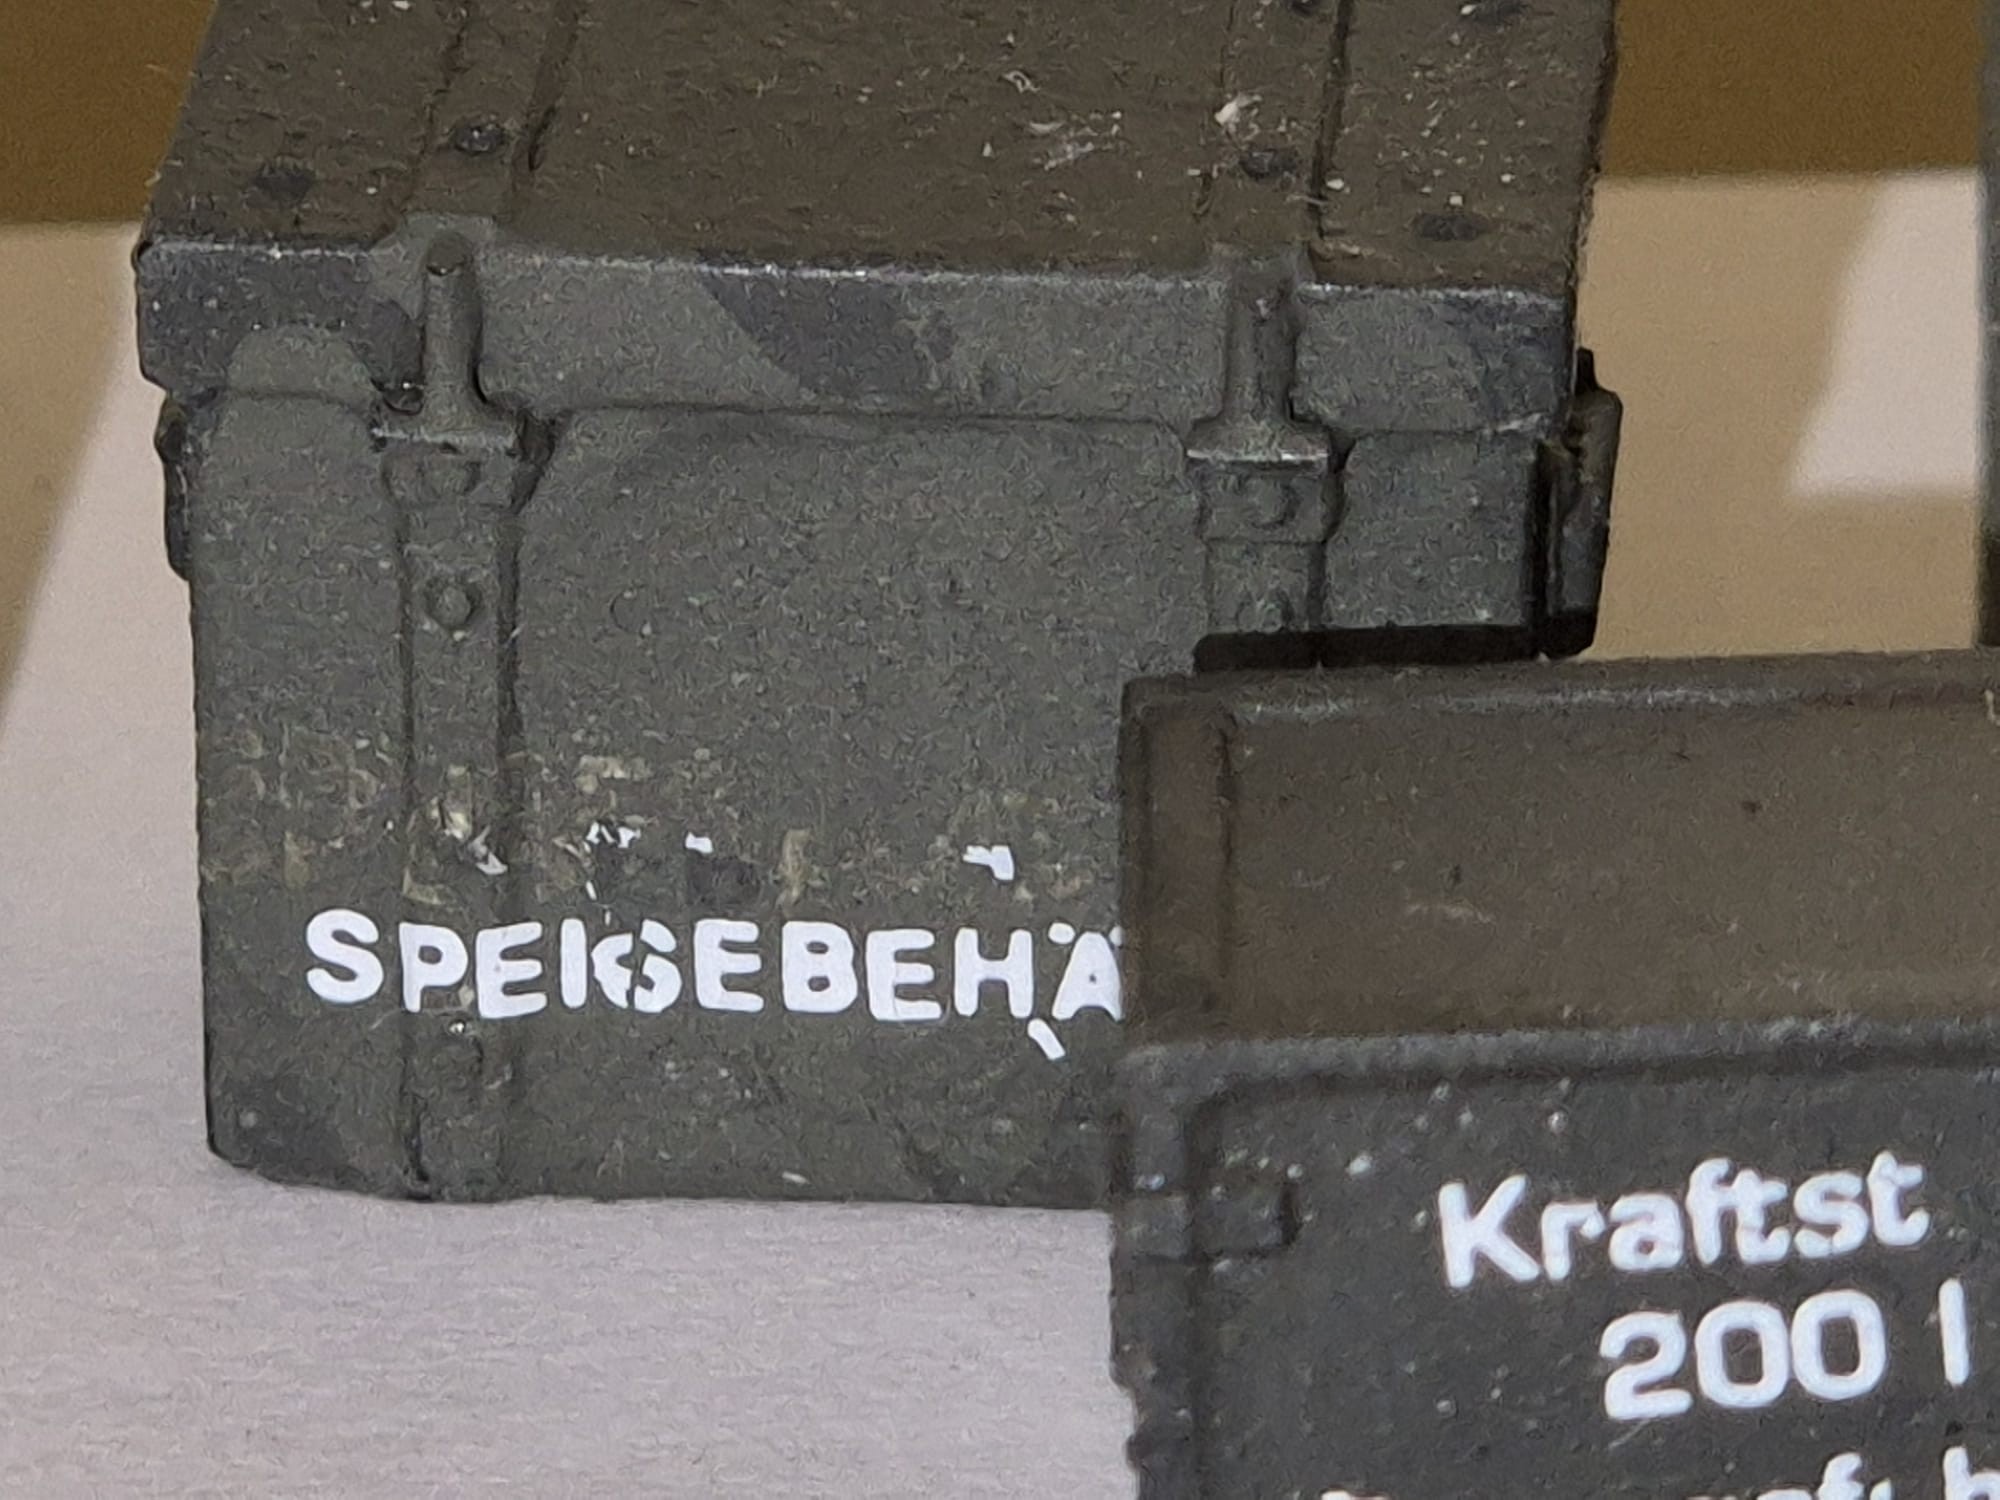
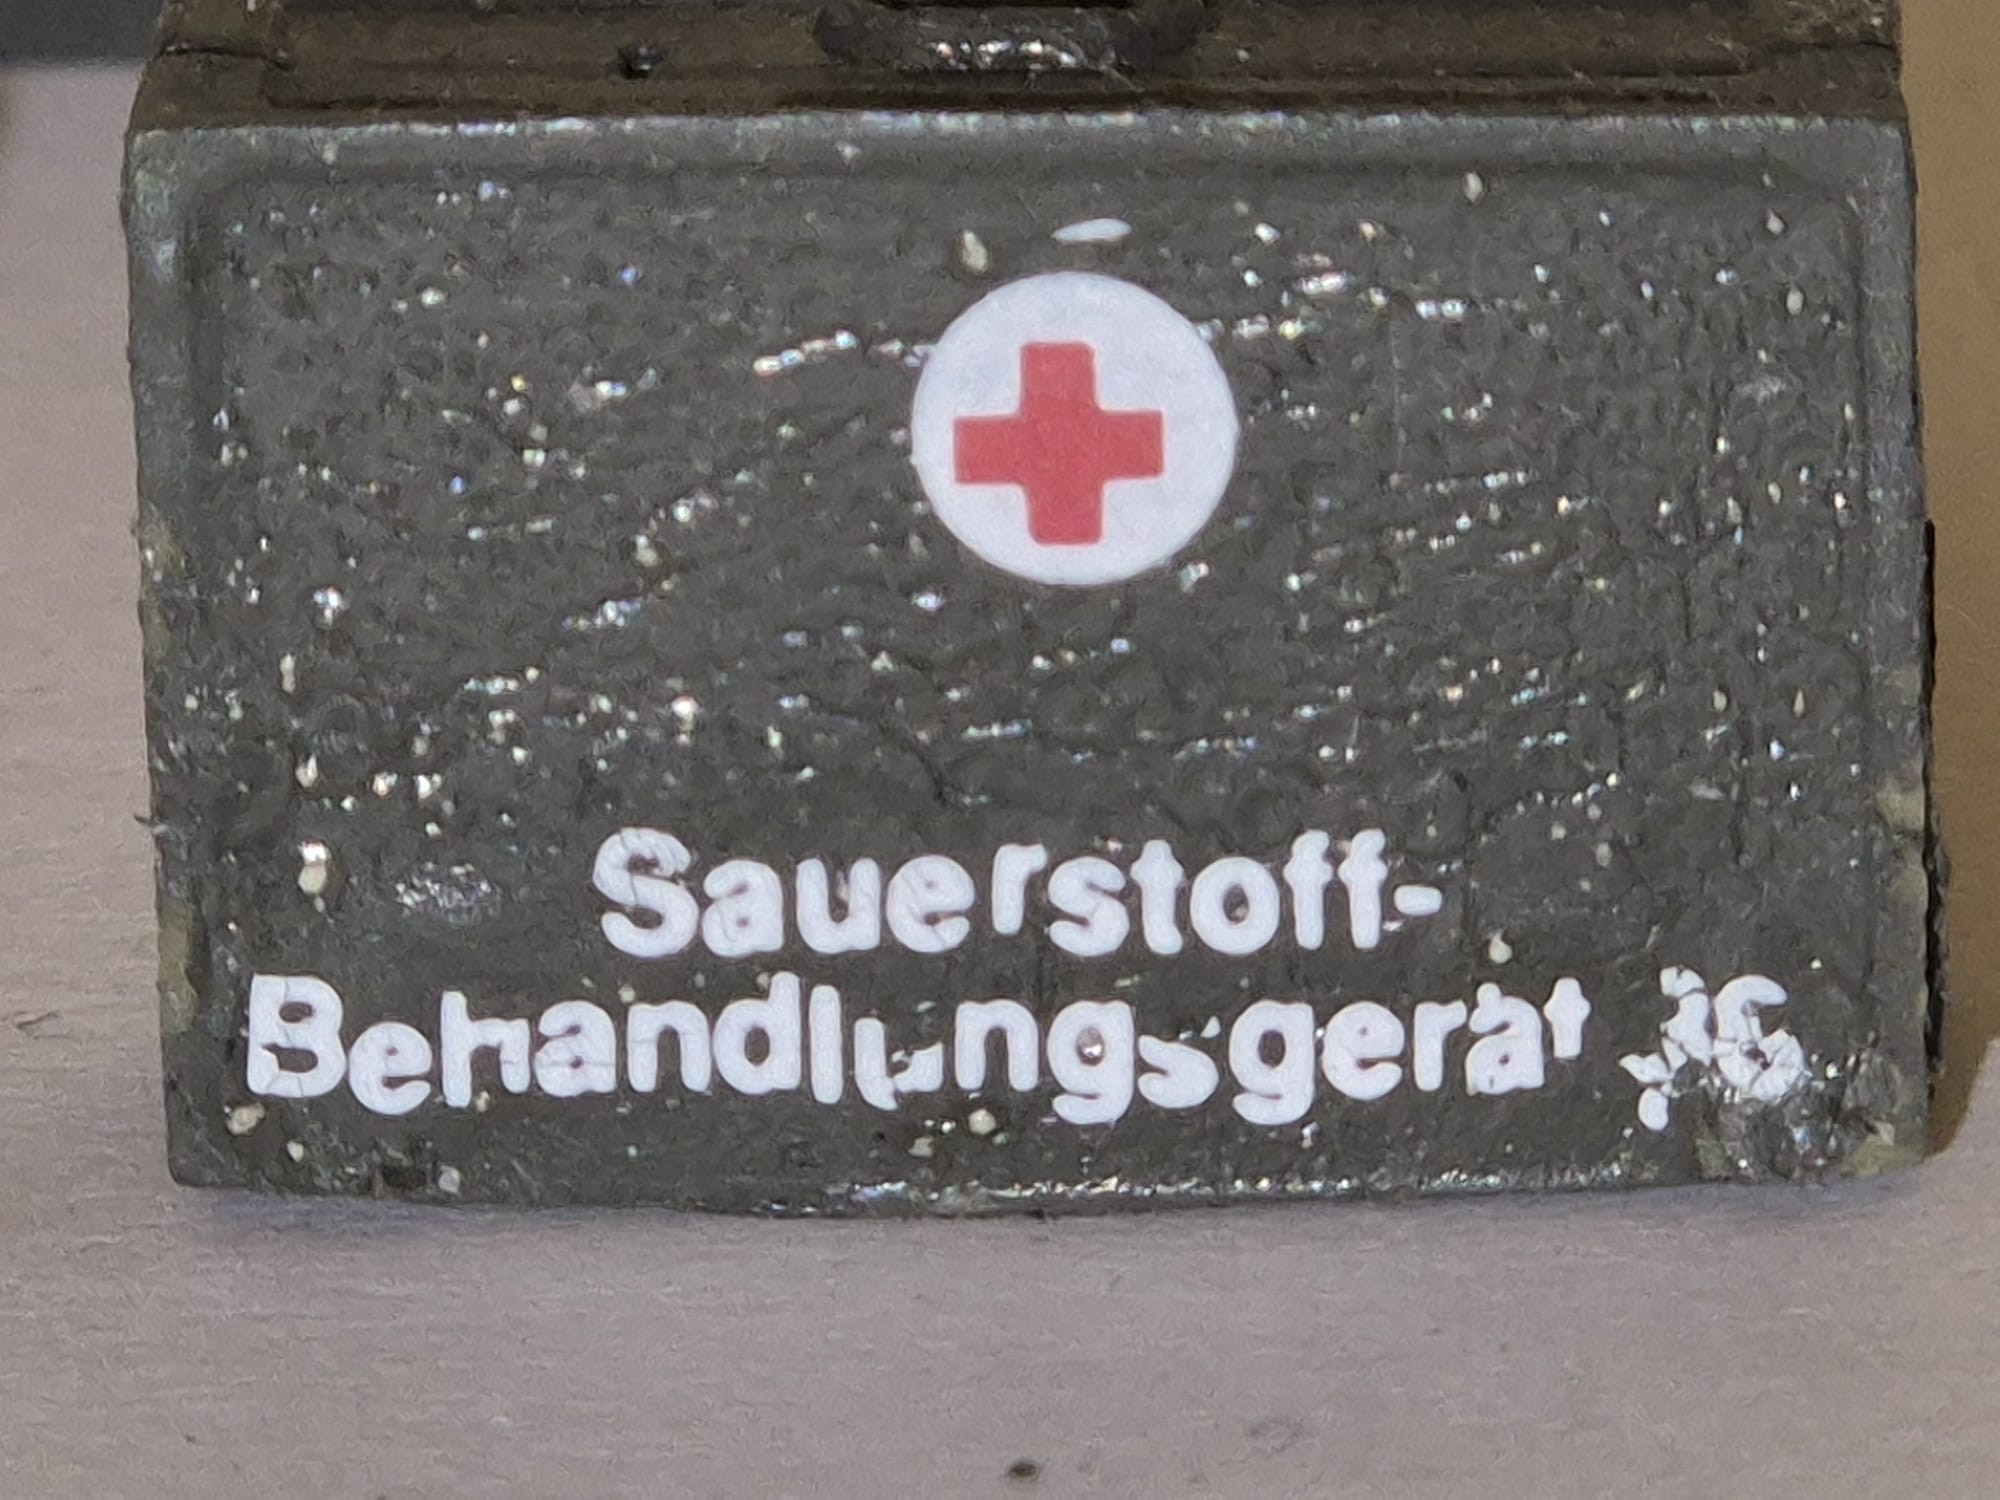
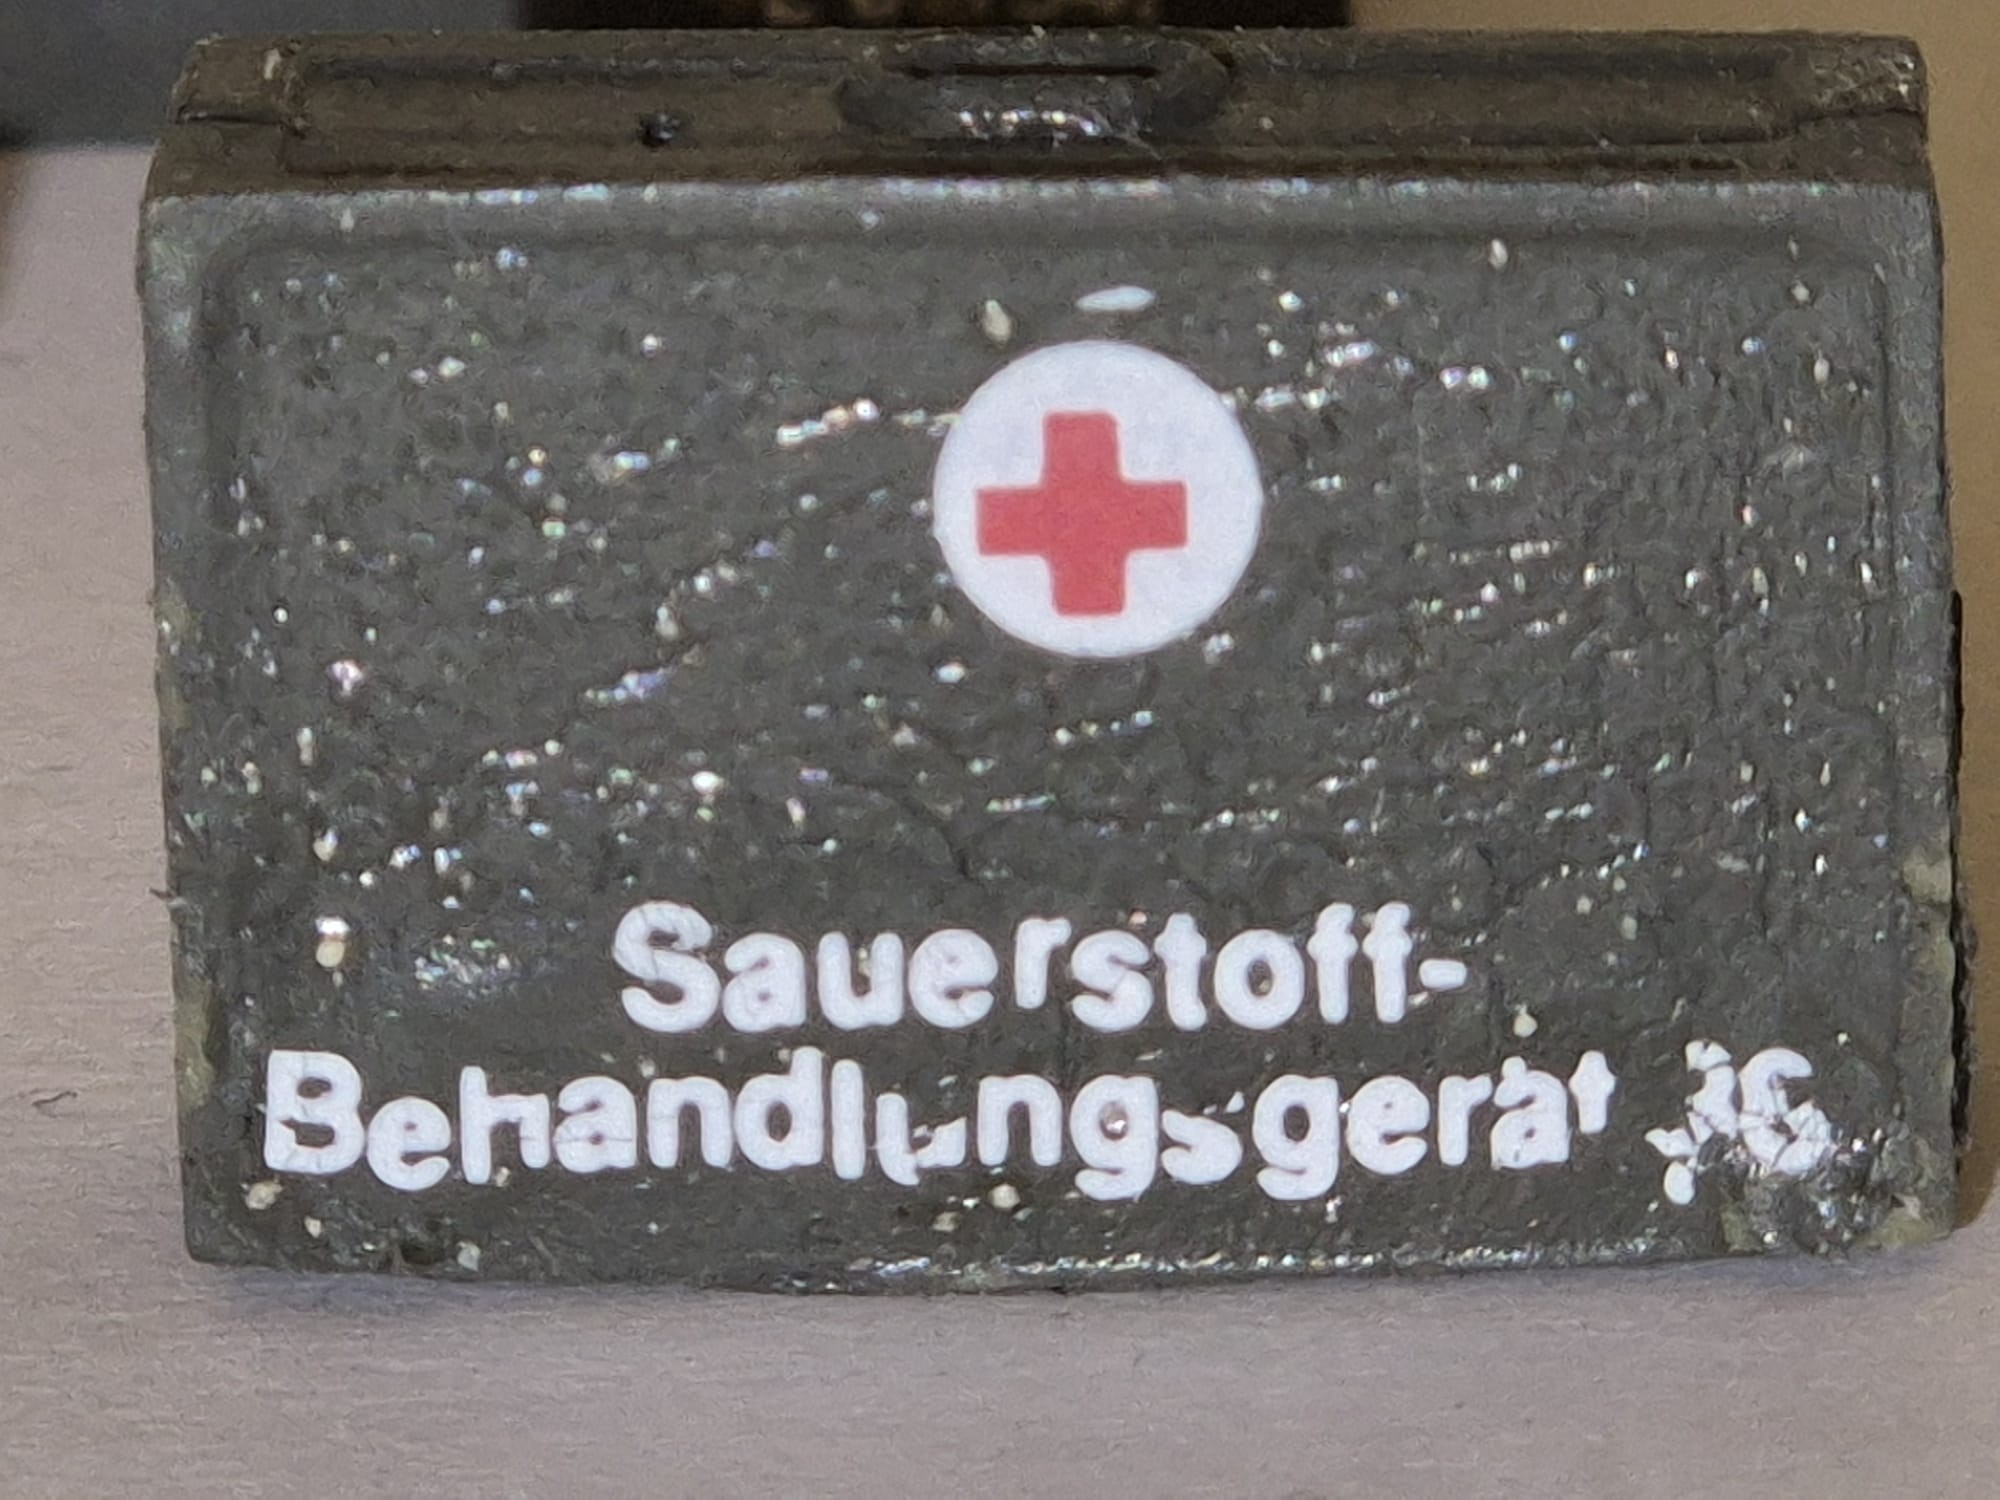
Well, as you can see, really lousy, but there is a positive side to this and it is that now I can weather them appropriately trying to depict wear and tear in their continuous transports. Do not be fooled by the bright spots you saw unto them, this is simply the reflection of the flashlight I used. When you look at them with your own eyes the colors are indeed uniform.
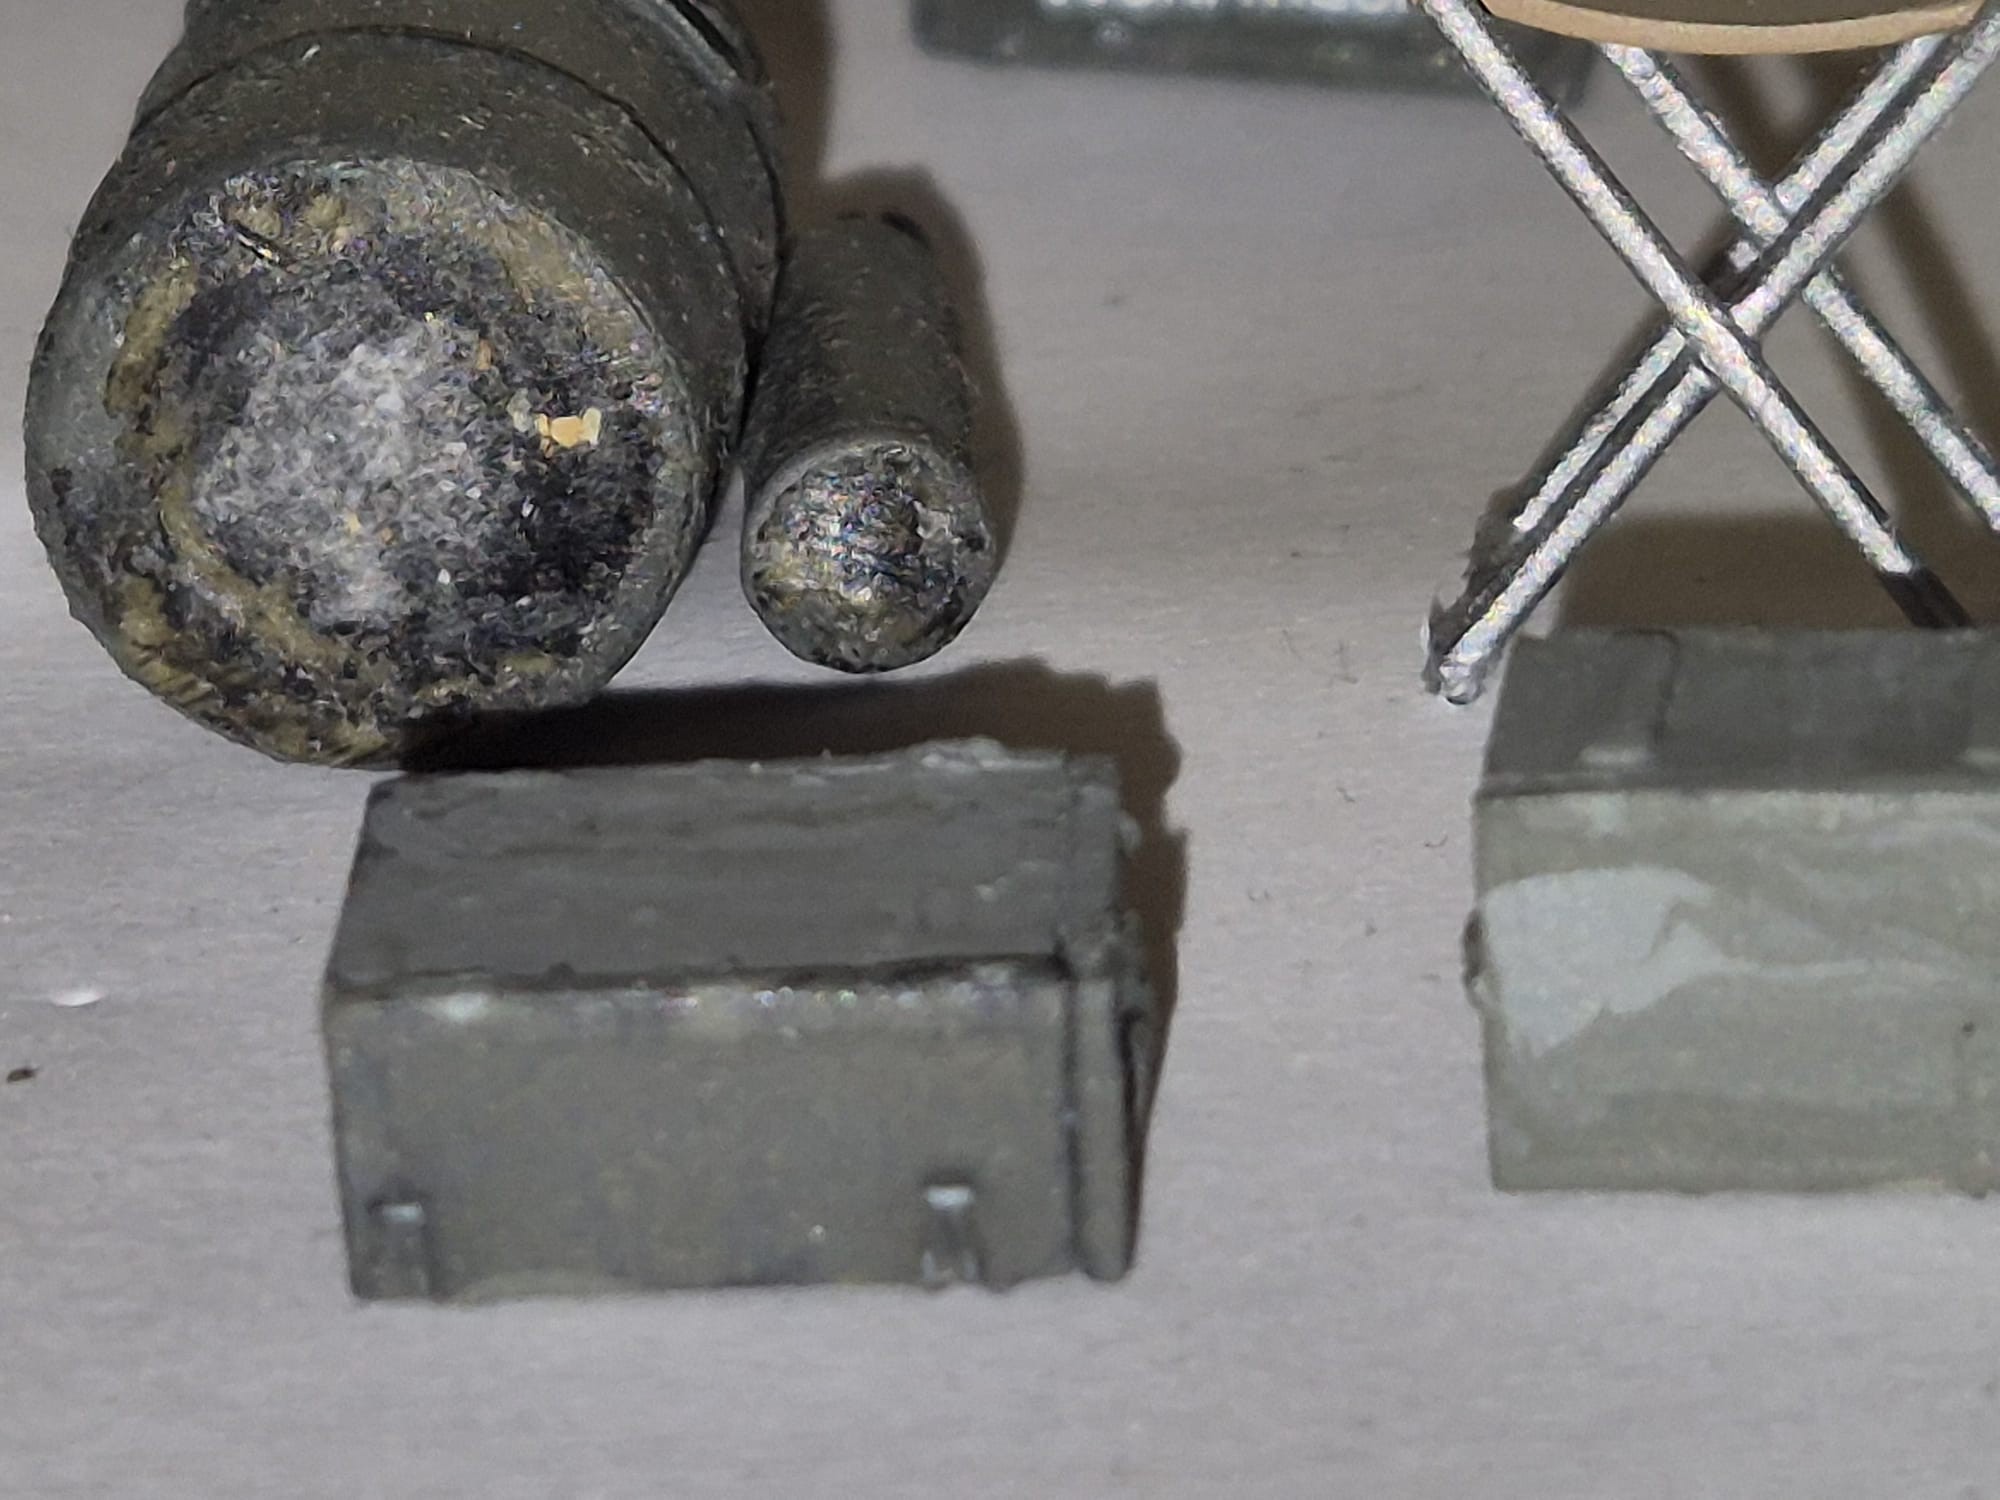
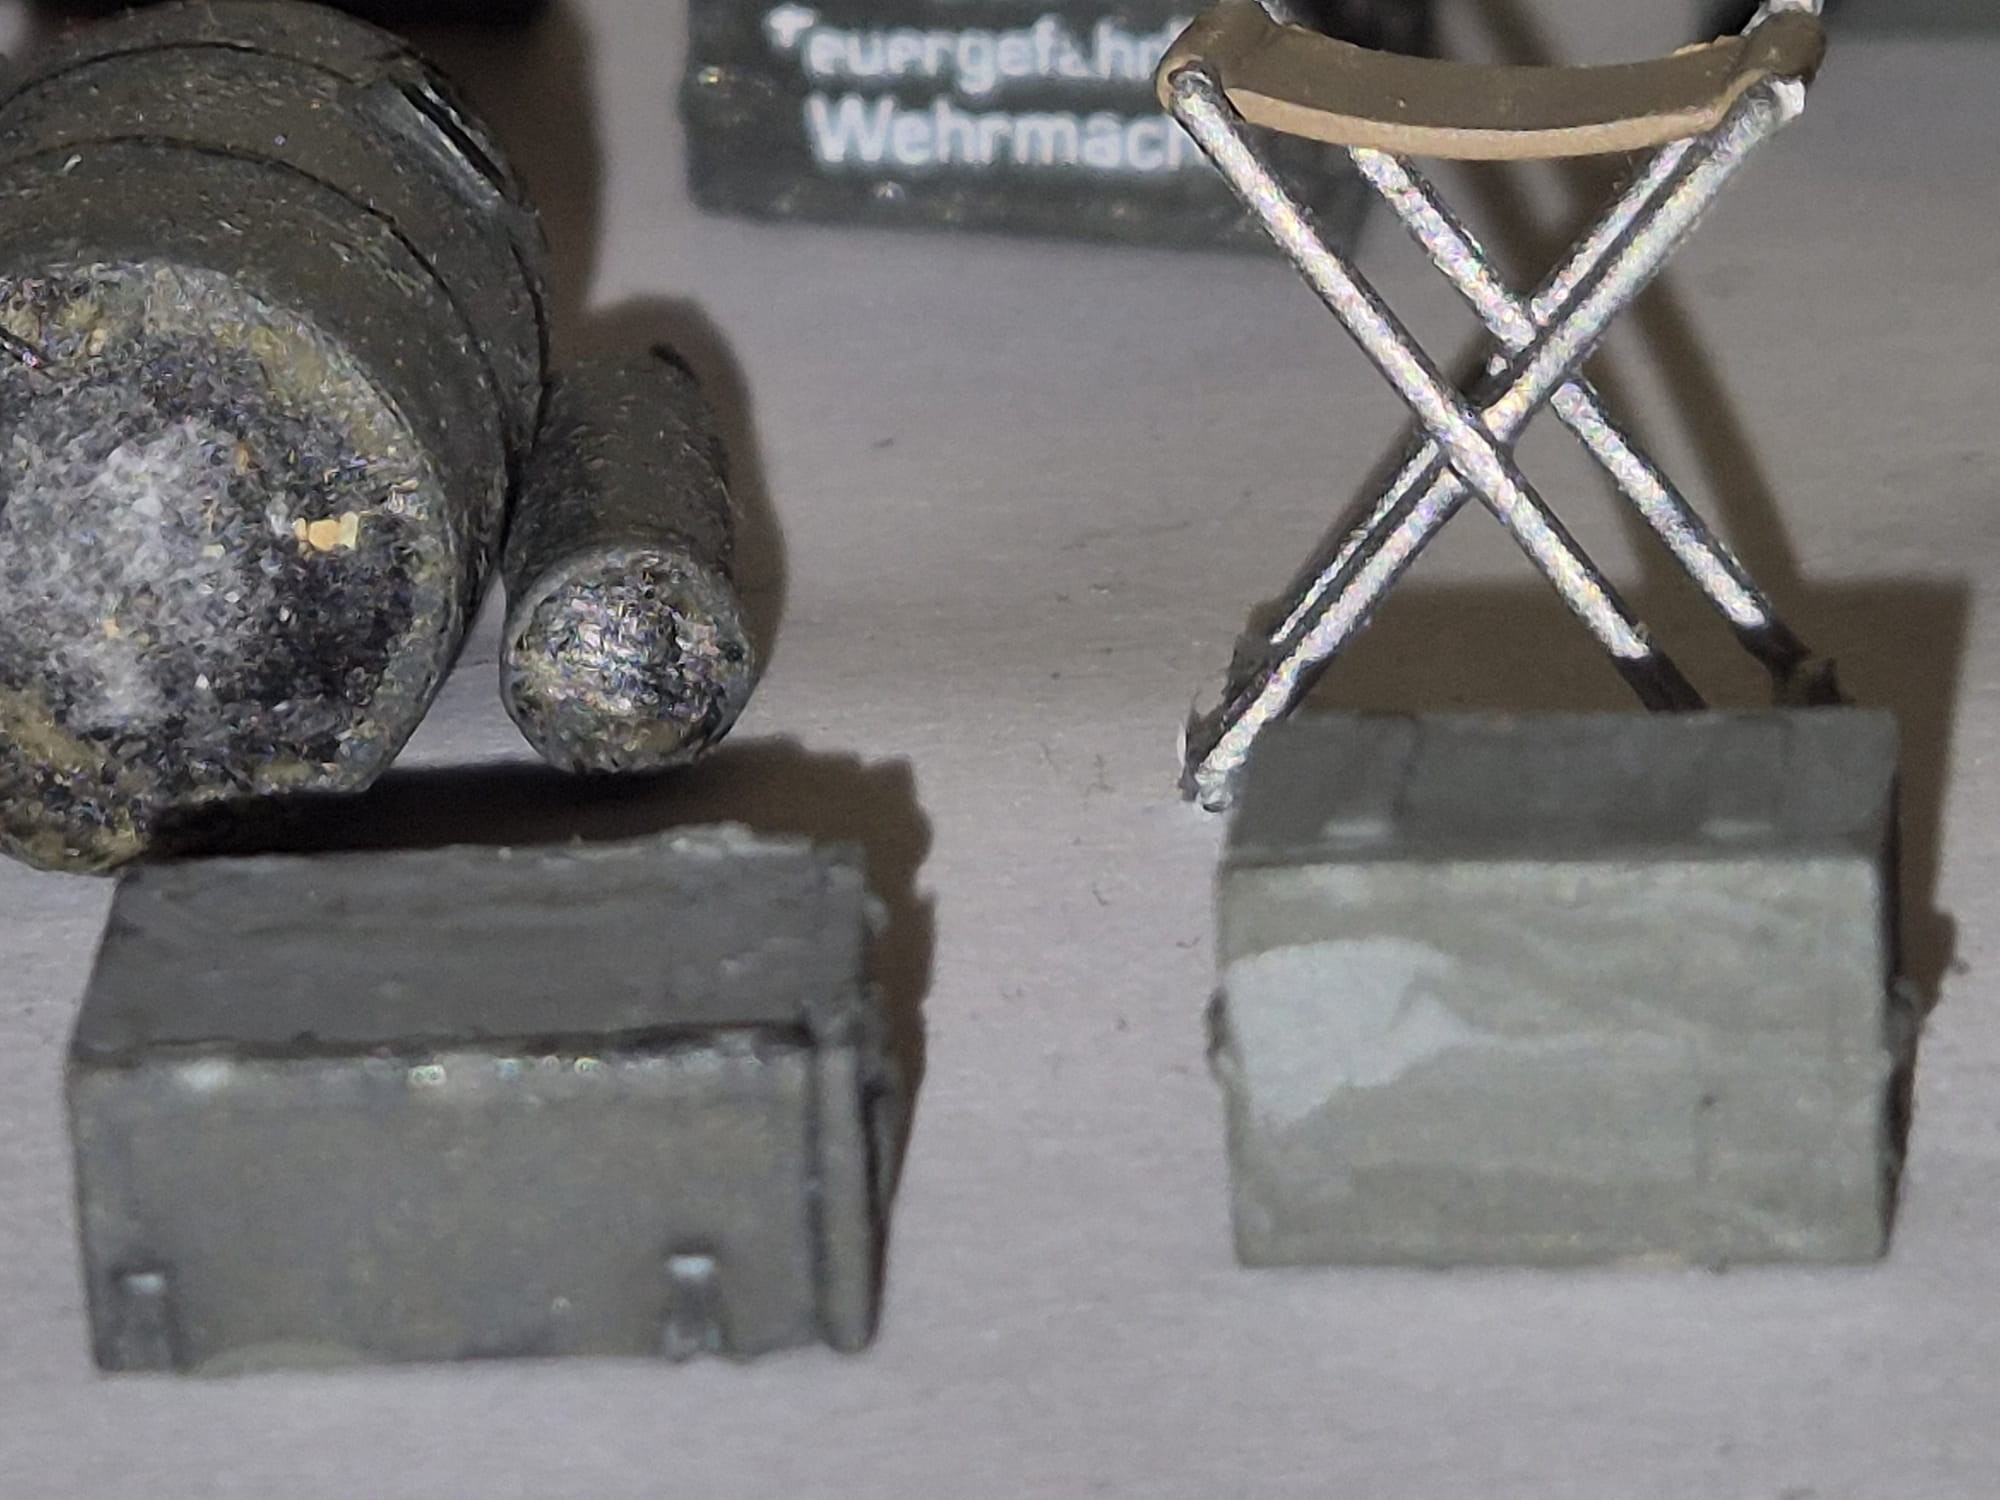
And this is just for Boxes and Canisters.
The rest follows…

6 Likes

OK now that I have shown you the disaster which will turn into something interesting anyway, I am going further and for this I need to Introduce the other two makers of these Communication Devices.
The first one being Dragon that in time offered an entire Communication Center in styrene which seemed quite appropriate.
Again nice picture on the box, but still no decals, nor specification of what type of what Communication Device you were supposed to build.
And here are the instructions they did offer…


About this last picture. What you see on top of the page is a soldier pedaling on a sort of power generator. If I were a fitness instructor I would admire him, but alas this is an outdated depiction of how later devices where powered. Evidently this is probably meant for an Operation Barbarossa scenario based in Russia in either 1941 or 1942. This is why I won’t include this outdated device and replace it instead with two fuel alimented GG400 Generators included in Riich Models offering which also includes excellent depictions of German Antennae.


I am still building them (pictures of this will follow once they are assembled).
Still, the rest of the scene Dragon presents is still valid.

I will send the pedaler on a journey across Normandy…

3 Likes

Third but not least, and probably the best of the bunch, although really more made for jewelers than for even the most skilled modeler, unless you are either Chinese or Japanese (they are extremely gifted as modelers), due to the many minute - almost invisible - tiny bits included. Eduard offering is filled with refined detail to the kazoo, but its thin PE parts tend to bend all by themselves and although this might be considered a major help by some modelers, it is not really very practical since they also tend to break if one is not very careful handling them. And those very tiny itsy-bitsy other things hanging on the frame are so fragile that one can barely handle them, even with specialize tweezers and highly sharp cutting tools. Not to speak completely impossible to glue them with super glue. They stick everywhere except where they belong.
And so here are their instructions, thank heavens, with reference to the actual device to be built and what’s more with all the details already pre-painted, except maybe of their casings which will have to receive a more appropriate touch of color with medium Feldgrau or German Sand Yellow, depending the maker of that device.


You may see a lot of crosses and obliterated details, since many are either not intended as a mobile item or the parts suggested are by far too tiny to handle and in 1:35 scale one can barely see them, if at all, especially once I will repaint the casings.


I want also to specify that some of these devices, when used indoors as in my case, rarely kept their frontal protective doors in place and many were simply detached from the device altogether, also to gain space. Believe me, I was a signal with the Swiss Army (or if you will, Communication NCO) and we often got rid of them when our radios or transponders were in use.

2 Likes

OK, now that I have introduced the various makers of my cross to bear, I am introducing you to the real devices I am attempting to so reproduce.

The first of them is the FuG. (for Funkgerät or Transmission device) 9.


The second is the FuG.11


The third is a Torn.E.b (stands for Tornister or Packed assembly version E.b)


The fourth is again a Torn.E., but this time version d…


The fifth is a Torn.FuG.b1…


The sixth is a Torn.FuG.d2…


The seventh is a Field Teletyper (later to become what we knew as Telex).


The eighth is the famous ENIGMA machine and its timer


Smaller devices were a portable radio station, either battery driven or loaded by hand using a handle, a field telephone and various telegraph desk devices, microphones and headphones.


You may have noticed how different they all look, either because some were still painted in early WWII colors, others instead, following some local prescriptions.
On the Torn.FuG.d2 you may have noticed that the interior of the protective shield door contains some wooden rods in segments. They were the poles on which the antenna was fixed on top of the device.
Eduard gives us just a very faint hint of this by just including two metal holders.
In order to depict it correctly I will need to cut some toothpicks to an equal length - probably having also to “thin” them somehow (probably with sandpaper) to make them fit smoothly into the holders) - and paint them accordingly.
Other than that their reproduction is still a valid one.

3 Likes

And finally… now I can show you what I have achieved so far. I hope you won’t be too disappointed by my work.

BTW. my Bunker is for now off limits, since I discovered during a test with the tables I have built that the wooden floor I did so carefully build, did start to bend up at its ends. Probably due to the plastic card to which I did attach it to secure the various boards. I now firmly stuck it to the ground with a huge dose of Ambroid Pro Weld waiting for it to dry thoroughly before fixing all the tables and devices in it.

I am also still studying the best way to cable them all together and with what materials. Metal rods, even the more flexible ones don’t work. I thought of fine soldering material which can easily be bent and painted as well as once again adding fine nylon thread, but this time attached with Pro Meld.
That stuff glues everything and once applied parts cannot be either separated again or broken off, unless of course you want to destroy your entire work, that is. I simply love that stuff.

And now to my work… First of all a general view from above. As you can see, I have more tables than chairs. This is due to the fact that I have two sets of the Communication Center by Dragon, but a few tables are not meant to harbor any device, instead they are meant to study maps.
All in all I have ten tables. Eight metallic folding ones (One is missing in the picture) and two wooden ones.
Five metallic tables and folding chairs are reserved for the operators, two more, on the opposite side of the Bunker will have all sorts of Maps laid down for officer’s situation studies and one wooden table (the field green one) will be placed against the end wall harboring hand held devices and perhaps underneath, also have medical wooden boxes (if they fit, that is).


So far so good. As said, I am still building the two power generators and now I will also have to paint the too shiny PE parts of the Eduard items which are neat indeed, but in an Army at war nothing is really neat or fashionable, it is always dirty, used, bent, bumped into, paint work constantly remade with variants, oil spills are often seen, at times even some slight rust, but more than everything else it’s the grime and the smudges that accumulate on them, and that’s what makes them all look as “lived in” or simply often used. That’s what any true military boots on ground modeler is actually looking to achieve, and so, hooray for my horrors, since they’ll become a conversation piece indeed, if not really museum worthy crap.

Of course I will also have to finely choose how many of these devices I can make fit on each of the tables - obviously not all, but the rest will find more appropriate fittings elsewhere, in half-tracks, various emplacements or open field scenes either further on in Normandy, in the Netherlands, in Belgium, Luxembourg or even near the German border.
The solitary wooden table I have built is reserved for a U.S. airborne scene located at Carentan of which I am also assembling a few faithful reproductions of French Houses, of which, one will represent an advanced German observation post. But all that I will show at a later date.

3 Likes

Wow Patrick, very detailed stuff, looks great!

2 Likes

Patrick - You are right that dry transfers are a blessing and a curse. I find many unique markings as dry transfers (the blessing). Unless the surface is perfectly smooth the dry transfers sometimes do not stick completely even after careful and prolonged burnishing (the curse). You are quite right that a little bit of weathering and the wear and tear of moving equipment around can help explain the imperfections in the labels.

2 Likes

Patrick - Terrific research on the devices you are recreating.

2 Likes

Patrick - Painstaking work! Each piece is convincing in its own right. By the time you get everything in place I have no doubt that your scene will be suitably busy, detailed and convincing.

2 Likes

Thank you so much S.Hollowell, very kind of you. Yes indeed, but it could even have been better, and yet in this scale it is very difficult to paint them all correctly. As you say, very detailed, perhaps also a bit too detailed if one thinks how crammed of life the Bunker interior will be, but at least people may still recognize the effort put into it. Be well and be happy.

2 Likes

Thank you PaulC for your kind recognition of these difficulties. And to say that I did apply two hands of Satin varnish and let them dry completely before applying these darned dry transfers, but the true horror was the too thick carrier they came in. Being too thick meant that it kept on moving right and left and up and down on a constant basis. Not even by securing it firmly did the letters want to stick to the surface, and as said, some even just flew away instead of sticking to the surface (go figure!). On one particular item, the one called “Sauerstoff something” I had to redo it three times by repainting it from scratch since the entire kaboozle came off sticking to the paint ripping it from the underlying resin. Yes, I will apply some washes and some slight weathering around them in order to make them look worn. I will also repaint the exteriors of the Eduard exteriors and some interiors as well, since nowhere have I spotted a brass color anywhere in the original items. Even their Brown color, simulating backpack style carriers belongs either to early war items or to some worn by mountain troops. So, once more unto the breech my friend and back to the painting job. Once I will have them all finished I will take more pictures of the more accurate paint job done unto them and the weathered boxes as well.
Be well and stay cool.

2 Likes

But the pain… the pain in researching them all. Not an easy task. More often than not, even on Wikipedia you may only find written descriptions, often only on the technical side, but seldom an actual picture. Fortunately Wikipedia left a single shortcut to a Russian museum that contains most of them. But further research brought me to an WWII items auction site and fortunately I found the other missing pieces (even better pictures as well). I can deem myself fortunate to have gathered them all in order to depict them in their original colors.
FYI, I instinctively thought that late war devices were mostly painted in German Field Gray II, the same some regular Army artillerymen and tankers wore at that time and luckily I was right in that assumption, although I also found that there were some painted in German Yellow Sand and some of the Eduard produced ones will be repainted like that. Be well and thank you for your kind comment.

2 Likes

Thank you again PaulC for your kind compliment. Indeed, the scene will rather be busy once the crew and officers will be added, and that’s one of the busy ones, believe me.
I only hope that once completely finished all this work will still be somehow visible. It all depends on how I will place the figures in it, but before the figures will still come all the vehicles included on the road and the parking lot. All the figures will come next and to finish it all will come the complete vegetation distributed a bit everywhere, including the cliffs and particularly where the hedgerow will be. There will also be a couple of trees and a few minor bushes. The camouflage net will be only presented rolled back only leaving a small portion stretched over a narrow stretch of the rear part of the Bunker, allowing thus to see the interior.
I am still looking for an interior lighting solution but alas none is readily available.
What I am seeking in fact is a bundle of warm white light LED self gluing strips which could be activated by remote control without all that stupid cabling interconnections which would mean a further very difficult operation of drilling a hole from beneath the diorama inserting those darned cables inside the bunker only to finally attach them all to the ends of those strips.
I just need a completely wireless kind of LED strips but I can’t find them anywhere.
Amazing considering that today almost everything runs without cables.
Oh well, I will look further.
Be well and stay alert.

2 Likes

I have used a few auction sites in the past to find uniform and equipment details. Generally this has worked well, though one must be careful that the item has not been refinished for sale as often the refinishing is not historically accurate. Finding the Russian museum is a stroke of good luck as they are perhaps less likely to refinish original articles.

2 Likes

Absolutely true, but concerning the Auction site, amazingly, except for some tubes to the rear and some remade cabling, the devices were as they were when found. They were even guaranteed to be the originals, otherwise I wouldn’t even have bothered downloading the images. Some were also taken from a group of true historic collectors who have just brought them back to life. Their devices are all in a functional condition. Some of them are even glass blowers themselves to reproduce the much needed bulbs to make them work. Just amazing.

3 Likes