I wish more people would comment here, what you’re doing is really cool G!
Thanks Gamera, but it’s no biggie as I’m primarily using this thread to motivate myself to keep pushing ahead.
Those curvy flaps are now being addressed. This was one of the stumbling blocks I ran into many years ago that contributed to shelving the project. I resorted to plank and frame with 0.030" sheet - it’s a primitive method but I know it works.
https://flic.kr/p/FMBTED]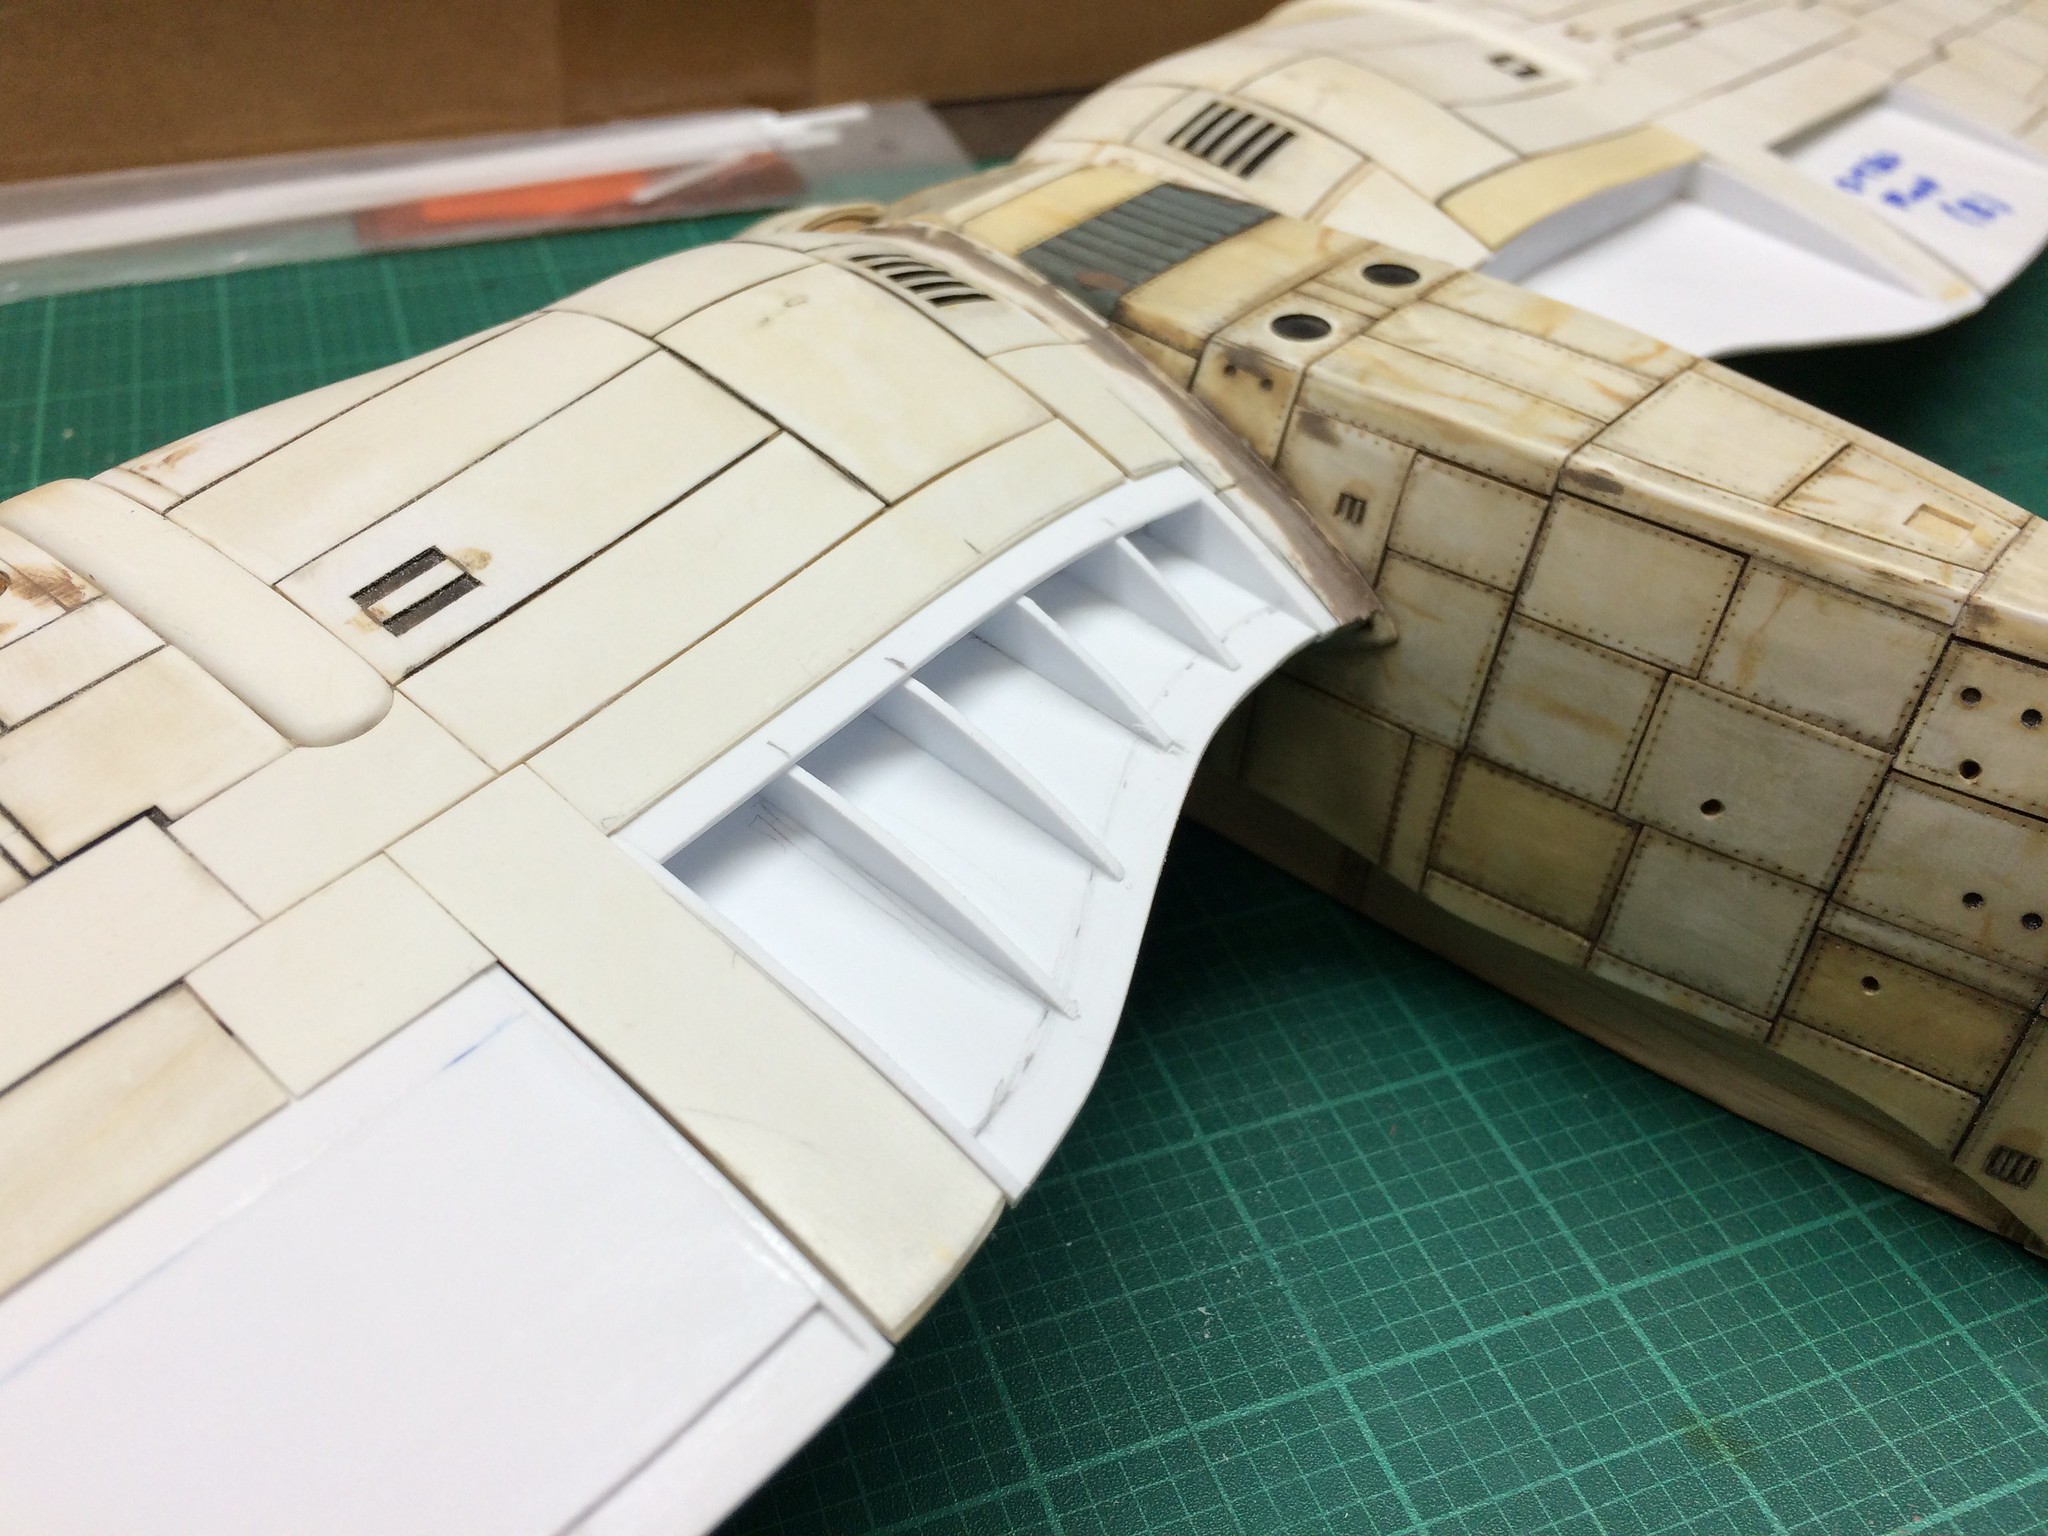 [/url]Bakagalas-40 by N.T. Izumi, on Flickr
https://flic.kr/p/HmL8Ld]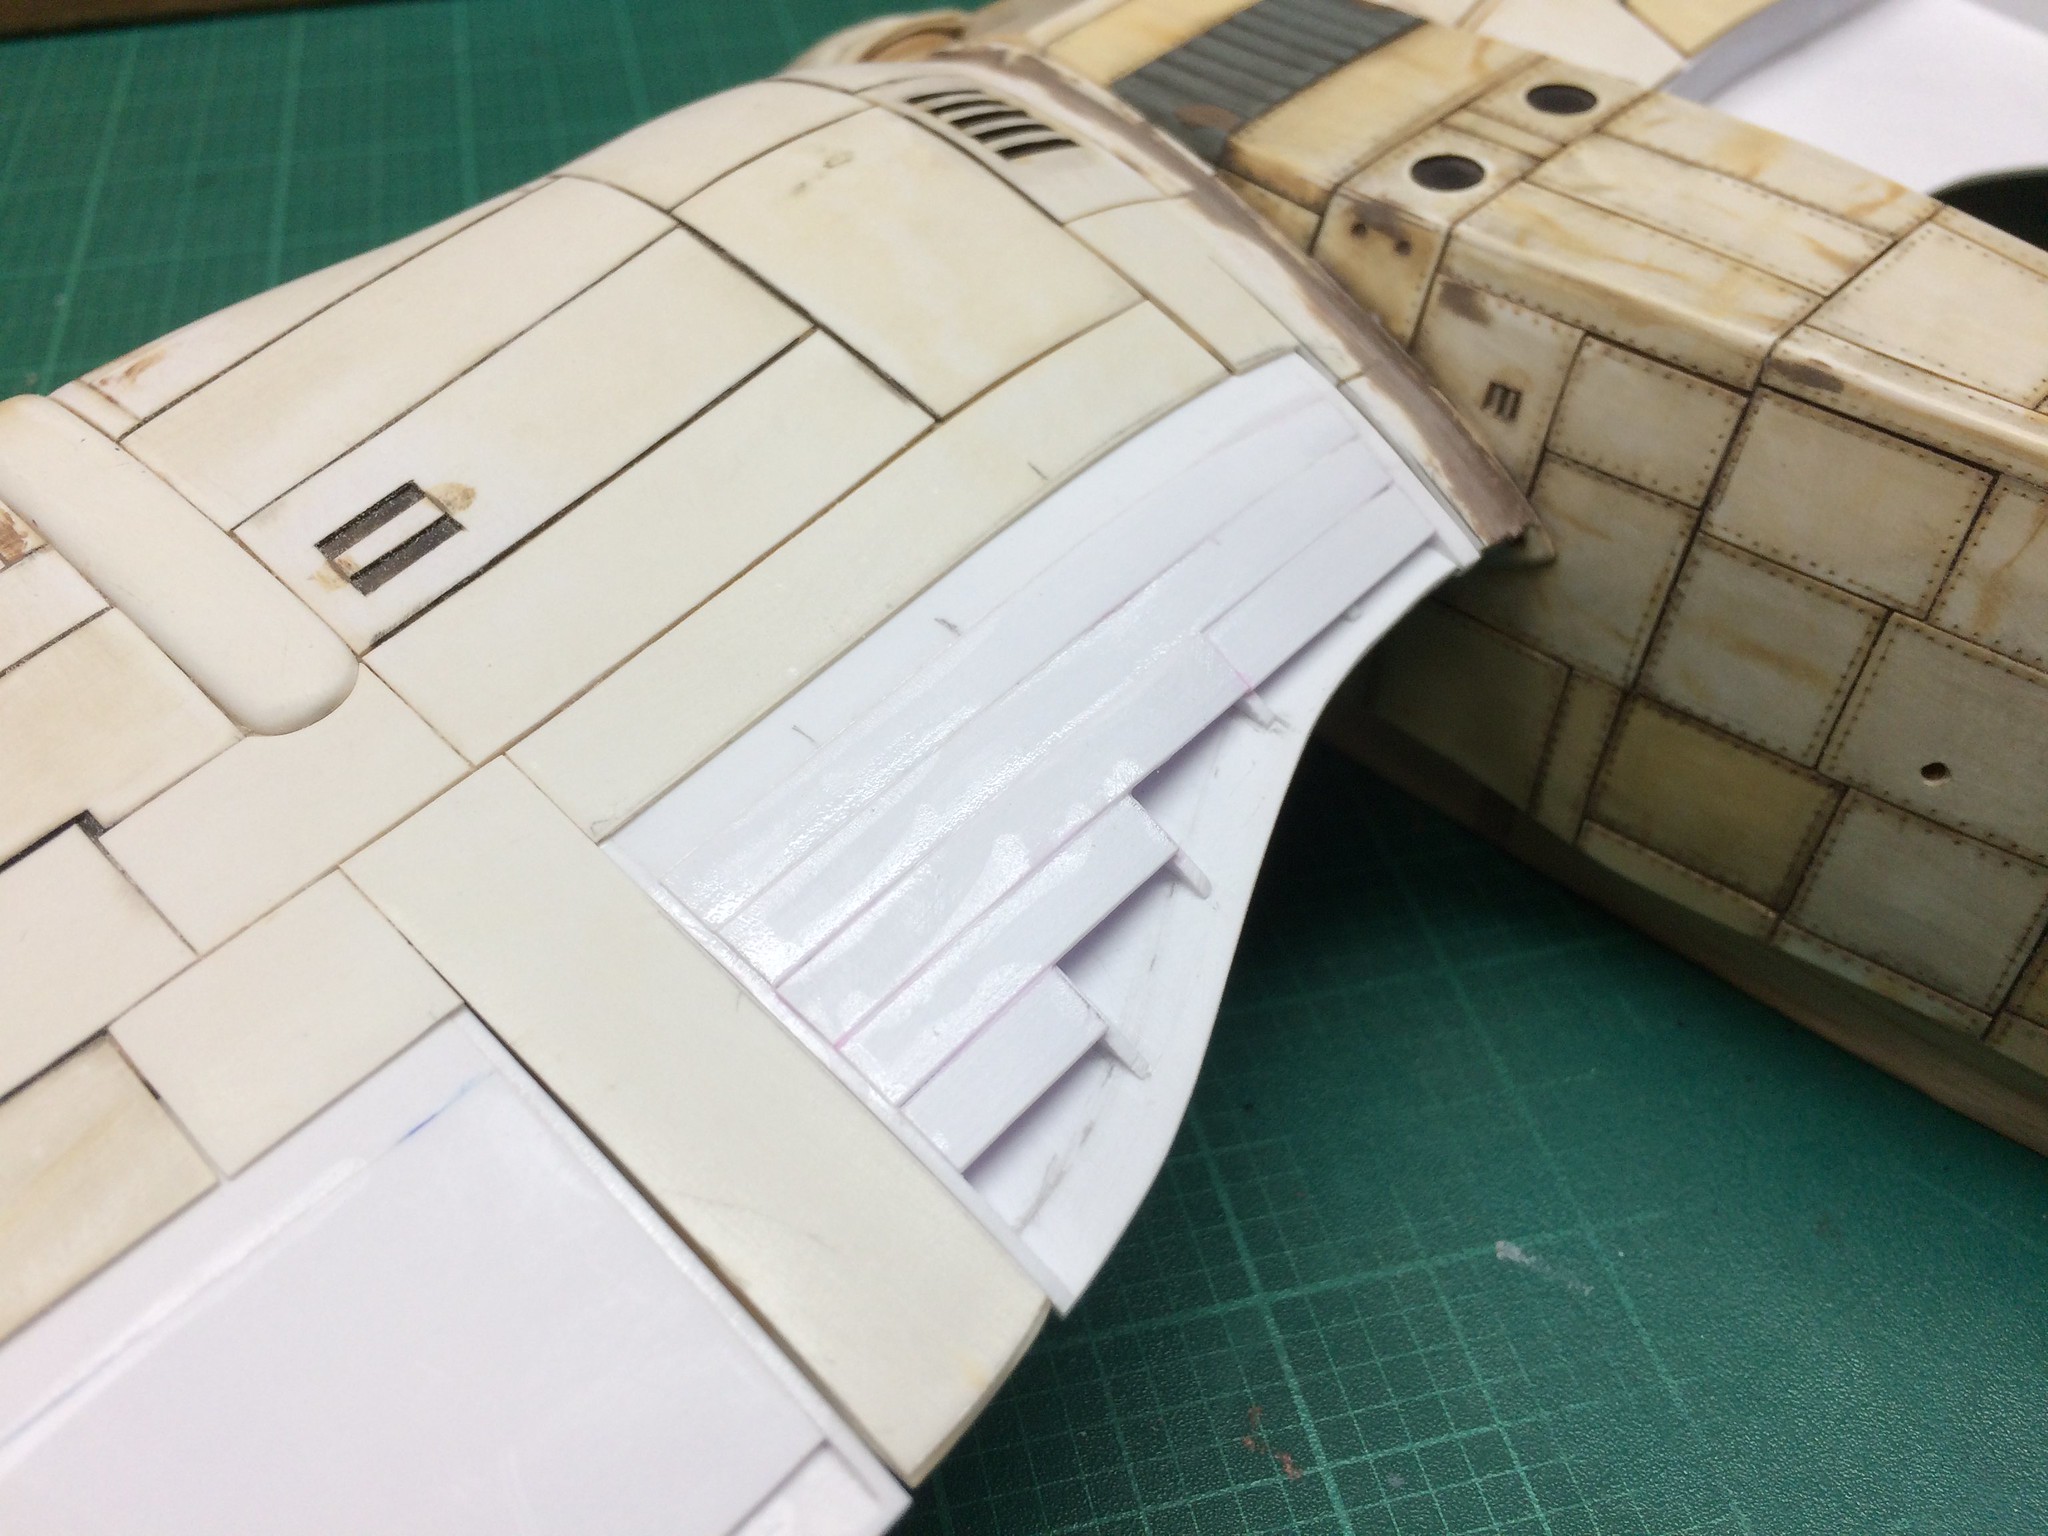 [/url]Bakagalas-41 by N.T. Izumi, on Flickr
https://flic.kr/p/248z84Z]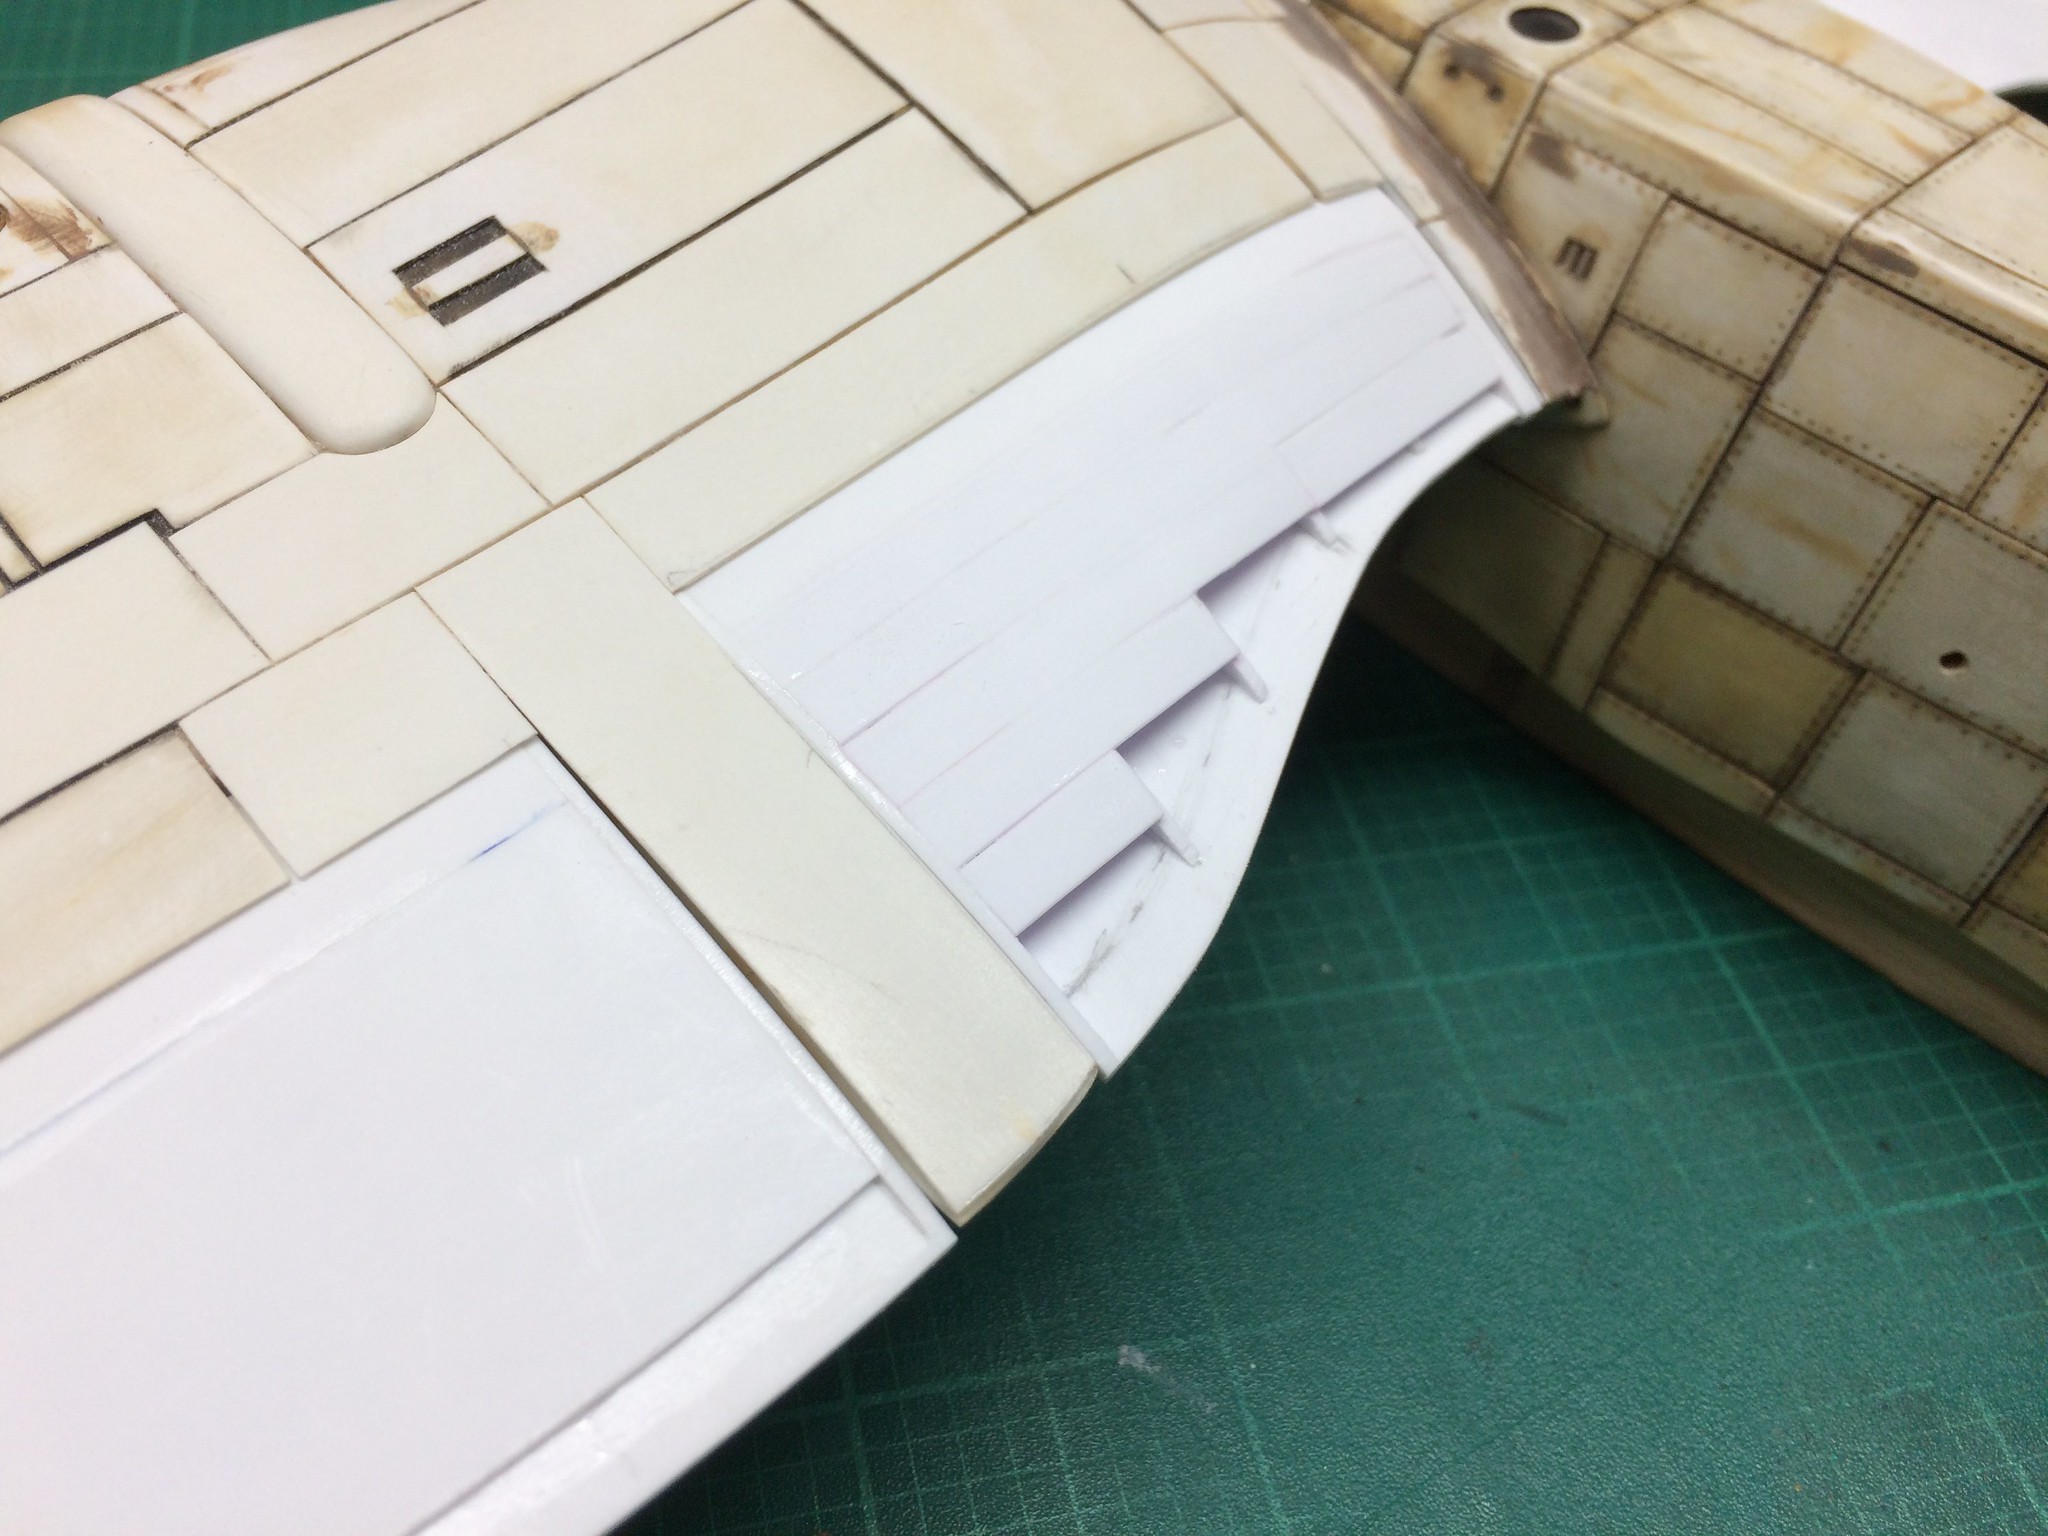 [/url]Bakagalas-42 by N.T. Izumi, on Flickr
https://flic.kr/p/HmL8ch]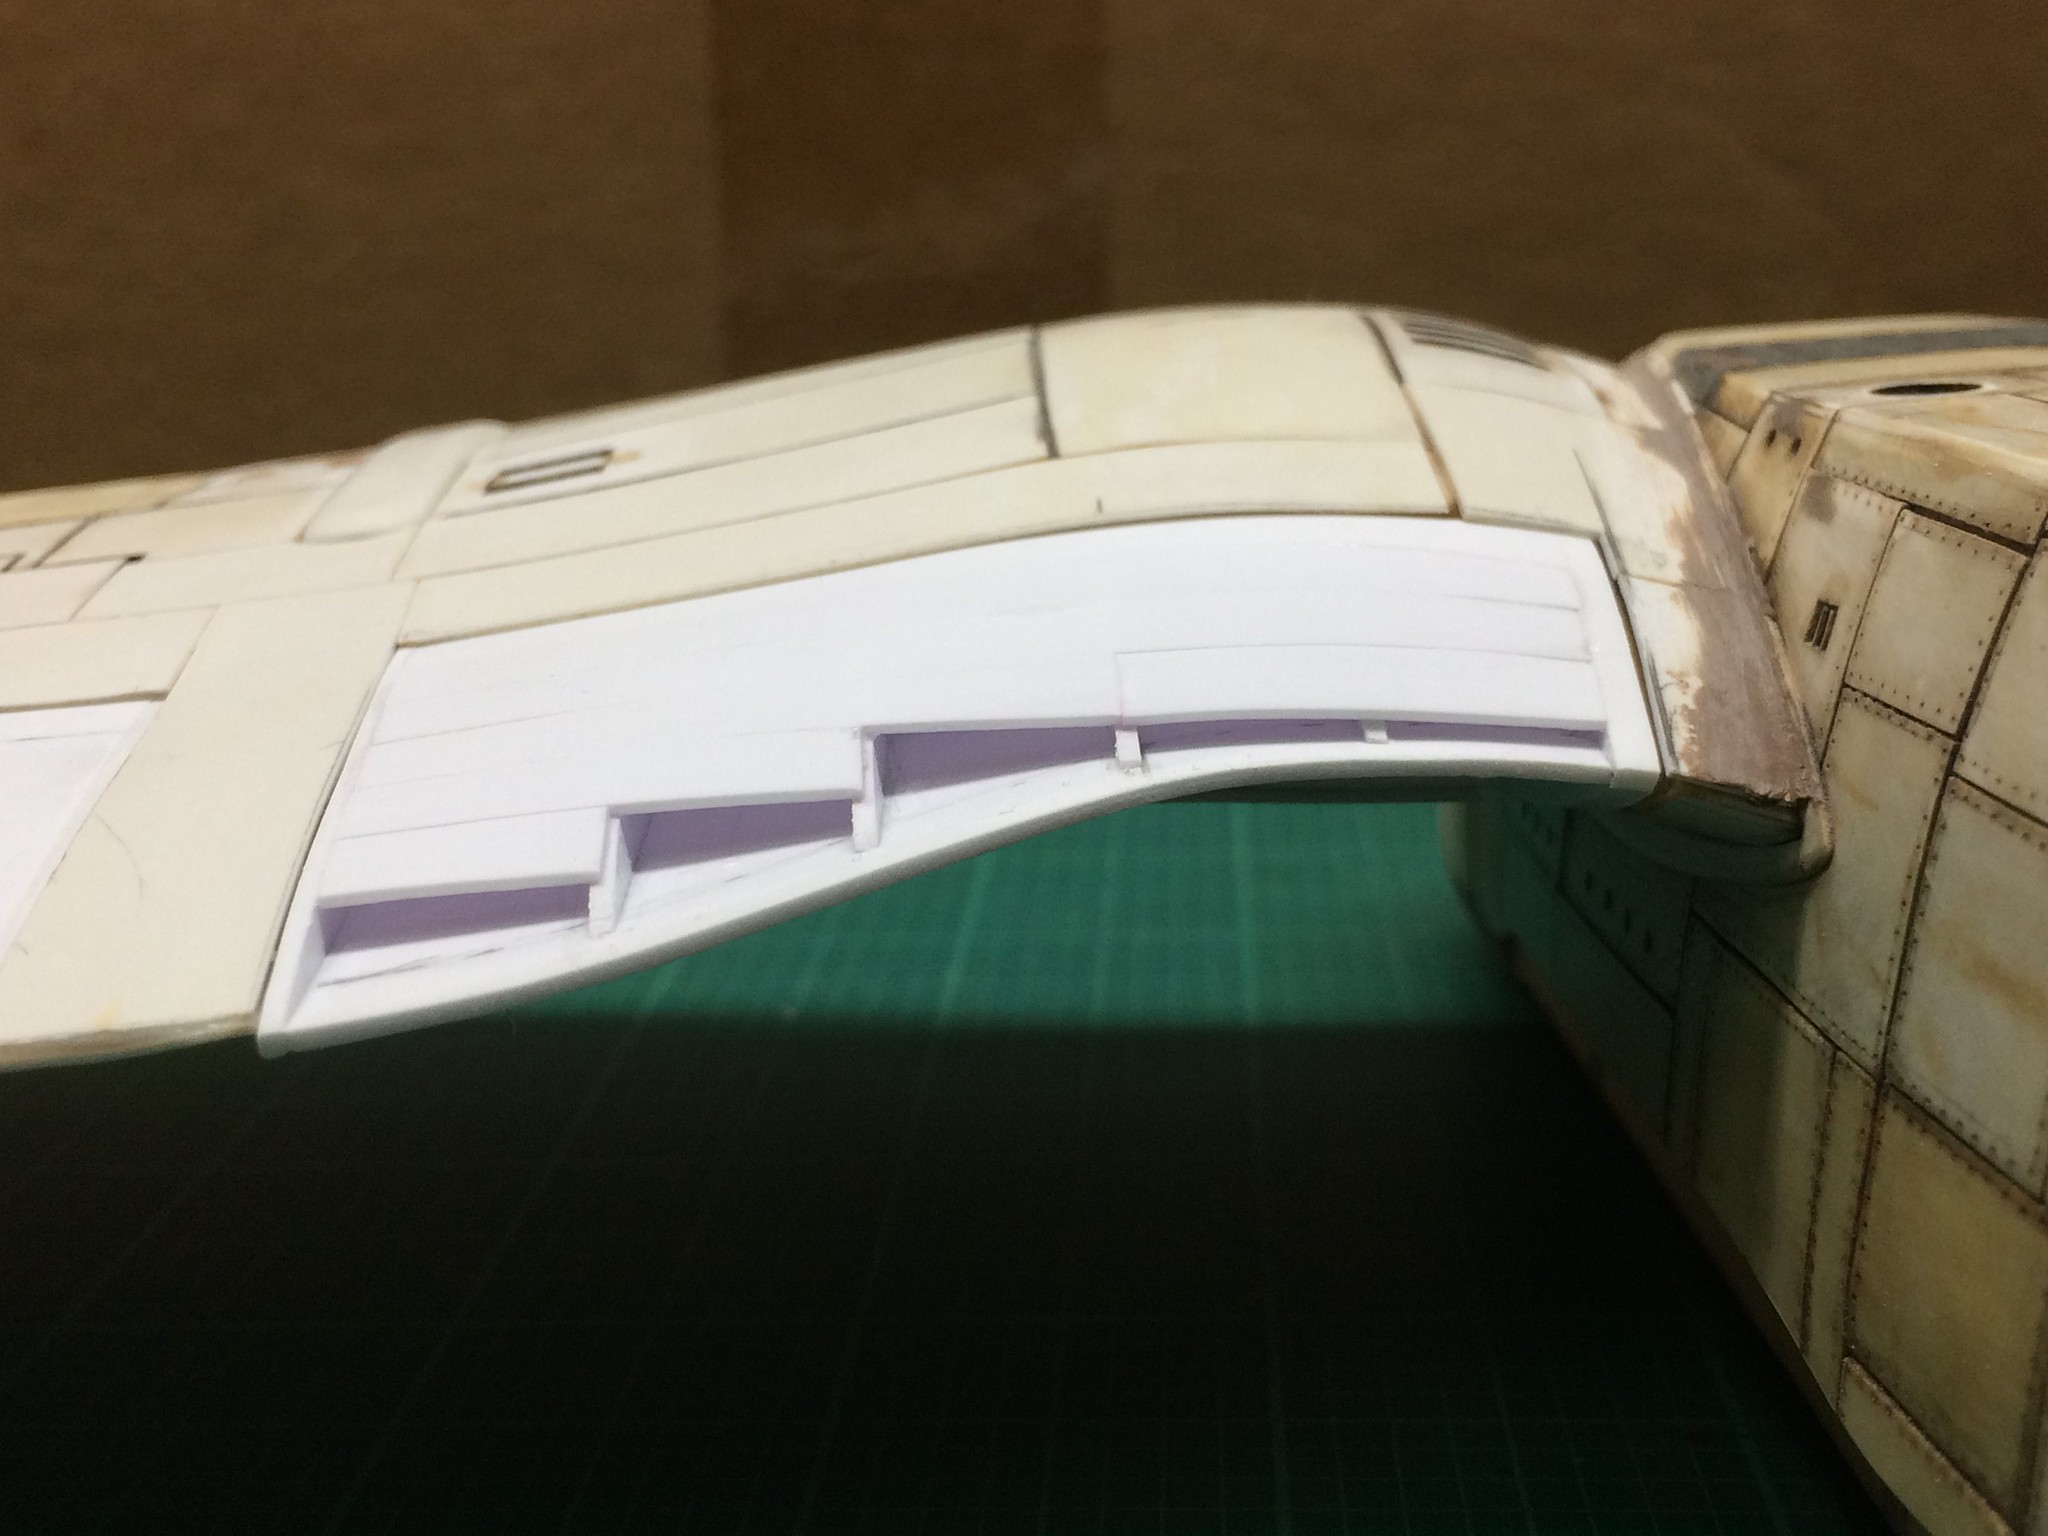 [/url]Bakagalas-43 by N.T. Izumi, on Flickr
I realise the photos are crummy, but my phone camera has difficulty focusing on all white things.
The flaps will receive a second skin to incorporate details, but they will need to be vac-formed so that they are one piece. Stay tuned as Wily E. Coyote concocts an elaborate plan to tackle this problem. Actually, I have already concocted it; I’m just waiting for the package from ACME. [:P]
Well, there may be only one passenger on the crazy bus but I’m enjoying the ride. [;)]
WOW, went back to the start of the thread, holy smokes what a cool project. I wouldn’t do a cool project, but you sir have this thing in the bag. Glad I started from the beginning 'cause it is cool. Bus driver this stop is mine but I will need a ride home.
Thanks Gamera and Armornut for the comments!
Poky progress due to work and feeling lousy last couple of weeks, but work continues on the flaps.
https://flic.kr/p/25GN9Pg]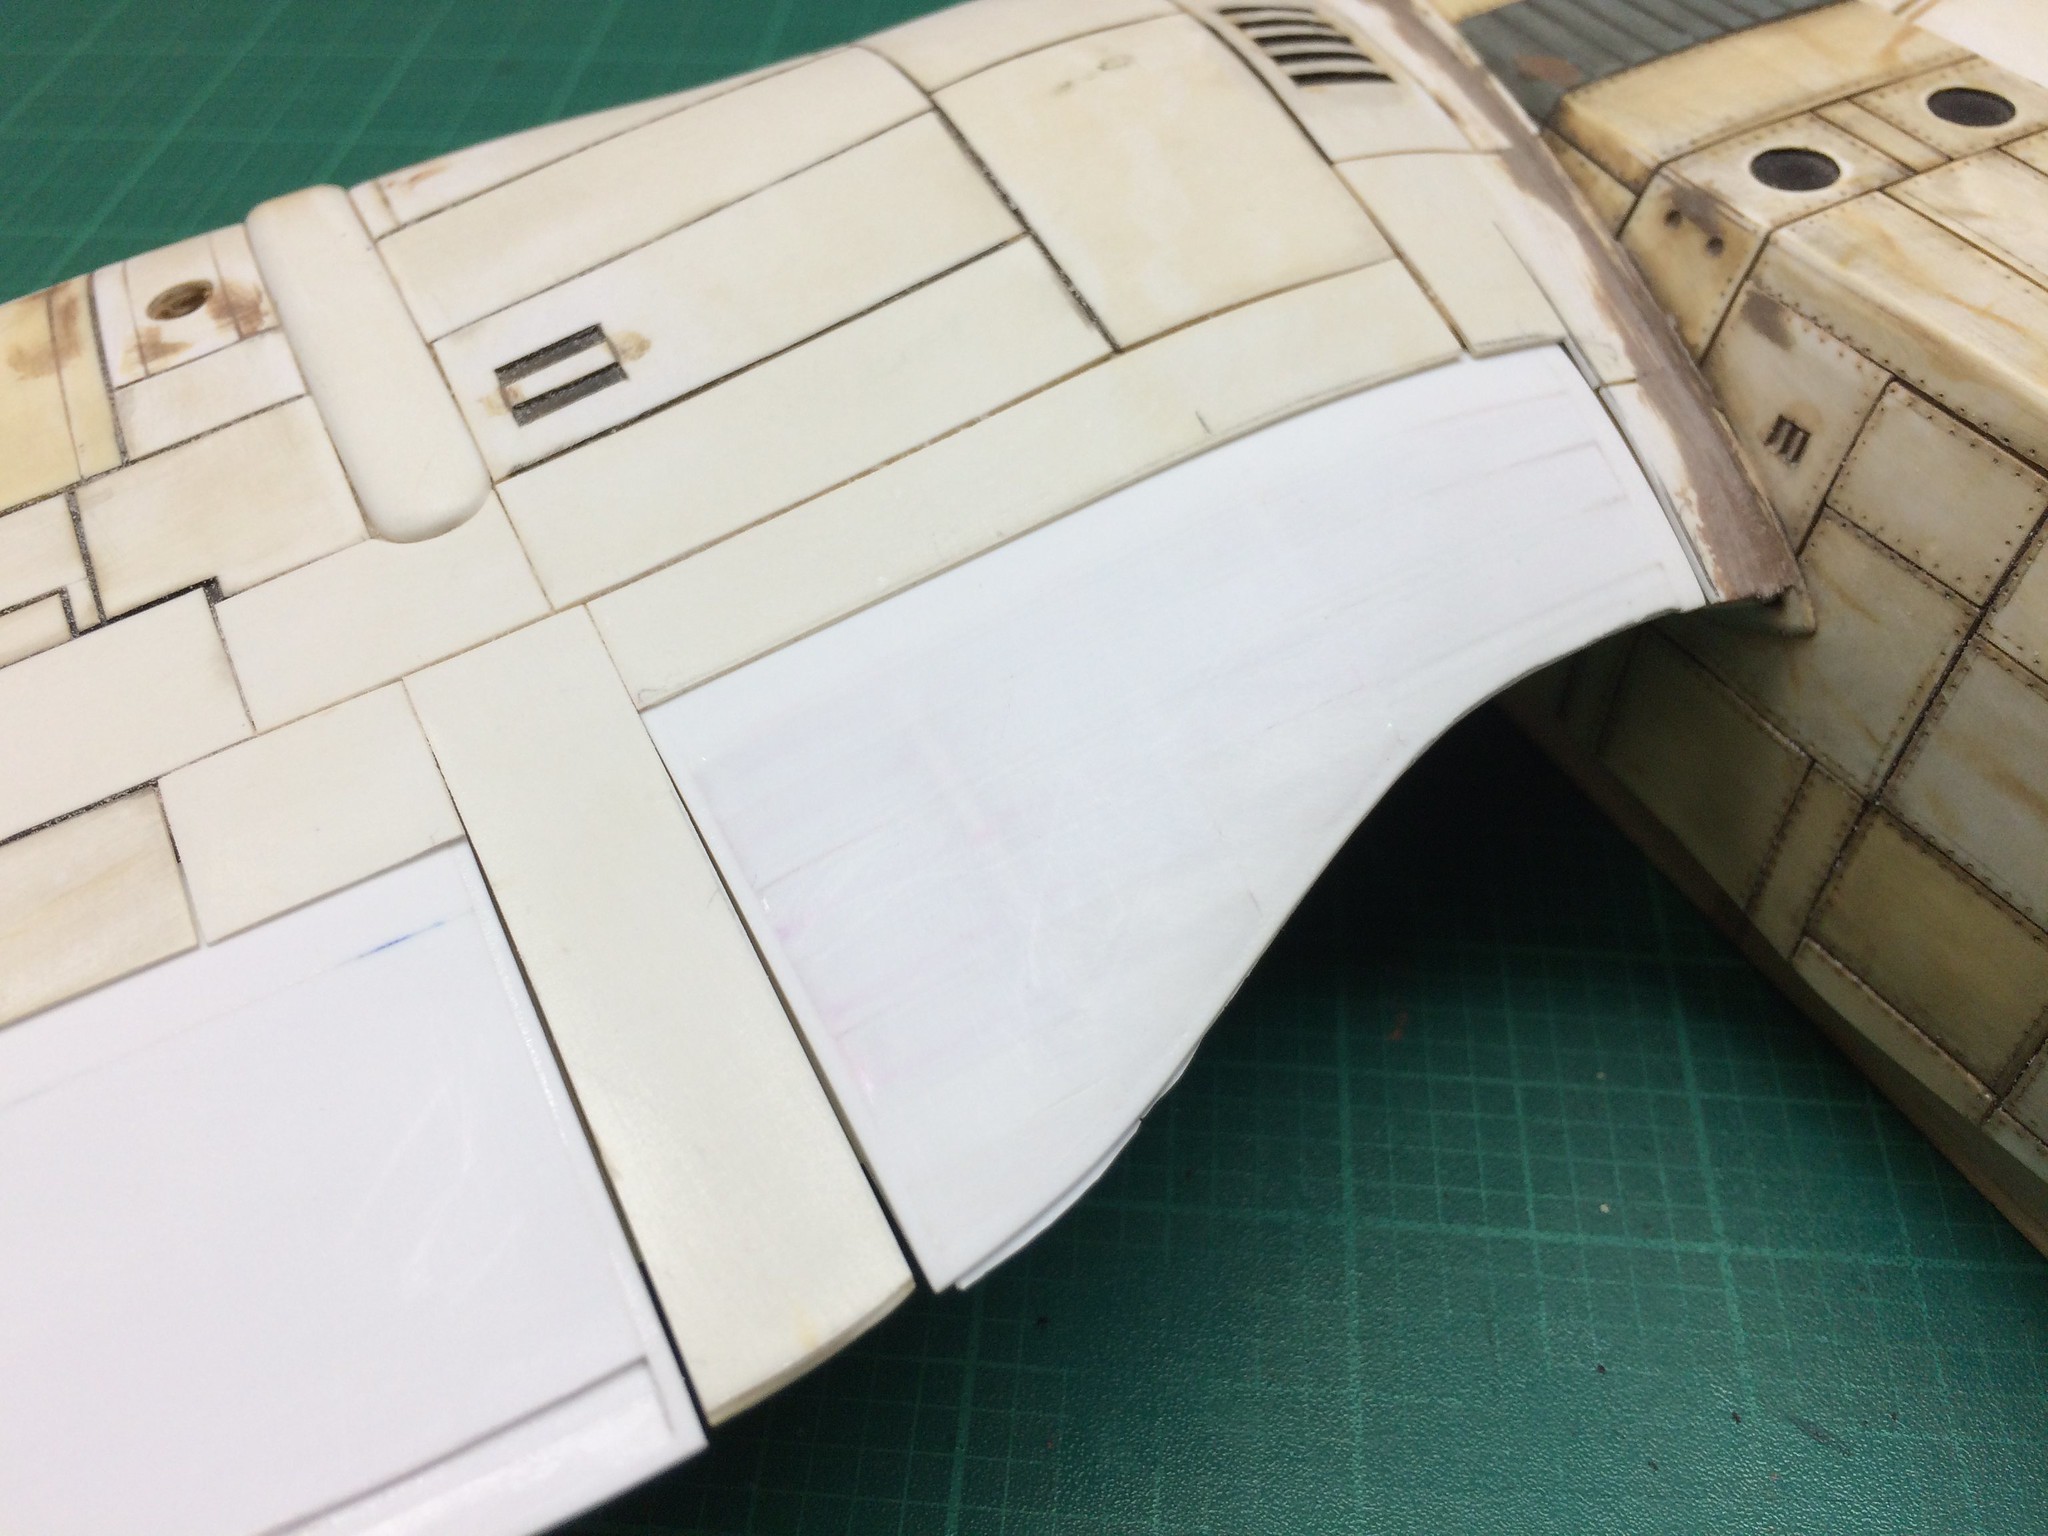 [/url]Bakagalas-44 by N.T. Izumi, on Flickr
The lower surface got planked this weekend, but not much else was done. Gaps and uneven areas will be filled in with stretched sprue and thin plastic strip. I favor this technique over putty as there is no shrinkage and the material cuts and sands the same as the plastic part.
https://flic.kr/p/22WShcU]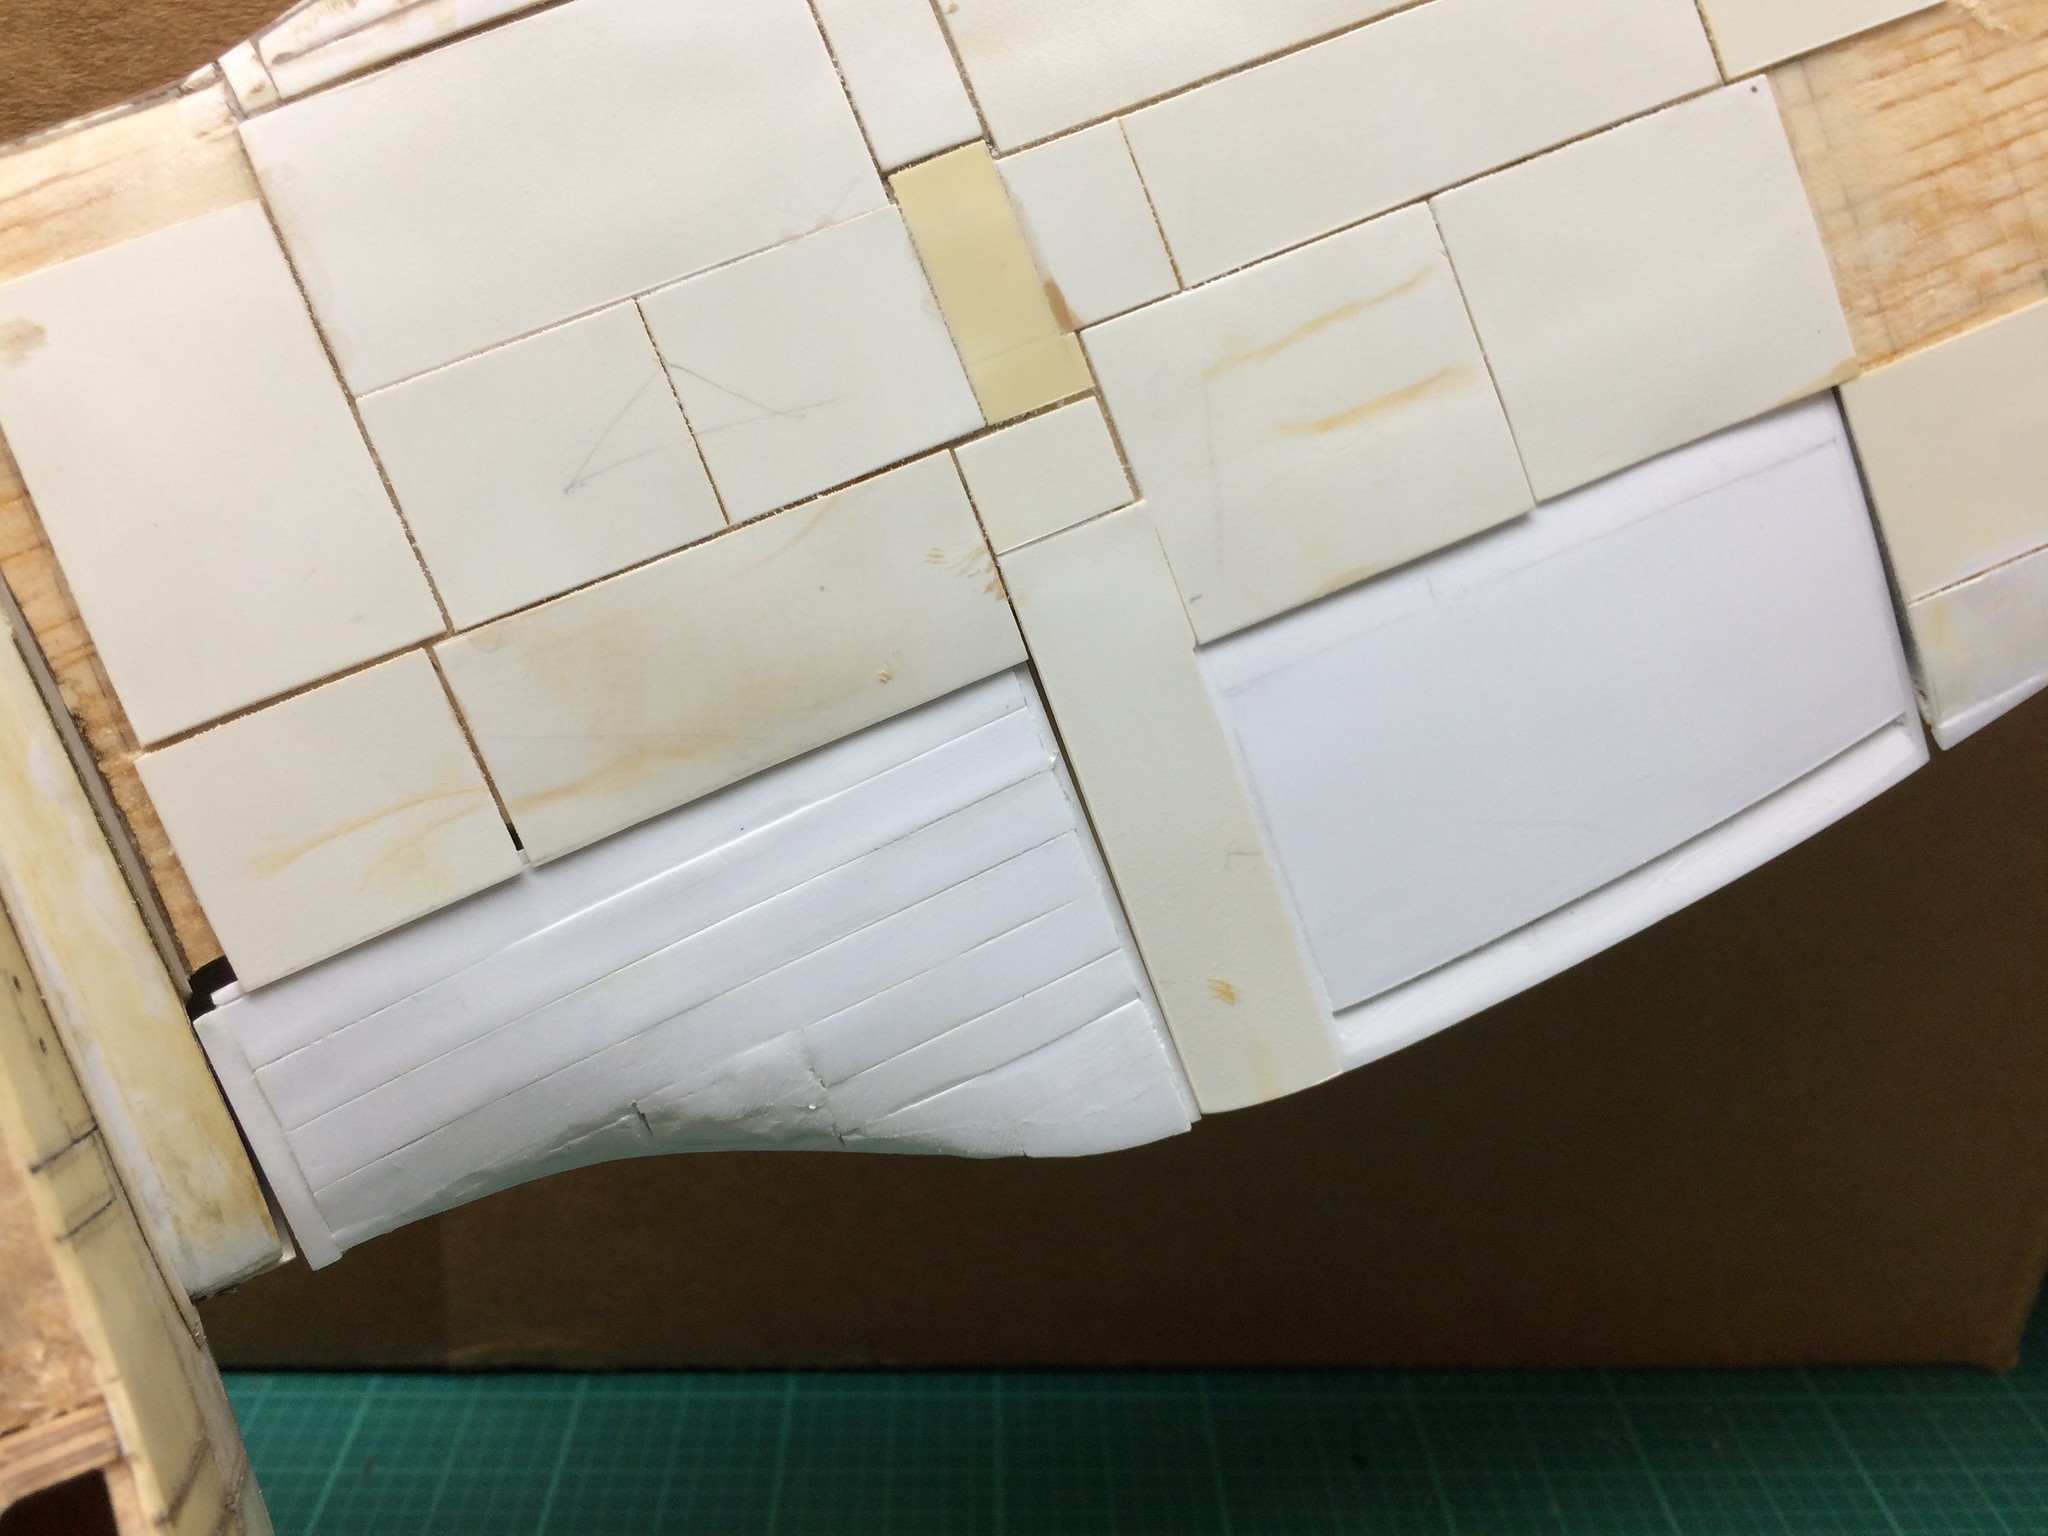 [/url]Bakagalas-45 by N.T. Izumi, on Flickr
I have sourced some Eduard 1/72 Ju-88 and 1/48 Bf-110 wheels for the project. Though differing in scale, they look very similar so I think they will work well. That was another stumbling block long ago - there were no resin wheels readily available back in the 1980s. Although the anime artwork appears to show the wheels all the same size, I decided to make the central wheels bigger, ala Me-323.
Anyway, I am getting anxious to finish the control surfaces so that I can move on to other areas that need attention.
Again, very cool!
Ok now I’m really liking it. You guys that can put thought to action…my hats off. Can’t stop looking.
Armornut,
Yes… I like solving problems I make. It’s a hobby of mine. [:P]
Real G,
You are being watched. It is beautiful work. I have limited experience and poor understanding of Scratch building and detailed Sketching. My comments would be quite juvenile and of no material value here. I suspect many other folks are in that same overloaded boat with me.
No previous comments means we are overwhelmed with your Project and Problem solving. Keep at it.
So, where might I find the old TV show(s) that you model is based on?
Nino.
Ok G, now, I’m intrested in doing some scratching myself thanks to you. I just need to come up with some crazy idea for something and dig into my parts and balsa boxes LOL.
Nino - No problemo! The Bakagalas is from the Miyazaki film “Nausicaa of the Valley of Wind” (Kaze no Tani no Nausicaa). Do NOT watch “Warriors of the Wind”, as it is a lobotomized version that had all the meaning of the story cut away. Avoid avoid!
Steve - Hee hee, the poison is working…
Real G, fantastic work! I just found this thread and read through, thank you so much for sharing the pix of this project. You are doing the Miyazaki designs proud. Truly, it is a mystery that models based on his movies aren’t more prolific…
One thought (reading about the ‘thopter wings’) is that they could be drawn as a grahic on the computer, then printed on transparency film in a laser jet printer, braced with thin wire if necessary. I seem to recall them being flat… I use the open-source office suite OpenOffice.org, ‘Draw’ tool to create vector-based graphics which can be sized with no loss of fidelity.
I look forward to further developments!
Regards, Robert
Thanks for looking in Robert! Yeah those bug wings are still a “thought in progress”. The bug models for sale at the Ghibli Museum had wings that seemed real, but I could not figure out where they could source such large wings. If they were real, the donor insect must have been scary huge!
Good lordy, it’s almost Friday already. I’d better get back to work!
I have not been able to work on anything the past week or so, but I did get in some bench time last night. The port inboard flap has been planked and rough sanded, and the resulting gullwing contours are pleasing.
https://flic.kr/p/HTfRmm]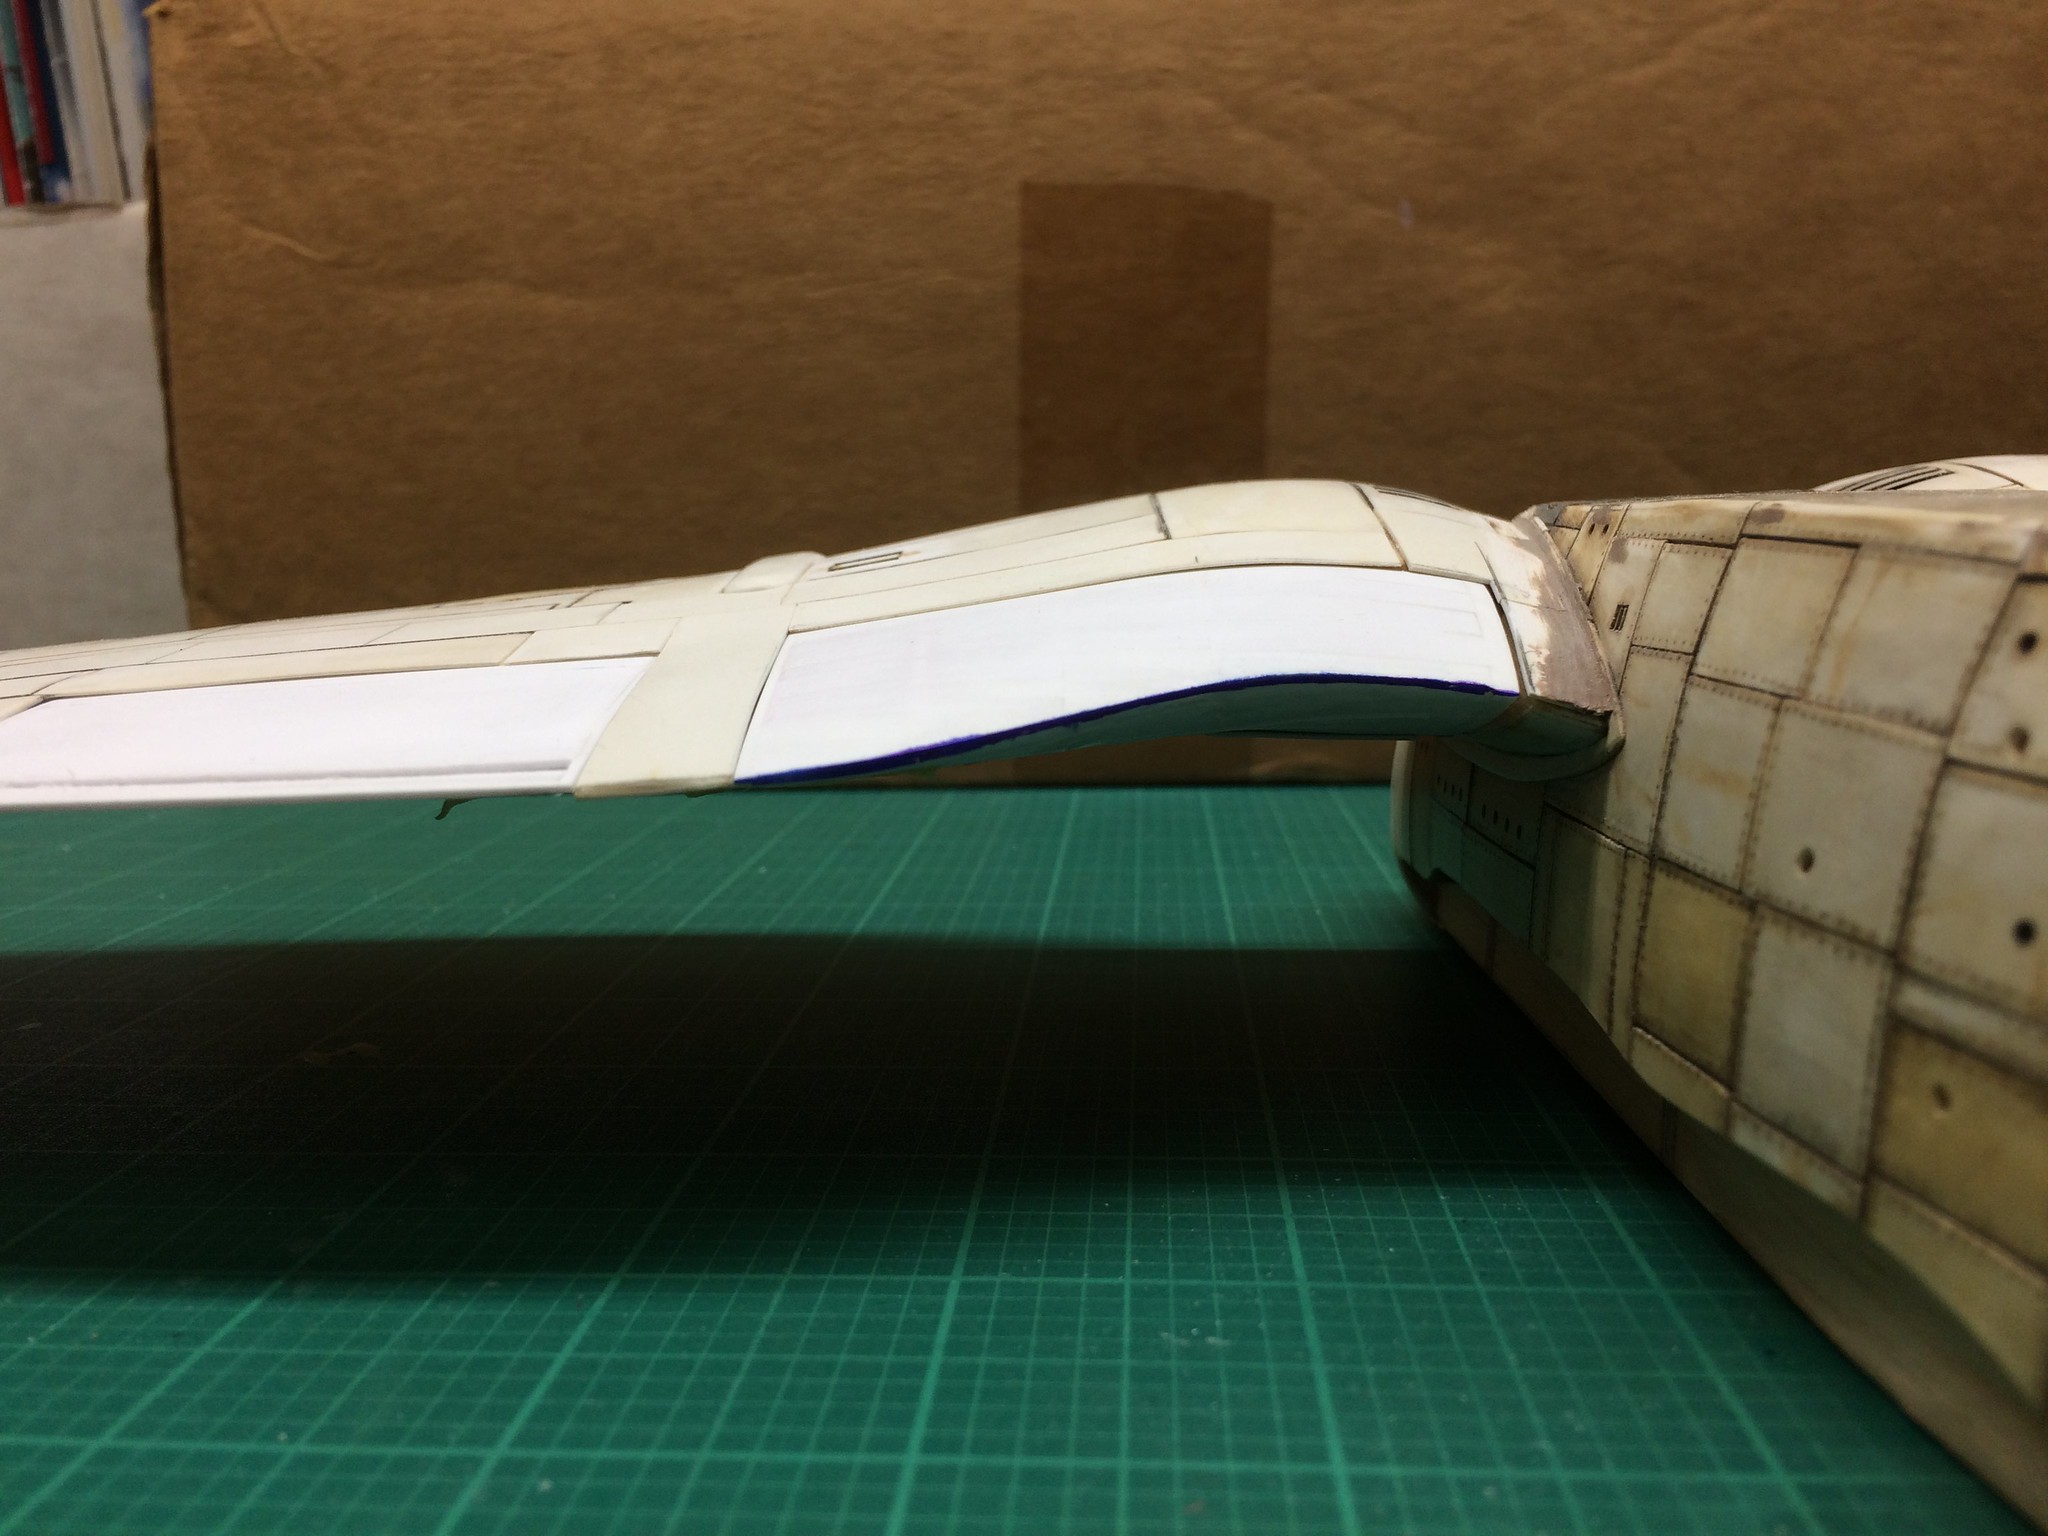 [/url]Bakagalas-46 by N.T. Izumi, on Flickr
The starboard flaps finally got their formers and were rough sanded. A little more refinement to their contours, then planking will follow. It’s happening a little faster compared to the port side, because now I know how to tackle the task.
https://flic.kr/p/2621LCi] [/url]Bakagalas-48 by N.T. Izumi, on Flickr
The Eduard 1/72 Ju-88 resin wheels I mentioned earlier were checked against the drawings I made, and they are an exact match in size! No skill or foresight involved here though, just dumb luck.
https://flic.kr/p/24Eqpip]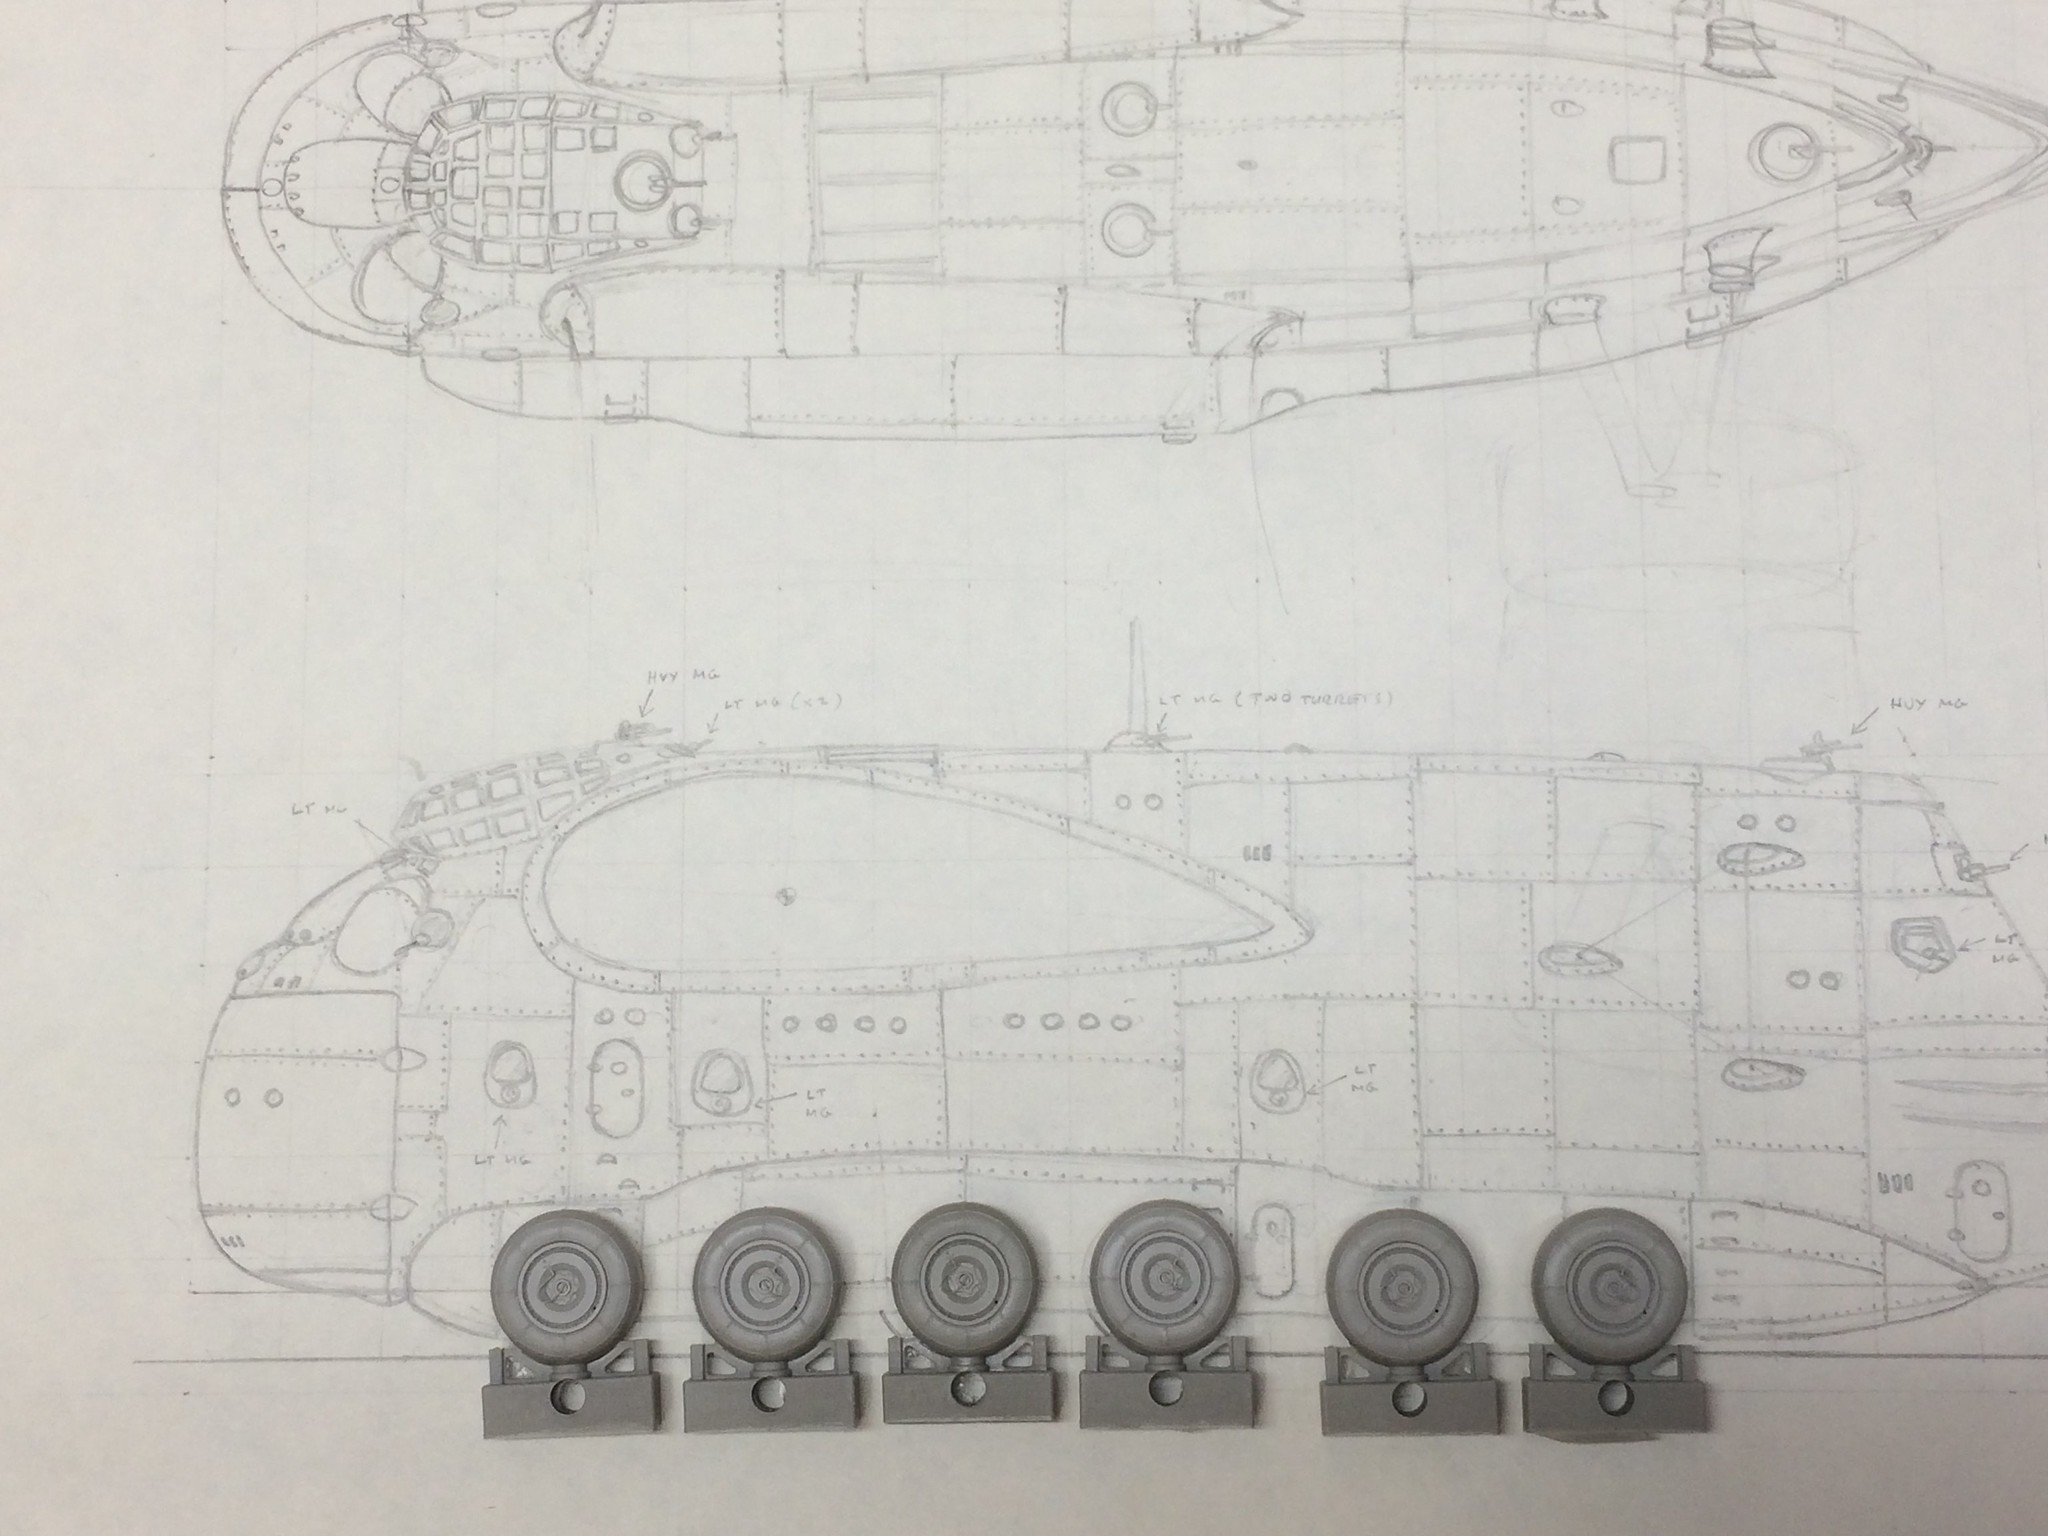 [/url]Bakagalas-49 by N.T. Izumi, on Flickr
I wanted to have some larger wheels mixed in, as the landing gear sponsons are bigger in the middle. So 1/48 Eduard resin Bf-110 wheels will be used. Luckily, the wheels have similar tire and hub styles so they match nicely. Again, dumb luck that it worked out. Gotta love German WW II balloon tires!
https://flic.kr/p/24EqoY6]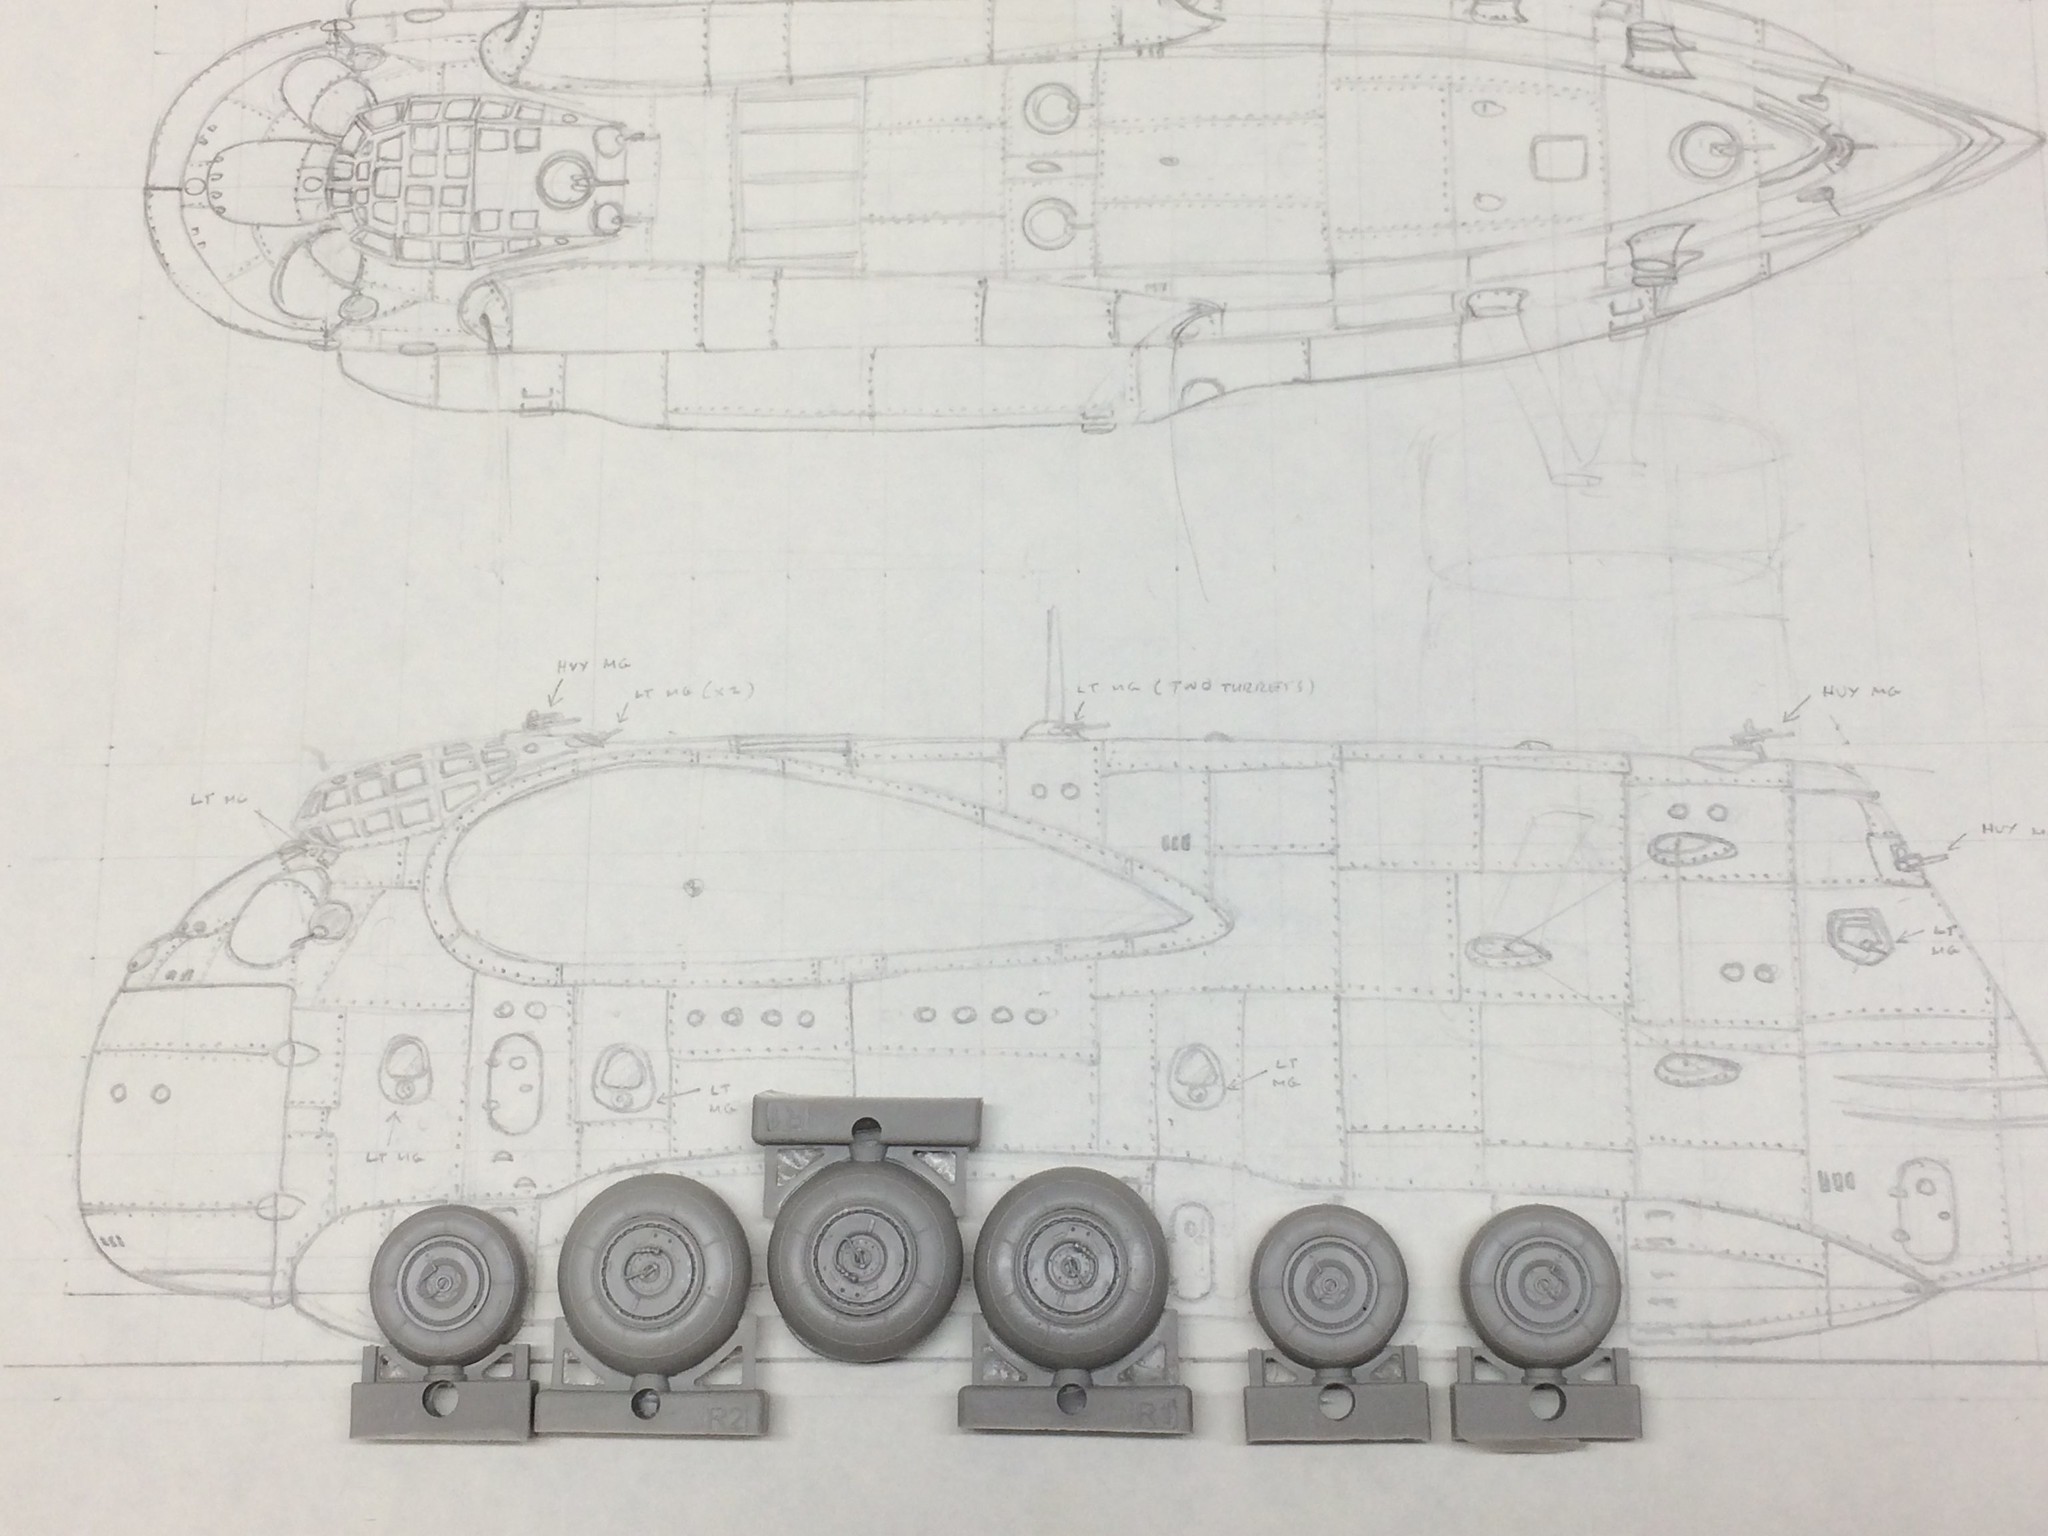 [/url]Bakagalas-50 by N.T. Izumi, on Flickr
Anyway, I’m getting tired of all this flappery, so I hope to get them done quickly and move on to the ailerons and wingtips. These will be easy compared to those wavy inboard flaps! Oh yeah, I still have to vacform the exterior skins for the flaps.
Keep it up Real G, seeing the drawings gives me a better perspective of what your going for. Man that is COOL.
Thanks Armornut! I sheeted the outboard flaps last night, so I will start planking the inboards tonight. I am aiming to complete the wing (flying surfaces, wing tips, skin sheeting) before the end of the month.
Total noob question, so I hope you’ll have some grace with me, but as a budding scratch builder, I’d love to understand. How did you accomplish such wonderful rivets???
Btw…totally blown away and overwhelmed by the coolness of this project and level of skill. I saw you used the Archer rivets, but I thought the recessed ones looked amazing already. I understand the concept behind the Archer rivets, but would love to know more about how you create a such a wonderfully perfect recessed rivets.
Ha ha Rinny, you are too kind! The recessed rivets were made using a compass point and done by eye (when I had 20/20 vision). If you look closely, you will see that they are most certainly not even nor straight! OK my cover is blown, I admit it! [:$] There was very little aftermarket in the 1980s, so most things were DIY.
This project is a labor of love, which is why I have pulled it off the Shelf of Doom and set my mind to completing it. I learn lots of new things when working on a project such as this (translation: I make stuff up as I go along), and so the knowlege gained is put to good use on future builds. From the Shelf of Doom. But this is the biggest SoD project I have. Honest. [6]
Oh wow, still coming along great! Looking forward to more updates.