Clever idea making the dividers [I] [Y]
[B]
Clever idea making the dividers [I] [Y]
[B]
Oh very cool! Glad to see you pull this back out of mothballs.

Oh Peter Pan, yousa breenga thats lousy Jarjar! He no welcome here! [:P]
Not having much bench time, but I have been working on the fin assemblies. One support strut has been fitted with base plates. Things have gone better than I was expecting, as fitting the struts to the curved fuselage was not too diffcult.
https://flic.kr/p/ELm1de] [/url]Bakagalas-11 by N.T. Izumi, on Flickr
https://flic.kr/p/24nkCeJ]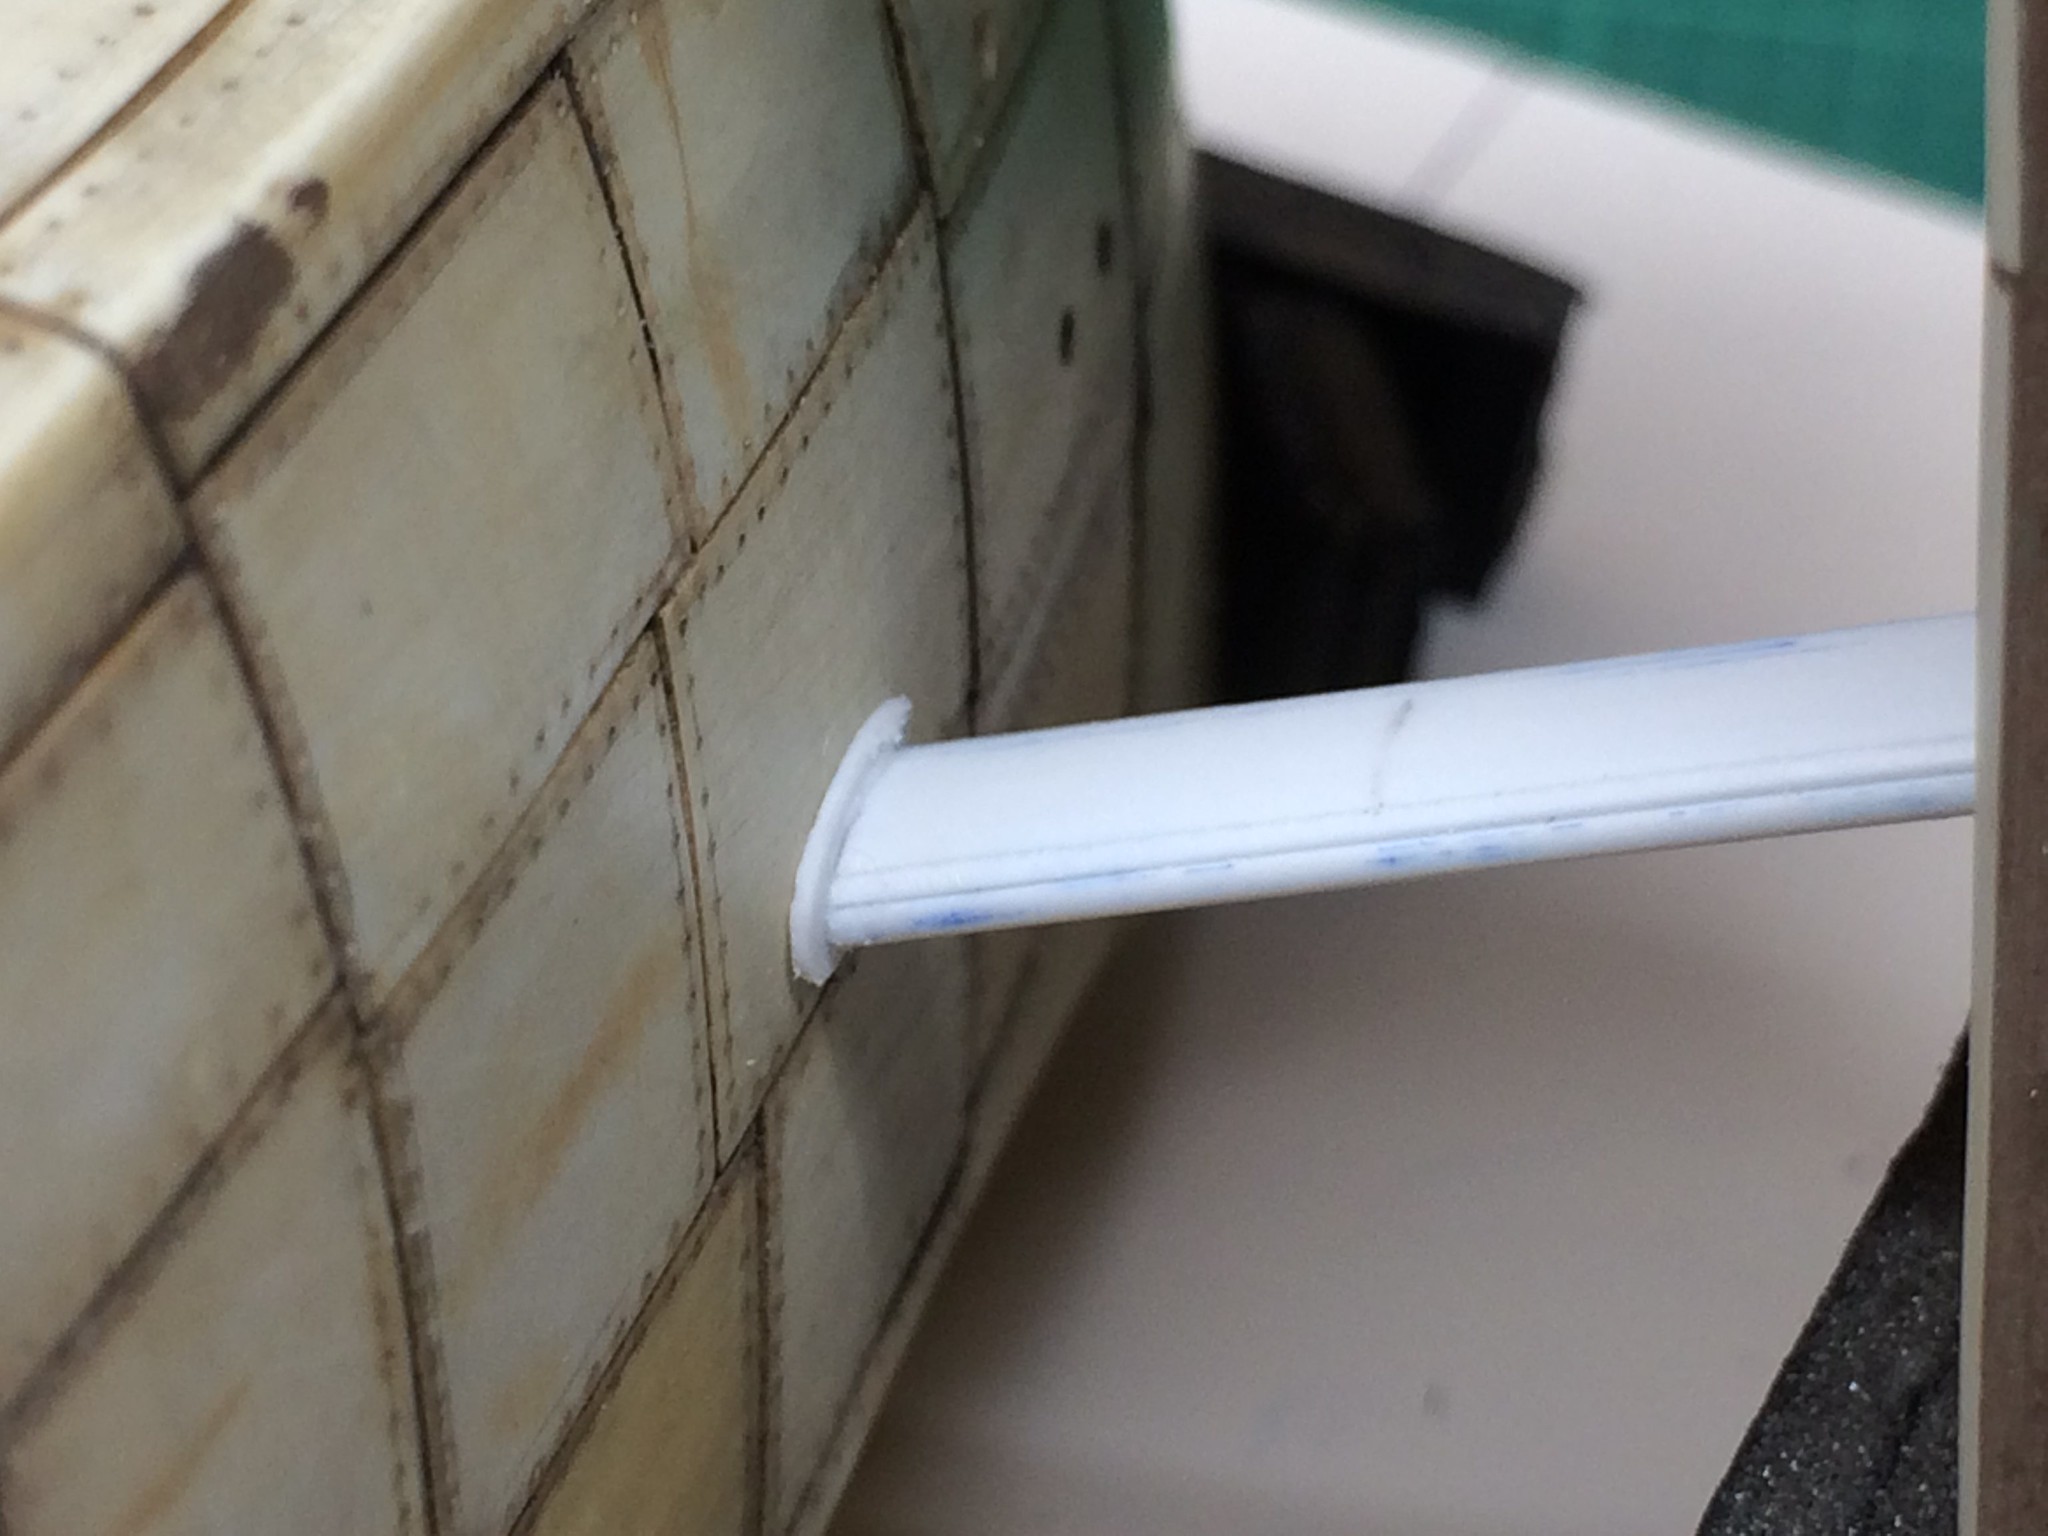 [/url]Bakagalas-12 by N.T. Izumi, on Flickr
But I realized the fins needed to have their rudders fitted to ensure proper fit into the jig assembly, so some sheet plastic was stacked and glued together. The inner two sheets’ mating surfaces were colored with pencil lead to provide a centerline reference during the shaping process. I have used permanent marker for this previously, but it gets messy with the liquid glue.
https://flic.kr/p/23sWNxQ]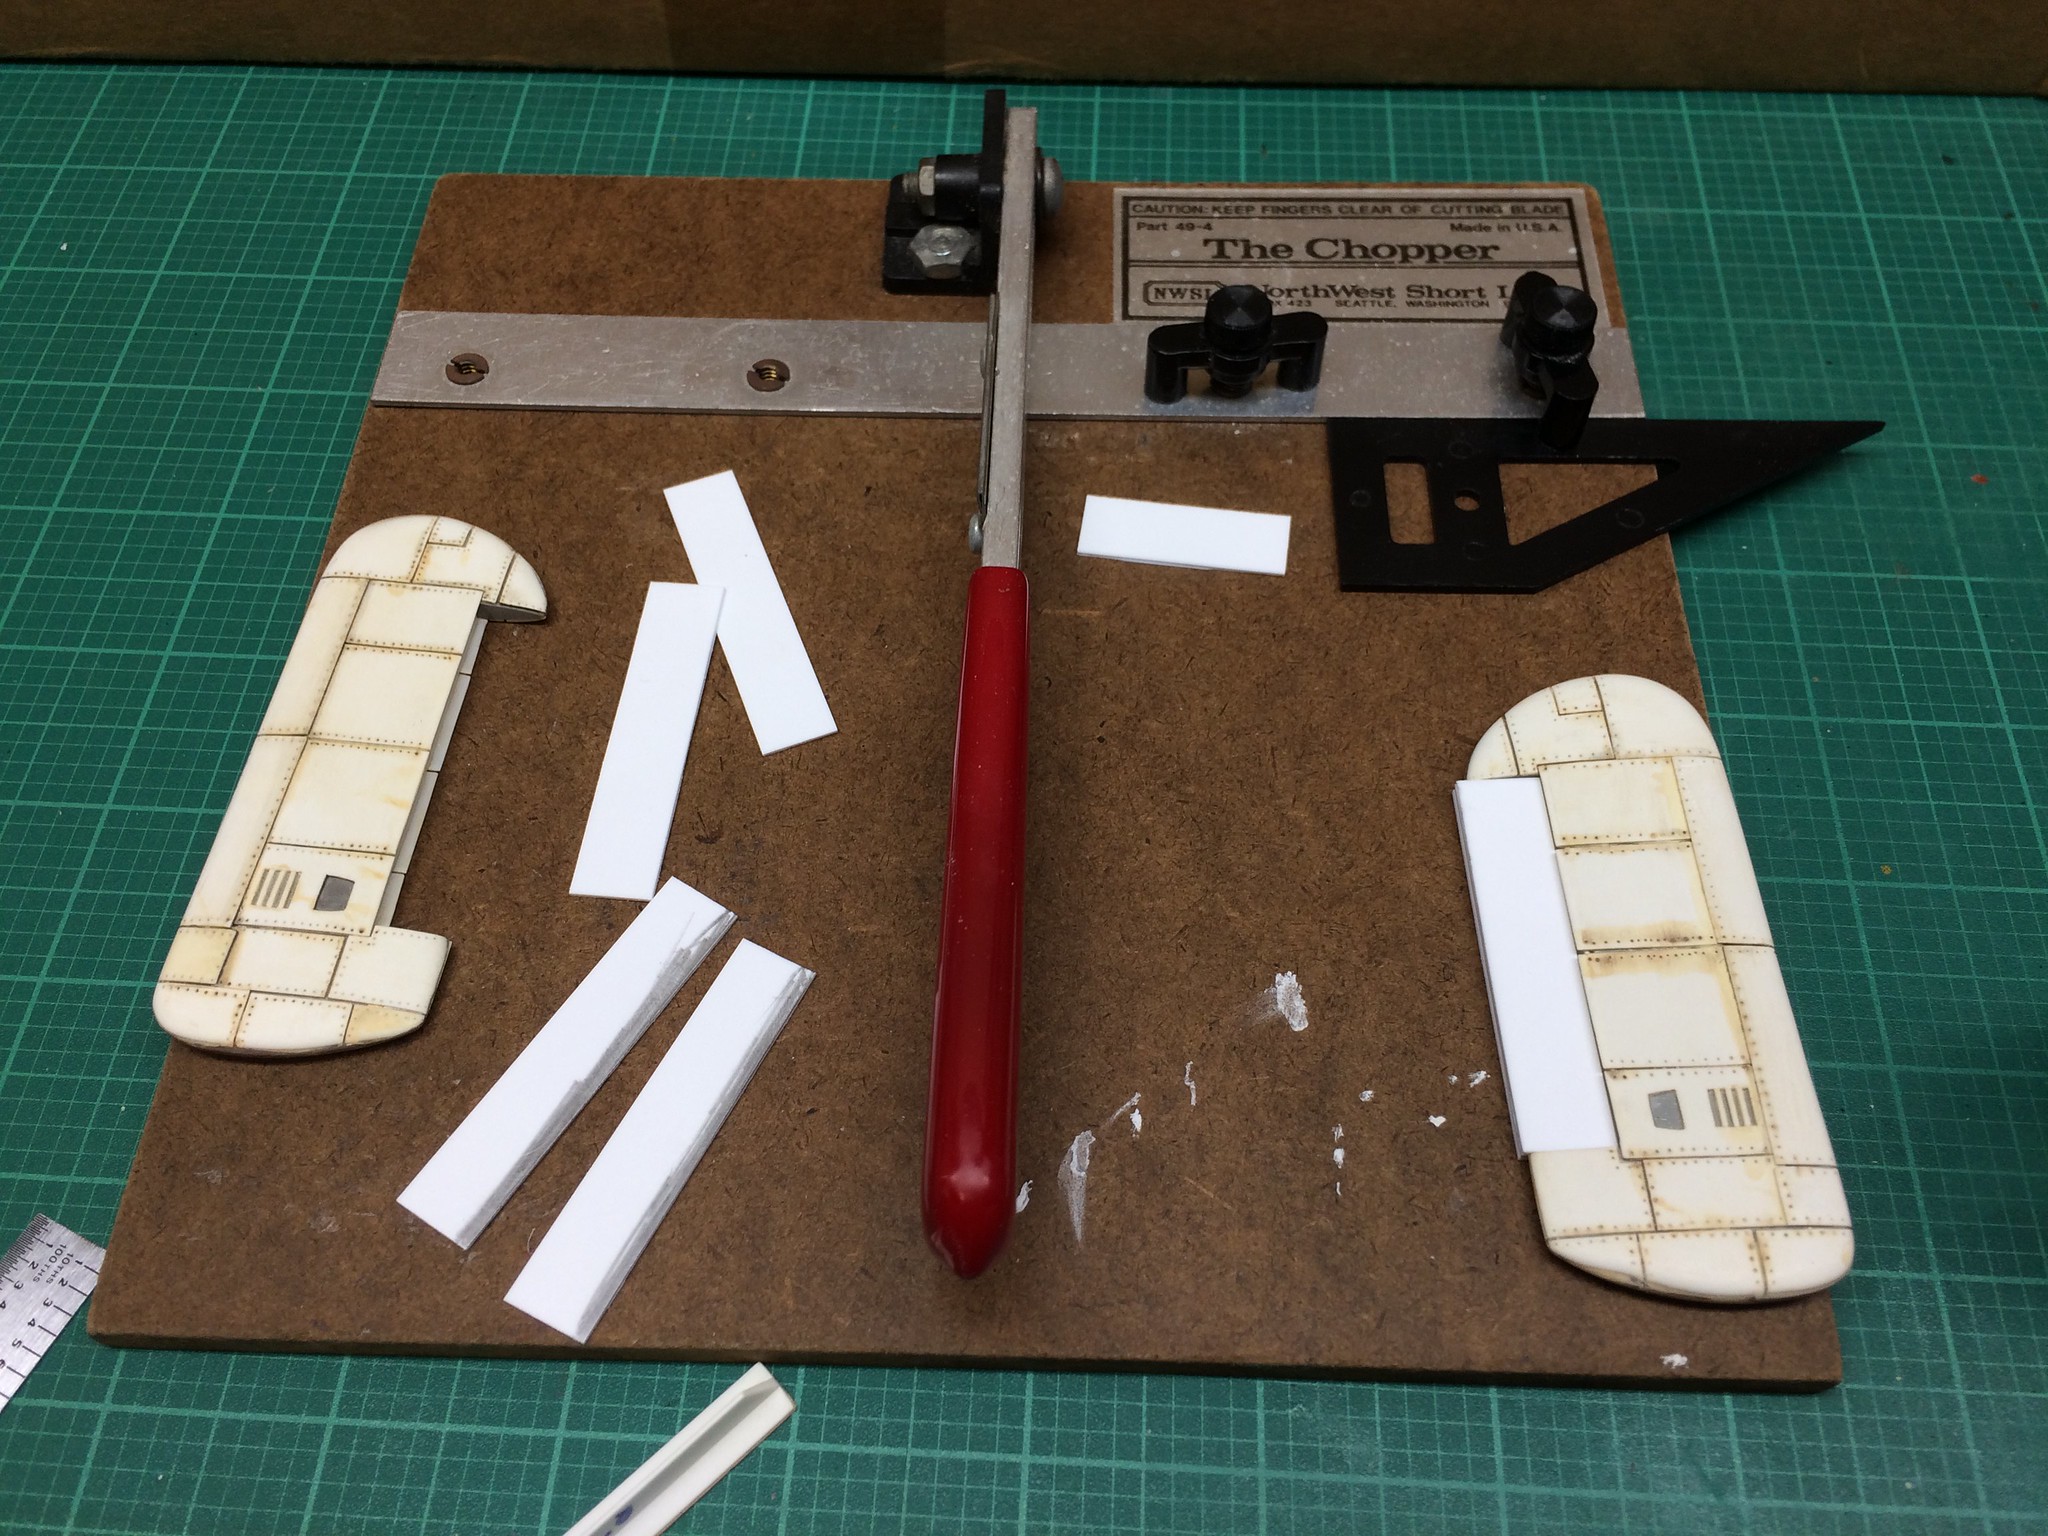 [/url]Bakagalas-13 by N.T. Izumi, on Flickr
https://flic.kr/p/23sWNom]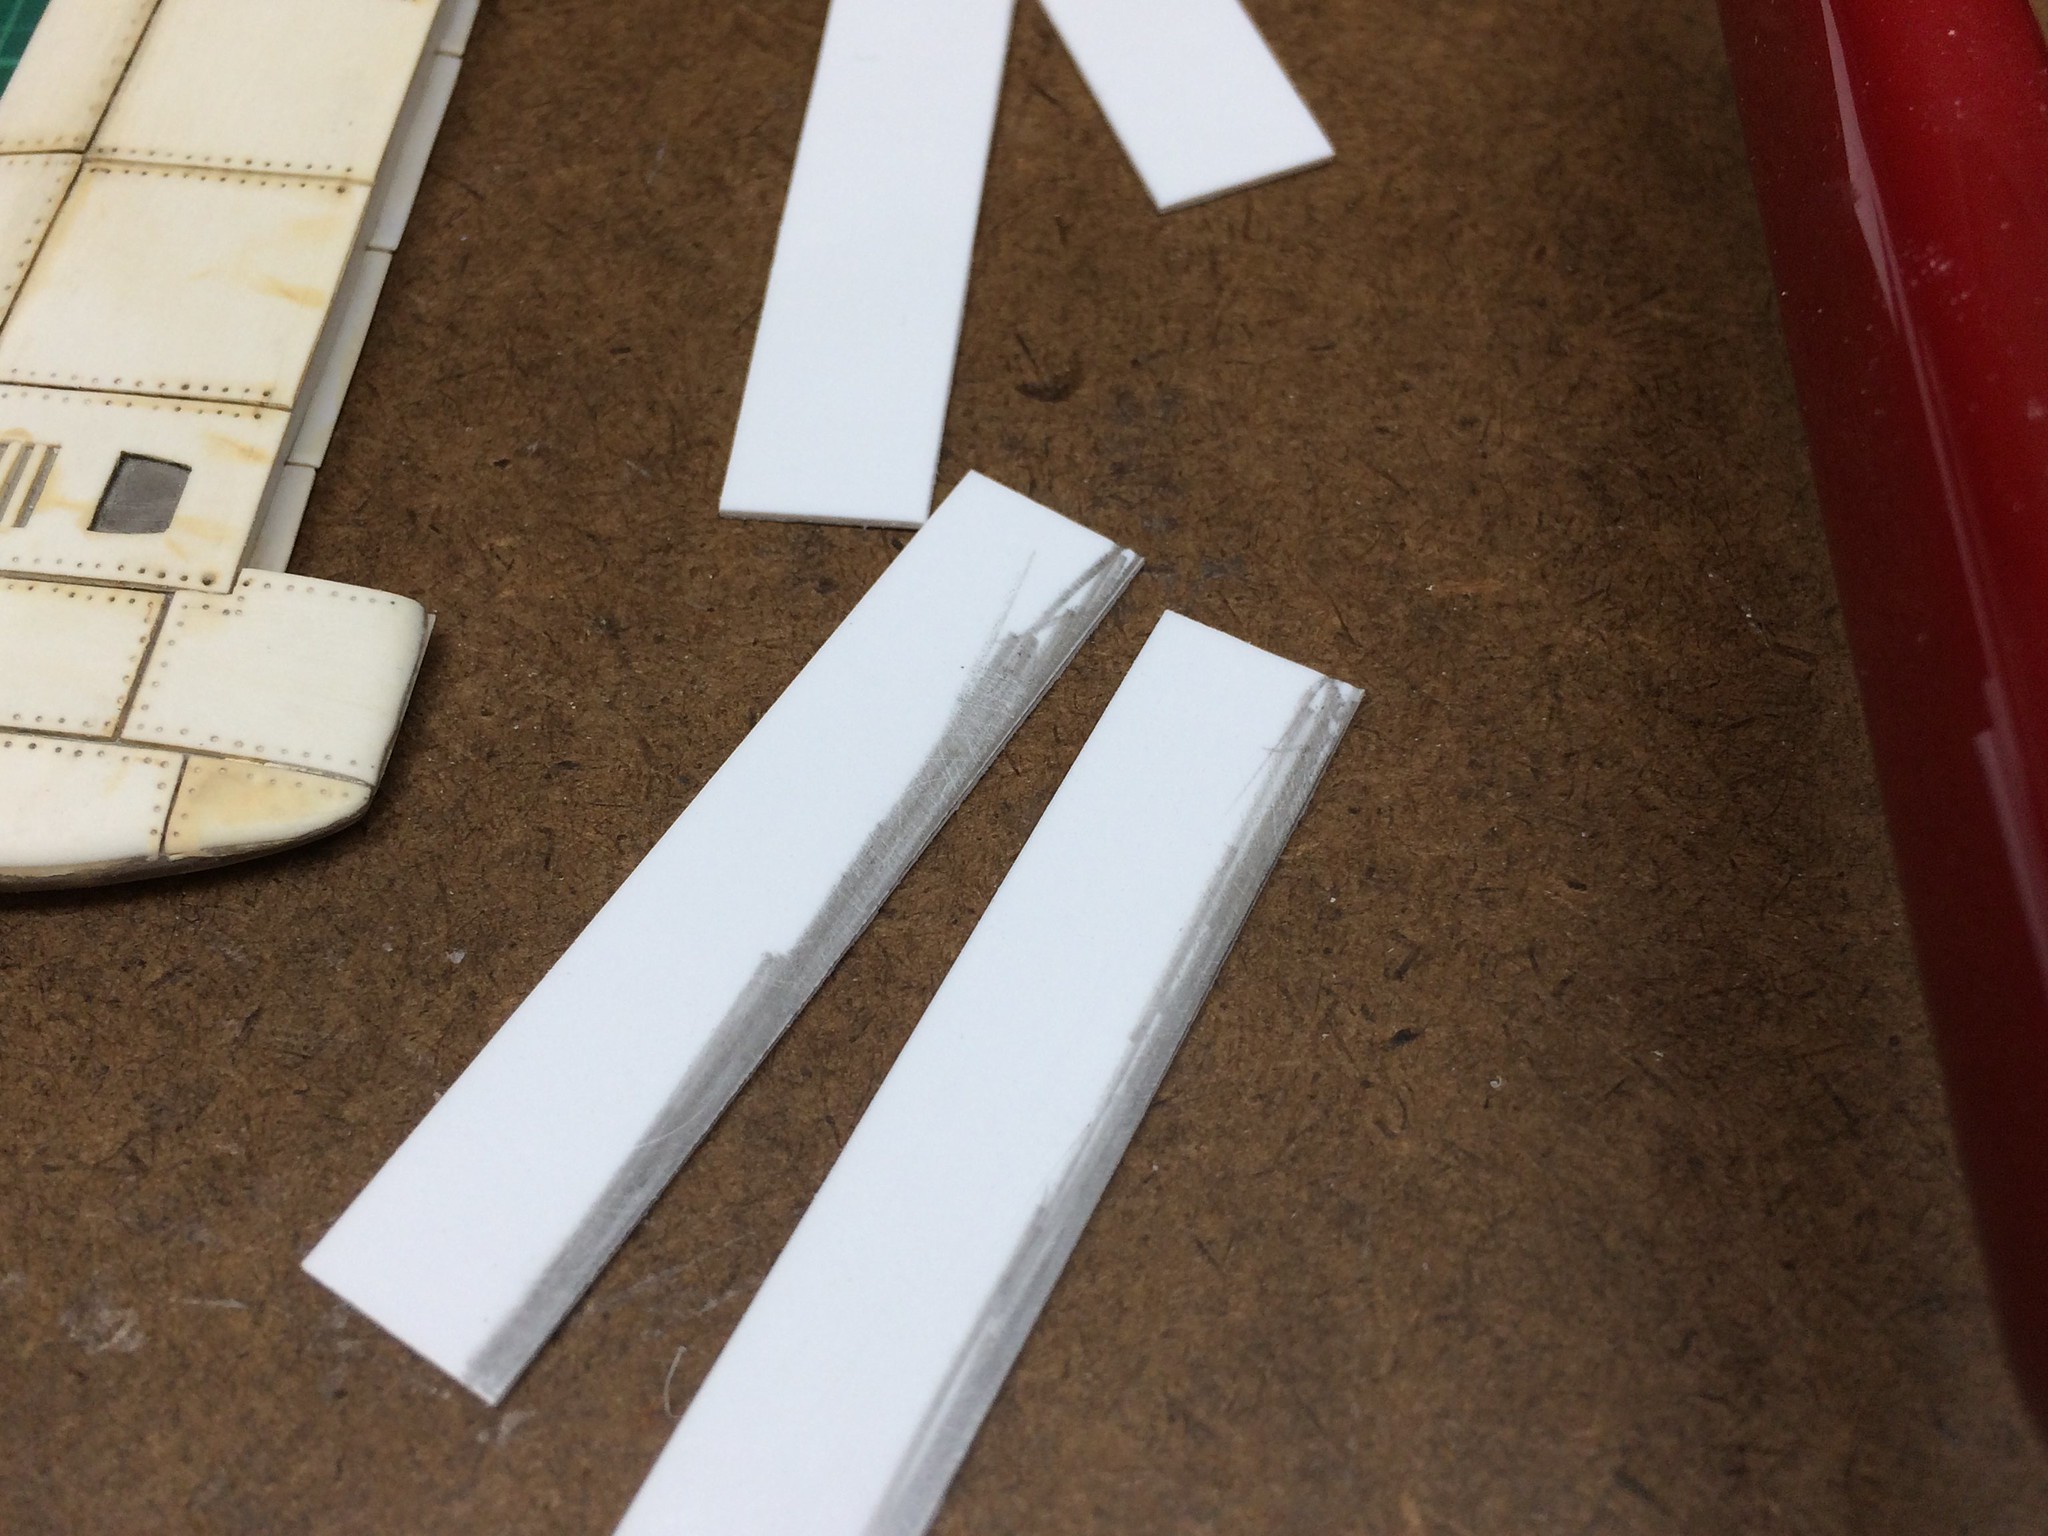 [/url]Bakagalas-14 by N.T. Izumi, on Flickr
https://flic.kr/p/24tNjFh]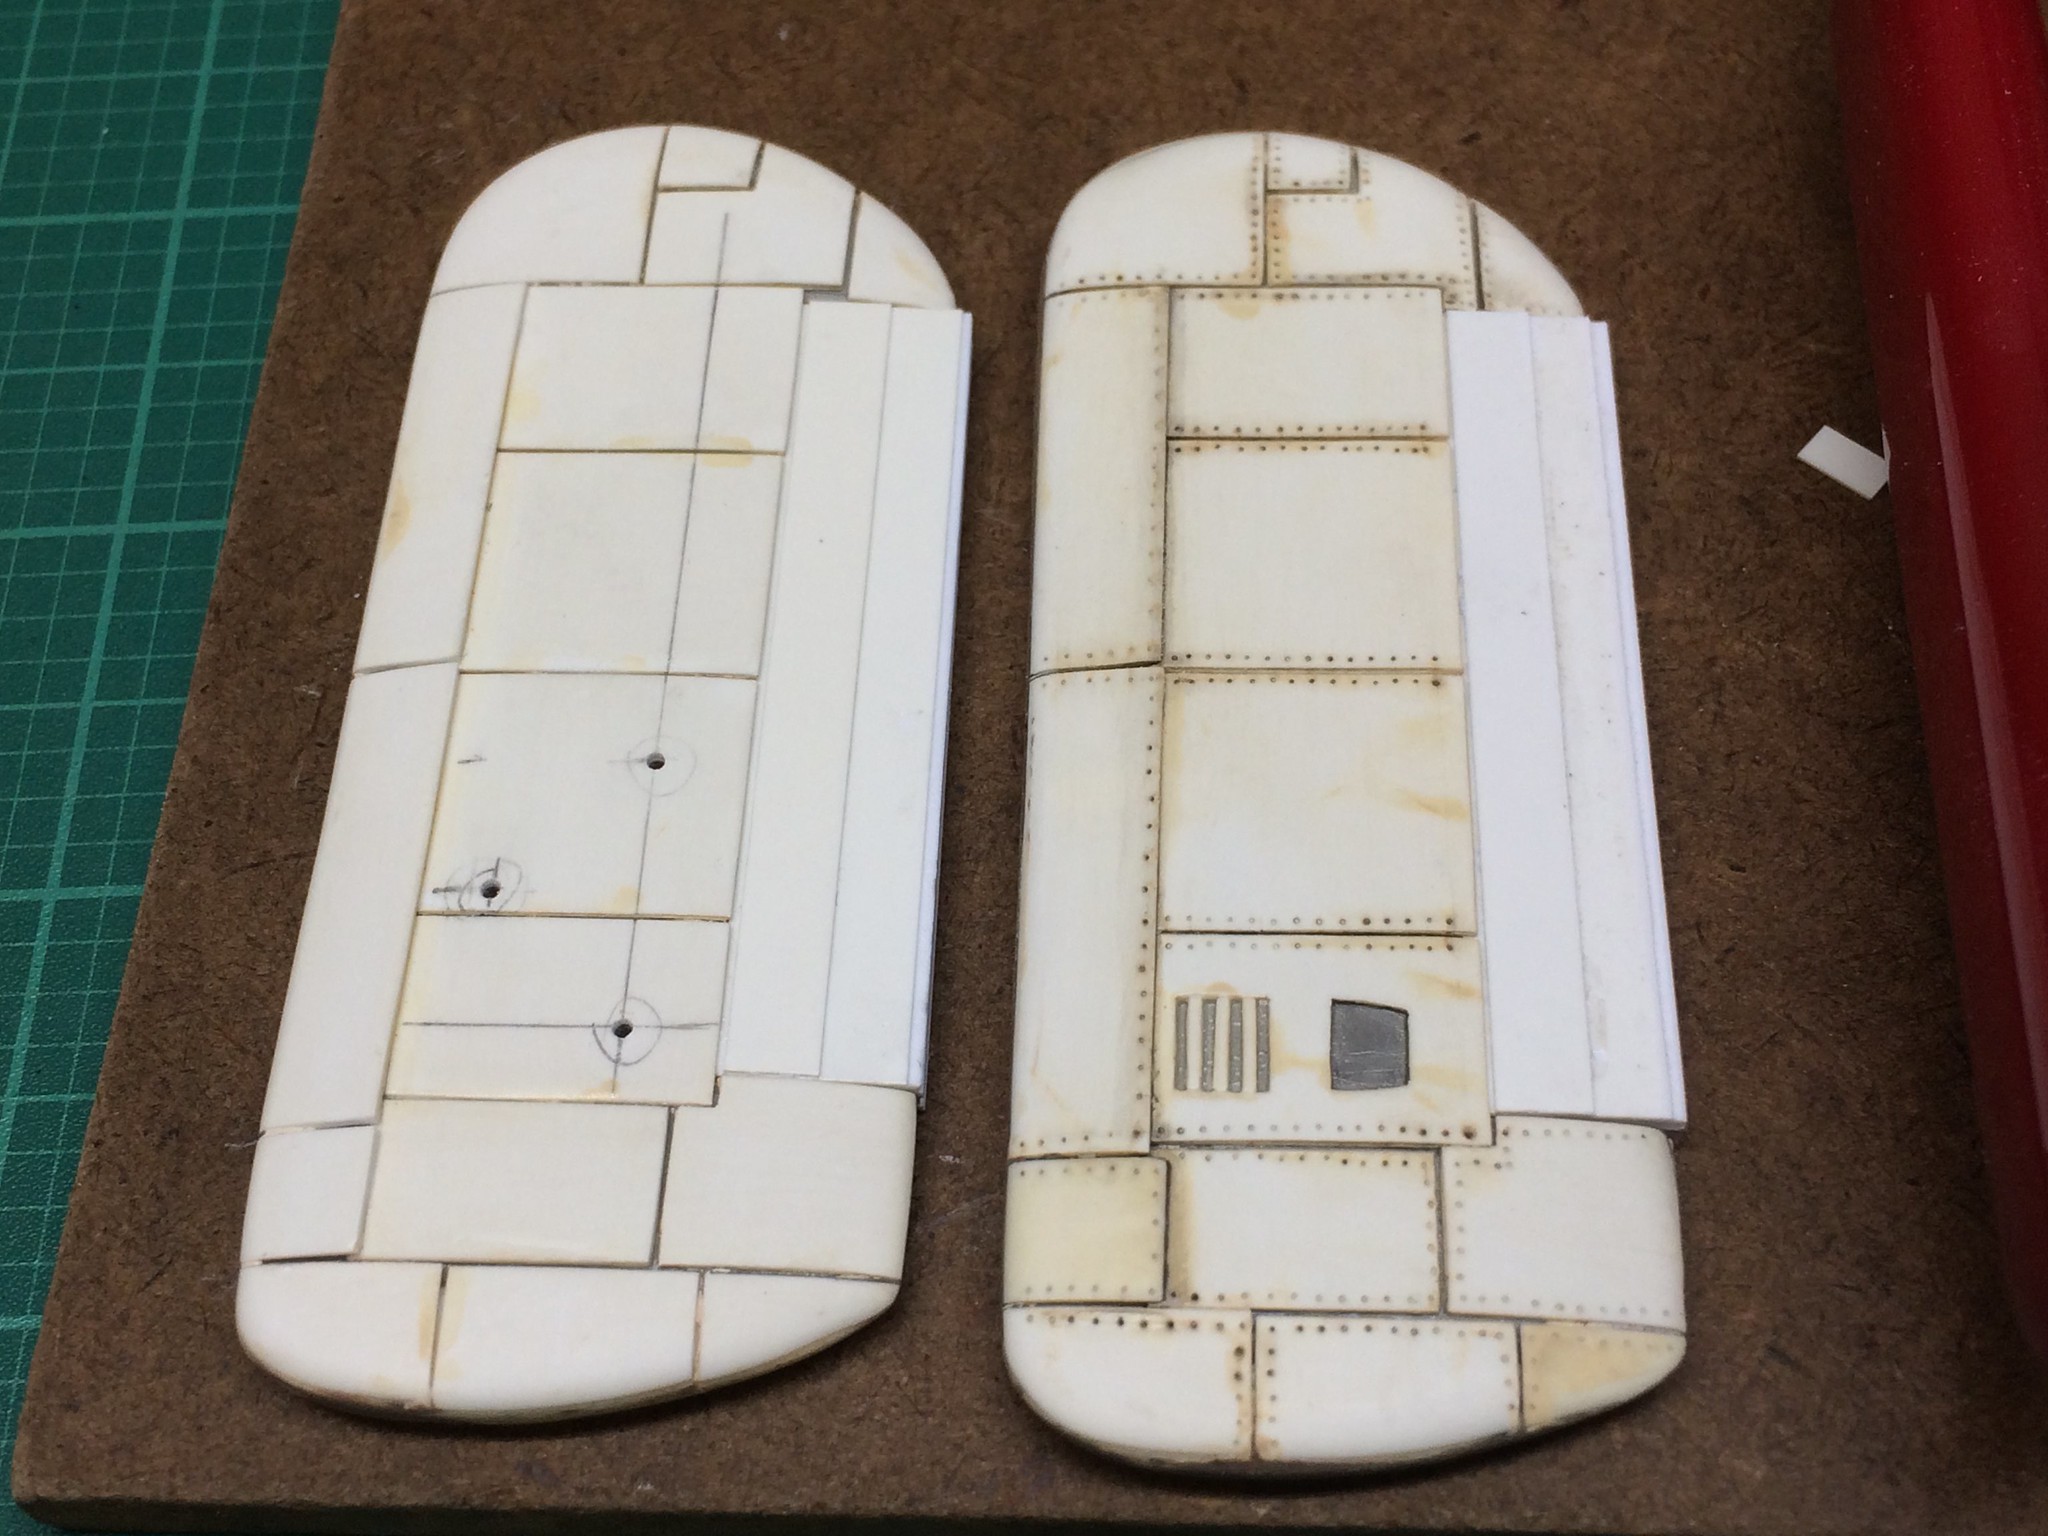 [/url]Bakagalas-15 by N.T. Izumi, on Flickr
The plan is to finish the fins as close to 100% as possible to get a morale boost. Then the wings will be tackled, followed by the landing gear sponsons. By that time I should be in the swing to make the faceted canopy and all the little bits like the gun ports.
The glue is drying while I am at work today. Can’t wait to get home and crack on with sanding the rudders!
Awesome G, love the steampunkish look of all those rivets.
I was able to sand one rudder last night. Note the slight curve at the top trailing edge, which is intentional in order to meet up with the fin profile. I hope to get the other one done soon. They will get lots of lumps and bumps to set the “feel” for the rest of the model.
https://flic.kr/p/21Py24y]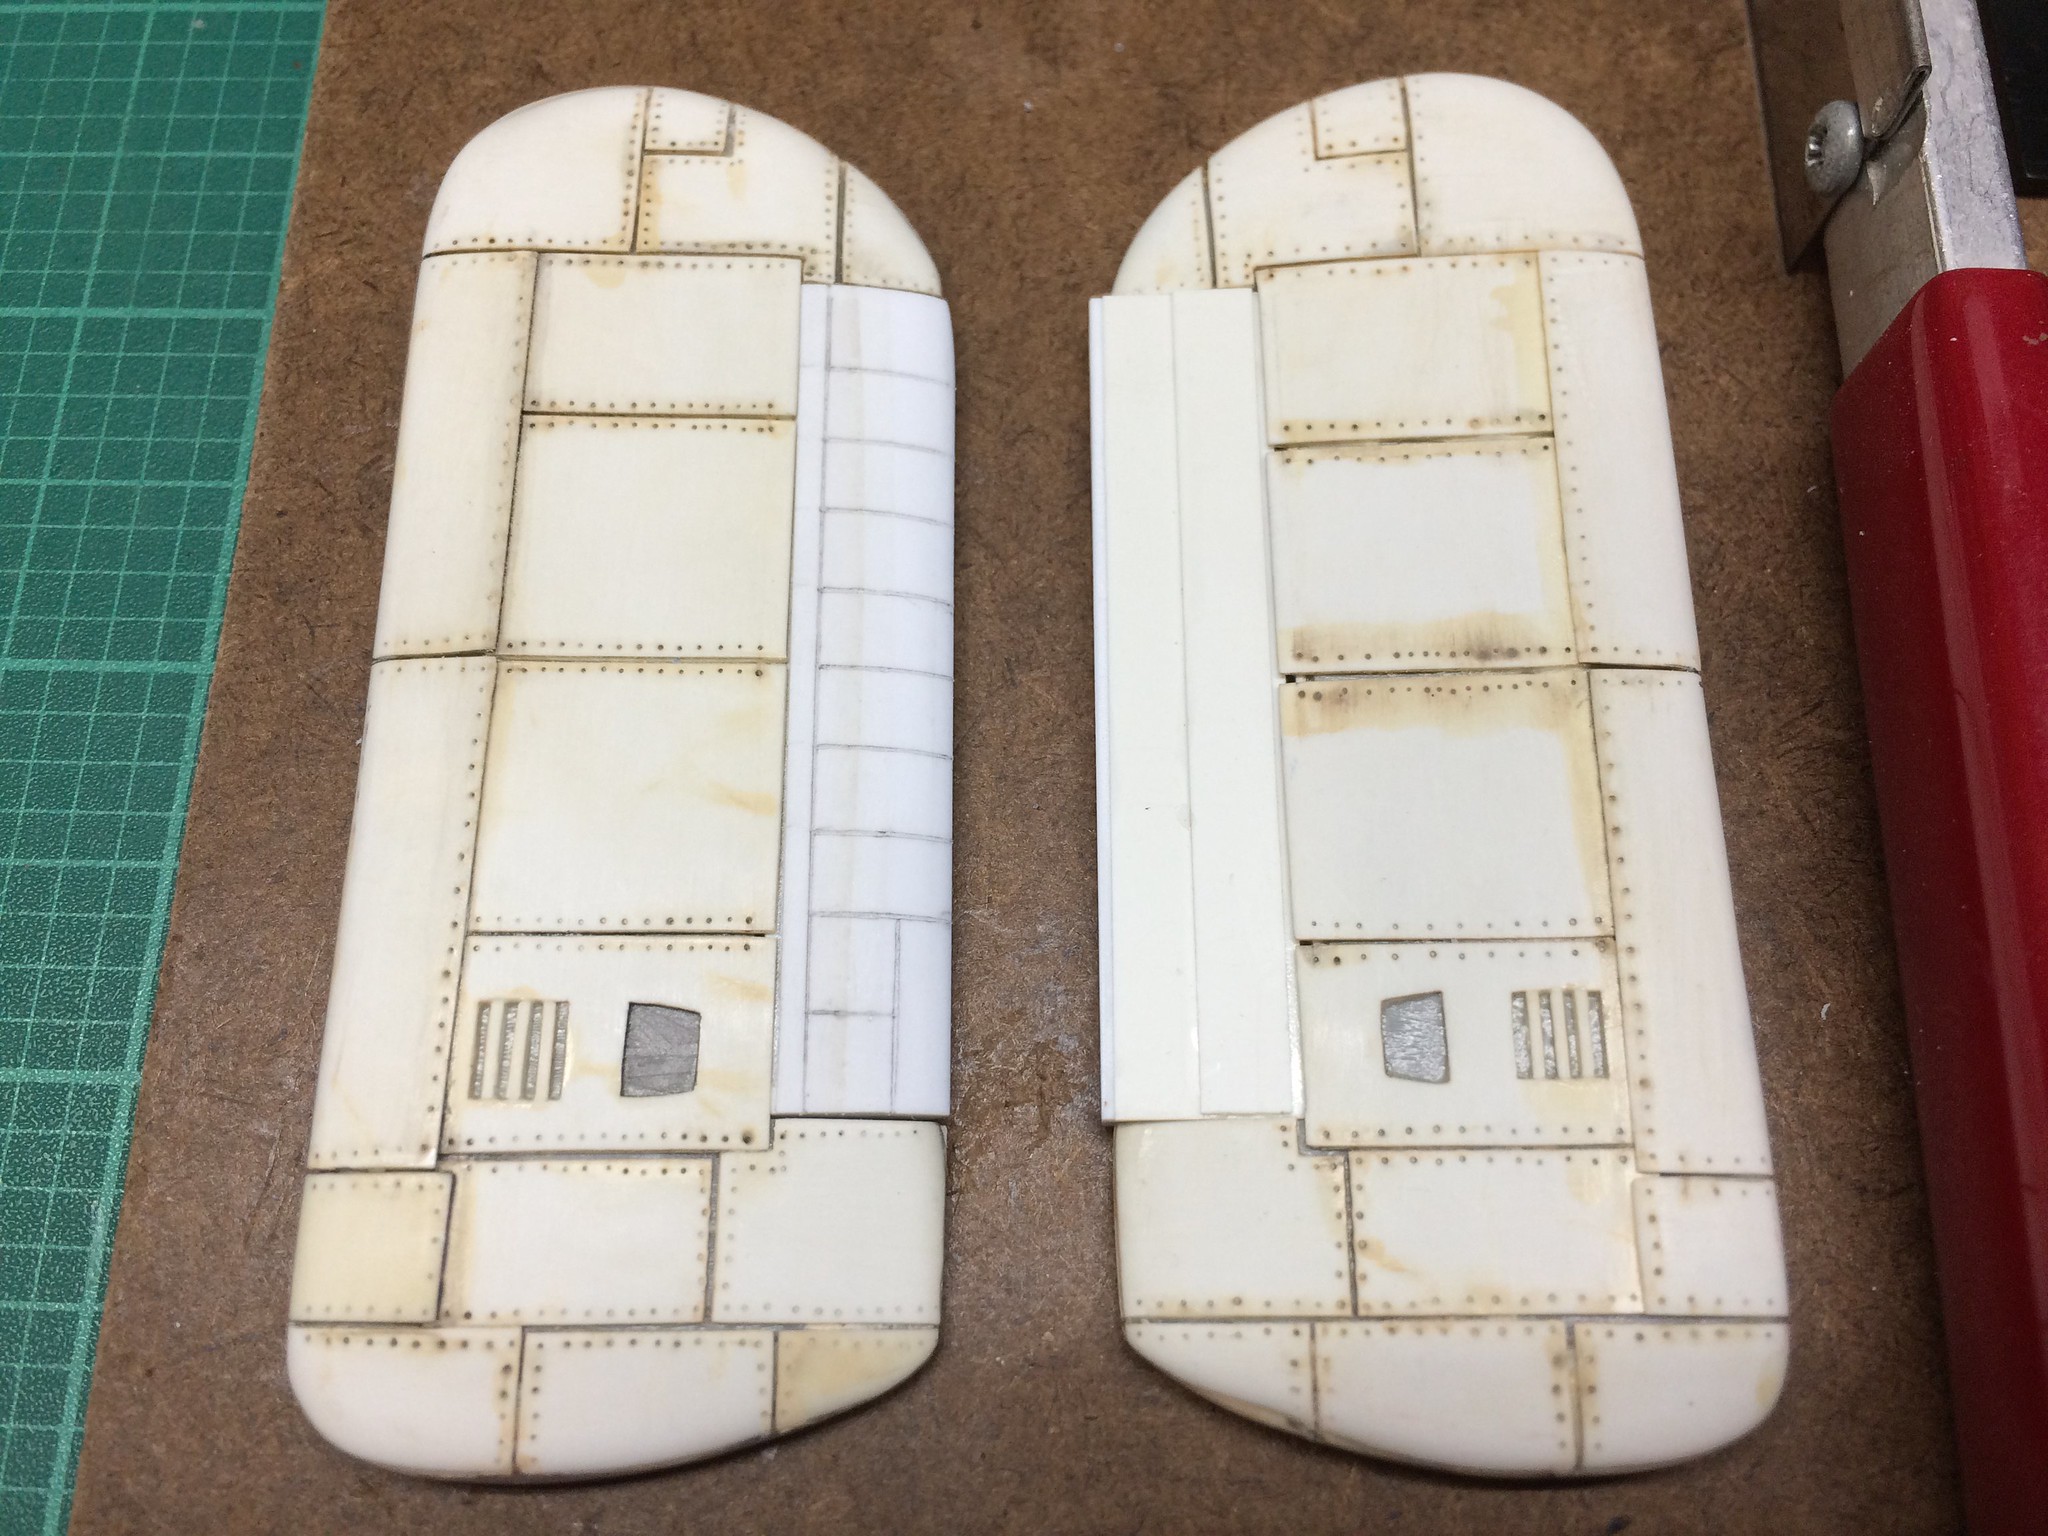 [/url]Bakagalas-16 by N.T. Izumi, on Flickr
Gamera, the recessed rivets will be replaced with raised resin rivets. The fins will be the test to verify if this is the way to go. I’ll be using Archer rivet decals, as they are quality and go on easily.
https://flic.kr/p/uwLYLN] [/url]P34-037 by N.T. Izumi, on Flickr
Oh cool G, I’ve picked up a sheet of those Archer rivet decals but haven’t used any yet. Looking forward to seeing how they work for you.
Gamera,
The Archer rivet decals work really good. The clear film is thin yet fairly durable, and it responds to Micro-Set and Micro-Sol. No need to break out the heavy duty Solvaset or Mr. Mark Softer. It also sticks pretty good too. The only tip I can offer to get the most out of using the decals is to use a sharp knife to cut as close to the line of rivets as possible. Oh and measure first - this stuff is expensive!
Here is another stalled project that trialed the Archer rivets:
https://flic.kr/p/sCQ9Zz] [/url]P34-015 by N.T. Izumi, on Flickr
https://flic.kr/p/vruyku]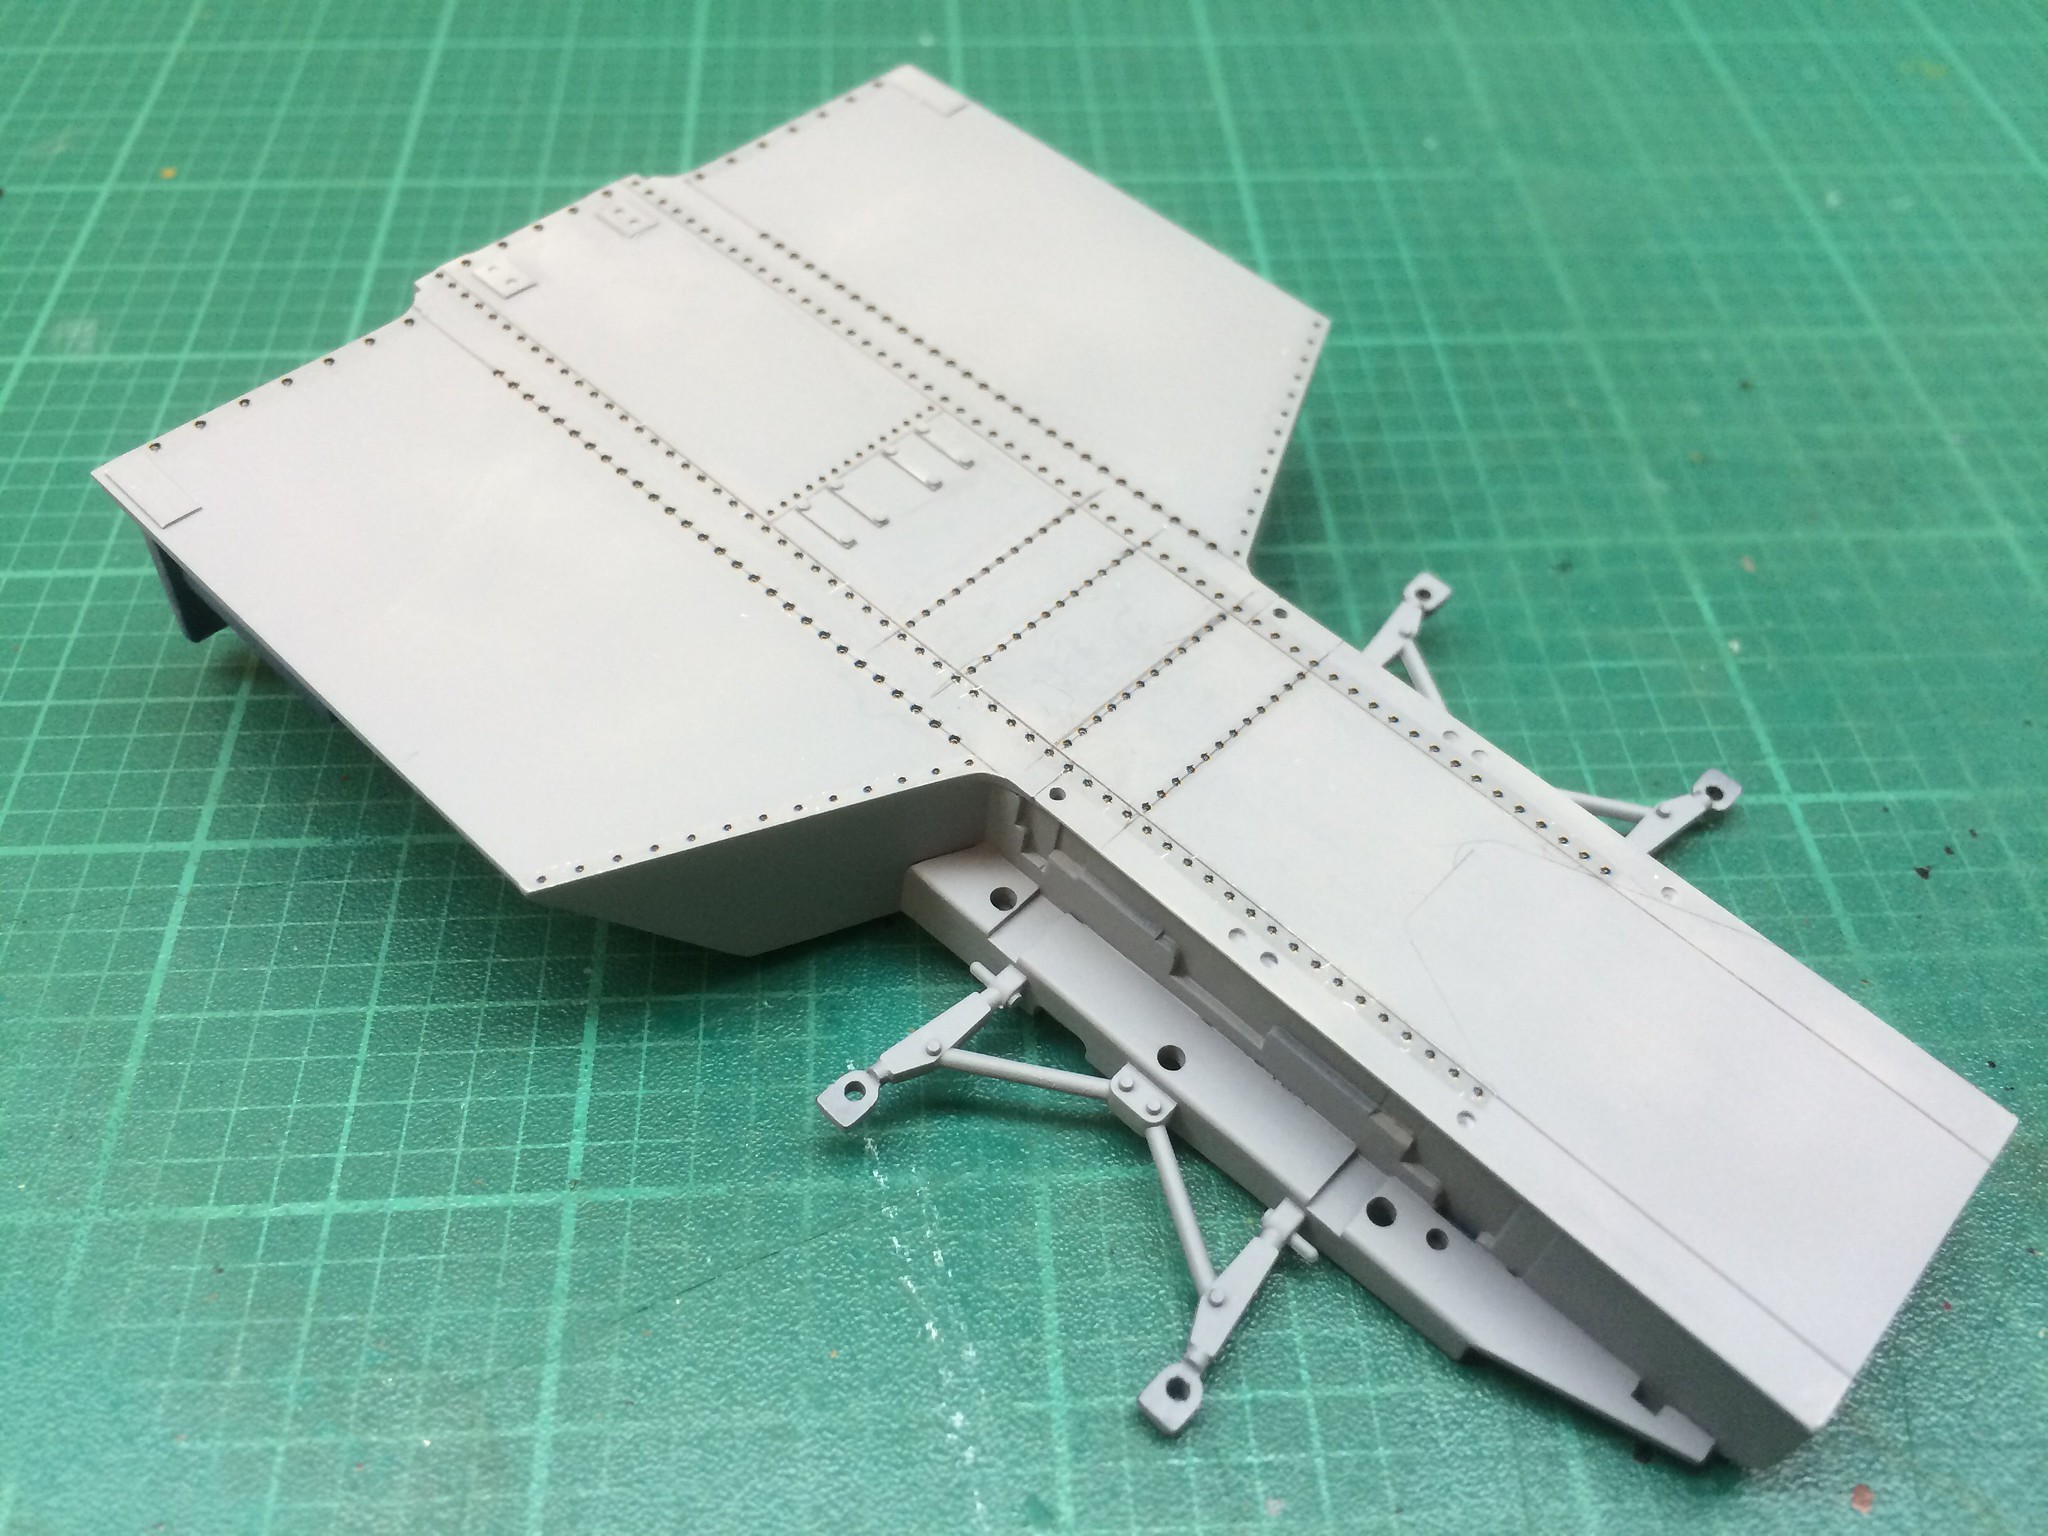 [/url]P34-038 by N.T. Izumi, on Flickr
https://flic.kr/p/vmvkiy]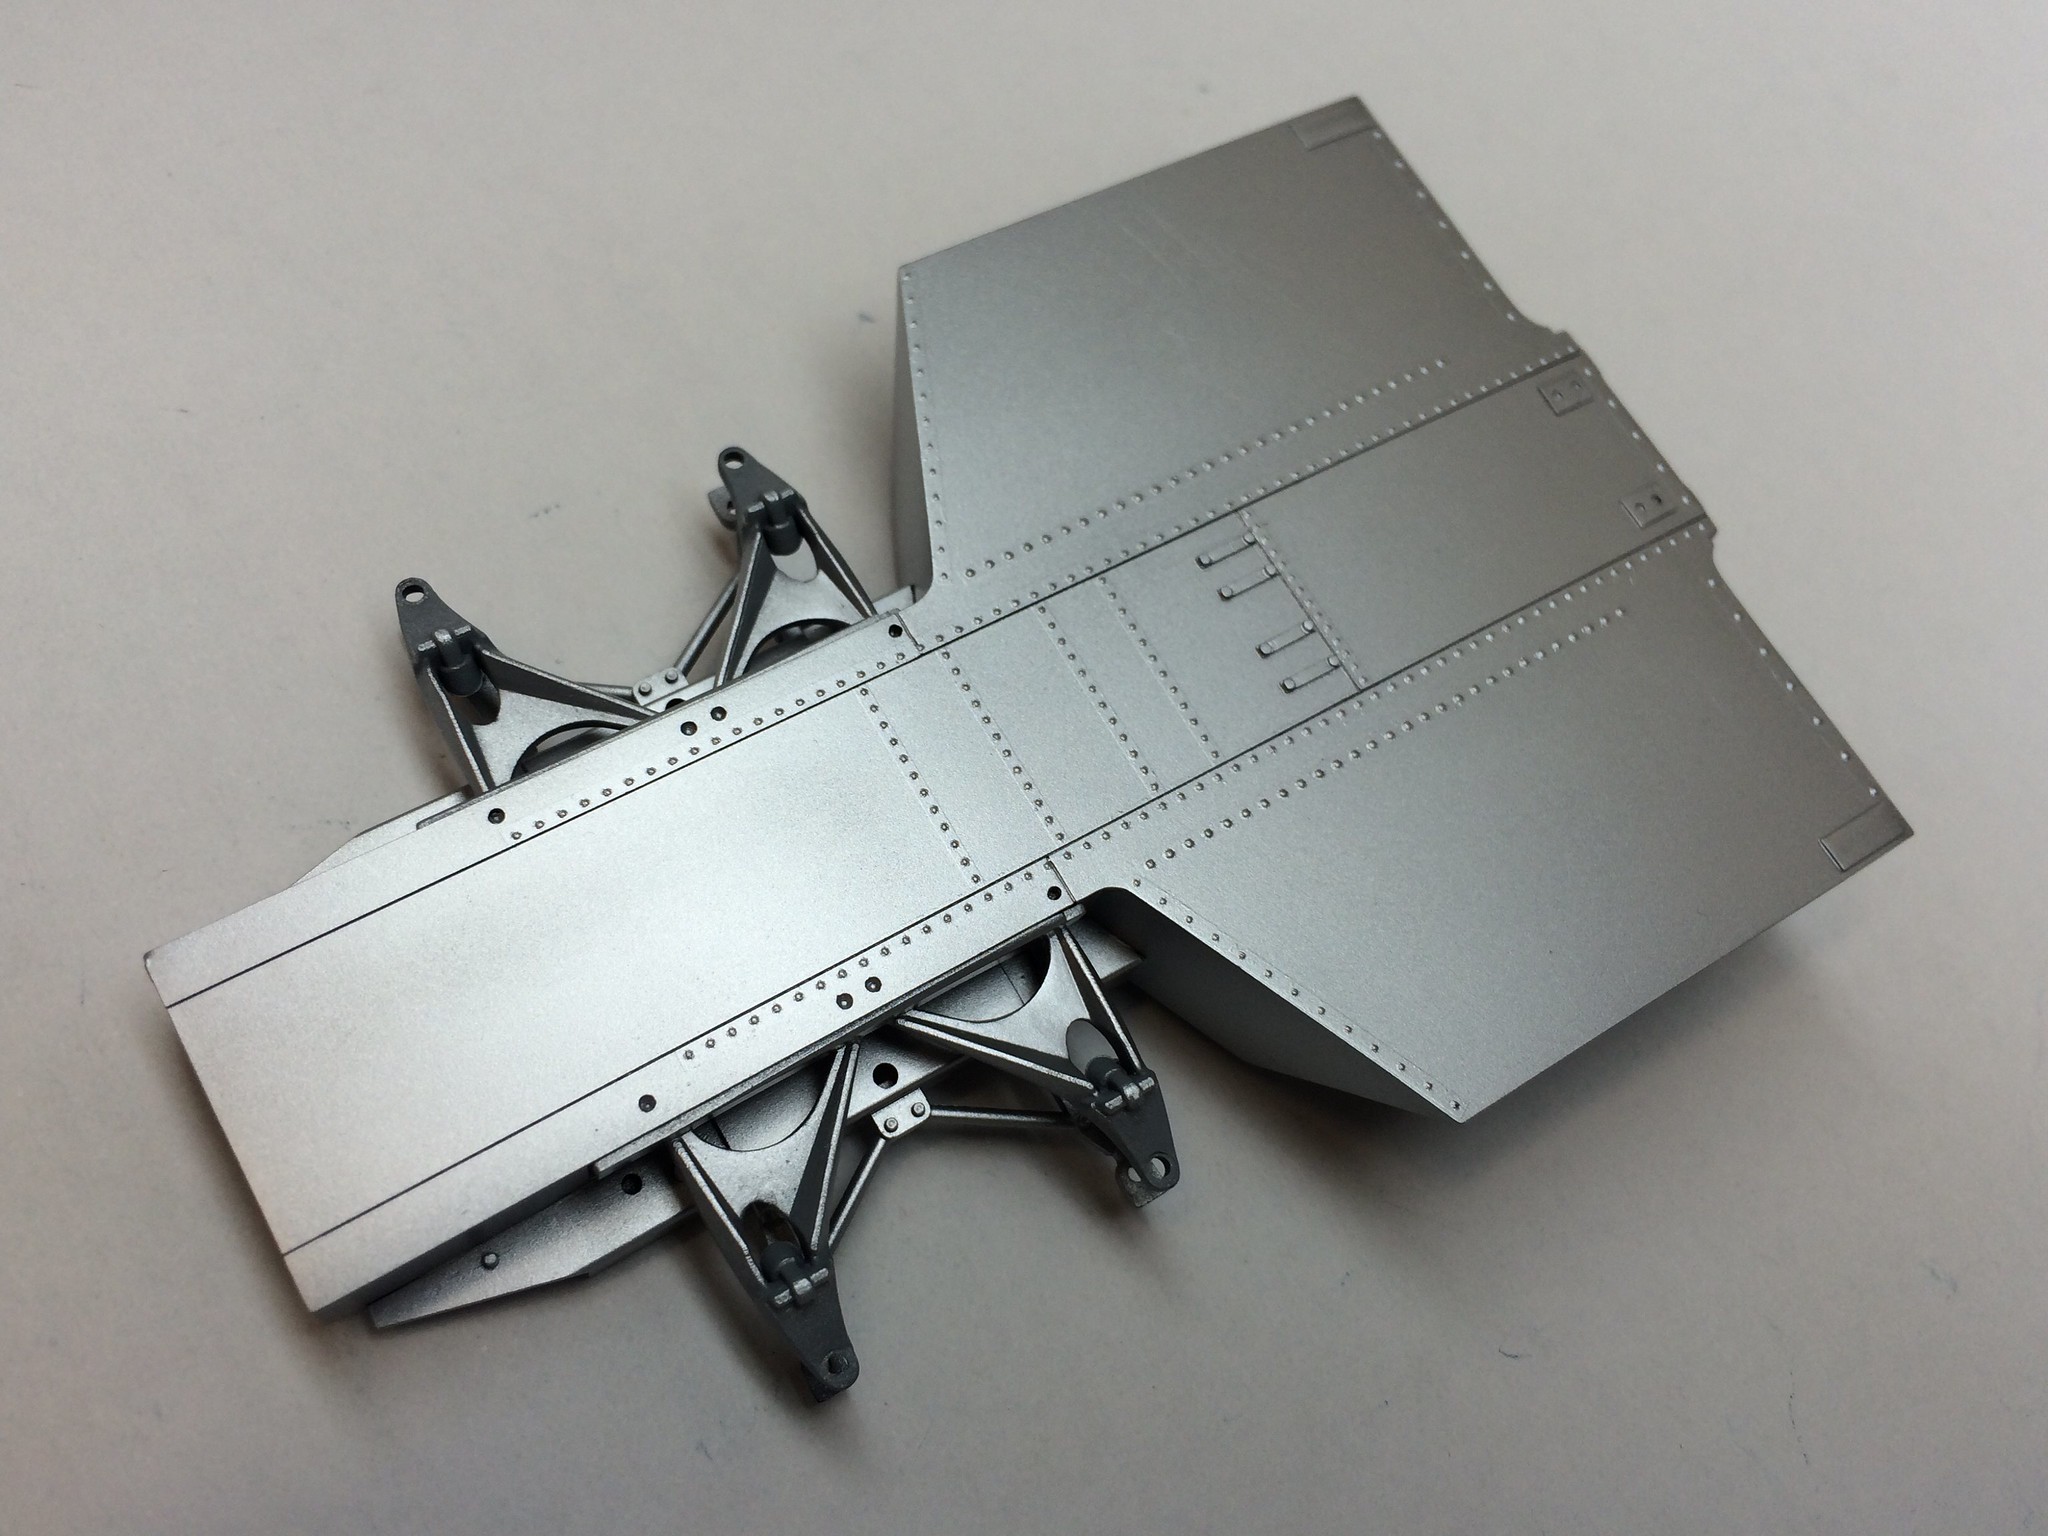 [/url]P34-064 by N.T. Izumi, on Flickr
Thanks G for the info on the rivets. And nice work there with them!
The fin support struts had their base plates trimmed, and the starboard rudder has been scribed. Now to detail the fins with lumps, bumps, and access panels.
https://flic.kr/p/23ozuxP] [/url]Bakagalas-21 by N.T. Izumi, on Flickr
https://flic.kr/p/GBhrw7]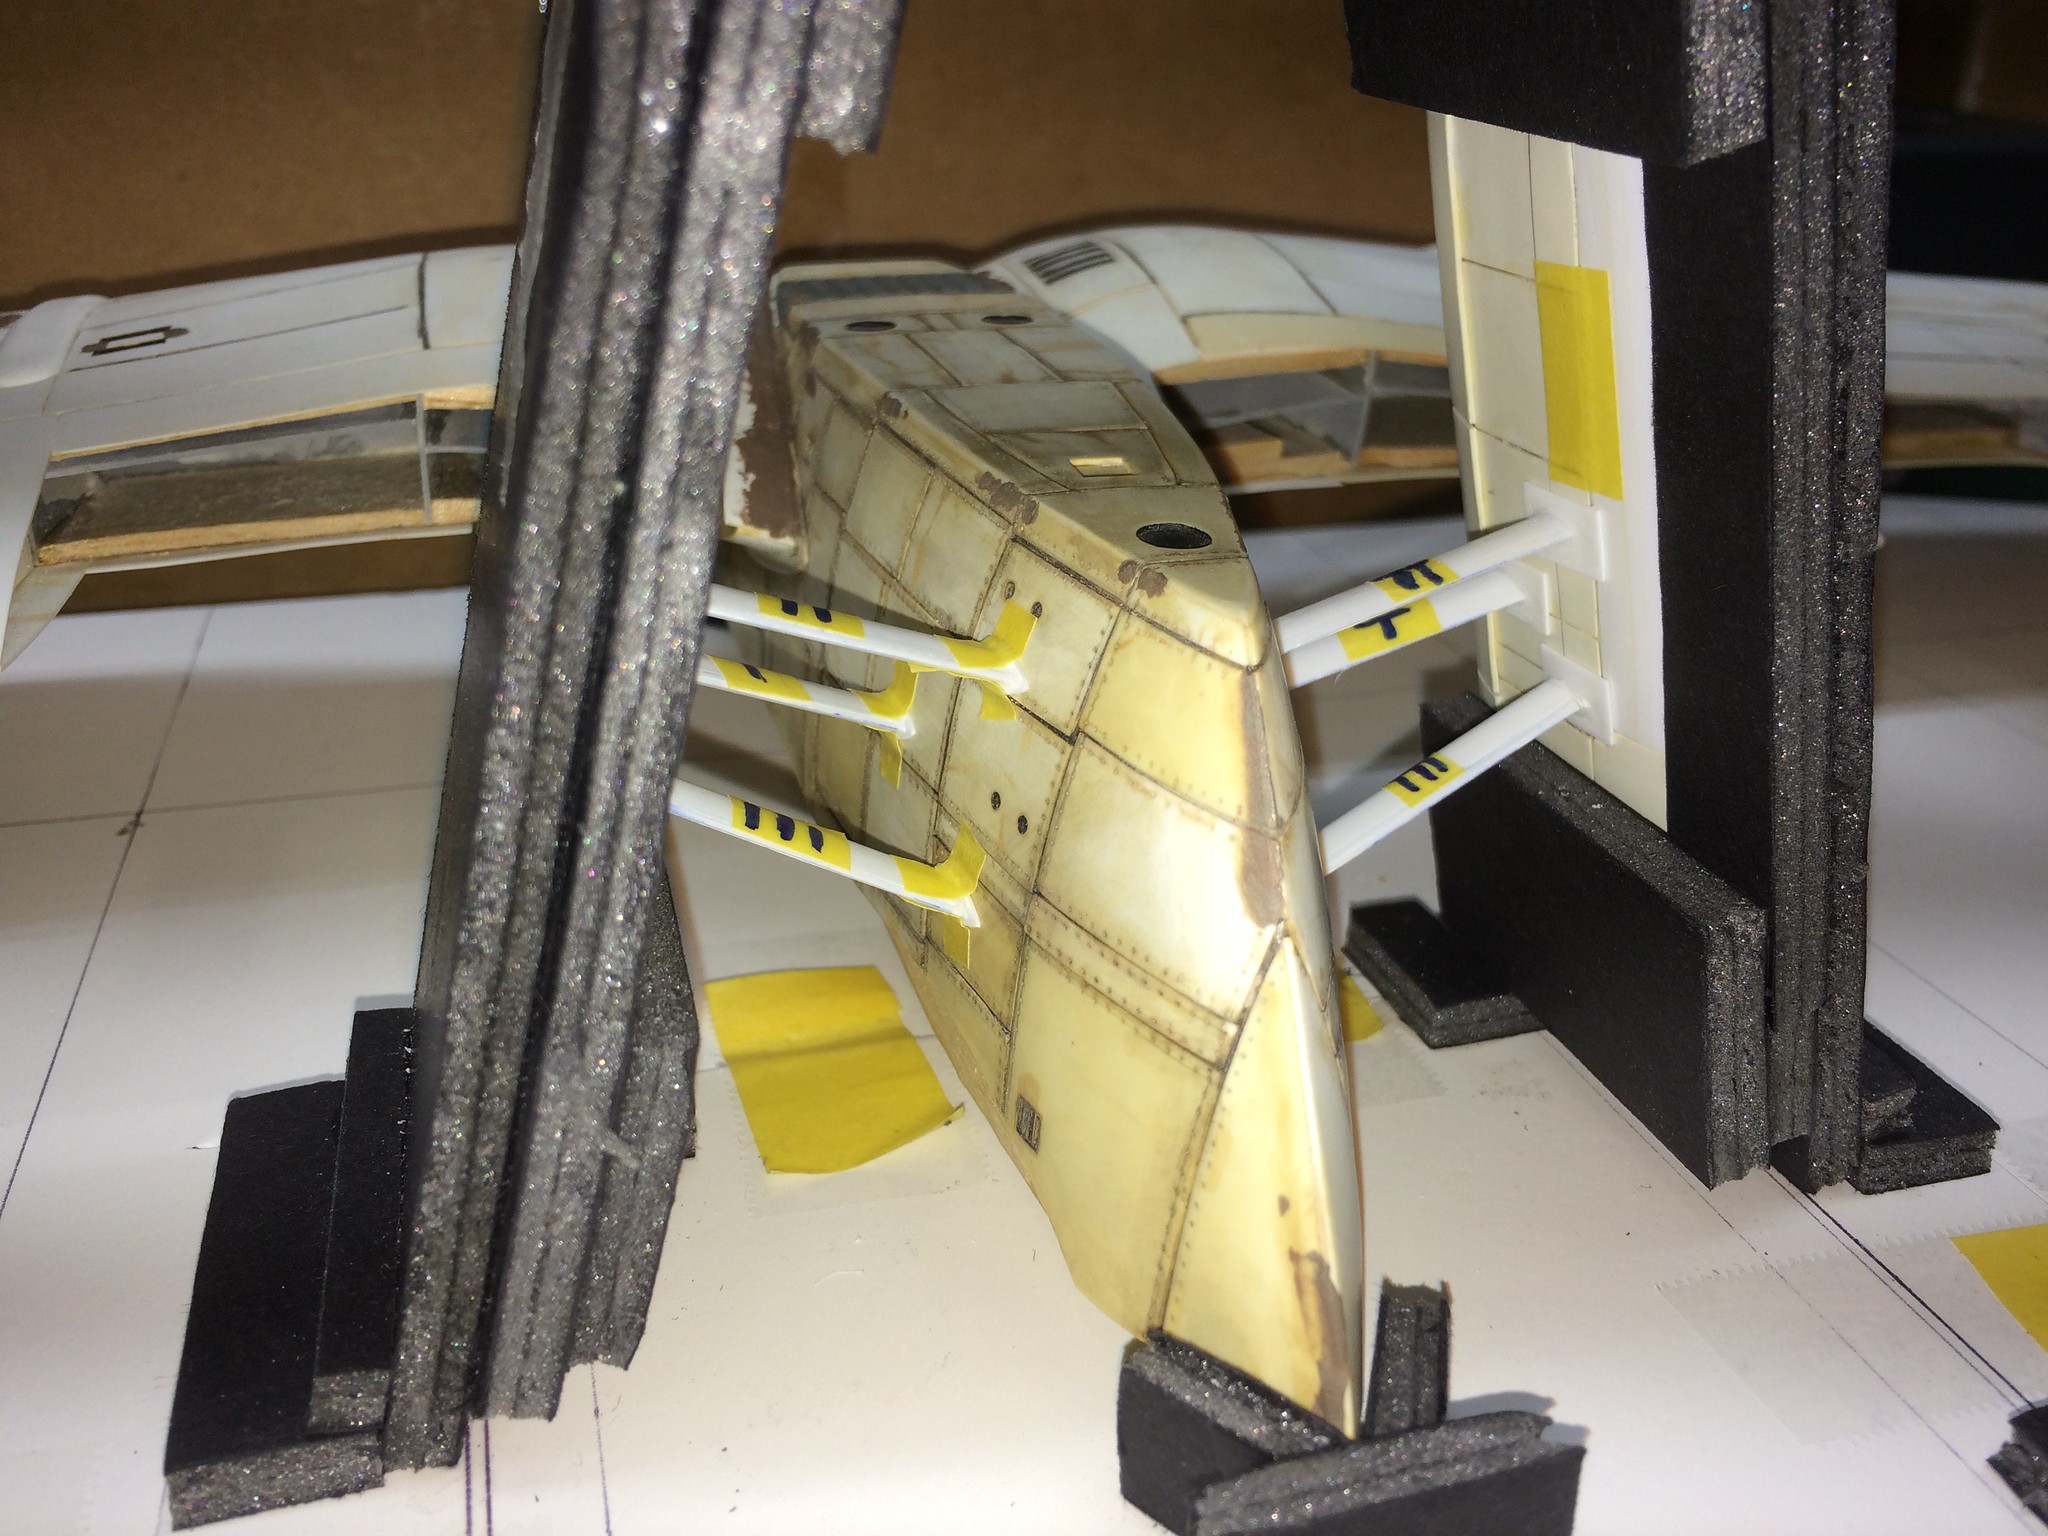 [/url]Bakagalas-20 by N.T. Izumi, on Flickr
I am still undecided how to make the many aerodynamic lumps needed for the model. Heat press, i.e. smash molding, is easy to do but yields inconsistent results. A female mold made from quick set plaster is more labor intensive to set up, but will get better results and allow for mass production. I am leaning towards the second option as I have never tried this.
I tried out the Shadow Hobby circle cutter to make some inspection panels on the fins. This tool is unique in that it does not leave a hole in the center of the circle. The blade smoothly glides around on the perimeter bearings, and the design allows very small (0.5mm) circles to be made. It can also do much larger circles, so cutting masks for roundels are also possible. I used 0.005" sheet plastic, which I find rather difficult to work with as it seems to deform rather than cut, but the tool made neat circles with little effort.
https://flic.kr/p/F94D9v]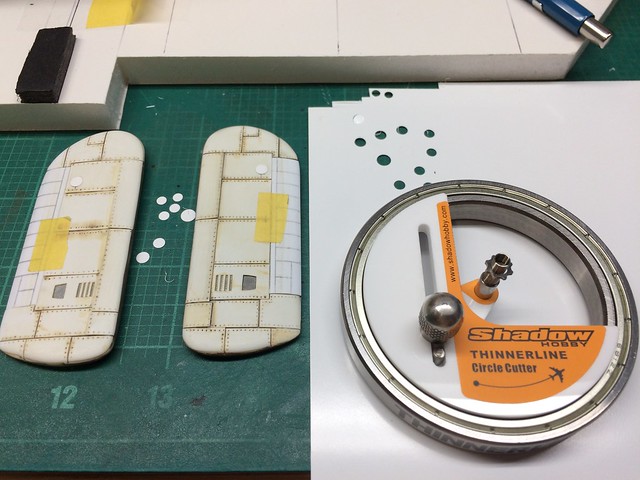 [/url]Bakagalas-22 by N.T. Izumi, on Flickr
https://flic.kr/p/23r1Siv]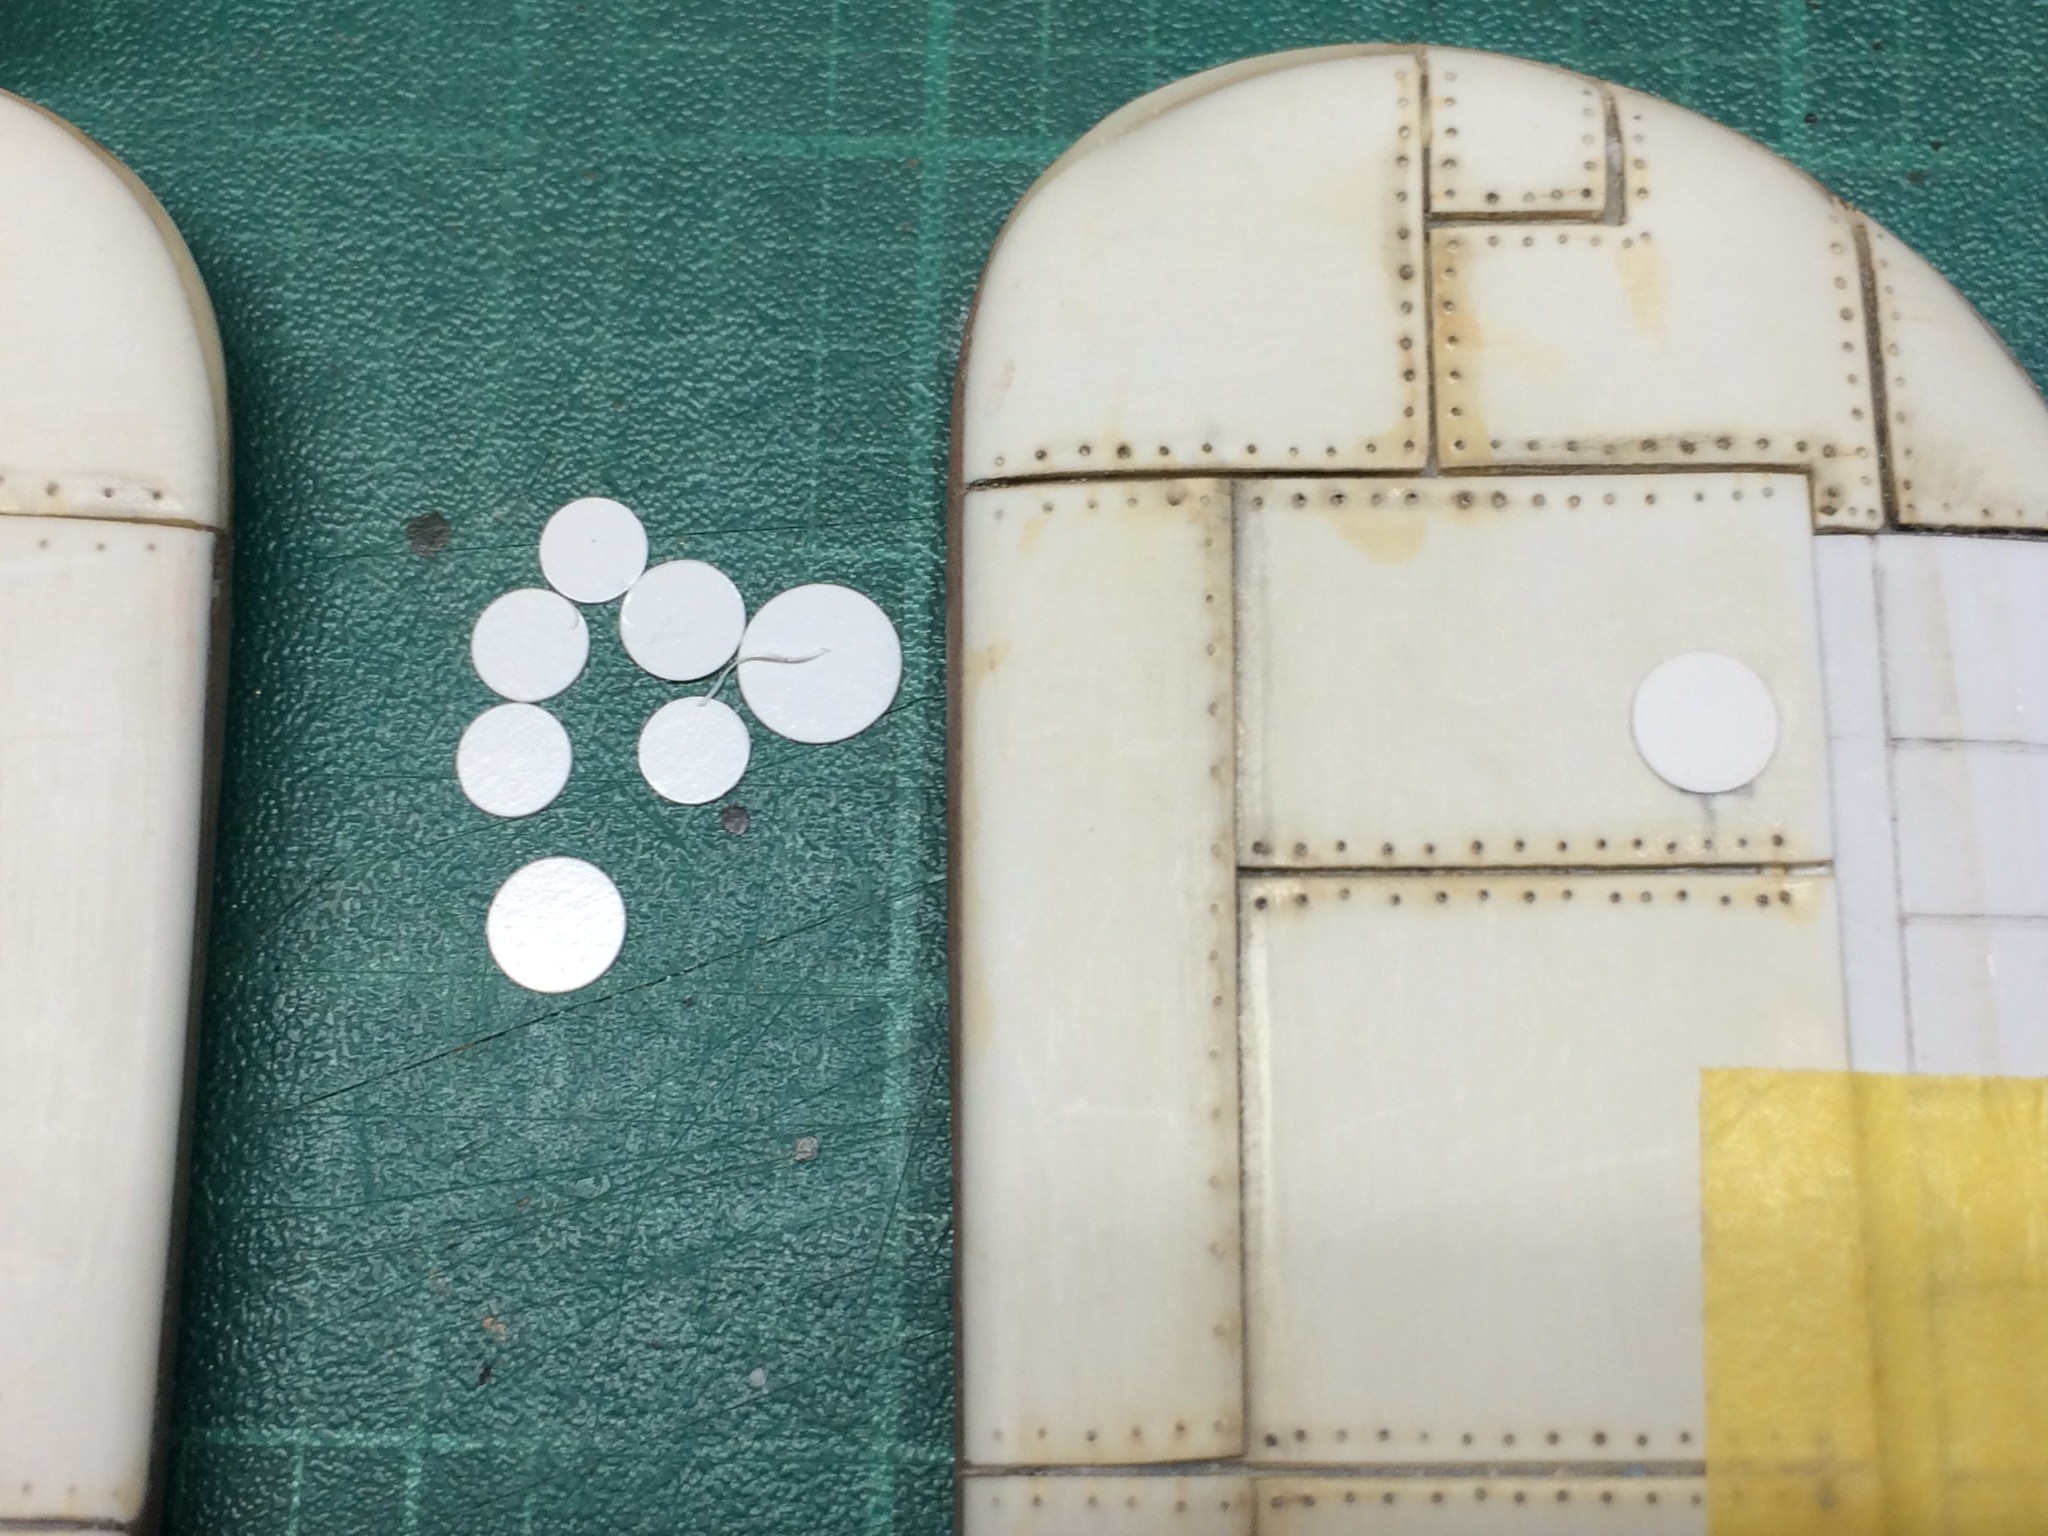 [/url]Bakagalas-23 by N.T. Izumi, on Flickr
The tool does require a gentle touch, and setting the exact diameter of the cut involves a little trial and error. But circles of any diameter (within the limits of the tool adjustment) can be made, unlike a punch and die set.
I had a brain fart to make blister fairings which would be much simpler than casting a plaster female mold. I’ll try out my theory this weekend.
I made some card stock templates for the flaps, ailerons, and wing tips last night. They were taped to the model along with the fins to check for fit, but also I really wanted to have a look at the overall silhouette.
https://flic.kr/p/F9Zeqa]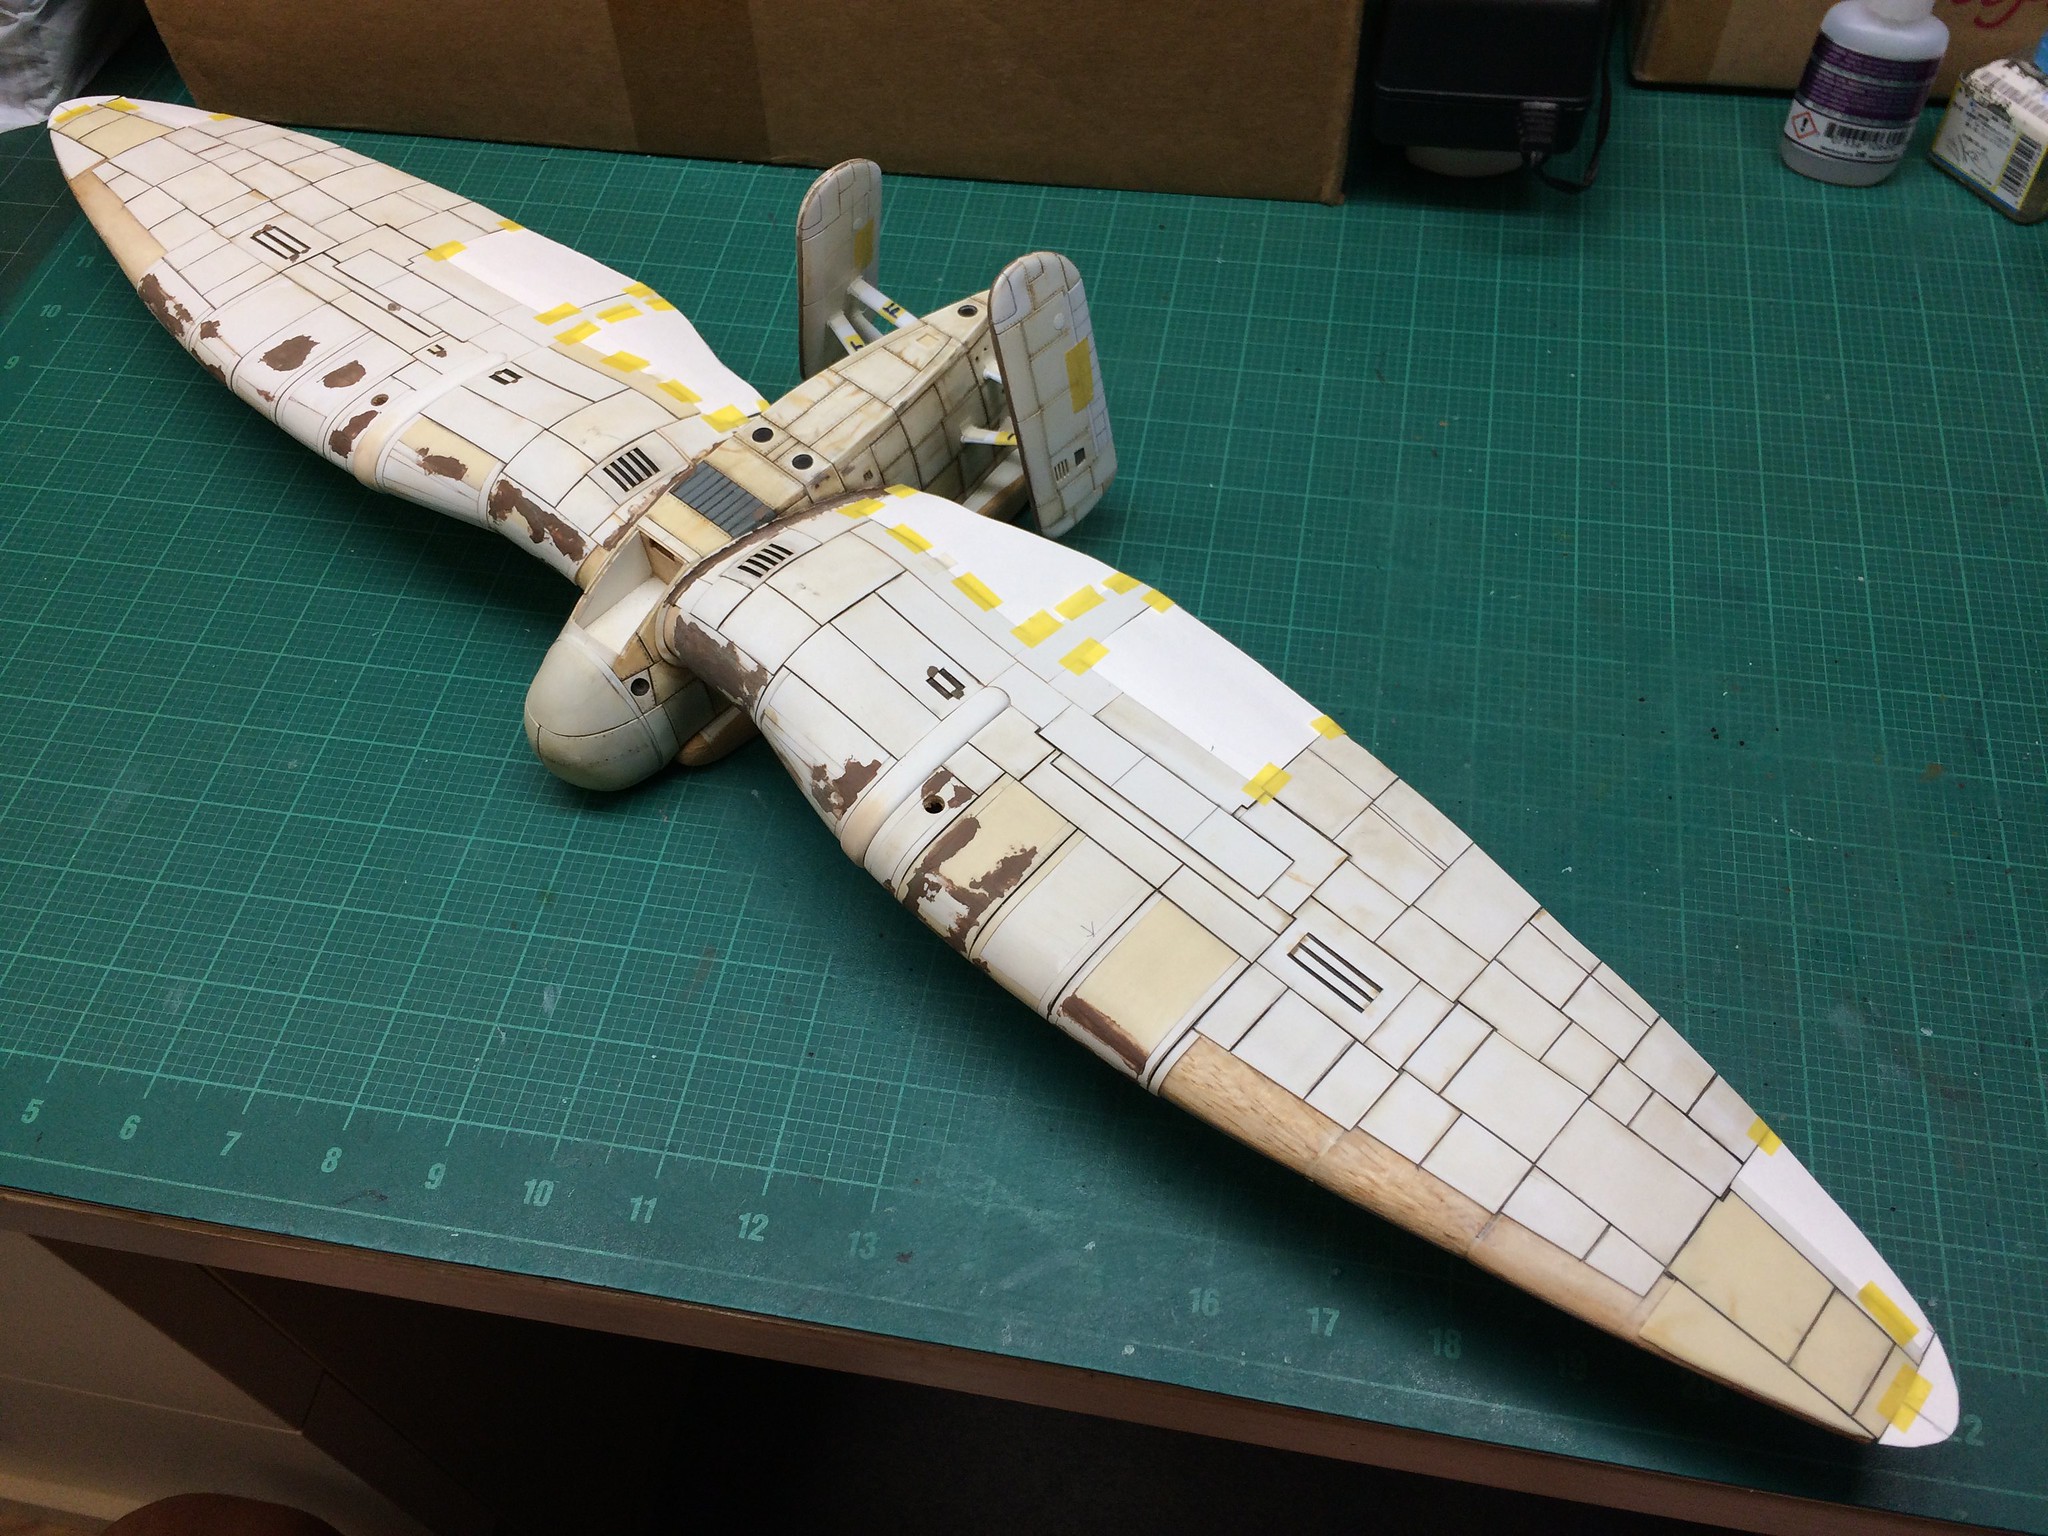 [/url]Bakagalas-24 by N.T. Izumi, on Flickr
https://flic.kr/p/F9Ze8X]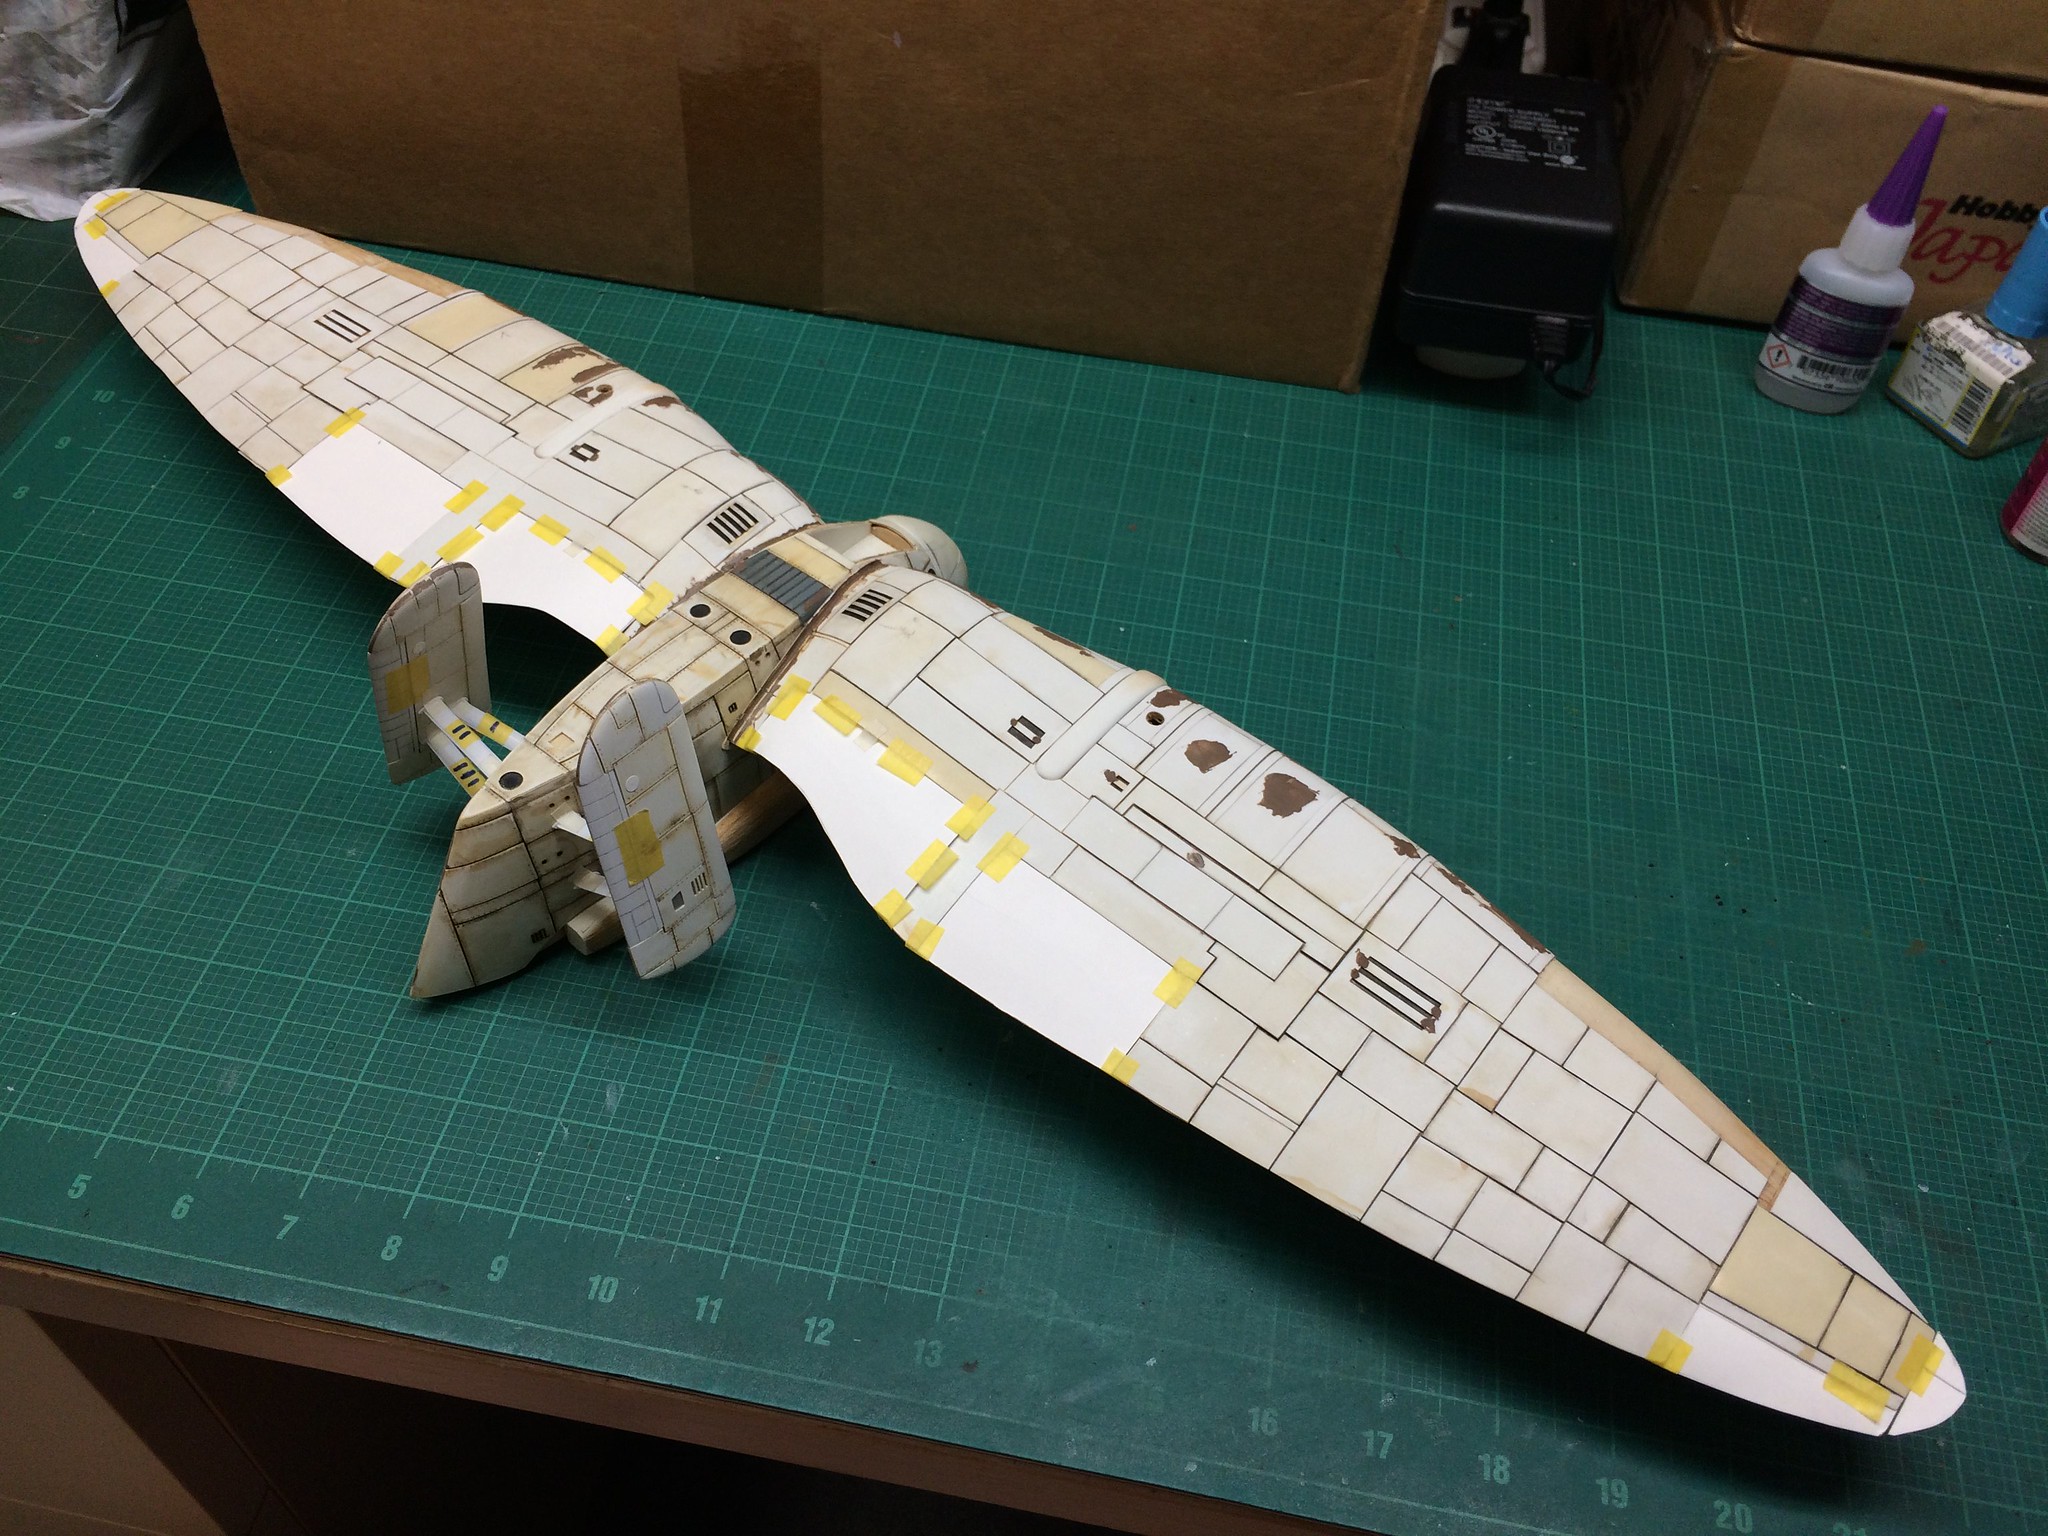 [/url]Bakagalas-25 by N.T. Izumi, on Flickr
I noticed the fin supports look too thick - I confess to increasing the cross section from my drawings when making them. No problemo, I’ll just sand them down. The anime version had struts that contiuously tapered, so I’ll go for that look.
https://flic.kr/p/F9ZdHZ]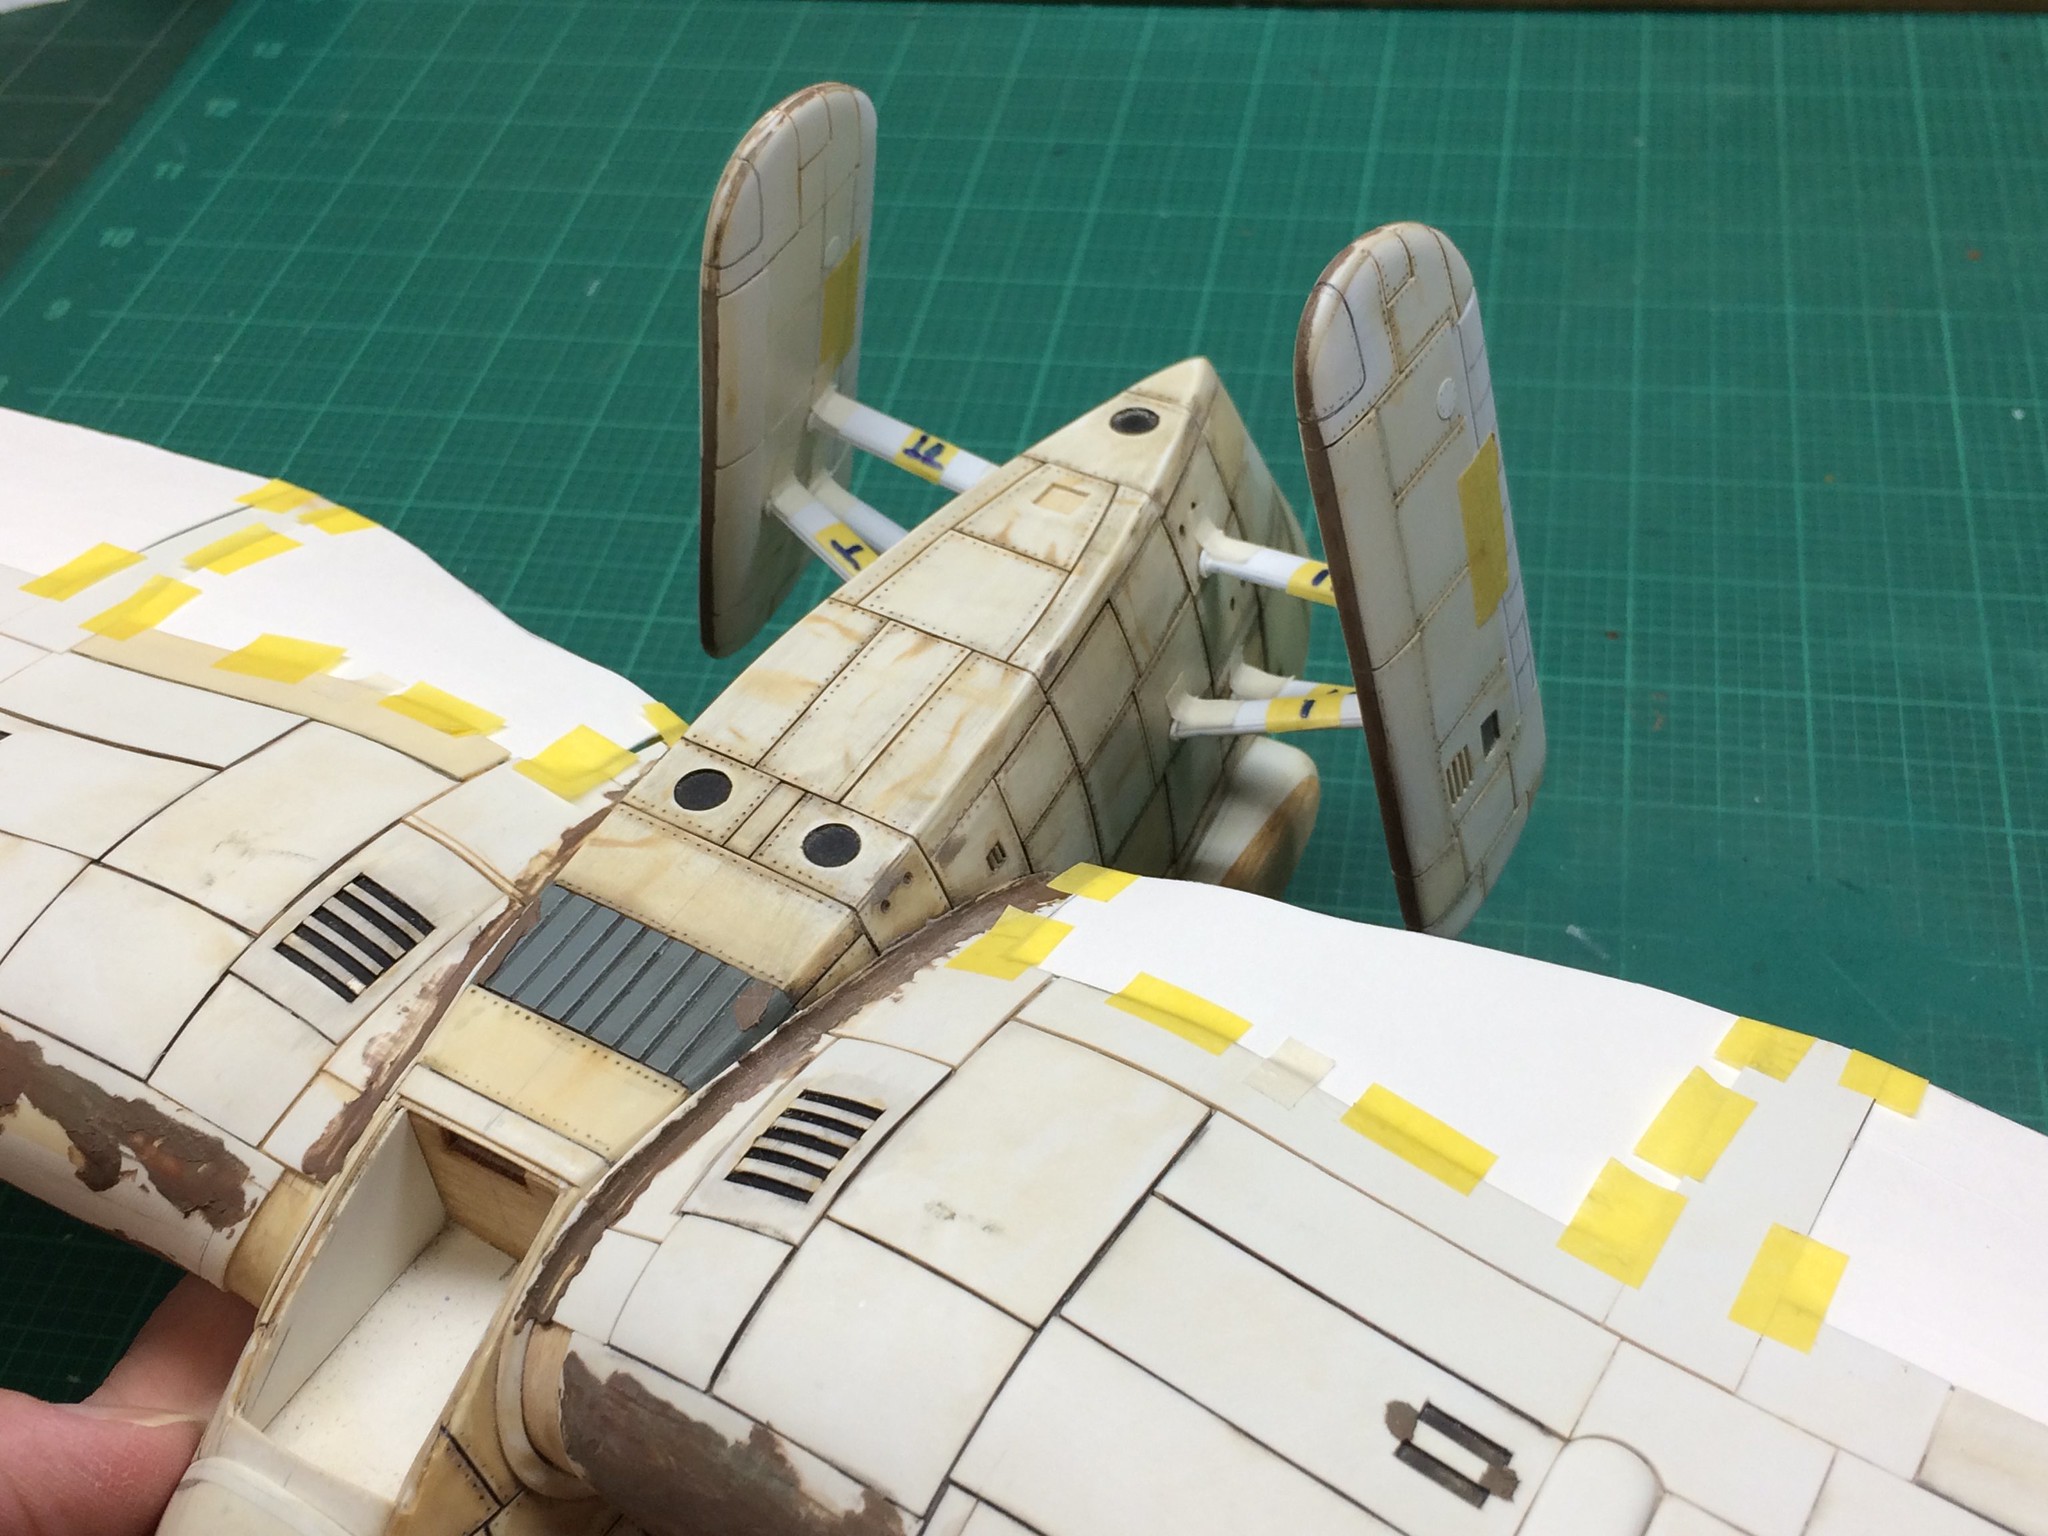 [/url]Bakagalas-27 by N.T. Izumi, on Flickr
They don’t look so bad from the rear, which is the only vantage point that was available while the fins were in the jig.
https://flic.kr/p/F9ZdQc]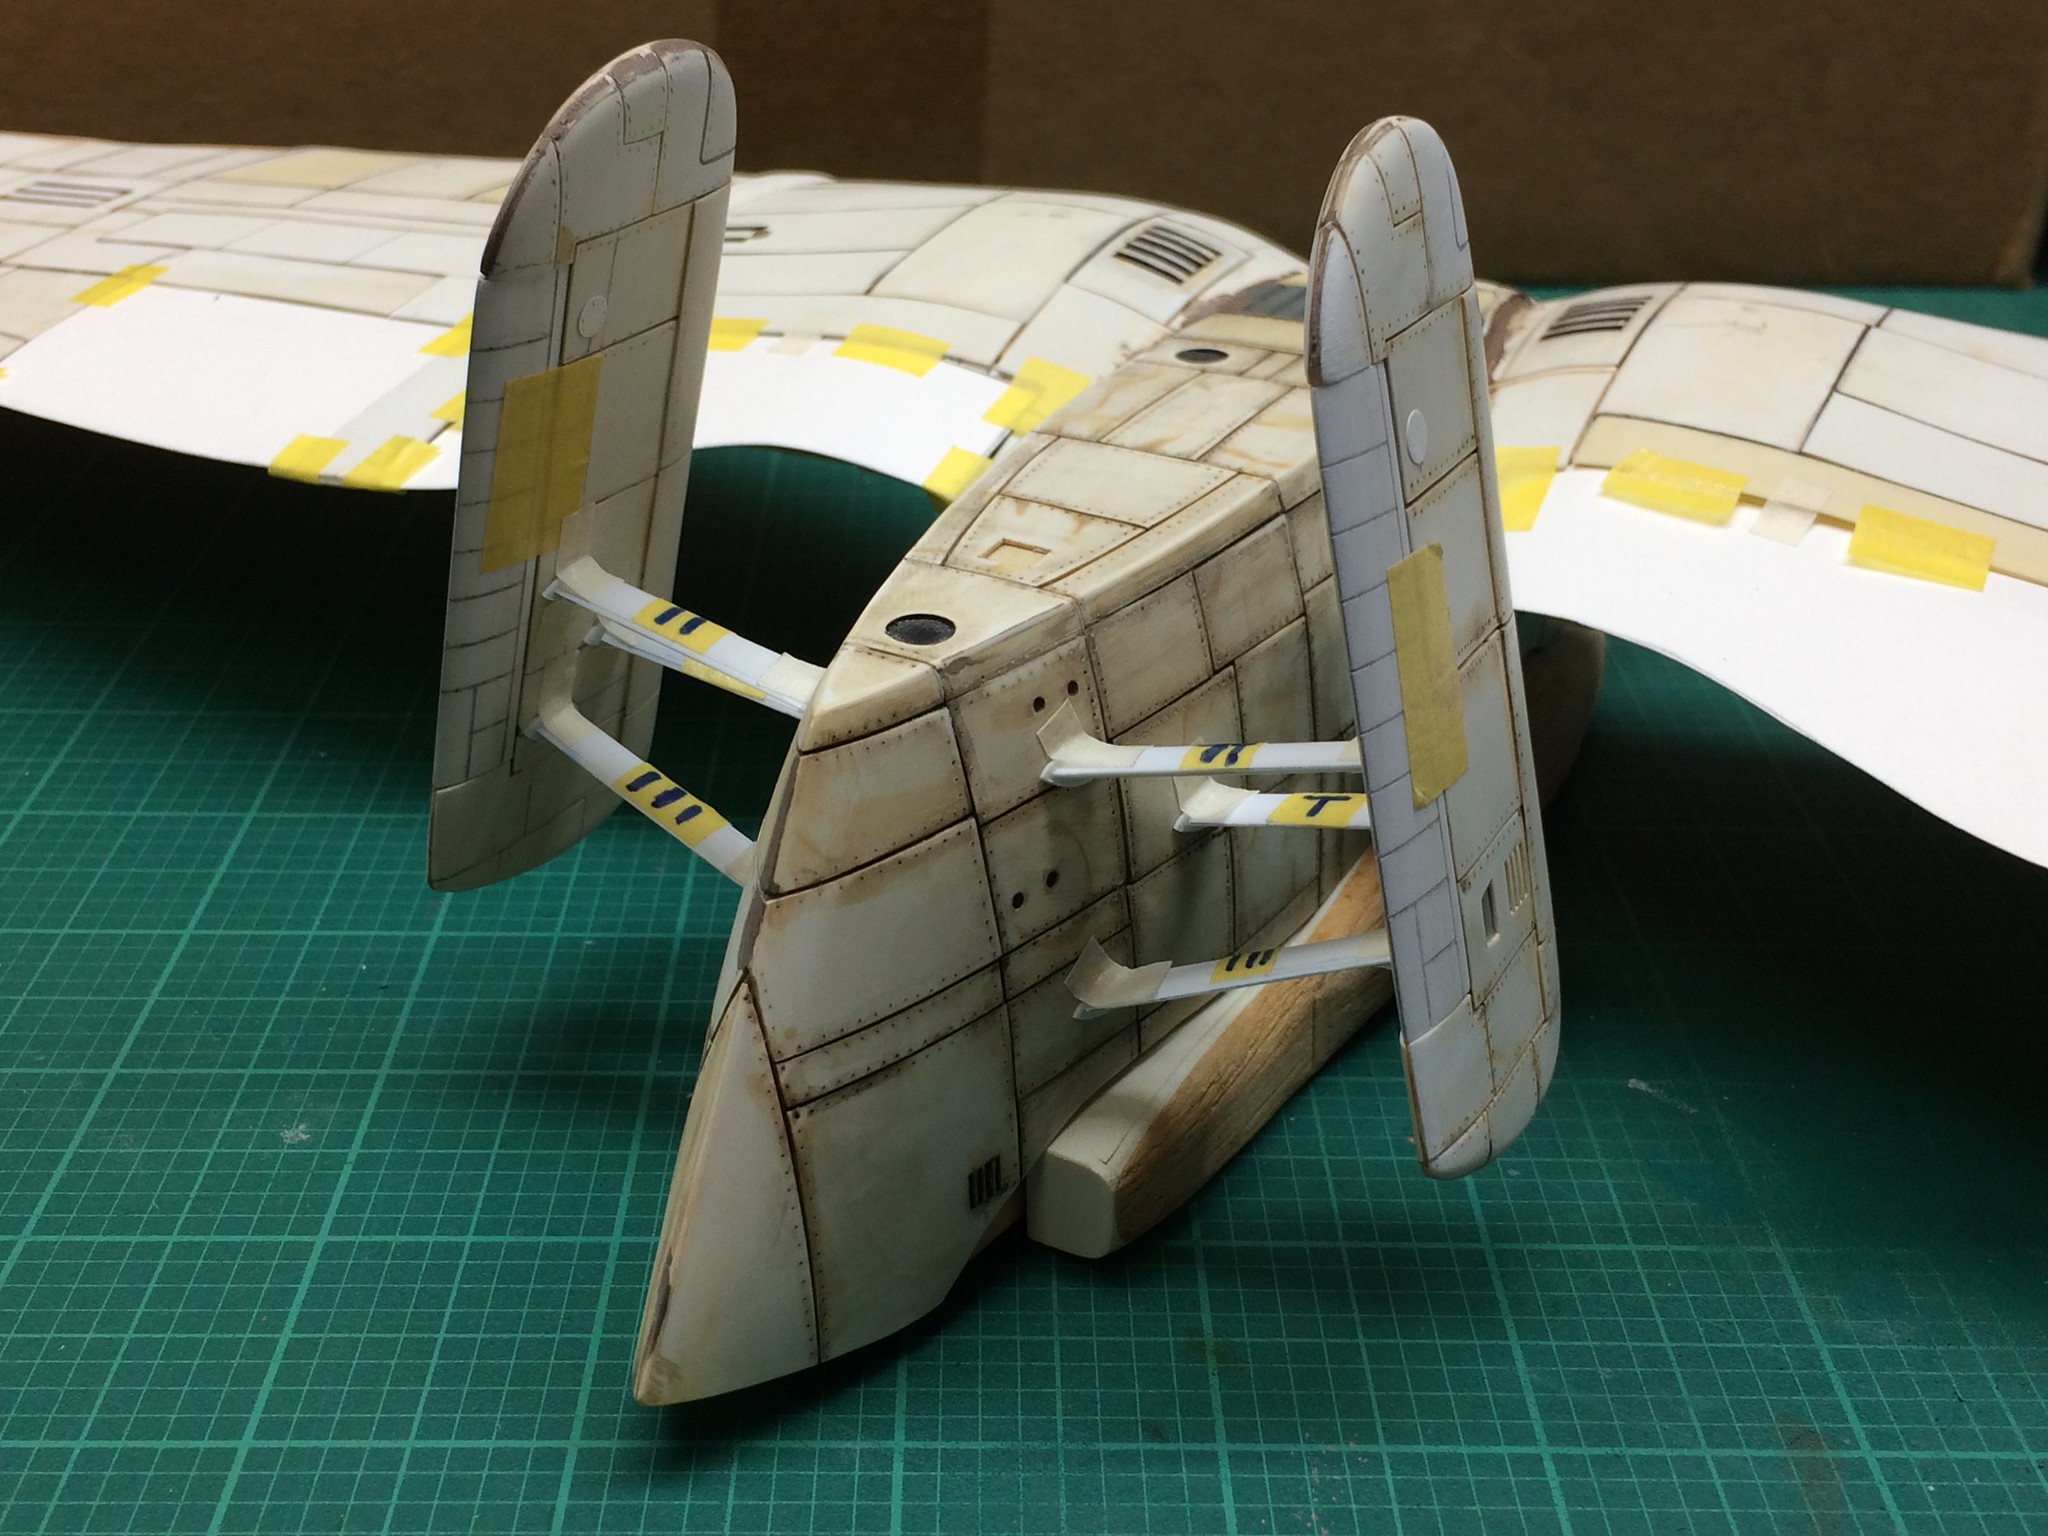 [/url]Bakagalas-26 by N.T. Izumi, on Flickr
I started making a mini vac-form rig to make the many lumps and bumps needed for the build. It is designed to take a 4"x6" sheet of plastic, which a standard 12"x6" sheet will provide three. The old vacuum cleaner attachment will provide connection to said vacuum cleaner. I have a larger home made vac-form rig which I was able to clamp to a kitchen drawer next to the electric range, so I’ll be doing the same here.
https://flic.kr/p/GHN8my]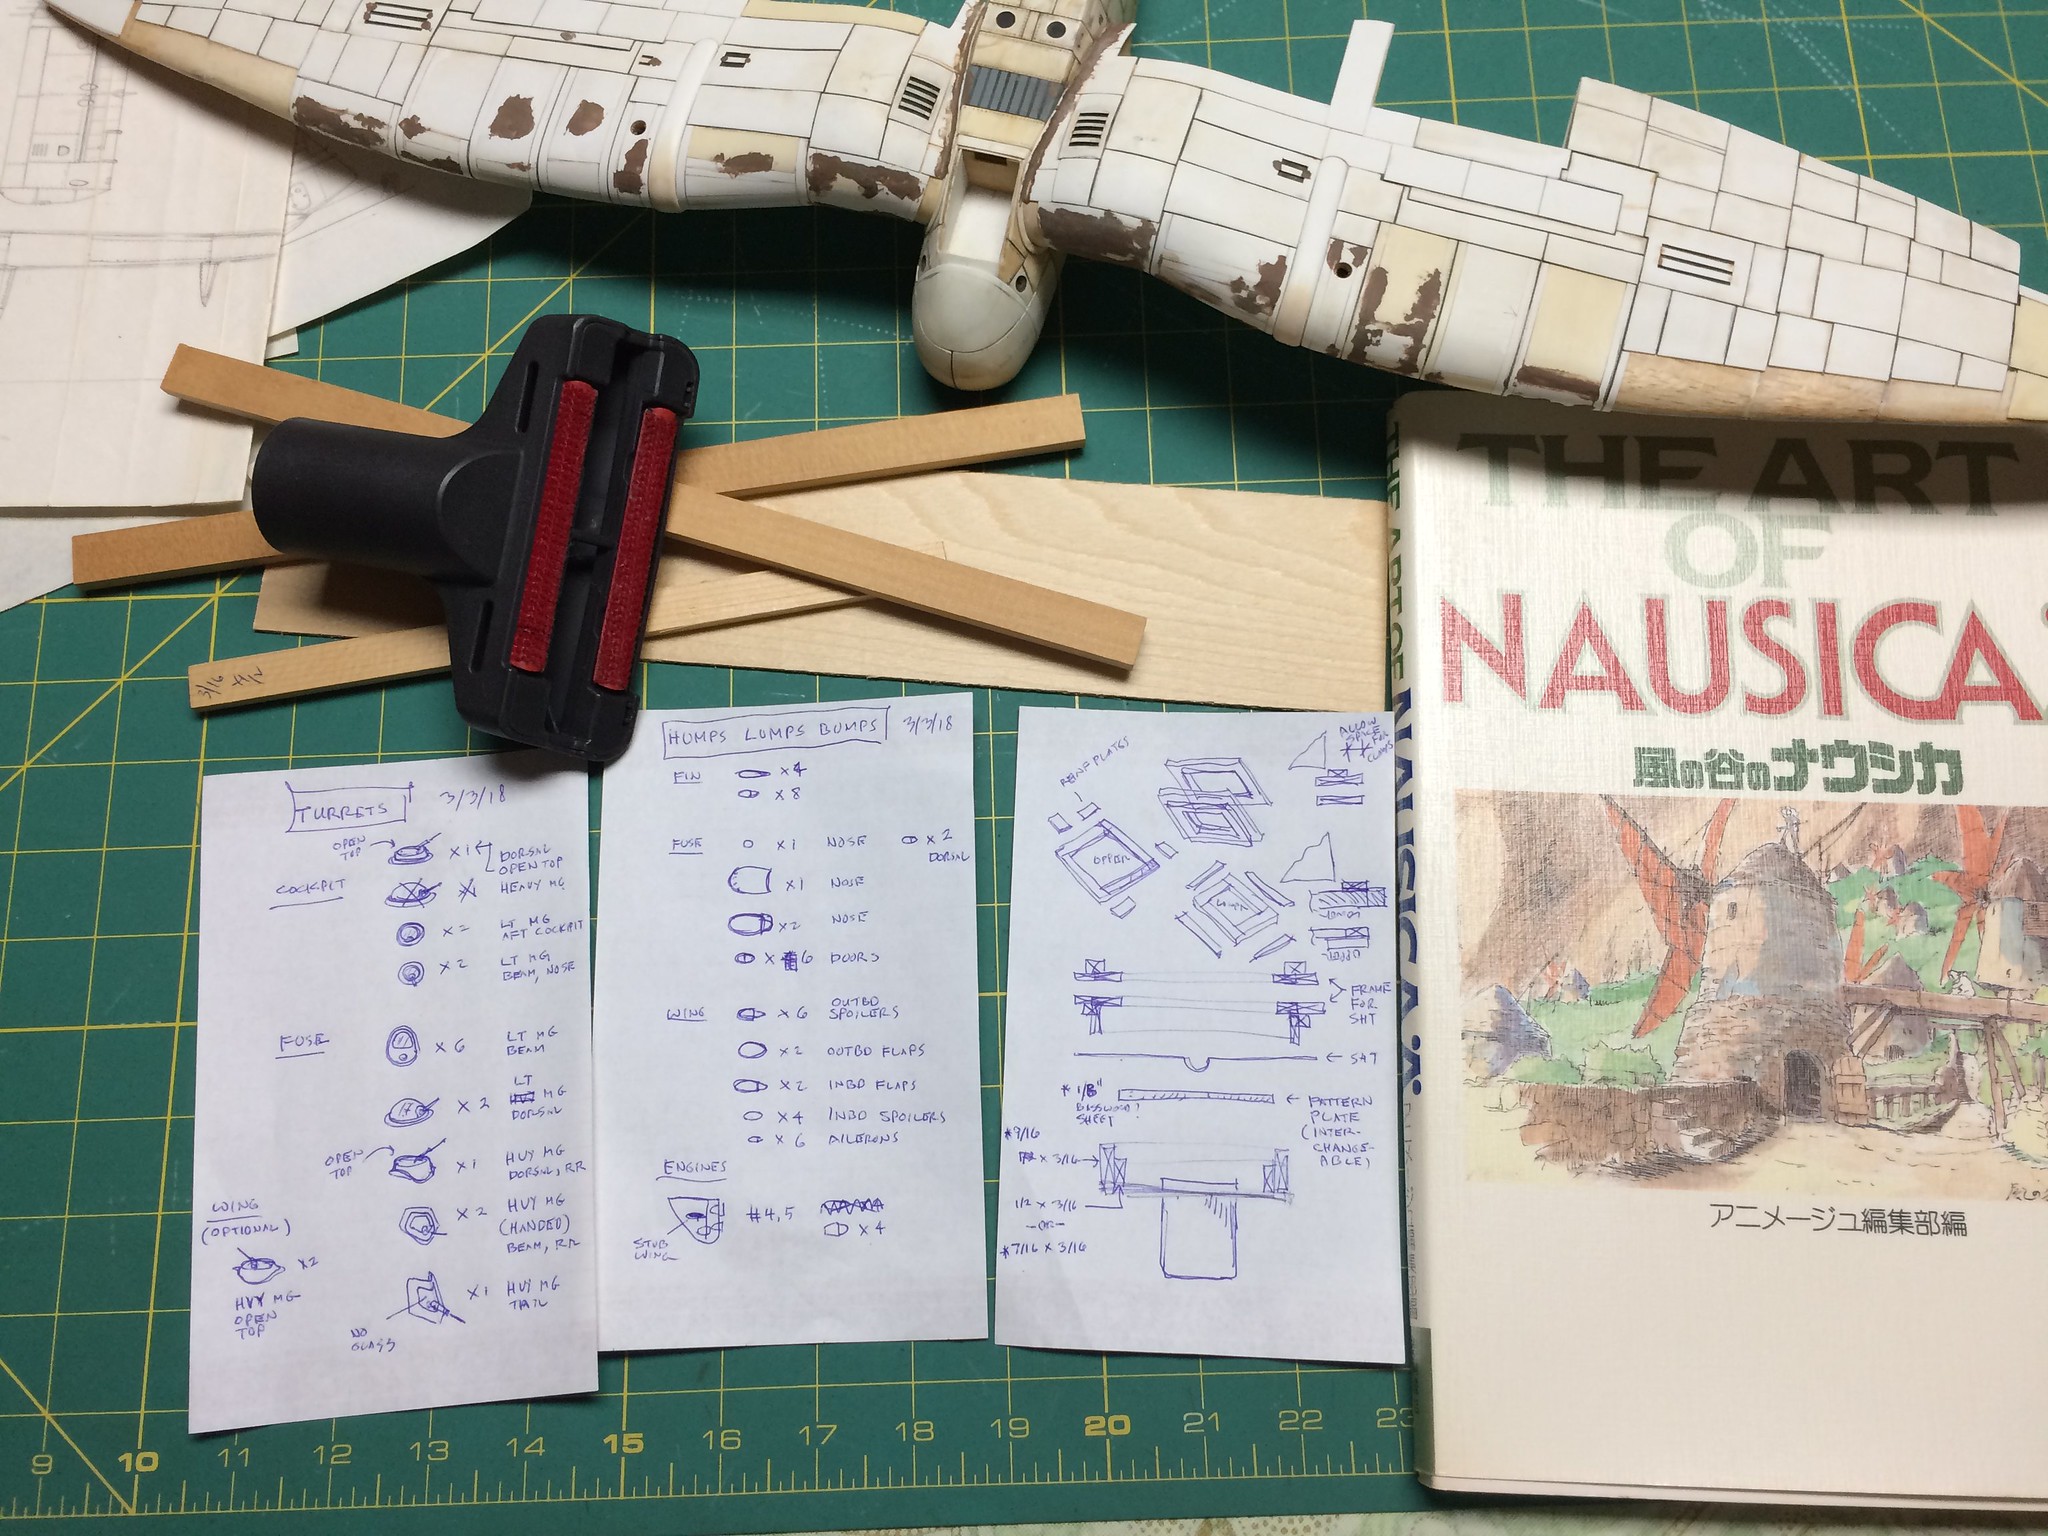 [/url]Bakagalas-29 by N.T. Izumi, on Flickr
I am still making pieces for the rig, and have to cut little teardrop shaped holes in a sheet of basswood. Progress photos and tests shots to follow soon.
That’s just amazing G! Great work there on all the surface detail.
Looking forward to seeing how she looks all painted up.
The vac-form rig is done, but during tests I discovered that enongated lumps tend to bulge out in the middle, ruining the shape. So back to Plan-A, which is squash forming with plaster female molds. At least I know this will work as I have done it before.
https://flic.kr/p/23ZAJ43]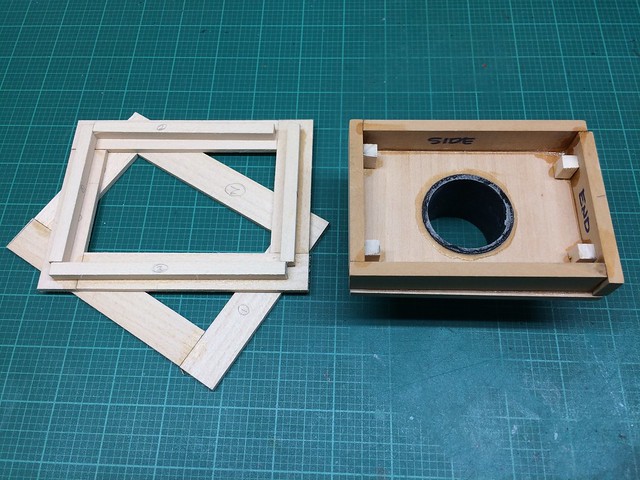 [/url]Bakagalas-30 by N.T. Izumi, on Flickr
To keep momentum going, I started working on the flaps. I’m just making it up as I go along, but the outboard segments are fairly simple in shape so they will probably just get sheeted over. The inboard flaps are another kettle of fish as they undulate quite a bit! The jury is still out on the best way to tackle them, but here is where I am at.
https://flic.kr/p/GWAG8S]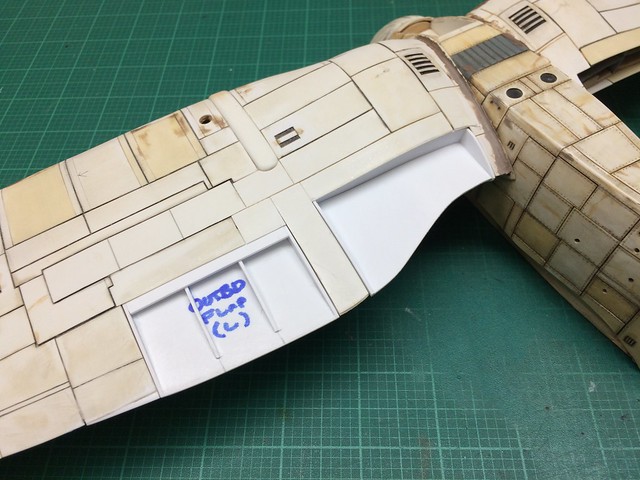 [/url]Bakagalas-34 by N.T. Izumi, on Flickr
The fin support struts got another look, and I decided to taper them down in the middle to get them to look slimmer. The anime art also has this feature so I should have planned this from the start. But I think they will look much better when done!
https://flic.kr/p/GWAGBs] [/url]Bakagalas-36 by N.T. Izumi, on Flickr
Really neat, G thanks for letting us follow along here.
No probelmo Gamera! But you do realize that the bus driver is crazy? [:P]
Sorry you feel that way about my friend.[:(]
This passenger ain’t exactly stable…
I paid my toll… FULL SPEED TO CRAZYVILLE!!!
[proplr]
Work has been slow, but I managed to start the starboard flap sections.
https://flic.kr/p/HhpsBW]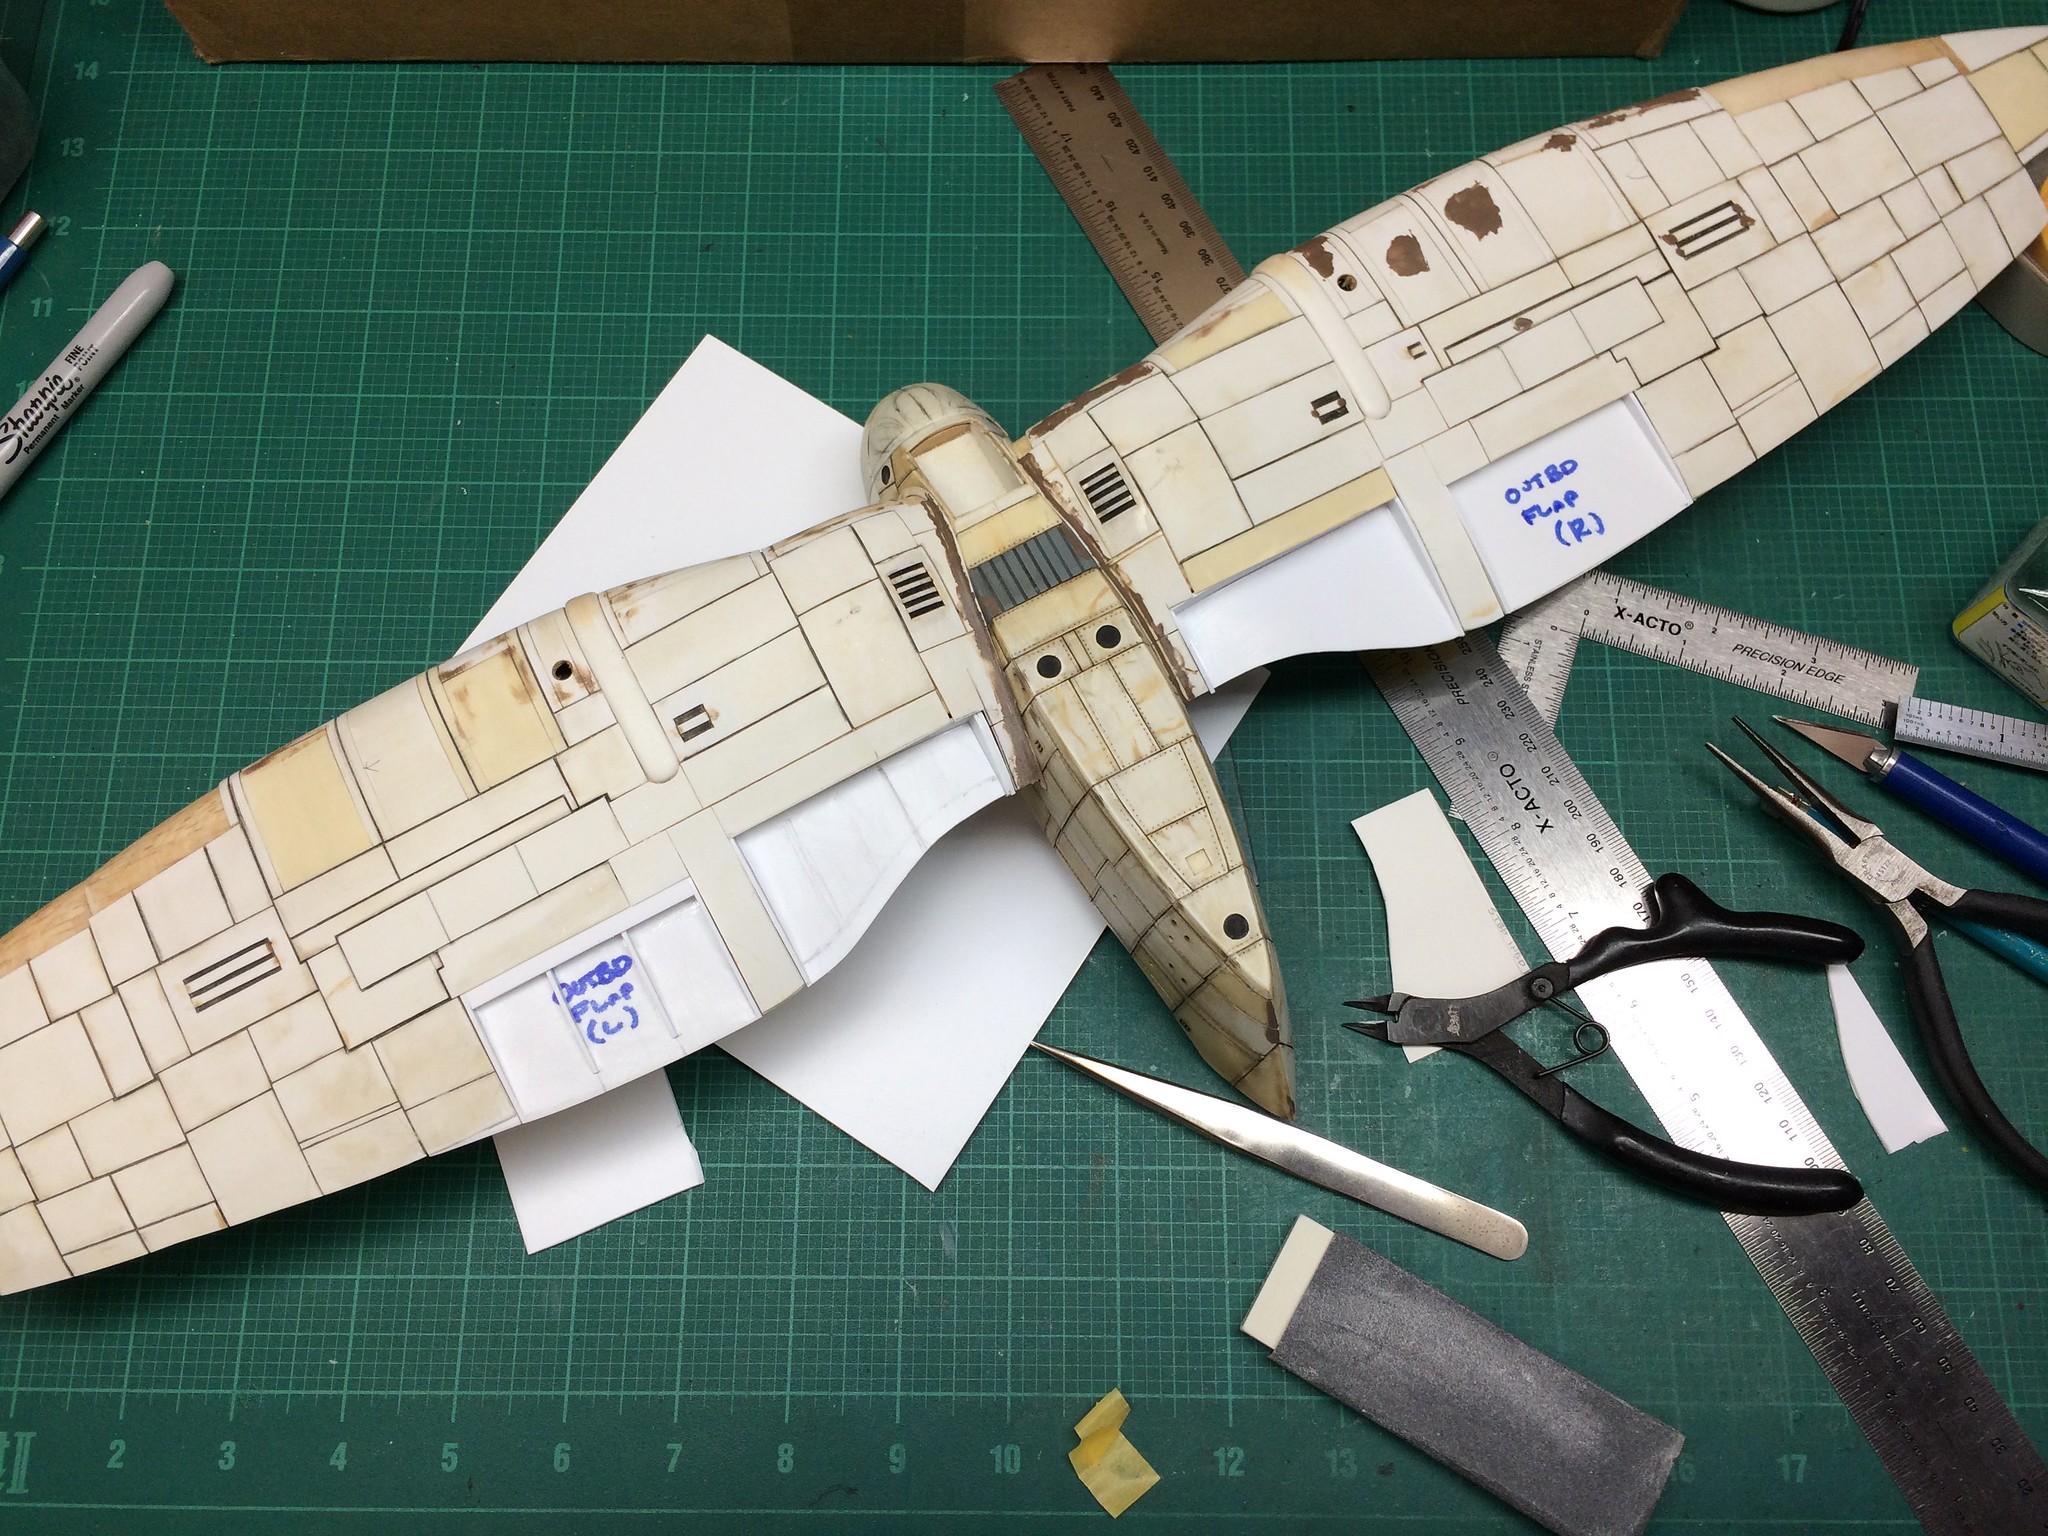 [/url]Bakagalas-37 by N.T. Izumi, on Flickr
https://flic.kr/p/22EgjMQ] [/url]Bakagalas-38 by N.T. Izumi, on Flickr
Once the support ribbing is in place, they will all get sanded to final shape and get sheeted over. After that, the ailerons and wingtips need to get done, but they are simple compared to those wiggly inboard flaps!