You’ll love that Core 1 Bill, it’s head and shoulders above the Mk 4…
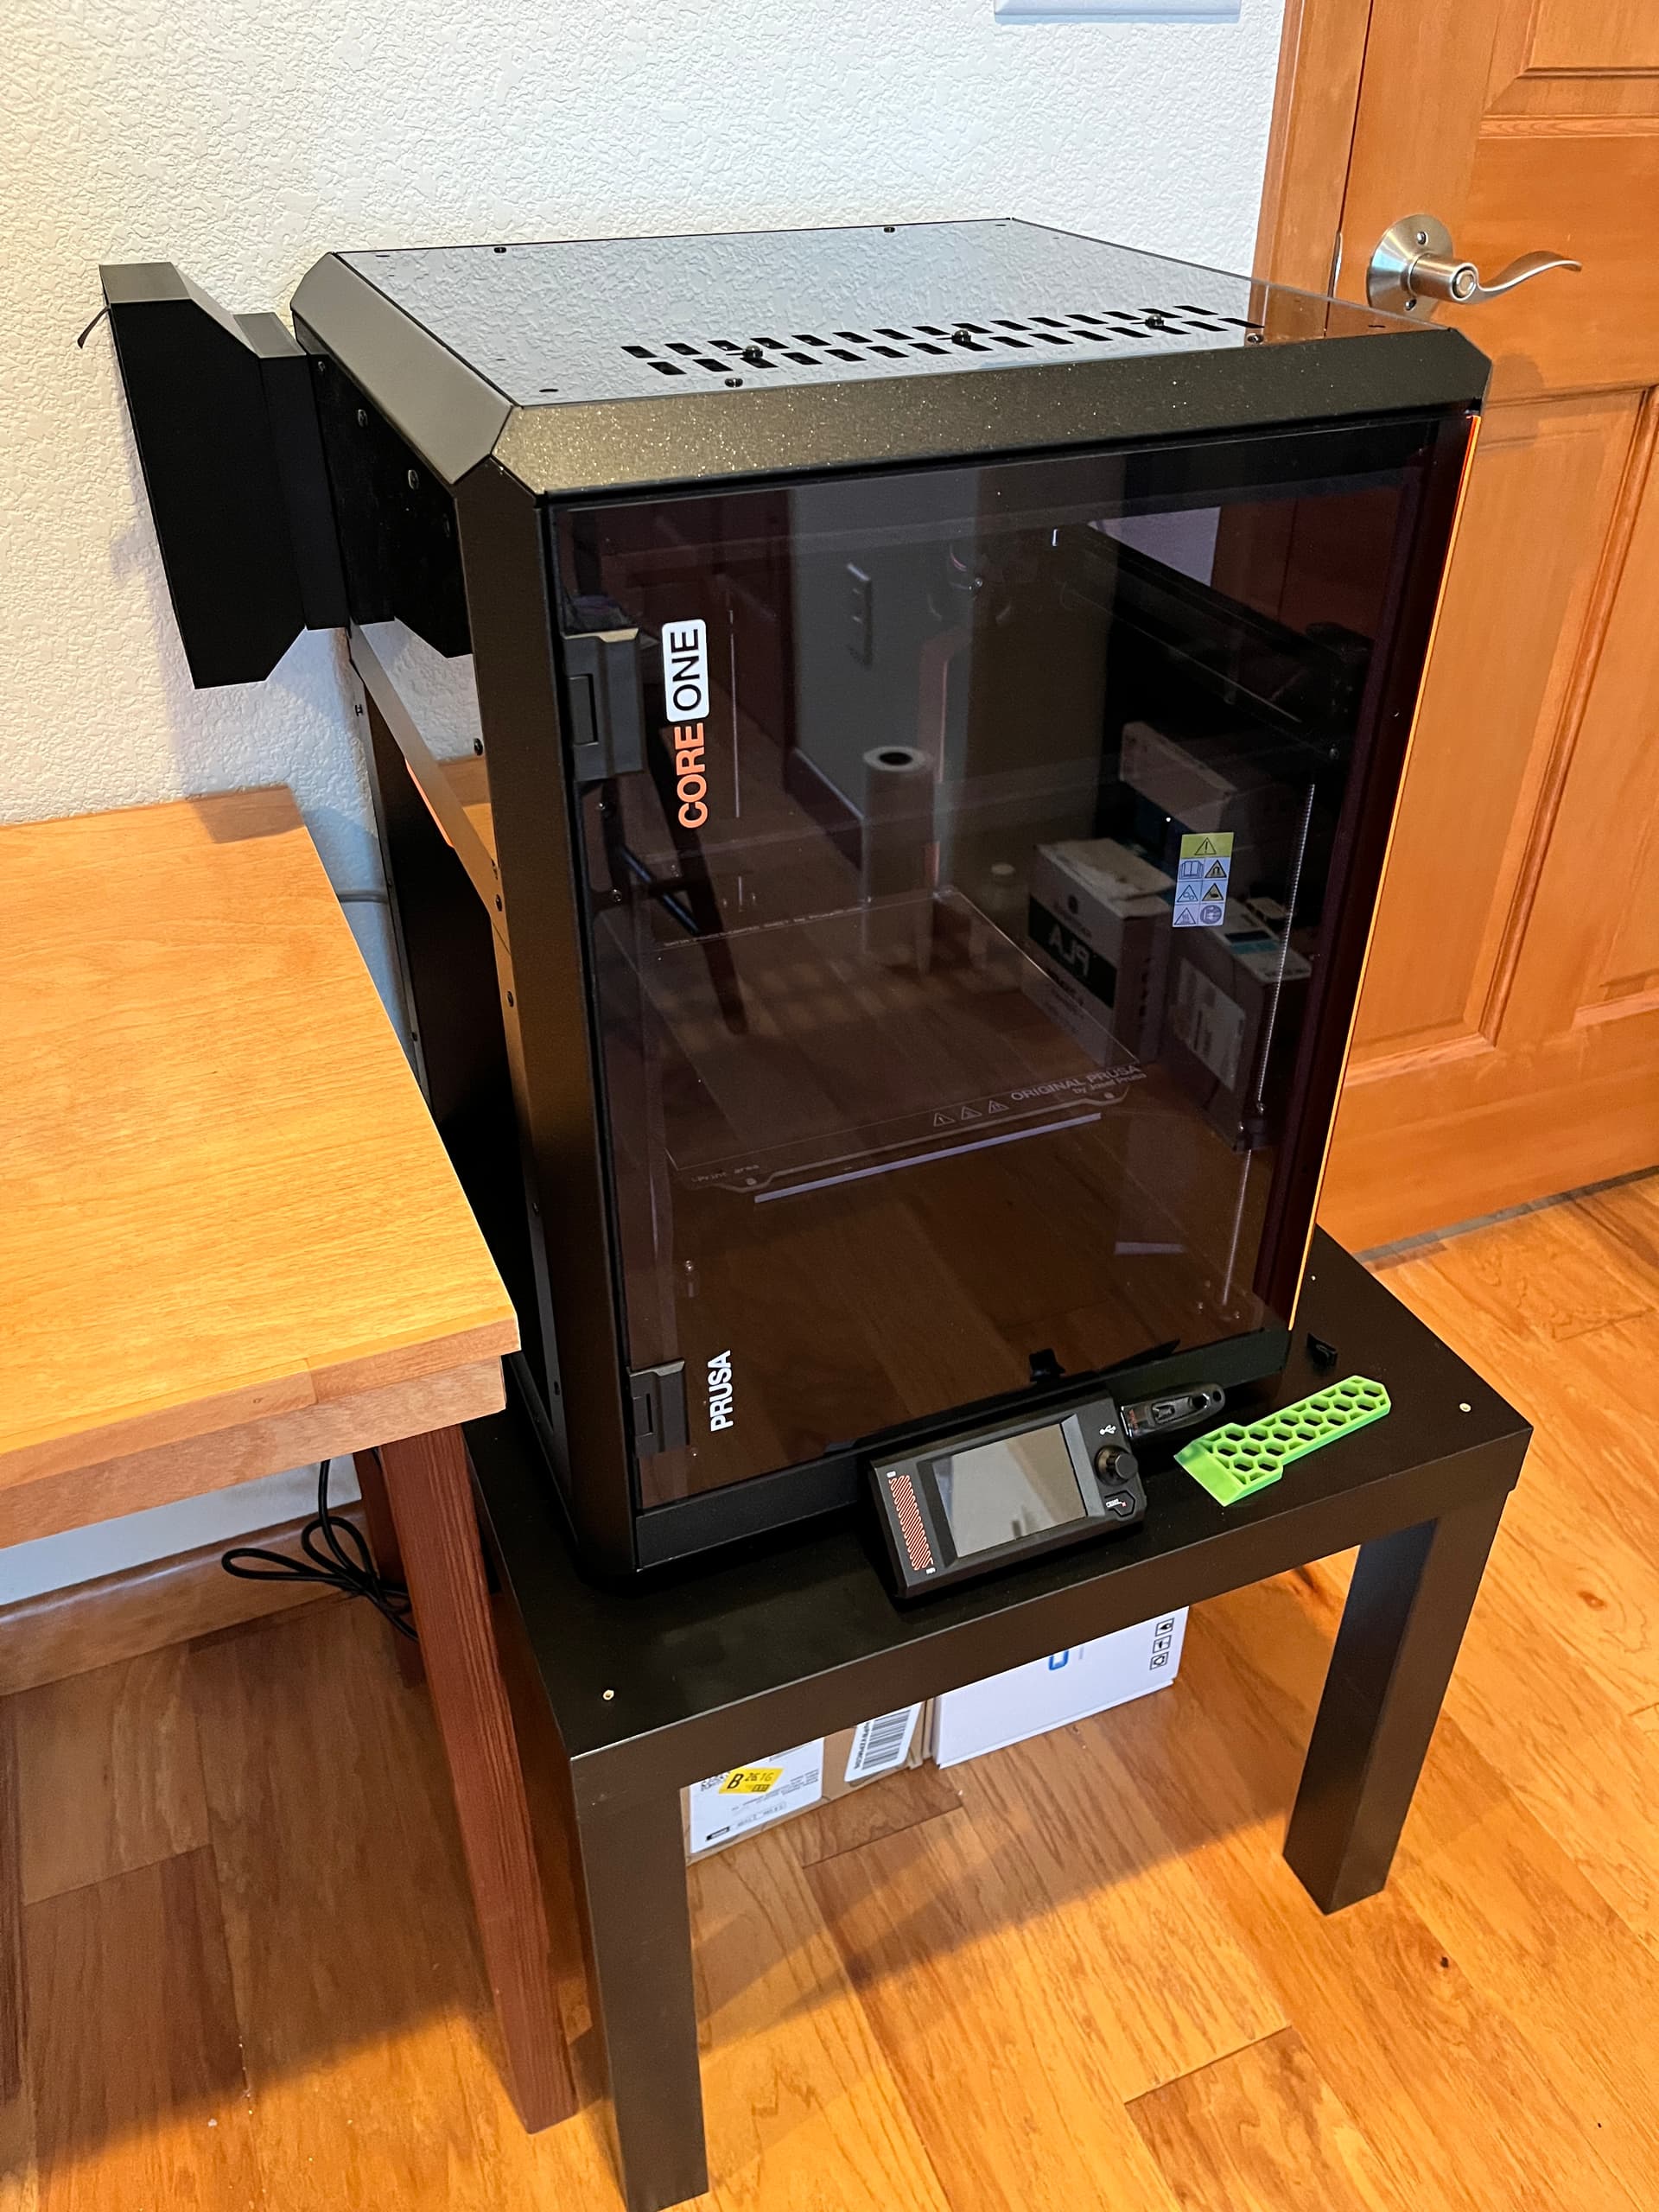
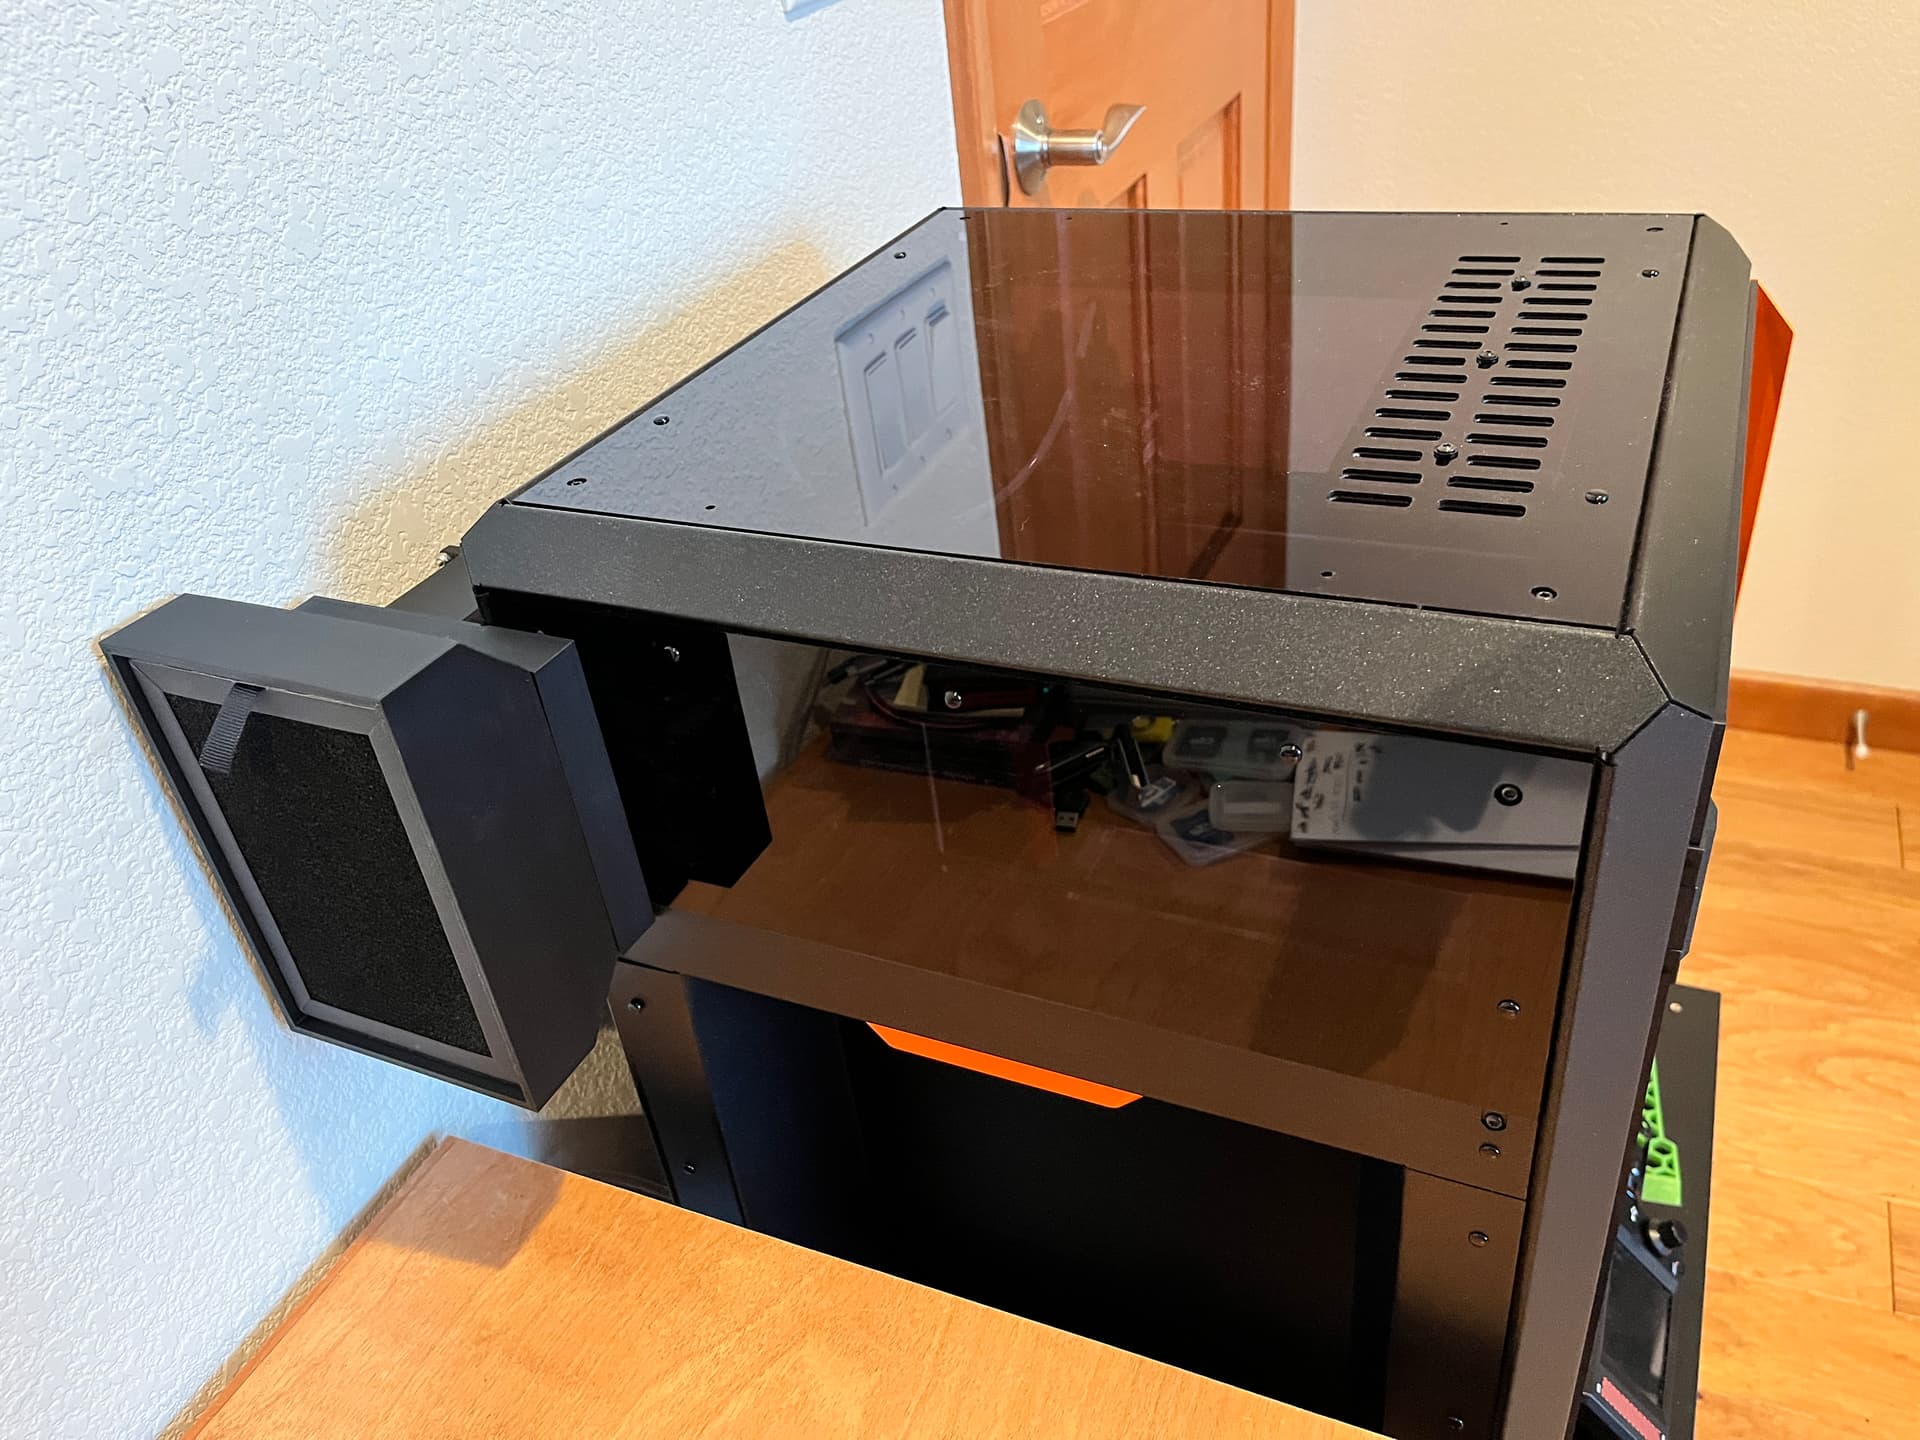
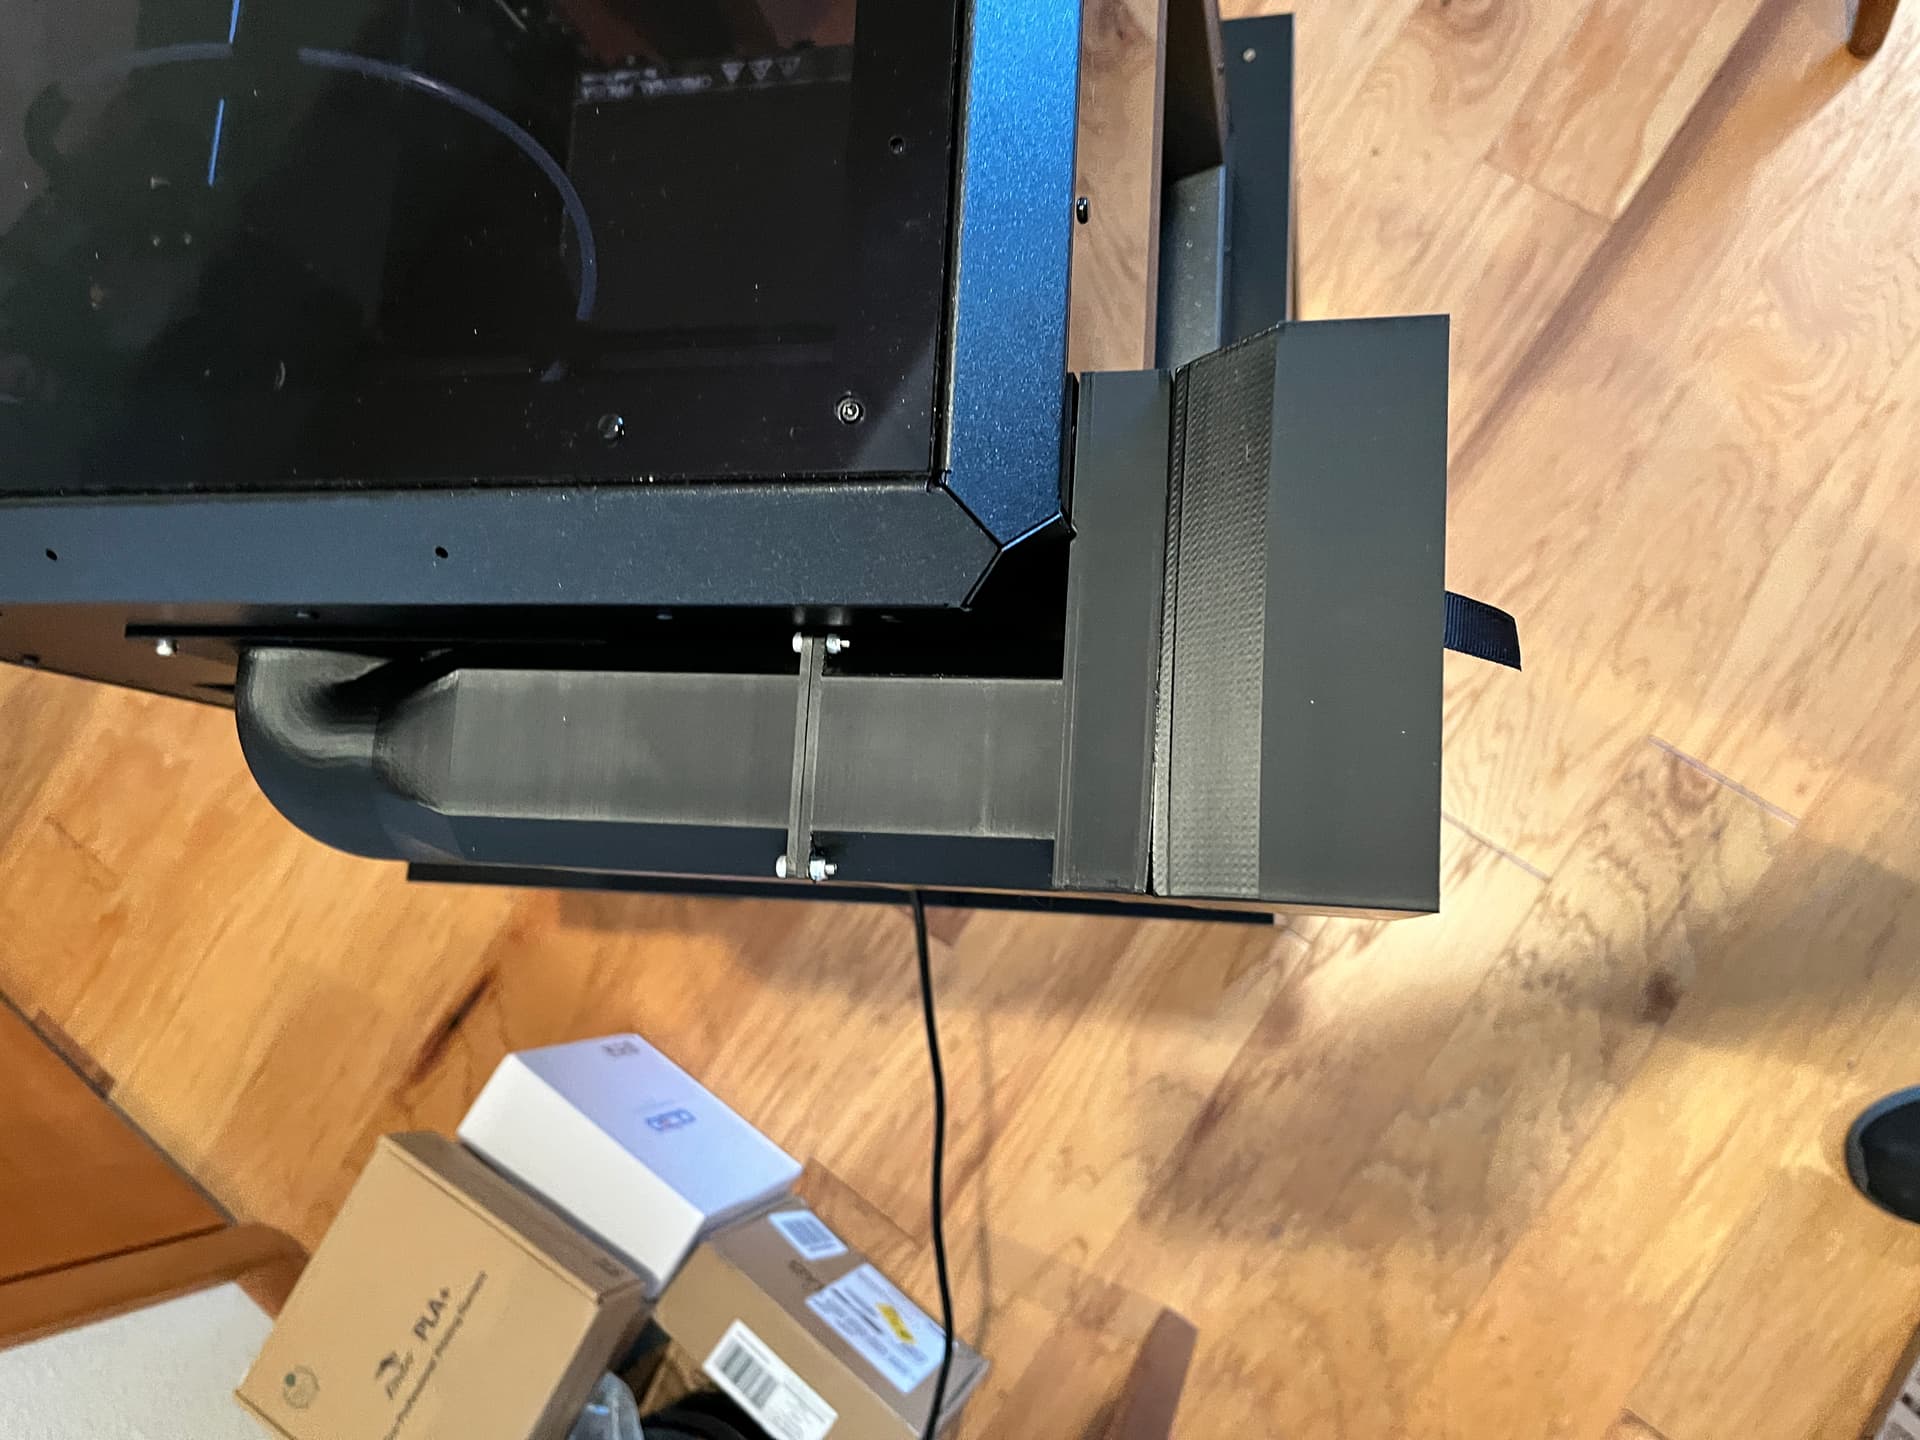
I have noticed the 25% faster speed. This is so much faster than the original MK3 I started with. I also like the compact size and can throw away the old enclosure the bed slinger was in. I took the time to make a low profile filter holder that can fit the filters and fans I used on the old enclosures.
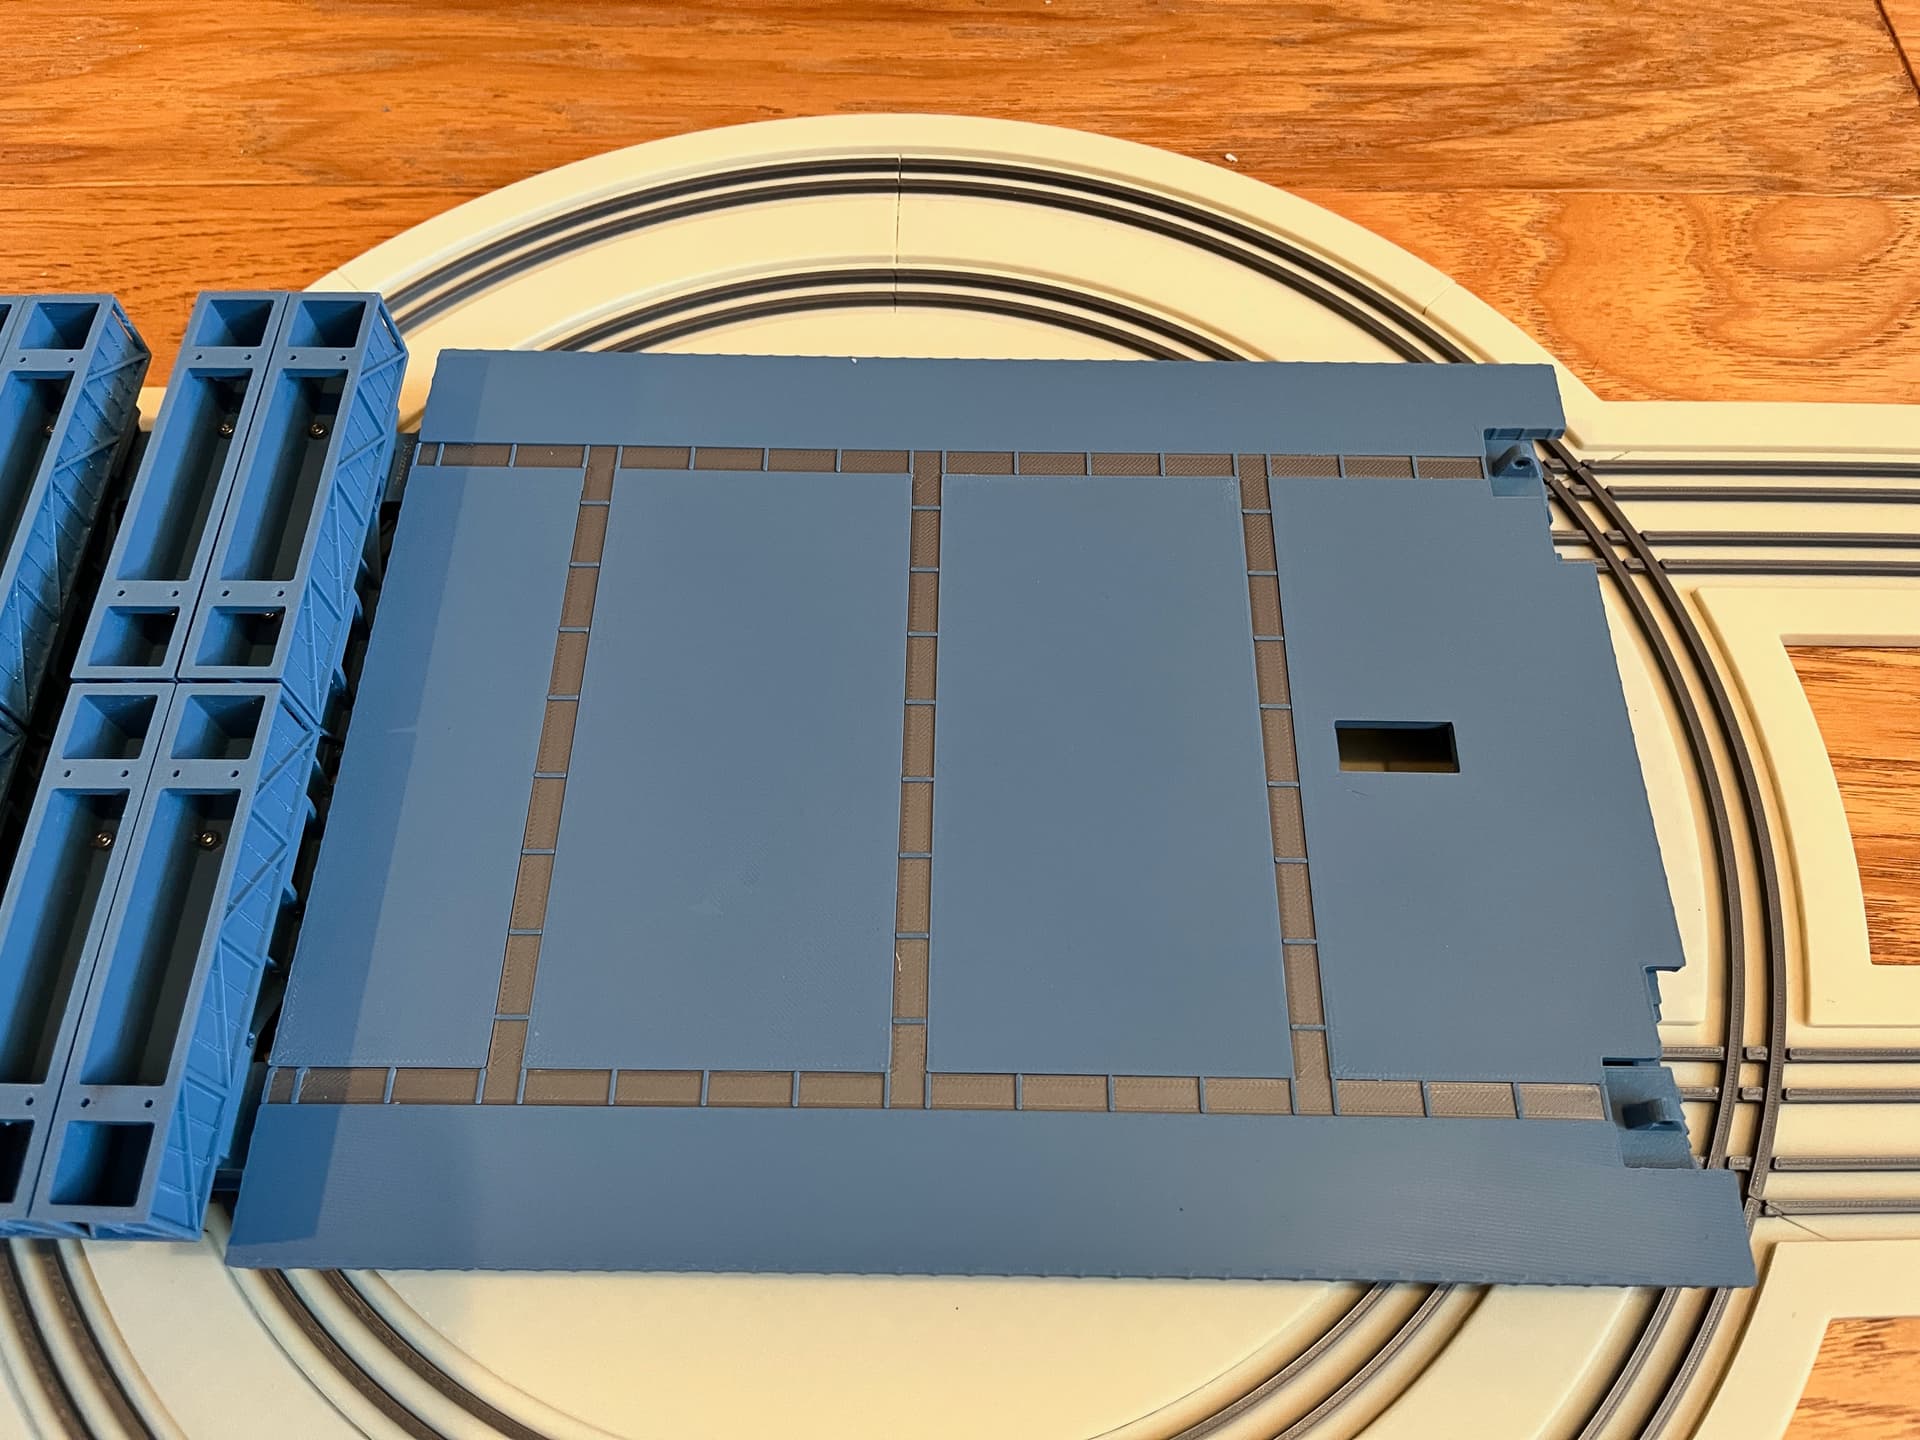
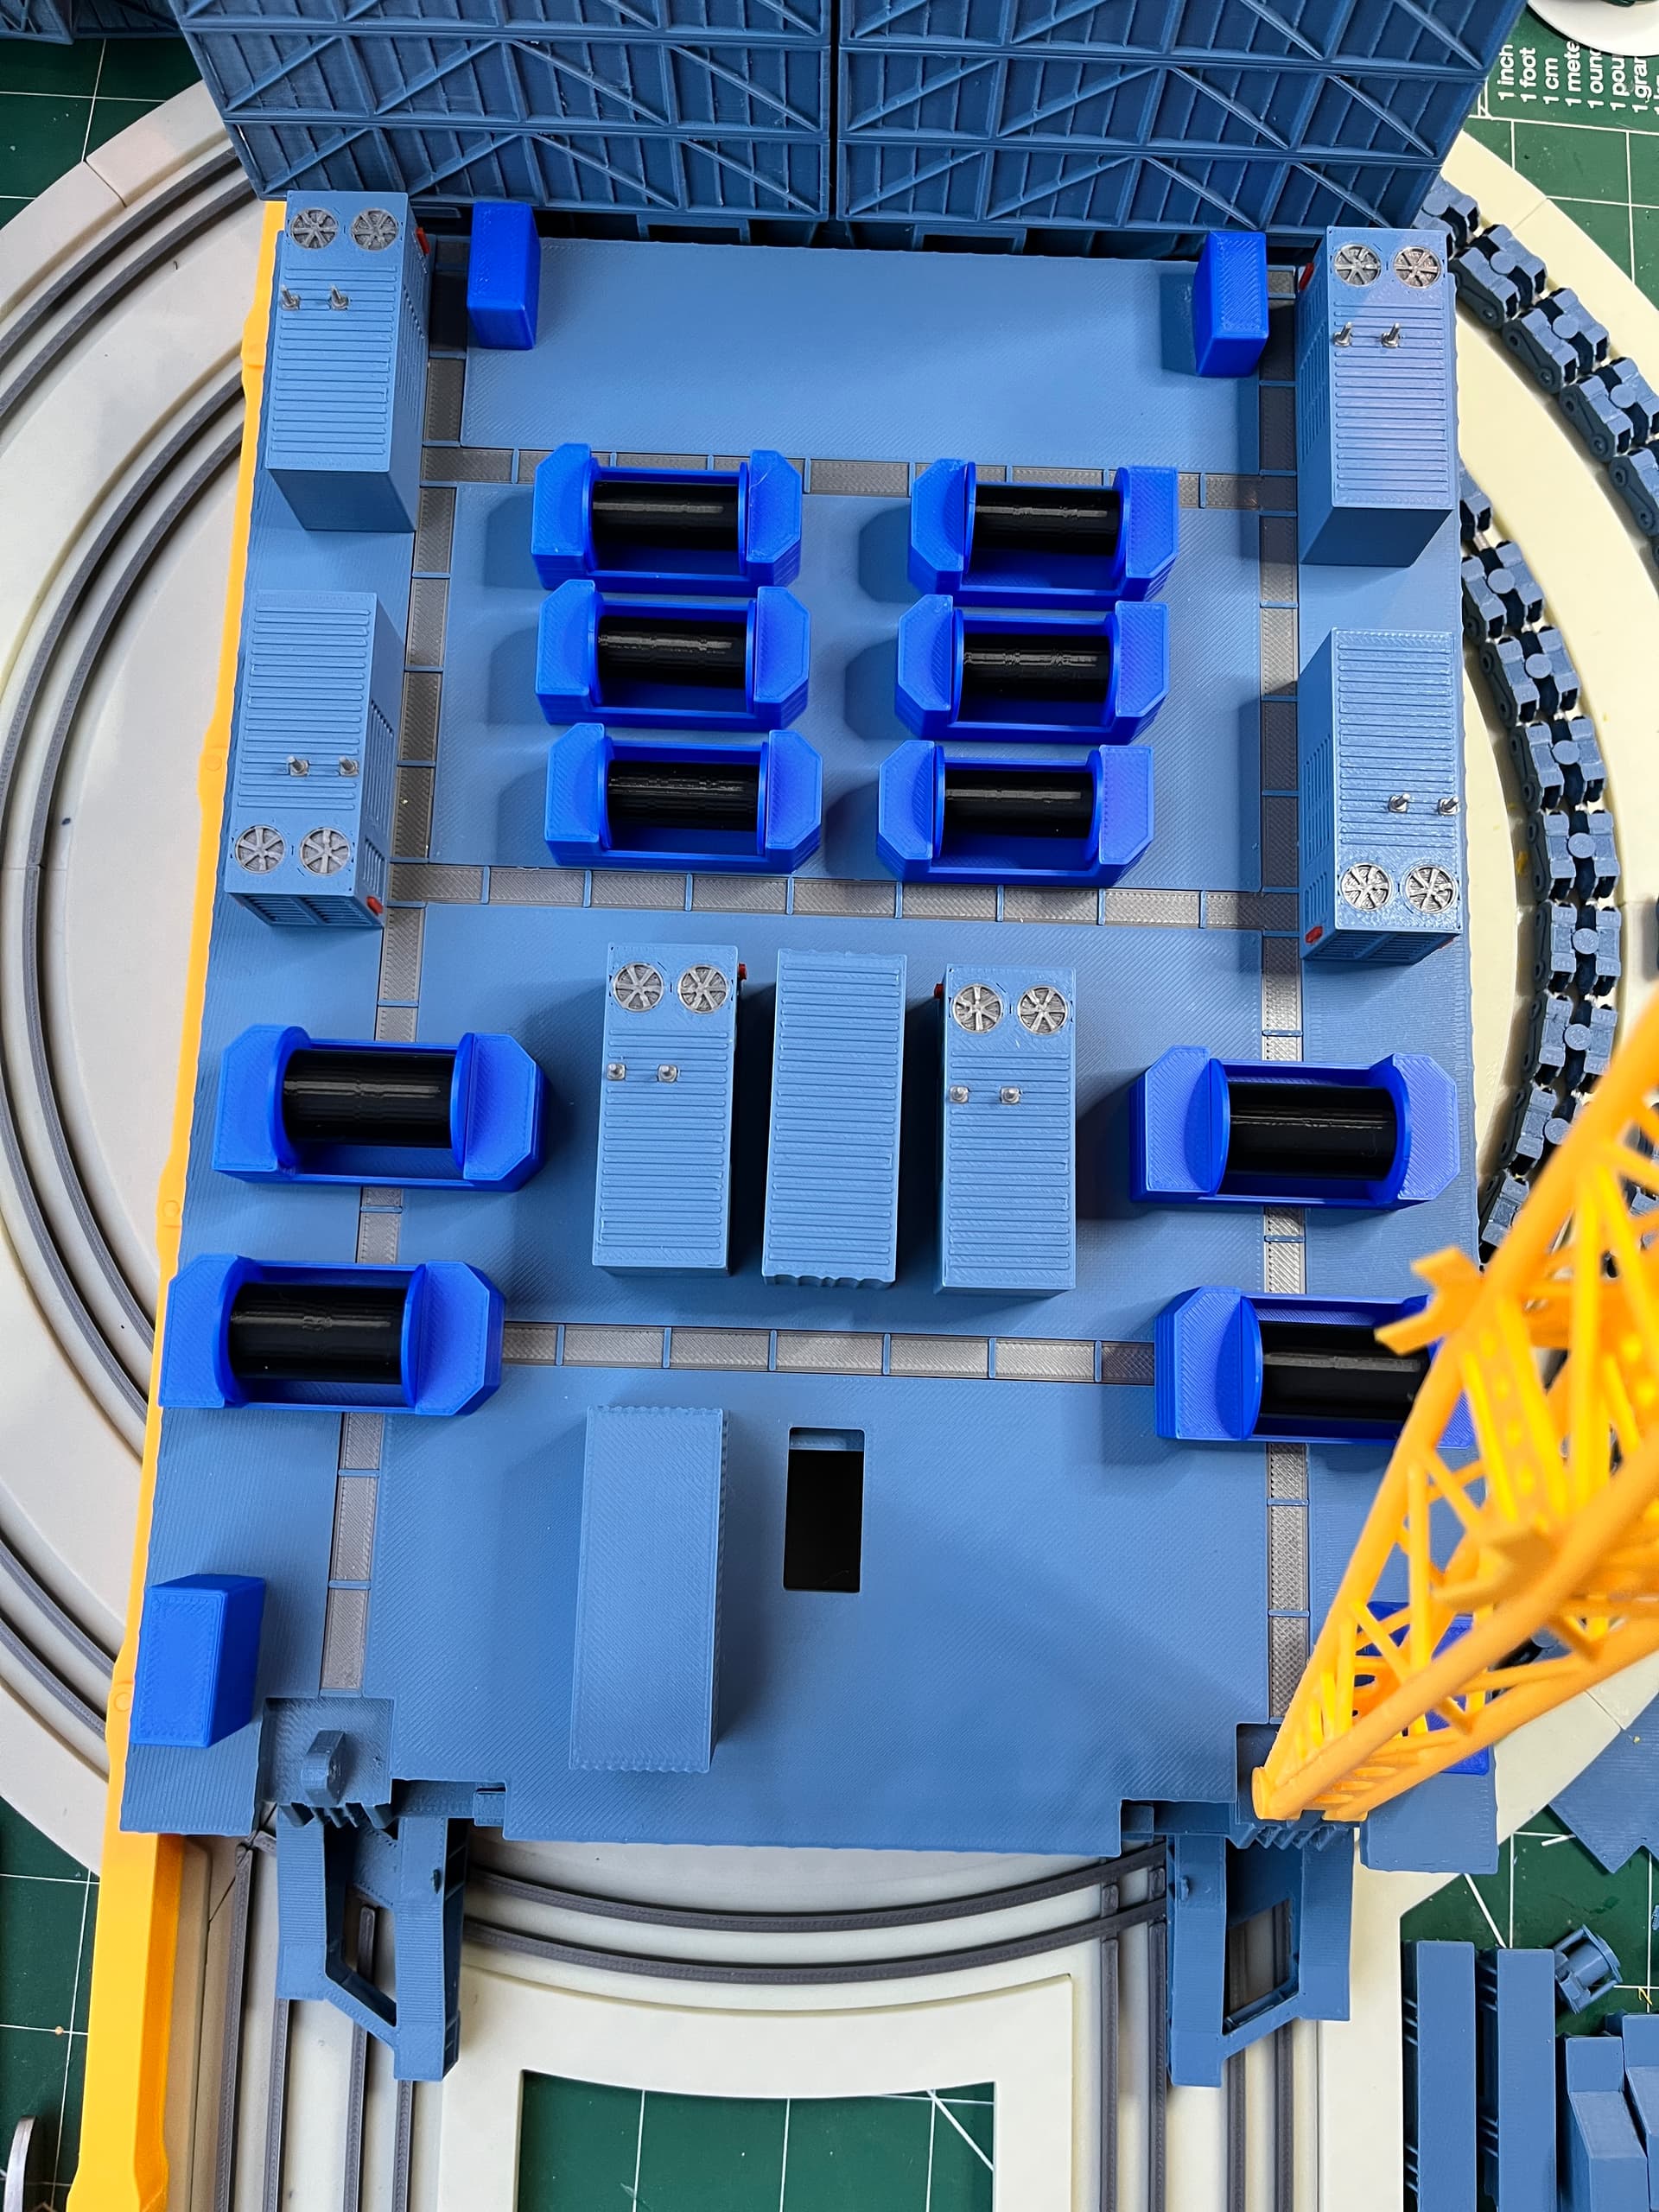
The platform is complete. I like the way the steel grey floor grates came out.
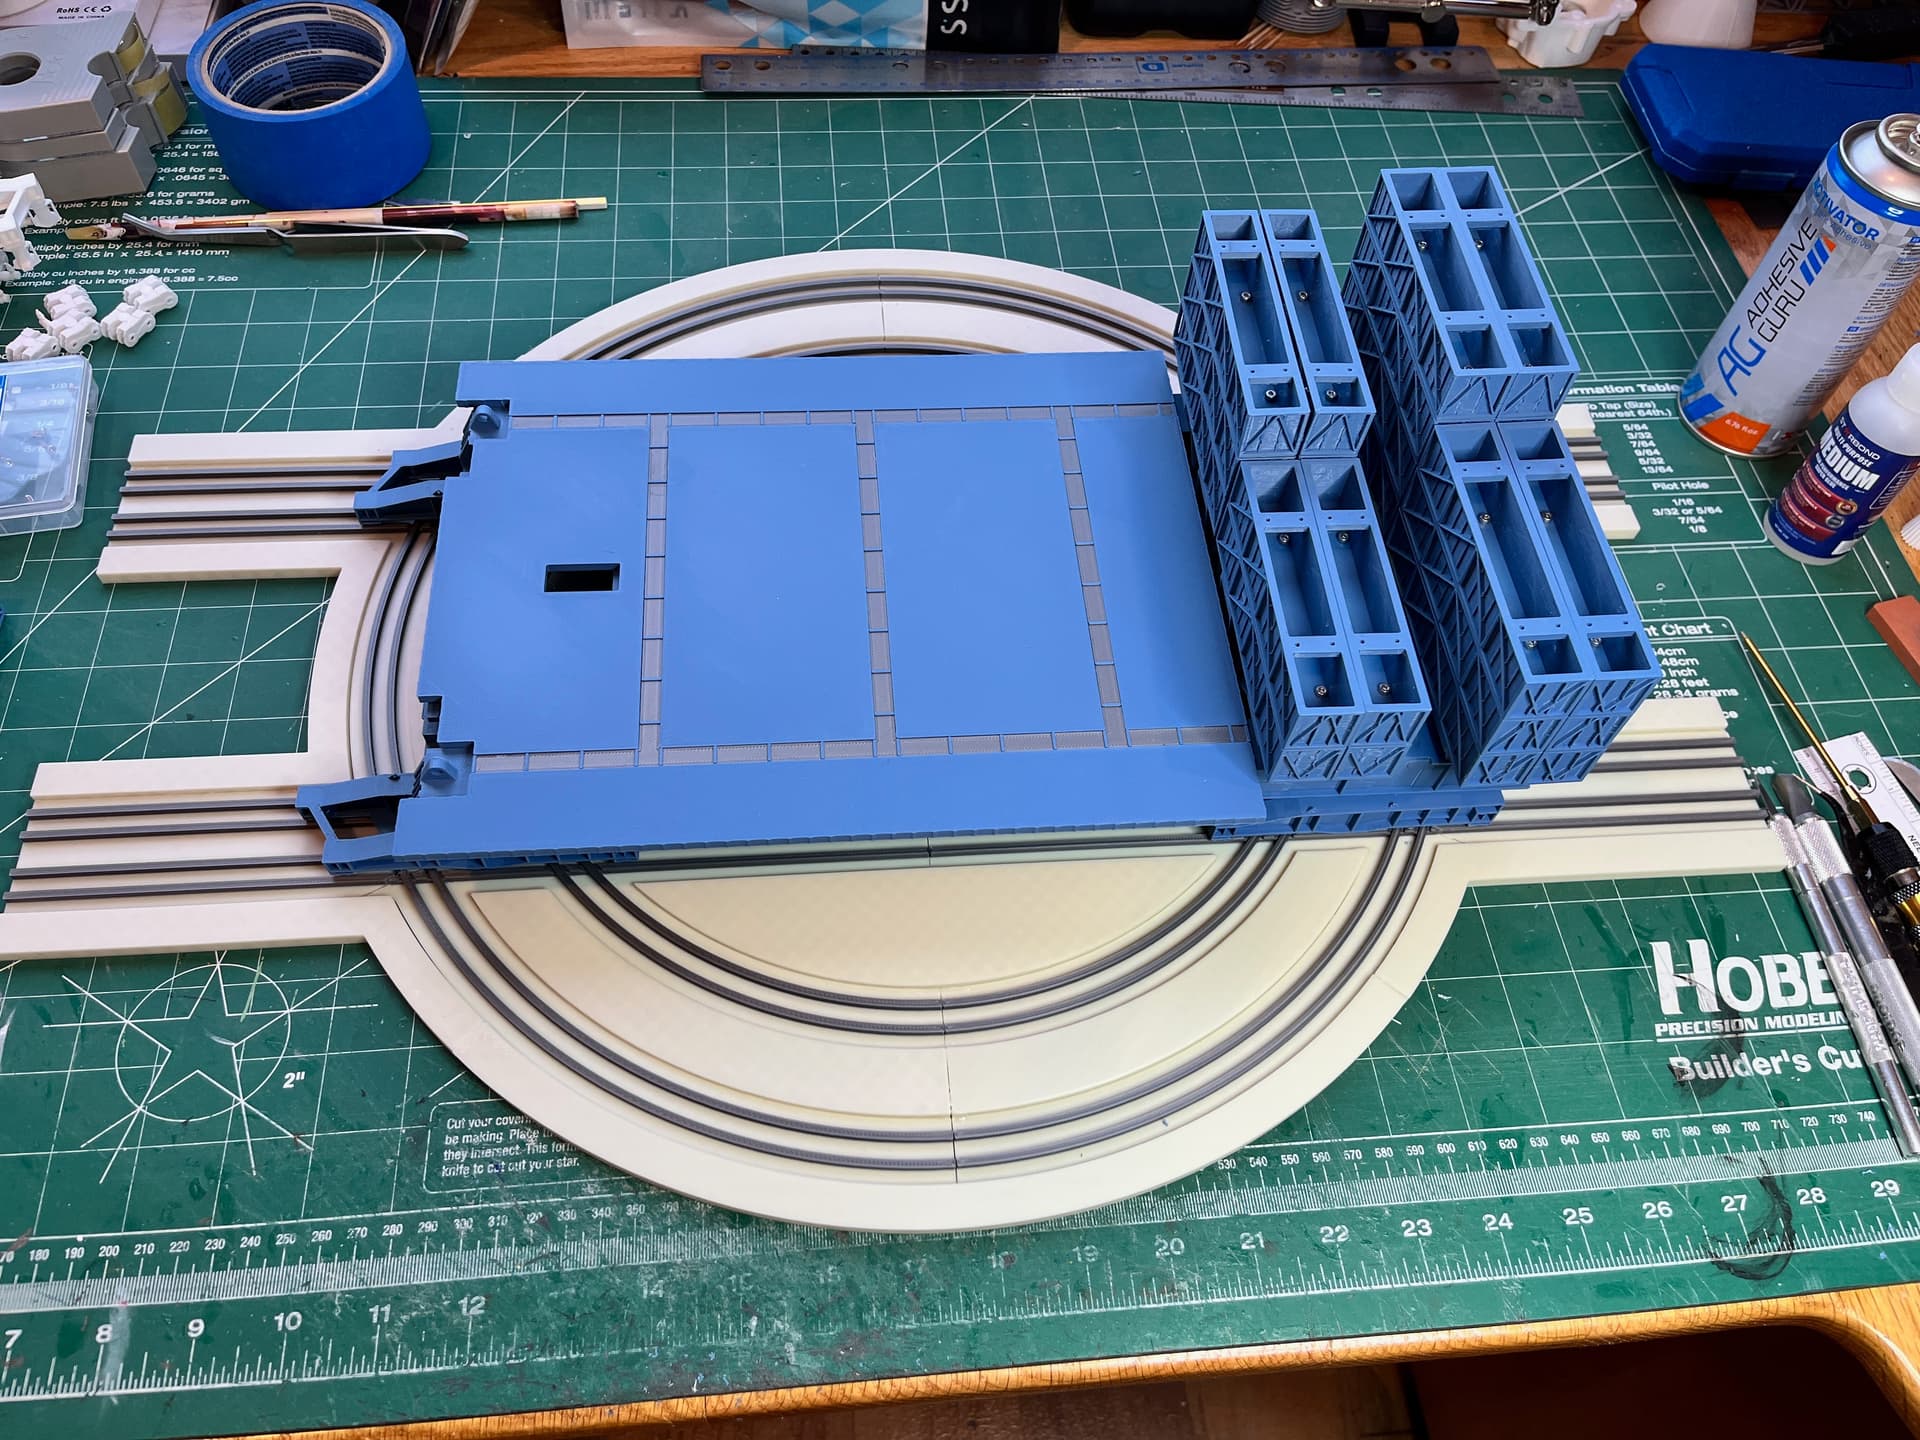
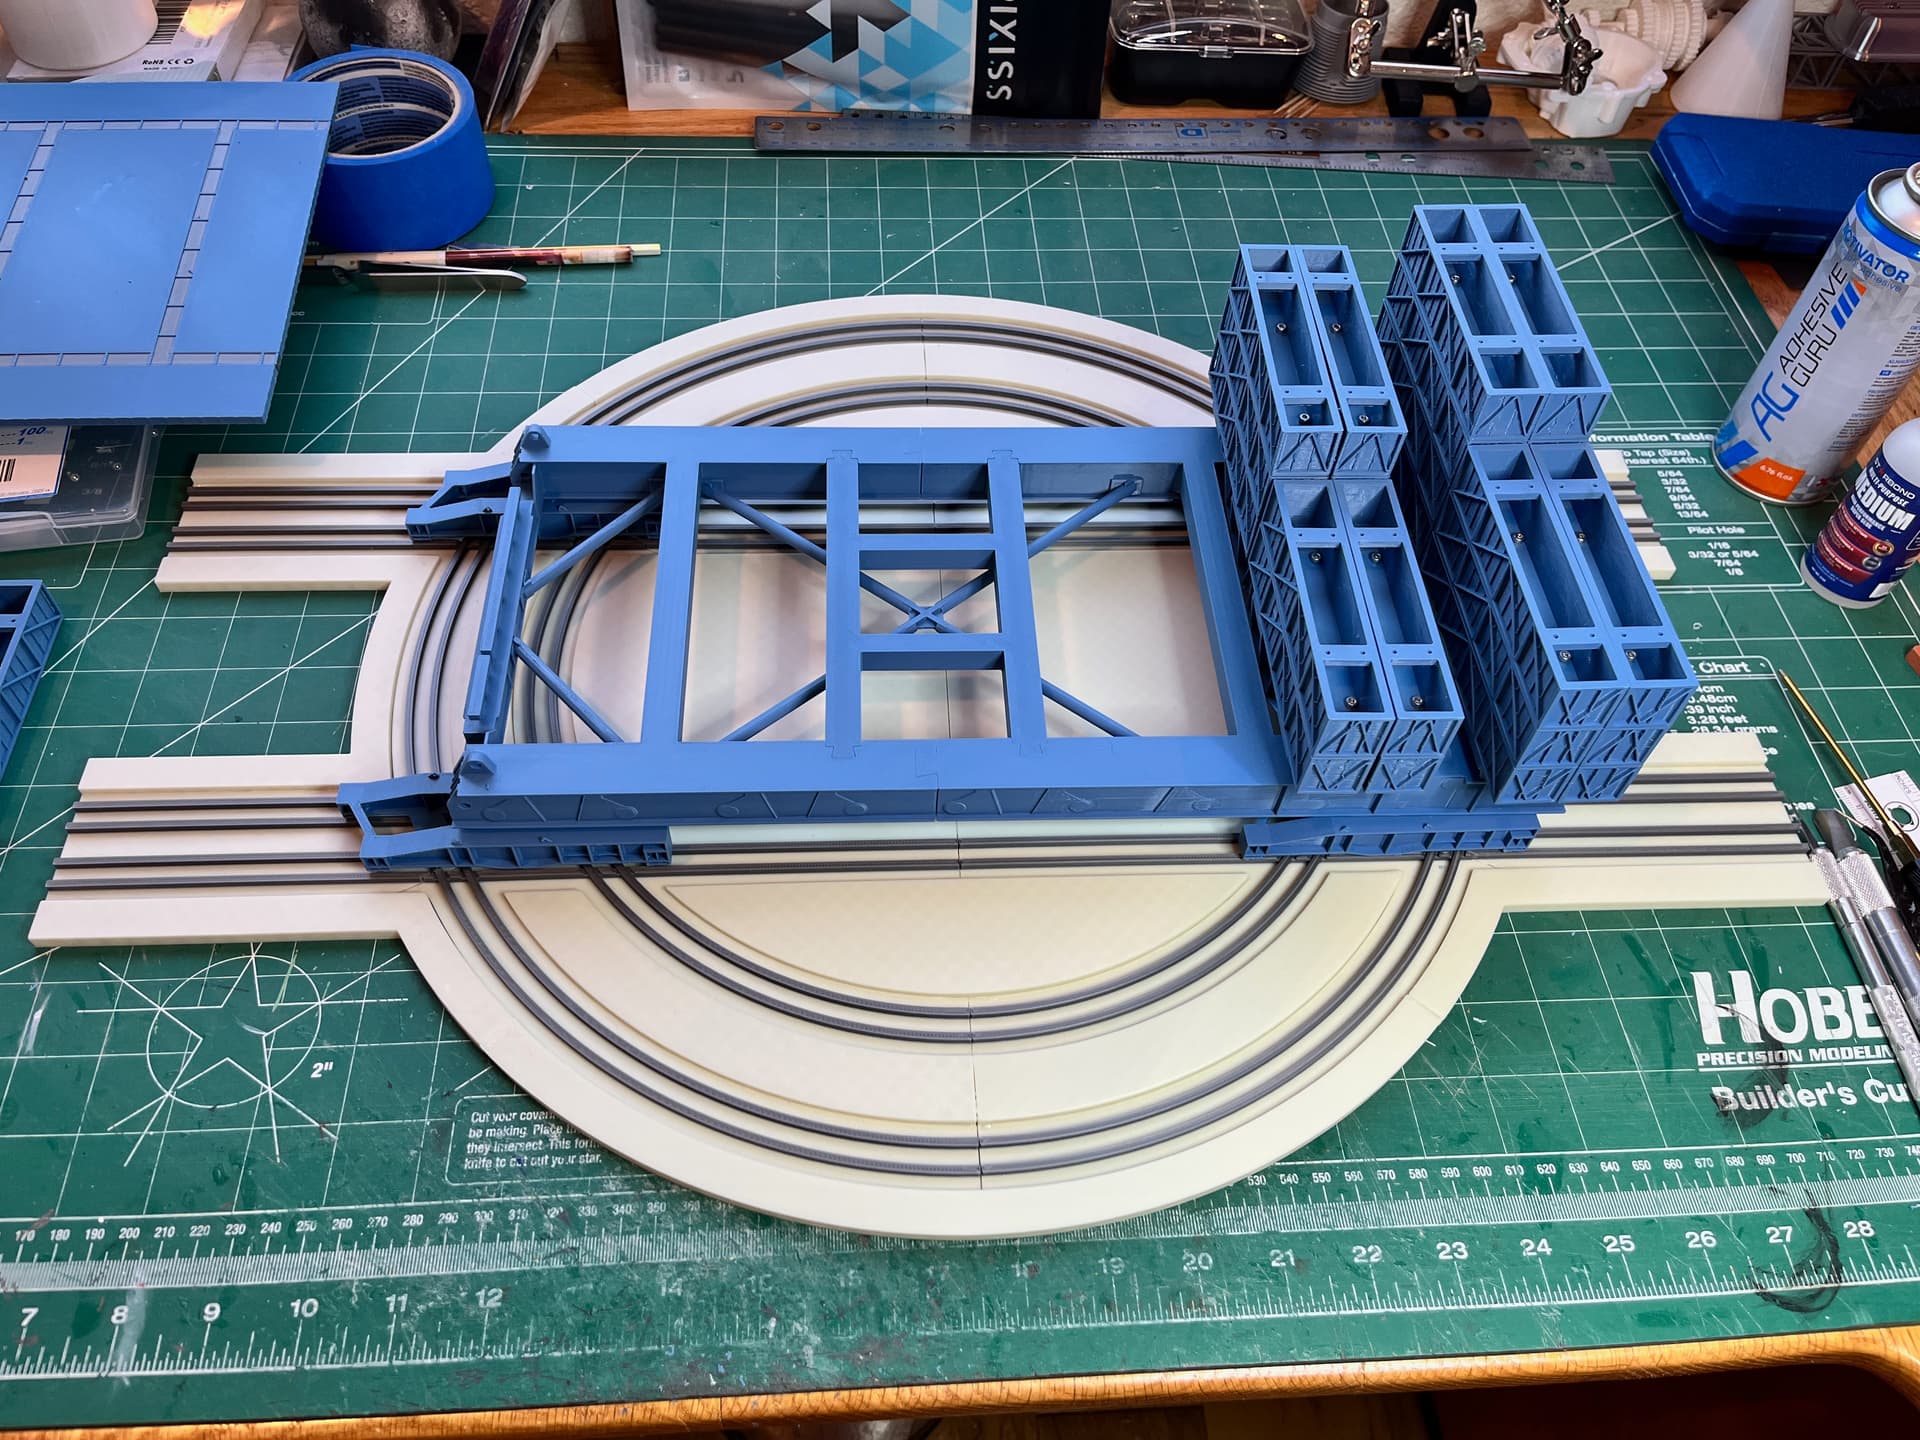
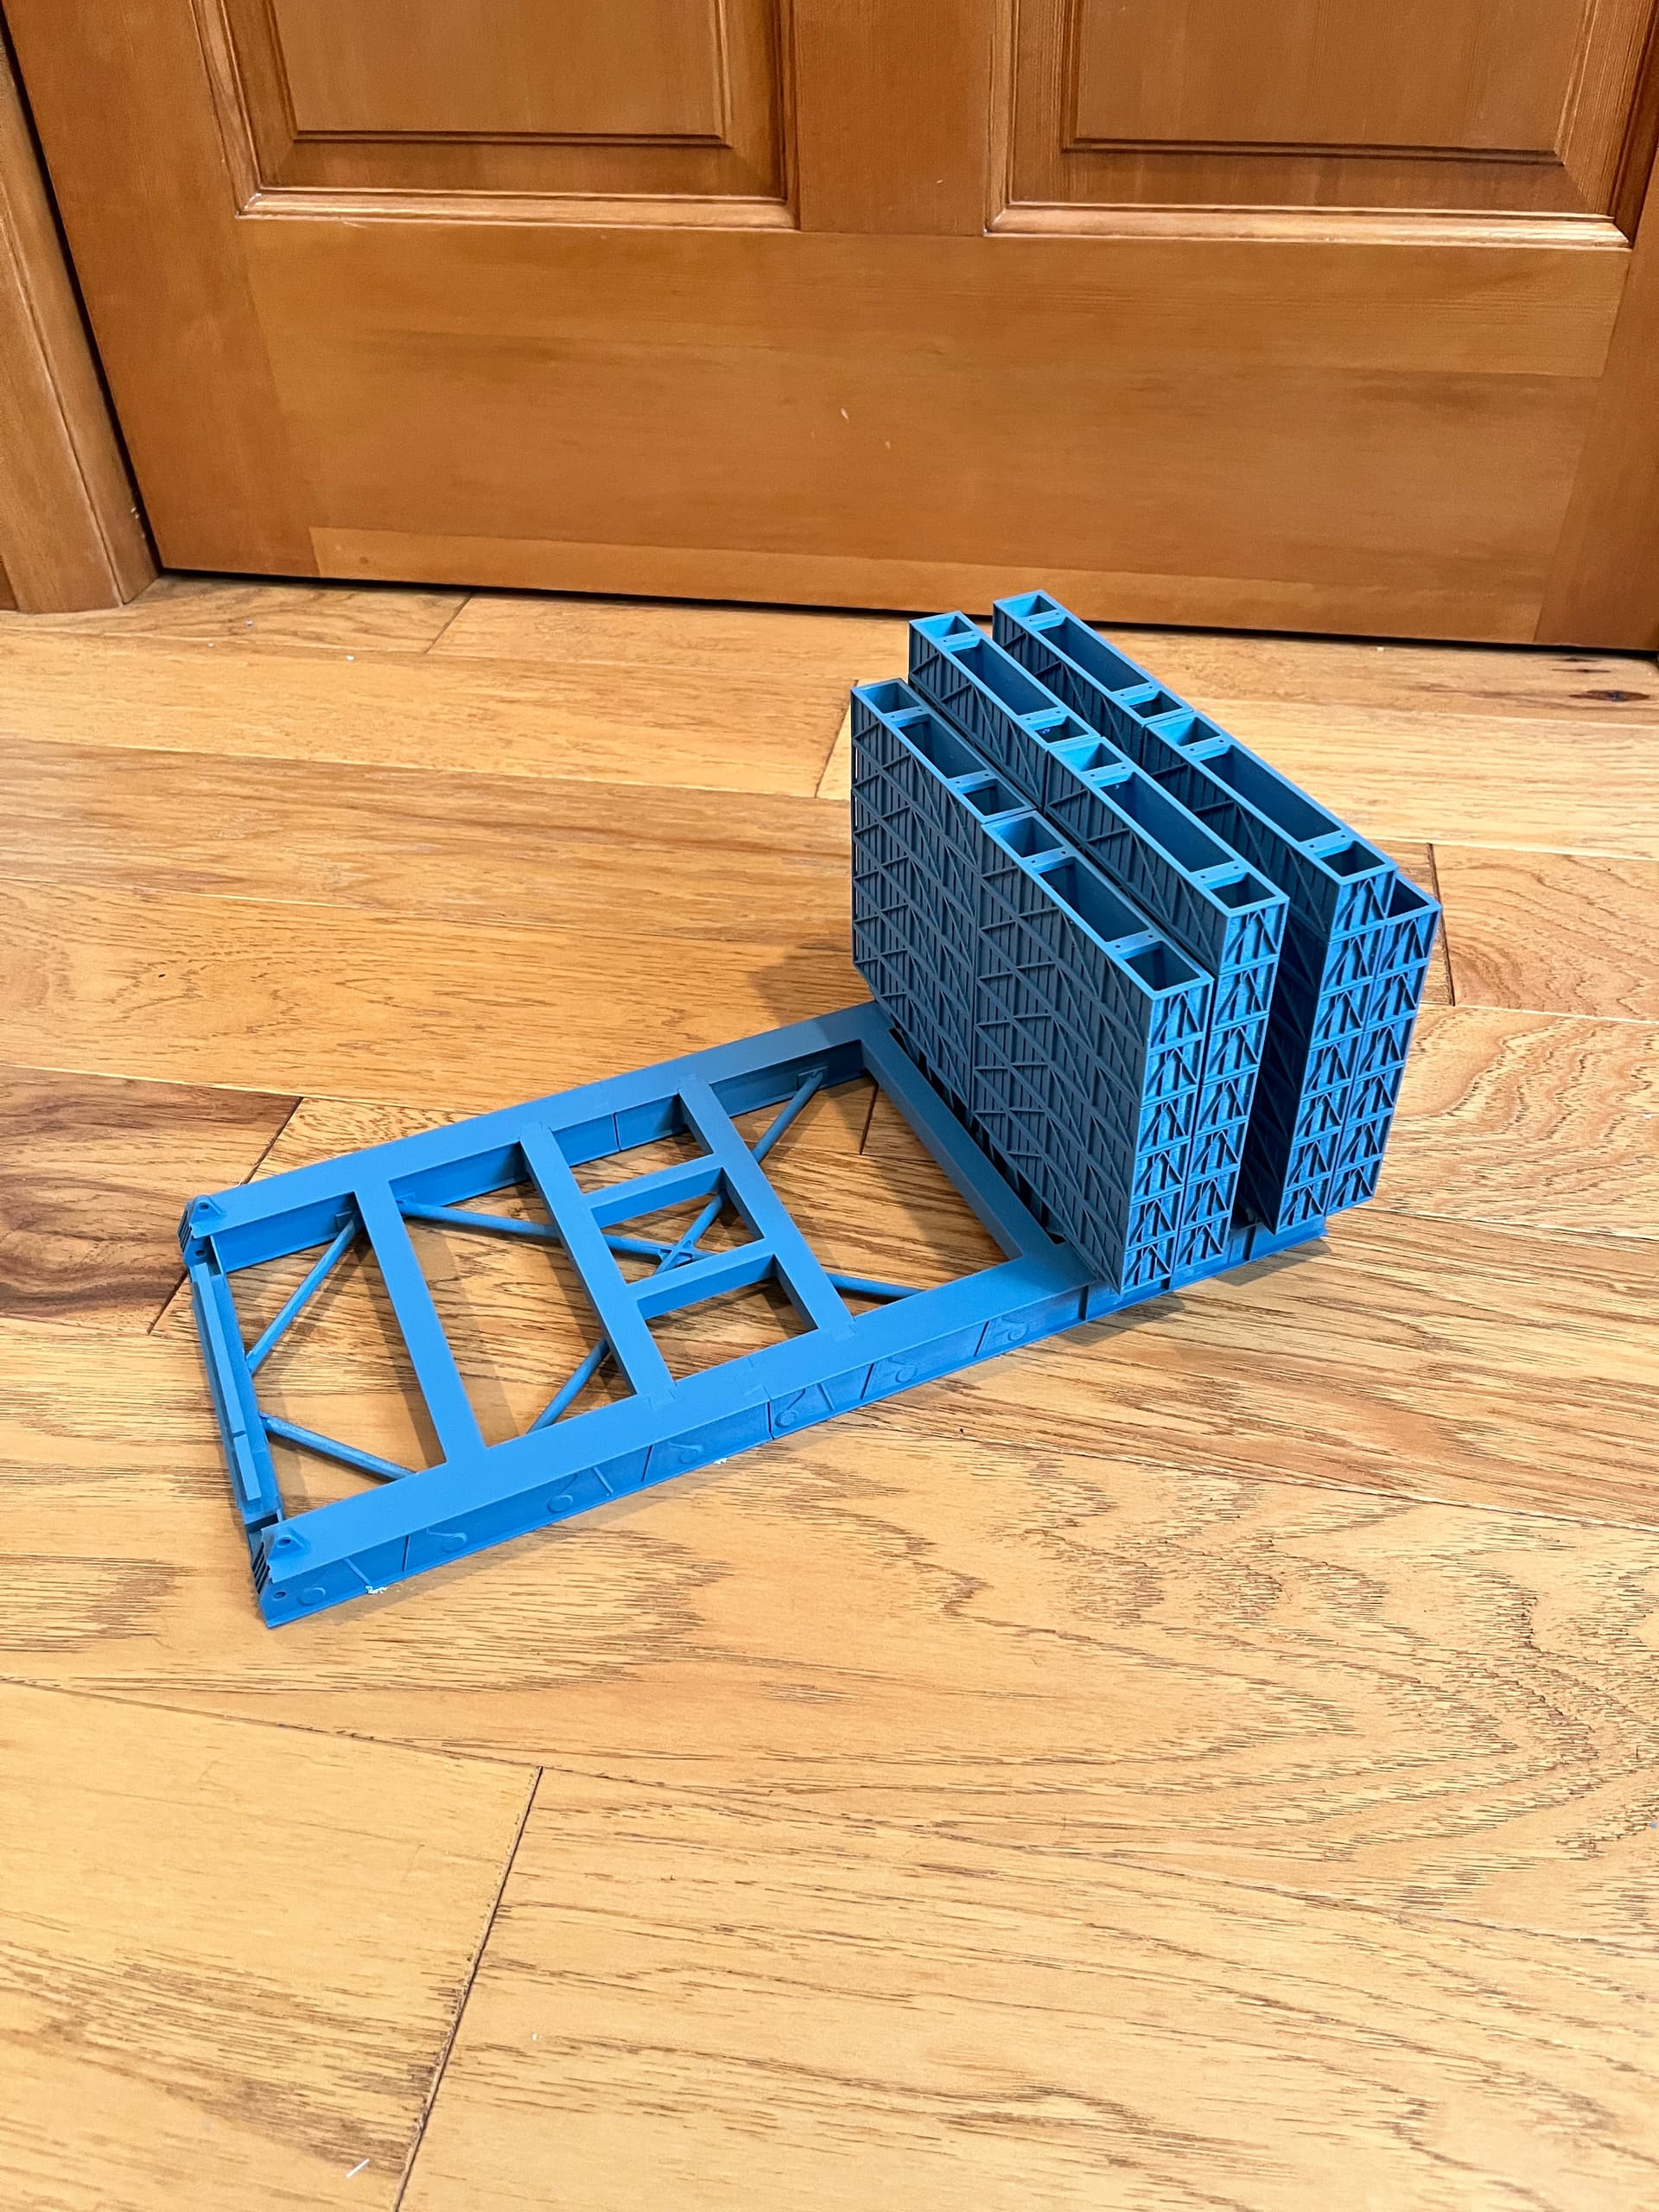
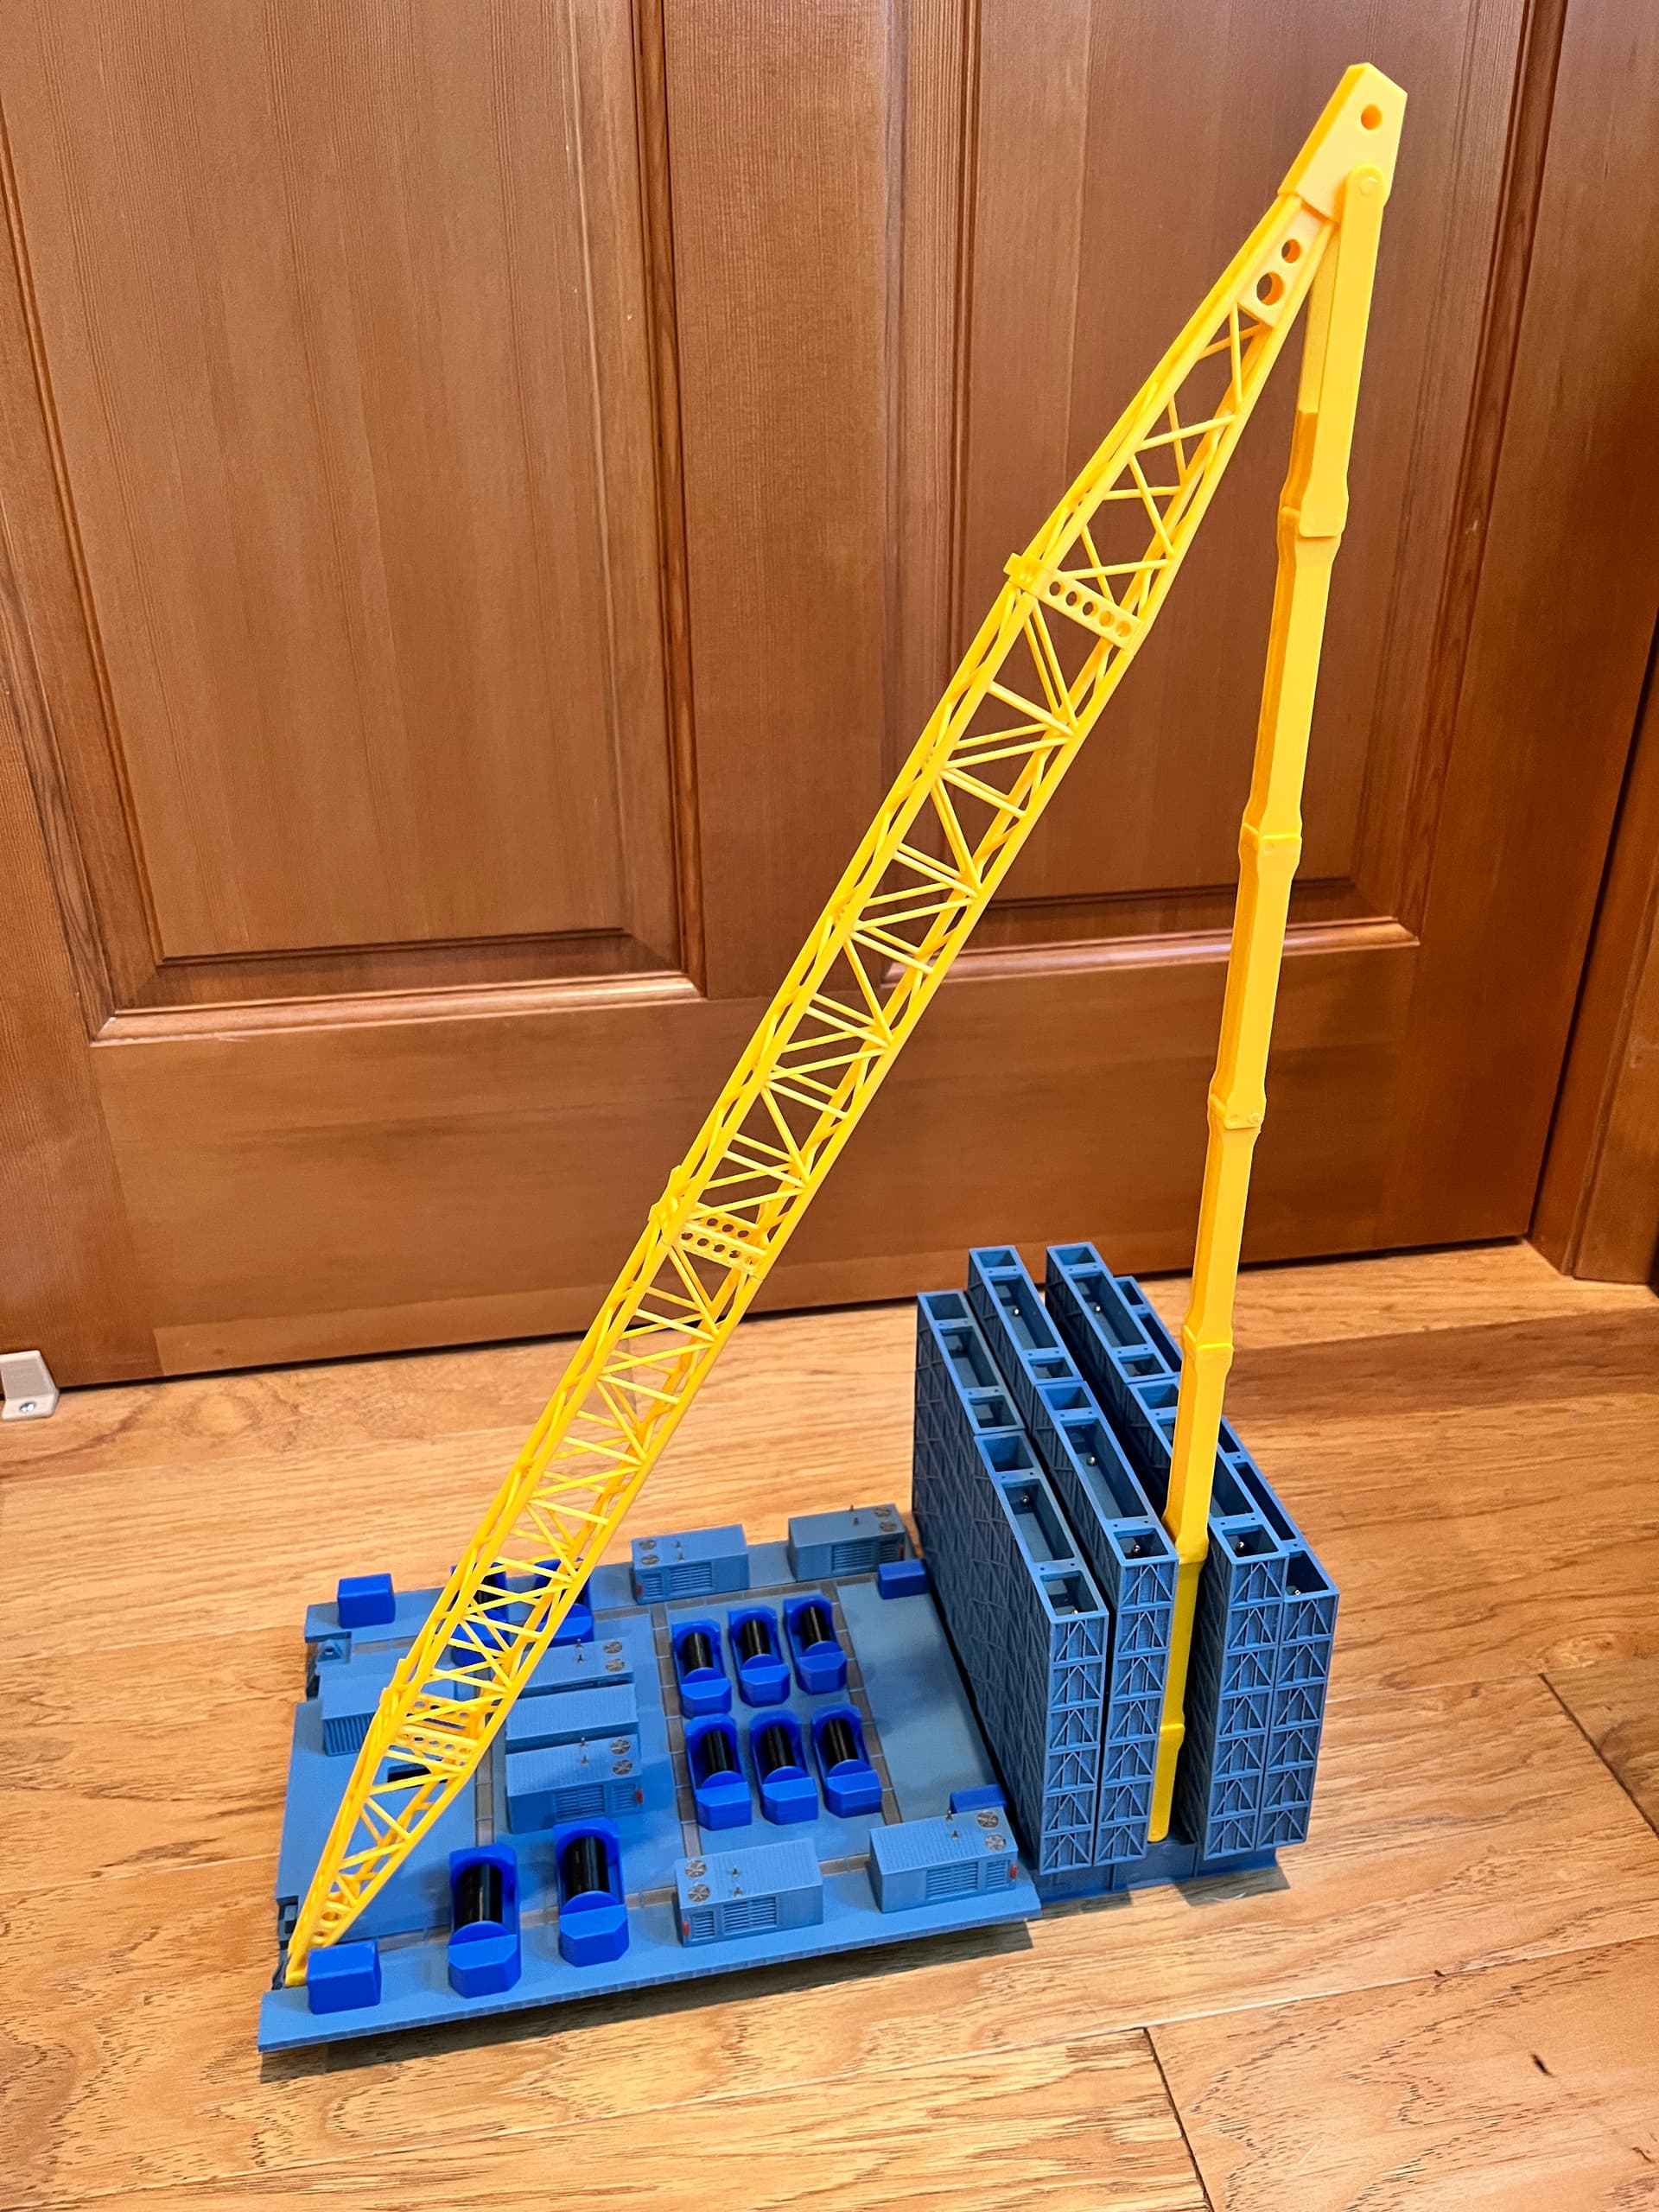
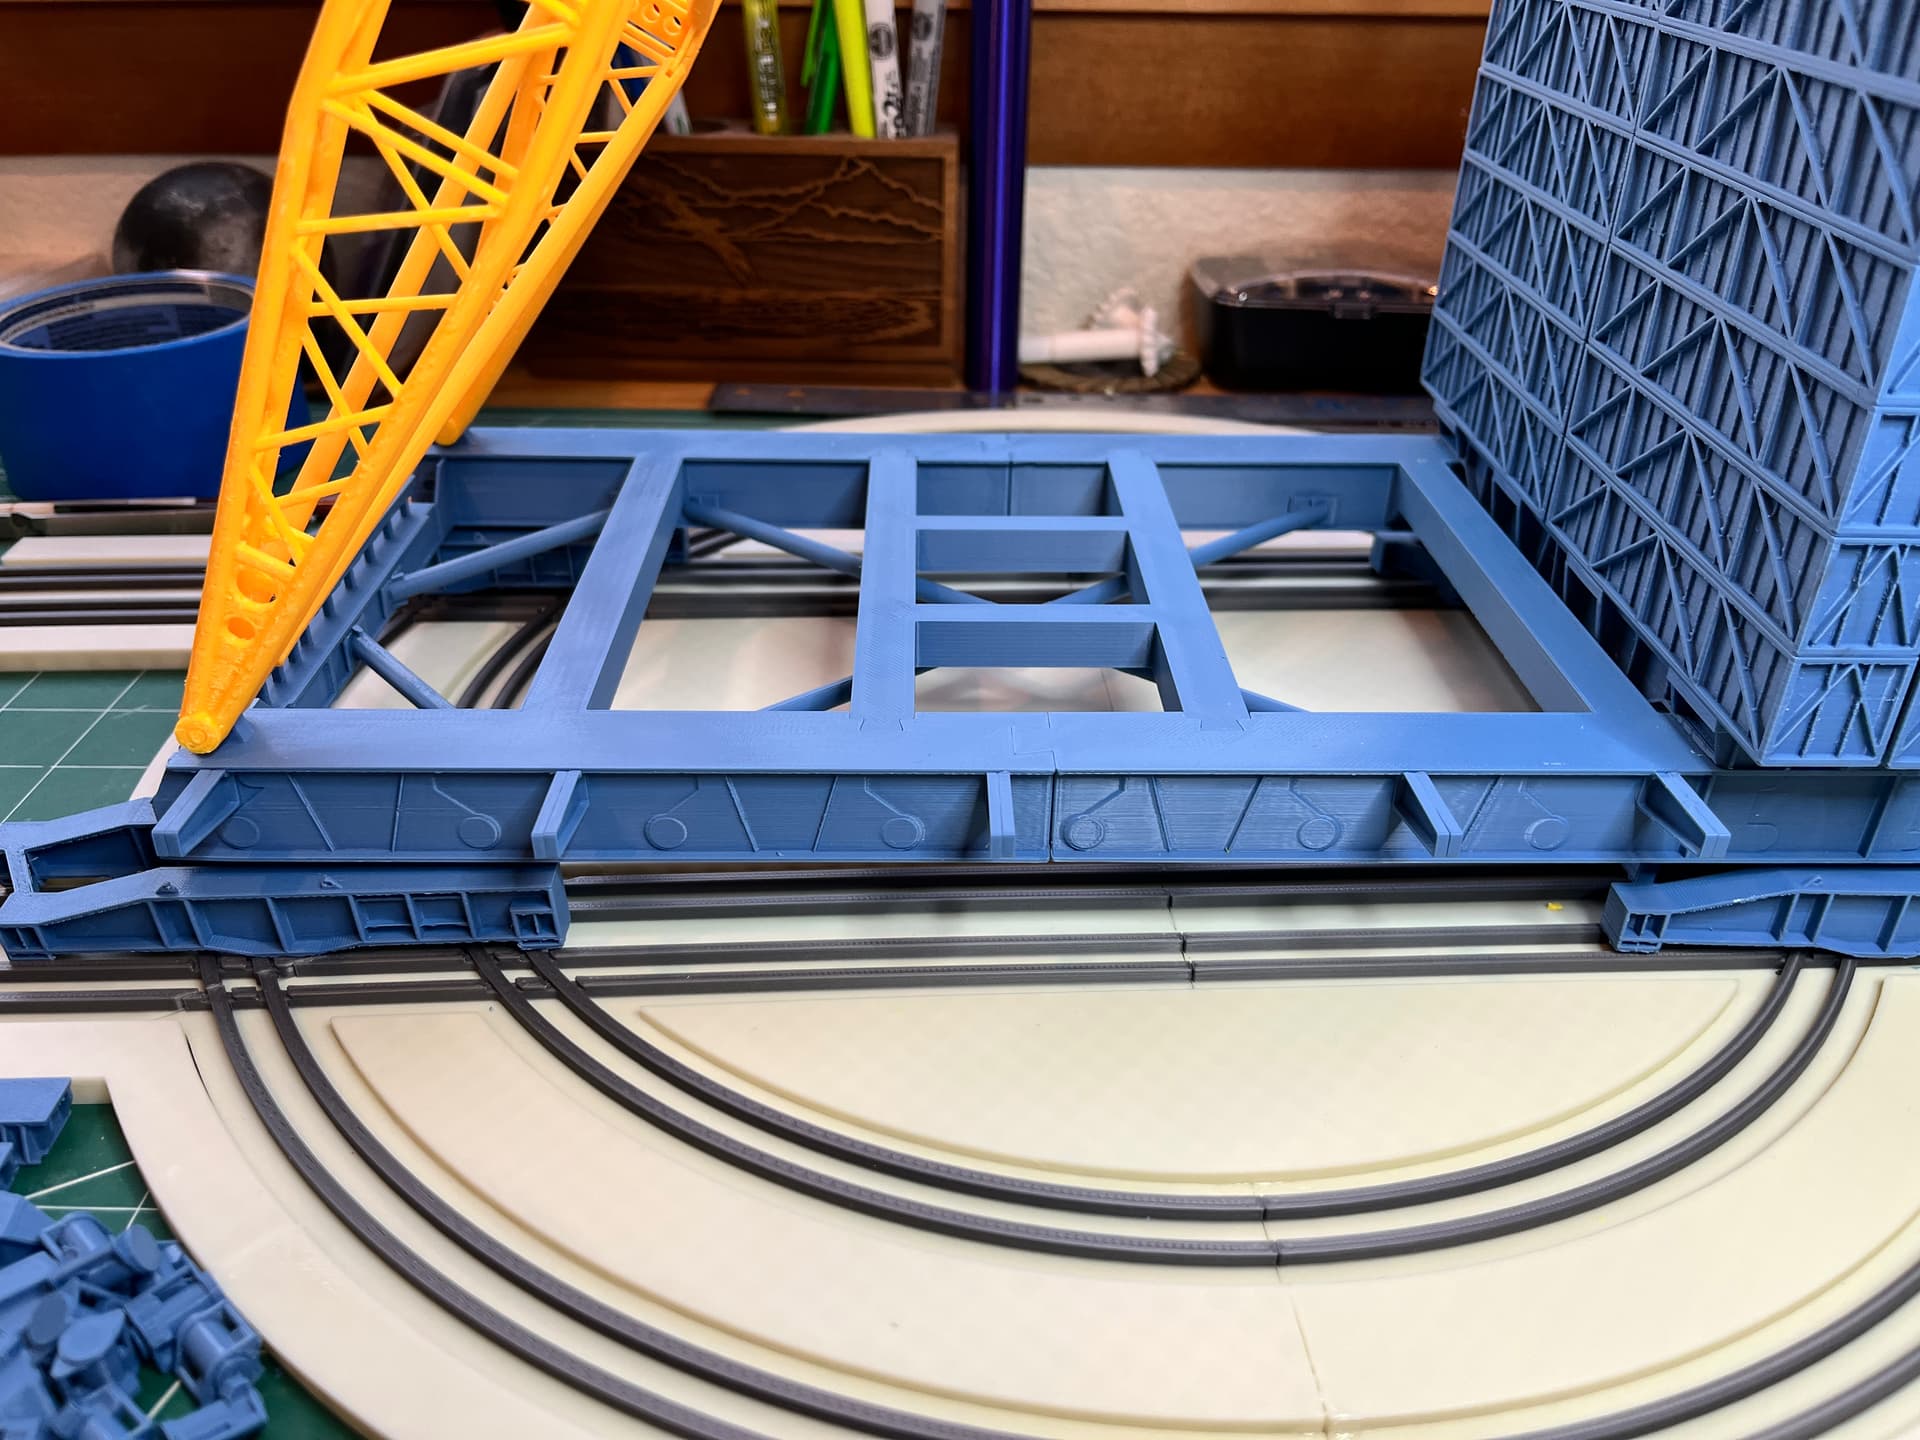
Here is the crane structure so far on top of the completed base rail structure. It still needs the trucks underneath.
3 Likes
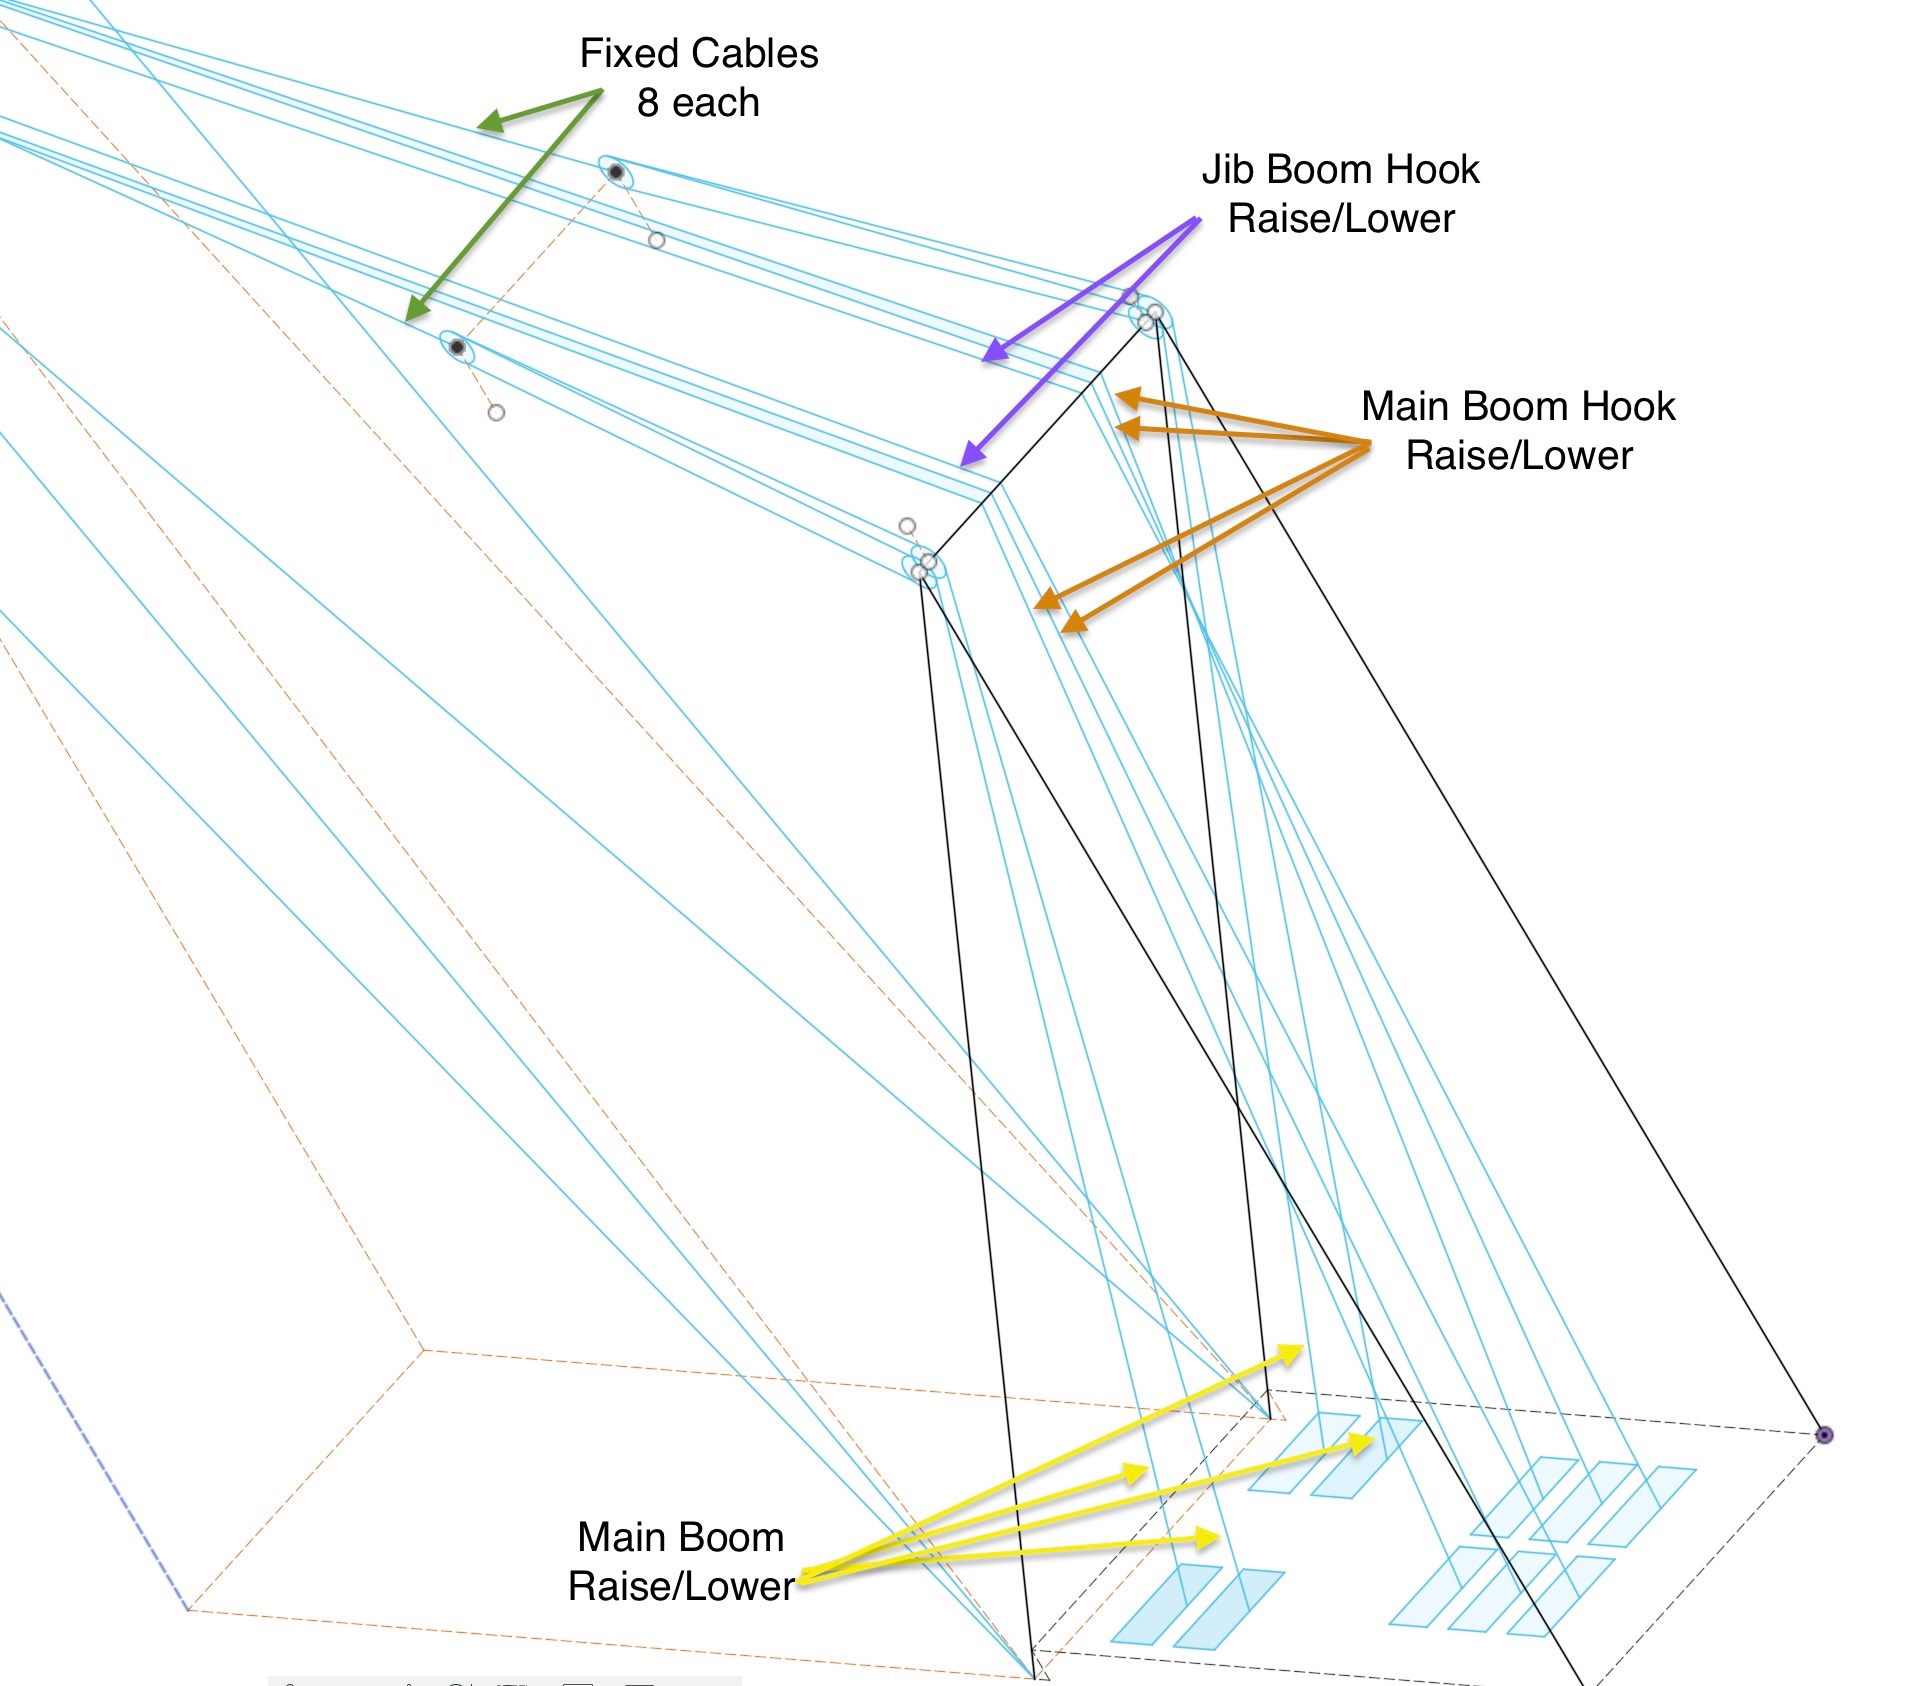
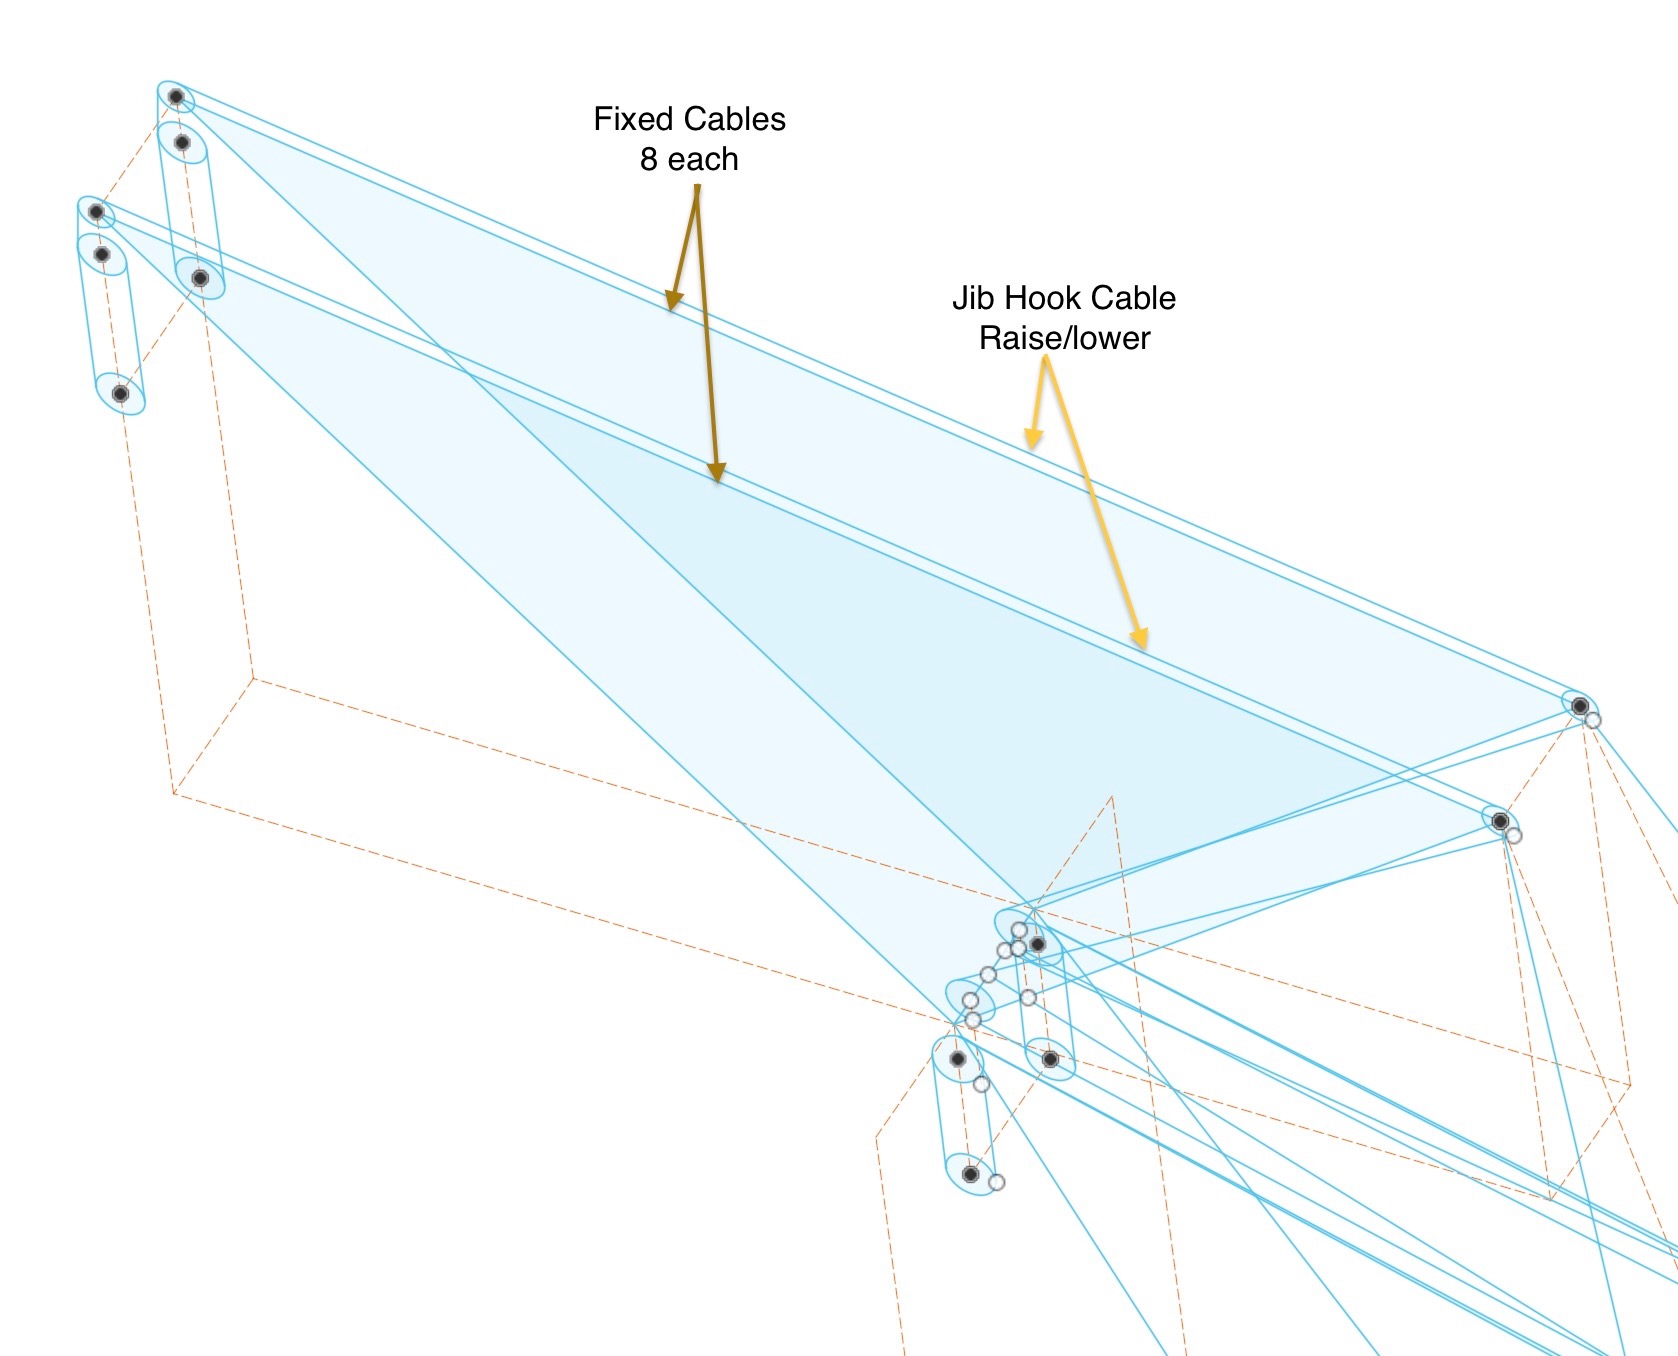
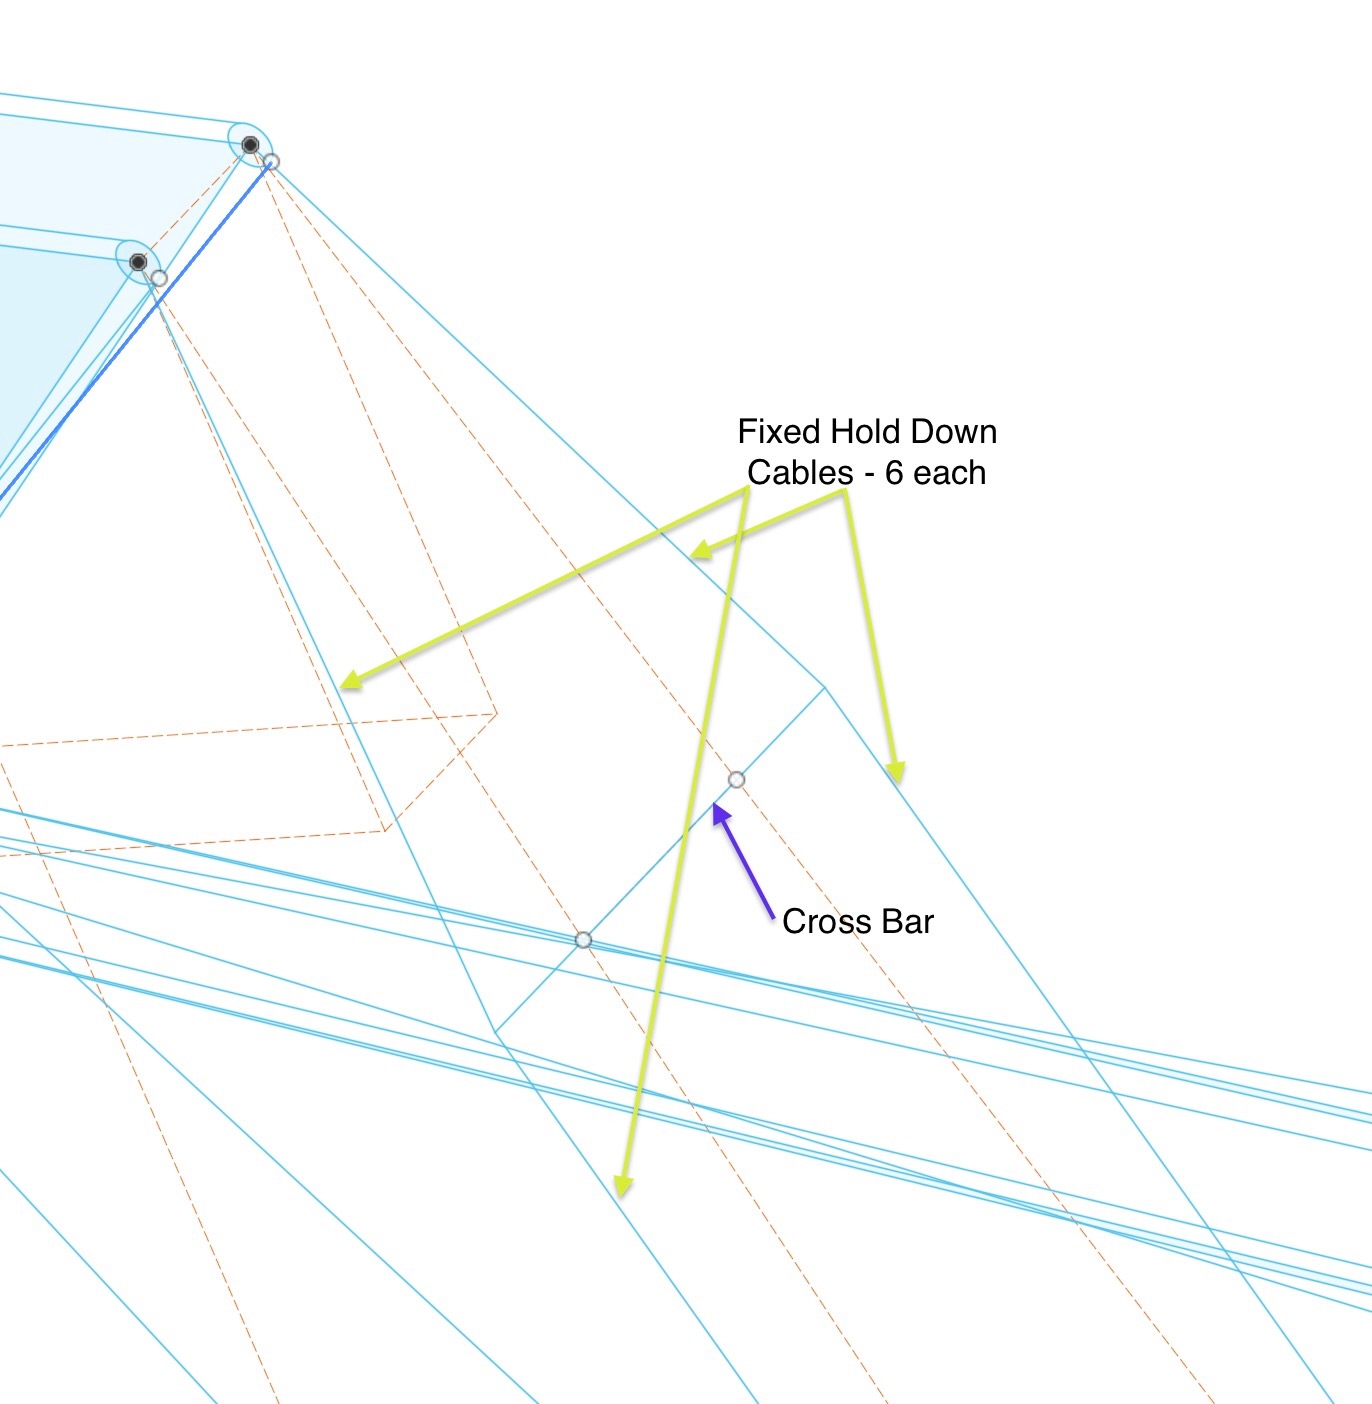
Studying the cables. There are fixed cables (standing), usually many in a group, and running cables (nautical terms). I believe I have the cabling figured out. Given the scale of this beast, the cables disappear when viewing the entire crane. The cables will be modeled as cotton/polyester thread, probably black. The standing cables are thicker than the running cables. To make sense of it all I created a 3D sketch that can be rotated. Here are a few static screen grabs that show the various cables.
1 Like
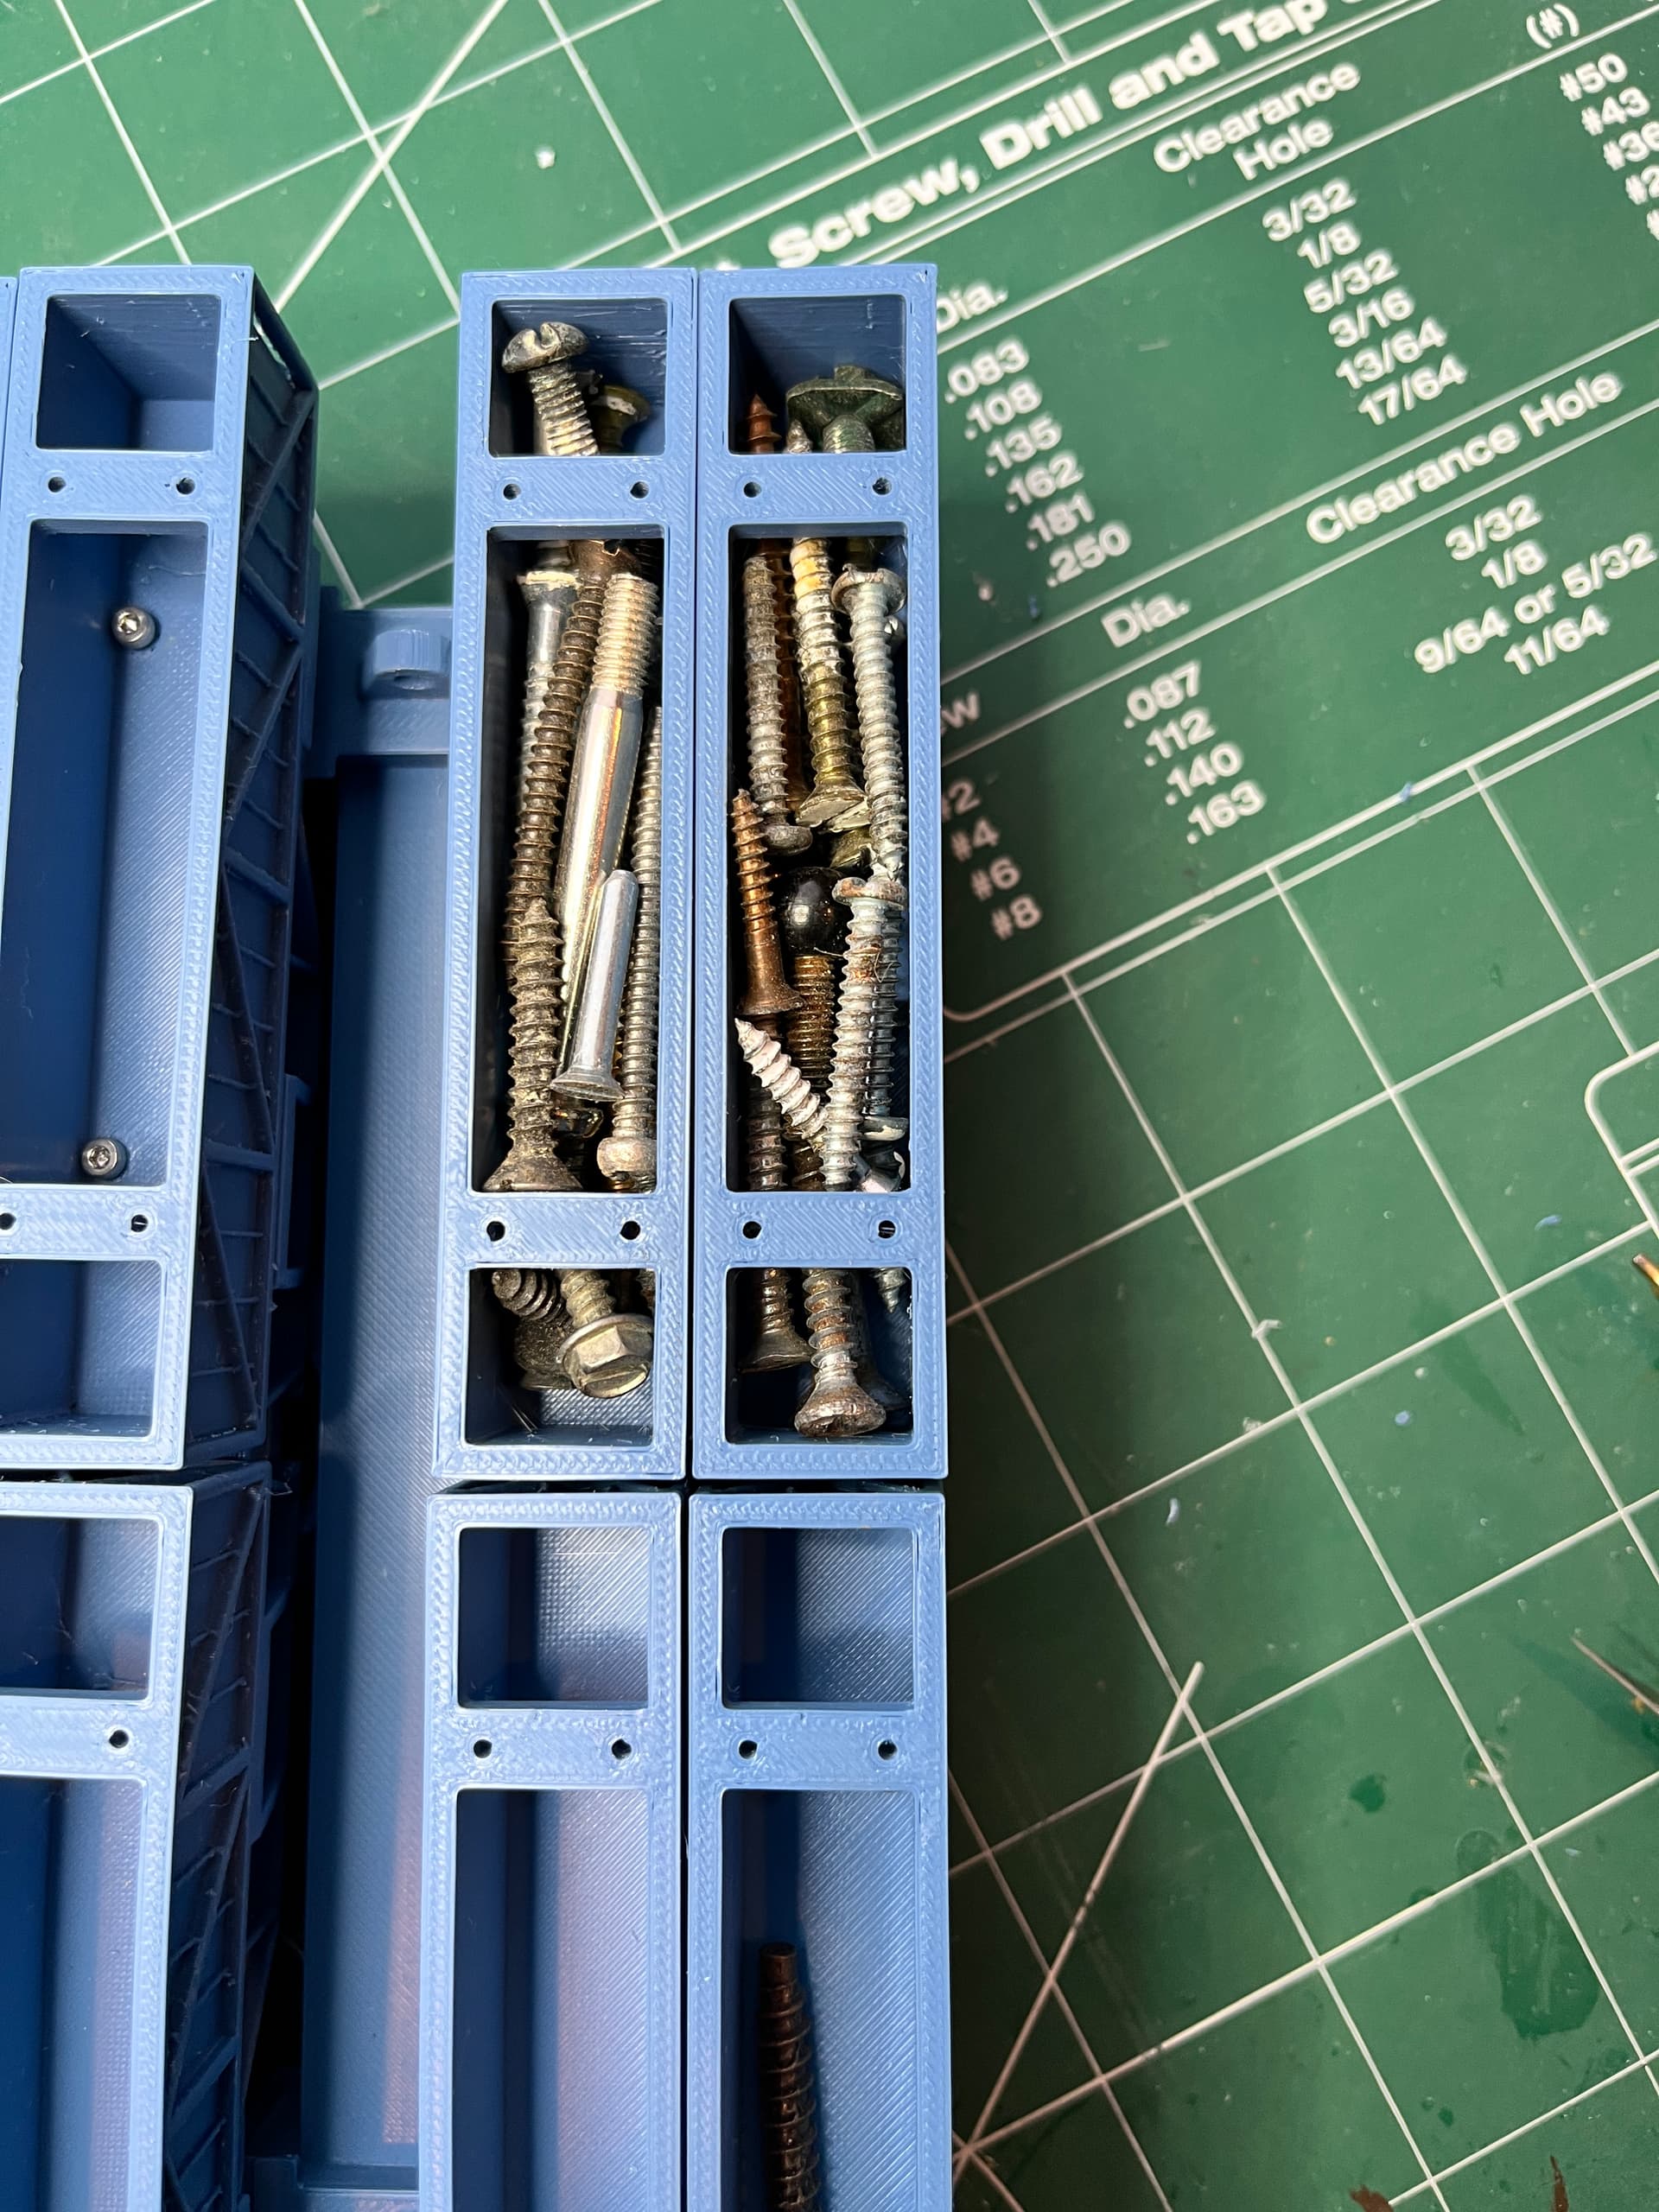
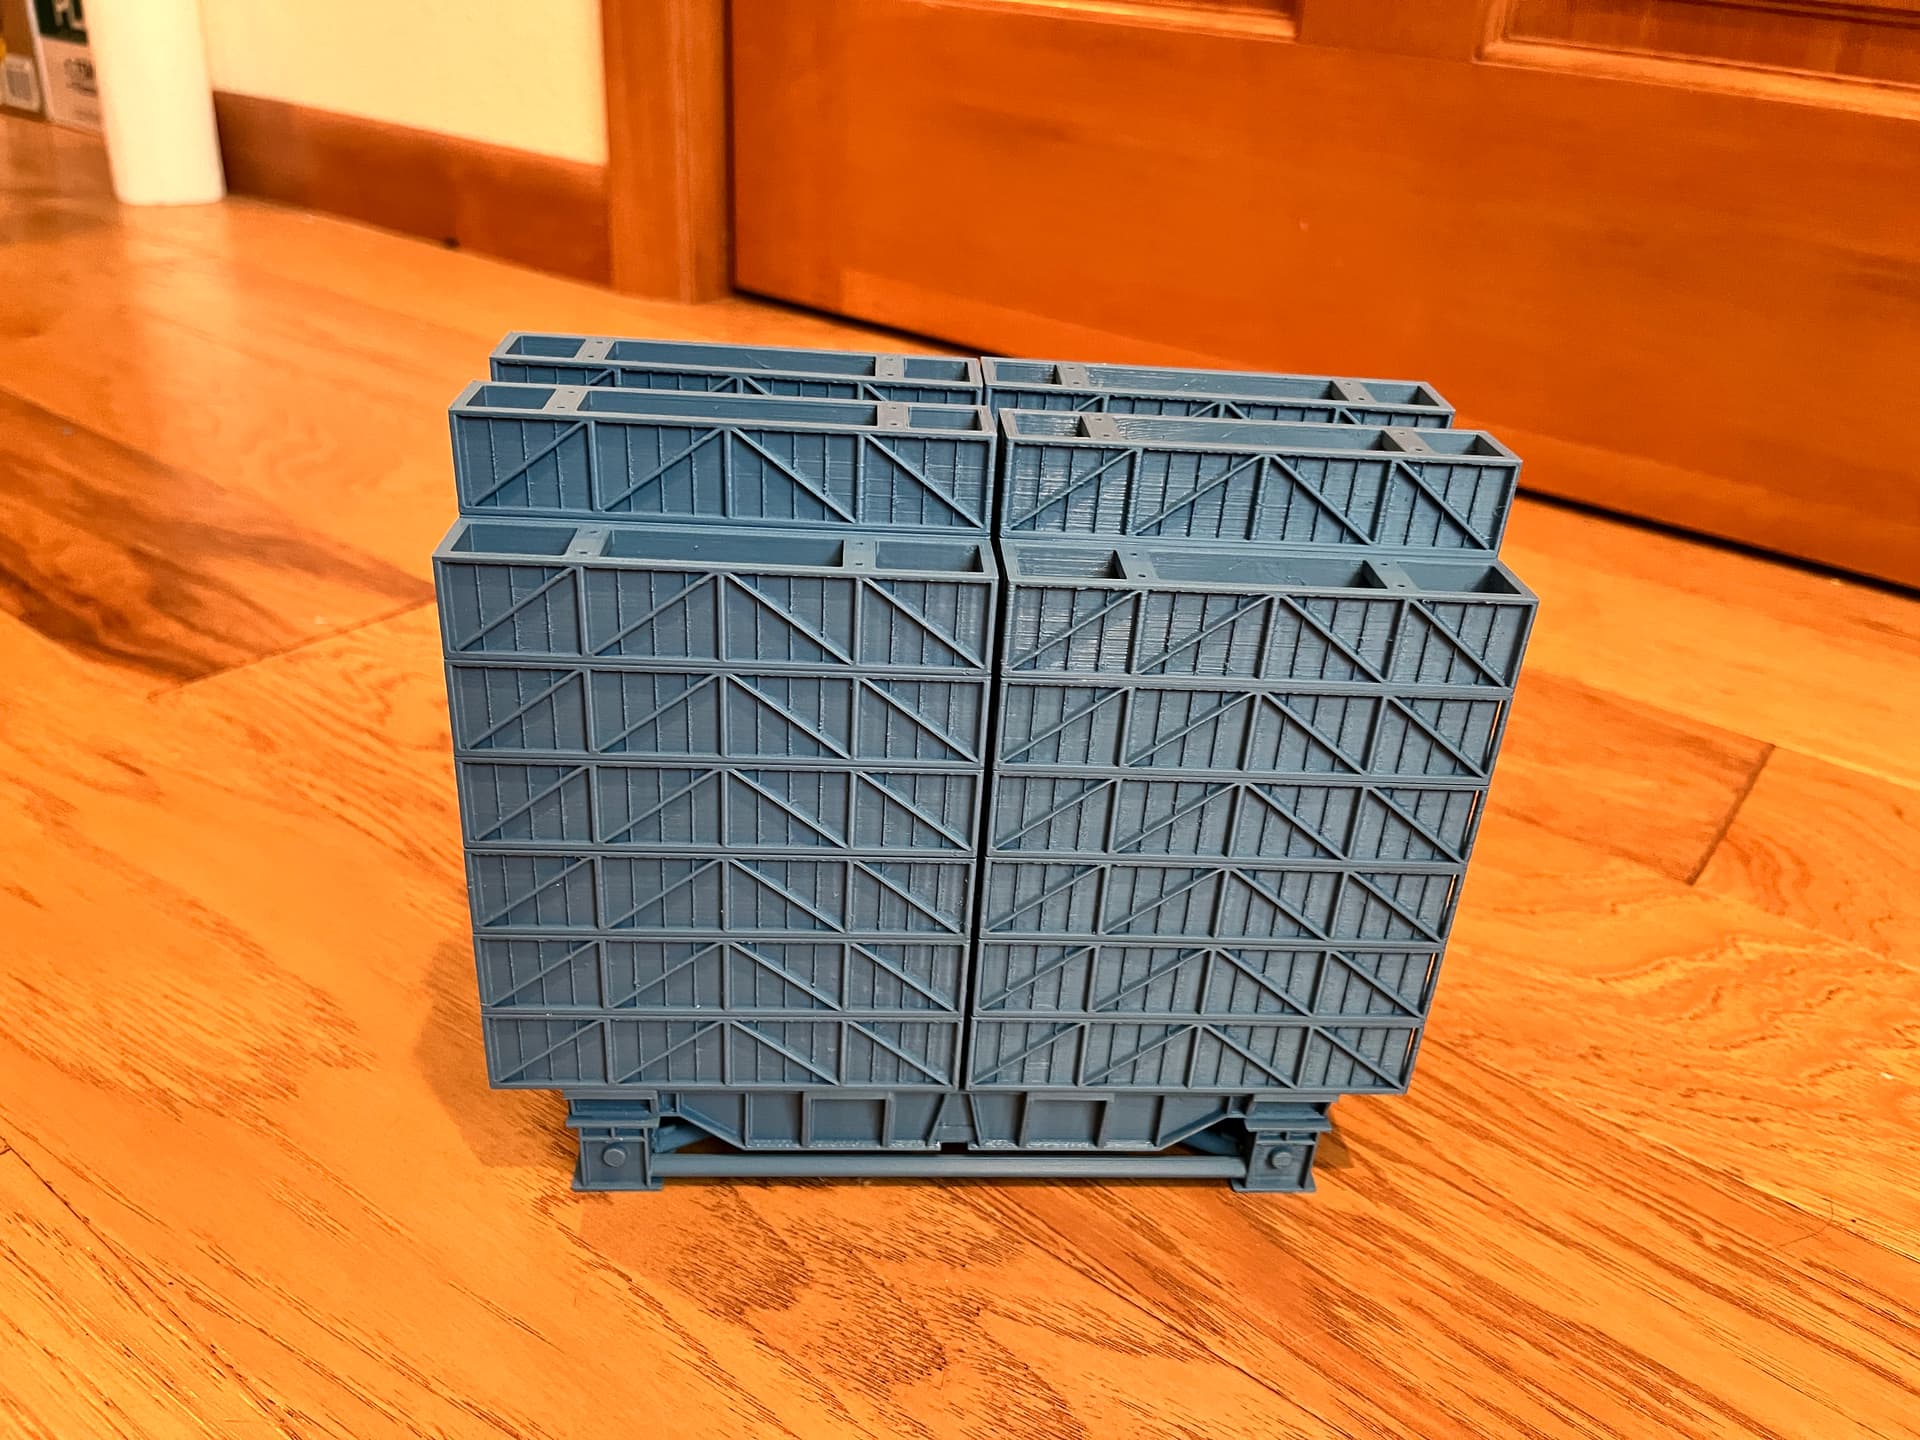
Starting to fill and stack the containers that make up the counter weight. You can use old nuts and bolts or sand/pea gravel, just about anything. I knew those old nuts and bolts would come in handy some day. Not sure yet how much weight will be required to offset the boom but I will fill a few layers and see how it goes.
1 Like
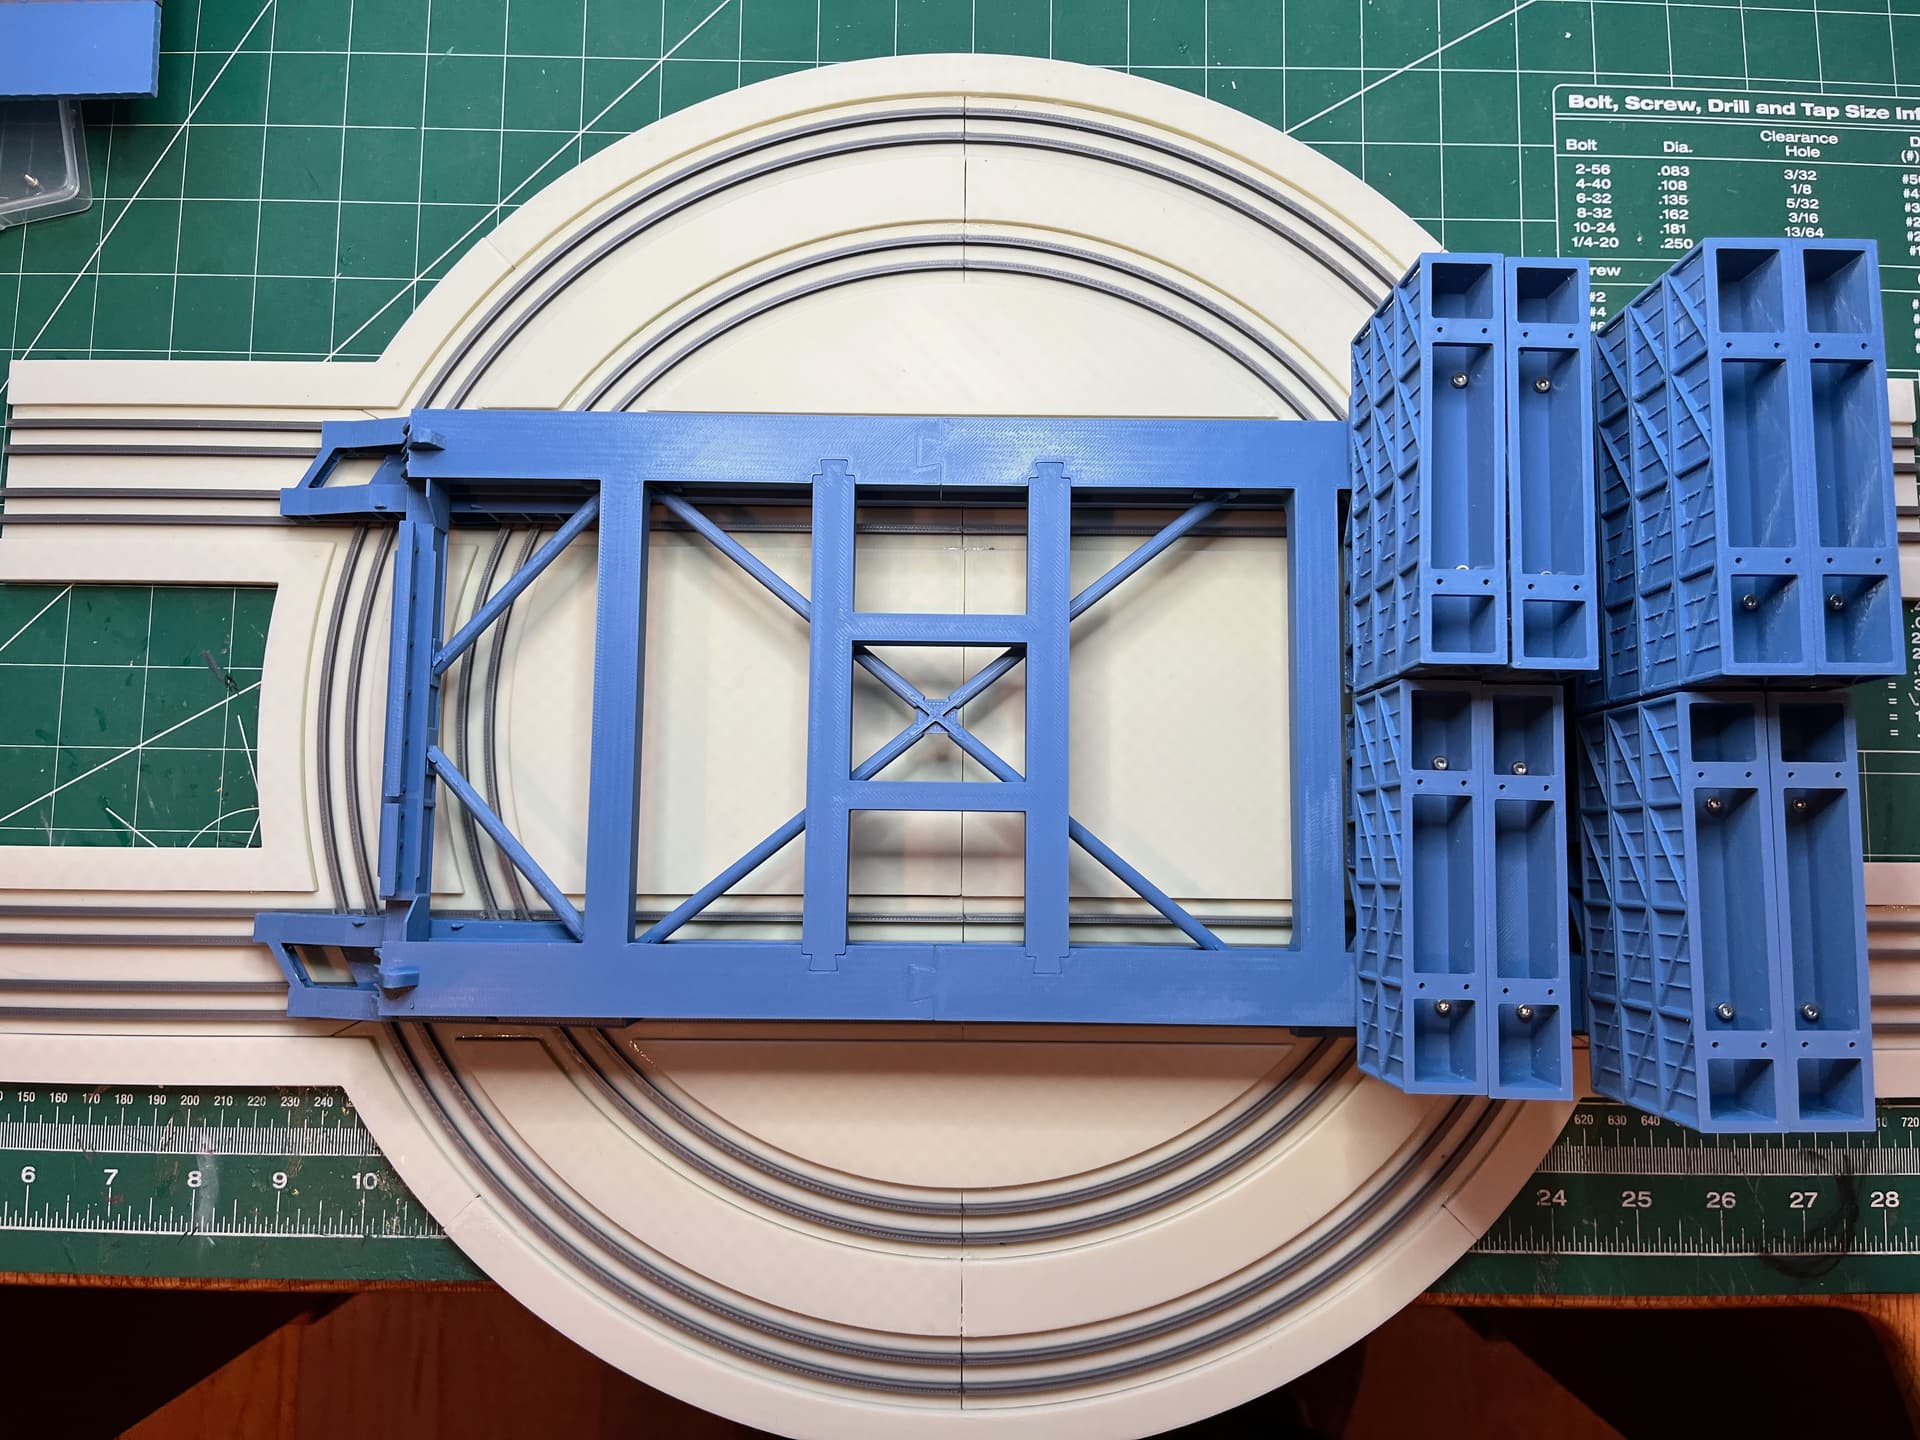
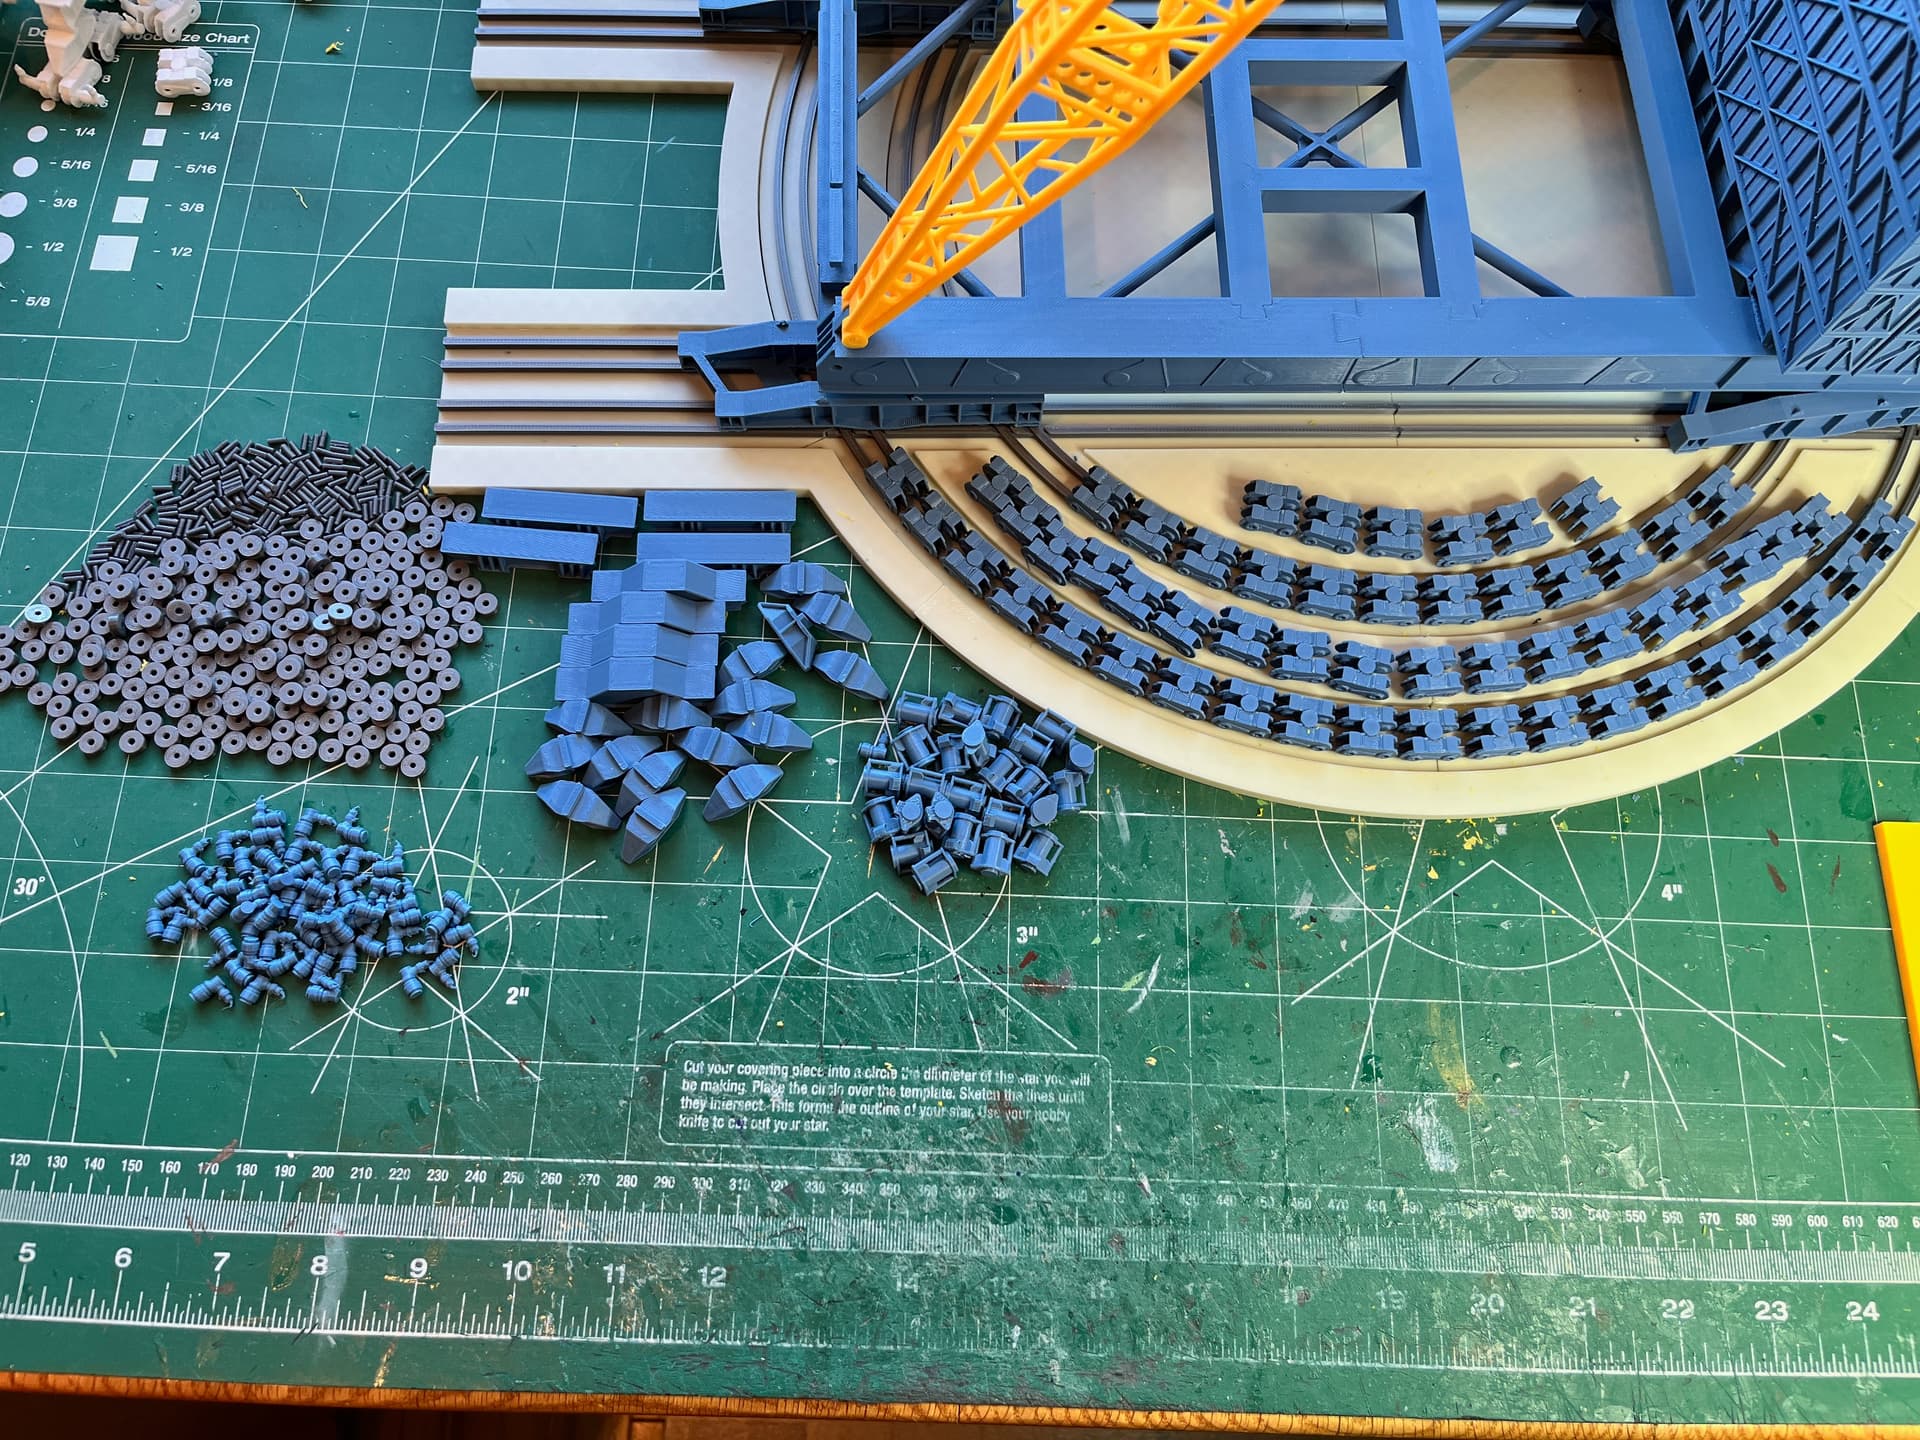
Printed the four main truck beams and positioned them between the platform and the rails to see that everything fits. The trucks are not nearly complete. There are still 664 parts to print to complete the trucks. That and more containers to print.
1 Like
And 52 containers later the counter weight is complete, all but the top lids. I am holding off on those in case it needs more weight. The color hue really changes from picture to picture. The phone camera is not the best. The back container structures are glued to the base structure. Each individual container is screwed down to the container structure and to each other. The front container structures have not been glued down yet so I can access the gantry attachment points. Towards the end of the build the covers will be snapped into place.
1 Like
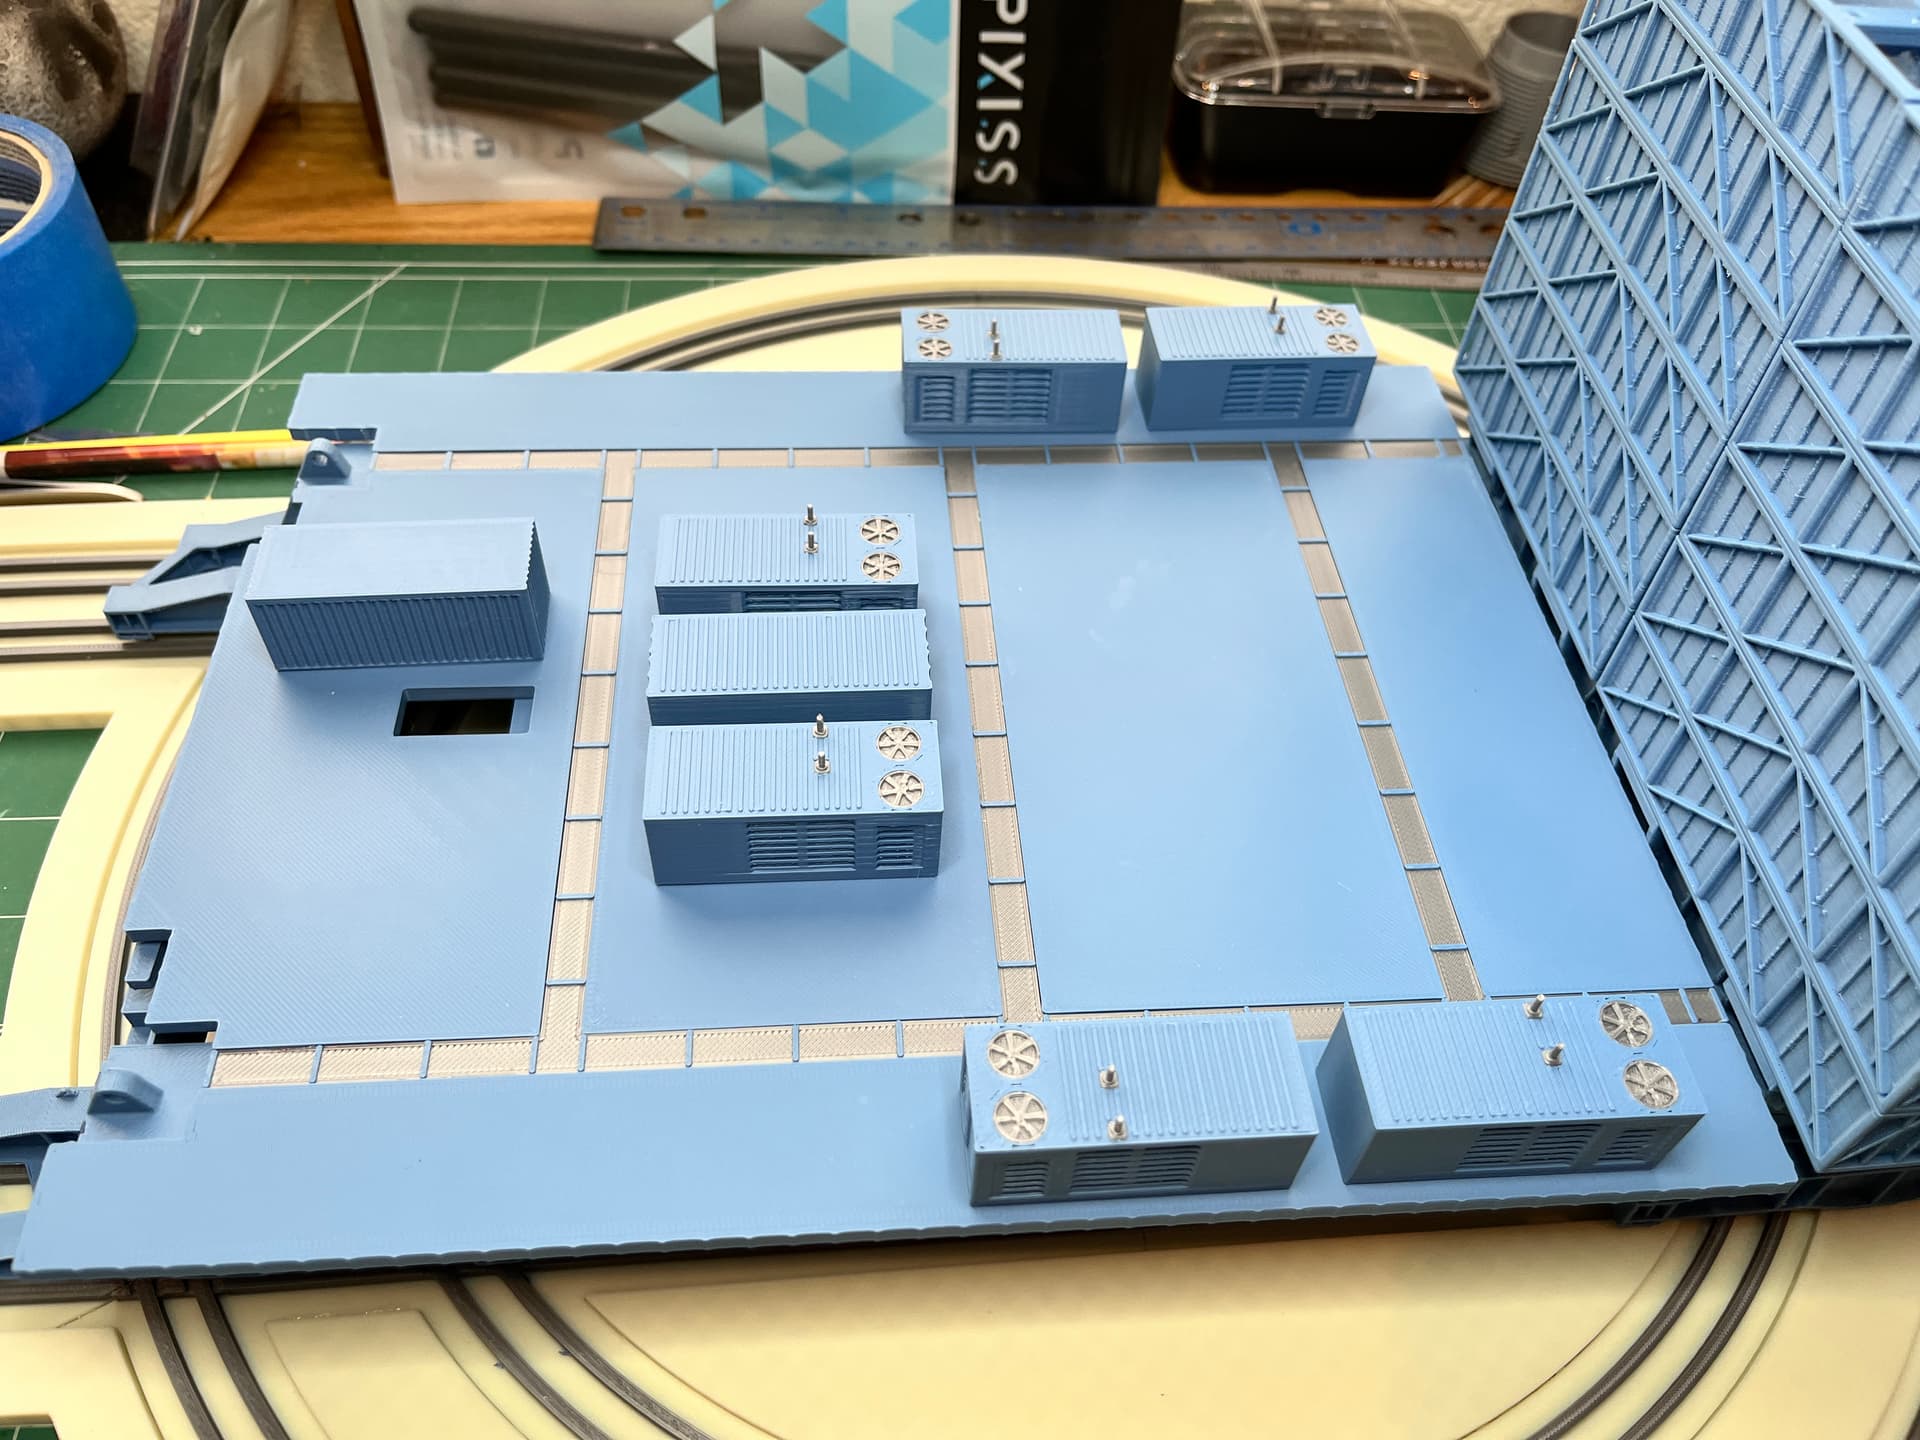
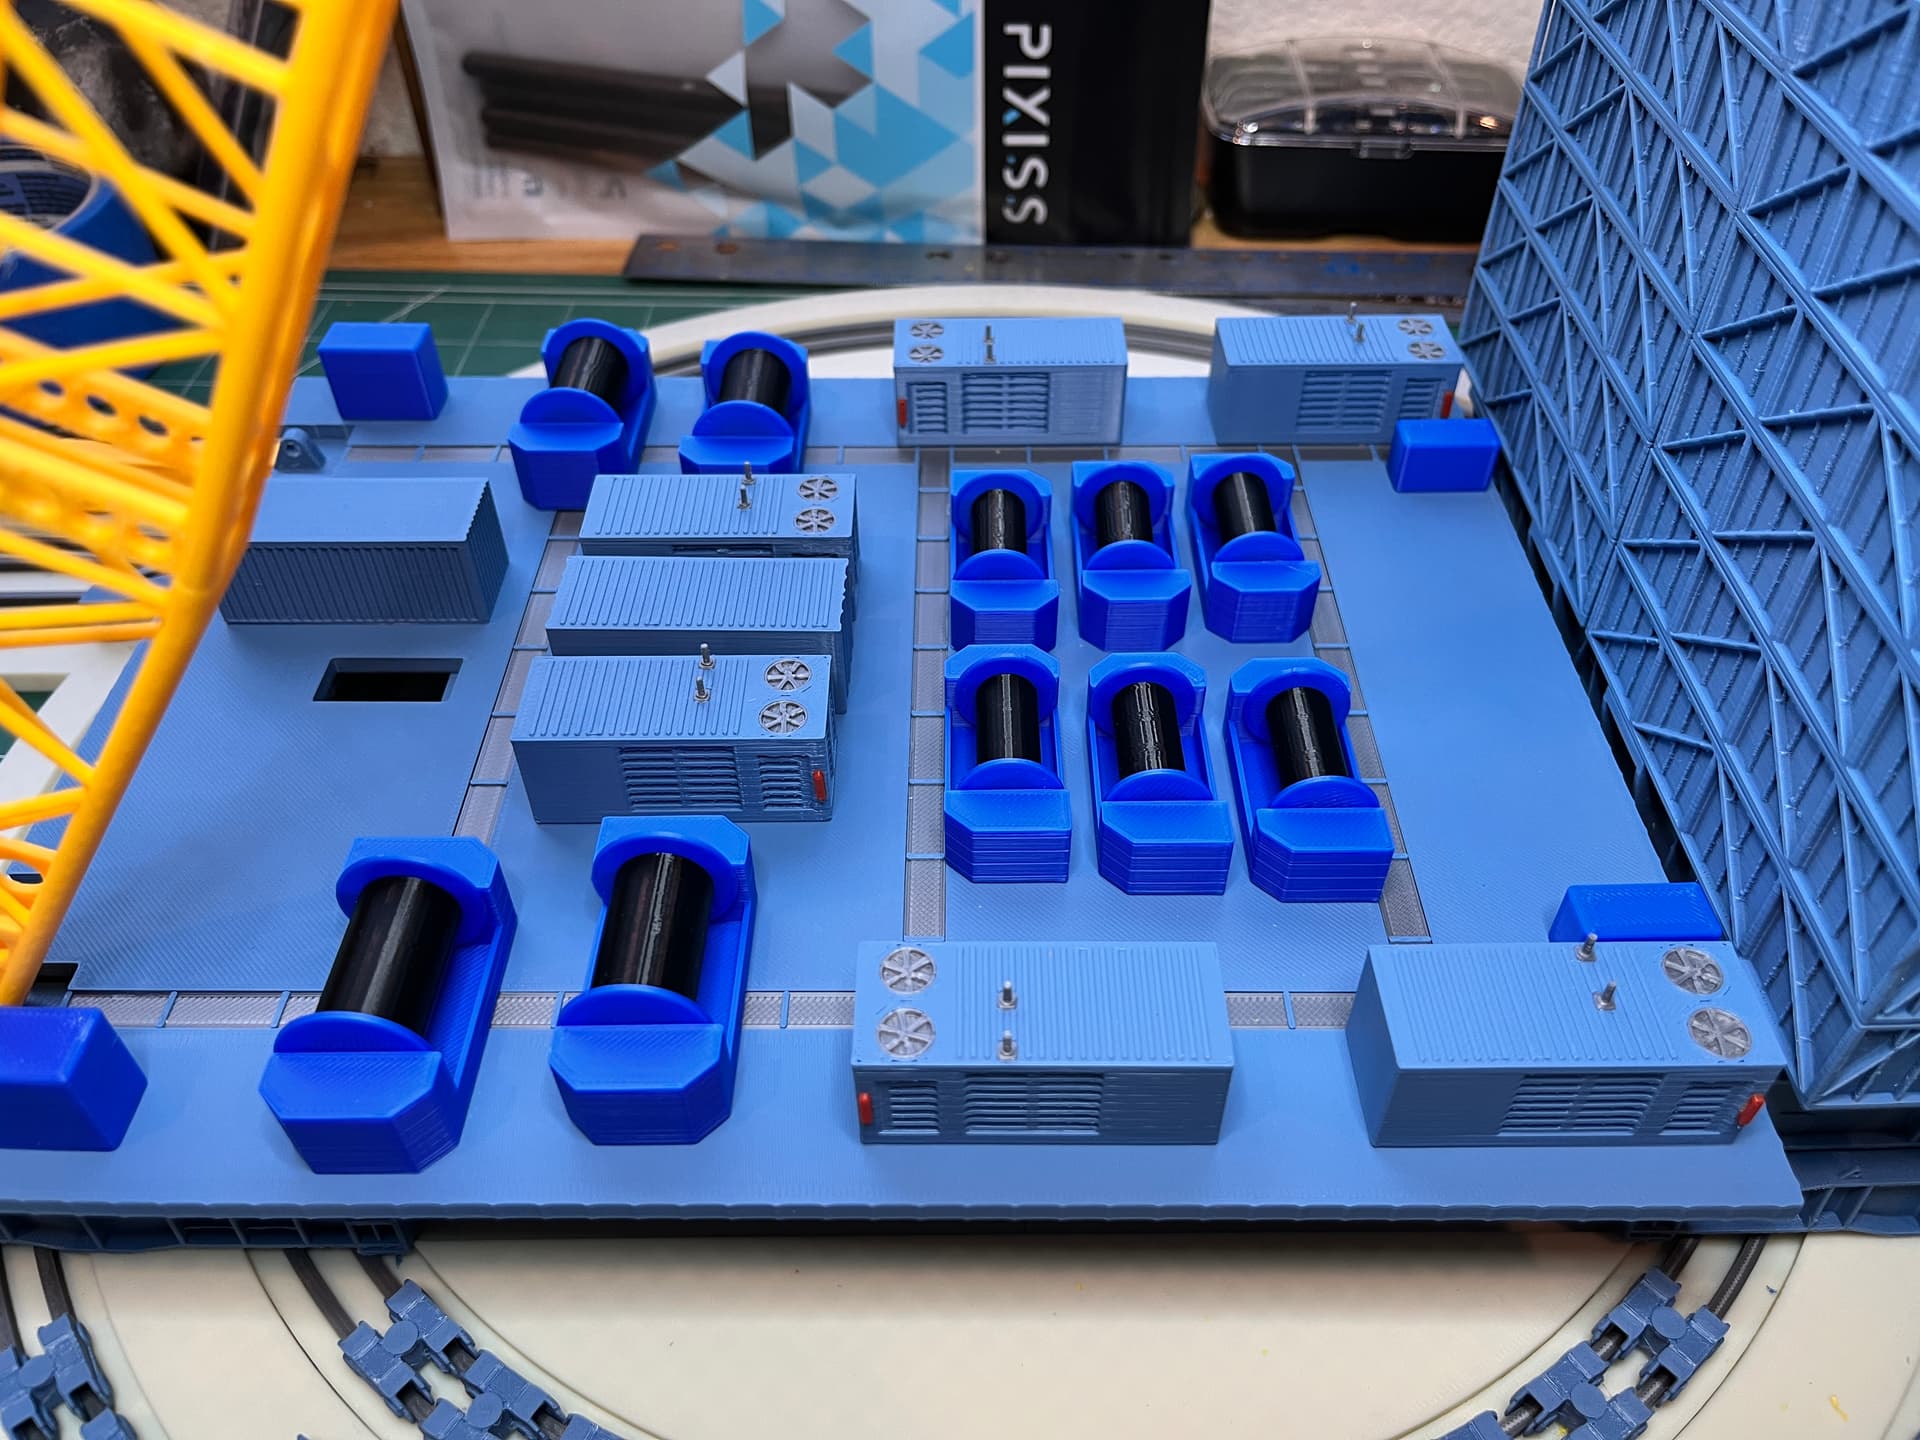
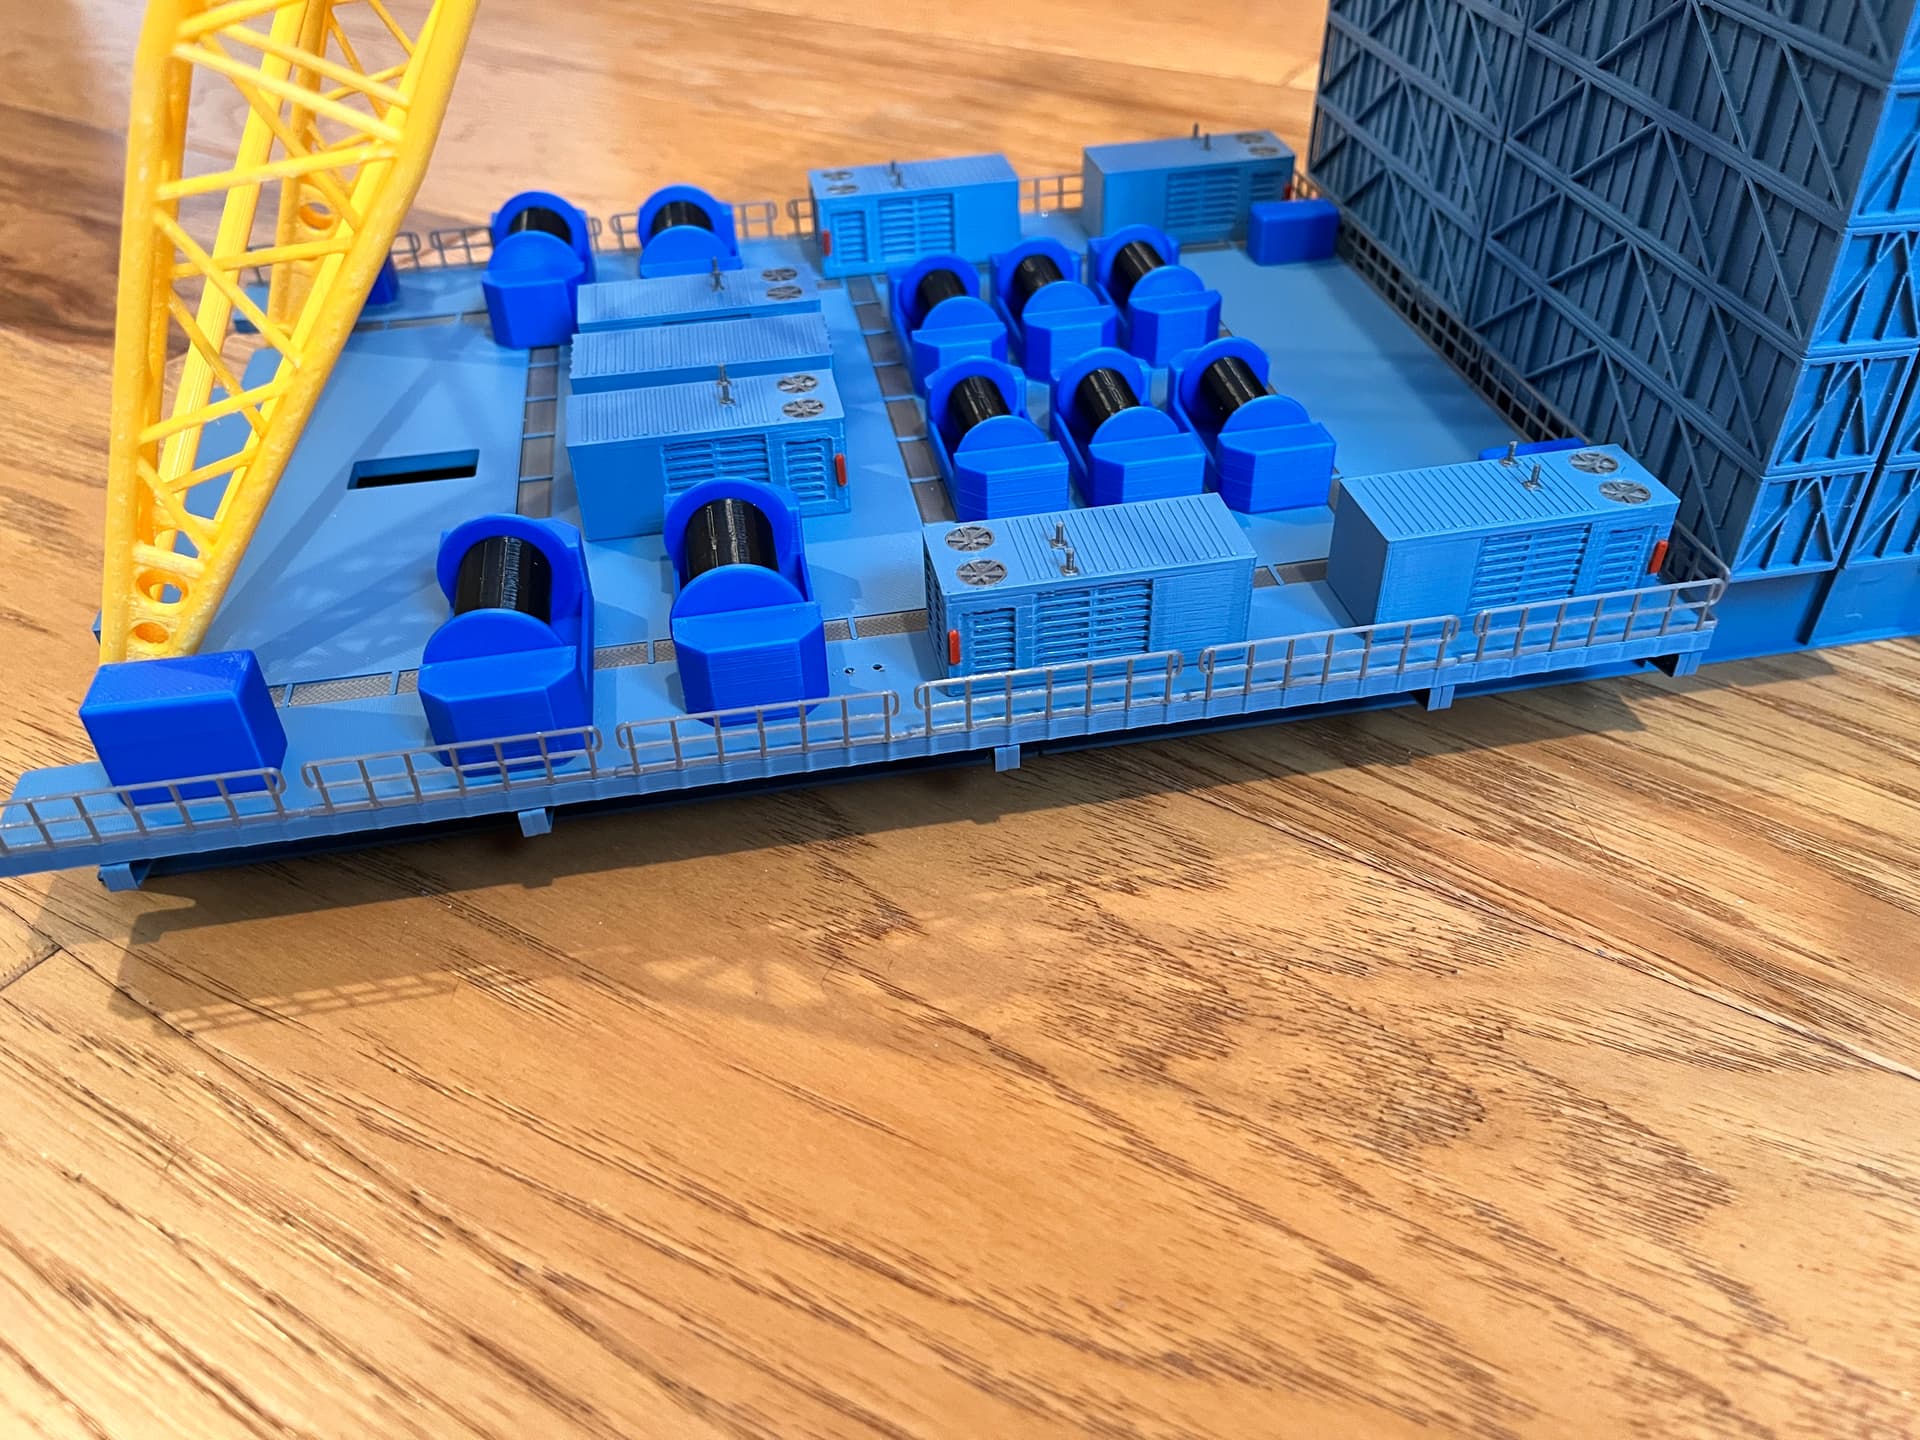
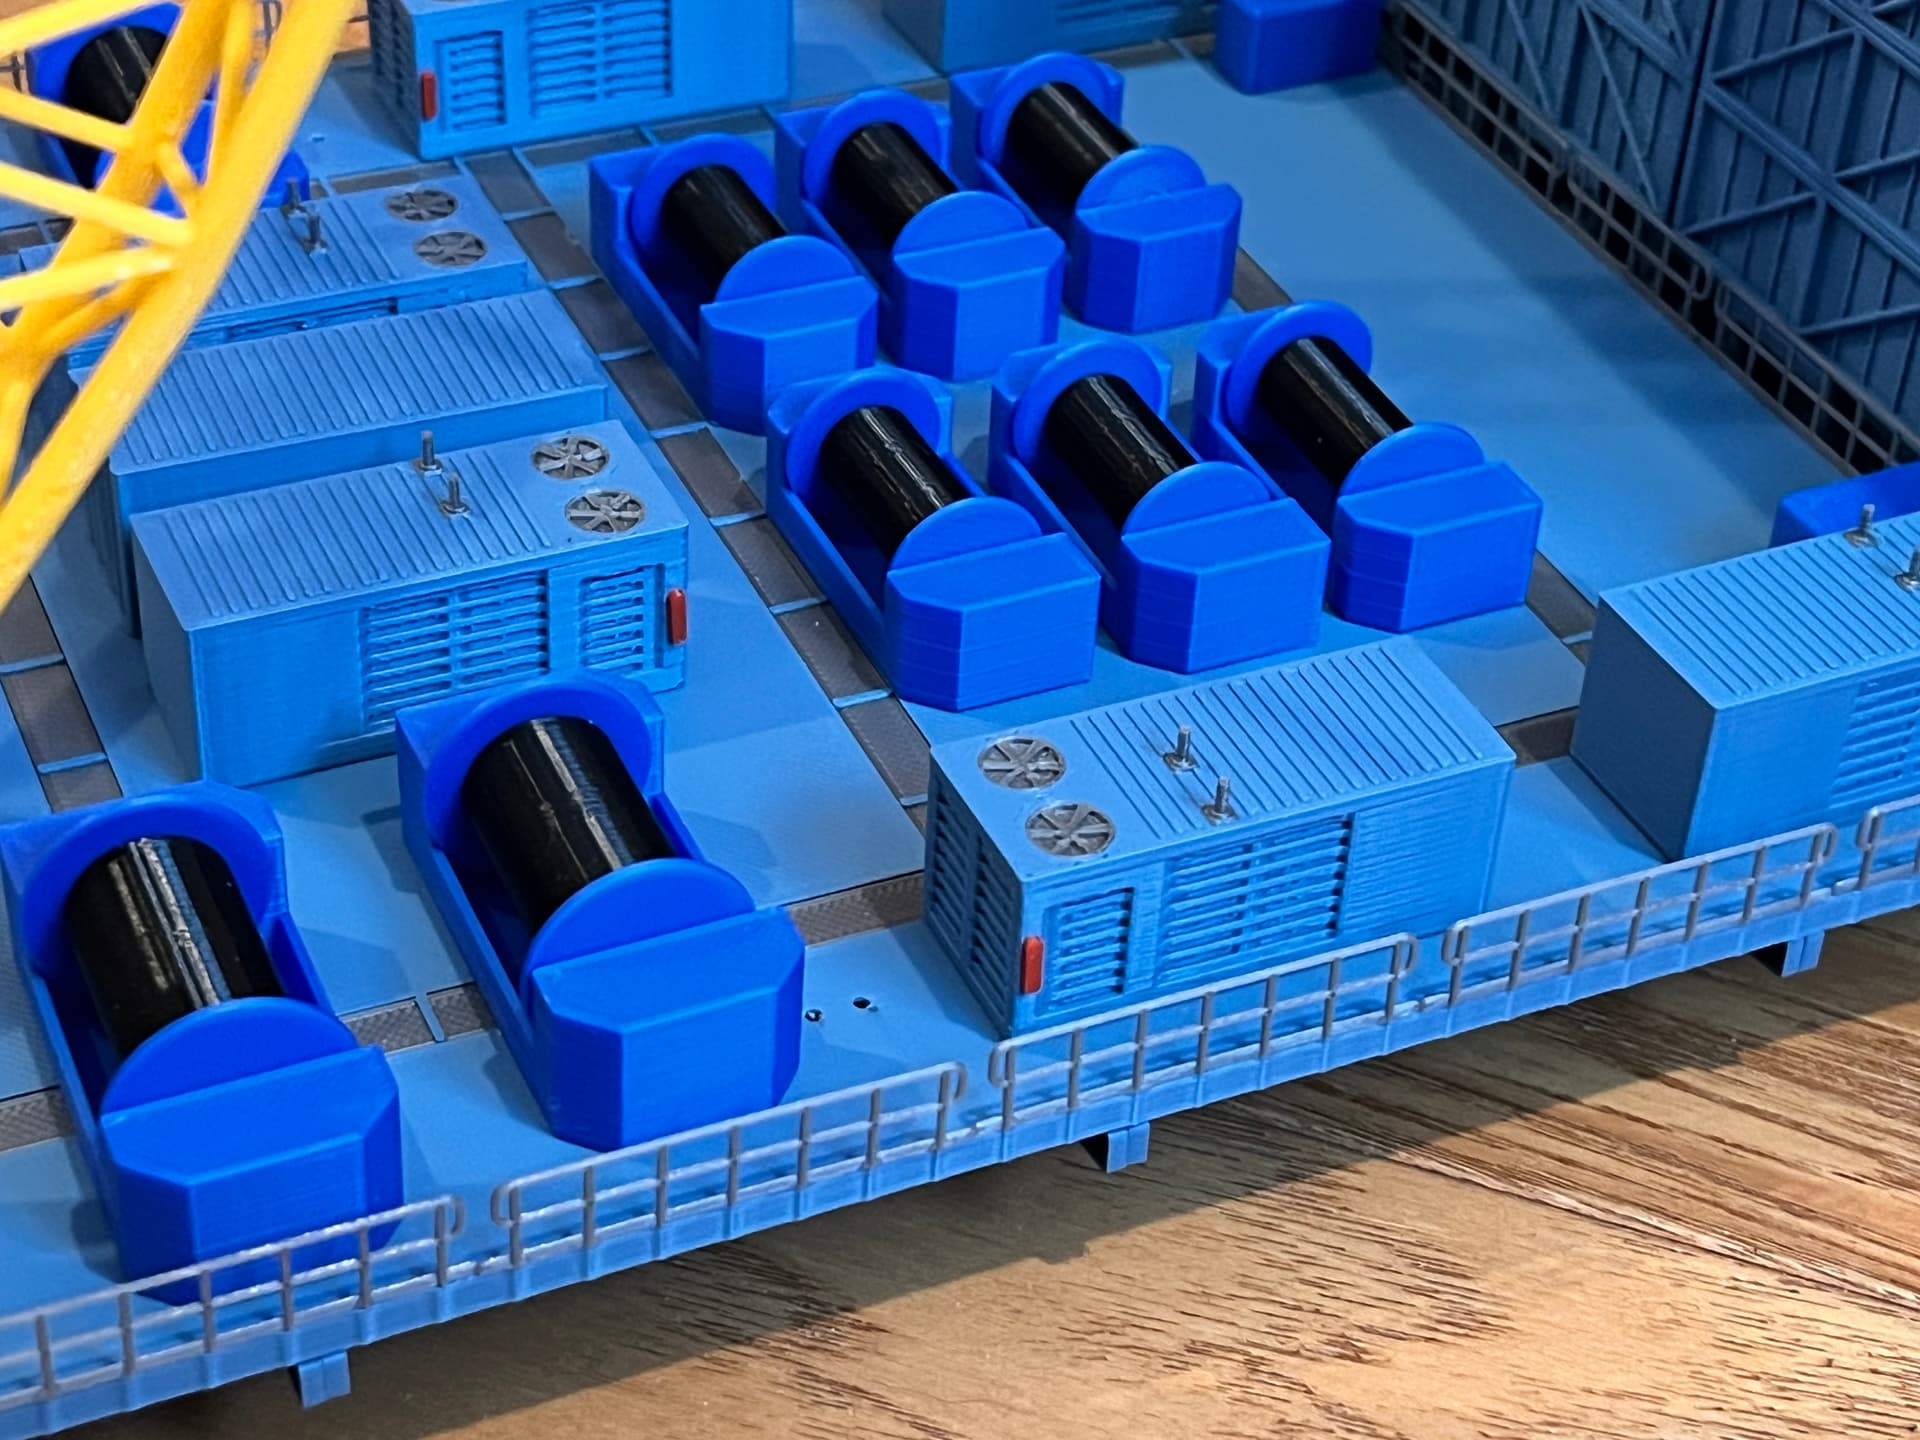
Some of the platform equipment is complete. The generators have separately printable fans and posts, both printed in steel grey. The fans just snap in. The cab will sit on top of the front container.
3 Likes
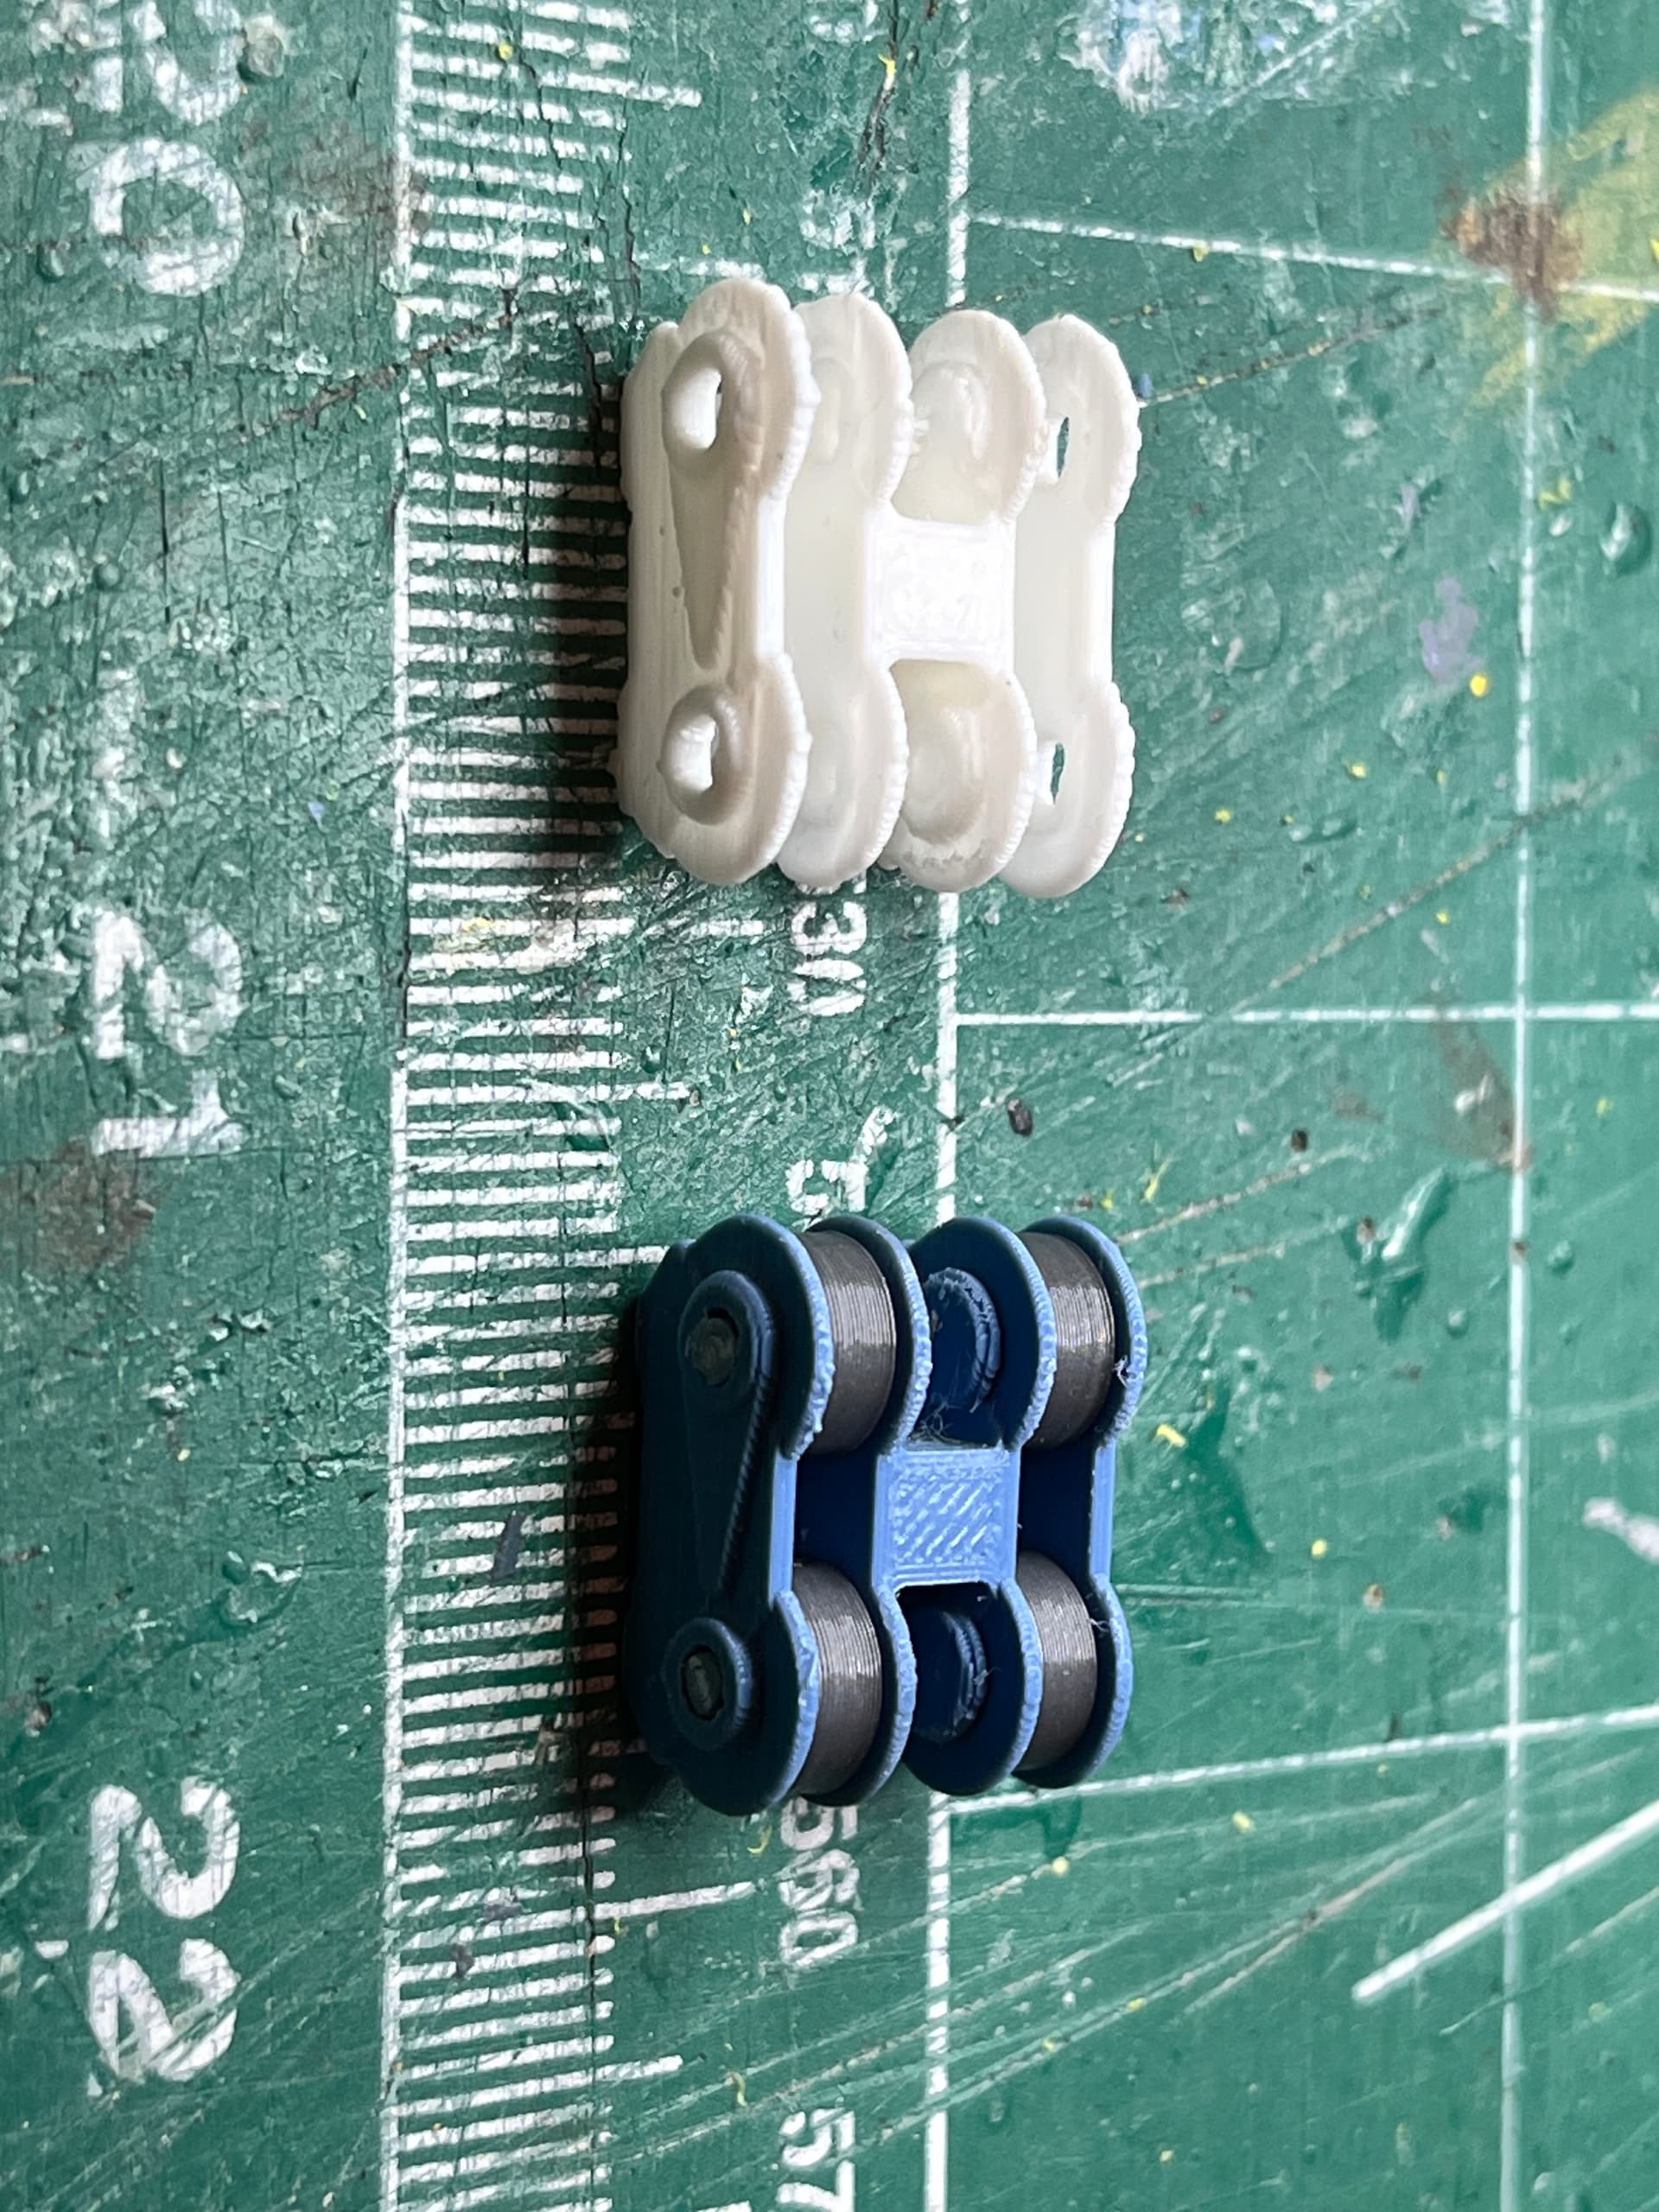
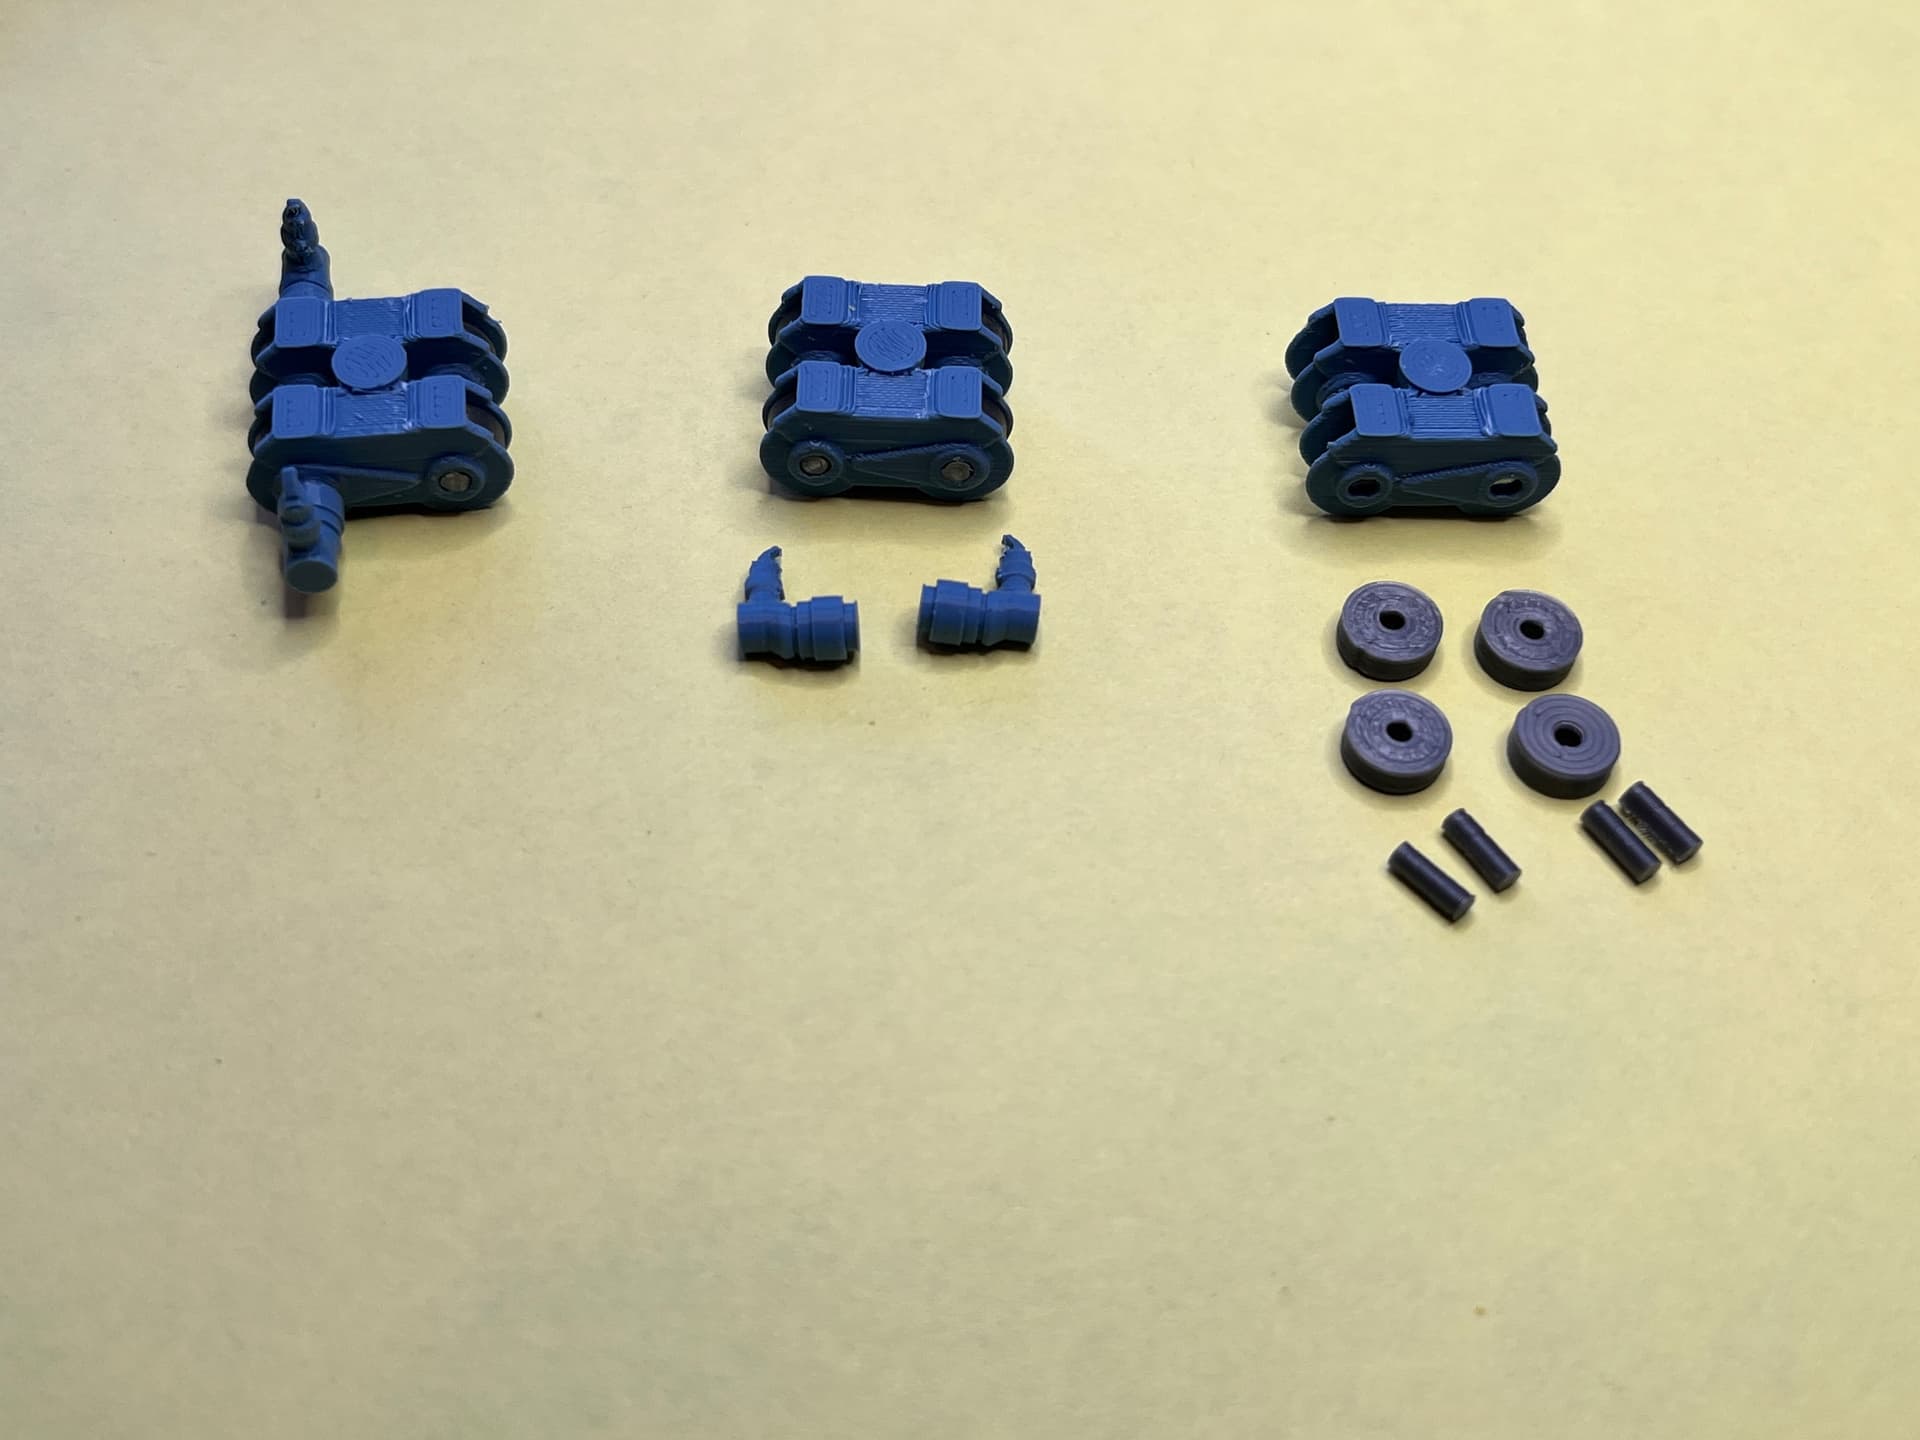
I finally got the second printer converted to a Core One and got a 0.25mm nozzle to print the smaller parts. For these bogie wheel assemblies they just were not printing well with a 0.4mm nozzle. For the layer height I went with 0.10mm. The smaller nozzle can print between 0.15 and 0.05mm. I am happy with the results at 0.10mm height. This part took 22 minutes to print. Now I only have 55 more to go, about 20 hours. You can see the four wheels and axles are printed in steel grey. The prints are taken alongside the 0.4mm results (printed in white). With the 0.25mm nozzle the thin side walls print in two passes versus one for the 0.4mm nozzle. I’m glad I didn’t go any smaller on the scale or these parts would have been problematic.

2 Likes
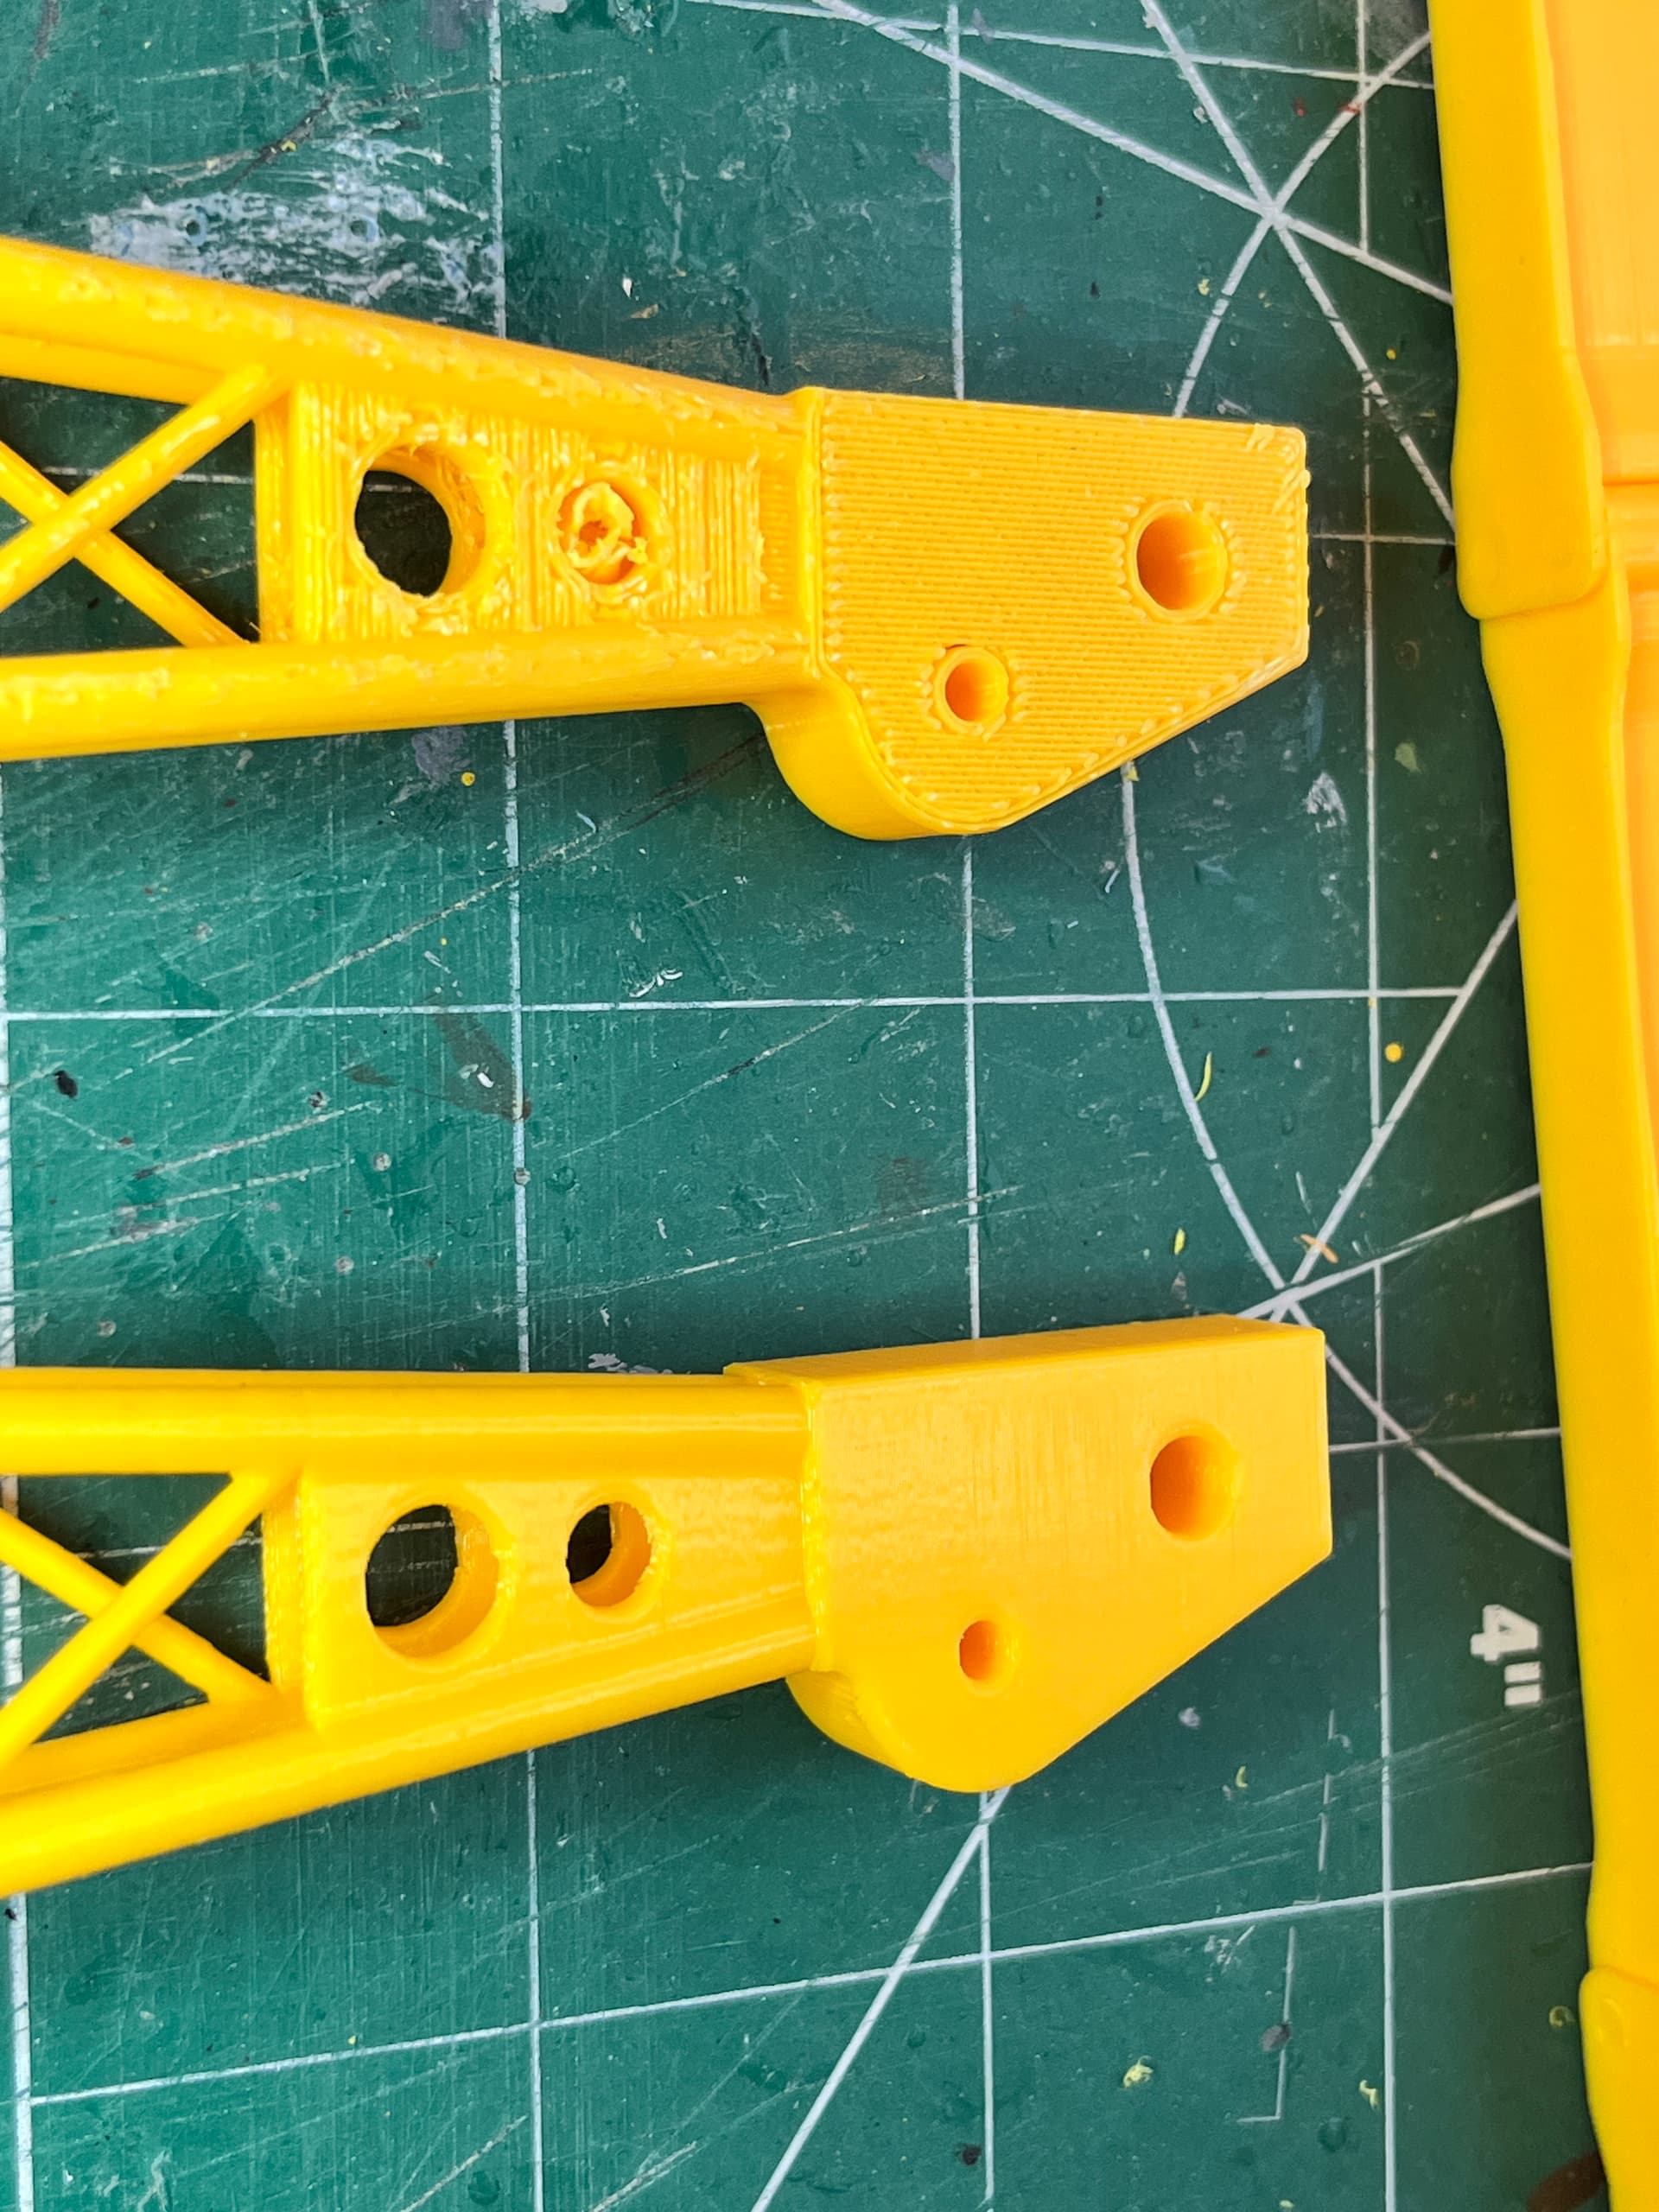
The gantry and back hitches are the first to go onto the platform. Most of the parts print fine laying down on the print surface. Here is the bottom section and one of the middle sections. You can also see a completed back hitch. The back hitch has pins that hold the parts together. They are fairly tight. To get them all the way in I used the back end of a screw driver to hammer them home. These parts do not need glue.
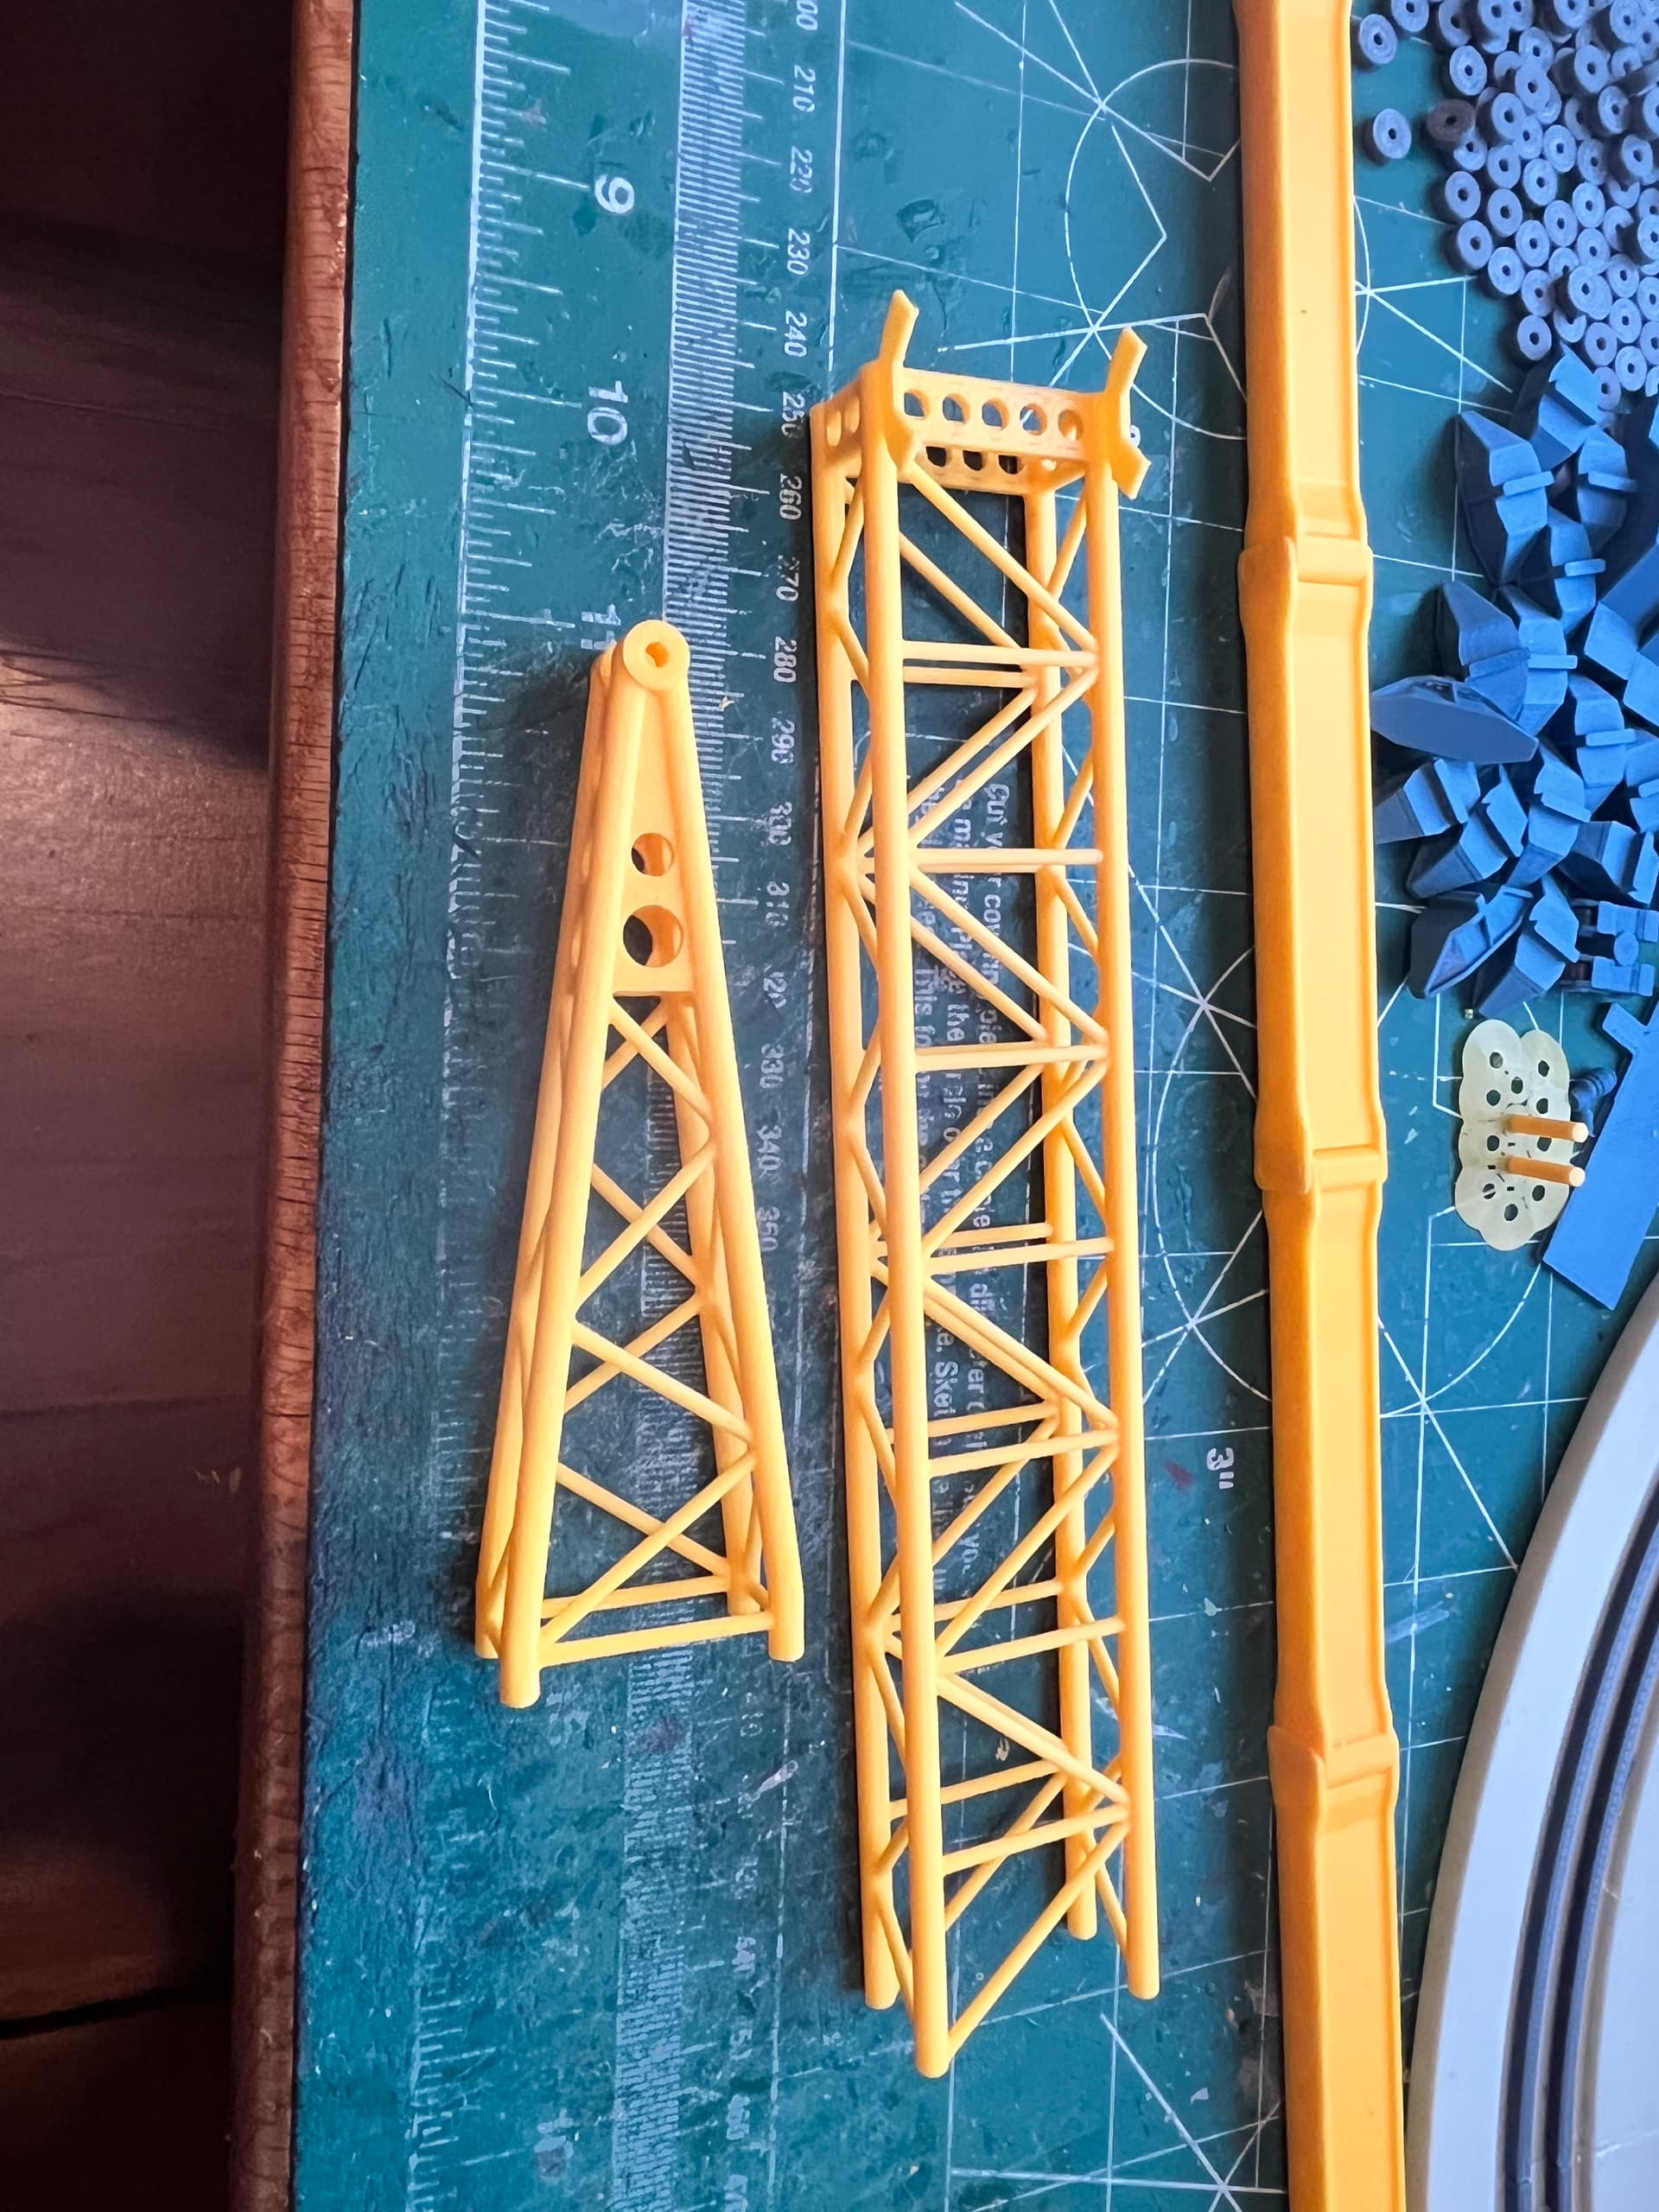
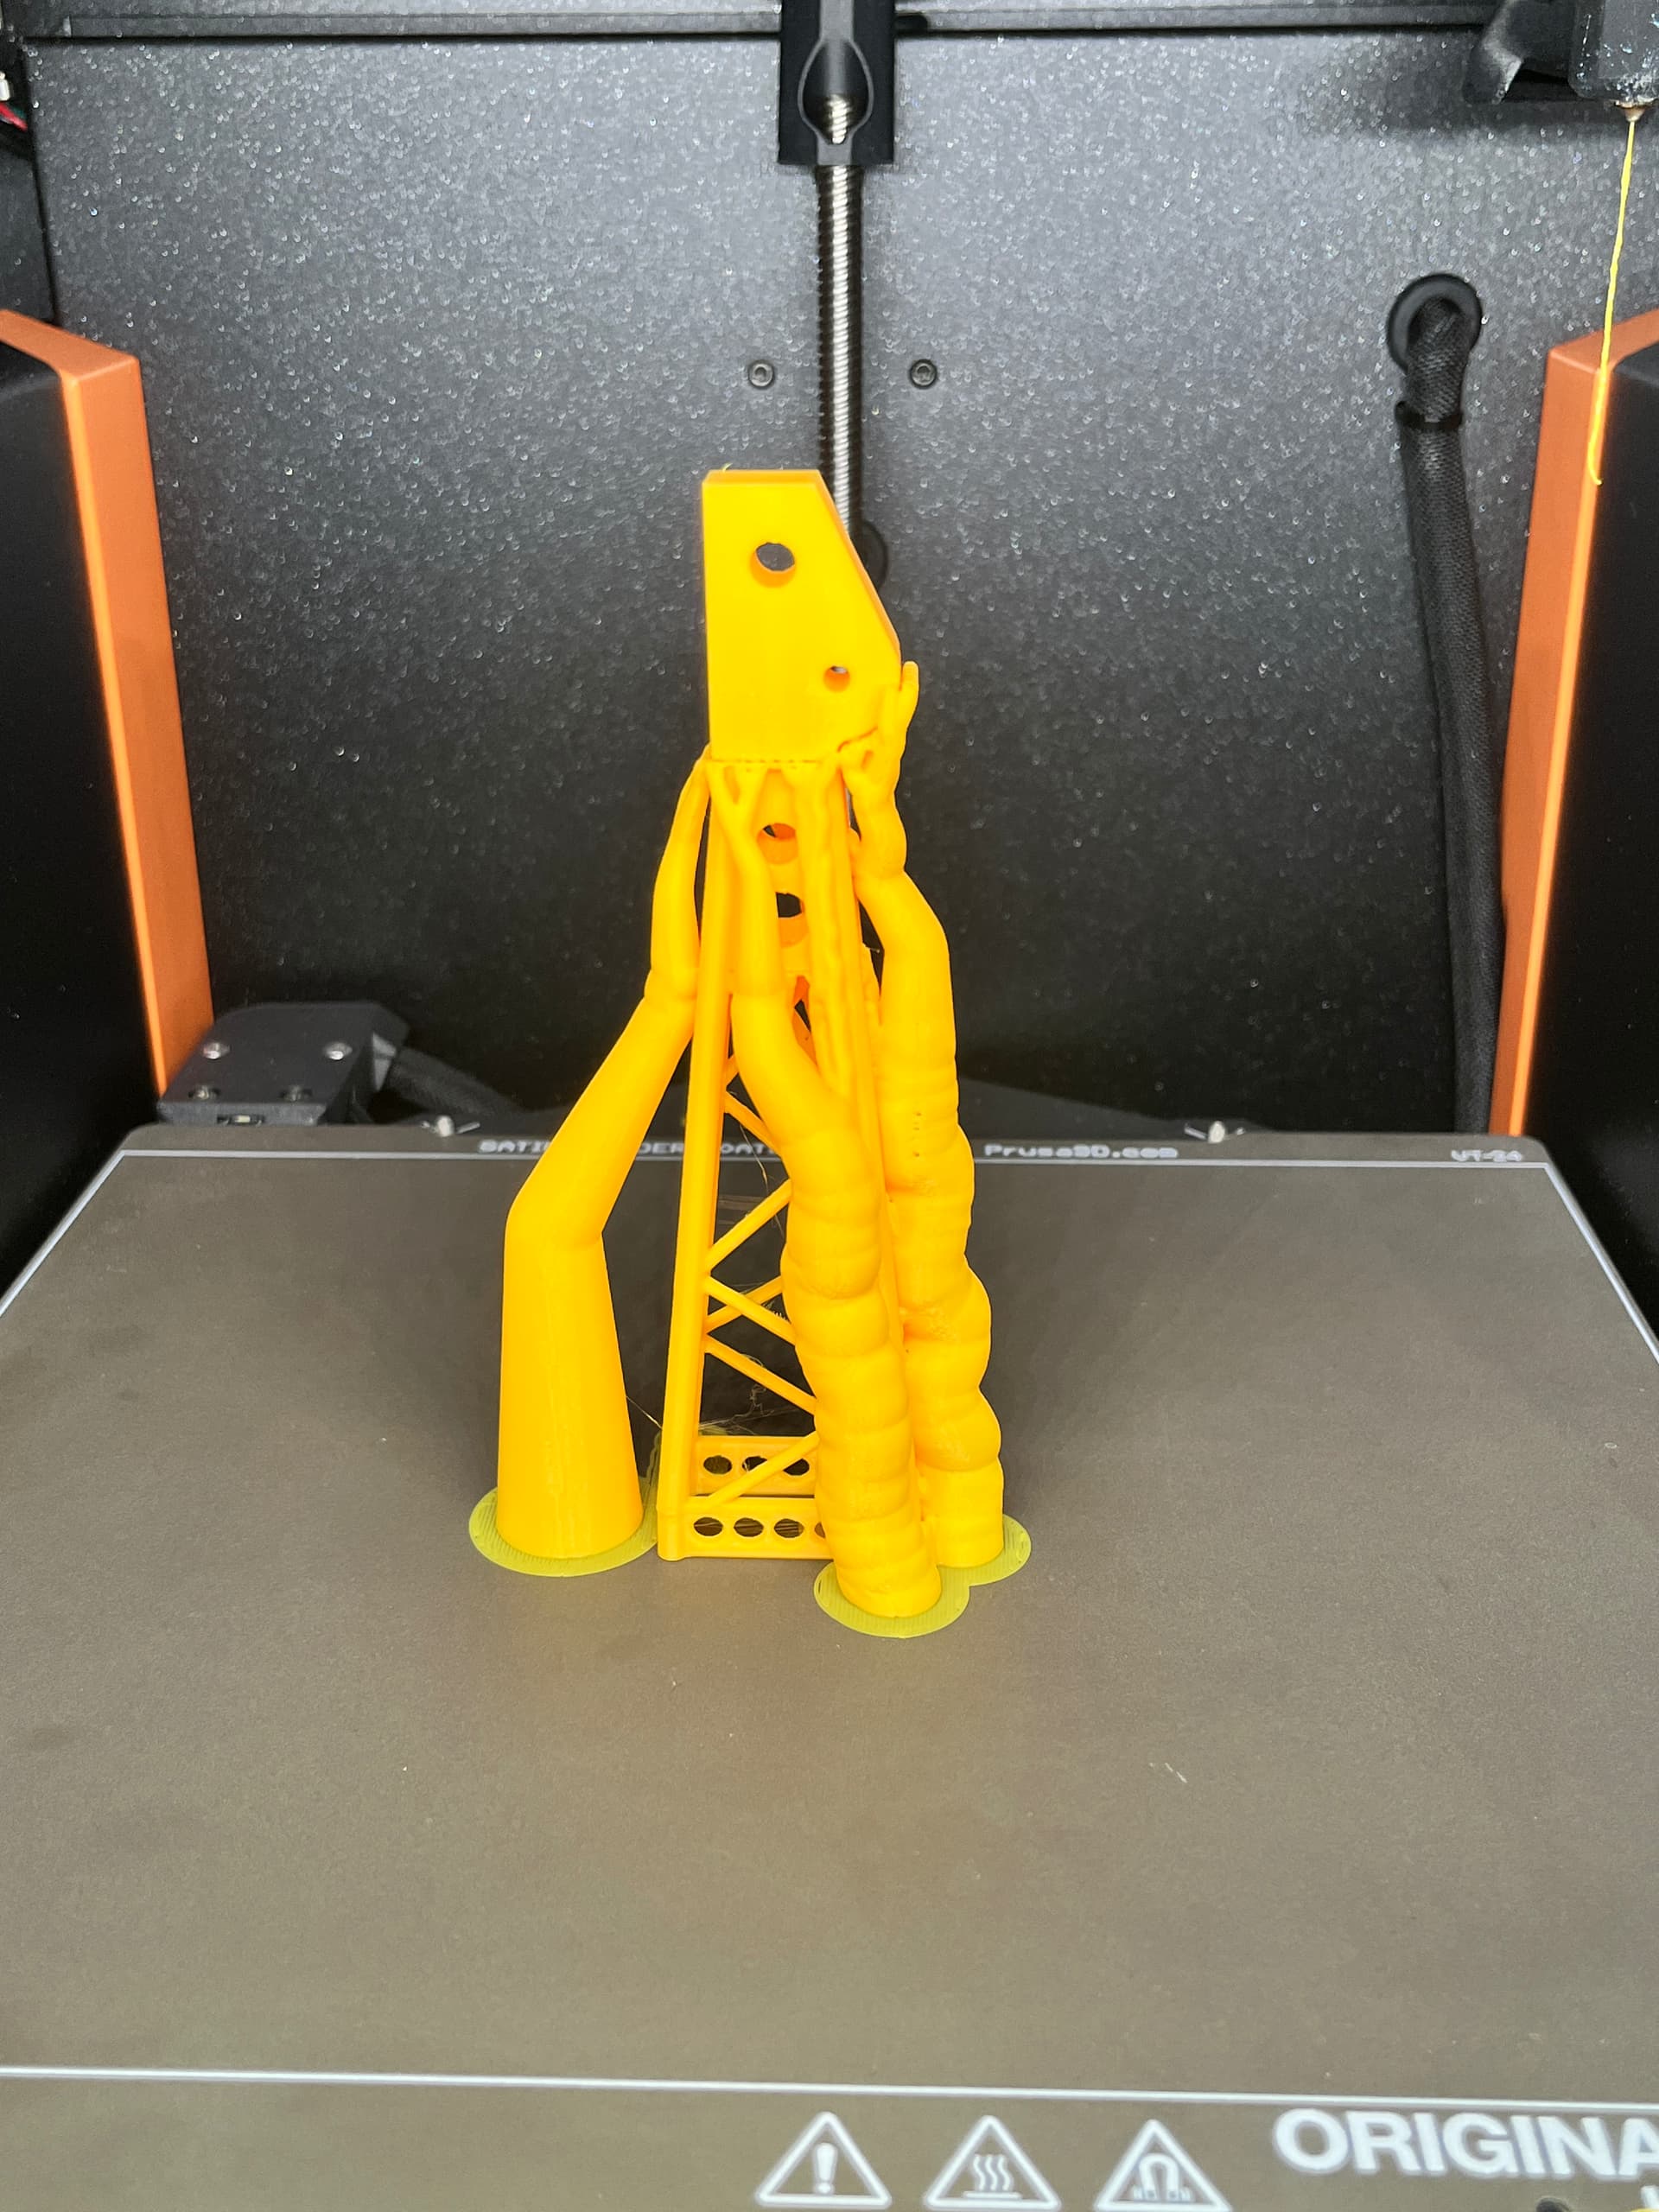
The top part of the gantry did not print well laying on its side. It was all but impossible to remove the support material in the end. You can see this bad print next to a good print. For the good print I stood it up on the print surface. This would also work well for the bottom end. The middle section may require too much support material to be worth it. I also added a picture of the top end on the printer with organic supports.
2 Likes
Dude, this is insane!! I 'll definitely be following, can’t wait to see it come together. Good luck!
Most of the equipment is glued down to the platform, all but the cab, stairs and railing. I am holding off gluing in the spools. The spools will be wrapped with black thread.
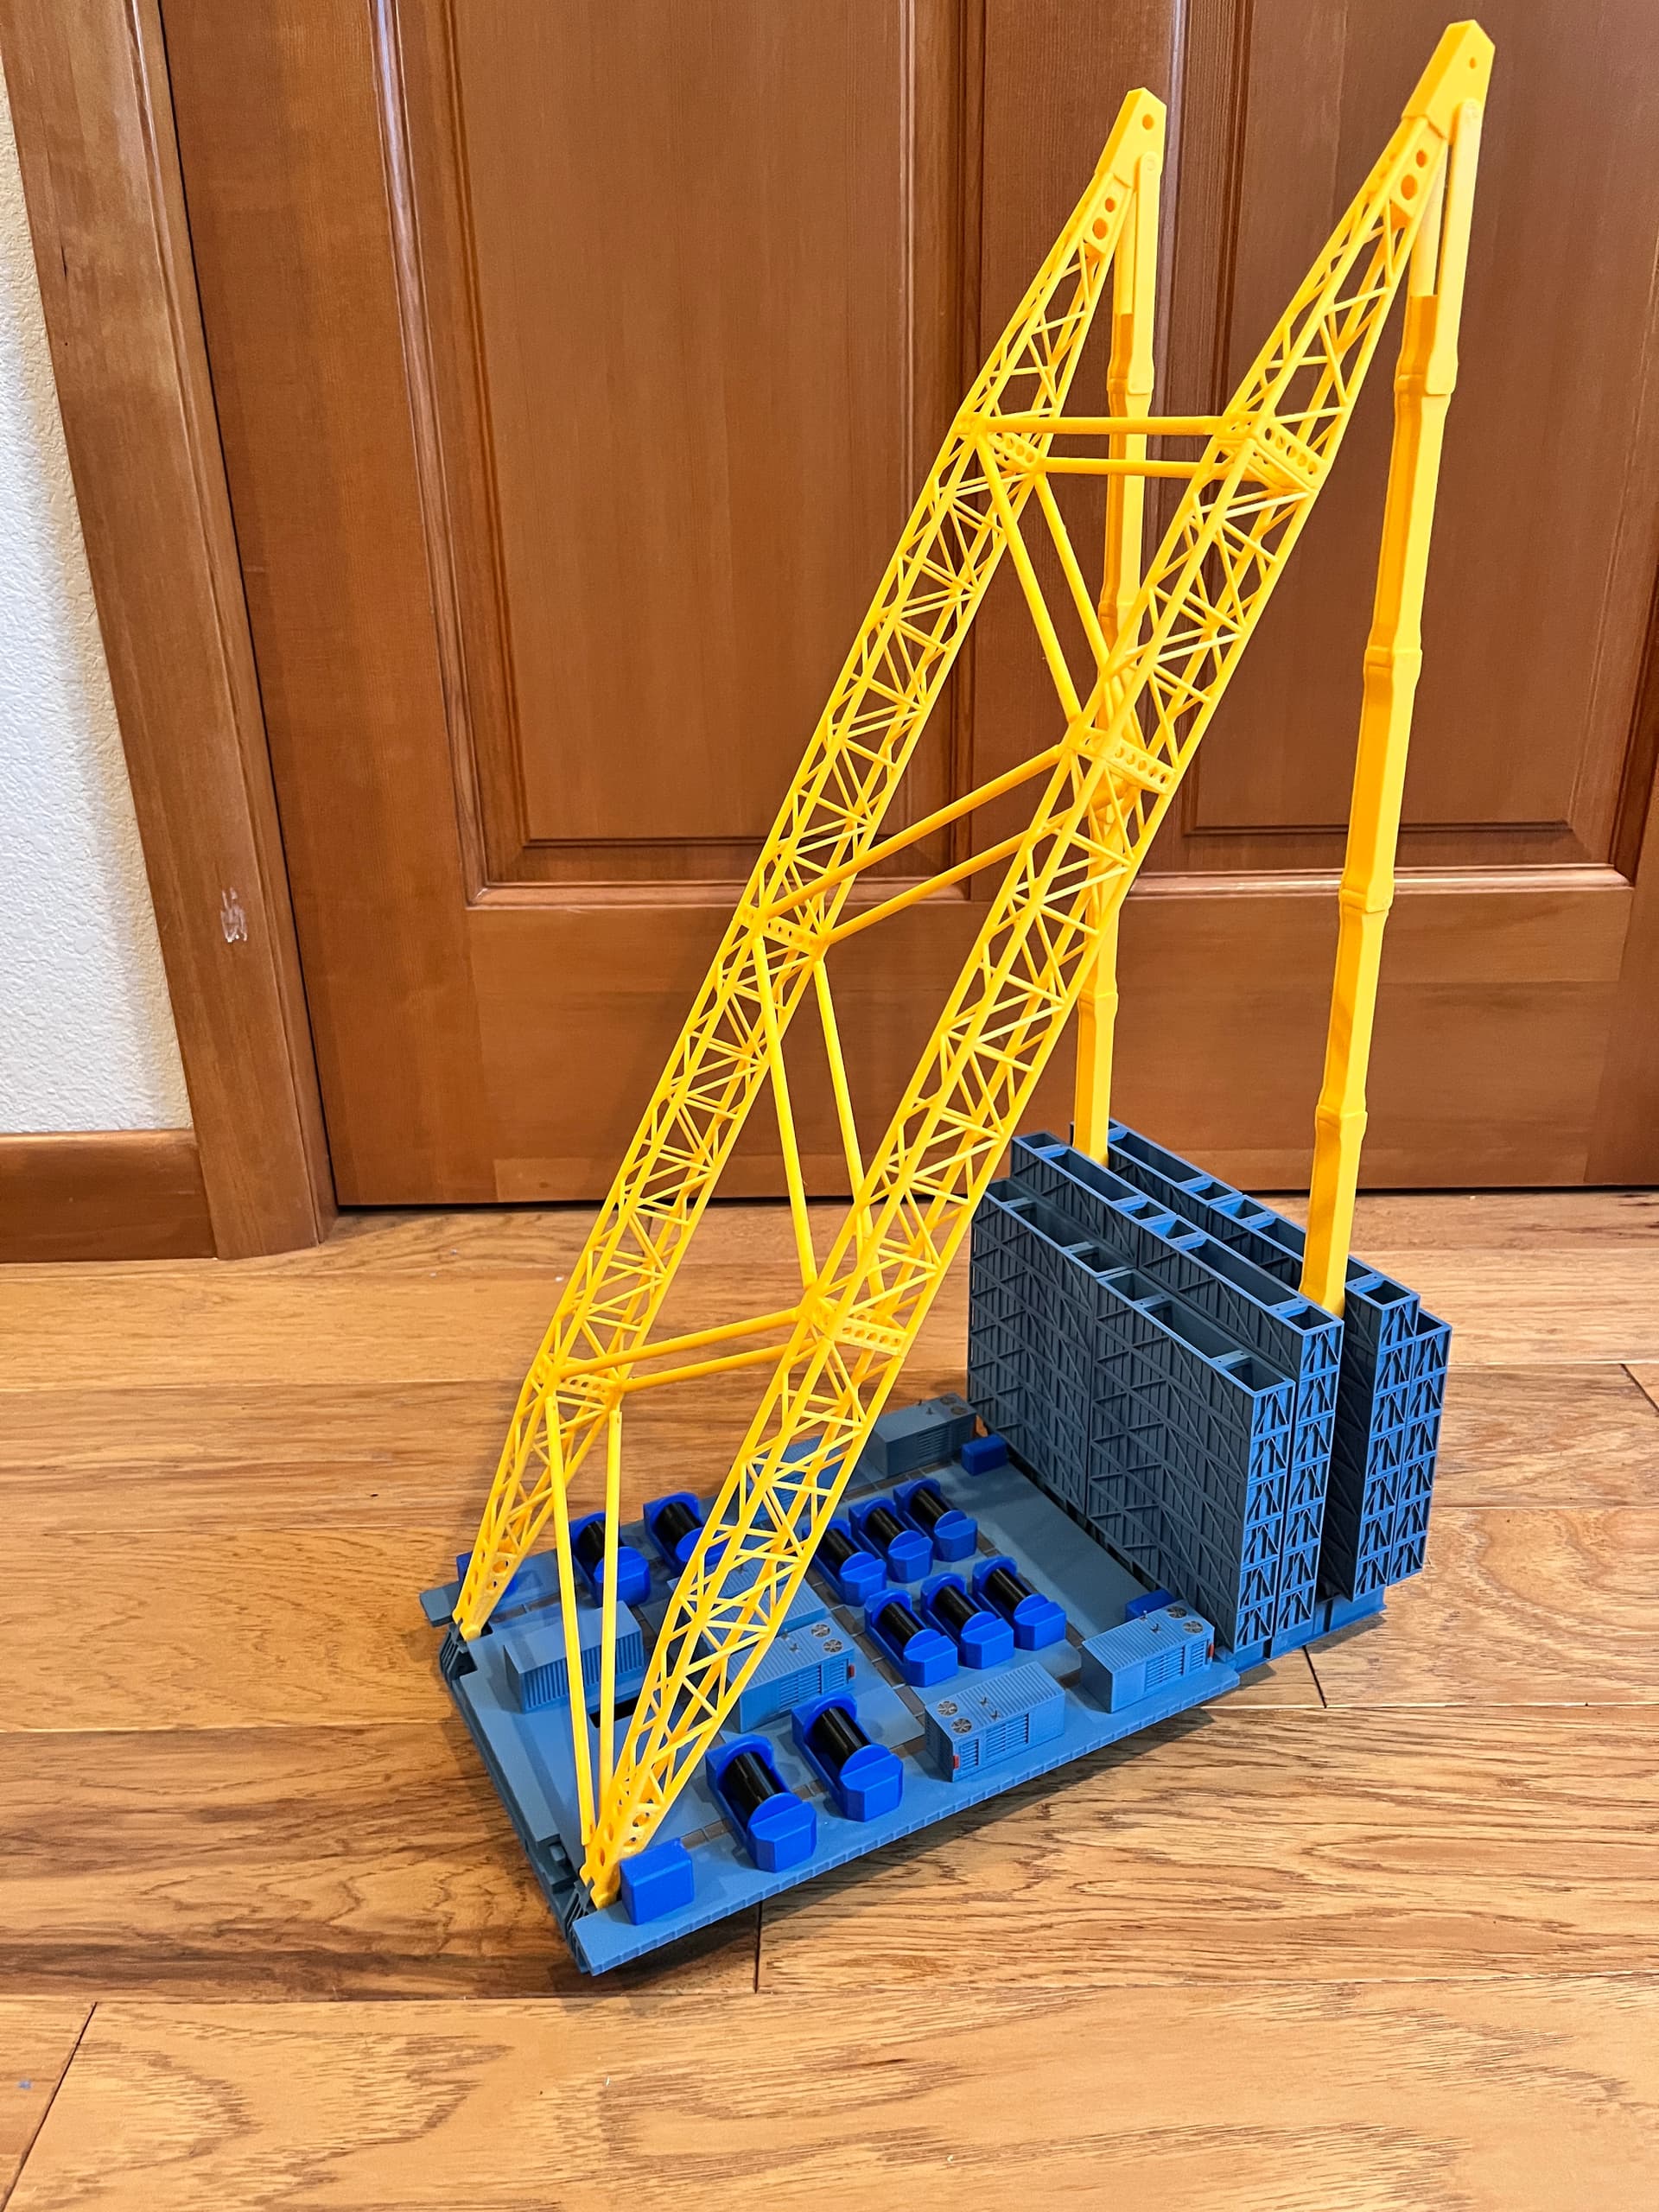
One side of the gantry is complete.
3 Likes
The gantry is complete except for the top cross bar and various pulleys. It is surprisingly strong. Went ahead and glued down the inner two container stacks. Holding off gluing down the platform until the railing goes on.

2 Likes
While one printer is printing yellow parts, the other printer is printing blue parts. The truck parts are almost complete and I have started assembling the 56 bogies. Here is an assembly picture.
3 Likes
Time to glue down the platform. Before that happens it is best to glue on the side and back rails. There are 6 standard rails on each side and 4 standard rails with one middle back rail for the back. Notice that there are bump outs that match the posts on the rails. I printed the rails with the 0.25mm nozzle although you can get good results with a 0.4mm nozzle.
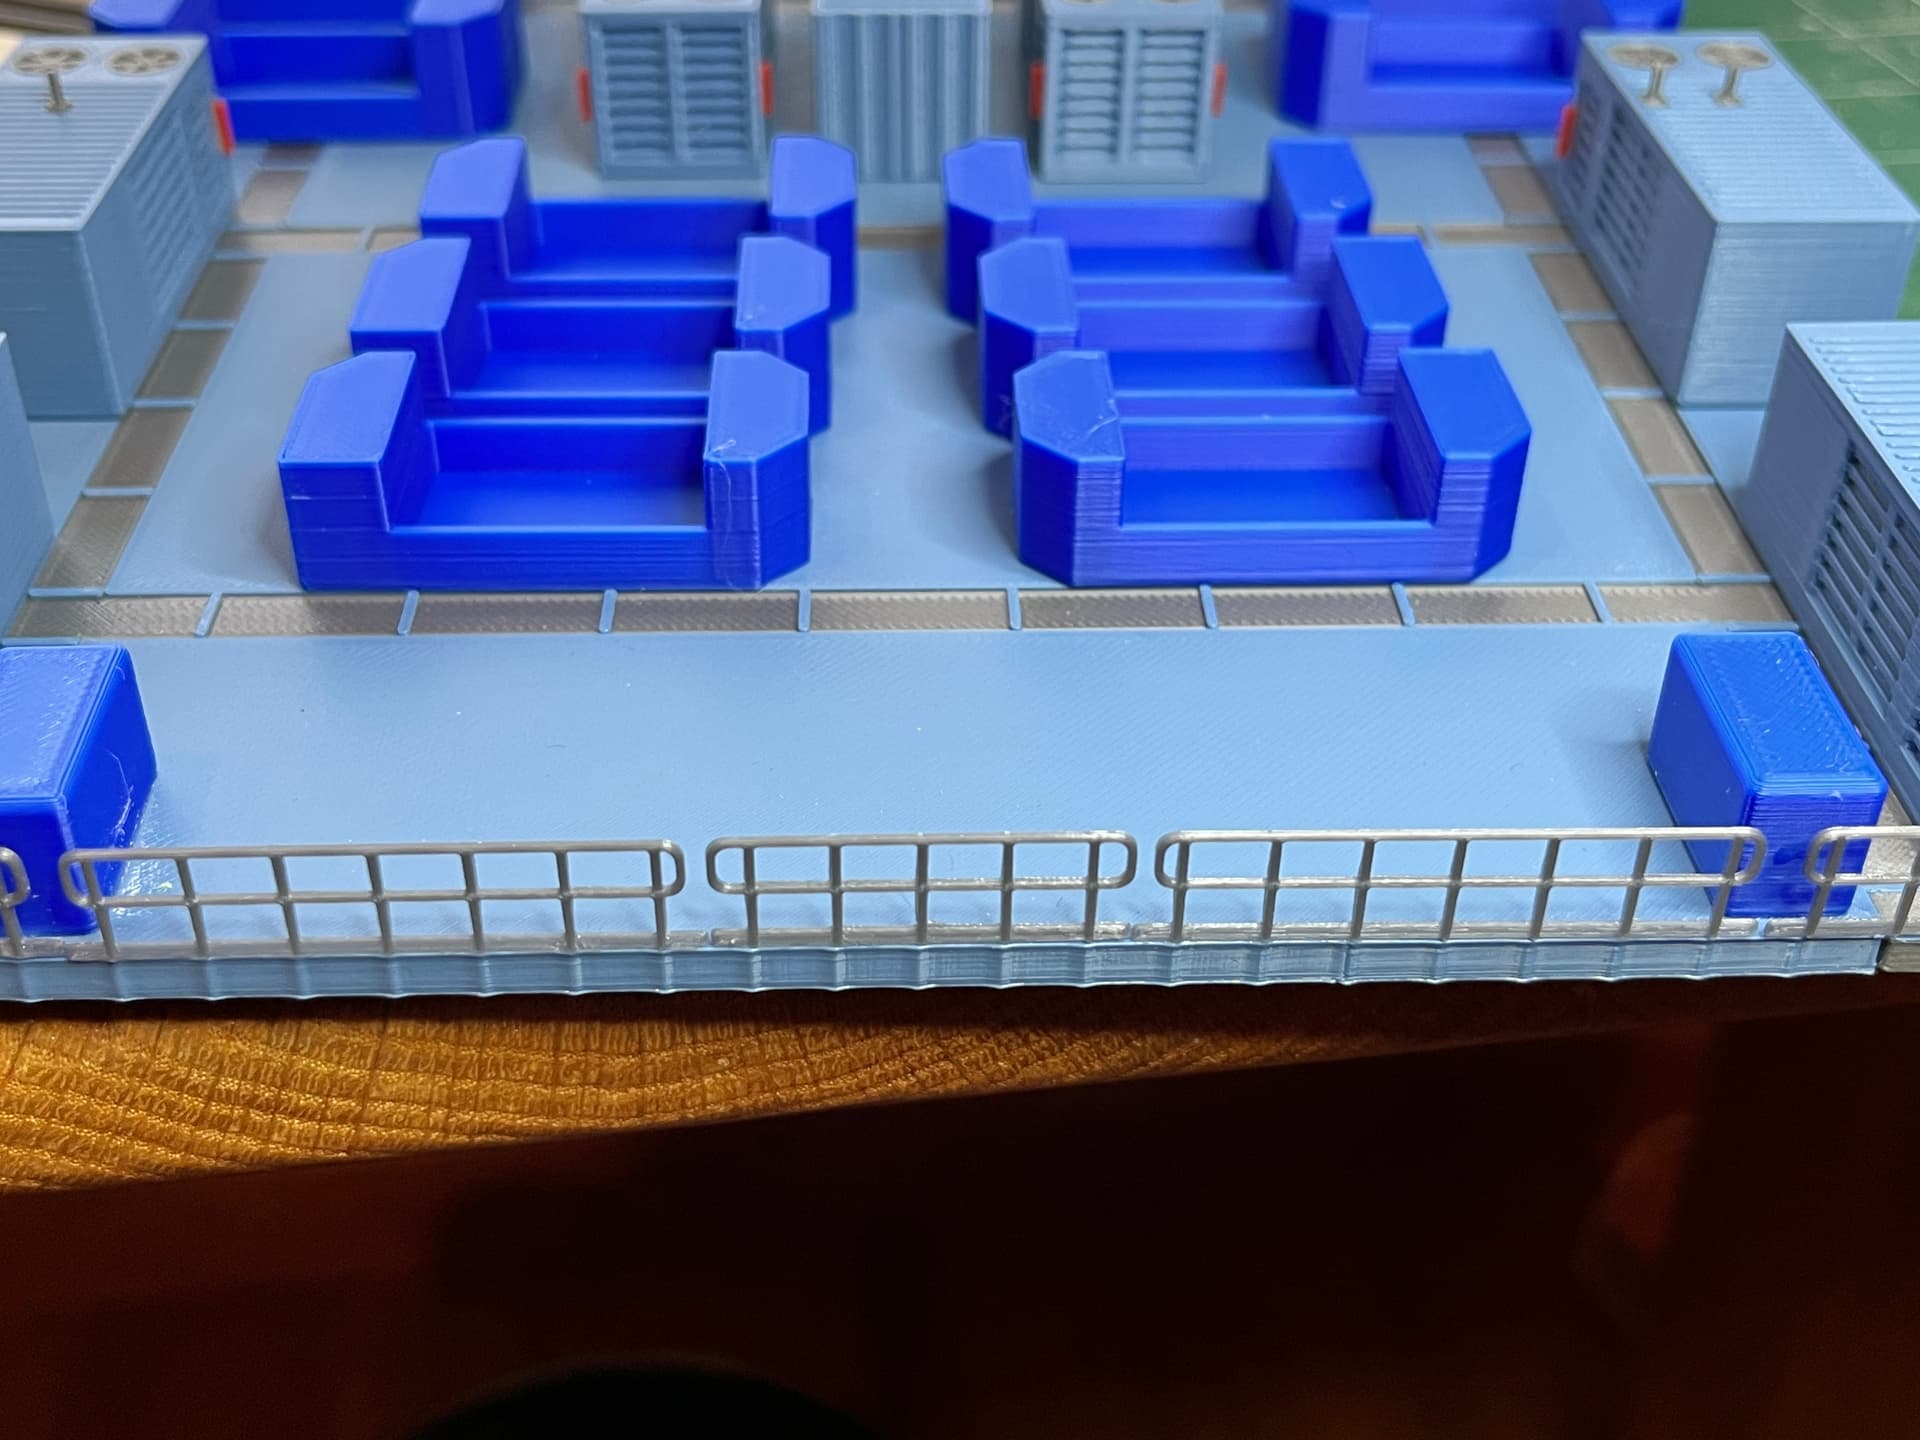
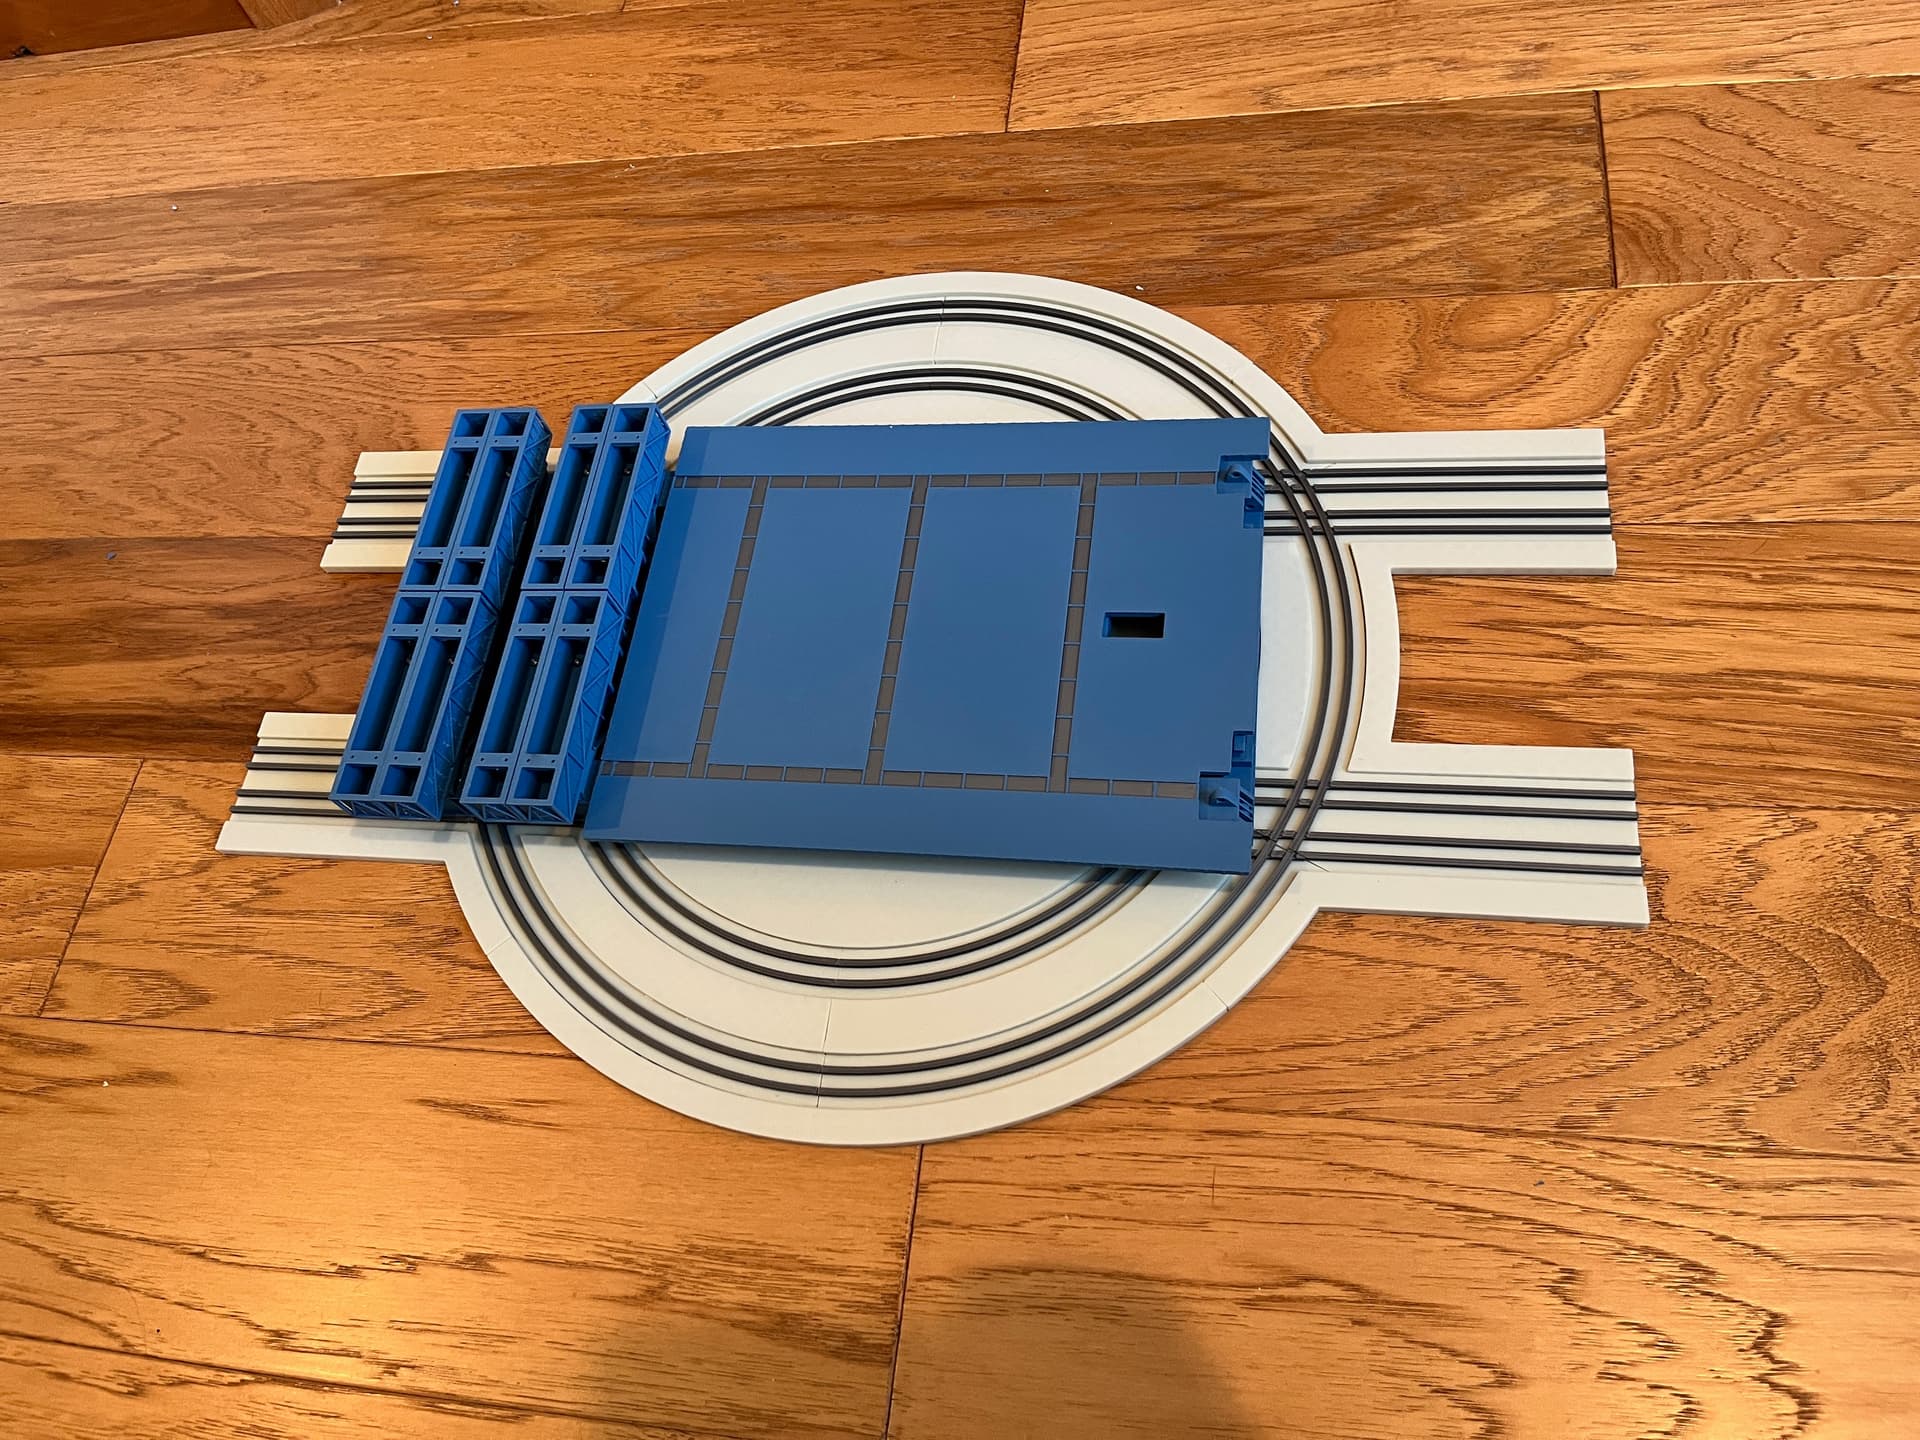
There are 10 outer supports for the platform. These are glued on before the platform. Their positions are not evenly distributed but are spaced based on the details of the side rails which is true to the actual crane.
In this close up picture you can see there are two holes per side that go through the platform. After printing the platform I realized I forgot those holes so mine are drilled out. I did go back and add these holes to the parts. There are a pair of cables that go from the top of gantry, down through the platform, around yellow wheels and join under the platform. These parts will not go on until the trucks are in place.
4 Likes
Wow what a project. Not sure how I missed this earlier - following along.
Looking great! That image of the full scale prototype helps a lot in seeing where you are going.
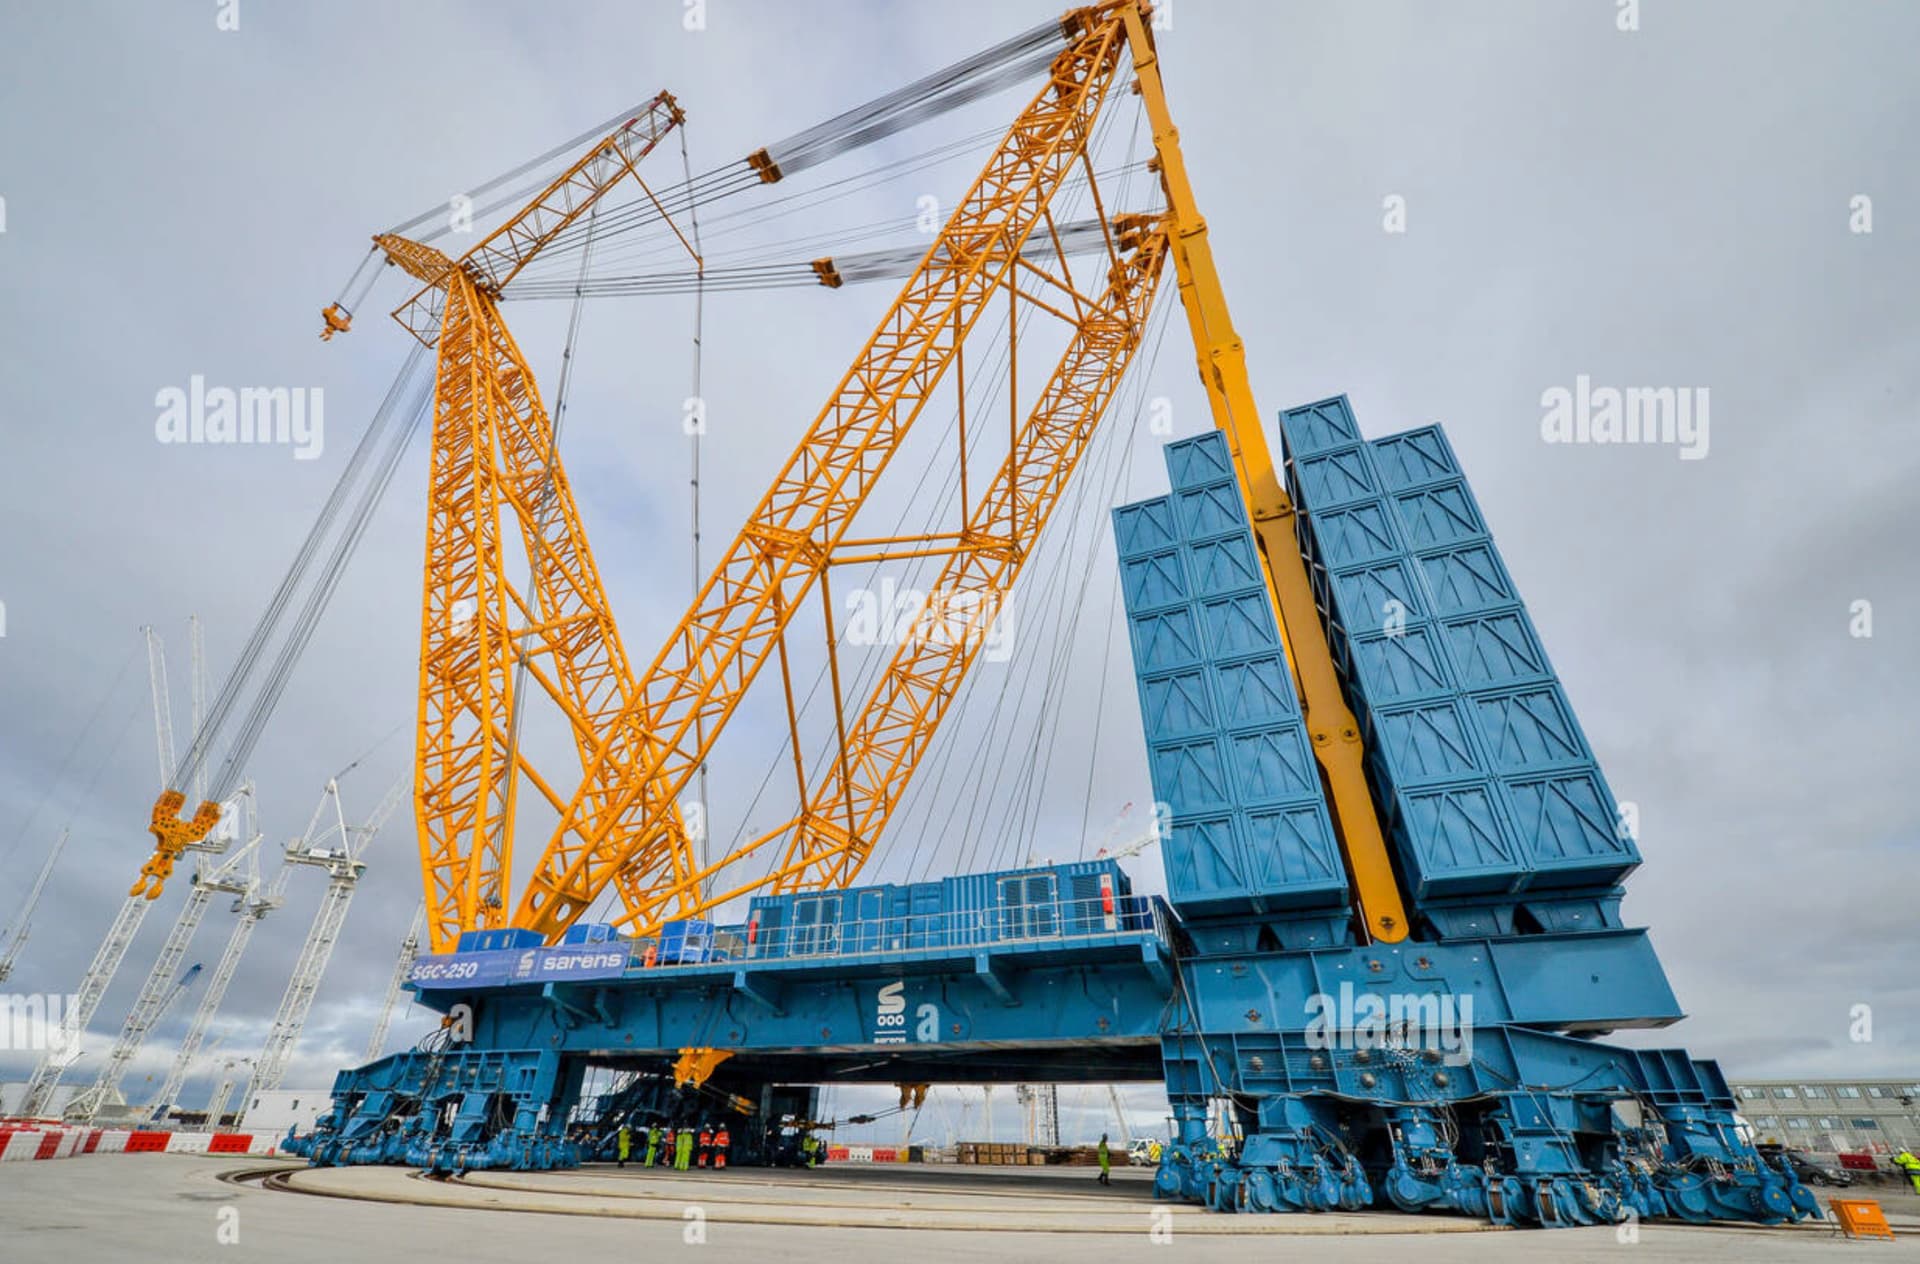
It’s hard to grasp how huge this beast really is without people as a frame of reference. I look for the close up pictures to get some of the fine detail. This is one of my favorite pictures, by Ben Birchall/PA Images via Getty Images, published in the Business Insider. This is the front corner of the platform where the gantry and main boom connect. You can really get a sense of what it takes to lift 5,000 tons.
1 Like
5k tons, thats 10,000,000 lbs…
If you assemble your own 3D printers from a kit, that’s about 1,980,000,000 gummy bears which is a lot of sugary satisfaction.