I guess you can put me down for a `77 GMC wrecker.
Tony: do you have a badge yet? If not, I have a great pic that I can convert.
I guess you can put me down for a `77 GMC wrecker.
Tony: do you have a badge yet? If not, I have a great pic that I can convert.
Thats looking really goog talentless, and I agree with you on those products, I’ve even used the metallics on suits of armor when building figure models.
Welcome aboard Seabe and Greg, I’ve updated the build roster for you. I have the Audi in my stash, so I’m very interested to see it.
What’s the photo of Greg, I don’t have a badge yet, and wouldn’t mind seeing it.
Cheers
Tony
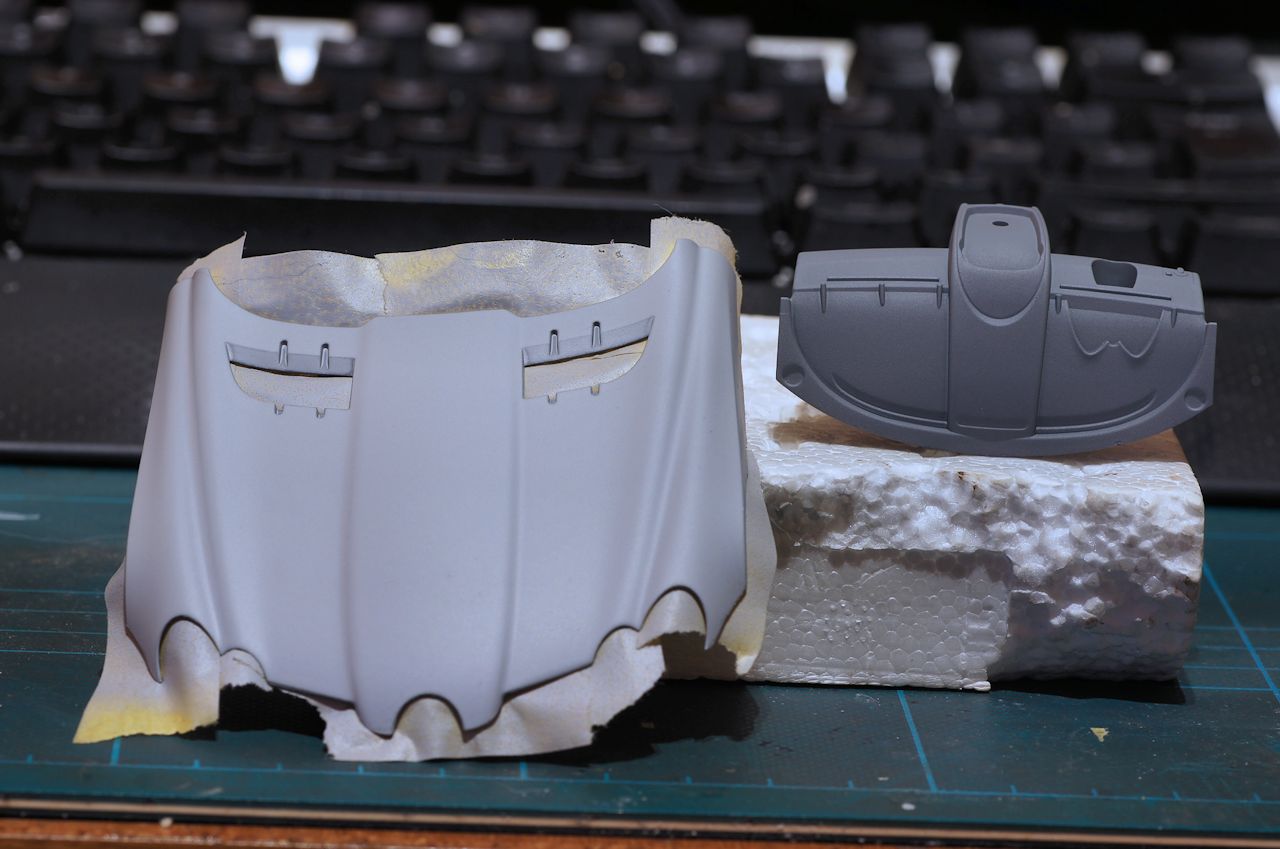
priming done on the rest.
heres a comparison between on the bonnet - Mr surfacer 1200 and the console halfords plastic primer.
the 1200 is as you would expect very smooth. the halfords is darker and slightly “dusty”. with a bit of a polish though its as good as the 1200.
Mmmm what a lovely finish…if it wasnt for the DAMN HAIR!!! out with the micromesh [bnghead]
hey tony
firetruck is probably a safe bet. i won’t get my UNIMOG firetruck until the end of the month since it was a squadron group buy from my 2 hour away club. beem looking at iltaleri ladder truckinstructions and just picked up the revell ladder truck to go with the pumper. also heard from revell they are going to reissue the flughaven 8x8 fire truck.
1/35 UNIMOG UN should be finished this weekend.
It’s a traffic jam in Los Angeles at sunset…my Household-6 loves it!
talentless,
That’s some awesome work. I’ve never tried the Mr. Hobby stuff but love the results so I may pick some up and give it a try. It’s been to cold to get out in the shop but hoping it warms up so I can get some work done on the Chevelle.
L8TR,
Eric
Thanks for having me, Tony! Only did start of engine build.
Initial observation was that thusfar it goes together nicely enough, but it’s not Tamiya. Fit is not always… not sure of the term, but… “well defined” is the best I can come up with. Long explanation - it fits together, but it is not 100% absolute in position, there’s a bit of play at times (can move this way or that). So it may be that some things may be slightly miss-aligned in the end.
Found some plastic parts quite hard and brittle even. Some parts already loose in the bags when I opened it. Some thinnish parts (think it was step 1) actually broke just trying to move it around to get the cutter in. There were some cleanup required, but nothing excessive. Looking at some upcoming sections, some painting instructions looked a little vague to me. But maybe it’s because I was just staring at the instructions instead of having the parts at hand, will see.
That all said, I’m enjoying myself with this one thusfar. I am not going to town on it and simply just piecing it together. The thumb is starting to feel a lot better after the weekend and I may even start fiddling with the Tameo shortly again as well. But very good (for me, anyways) to have another project to keep you going. There are times when I look at any multimedia build and simply don’t have time for the next step for a day or two. But can quickly glue a sub-assembly on a plastic kit or do some painting or the likes.
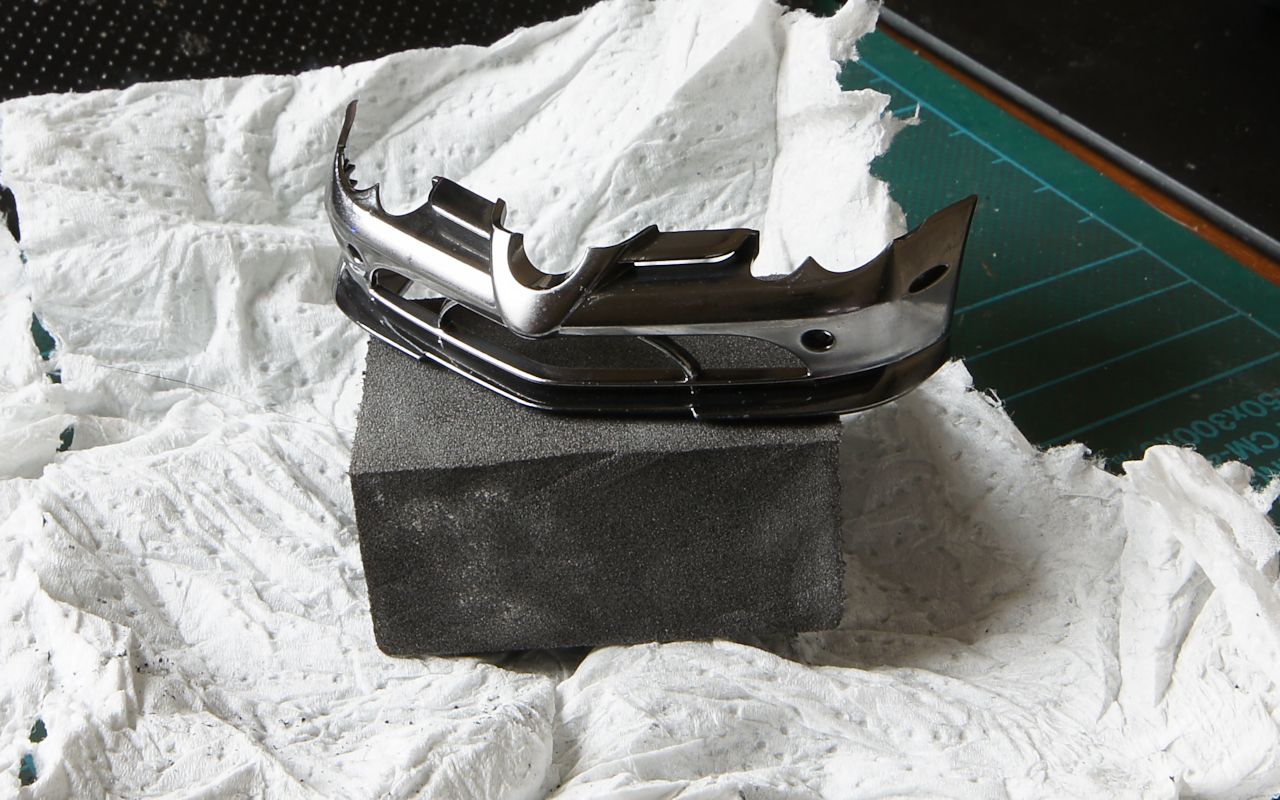
before committing to using thisC1 metaliser stuff on the whole car i thought i had better try it out, so i gloss coated the front fender and this it the result. doesnt look too bad. i dont think i will polish the gloss coat right up as i think it will look a bit odd on the whole car. instead i will stop at the 12000 micromesh and go for a “brushed” look rather than a “chrome” look. i saw a vid of a polished up chrome look real SLR and it looked a bit s*1t TBH
That’s looking very nice talentless. I sprayed another model last night, then dropped it ! I think your 722 will look splendid, I am looking forward to seeing the whole body done.
Go for it with the badge, please, Greg, sounds good.
The firetruck it is then Wayne, looking forward to some WIP photos.
Glad you’re enjoying the R10 Seabe. I know what you mean about the multi media thing, it takes real time and energy. Just look at my never to be finished Ferrari F186 for that. Post us some pics when you can.
Cheers
Tony
Seabe, I have an R10 also and look forward to your build. Tony, I may hate myself for this choice also but put me down for a 1931 Cadillac Town Brougham. Its the old Johan kit I have had for years and think its time to build it. I have always liked that car just not sure how this will go together. I guess the worst thing that could happen is everyone can watch an epic failure happen! Hope you beat the head cold.
george
started on the “pit”. look close at the dial decals. they ALL broke. these are some of the worst decals i have come across, they crack at the slightest provocation. next time i will coat them in decal fix before using. be warned!
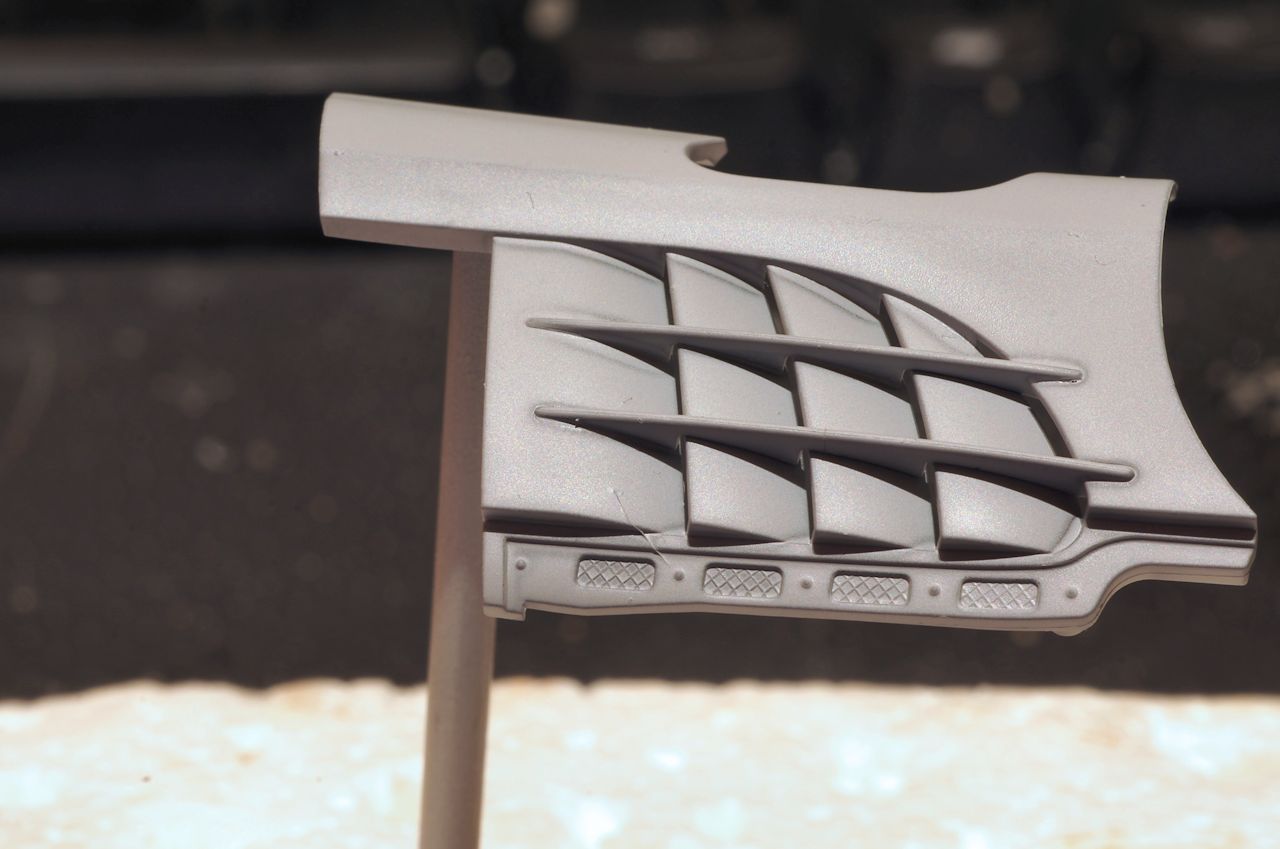
I ahave loked at the hobby design pe set and a lot of it seems a waste of time. a lot of parts are superflous or worse than the kit parts. i reckon at least 1/3 are redundant. love the aircon grills though

Hmmm… my build went a bit downhill just now.
Was fitting drive shafts. Could not for the life of me figure out how on earth it’s supposed to remain in place, esp with instructions not to glue. And it looked short. Then I looked back at the sheet which displays the parts. Mumbled, looked in the bag… grumbled. One drive shaft breaking off was fine. But BOTH having been snapped in the middle went a bit past my sense of humor. To boot, only one of the shafts other half can be found. Did not even warrant trying to figure out L or R! So, with it being hidden from sight, my Audi will be without drive(-shafts)!
Looking around at the rest of snapped off (prior to me receiving the kit) pieces, I saw another disturbing sight. One of the wishbones in half. Full L and R wishbone. Fortunately I looked and saw it’s the top wishbone. The supporting (bottom) one is in tact. So will be able to wangle something there, even if it means gluing the support structures in place.
So, no drive shafts at the back, not fully wishboned in the front. Should I make another car than the no 8 and have a crash scene rather?! ![]() (Sorry, humour…)
(Sorry, humour…)
So to the guys who have this kit - I hope yours were treated better than mine! And remove carefully from sprues, otherwise you may end up breaking things - if mine broke whilst removing themselves.
Not complaining about the kit itself. I think mine was just handled very badly en route to my grubby paws. Onwards we go…
Seabe - it really sucks when something turns up damaged, doesnt it. i have a 1/48 flanker with really bent wings, not actually broken but still disappointing,
this is one part of the pe set that appears to be well worth using.

Yeah, that’s an awesome improvement, Talentless! You can hardly compare the two parts…
Looks great Talentless.
Bad luck on the driveshafts Seabe. That is annoying.
Cheers
Tony
Seabe: Not sure where you live, but if you’re in the USofA (or Canada), try contacting Revell (www.revell.com/…/index.html) for replacement parts…just click on “Online Parts Request” button
i seem to have misplaced or lost a lot of pics, most of the painting, so no great loss really ![]()
here is the latest. front suspension assembled

r
Wow, those brake discs really are a standout. Look great from every angle. How did you paint the springs Talentless ?
Cheers
Tony
just with an artist fibre tip pen , easier to control than a paint brush.
Thanks Greg. From South Africa, so will just soldier on - think I’ll manage without those.
Not much progress, was away for the weekend. But I did start the body colour on one section. Thought I’d use silver leaf to give a lighter and brighter colour… but then it turned out quite a matt colour. No worries, we just slap it with clear… it turned a semi-gloss (at best!) greyish colour. Hmmm… So I re-did it with gloss alu this morning and will see how that comes out.
To add it to the discussion, the Lotus cockpit was added. Saw afterwards the steering wheel is straight, but “turned”… I am trying my best not to give in and correct it! (Who will really see it anyways!) But it is taunting me.