This was just a simple little build but it was very fun none-the-less. I built this for a friend of a friend who is decorating her young son’s room in a “golden days of aviation” theme. I’ve already given her several planes, this one being the latest. Hopefully in another week or two, I’ll be able to give her the Laird-Turner Meteor that I’ve been working on as well.
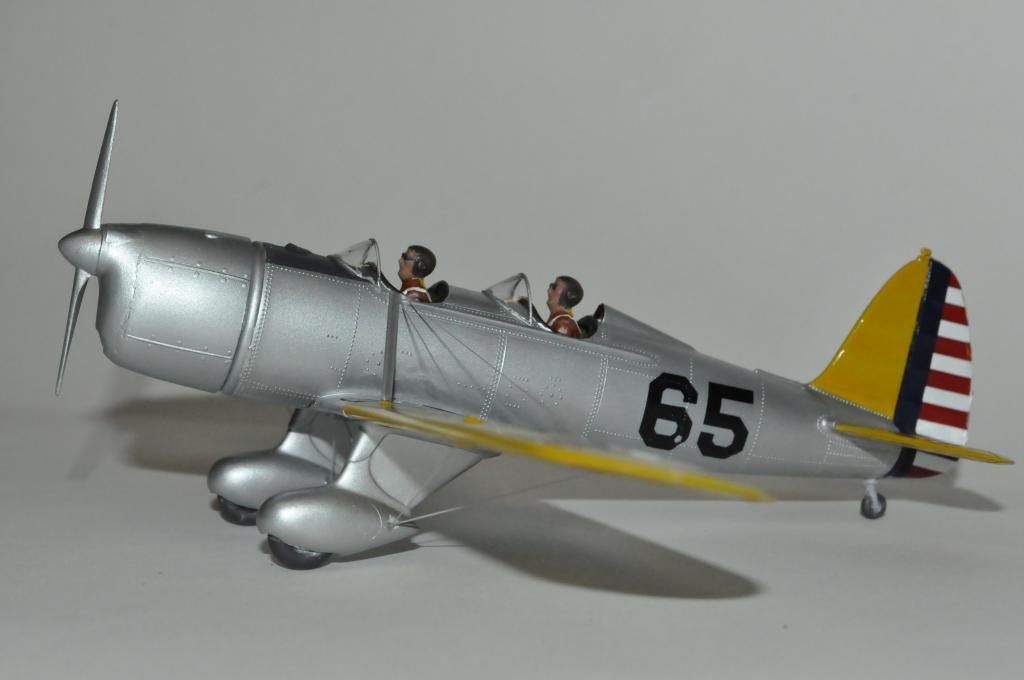
Anyway, here it is, the Testor’s (formerly Hawk?) Ryan PT-20. Nothing overly fancy. It went together quickly and then I applied a Tamiya primer coat. Man that stuff goes on silky smooth! It’s like buttah! I then painted the wings and tail with about four coats of Testor’s yellow from the little square bottles. After I masked those off, the fuselage was painted with Floquil Old Silver.
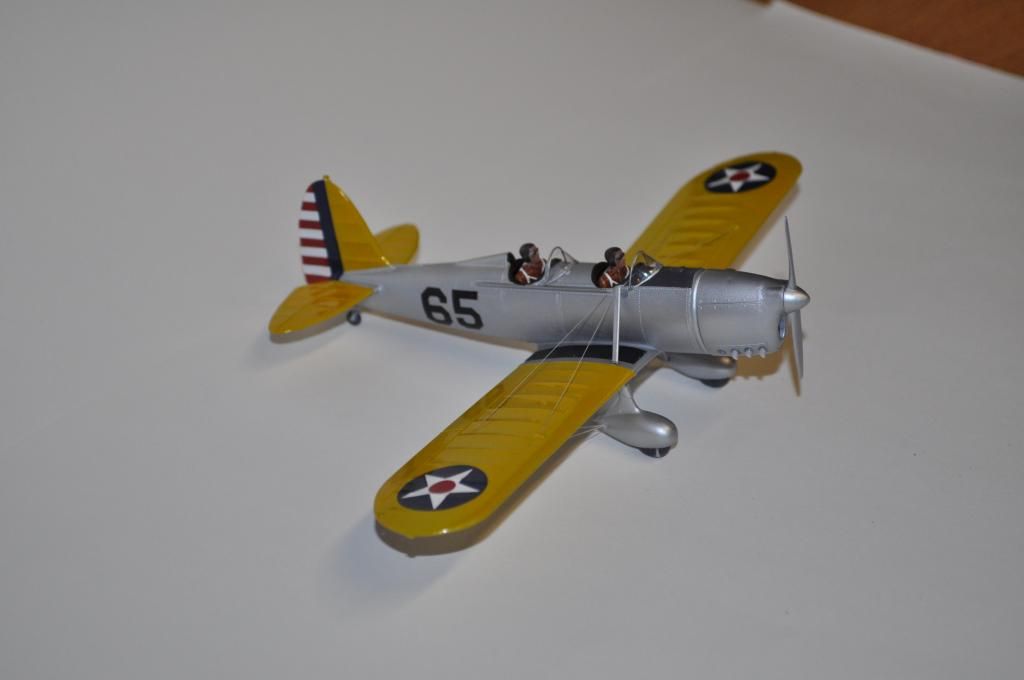
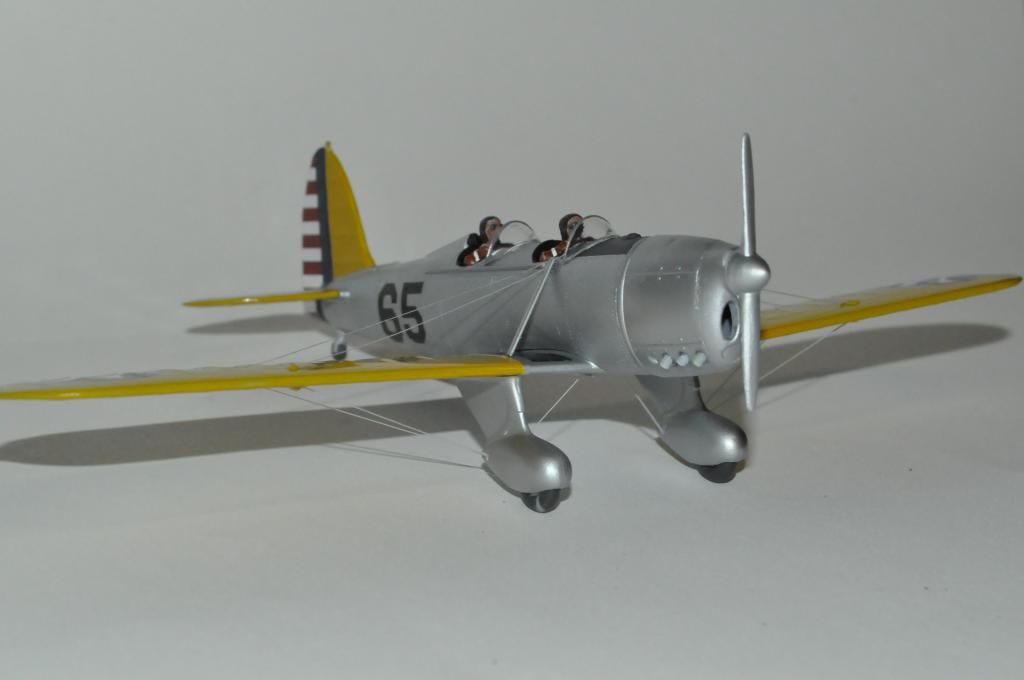
The wings made for a great handle since I didn’t want to handle the silver fuselage all that much. The Floquil Old Silver is a tough paint but I just didn’t want to press my luck with any fingerprints showing up. As a result, I gave the wings a protective hand-brushed coating of Future. I really like how they turned out. The whole works was finished off with stretched sprue rigging. I usually like to rig using super-thin wire but, since I was out, I used the stretched sprue. I couldn’t believe how the sagging sprue just snapped tight when I held the heated tip of a metal file under them! Wow!
I hope you all like the pics. It’s a fun little plane to work with especially when you want a break from some one of those 300+ part kits.
Eric
PS. I see now that I forgot to paint the tail wheel strut. Darn it! I’ll fix that tonight.
Eric, I started this same kit and “re-boxed” it since there is basically no interior detail. Seeing your built up so well , I might have to give mine another go.
Thanks guys! It was such a basic build that I wasn’t expecting any comments really. I was just posting the picture for kicks and grins and to show something simple for a change.
John, I really need to see what group builds are out there. I didn’t realize there was a trainer one going on at the moment. It took me about a month to finish this one. I like group builds and to see everyone’s results but sometimes I feel like it takes me too darned long to complete my own models. That’s why I don’t really participate in the group builds. What with the demands of the family, kids in school, me being back in school, etc…it means I never know when I’ll finish a kit.
As for dirtying up the stacks, I’d love to add a touch of weathering to the plane. Try as I might, I’m having a hard time finding any reference pictures of this plane in a weathered state. I think I just need to look harder.
Stik, I couldn’t agree more! I’ve got the venerable Monogram AT-6 about half way built. I’ve got the wings about half way foiled but I just don’t think I’m liking how it’s all turning out. I think I’m going to end up stripping the foil off and maybe going with some SnJ powder instead.
Theuns, want to hear something funny? This is like my third attempt at this kit. The first time I tried it, I tried foiling the fuselage but, like the AT-6 above, I just didn’t like it. (I’m sensing a pattern here.) I botched it up pretty badly and had the devil of a time trying to get the gummy residue off. That was before I discovered the joys of “Goo Gone”. The second time I tried it, I think I botched the paint job. What you see in the pictures above is my third attempt. For it being such a simple little kit, it sure got the best of me a few times.
As for the interior, you’re right. There is none. However, if you put the pilots in, they completely block off whatever might be on the inside. So that takes care of that problem. On a side note, the pilot in the rear cockpit in the pictures above has no feet. I had to amputate them right at the ankles in order to allow the front pilot to fit.
Eric, that’s a neat little plane! I have that Testor’s kit in my un-built stash, it comes with the option of floats too right? You did a fine job on her! Say, are those pilots twins? [:D]
Very nice! I love those old golden age trainers. I was a hanger brat in those days, and frequently saw such planes at the local airports that dad used to drag me to.
Eric you wrote: Stik, I couldn’t agree more! I’ve got the venerable Monogram AT-6 about half way built. I’ve got the wings about half way foiled but I just don’t think I’m liking how it’s all turning out. I think I’m going to end up stripping the foil off and maybe going with some SnJ powder instead. I did a Monogram P-51D in '92 or '93 and used regular household aluminum foil to cover it. I followed the method in a FSM article in the late 80’s. IIRC you use spray adhesive thinned down with mineral spirits to stick it on with. I didn’t go panel by panel but burnished different ones more than others. Decals, paint and the aluminum itself are still holding after 20 some years. I can find that article i you are interested.
Theuns, maybe I will get in on that group build. :o) As for the decals on the Ryan, they were perfect. No problems whatsoever. There really aren’t any overly complex curves on the plane so they behaved just fine. One thing I did notice was in the “6” on the port side “65”. There seems to be a spot where the black came off. I don’t think it was like that on the sheet so it must have sluffed off somehow. It’s nothing a little bit of black paint won’t fix. Other than that, a coat of Microsol made the fuselage decals snuggle down nicely over the rivets.
Gary, yep…the kit does come with the floats as well. I thought those looked pretty snazzy and just something different. I think I might pick another kit up and do it with the floats next time. I’ve never done a water diorama before but I kind of experimented with the “water” base they included with the kit. For a guy like me with no experience modeling “water”, the included base is a great place for me to start.
Don, I go through my various phases in model building. The “Golden Age” is one of my favorites. I love reading the old stories of pilots who flew all over creation as they buzzed farm fields and under bridges. Nowadays if that were to happen, there’s be federal investigations, paperwork, fines, legal repercussions, etc. I never lived in the “olden days” but I sure wish I could have lived back then (at least for aviation-related purposes).
Chris, on the AT-6 I’m working on, I used some sort of special foil glue that I picked up from a local craft store (Michaels). The stuff works great! It’s like a thin white glue that I brush on. It levels off perfectly and dries clear in a matter of minutes. I then use el cheapo no-name brand foil since it’s so thin compared to the good quality brand name stuff. I think my big problem is that I just can’t make it look nice around the more complex curvatures of the given airframe.
I remember seeing a gorgeous P-38 covered completely in household foil. There’s no way I could do a nice job around the radiator bulges. I can do wings okay and I’m fine with handling the easier sides of the fuselage but, on something like a P-51, I just wouldn’t be able to make it look nice down by the radiator scoop. That would be enough to thwart me from every trying to foil something like a Mustang. I’ll keep practicing though. Maybe some day I’ll have one that turns out nice.
Eric, I only meant giving the pipes themselves a bit of a burnt look. Only 317 Menasco powered Ryan Trainers were built, and I haven’t seen anything more than minor oil leaks on any of the pictures from the time.
Thank you again. Tonight I’m going to hollow out the exhuast pipes just a little bit to give them some depth. I think I’m also going to give the propeller a wooden look to it as well. I think then I will be 99.9999% satisfied with it.
I have started to complete mine after seeing yours. I did however sand down the rivet detail and re-scribe the pannels…mige have to do the fuse in alclad pollished alluminium.
Theuns, if I were to do it all over again (and I just might), I would do the same thing you’re doing. I’ve never been one to scribe anything but this plane is so small and simple that it might be worth the experiment.
I’ve also seen images of this plane all shined up. That might be the perfect reason to use polished aluminum.
I think the other thing I might do differently is to use a base coat of white on the wings and tail. I used Tamiya’s primer which is more of a grey. I think if I were to use white next time, that would really make the yellow be a little brighter than how mine turned out.
Simple or not, it turned out to be a nice plane. It’s going towards a wotthy cause as well. Who knows, you might just spark the kids imagination! Thanks for the look see.