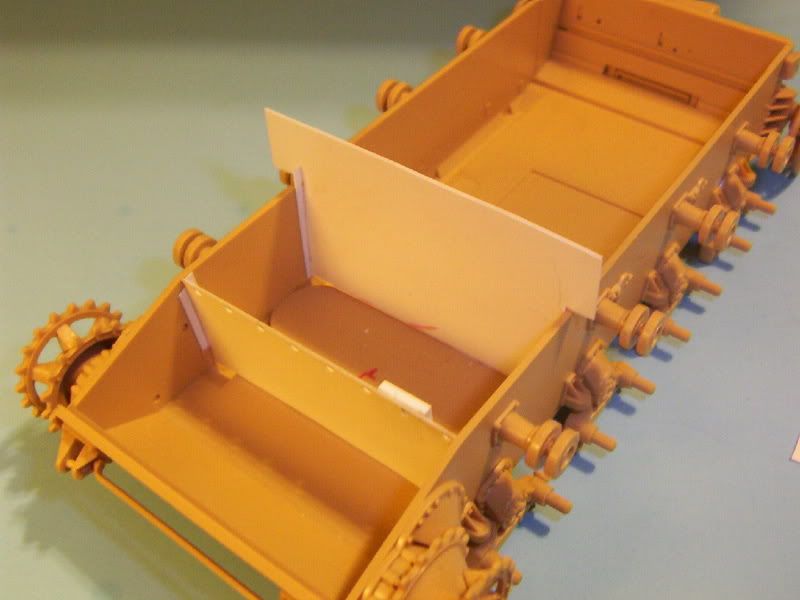
Got this going in the GB forum, part of a diorama for the 1000 Roadwheels GB…
The driver/radio ops compartment get a bit of a fice-lift… The hatches will be open so I decided to add some details, since there’s nothing in it. I didn’t bother with references either, they slow me down, so I just approached it logically… THere’s no turret basket or any thing between the driver’s compartment and the turret, so I added some sheet plastic from a tough-to-obtain source, the “Garage Sale” sign for the walls between the back and the final drive…
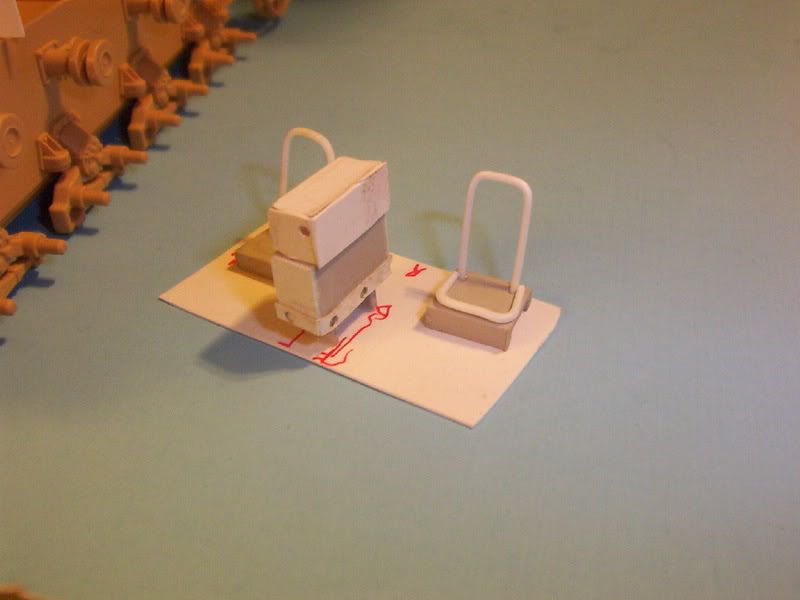
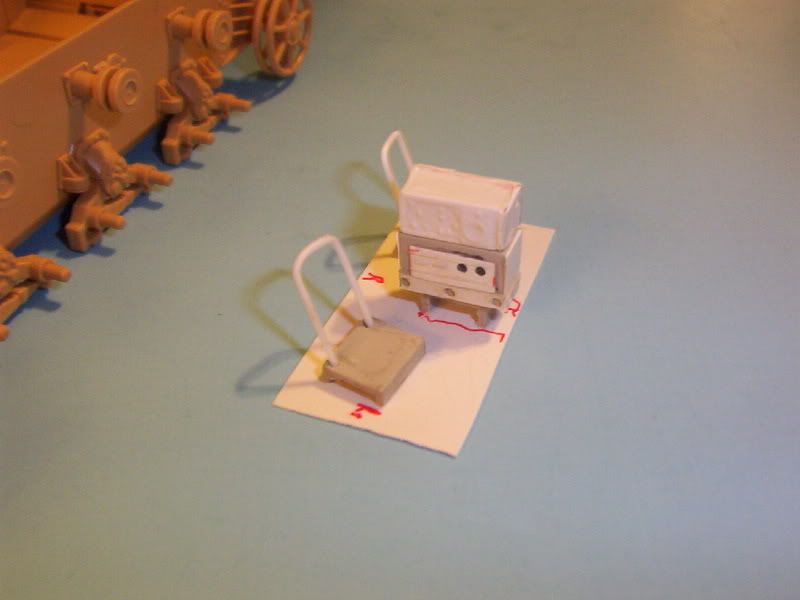
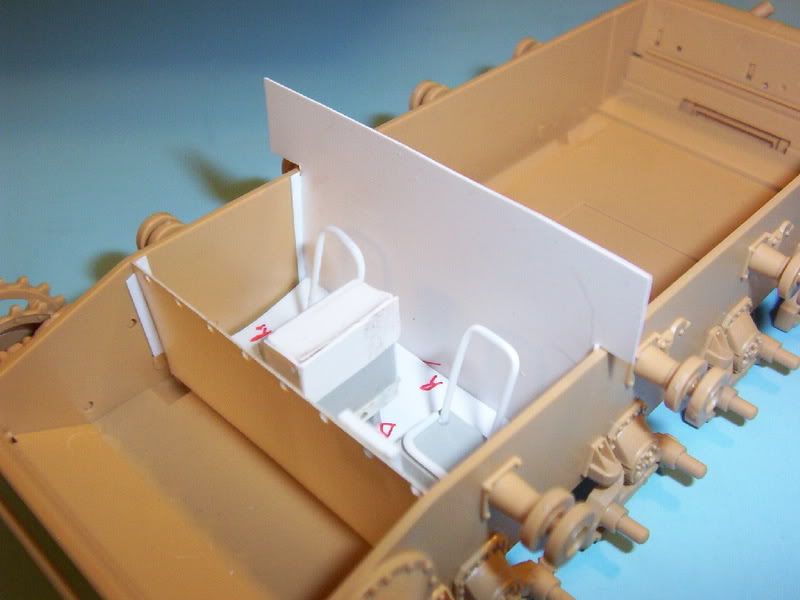
I then built a floor with the seat and radios and test-fitted the assembly…
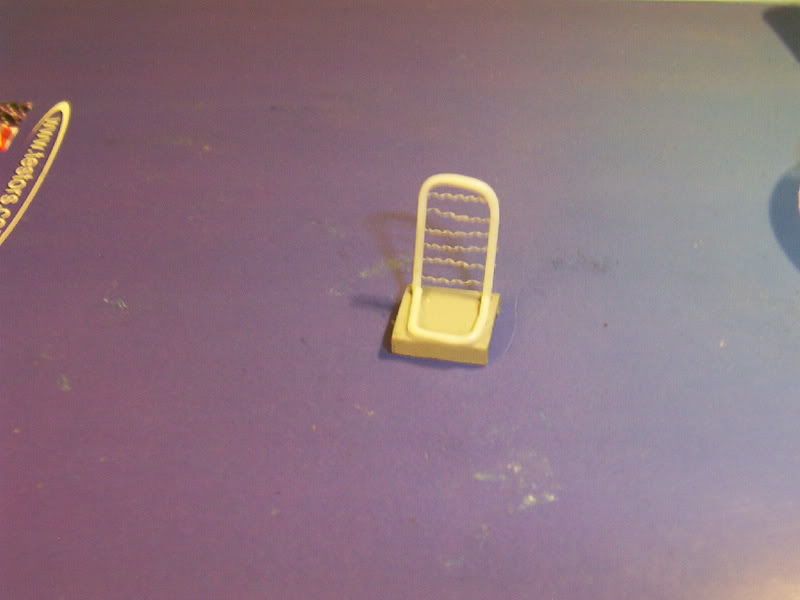
The seats were made from Evergreen rod and Plastruct channel, the radios from sheet and a vacuformed '46 from the Tamiya M151 kit. The seats, after I did the frame, got springs from the little curly-cues formed while drilling the styrene for the radio mount. I added epoxy putty cushions as well… You can’t see them, (the springs) but I wanted to try it to see if it’d work, since another project will have them visible…
Yup… Needed a place for the instrument panel, and to block the “see-through” effect… The driver will be in the hatch, haven’t thought much about the Funker yet…
hans great idea for the seat springs!! im thinking of doin this one for a second entry in the GB so im gonna be asking lots of questions about this 'n that.so keep up the good work[tup]
Nice work on the placeholders HvH, as you mention there’s very little to see through the hatches unless you’ve got a dental mirror and a pen light! These ought to fill up the voids nicely. [tup]
Lookin’ good so far Hans! I built Tamiyas 1/48 Wirbelwind, didn’t turn out as expected, due to the fact I was testing out different ways of painting camo. Nevertheless, I can’t wait to see how your 1/35 Wirbelwind turns out.[:)]
Wonder how long it’ll be before I read about my “spring technique” in the “Reader Tips” section of FSM?[;)] Reckon I should send it in tommorrow…
I temporarily closed up the hull of it a little while ago to start painting the base-color, and discovered that the driver’s compartment detail is, after painting it in the German primer, not just hard to see, it’s almost invisible…
Gonna depart “authentic” and get some contrast in there… Only thing you can see right now is the machinegun and the steering wheel. Probably should have researched that part… Dunno if the Panzer IV series had a wheel like the Tiger or levers… Oh well… The driver’s gonna be in the hatch anyway, and the radio operator watching from the ground…
See, the dio is a shot-down Russian Spitfire Mk I (I’m using the Revell 1/32 Spit. It’s about ready for paint) bellied in near some railroad tracks, with some German infantry having just captured the injured pilot after a brief hunt and are escorting him to their Blitz, while the Wirbelwind crew has just rolled up to see their latest barrel kill-ring first-hand (wanted to combine the “Big Four”, Armor, Aircraft, Automotive, and Model Railroading)… I initially was going to use the Academy Wirbelwind, but upon opening it, I discovered it had no crew, so I hit Ebay and scored a Tamiya re-release (1994). for 20 bucks and free shipping…
I decided to go with the Ostfront scenario, since I wanted to use the reversable cold weather uniforms on the Tamiya figures… Never attempted that camo before, so I figured a mix of snow-side and camo-side among them would add some visual interest, along with great-coated infantry and that the Mk I Spit would likely still be operational in the Soviet Air Force in the fall/winter of '43… That and I’ve never done a Russian Front diorama or Soviet lend-lease aircraft…
You may want to reconsider the use of the Spit Mk I and/or your overall timeframe for the dio, the Wirbelwind didn’t enter production until August 1944 when the first 22 were delivered.
Hans, are you sure that the WIrbelwind would necessarily have had a primer-red interior?! While researching the PzIV interior colors for my “SPOOKED!” dio, I learned that the primer red interior color was tried for a few weeks, but crews complained so much about the lack of visibility that it was hastily changed back to elfenbau, ie, off-white.
I don’t think that anyone would criticize you having a white interior; in fact, it might be techncally more accurate even?
What are you using for references that have pointed you to red primer? I’m genuinely curious.
By the way, if you’re interested, RJ Products have what they call a “drop in” Pz IV driver’s compartment for relatively cheap–$12,00–
http://www.rjproducts.com/ see parts #RJ35210, or RJ3521. Click on the part numbers to see the products. Check also RJ35243—individual transmission pieces for the PZ IV.
Actually, I already did that Doog… I couldn’t find anything that ok’d it, so I squirted it back to off-white a bit ago…
Didn’t use any, which is a definate “ahh, Sh*t” on my part…
After-market parts??? ME???[soapbox]
Kidding… Not my style, mein Freund…[;)] I live to scratch-build the details and super details from sheet and strip, rod, & other fiddly-bits from the parts box…
Comin’ from you Doog, that’s high praise indeed…[bow]
One thing I’ve discovered since joining this outfit is that there’s some pretty high standards to meet and with all the after-market stuff out there, us Auld Phart sprue-stretchers gotta hustle to keep up… It forces the tightwad, err… scratcher like me to really think outside the box (or pegboard bag)…
I have come up with a good explaination (outside the obvious money-savings that is) as to why I stay a scratch-builder though… I took a 10 or 12-year hiatus from modeling, so as far as I’m concerned, it’s only 1996 or so in “model years”… Monogram still lives and Pro Modeler is state-of-the-art as soon as you walk into m’ house… This Tamiya kit I’m doin’ is then only two years old… And since I snag most of my kits from Ebay, I’m payin’ close to 1996 prices as well…
I’m more Van Winkle than Von Hammer in here, lol…
Takin’ a break now from the Wirbelwind for a few hours though… I gotta scratch-build a set of exhaust stacks for a Mk I Spitfire and turn it into a Mk IX…
As soon as I read doog’s post I had a pretty good feeling what you were gonna say. I, on the other hand, am very glad doog posted that link[:D] I am doing more scratch building small bits but I have a long way to go.
“To Zimm or not to Zimm, that is the question” Haven’t decided yet… Leaning towards “no” since it’s taking place in late '44… I’ve been experimenting with doing the Zimmerit on a couple hulks, trying to find what works best for me (so far, it’s Bondo red putty and a razor saw section) but there’s a couple othe things I want to try, like Bondo auto-body filler and Testor’s white…
I didn’t plan on a full interior either, but I test-fitted the turret today, and the according to the refs I have, the engine’s visible from inside the turret… I gotta wait until I get the gun carrraige installed to be sure…