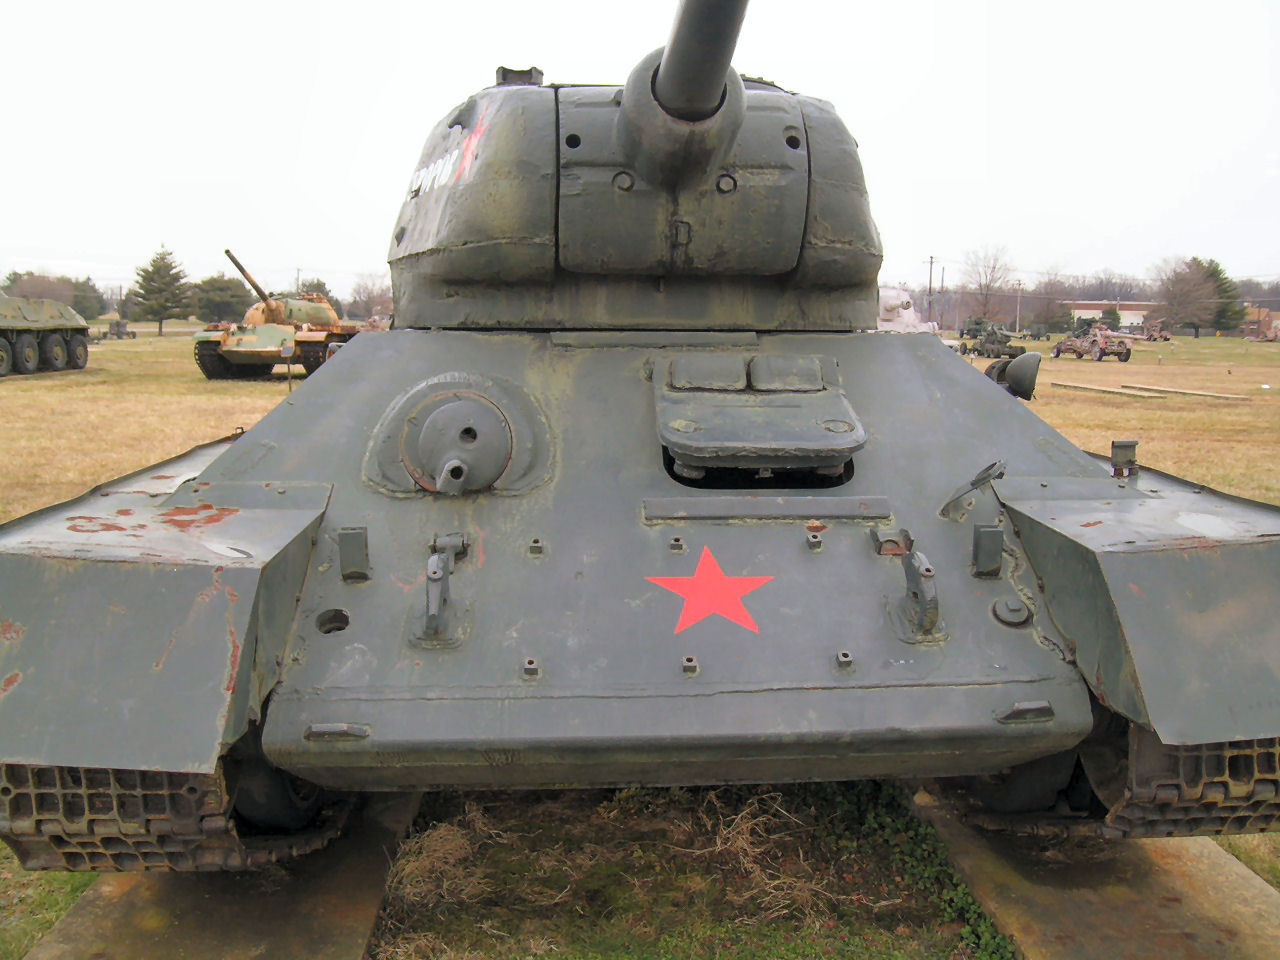
My mom gave me a hobby shop gift card for my 26th birthday recently so I grabbed Tamiya’s T 34/85 kit since I had never done any Soviet armor before. I plan to do a version from January 1944 with a whitewash so without further adieu lets get started…
Being an older offering (the mold dates back to 1985 or earlier if I’m not mistaken), the lower hull has numerous holes and slots for motorization. Before any other work was done the first step was to plug the holes with sheet styrene and Bondo spot & glazing putty.
There was a slot on either side near the transmission cover on both sides. A backing of .020 styrene formed a base folloed by L shaped plugs of .060 jammed in the hole and carved as needed. Bondo covered the rest in a couple of applications. I decided not to continue the strip with the bolts on it all the way around because once the tracks are on you can’t really see up in there as well as I plan on making the bottom pretty muddy when it comes time for weathering which will hide the fact it’s not compltete.
When the upper and lower hulls are joined there is a cavernous space left behind. I cut strips of Plastruct .020 sheet to plug the holes with even more Bondo.
Lastly everything on the bottom was primed to see how it all fit together. All I was worried about was getting the seams filled decently but not perfect since like I said earlier you can’t really see this area with the tracks installed and I plan on making a muddy bottom so my textured medium will cleverly hide divots and foul-ups.
Mike, check the hull top. A T-34/85 should have a sharp front lip. This one seems to have a rounded lip and two slots for the “towing eyes” which are an incorrect feature of Tamiya’s T-34/76 kits.
Edit: Disregard the above. There’s an insert piece which fits over this to provide the sharp nose… [:$]
Might be hard to fix now with the upper and lower hulls permanently joined, I’ll need to fiddle with it a bit and see what can be done. I almost missed that thanks
Yep, I just edited my previous. I hadn’t looked at the /85 kit in years but I just pulled it out and checked - there’s a “sharp nose” insert which fits over the rounded lip - it’s all good.
Hey Mike, that reminds me so much of the first kit I build after a 35 yr hiatus!! Mine was a Tamiya T-34/76 and I did the same things to the lower hull that you’ve done, although I don’t recall as nicely done as yours!
Thanks everyone :). I’ll get to the next round of construction this weekend, trying to juggle this with a Tamiya Kawasaki ZX-14 motorcycle that’s about 60% done I want to get done for a show in October. If you’ve never built a Tamiya 1/12 bike they have 10000000000000000000 pieces so I need to get cracking on some semblance of progress if I want to meet my deadline.
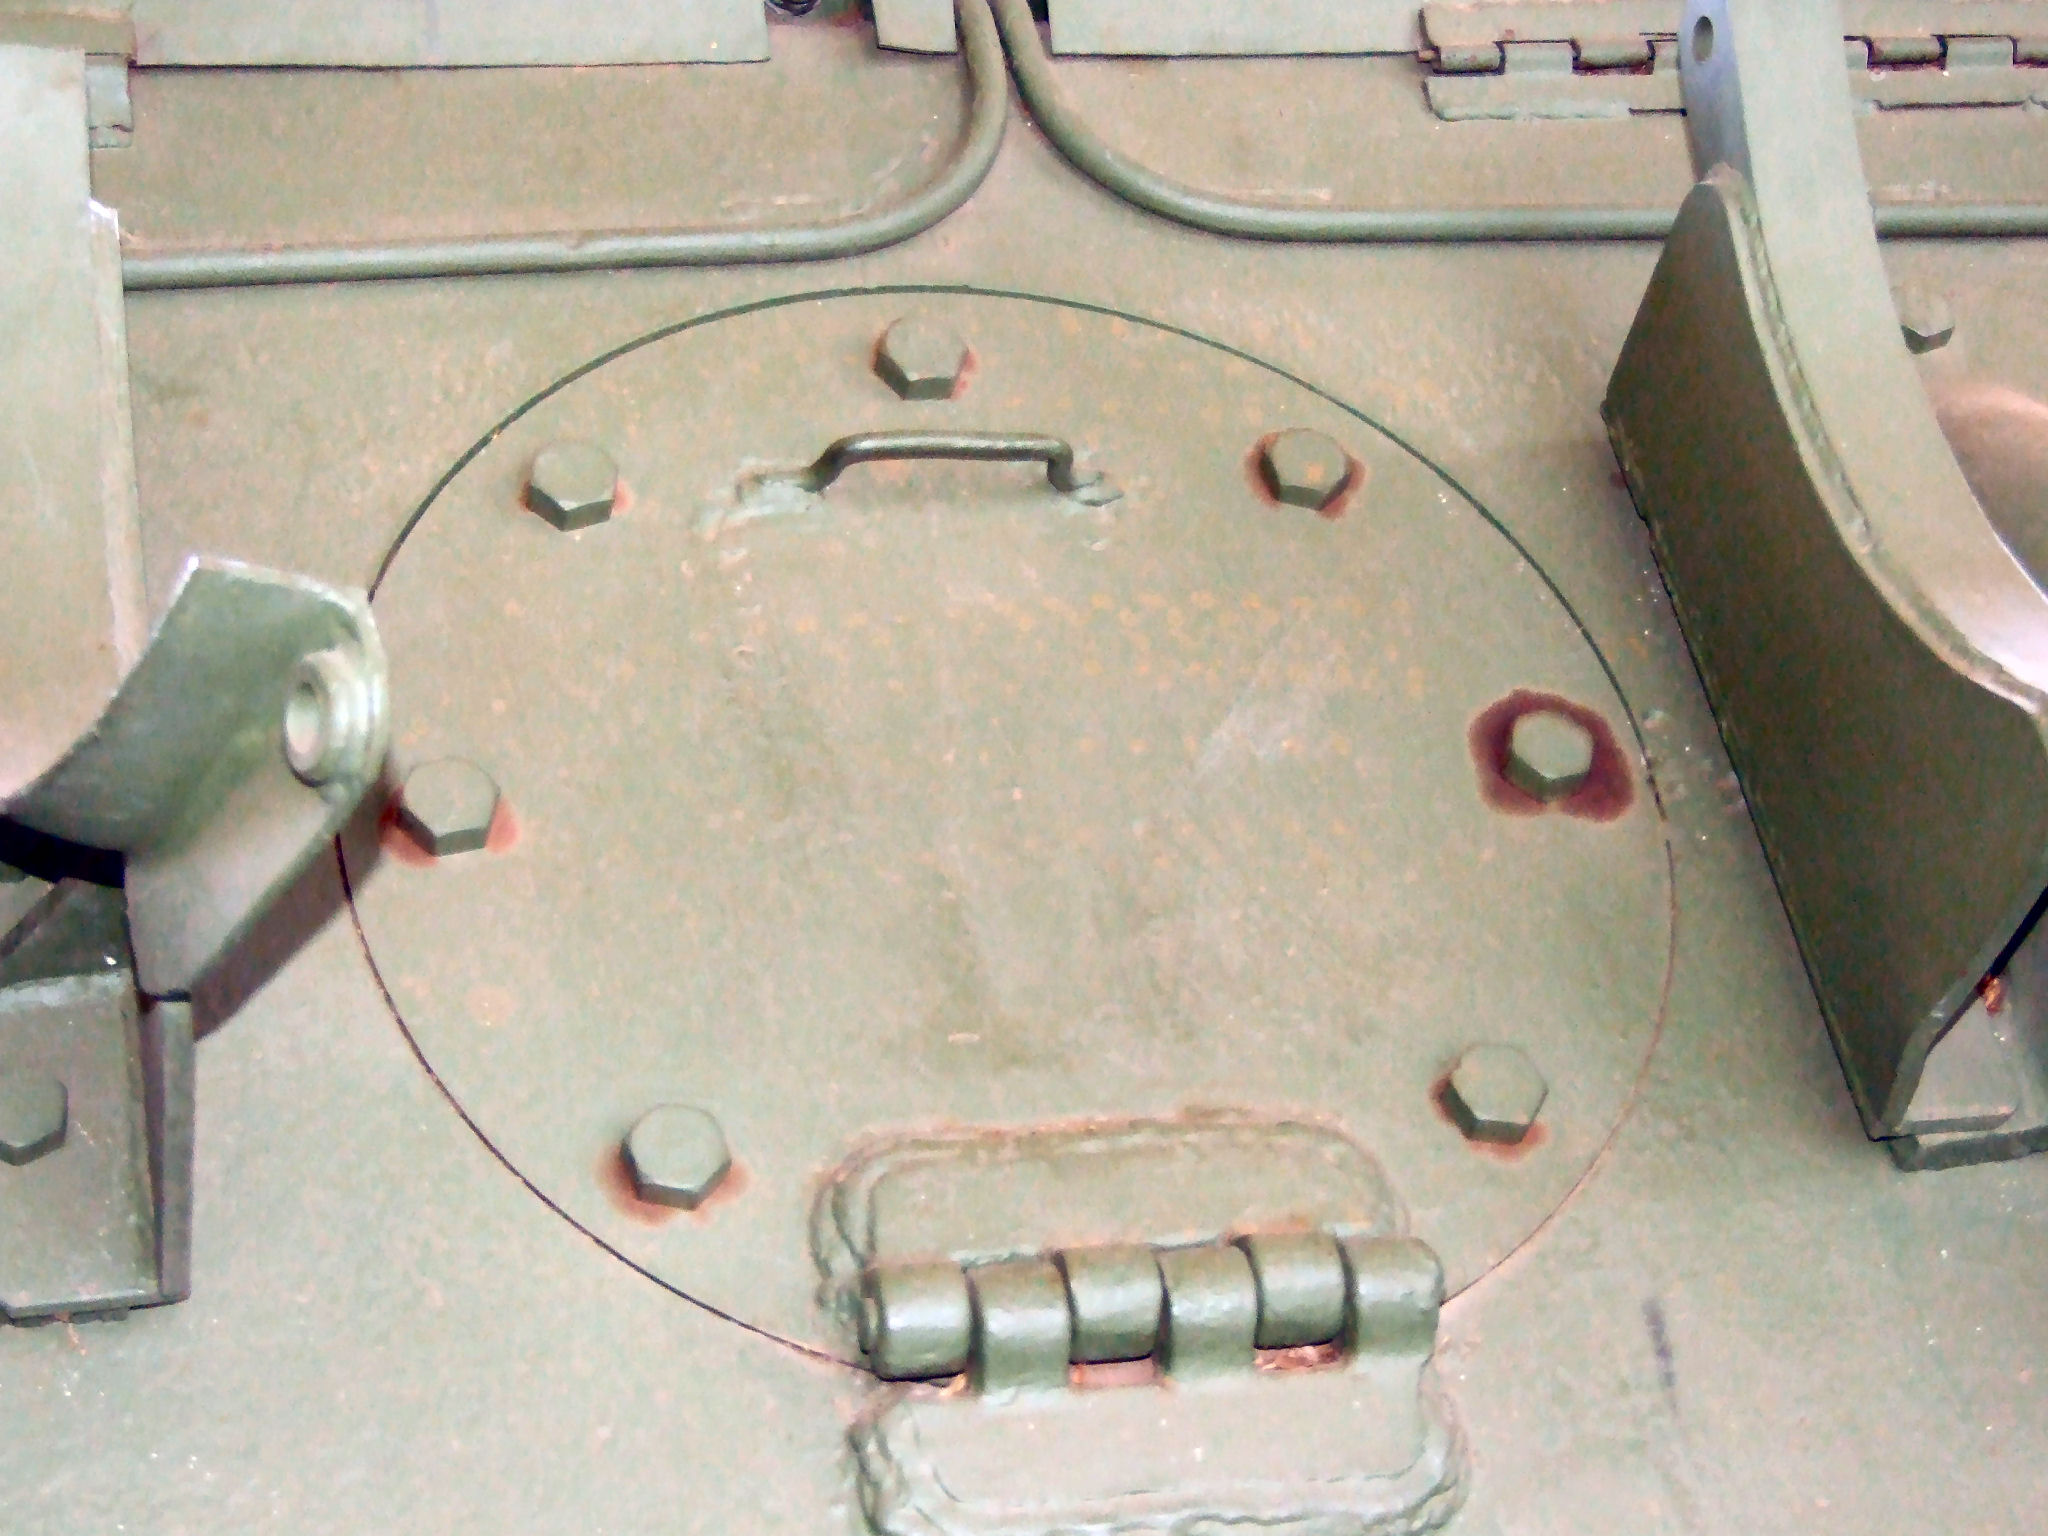
Tonight I started in on the rear panel. First things first on the /85’s there was no center hinge, so I scraped it off and replaced the hinge with a bolt made of .040 Plastruct hex rod. Down the sides the kit bolt pattern looks like this:
X = bolt
= space
X X - X X
When it should look like this:
X X X X X
The missing bolts are more Plastruct hex rod which I cut slightly thicker than the kit bolts, set with liquid cement and after it had dried I sanded them flush with the kit bolts using a 400 grit sanding stick. I added a grab handle in the center of the circular hatch using .020 Plastruct rod, however I probably need to remove it and fill the peg holes. According to photos it should be narrower and positioned pretty much in line with the two bolts above where I placed mine.
You can see the bolt layout and missing hinge here
And here’s what I mean about the grab handle:
Question too. Those pipes(?) that come from the vent on the engine deck and make right angles forming kind of a upside down “T” what are they and should they be on every T 34/85 or are they a unit specific kind of thing?
I wanted to use photoetch engine grilles on the rear deck of this build so I went to order a set of Eduard TP006 grilles for the Tamiya kit. After about 90 minutes of fruitless searching and 'OUT OF STOCK" screens I finally found a set. The vendor however required a minimum $20 order plus another $20 for shipping. Not willing to pay that much for a $4 part I went to work with a Dremel and a sanding drum thinning the back of the molded vents to paper thinness. Then using a hobby knife and a set of jewelers files I cleaned out the molded in mesh and replaced it with some screen material from my spares box. A black styrene plate was installed over the void in the hull underneath the engine grille.
I noticed that you haven’t installed the engine deck side grilles yet. It would have been easier to do this before you glued the upper and lower hull parts. The grille parts are slightly undersized compared to the openings, so there is a little potential for alignment problems. Take your time and adjust as the glue dries and it should be ok.
Nice job on the replacement screens. Can’t help you on the lines question but would speculate that they might be air vents for the internal fuel tanks or engine compartments of some type?
Thats ridiculous that some vendors require that much of a minmum order and that much for shipping ! Your improvisation of parts to achieve the goals is certainly working out
Great link Phil ! Ya know, most of these units were converted to extra fuel storage as the canisters were in short supply, but when I researched it I never found this link although I knew what the conduit was for… you must have dug deep !
Hi Tread I didn’t dig that deep, just did a search using the phrase “t-34 smoke generator” and this was one of the links that came up on the first page.
Phil_H: Thanks for the info on the conduits. In further research it would seem most of the /85’s I saw have them and like what was said they have no canisters or a set of external drums in their place, however there was a fair share of photos showing no equipment at all, just the conduits. Also on those engine deck vents you were more than right. Those things are way too small it took me a good 30min to get them in with all the fiddling and they still don’t look completely right. I had to do alot of “shake-n-bake” on the hull to retrieve them a few times after they fell inside the completed hull.
Anyway here are my smoke canister conduits. They are made from hollow core solder bent to a 90 degree angle around a paint brush handle and inserted in to the hole under the engine screen (which now it makes sense what that hole was for and it doesn’t look so barren now).