I bought this kit at a recent show, mainly because it was priced to sell, and I had heard good things about it. I have zip for Leopard knowledge or references, so my intention was to build it OOB, enjoy the process, and experiment with the camo. I’m a rattle-can user (Hi, my name is Russ and I use rattle cans) so the camo will have to be done with cans or a brush. I’ve done a few hard-edged schemes using both, so it’s not a first, and all the pics I have of both the real thing and other models show a fairly tight line on the different colors, so I should be okay.
The build began as usual, lower hull, wheels and suspension, which I had done in a couple of hours, absolutely lovely fit. I had a slight gap at the front of the upper and lower hulls when I mated them up, but a little tape and some time got everything in touch.
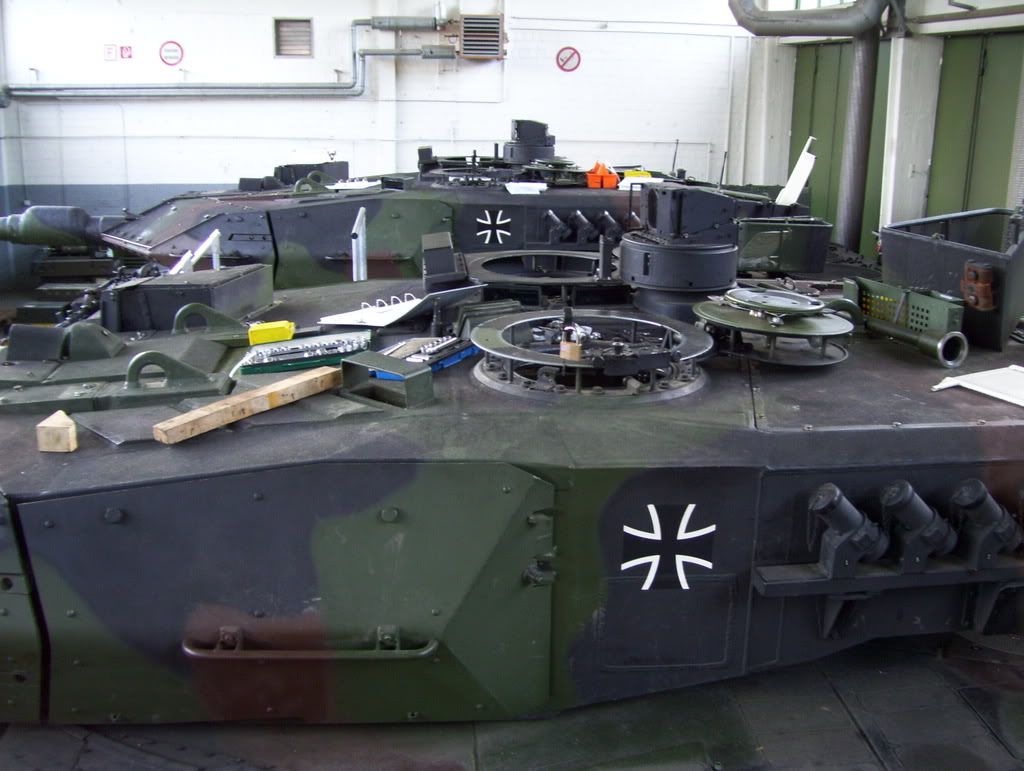
For you Leo people: should the front of the hull have a weld where the upper and lower glacis meet? Pic below:
And after taking two links out of the tracks, I have a nice fit. Any looseness will be hidden by the skirts, but I have a good fit on the sprocket.
Super-fast progress for me, all this happened in a couple of hours. I ordered a couple of goodies this morning that may slow me down a bit, but the kit is great, almost falls together so far.
More fun with Leo last night: some small seams filled with Vallejo acrylic putty, gun tube and mantlet started and a few teeny bits built up. I have some Eduard PE on the way, so I don’t want to get into the teeny detail bits yet, but it’s still going together like a dream. The seams I filled (then wiped with a damp Q-tip) are very small, and most likely due to my assembly rather than any fault of the kit.
This kit is an absolute stunner. I built it years ago, and it’s a great build.
This link might help you, Russ. Time I spent out at the Wolfhagen Leopard base while on tour. Leopard 2A6’s are the same as A5’s but with the bigger gun. Everything else is basically the same. Paint schemes, details, etc,
Yeah, I’m really enjoying the kit, very refreshing.
I bookmarked the Leo pics, fabulous, thanks Karl!
Cliff, this is a pretty new kit (2000) and is supposed to be very accurate, with very few simplifications. No retail on the backs of the road wheels is one, but I can live with that easily. I also just received the Eduard etch set and some AFV Club reflective lens cover stickers, so I’ll be adding some AM.
Anthony, thanks. It’s a pleasurable build, no doubt.
Chris, I’m in the same boat. Tamiya kits are hard to beat for good engineering and relative easy of assembly. I think the M51 Sherman is their best example of superb detail and easy assembly, but this Leo kit may even be easier to put together.
I got a start on the brass, and what little bit I did took me as long to do as the entire rest of the kit assembly so far. Sheesh…
Two pics of the back of the turret, where I started, and one pic of a shot of the Eduard instructions, for a question: The part in the top of the frame, showing a piece built up on one of the turret front lifting lugs is shown with the “front” pointed out, but no mention of which side. Anyone? Prime Portal no help…
More brass last night, and the commander’s ITV (I think).
I still like this kit, things fit as they should, something I appreciate. And kudos to Eduard here, the etch for the turret baskets fit well, nicely done parts.
I’m still plodding along through the brass, and once again I’m glad of the ease of assembly of the kit, otherwise I’d be back in one of my tedious pits.
Ah my apologies, I was thinking this was another of Tamiya’s classic kits. I’ve always liked the look of the Leopard II, if I wasn’t so piled up with stuff now I’d be tempted to pick one up.
She’s looking good! I still hate PE, nice to see how well the Eduard set fits.
Karl, it’s a tough shot, but I haven’t found that little bit in ANY pics, so it’s not going on for now.
Speaking of brass, I did some work on the engine deck last night, cooling air intake screens were time consuming, but went on okay. My only issue was due to me breaking one of the covers as I removed the center, which was actually pretty nice in the kit, but the etch looked really good. I’m staying with the kit exhaust covers, as the Eduard parts just look wrong, and once again the kit representation is good. A little creative painting should suffice here…
I put heavy black paper under the big screens so I wouldn’t get any light up from underneath. I saw one build a while ago where the builder scratched the rather unusual fans, but they were invisible once the screen were on, so I felt just fine using black paper here.
Also done last night was the brass on the rear, rest of the driver’s hatch parts, filling the slots in the tow cable ends in preparation for drilling them out to accept wire and some bits up front.
I was moving along at a pretty good clip until I decided to use the brass… and then I looked at the Tamiya “grab-blades” and decided they had to come off, and Eduard supplied flat pieces, so about three hours later I have all the hull grab handles replaced with wire. I haven’t even looked at the turret yet…